Ascent GX10 - Desktop computer ASUS - Free user manual and instructions
Find the device manual for free Ascent GX10 ASUS in PDF.

User questions about Ascent GX10 ASUS
0 question about this device. Answer the ones you know or ask your own.
Ask a new question about this device
Download the instructions for your Desktop computer in PDF format for free! Find your manual Ascent GX10 - ASUS and take your electronic device back in hand. On this page are published all the documents necessary for the use of your device. Ascent GX10 by ASUS.
USER MANUAL Ascent GX10 ASUS
No part of this manual, including the products and software described in it, may be reproduced, transmitted, transcribed, stored in a retrieval system, or translated into any language in any form or by any means, except documentation kept by the purchaser for backup purposes, without the express written permission of ASUSTeK COMPUTER INC. ("ASUS").
ASUS provides this manual "as is" without warranty of any kind, either express or implied, including but not limited to the implied warranties or conditions of merchantability or fitness for a particular purpose. In no event shall ASUS, its directors, officers, employees or agents be liable for any indirect, special, incidental, or consequential damages (including damages for loss of profits, loss of business, loss of use or data, interruption of business and the like), even if ASUS has been advised of the possibility of such damages arising from any defect or error in this manual or product.
Products and corporate names appearing in this manual may or may not be registered trademarks or copyrights of their respective companies, and are used only for identification or explanation and to the owners' benefit, without intent to infringe.
Specifications and information contained in this manual are furnished for informational use only, and are subject to change at any time without notice, and should not be construed as a commitment by ASUS. ASUS assumes no responsibility or liability for any errors or inaccuracies that may appear in this manual, including the products and software described in it.
Copyright © 2025 ASUSTeK COMPUTER INC. All Rights Reserved.
LIMITATION OF LIABILITY
Circumstances may arise where because of a default on ASUS' part or other liability, you are entitled to recover damages from ASUS. In each such instance, regardless of the basis on which you are entitled to claim damages from ASUS, ASUS is liable for no more than damages for bodily injury (including death) and damage to real property and tangible personal property; or any other actual and direct damages resulted from omission or failure of performing legal duties under this Warranty Statement, up to the listed contract price of each product. ASUS will only be responsible for or indemnify you for loss, damages or claims based in contract, tort or infringement under this Warranty Statement. This limit also applies to ASUS' suppliers and its reseller. It is the maximum for which ASUS, its suppliers, and your reseller are collectively responsible.
Under no circumstances is ASUS liable for any of the following: (1) third-party claims against you for damages; (2) loss of, or damage to, your records or data; or (3) special, incidental, or indirect damages or for any economic consequential damages (including lost profits or savings), even if ASUS, its suppliers or your reseller is informed of their possibility.
ACCESSIBILITY STATEMENT
ASUS is committed to making our documentation accessible, in accordance with Directive (EU) 2019/882 of the European Parliament and of the Council. This document is designed to meet requirements for WCAG 2.1 (level AA)/EN 301 549 and be accessible to screen readers such as NVDA Screen Reader or Microsoft Narrator.
SERVICE AND SUPPORT
Visit our multi-language website at https://www.asus.com/support/.
Table of Contents
Important information 2
Safety and caution information....6
Package contents 7
Front view 8
Rear view 8
Small Scale Server setup guide....9
Connecting the display 9
Connecting the keyboard and mouse....11
Connecting the QSFP cable....12
Connecting the LAN cable....13
Connecting the power adapter....14
Starting up the first time....16
Powering on the system....18
Safety precautions....19
Care during use 20
About this guide
This user guide includes information on your Small Scale Server:
Memory and M.2 solid state drive already included; NVIDIA DGX™ Base Operating System included:
Specifications and steps to set up your Small Scale Server.
Audience
This user guide is intended to provide basic setup information about the Small Scale Server and components to vendors, system integrators, and other engineers and technicians who need this level of information.
Conventions used in this guide
To highlight key information in this manual, some text are presented as follows:
IMPORTANT! This message contains vital information that must be followed to complete a task.
NOTE: This message contains additional information and tips that can help complete tasks.
WARNING! This message contains important information that must be followed to keep you safe while performing certain tasks and prevent damage to your Small Scale Server's data and components.
Other Common Notations
| Abbrev. Description |
| # Used after a signal name to identify an active-low signal (such as USBP0#) |
| GB Gigabyte (1,073,741,824 bytes) |
| GB/s Gigabytes per second |
| Gb/s Gigabits per second |
| KB Kilobyte (1024 bytes) |
| Kb Kilobit (1024 bits) |
| kb/s 1000 bits per second |
| MB Megabyte (1,048,576 bytes) |
| MB/s Megabytes per second |
| Mb Megabit (1,048,576 bits) |
| Mb/s Megabits per second |
| TDP Thermal Design Power |
| xxh An address or data value ending with a lowercase h indicates a hexadecimal value. |
| x.x V Volts. Voltages are DC unless otherwise specified. |
| x.x A Amperes. |
Production identification information
ASUSTeK Small Scale Server Ascent GX10 Identification Information
| Product Name | Ascent GX10 |
| GX10 | Small Scale Server |
Where to find more information
Refer to the following source(s) for additional information and for product and software updates.
ASUS website
The ASUS website (www.asus.com) provides updated information on ASUS hardware and software products.
Safety and caution information
- Accessories that came with this product have been designed and verified for the use in connection with this product. Never use accessories from other products to prevent the risk of electric shock or fire.
- This device may interfere with the operation of some pacemakers, hearing aids or other medical devices. To reduce the risk, maintain a separation distance of 20 cm (8 inches) between the device and the medical device. Refer to the medical device for additional information.
- Modification of the wireless solution, thermal solution, device components or enclosure shall violate regulatory compliance requirements and may induce safety hazards.

Risk of explosion if the battery is replaced with an incorrect type. Batteries should be recycled where possible. Disposal of used batteries must be in accordance with local environmental regulations.
Package contents
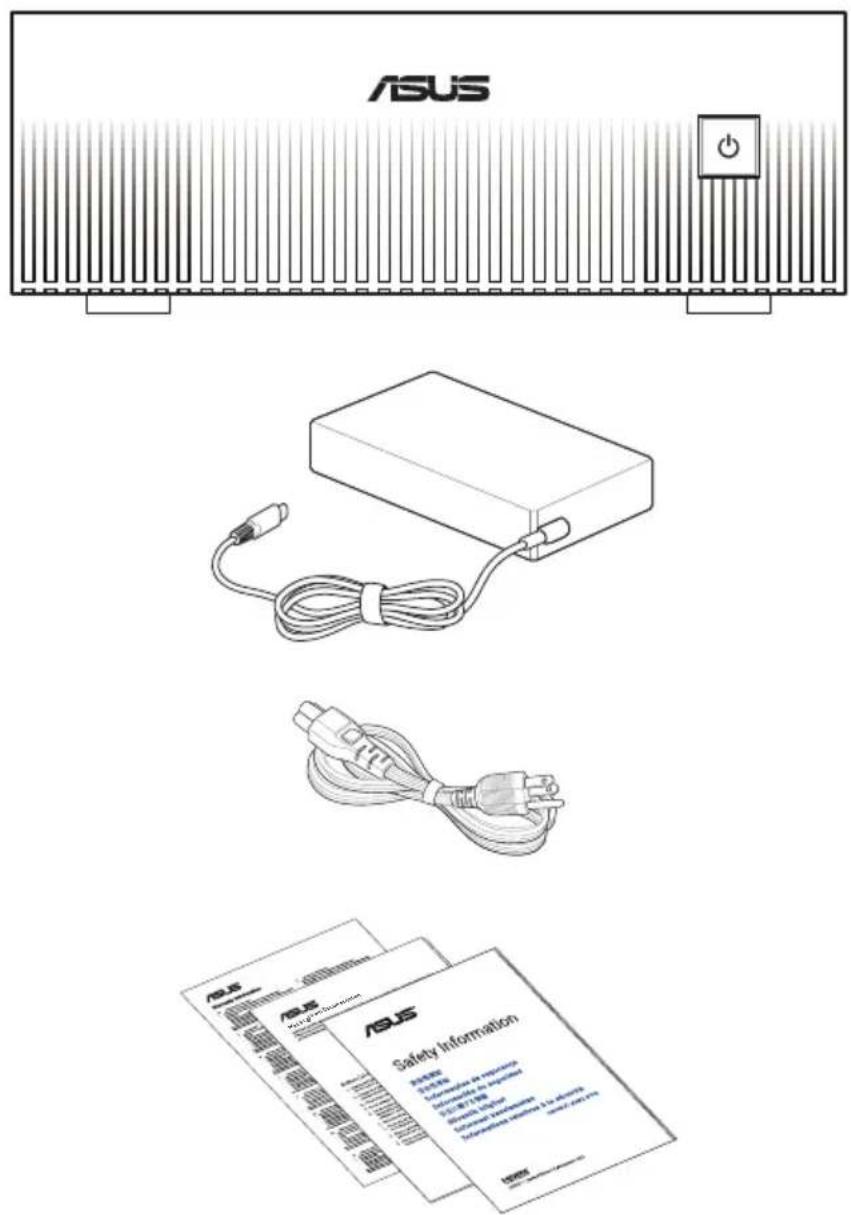
- The most up-to-date and accurate product specifications are available on www.asus.com for download.
- Product and accessory images are for illustrative purposes only. The actual appearance and specifications may vary depending on the model.
*The bundled power adapter may vary depending on the model and the country (or region) of sale. - Some bundled accessories may vary depending on the model. For details on these accessories, refer to their respective user manuals.
- If the device or its components fail or malfunction during normal and proper use within the warranty period, bring the warranty card to the ASUS Service Center for replacement of the defective components.
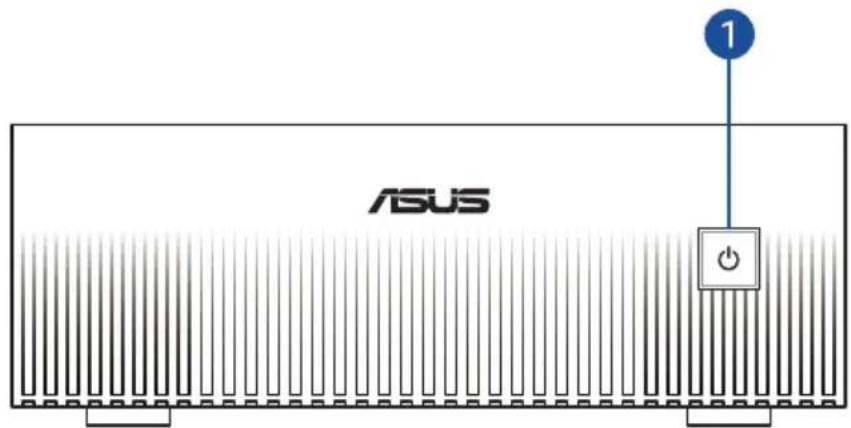
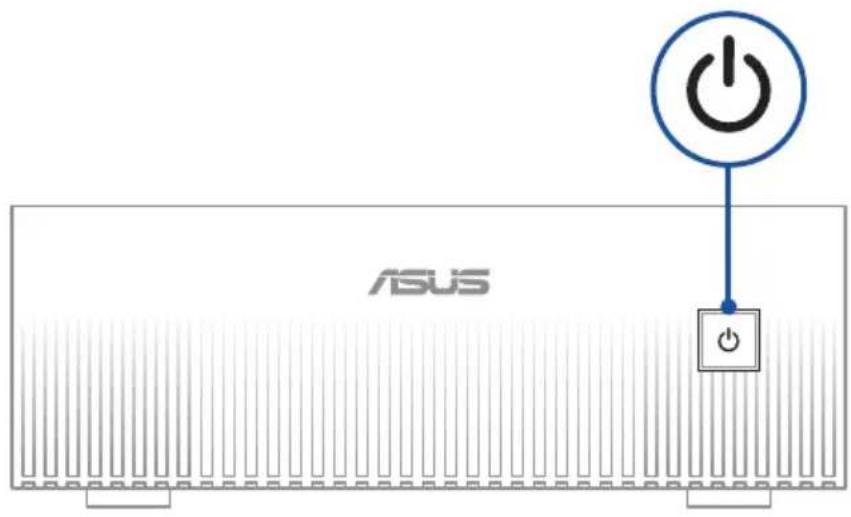
Front view
text_image
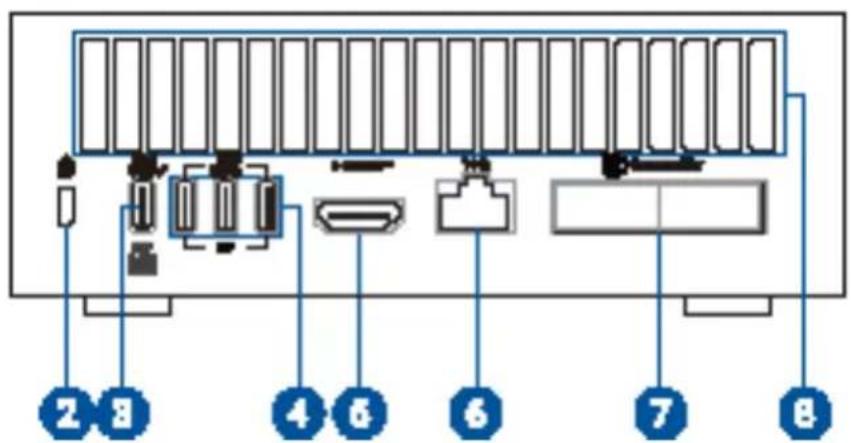
ASUS 1Rear view
text_image
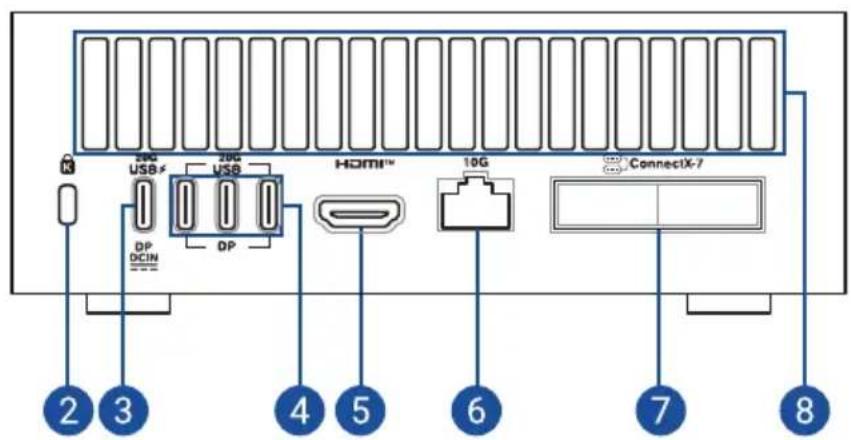
20G USB 20G USB HDMI™ 10G ConnectX-7 DP DCIN 2 3 4 5 6 7 8- Power button
- Kensington ^® security slot
- USB 20Gbps Type-C ^® port with DisplayPort 2.1 and power input support
- USB 20Gbps Type-C ^ port with DisplayPort
- HDMI™ port
- LAN port
- ConnectX ^® -7 interface with QSFP ports
- Air vents
Small Scale Server setup guide
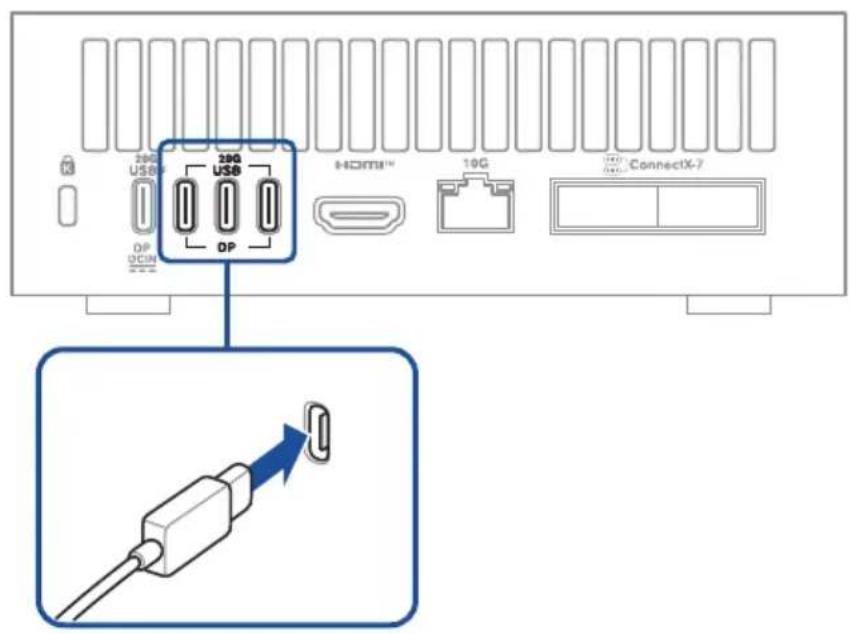
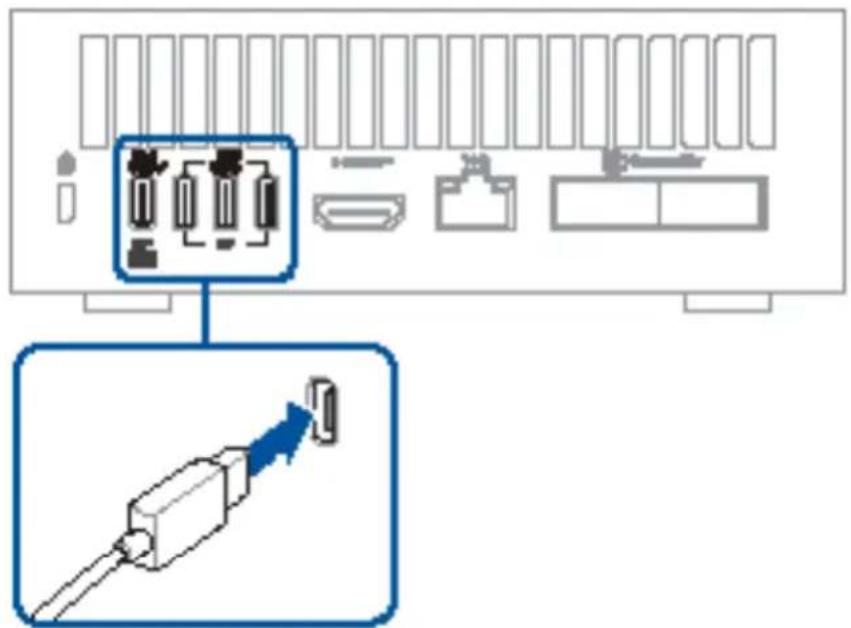
Connecting the display
HDMI port

text_image
36G USB 30G USB HOMI™ 10G ConnectX-7 DP DCINUSB Type-C® port

text_image
20G USB# 20G USB DP DCIN HDMI™ 10G ConnectX-7USB Type-C ^® specifications:
| Port Details Specifications | ||
| USB 20Gbps USB-C | ^® output support DP2.1 (HBR3) | |
| Power over USB-C ^® | 15W per port, max 30W total (output) | |
| Power profile support 5V @ | 3A (output) | |
| USB 20Gbps with power delivery input | Power delivery input 240W | (48V @ 5A, PD3.1 EPR) (input) |
Display resolution table:
| Port Video Output Max. | Resolution | |
| USB 20Gbps USB-C® | DisplayPort 2.1 (UHBR10) | 4K (3840 x 2160) @ 144Hz |
| HDMI HDMI 2.1b (FRL8) | 4K (3840 x 2160) @ 60Hz |
Connecting the keyboard and mouse
text_image
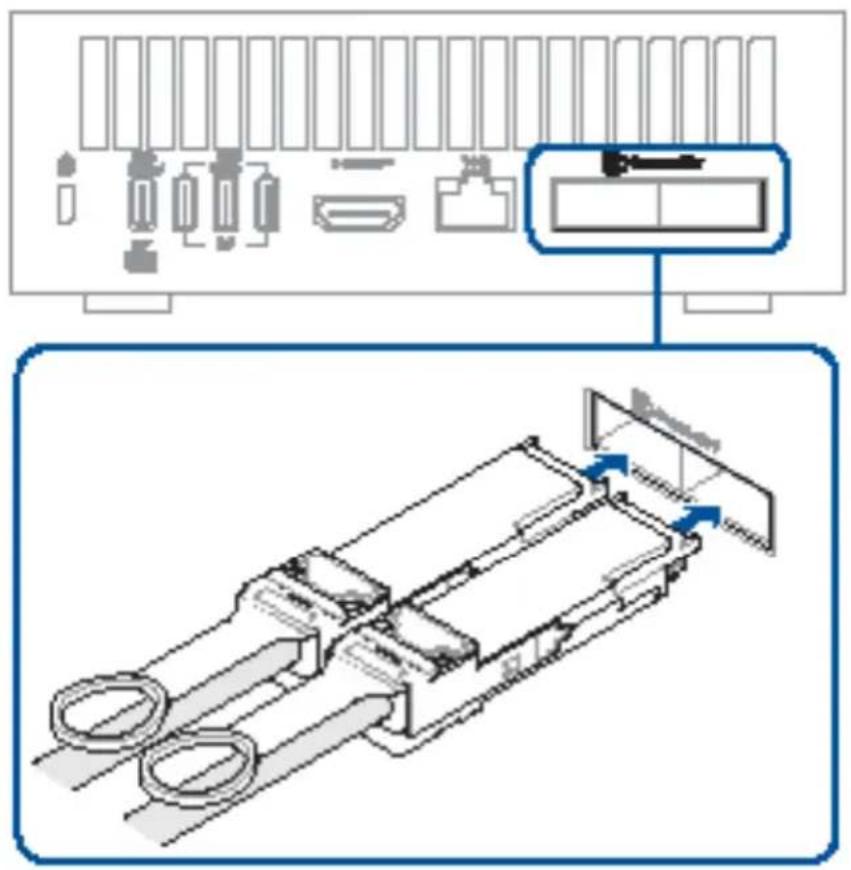
20G USB 20G USB HDMI™ 10G ConnectX-7 DP DCUN DPConnecting the QSFP cable
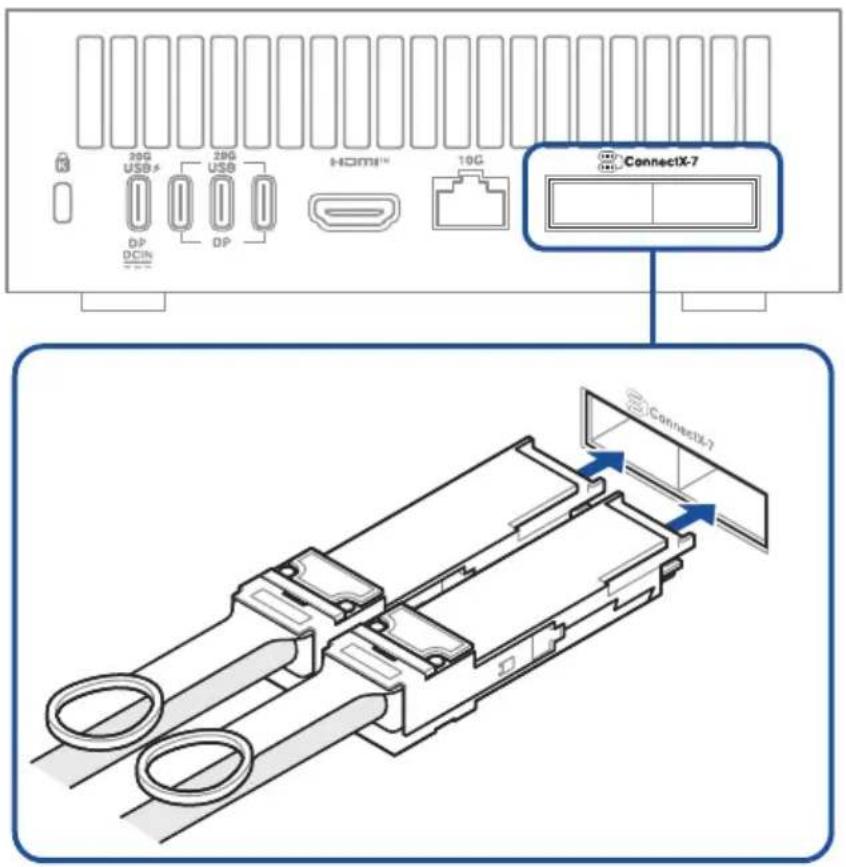
text_image
38G USB # 38G USB HDMI™ 10G ConnectX-7 ConnectX-7NOTE: You must use a Quad Small Form-factor Pluggable (QSFP) cable that is less than three (3) meters in length.
Connecting the LAN cable
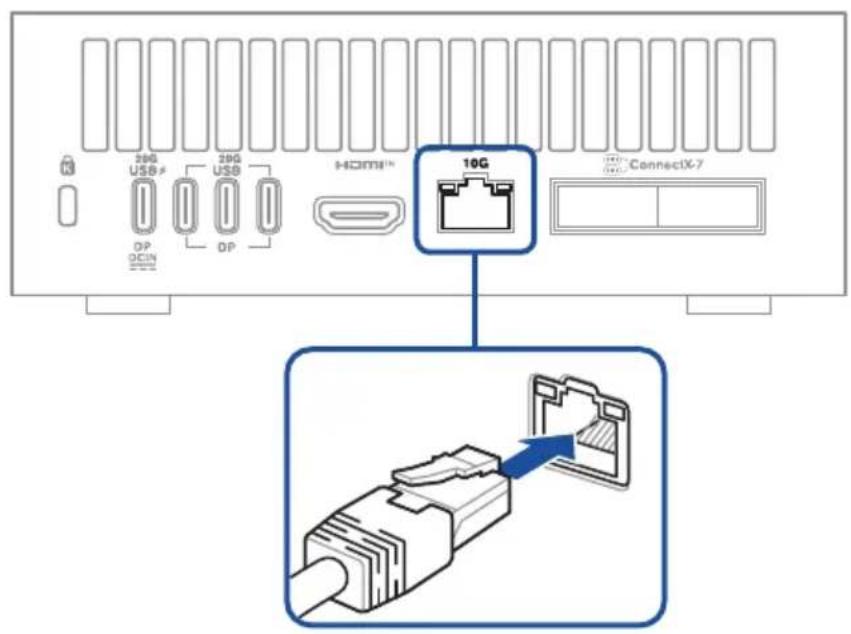
text_image
28G USB 28G USB HOMIN 10G ConnectX-7 DP DCIN DPNOTE:
This Small Scale Server uses the following network ports for optimal functionality, secure management, and simplified network discovery:
- TCP Port 22 (SSH): Enables secure remote access for device management and configuration.
- TCP Port 80 (HTTP): Supports initial headless device configuration (OOBE) via a web interface. This port is automatically disabled after initial setup to minimize security risks.
- UDP Port 5353 (mDNS/Avahi): Simplifies local network service discovery, allowing devices to resolve this device by hostname and discover advertised services like SSH and HTTP.
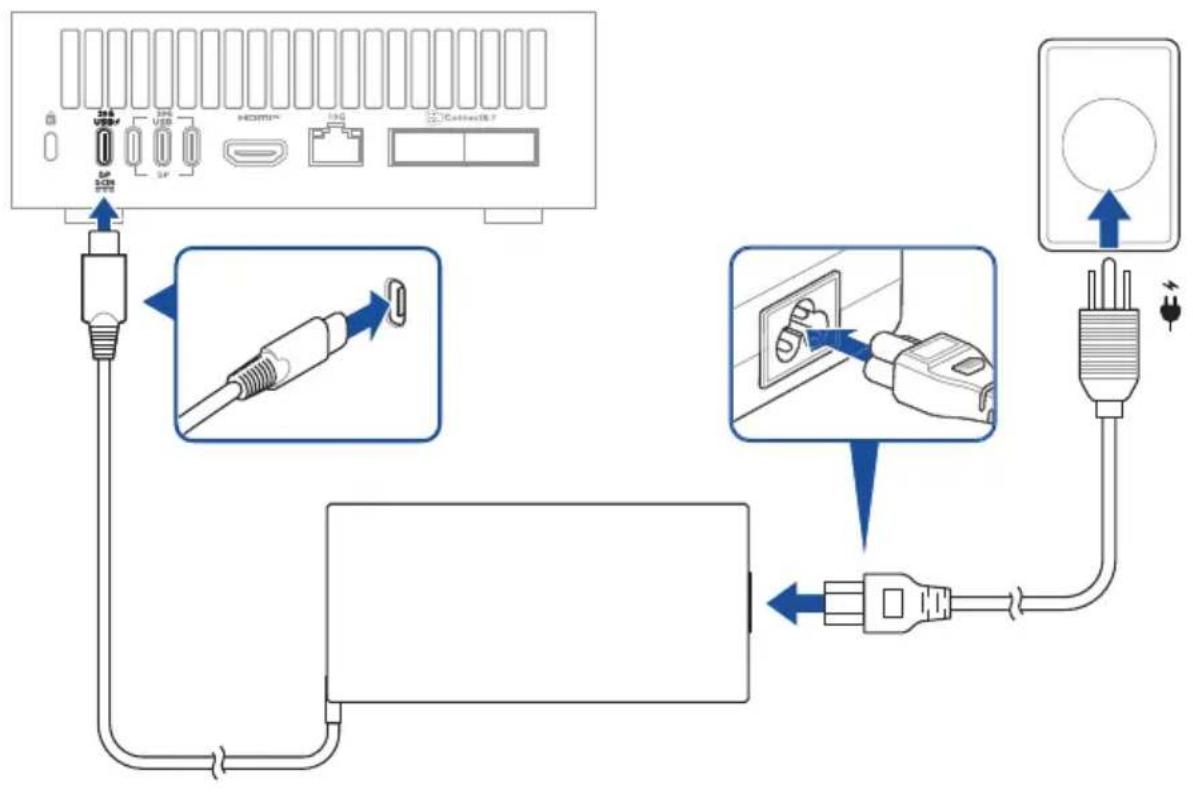
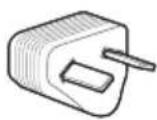
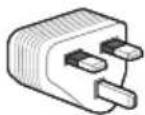
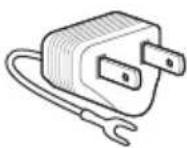
Connecting the power adapter
flowchart
graph TD
    A["Power Supply"] --> B["Switch"]
    B --> C["AC/DC"]
    C --> D["AC/DC"]
    D --> E["ConnectS"]
    E --> F["Terminal"]

    subgraph Power Supply
        G["AC/DC"] --> H["Switch"]
        I["AC/DC"] --> J["AC/DC"]
        K["AC/DC"] --> L["AC/DC"]
        M["AC/DC"] --> N["AC/DC"]
    end

    subgraph Cable Routing
        O["AC/DC"] --> P["Switch"]
        Q["AC/DC"] --> R["AC/DC"]
        S["AC/DC"] --> T["AC/DC"]
        U["AC/DC"] --> V["AC/DC"]
        W["AC/DC"] --> X["AC/DC"]
    end

    style A fill:#f9f,stroke:#333
    style E fill:#ccf,stroke:#333
    style F fill:#cfc,stroke:#333
    style G fill:#fcc,stroke:#333
    style H fill:#cff,stroke:#333
    style I fill:#ffc,stroke:#333
    style J fill:#ffc,stroke:#333
    style K fill:#ffc,stroke:#333
    style L fill:#ffc,stroke:#333
    style M fill:#ffc,stroke:#333
    style N fill:#ffc,stroke:#333
    style O fill:#fcc,stroke:#333
    style P fill:#fcc,stroke:#333
    style Q fill:#fcc,stroke:#333
    style R fill:#fcc,stroke:#333
    style S fill:#fcc,stroke:#333
    style T fill:#fcc,stroke:#333
    style U fill:#fcc,stroke:#333
    style V fill:#fcc,stroke:#333
NOTE:
- Please refer to the following for more information on the adapter and the system:
240W Power adapter
- Input voltage: 100-240 Vac
- Input frequency: 50-60 Hz
- Output current: 5 A (240.0 W)
- Output voltage: 48 Vdc
- Rated for use between 0°C and 35°C (32°F and 95°F)
System
- Rated input current: 5 A (240 W)
- Rated input voltage: 48 Vdc
- Operating temperature: 0°C to 35°C (32°F to 95°F)
- Operating this system in an environment that exceeds 50^ C ( 122^ F) may cause the system time shown in the BIOS to deviate by more than 3 seconds.
Plug
Code
Country
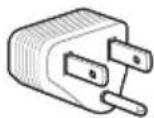
US United States
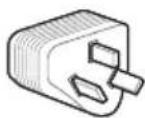
CN
China
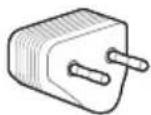
EU European Union
AU
Australia
UK United Kingdom
JP Japan (Type-A)
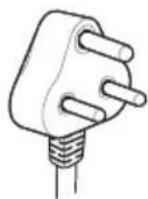
IN
India
Starting up the first time
After you have connected your Small Scale Server to power source and turned it on, you will be guided through a series of steps for initial device setup.
You have three ways to access the initial setup interface:
- Standalone (desktop) mode
- Network appliance mode using Wi-Fi connection
- Network appliance mode using Ethernet connection
Standalone (desktop) mode
In this mode, you need to connect a display, keyboard, and mouse as they are used to interact with your Small Scale Server's Out-of-Box Experience (OOBE) system setup user interface.
- Connect a display via HDMI (recommended) or USB Type-C ^® (for DP displays).
- Connect a keyboard and mouse.
- Turn on your Small Scale Server, and follow the on-screen instructions.
NOTE: The OOBE system setup user interface shows only after a keyboard and mouse are detected.
Network appliance mode using Wi-Fi connection
In this mode, you need to set up your Small Scale Server over your Wi-Fi network. To do so, you will need the following information:
Hotspot SSID: gx10-
Hotspot password:
System setup page: http://gx10-
Values in <> are derived from your Ethernet adapter's MAC address and must be in lowercase. You should also be able to find this information on page 3 of the insert that came with your Small Scale Server.
Generating device-specific values
Example MAC address: 1F:2D:3E:4A:5B:6C
| Device-specific value Example How to generate | ||
| 5b6c Last four characters of your MAC | address | |
| b9942196 1. Start with your MAC address.1F:2D:3E:4A:5B:6C2. Remove the colons (:).1F2D3E4A5B6C3. MD5 hash the string.cd1c5e7d3f83b1c4046e9699b99421964. Take the last eight characters.b99421965. Ensure all characters are lowercase.b9942196 | ||
Setting up using Wi-Fi connection
The following steps use the example MAC address provided above. Your actual SSID, password, and system setup page will be based on your Ethernet adapter's MAC address.
- Turn on your Small Scale Server, and it will create a Wi-Fi access point with the following SSID and password:
SSID: gx10-5b6c
Password: b9942196
- Use a laptop computer (preferred) or mobile device to connect to this Wi-Fi access point.
- Once connected, open a web browser on your laptop computer or mobile device and go to http://gx10-5b6c.local.
- Follow the instructions on your laptop computer or mobile device's screen.
Network appliance mode using Ethernet connection
Even if you have connected an Ethernet cable to your Small Scale Server, you still need to follow the instructions in the Network appliance mode using Wi-Fi connection section for the initial setup. Only later in the setup process will your Small Scale Server switch to using the Ethernet cable.
Powering on the system
text_image
ASUSNOTE: This Small Scale Server does not support system power state S3 (ACPI S3 mode).
Safety precautions
IMPORTANT! ASUS is not responsible for direct, indirect, intentional or unintentional damages resulting from improper installation and operation.
- This device is intended for use in ambient temperatures between 0°C and 35°C (32°F and 95°F). Avoid using or storing next to heat sources, in direct sunlight, or outside the intended temperature ranges.
- Do not use this product near water or a heated source.
- Openings on the chassis are for ventilation. Do not block or cover these openings. Make sure you leave plenty of space around the system for ventilation. Never insert objects of any kind into the ventilation openings.
- Use this product in environments with ambient temperatures between 0°C and 35°C.
- Failure to use the included power adapter shall violate regulatory compliance requirements and may expose the user to safety hazards.
- Risk of electric shock, fire, or burn if using an AC adapter other than the one provided with this device. Indoor use only and in dry locations. The adapter is rated for use between 0°C and 35°C (32°F and 95°F).
- If you use an extension cord, make sure that the total ampere rating of the devices plugged into the extension cord does not exceed its ampere rating.
- The power supply cord must be plugged into a socket or outlet that is provided with a suitable earth ground.
- This equipment should be installed and operated with a minimum distance of 20 cm between the radiator and your body.
- Do not install this equipment at a height exceeding 2 meters.
Care during use
- Do not walk on the power cord or allow anything to rest on it.
- Do not spill water or any other liquids on your system.
- When the system is turned off, a small amount of electrical current still flows. Always unplug the power cord from the power outlets before cleaning the system.
- If you encounter the following technical problems with the product, unplug the power cord and contact a qualified service technician or your retailer.
- The power cord or plug is damaged.
- Liquid has spilled into the system.
- The system does not function properly even if you follow the operating instructions.
- The system was dropped, or the cabinet is damaged.
- The system performance changes.
- Disposal of a battery into fire or a hot oven, or mechanically crushing or cutting of a battery, that can result in an explosion.
• Leaving a battery in an extremely high temperature surrounding environment that can result in an explosion or the leakage of flammable liquid or gas.
- A battery subjected to extremely low air pressure that may result in an explosion or the leakage of flammable liquid or gas.
Ascent GX10
GX10
natural_image
Illustration of electronic devices including a USB controller, cable bundles, and printed documents (no text or symbols visible)REMARQUE :
natural_image
Diagram of a device with a black logo and a blue label pointing to it, no readable text or symbols present.Vue arrière
text_image
2 8 4 6 6 7 8text_image
Diagram showing connection between a server rack and an Ethernet cable with labeled ports and connectorsPort USB Type-C®
text_image
Diagram showing a device panel with labeled connectors and an icon of a USB cable pointing to a connector.text_image
Diagram showing a device panel with an inserted port and a close-up of the cable being inserted into a socket, with Chinese text labels.Connector un câble QSFP