
HA2MTCBP58IRB1S - Cooker HAIER - Free user manual and instructions
Find the device manual for free HA2MTCBP58IRB1S HAIER in PDF.

| Product type | Induction hob |
| Brand | Haier |
| Model | HA2MTCBP58IRB1S |
| Number of cooking zones | 4 |
| Dimensions (W x D x H) | 60 x 52 x 6 cm (estimate) |
| Power supply | 220-240 V ~ 50/60 Hz |
| Maximum power | 7.4 kW |
| Power management | 8 adjustable levels from 2 kW to 7.4 kW |
| Special functions | Boost (14/15), Varycook, Assisted cooking, Sous-vide, Grill, Simmering, Steam cooking, Preci Probe |
| Cookware detection | Automatic induction detection |
| Safety | Safety shut-off, control lock, safe activation (pan required) |
| Display | Touch screen with digital display |
| Timer | Integrated |
| Connectivity | hOn app (Wi-Fi) |
| Surface material | Glass ceramic |
| Cleaning | Soft cloth and special induction cleaner; scraper for stubborn residues |
| Maintenance | Clean after each use; avoid abrasive products |
| Weight | Approximately 10 kg (estimate) |
| Spare parts | Available from authorized after-sales service |
| Repairability | Call a qualified technician for repairs |
| Repairability index | Not provided |
Frequently Asked Questions - HA2MTCBP58IRB1S HAIER
User questions about HA2MTCBP58IRB1S HAIER
0 question about this device. Answer the ones you know or ask your own.
Ask a new question about this device
Download the instructions for your Cooker in PDF format for free! Find your manual HA2MTCBP58IRB1S - HAIER and take your electronic device back in hand. On this page are published all the documents necessary for the use of your device. HA2MTCBP58IRB1S by HAIER.
USER MANUAL HA2MTCBP58IRB1S HAIER
DISCOVER THE FULL USER MANUAL
(FR) DÉCOUVREZ LE MANUEL D'UTILISATION COMPLET (IT) SCOPRI IL MANUALE UTENTE COMPLETO (EL) ANAKAΛΥΨTE TO ΠΛΗΡΕΣ ΕΓΧΕΙΡΙΔΙΟ ΧΡΗΣΤΗ (LT) SUSIPAŻINKITE SU VISU NAUDOTOJO VADOVU (LV)
ATKLÄJIET PILNIGU LIETOTAJA ROKASGRAMATU(HR) OTKRIJTE KOMPLETNI KORISNICKI PRIRUCNIK (ET) POGLEDAJTE KOMPLETNO UPUTSTVO ZA UPOTREBU (RO) DESCOPERITI MANUALUL COMPLET DE UTILIZAREDE (HU) FEDEZZE FEL A TELJES FELHASZNALÓI KÉZIKÖNYVET (PL) ODKRYJ PEŁNA INSTRUKCJE UZYTKOWNIKA (SL) ODKRIJTE CELOTNA NAVODILA ZA UPORABO (DE) ENTDECKEN SIE DAS VOLLSTÄNDIGE BENUTZERHANDBUCH

Haier
INSTRUCTION GUIDE HOBS EN
5 Before starting
8 Cooking guidelines
11 Care and cleaning
12 Failure display and inspection
WELCOME
Thank you for choosing our product. To ensure your safety and get the best results, please read this manual carefully, including the safety instructions, and keep it for future reference. Before installing the hob, note the serial number, which you might need for repairs. Check for any damage during transportation and consult a technician if you're unsure before using it. Keep packaging materials away from children.
NOTE: Please note that the hob's accessories may vary depending on the model you purchased.
1. BEFORE STARTING
1.1 GENERAL INFORMATION
Before you begin, it is important to know: all functions of this hob are designed in order to comply with the most stringent safety regulations.
For this reason:
- Some functions will be activated, or will be automatically deactivated in absence of pots on the burners or when they are not correctly positioned.
- In other cases, functions will be automatically deactivated after a few seconds when it requires more than one step (e.g. "Turn the hob on " without "selecting the cooking zone").
- In case of longtime use, the appliance may not immediately shut down, even with all the cooking zones off, because it is in the cooling phase; the H symbol appears on the cooking zone display until it is cooled.
Safe activation: the product is activated with the presence of pots on the cooking zone. The heating process does not start or is interrupted if there are no pots or if these are removed.
Safety shut down: for safety reasons, each cooking zone has a maximum operating time, which depends on the maximum power level set.
1.2. POWER MANAGEMENT
When product is first used, the hob is set to maximum reachable power. Different power limits can be chosen according with home main supply system by using power management fun
How to set the power management
It is possible to set a maximum power absorption level for the Induction hob, choosing up to different power ranges.
Induction hobs are able to limit themselves automatically in order to work at lower power level, to avoid the risk of overloading.
To enter Power Management Function:
- Turn on the hob, then press at the same time and.
- The timer indicator will show "P8" which means power level 8. The default mode is on 7.4kW.
To switch to another level
- Scroll left and right the slider to change the power management level.
- There are 8 power levels, from "P1" to "P8". Timer indicator will show one of them:
| P1 P2 | P3 P4 | P5 P6 | P7 P8 | ||||
| 2kW | 2,5kW | 3kW | 3,5kW | 4,5kW | 5,5kW | 6,8kW | 7,4kW |
Confirmation and Exit Power Management Function
For confirmation, turn off the hob. The power level will be saved automatically. Selected value is permanently stored and remains even after power down of the main supply.
To change the power level repeat the operations described above.
NOTE: depending on the power management selection, some power levels and functions of the cooking zones could be automatically limited not to exceed the selected value. In particular, in case of a power management level set less than 4,5kw, Boost function, Varycook and some cooking preparations with the app, could not be selected.
In particular last power level selection can be refused/adjusted according with the available amount of residual power from the previous setting.
1.3. CHOOSING THE RIGHT COOKWARE
1.3.1. Characteristics of the cookware
Use only pots with the induction symbol.
- Only pots with a perfectly flat bottom. Otherwise, the following situations may occur:
- No pot detection;
- Low performance;
- Unwanted noise.
- Only pots with a smooth base, to avoid scratching the hob surface;

natural_image
Simple line drawing of a frying pan with a handle and checkmark icon (no text or symbols)NOTE: avoid as much as possible moving pot operations on the glass surface just to minimize scratches.
Magnet test
Induction cooking uses magnetism to generate heat; pots must therefore contain iron. If you already have a cookware you can check if the material is magnetic by using a magnet. Pots are suitable if they are magnetically attracted by the magnet.
Cookwares made from the following materials are not suitable: pure stainless steel, aluminum or copper without a magnetic base, glass, wood, porcelain, ceramic, earthenware.
1.3.2 Higher quality cookwares
All cookwares with the induction symbol are generally accepted. Depending on the type of bottom, however, the behavior may vary. When using large cookware with a smaller ferromagnetic element, only the ferromagnetic element heats up. Consequently, heat might not be uniformly distributed.
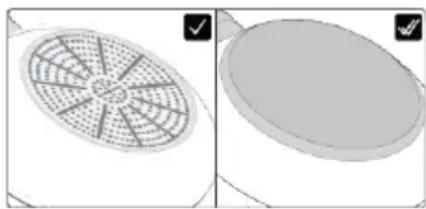
natural_image
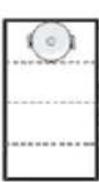
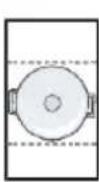
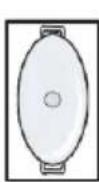
Two technical diagrams showing a circular fan-like structure on the left and a blank circular plate on the right, with no visible text or symbols.1.3.3. Dimension & placement
Always use the cooking zone that best matches the bottom diameter of the pan. Place the pot making sure it is well centered in the cooking area.
NOTE: it's recommended not to use pans that exceed the perimeter of the cooking zone.
For the correct working of the hob, it's necessary to use pots with the bottom diameter inside the range described in the following table.
 |  |  |  |  |  | |
 | min. | 90 mm | 160 mm | 160 mm | 185 mm | 90 mm |
| max. | 180 mm | 220 mm | 200 x 380 mm | 210 mm | 150 mm | |
NOTE: by using a cookware smaller than the minimum required, it could not be detected. While using one bigger than the maximum required, malfunctions or low performances may occur.
ATTENTION: do not put the pot on/near the control panel during cooking or cooling down.
2.COOKING GUIDELINES
2.1 POWER TABLE
| POWER LEVEL | SYMBOL | TYPE OF COOKING SUGGESTED USE | |
| 14/15 BOOSTER | [273H] | Fast Heating, Booster | Ideal for stir-frying, searing, bringing soup to the boil, boiling water |
| 11-13 | Frying, Grilling, Keep Boiling | Ideal for starting cooking, sautéing, cooking pasta, deep frying, grilling | |
| 5-10 | Stewing, Cooking | Ideal for preheat stewing, keep gentle boiling, cooking, long & continuos frying (rice, roast, pancakes*) | |
| 3-4 |  | Simmering, Keep Warm, Slow Cooking | Ideal for slow cooking recipes, gentle simmering, cream sauces and liquid |
| 1-2 |  | Melting, Keep Liquid, Defrosting | Delicate warming for small amounts of food, slow warming, melting & keep liquid chocolate** |
| OFF | - | - | |
*Continuous frying pancake at level 5-6.
**Melting Level 2, when begins to melt, move to level 1 to keep liquid.
5.2. COOKING TABLE
| MANUAL COOKING GUIDELINES | EVERYDAYCOOKING& SPECIALPROGRAMSAVAILABLE | EVERYDAYCOOKING,RECIPES &SPECIALPROGRAMSAVAILABLEON APP | CULINARYSENSORRECIPESAVAILABLEON APP (*) | ||||
| FOOD | RECIPE | Preheat | Cooking | ONPRODUCT | |||
| CATEGORY | Heating Phase | Power Level | Power Level | ||||
| Pasta & rice | Pasta | Heating Water | 14 - 15 6 | - 11 | X | ✓ | X |
| Rice Pudding | Heating Milk | 13 - 15 6 | - 8 | ||||
| Boiled Rice | Heating Water | 14 - 15 | 6 - 8 | ||||
| Risotto | Stir-frying &Roasting | 13 - 15 | 6 - 8 | ||||
| Meat | Roast Meat | Stir-frying &Roasting | 10 - 13 | 6 - 11 | X | ✓ | ✓ |
| Grilled Steak | Preheat Grill | 10 - 13 | 10 - 13 | ||||
| Sausages & Hamburger | Preheat Grill | 10 - 11 | 10 - 13 | ||||
| Chicken Pieces | Preheat Pan | 10 - 11 | 6 - 10 | ||||
| Breaded Steak | Preheat Pan | 6 - 11 | 10 - 13 | ||||
| Fish | Grilled Fish | Preheat Grill | 10 - 13 | 8 - 10 | X | ✓ | ✓ |
| Fillet Fish | Stir-frying | 10 - 13 | 8 - 10 | ||||
| Shrimps & Prawns | Stir-frying | 10 - 13 10 | - 13 | ||||
| Vegetables &legumes | Fresh Frying Potatoes | Heating Oil* | 14 | 11 - 14 | X | ✓ | ✓ |
| Frozen Frying Potatoes | Heating Oil* | 14 | 11 - 14 | ||||
| Grilled vegetables | Preheat Grill | 6 - 11 | 10 - 13 | ||||
| Peppers, Zucchini & Eggplan | Preheat Pan | 6 - 11 | 10 - 13 | ||||
| Eggs & Eggproducts | Hard Boiled Eggs | Heating Water | 14 - 15 6 | - 8 | X | ✓ | ✓ |
| Fried Eggs | Stir-frying | 10 - 13 | 8 - 10 | ||||
| Pancakes | Preheat Pan | 6 - 11 | 5 - 6 | ||||
| Sauces,Creams &Dessert | Tomato Sauces | Heating Sauces | 4 - 6 2 - 4 | X | ✓ | X | |
| Melted Cheese | Melting | 6 - 11 | 2 - 5 | ||||
| Cream & Custard | Heating Cream | 4 - 6 2 - 4 | |||||
| Melted Chocolate | Melting | 1 - 2 1 | |||||
| Butter | Melting | 1 - 3 1 - 3 | |||||
*Applicable for models with Culinary Sensor
2.3. COOKING PREPARATIONS WITH THE APP
Preci Probe as thermometer
Set in the hOn App the target temperature you want to reach, insert the Preci Probe inside the food or with its accessory inside liquids and you will see the temperature raising from the app until reaching the target temperature.
It will help you to accurately maintain the temperature for all kind of food. You cannot use it when the Assisted Cooking function operates.
Assisted Cooking: "Cook with me" function
Choose from the hOn App recipes or special programs, follow step by step the preparation and then the hob will automatically set the parameters for the chosen cooking method.
Sous Vide
Type of cooking in which the food is placed in a vacuum bag and cooked in a low temperature water bath.
The food prepared in this way will be more juicy and tender and will keep the nutritional properties intact, making it healthier and tastier.
Go on the hOn App select the category of food, select this type of cooking, insert the bas with the food in the pot with water and the induction hob will set the correct cooking temperature for a perfect result.
Grill
Select the category of food from the hOn App, select this type of cooking and the induction hob will automatically bring the grill to the correct temperature in a predetermined time.
Simmering
The simmering function is ideal for cooking sauces, stews, braised dishes and all preparations with an average long cooking time.
The automatic function you find on the hOn App will gently bring the food to a slightly boiling temperature, keeping it for all the duration of cooking.
Steaming
With the steaming function you can steam food such as vegetables, meat or fish in pots equipped with a steamer basket. Steam cooking is faster than boiling, as it is not immersed in a liquid it disperses less nutrients contained in the food and preserves its vitamin content, improving its taste and structure which will be more compact and pleasant.
If necessary, contact the authorized service center.
2.4 CULINARY SENSOR (available depending on the model)
This function is available for three cooking method: Grilling, Pan frying and Deep frying. All accessible in the Everyday Cooking section (HoN app). All accessible in the Everyday Cooking section (HoN app).
Utility
Thanks to Culinary Sensor technology, the pan or the oil automatically reaches and maintains the ideal temperature based on the selected cooking method.
Directions for Use
- Cooking performance may vary because of cookware quality: please refer to Paragraph 3.3. Optimized cookware bottom diameter is 18 cm.
• Cookware must be placed centered on cooking zone and not moved during the initial cooking phase (preheating phase)
• The function must be started only when the hob is cold.
Grilling and Pan-frying
Please use empty cookware before activating the function.
Deep Frying
Please fill in the cookware with 1,5 liters of frying oil (around 5 cm frying oil depth) before activating the function.
3.1. GENERAL RECOMMENDATIONS
Regular cleaning can extend the lifecycle of your appliance.
• Clean the hob after each use;
• Always use cookware with a clean base;
• Scratches on the surface have no effect on how the operates;
• Use a special cleaner suitable for the surface of the hob;
• Use a special scraper for the glass.
3.2. CLEANING THE HOB
Before proceeding with the cleaning, make sure that the cooking zones are turned off. Always remember to follow the recommended cleaning instructions and avoid using abrasive products that could damage the surface of the cooktop.
a) FATTYSOIL
This procedure is recommended for these kinds of scenarios; splatters caused by frying or grilling meat.
- Let the hob cooldown.
- Absorb any excess liquid around the pot with kitchen paper, then remove the pot.
- Clean the cooking surface with a cloth and detergent solution.
- If necessary, clean the hob a second time using hot water and cleaner for induction hob glasses.
b) SUGARYSOIL
This procedure is recommended for foods that, due to their high sugar content, need to be promptly removed to prevent damage to the hob surface (syrups, jams, or preserves).
- When the hob is still warm, absorb any excess liquid around the pot with kitchen paper, then remove the pot.
- If necessary, we recommend using a scraper at an acute angle to remove any remaining residue.
- Clean the cooking surface with a detergent solution and dry it with the kitchen paper.
• If necessary, clean the hob a second time using hot water and cleaner for induction hob glasses.
c) STARCHY SOIL
This cleaning procedure is recommended for these kinds of foods: pasta, rice and potatoes.
- Absorb any excess liquid around the pot with kitchen paper, then remove the pot.
- Let the hob cooldown.
- Use a damp cloth to moisten any starch residues. Allow it to sit for a couple of minutes.
- Clean the cooking surface with a cloth and detergent solution.
• After cleaning, wipe the hob dry with a soft cloth. - If necessary, clean the hob a second time using hot water and cleaner for induction hob glasses.
NOTE: Please consider these instructions also for; water rings, limescale rings, fat stains.
d) SHINY METALLIC DISCOLORATION
Use a solution of water with vinegar and clean the glass surface with a cloth.
4. FAILURE DISPLAY & INSPECTION
4.1 TROUBLESHOOTING
| Problem | Possible causes | What to do |
| The induction hob cannot be turned on. | No power. | Make sure the induction hob is connected to the power supply. Check whether there is a power outage in your home or area. If the problem persists, call a qualified technician. |
| The touch controls are unresponsive. | The controls are locked. | Unlock the controls by checking the section 'How product works'. |
| The touch controls are difficult to operate. | There might be water residue on the controls, or you might not be applying the correct pressure to the buttons. | Make sure the touch control area is dry and use the right pression when touching the controls. |
| The glass is being scratched. | Rough-edged cookware. Unsuitable, abrasive scourer or cleaning products being used. | Use cookware with flat and smooth bases. See 'Choosing the right cookware' and "Care and cleaning" sections. |
| Some pans make crackling or clicking noises. | This may be caused by the construction of your cookware (layers of different metals vibrating differently). | This is normal for cookware and does not indicate a fault. |
| The induction hob makes a low humming noise when used on a high heat setting. | This is caused by the technology of induction cooking. | This is normal, but the noise should quieten down or disappear completely when you decrease the heat setting. |
| Fan noise coming from the induction hob. | A cooling fan built into your induction hob has come on to prevent the electronics from overheating. It may continue to run even after you've turned the induction hob off. | This is normal and needs no action. Do not switch the power to the induction hob off at the wall while the fan is running. |
| Pans do not become hot and "U" appears in the dis play. | The induction hob cannot detect the pan because it is not suitable for induction cooking. The induction hob cannot detect the pan because it is too small for the cooking zone or not properly centred on it. | Use cookware suitable for induction cooking. See section 'Choosing the right cookware'. Centre the pan and make sure that its base matches the size of the cooking zone. |
| The induction hob or a cooking zone has turned itself off unexpectedly, a tone sounds and an error code is displayed (typically alternating with one or two digits in the cooking timer display). | Technical fault. | Please note down the error letters and numbers, switch the power to the induction hob off at the wall, and contact a qualified technician. |
| d0 warning appears on display | Pressing two buttons at the same time, waterdrops or dust on the glass | Make sure no buttons are being pressed at the same time and clean the hob to remove any water or dust residues. |
4.1.2 ERROR CODES
| ERROR CODE | RULE OF DISPLAY | ACTIONS | |
| E0 | Call ASA | ||
| Front left | |||
| E1 | Call ASA | ||
| Front left | |||
| E2 | Call ASA | ||
| Front left | |||
| E3 | Call ASA | ||
| Front left | |||
| E4 | Left Right | Check mains cable & circuit breaker, Check mains supply voltage If ok call ASA | |
| E5 | Wait for cooldown, clean and/or remove foreign bodies Call ASA | ||
| Front left | |||
| E6 | Rear left | Rear right | Check installation requirements via user manual, if ok call ASA |
| Front left | Front right | ||
| E7 | Rear left | Rear right | Call ASA |
| Front left | Front right | ||
| E8 | Rear left | Rear right | Check installation requirements via user manual, if ok call ASA |
| Front left | Front right | ||
| E9 | Call ASA | ||
| Front left | |||
*ASA = Service Center
natural_image
Simple line drawing of a frying pan with a checkmark icon (no text or symbols)natural_image
Two 3D-rendered objects: a fan-shaped grid on the left and a circular object on the right, both without any text or symbols.natural_image
Simple line drawing of a frying pan with a checkmark icon (no text or symbols)natural_image
Two 3D-rendered objects: a circular fan with radial blades and a flat circular object, both without any text or symbols.natural_image
Simple line drawing of a frying pan with a handle and checkmark icon (no text or symbols)natural_image
Two 3D-rendered objects: a fan with radial blades and a circular object on top, both without any text or symbols.natural_image
Simple line drawing of a frying pan with a checkmark icon (no text or symbols)natural_image
Two 3D-rendered objects: a fan-shaped object with radial lines and a circular base, both without any text or symbols.natural_image
Simple line drawing of a frying pan with a handle and checkmark icon (no text or symbols)- Samo posude s glatkim dnom, kako bi se izbjeglo grebanje površine ploče za kuhanje;
natural_image
Two 3D-rendered diagrams showing a fan-like structure on the left and a circular object on the right, both without any text or symbols.natural_image
Simple line drawing of a frying pan with a checkmark icon (no text or symbols)natural_image
Two 3D-rendered objects: a fan with radial lines and a circular object with a checkmark (no text or symbols)natural_image
Simple line drawing of a frying pan with a checkmark icon (no text or symbols)natural_image
Two 3D-rendered objects: a circular fan with radial lines and a flat oval, both without any text or symbols.natural_image
Simple line drawing of a frying pan with a handle and checkmark icon (no text or symbols)natural_image
Two 3D-rendered objects: a circular fan with radial blades and a flat plate, both without any text or symbols.1.3.3. Dimenzije in postavitev
natural_image
Simple line drawing of a frying pan with a checkmark icon (no text or symbols)natural_image
Two 3D-rendered objects: a fan with radial blades and a circular object on a flat surface, both without any text or symbols.natural_image
Simple line drawing of a frying pan with a handle and checkmark icon (no text or symbols)natural_image
Two technical diagrams showing a circular fan-like structure on the left and a flat circular object on the right, both without any text or symbols.natural_image
Simple line drawing of a frying pan with a handle and checkmark icon (no text or symbols)natural_image
Two 3D-rendered objects: a fan-shaped object with internal grid pattern and a circular object with checkmark indicators (no text or symbols)natural_image
Simple line drawing of a frying pan with a handle and checkmark icon (no text or symbols)natural_image
Two 3D-rendered objects: a fan with radial blades and a circular object, both without any text or symbols.* ASA = servisa centrs
70078143
12.02.2025