DO7245S - Vacuum Cleaner DOMO - Free user manual and instructions
Find the device manual for free DO7245S DOMO in PDF.

User questions about DO7245S DOMO
0 question about this device. Answer the ones you know or ask your own.
Ask a new question about this device
Download the instructions for your Vacuum Cleaner in PDF format for free! Find your manual DO7245S - DOMO and take your electronic device back in hand. On this page are published all the documents necessary for the use of your device. DO7245S by DOMO.
USER MANUAL DO7245S DOMO
natural_image
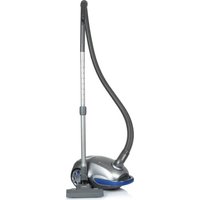
Black and white photo of a compact vacuum cleaner with mesh grille and handle (no visible text or symbols)DO7245S
PRODUCT OF LINEA 2000
GARANTIEVOORWAARDEN
CONDITIONS DE GARANTIE
This appliance has a two year warranty period. During this period the manufacturer is responsible for any failures which are the direct result of construction failure. When these failures occur the appliance will be repaired or replaced if necessary. The warranty will not be valid when the damage to the appliance is caused by wrong use, not following the instructions or repairs executed by a third party. The warranty will only be valid if the warranty application has been completed by the dealer at the time of purchase. All parts, which are subject to wear, are excluded from the warranty.
Type nr. Apparaat
RECYCLING INFORMATIONEN
RECYCLING INFORMATION
The symbol ☒ on the product or on its packaging indicates that this product may not be treated as household waste. Instead it shall be brought to the applicable collection point for recycling of electrical and electronic equipment. By ensuring this product is disposed of correctly, you will help prevent potential negative consequences for the environment and human health, which could otherwise be caused by inappropriate waste handling of this product. For more detailed information about recycling of this product, please contact your local city office, your household waste disposal service or the shop where you purchased the product.
If the supply cord is damaged, it must be replaced by manufacturer of its service agent or a similarly qualified person in order to avoid a hazard.
WAARSCHUWINGEN
text_image
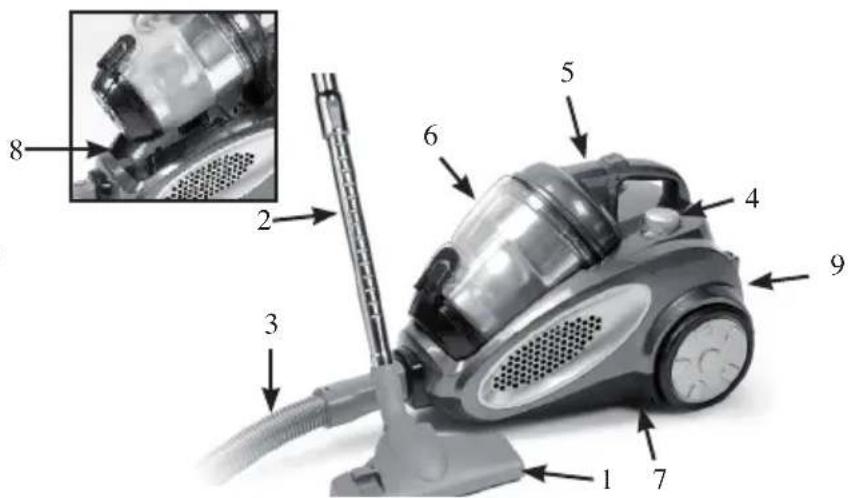
Labeled diagram of a vacuum cleaner with numbered parts and an inset showing a component detailMONTAGE DE L'ASPIRATEUR
IMPORTANT SAFETY INSTRUCTIONS
To reduce the risk of fire, electric shock, or injury:
- Do not leave vacuum cleaner when plugged in. Unplug from outlet when no use and before servicing.
- To reduce the risk of electric shock, do not use outdoors or on wet surfaces
- Do not allow to be used as a toy. Close attention is necessary when used by near children.
- Use only as described in this manual. Use only manufactures recommend attachments.
- Do not use with damaged cord or plug. If vacuum cleaner is not working as it should, has been dropped, damaged, left outdoors, or dropped into water, enter it to a service center.
- Do not pull or carry on cord, use cord as a handle, close door on cord, or pull cord around sharp edges or corners. Do not run vacuum cleaner over cord. Keep cord away from heated surfaces.
- Do not unplug by pulling on cord. To unplug, grasp the plug, not the cord.
- Do not handle plug or vacuum cleaner with wet hands.
- Do not put any object into openings. Do not use with any opening blocked. Keep free of dust, lint, hair and anything that may reduce airflow.
- Keep hair, loose clothing, fingers and all parts of body away from openings and moving parts.
- Turn all controls off before unplugging.
- Use extra care when cleaning on stairs.
- Do not use to pick up flammable or combustible liquids, such as gasoline, or use in areas where they may be present
- Hold plug when rewinding onto cord reel. Do not allow plug to whip when rewinding.
- Unplug before connecting the hose
- Do not pick up anything that is burning or smoking, such as cigarettes, matches, or hot ashes.
- Do not use without dust bag and/or filter in place.
- Only use approved extension cords.
- If the supply cord is damaged, it must be replaced by the manufacturer or its service agent or a similarly qualified person in order to avoid a hazard.
PARTS
-
Floor brush
-
Tubes
-
Flexible hose
-
On/off switch
-
Button lock/release dust cup
-
Dust cup
-
Base body
-
Hepa-filter
-
Air exhaust filter
text_image
Labeled diagram of a vacuum cleaner with numbered parts and an inset showing the internal component.ASSEMBLING THE VACUUM CLEANER
1. Fitting or removing the flexible hose
Insert the flexible hose into the air inlet on the top of appliance. Press until it clicks into position.
Removing the flexible hose: remove the plug from the power socket and push on the release button to remove the flexible hose from the air inlet.
-
Attach the telescopic tubes to the handle.
-
Attach the floor brush to the telescopic tubes.
ACCESSORIES
a) Crevice tool: for radiators, crevices, corners, baseboards and between cushions.
b) Dusting brush: used for furniture, blinds, books, lamp shades and shelves.
c) Small brush: used to clean the sofa.
INSTRUCTIONS FOR USE
-
Before using the appliance, unwind a sufficient length of cable and insert the plug into the power socket. A yellow mark on the power cable shows the ideal cable length. Don't pull the cable beyond the red mark.
-
Press the 'on/off' button to switch the appliance on.
-
To rewind the power cable, press the rewind button with one hand and guide the cable with the other hand to ensure that it does not whip causing damage.
MAINTENANCE
Spilling rubbish from the dust compartment subassembly.
Always operate the vacuum cleaner with the dust compartment subassembly installed. Make sure to place the filter and Hepa-filter in the correct position.
- Remove the flexible tube, press the lock/release button and remove the dust cup.
- Press the bottom release button and empty the dust cup.
- Replace the dust cup until it is locked.
Cleaning and changing of the filters.
Never use the vacuum cleaner without filters.
Disconnect from electrical outlet before removing the filters.
Do not use a washing machine to rinse the filters.
Do not use a hair dryer to dry the filters.
a) Cleaning and changing filter and HEPA for air-inlet.
- Remove the dust cup from the vacuum cleaner.
- Underneath the dust cup is located a black lid.
- Remove the lid, now the Hepa filter is exposed.
- Take out the Hepa filter and clean it in lukewarm water and dry the Hepa completely.
- Place the Hepa filter bag in the unit, close the lid and replace the dust cup.
b) Changing filter for air-outlet.
- Open the grille for air-outlet.
- Replace the filter and close the grille for air-outlet.
ATTENTION : all filters need to be replaced every 6 months.