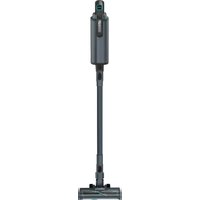
BX7 - Vacuum Cleaner THOMAS - Free user manual and instructions
Find the device manual for free BX7 THOMAS in PDF.


| Product Type | Cordless stick vacuum with rechargeable battery |
| Brand | Thomas |
| Model | BX7 |
| Power supply | Lithium-ion battery 25.3 V (mains charger 220-240 V, 50/60 Hz, 2.5 A) |
| Motor power | 400 W |
| Dust bag capacity | 1000 ml (disposable bag) |
| Runtime | Approximately 62 min in Eco mode, 12 min in Power mode (according to manual) |
| Filtration | Washable pre-motor filter + outlet filter |
| Power modes | Auto, Eco, Power (with LED display) |
| Display | Multifunction: charge level, power level, bag full indicator, missing bag indicator, blocked roller indicator, error indicator |
| Included accessories | Floor brush with LED, special brush for hard/delicate floors, electric upholstery nozzle and anti-mite nozzle, crevice tool, upholstery and furniture nozzle, wall mount with charging station, safety cord |
| Brush type | Motorized brush with removable roller (for hard floors and carpets) |
| Sensors | Dust sensors for automatic power adjustment in Auto mode |
| Weight | Not specified (estimated ~4 kg with battery) |
| Dimensions (approx.) | Height with tube: ~110 cm |
| Warranty | 24 months (except accessories, consumables, batteries subject to wear) |
| Maintenance | Emptying bag, cleaning pre-motor filter (washable), cleaning outlet filter, cleaning brush roller, cleaning dust sensors |
| Available spare parts | Bag (ref. 767 415), pre-motor filter (150 030), outlet filter (150 019), battery 25.3 V (767 416), orientation filter (150 023), brush roller for hard/delicate floors (150 019) |
| Safety | Overheating protection, automatic shut-off in case of blockage, anti-tip safety cord, use without filter prohibited |
| Intended use | Domestic use only, dry vacuuming on hard floors, carpets, rugs, furniture. Do not vacuum liquids or hazardous dusts. |
Frequently Asked Questions - BX7 THOMAS
User questions about BX7 THOMAS
0 question about this device. Answer the ones you know or ask your own.
Ask a new question about this device
Download the instructions for your Vacuum Cleaner in PDF format for free! Find your manual BX7 - THOMAS and take your electronic device back in hand. On this page are published all the documents necessary for the use of your device. BX7 by THOMAS.
USER MANUAL BX7 THOMAS
| Yes | |
| Non-Non-Non-Non-Non-Non-Non-Non-Non-Non-Non-Non-Non-Non-Non-Non-Non-Non-Non-Non-Non-Non-Non-Non-Non-Non-Non-Non-Non-Non-Non-Non-Non-Non-Non-Non-Non-Non-Non-Non-Non-Non-Non-Non-Non-Non-Non-Non-Non-Non-Non | Yes |
| Non-Non-Non-Non-Non-Non-Non-Non-Non-Non-Non-Non-Non-Non-Non-Non-Non-Non-Non-Non-Non-Non-Non-Non-Non-Non-Non-Non-Non-Non-Non-Non-Non-Non-Non-Non-Non-Non-Non-Non-Non-Non-Non-Non-Non-Non-Non- Non | Yes |
| Non-Non-Non-Non-Non-Non-Non-Non-Non-Non-Non-Non-Non-Non-Non-Non-Non-Non-Non-Non-Non-Non-Non-Non-Non-Non-Non-Non-Non-Non-Non-Non-Non-Non-Non-Non-Non-Non-Non-Non-Non-Non-Non-Non | Yes |
| Other Non Non Non Non Non Non Non Non Non Non Non Non Non Non Non Non Non Non Non Non Non Non Non Non Non Non Non Non Non Non Non Non Non Non Non Non Non Non Non Non Non Non Non Non Non Non Non Non Non Non Non Non Non Non Non Non Non Non Non Non Non Non Non Non Non Non Non Non Non Non Non Non Non Non Non Non Non Non Non Non Non Non Non Non Non Non Non Non Non Non Non Non Non Non Non Non Non Non Non Non Unisituted | Yes |

7.61
27
- ≥slant 24. ≥slant 37. ≥slant 40.
Intervideo de 1 mm x 25
Incorporation
Bened move
Vieken Bank Brocken, 2016 Sediment, Descentive, Cauty and the other side of the same Foresal Trade and the Cauty and the other side of the Other Intangible assets. From Pricet's Debt to the above-ordinary deal and the above-ordinary contract of the Company's Debt Securities under the Stock Act of Sale in August 2016
作
flowchart
graph TD
    A["Raw Material Input"] --> B["Add Mixing"]
    B --> C["Assembly"]
    C --> D["Finishing"]
    D --> E["Final Product Output"]
In the New Year
(1)
项

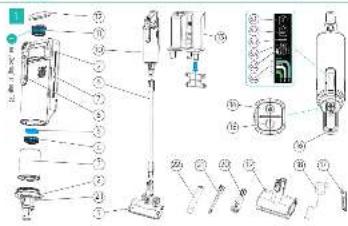
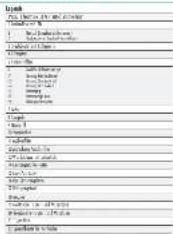
| Item Themes 8X7 and accessories | |
| 1. Face note with fill | |
| 2 | bd [clear bag compartment] |
| 3 | Distance to the wall, no. of a small part, wide |
| 4. See log with retaining plate | |
| 5. Free pad | |
| 6. Free sheet line | |
| 7. Wall-functional claybag | |
| 8. Folding, hot, cool, flat | |
| 9. Folding, smooth, flat | |
| 10. Folding sheet | |
| 11. Folding sheet | |
| 12. The profile of the surface, flat, flat, soft, thin, light | |
| 13. Power winding | |
| 14. Rednessy texture | |
| 15. Sutty tube | |
| 16. Blone plug | |
| 17. Bullard curvature | |
| 18. Lidded tile | |
| 19. Sliding of blue stone | |
| 20. Wall socket with charging grille | |
| 21. Power setting pan button | |
| 22. City/all buttons | |
| 23. Sutty type socket | |
| 24. Folding tool | |
| 25. Leaves ulcers | |
| 26. Formal splice artery and roots were | |
| 27. Condiment understanding and lubricant were | |
| 28. Cover were | |
| 29. Special brush for land lines | |
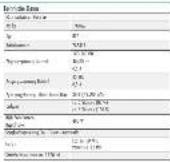
| Technical data | |
| Characteristics Values | |
| Used | 185465 |
| Type | B47 |
| Order studies | 205303 |
| Mass adapter root valence | 100-240 gm, 50-120 lb, 2.5 A |
| Mass adapter root valence | 35 mV, 2.5 A |
| Valence/disanging for infants are testing | 30.8 w/3,000 m/s |
| Charging time | minutes: 5 hours (20.5 A) minutes: 6 hours (20.0 A) |
| High-performance digital sector | 400 W |
| Station power regulation box Power | system |
| Running time | Box power: 50 min. Power approx. 17 min. |
| Door bag valves appson. 1020 m | |
Table of Contents
1 General 27
7. Safety notices....20
3. Prepare use 29
4 Operation 33
5 Cleaning and maintenance....37
6 Spare parts and accessories ....41
7. Specification of fuels....43
8 information on disposal 43
9 Guromae....43
Many thanks
Dear customer.
Thank you for deciding to purchase a Thomas product. We note that you enjoy using the appliance and would like to say thank you for purchasing it.
You can find further information about your product in these operating instructions
and or our website www.izbert-thomos.net.
You can contact our service team using the contract details provided on page 1.
ustation #2004 Thems 137
Evansco Manuel Thomas 107
1 General
These instructions for use contain important information for your safety as well as on the use of the appliance.
- Read the instructions for use in full and attentively prior to initial use. Failure to observe the instructions for use may result in injury to persons or damages to property as well as loss of warranty.
- Store these instructions for use at an easily accessible location in the vicinity of the appliance.
- Always provide third parties these instructions for use together with the appliance.
1.1 Target group
- This appliance and its accessories may only be operated by children above 8 years of age and persons with reduced physical, sensory or mental abilities as well as also in general in case of lacking experience and/or knowledge if they are previously instructed by experienced adults regarding potential danger and safe use or are supervised during use.
- All use and work on and with the appliance as well as playing within its proximity is prohibited for children under 8 years of age.
1.2 Intended use
The battery-operated vacuum cleaner Thomas BX7 is exclusively intended for dust removal in domestic surroundings. The battery-operated vacuum cleaner Thomas BX7 (in the following also related to as the appliances) may only be used with the Thomas accessories belonging to it.
Use the appliance exclusively in the household for vacuum cleaning oven, dry, normally soiled hard floors, short tile carpets or sets which withstand the buttons of the notting brush without damages. Dependant on the brush attachment selected, the appliance can also be used to vacuum furniture. All further use is deemed as not intended and is prohibited. The appliance is not suitable for the removal of dangerous dust or liquid.
The appliance and its accessories do not have any moisture protection. Only use it in dry indoor vams.
1.3 Predictable misuse
All different use or use above and beyond the intended use is deemed as unintended use.
The manufacturer is not liable for damages resulting from this. In case of alterations or incorrect assembly, installation, commissioning, operation, servicing or repairs, the manufacturer assumes no liability.
Exclusively original parts from the manufacturer are permissible as spare parts and accessories. Spare parts and accessories nor delivered by the manufacturer are not tested for operation and may influence operational safety. The manufacturer assumes no liability for damages arising from the use of non-permissible spare parts and accessories.
Reasonably predictable misuse includes in particular:
• Operation without a der bag
• Operation with an incorrectly positioned due to
• Outdoor use and/or use in the rain
- Operation with incorrect operation: Vacuuming unwanted items all humans and animals. In particular, fur, hair, fingers and other parts of the body
• Operation with a floor nozzle above head height
• Operation without a brush roller
• Operation with an open cover
• Operation without a fiber - Suction of construction dust
2 Safety notices
2.1 Basic safety measures
If you abuse the following basic safety measures, this may result in severe injury to persons or damages to property!
• The product:
• Use exclusively in accordance with the intended purpose
- Never commission despite recognisable damages
- Never make technical alterations
• Never operate when incompletely assembled
- Never operate without the required covers
- The safety measures are the prerequisite for safe, disturbance-free operation and for the achievement of the specified product properties.
2.2 Structuring warning notices
Safety notices protect against injury to persons or damages to property. The measures described for danger avoidance must be adhered to.

WARNING
Thanks on exceptionally high danger situation. If this notice is not observed, severe, irreversible or lethal injuries may be incurred.

CAUTION
Marks a danger situation. If this notice is not observed, minor or moderate injuries may be incurred.
NOTICE
Marks risk of danger for property. If this notice is not observed, damage to property may be incurred.
2.3 General safety notices

WARNING
Danger of explosion, bursting!
Appliance and rechargeable battery are heat-sensitive.
▶ Neither subject the appliance and rechargeable battery to fire or to temperatures exceeding 45 °C.

WARNING
Danger of suffocation, choking!
It is possible that packaging material and small parts can be iminated, swallowed or misused for playing with.
▶ Secure packaging and small parts against use.
3 Prepare use
Follow the notices listed to prepare the appliance for operation
- Check the network adapter cable for possible damages prior to operation.
- Never use a network adapter with a damaged plug or cable.
- Only connect the network adopter to sockets which use the electrical voltage defined on the network adopter.
• In case of increased treatment of rechargeable batteries, danger of injury exists.
- Only use the charger provided to charge the rechargeable battery pack.
3.1 Unpacking
The packaging process the vacuum cleaner against transport damages. Keep the packaging for transport purposes. Disposal notices are provided at the end of the instructions.
Follow the action steps listed to unlock the appliance.
1. Unpacks the appliance and its necessary components.
2. Check the completeness and intraclass of the ungracked contents.
→ In case of transport damages or missing parts, turn to your dealer without delay.
3.2 Become acquainted with the displays
The opulence has a multi-functional display (Fig. 1, no. 6) on the manual control unit with the following functions and displays:
Battery display
The multi-functional display shows the appliance charge status. The current charge status is displayed during operation with a percentage figure (Fig. 1, no. 6.5).
The icon "Charging process" (Fig. 1, no. 6.4) vibrates during the charging process.
Power setting display
The multi-functional display shows the power setting set (Fig. 1, no. 6.6). Use the power setting push button (Fig. 1, no. 14) to set the power level.
ustation #2001 Thems 137
• The green iron "ECO" is displayed in 200 mode.
- The white icon "AUTO" is displayed in automatic mode.
• The blue iron "MOS" is displayed in power mode.
Cleaning and error display
The multi-functional display shows the current appliance status.
- Cleaning display: the scan "Naming: dust bug ful" (Fig. 1, no. 6.2) is displayed when the dust bug is ful.
- Error display: the item "Warning: no dust bug" (Fig. 1, no. 6.1) is displayed if there is no dust bug in the appliance.
- Emo! display: the icon "Warning: rozzle blocked" (Fig. 1, no. 6.3) flashes if the brush roller is blocked
- Error display: the iron "EA" is displayed if an error is incurred during the
3.3 Assembly
3.3.1 Wall station installation
- The wall station must be mounted at a height of which the opalance fasts freely and does not rest on the floor nozzle. Hold the wall breaker (Fig. 1, to. 13) against the wall of the appropriate height for installation. Mark four boles of the attachment points.
- Drill four holes (8 approx. 8 mm) at the locations marked and insert the four dowels provided into the drill toles.
-
Attach the wall station using the four screws provided
-
Hang the changing code in the wall bracket.
- Insert the mains adapter plug provided (Fig. 1, no. 18) into the wall station connector socket.
- Connect the mains adaptor to the wall socket.
- Check whether the wall stator stops in place correctly
3.3.2 Assembling the manual control unit
Before you assemble one of the matches, you must assemble the manual control unit 1. Insert the manual control unit (Fig. 1, no. 10) into the upper end of the section tube (Fig. 1, no. 8) until the adapter engages audibly and seriously.
3.3.3 Assembling the nozzles

CAUTION
Danger of injury!
Unintended activation of the appliances may result in injury.
▶ Switch the appliance oil before assembling the noodles.
▶ Secure the appliance against unimanded activation before assembling the roses.
NOTICE
Property damages!
Increase use of the nozzles may result in damaging your flooring.
▶ Before vacuuming, inform yourself regarding the requirements of your
flooding. Observe the recommendations made by the flooring manufacturers.
Assembling the floor nozzle
- Insert the floor mangle with LED (Fig. 1, no. 1) onto the lower end of the section tube (Fig. 1, no. 8) until it engages audibly and noticeably.
Exchanging the floor nozzle brush roller
The scope of delivery includes a special brush for hard/sensitive floors. The special brush can be inserted into the floor nozzle.
Follow the action steps listed to replace the brush roller: - Press the lower loding mechanism on the lower end of the suction tube (Fig. 1, no. 8) to release the floor nozzle (Fig. 1, no. 1).
- Pull the floor nozzle off the suction tube.
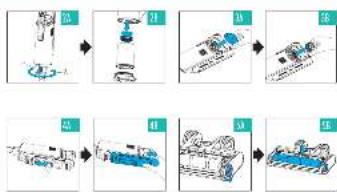
- Release the brush locking mechanism on the side of the floor nozzle. If the locking mechanism cannot be released, use a coin as a help (Fig. 5A "Cleaning", p. 195).
- Remove the inserted brush roller (Fig. 5B).
-
Insert the special brush (Fig. 1, no. 22).
-
Close the locking mechanism.
- Insert the floor nozzle onto the lower end of the suction tube.
Assembling a further nozzle
You can extend the functional scope of your appliance by exchanging the floor nozzle. In addition to the floor nozzle, an electrical upholstery and mine brush, a cleaver nozzle and a combined upholstery and furniture nozzle belong to the scope of delivery of your appliance.
- Electrical upholstery and mite brush (Fig. 1, no. 19): Use the electrical upholstery and mite nozzle to brush out fibres and rites and to ease cleaning upholstery and furniture.
- Creative nozzle (Fig. 1, no. 21): Use the creative nozzle to vacuum dust out of locations which are difficult to access.
- Combined upholstery and furniture nozzle (Fig. 1, no. 20): Use the upholstery and furniture nozzles to remove dust from items with sensitive surfaces.
Follow the action steps listed to assemble a different nozzle:
- Press the lower locking mechanism on the lower end of the suction tube (Fig. 1, no. 8) to release the floor nozzle (Fig. 1, no. 1).
- Pull the four nozzle off the so
- Insert the desired nozzle onto the end of the suction tube until it engages audibly and noticeably.
The device nozzle and the combined upholstery and furniture nozzle can alternatively be connected directly to the manual control unit.
3.3.4 Charging the rechargeable battery

WARNING
Danger of electric shock!
In case of non-intended use or damages, short-circuits and contact with dangerous voltages may occur.
▶ Test the appliance and accessories for damages, in particular the minus adapter, before all work on or with the product.
▶ Only operates the appliance and its accessories in a perfect state.

CAUTION
Danger of short-circuit of the rechargeable battery!
▶ Never contact both poles simultaneously with electrically conducting items.
▶ Do not increase the rechargeable battery in liquid.
NOTICE
Property damages and loss of warranty!
The product is only approved for use with the mains adapter provided.
▶ Only use the mains adapter provided.
NOTICE
Property damages!
The mains adapter and cable are prone to damages.
▶ Only unplug the mains adapter from the connector casing and never at the cable from the wall socket.
▶ Neither bend, clamp nor drive over the mains adapter cable.
NOTICE
Danger of stumbling!
▶ Lay the mains adapter cable safety, avoiding sharp edges and bends.
Operation
Operation
The appliance is charged with electrical content. Here, the basic danger of an electric shock exists. Therefore, pay attention to the following:
- Check the appliance and mains adopter for damages before use. Never use a faulty appliance or an appliance with a faulty mains adopter.
- Only contact the mains adapter to wall sockets with electrical current equivalent to that defined on the name plate of the appliance.
Change the rechargeable battery completely prior to initial use. It is best to charge the rechargeable battery before each use, above-all if not used for a longer period. This increases the working life of the rechargeable battery and enables long cleaning cycles.
Charging the rechargeable battery
A second rechargeable battery can be issued into the left-hand side coal station compartment with a charging cable (Fig. 1, no. 13). If the appliance will the rechargeable battery (Fig. 1, no. 7) and the replacement rechargeable battery are in the charging cable, firstly the rechargeable battery on the appliance and then the replacement rechargeable battery is charged. When charging the replacement rechargeable battery, the charging cable has vibrates. You can order on the replacement rechargeable battery on the Internet or see our Service document (6,8,9,10,11,12,13,14,15,16,17,18,19,20,21,22,23,24,25,26,27,28,29,30,31,32,33,34,35,36,37,38,39,40,41). Follow the action stops listed to charge the rechargeable battery.
- Insert the mains adapter plug provider (Fig. 1, no. 15) into the wall stator connector socket or directly into the reconvertible screw.
- Connect the mains adapter to the wall socket.
→ The icon "Charging process" (Fig. 1, no. 6.4) vibrates during the charging process.
3. Wait until the display stops vibrating
Then, the rechargeable battery is fully charged. After the appliance is switched on L4.1.1 Switching the appliance or" on page 35) battery status 700% is displayed.
4. Unplug the mains adopter from the wall socket.
5. Unplug the mains adopter plug from the wall station connector socket or the rechargeable battery.
4 Operation
WARNING
Danger of electric shock!
Comp and moisture in the appliance may cause contact with dangerous voltage.
▶ Neither touch the appliance nor the mains adaptes with wet bands.
▶ Neither immense the oppliance nor the mains adapter in liquid.
▶ Protect the appliance and accessories against moisture

CAUTION
Danger of injury!
If you don't the appliance or it fails over accidentally, injuries may be incurred.
▶ Do not drop the appliance when in use.
▶ When not in use, secure the appliance against falling over
4.1 Vacuum cleaning

WARNING
Danger of injury!
The use of a damaged appliance may result in injury.
▶ Test the appliance prior to each use
▶ Do not use any damaged appliances.

CAUTION
Danger of injury!
The installed brush roller rotates at a high speed and can cause injuries.
▶ Do not position yourself beneath the brush roller with any parts of your body.

CAUTION
Glare!
The LEDs on the floor must be exchanged and illuminate the working area.
▶ Do not store directly into the LEDs.
NOTICE
Property damages!
The brush roller can suck in items, damage them or wrap them around itself, resulting in blocking and overheating the motor.
▶ Do not vacuum in the vicinity of cables and leads.
▶ Do not vacuum any slag-pile carpets or loose threads.
NOTICE
Property damages!
The appliance may be damaged if a filter is incorrectly inserted or blocked.
▶ Ensure that the filter is inserted correctly.
▶ Ensure that no openings are blocked.
▶ Ensure that the filter is intact and dry.
Power settings
The appliance has three power modes. Use the corresponding setting for the degree of scaling.
- Automatic mode: Use automatic mode if the power should be adopted automatically according to the extent of selling.
- Eco mode: Use eco mode to remove sight wiring. The appliance uses less energy and the rechargeable battery operating time is increased.
- Power mode: Use power mode if more suction power is required. The appliance runs or top performance.
Safety rope
the appliance can be equipped with a safety rope. For this, struck the safety rope provided into the oxylet (fig. 1, no. 16).
The safety rope provides support during the vacuuming process and secures against fuling over during breaks.
Do not hang the cushion up using the safety mode in the long-term.
4.1.1 Switching the appliance on
- Remove the appliance from the wall station (Fig. 1, no. 13).
- Ensure that the manual control unit (Fig. 1, no. 10) and the floor nozzle (Fig. 1, no. 1) are assembled correctly (3.3.2 assembling the manual control unit on page 30 and 3.3.3 assembling the nozzles" on page 30).
- Press the appliance on/off button (Fig. 1, no. 15).
4.1.2 Change power setting level
- Switch the appliance or (4.1.1 Switching the appliance or "on page 35). The appliance starts in automatic mode.
- Press the power level setting push button (Fig. 1, no. 14) once to select the next power mode.
4.2 Deactivation
- Press the on/off button (Fig. 1, no. 15).
⇒ The appliance is decontested. The display [Fig. 1, no. 6] goes off
4.3 Keeping and storage

CAUTION
Property damages!
The appliance may be damaged by best.
▶ Do not place the appliance directly next to heat sources (e.g. heating or storage).
▶ Avoid direct insolation.
4.3.1 Keeping the appliance
NOTICE
Property damages!
Constant charging may damage the appliances.
▶ Do not insert the moins adapter plug inside into the contractor socket on the sppliance permanently during storage.
Follow the action steps listed for appliance storage.
- Ensure that the appliance is switched off (4.2 Description* on page 35)
- Using the appliance on the intended wall station (Fig. 1, no. 13).
4.3.2 Storing the appliance
Follow the action steps listed to prepare the appliance for longer-term storage.
1. Ensure that the appliance is switched off (A.2 Denactivation" on page 35).
2. Replace the dust bag (.5.1) replacing the dust bag* on page 37).
3. Cem the pre-motor filter (5.2 Cleaning the pre-motor filter" on page 38)
4. Cram the exhaust filter (5.3 Clearing the exhaust filter* on page 38).
4.4 Transport and disassembly
For comfortable transport, you can remove the suction tube from the manual control unit and disconnect the nozzle used.
- Ensure that the appliance is switched off (4.2 Deactivation" on page 35).
- Pass the locking mechanism on the upper end of the suction tube (Fig. 1, no. 8) to release the manual control unit (Fig. 1, no. 10).
- Pull the manual control unit out of the suction tube.
- Press the locking mechanism on the floor nozzle (Fig. 1, no. 1) to release the floor nozzle from the lower end of the suction tube.
- Pull the four mangle off the section tube
5 Cleaning and maintenance

WARNING
Danger of electric shock!
Dump and moisture in the appliance may cause contact with dangerous voltage.
Neither touch the appliance for the mains adapter with wet hands.
▶ neither increase the applications nor the mains adjuster is liquid.
▶ Protect the appliance and accessories against moisture.

CAUTION
Danger of injury!
Unintended action of the appliance may result in injury.
▶ Switch the appliance off before cleaning and maintenance work.
▶ Secure the appliance against unintended activation before cleaning and maintenance work.
5.1 Replacing the dust bag
NOTICE
Property damages!
The dust bag can only hold a limited quantity of dirt. The appliance can be damaged by dust.
▶ Replace the dust bag regularly, or the latest when occurring performance worsens motility, dust fills out of the appliance after switching off or a "MAX" is displayed on the multi-functional display (Fig. 1, no. 6.2).
- Ensure that the oppliance is stained off (L4.2 Deutition to page 35).
- Press the upper locking mechanism on the suction tube (Fig. 1, no. 8) to release the manual control unit (Fig. 1, no. 10).
- Pull the manual canal unit out of the suction tube.
- Press the cover release catch (Fig. 1, no. 2) and turn the cover anti-classwise to open it (Fig. 2A "Ceiling", p. 195).
- Remove the dust bag (Fig. 1, no. 3) from the manual control unit (Fig. 2B).
- Insert the new dust bag into the manual carrotal unit. Make sure that the "Recycled" lettering on the holding plate of the dust bag is at the top and readtable.
- Tom the cover clockwise until it engages audibly and noticeably.
- Check the corner positioning of the dust bag.
5.2 Cleaning the pre-motor filter
NOTICE
Loss of vacuuming performance!
The pre-motor filter may become blocked during use. Voccurring performance characteristics.
▶ Clear the pre-motor filter regularly, however at the latest when vacuuming performance worsens significantly.
▶ If necessary, replace the pre-motor fiber in order to remain minimum vacuuming performance
- Ensure that the appliance is switched off (4.2 Coactivation* on page 35).
- Replace the dust bag (5.1 Reducing the dust bag" on page 37).
- Leave the dust hog (Fig. 1, no. 3) dismounted.
- Remove the pre-motor filter (Fig. 1, no. 5) located behind the dust bag (Fig. 2B "Cloning", p. 195).
- Separate the pre-motor filter from the filter grid (fig. 1, no. 4).
- Beat the pre-motor filter above the dustbin and rinse the filter using clear water.
- Let the pre-motor filter cry completely in the fresh air or on a radiator. Drying on a radiator takes at least 24 hours. Drying in the fresh air may take up to 72 hours. If necessary, use a replacement filter during this period, which can
be ordered on the interest or no our service department (S.6 Space ports and accessories* or page 41).
- Re-insert the pre-motor filter into the filter grid and then into the manual control unit (Fig. 1, no. 10).
- Insert the reed dust bag into the manual control unit.
- Turn the cover dockwise until it engages audibly and noticeably.
- Check the correct positioning of the dust bag
5.3 Cleaning the exhaust filter
NOTICE
Property damages!
The exhaust filter can be damaged by water and heavy tailing.
▶ Only clean the exhaust filter dry by beating and brushing it carefully.
▶ Cen on the filter regularly, however: at the latest when occurring performance worsens significantly.
- Removes the cover (Fig. 1, no. 12) of the exhaust filter (Fig. 3A "Cleaning", p. 195).
- Turn the colour filter (Fig. 1, no. 11) anti-clockwise to release it (Fig. 39).
- Remove the equest filter
- Beat the exhaust filter empty.
Cleaning and maintenance
Cleaning and maintenance
- Brush the edmost hitter carefully with a soft brush, e.g. the upholstery and furniture nozzle (Fig. 1, no. 20) or the detering tool (Fig. 1, no. 17) provided within the scope of delivery.
- Re-insert the exhaust filter into the appliance. For this, turn the exhaust filter clockwise until it engages audibly.
- Put the cover back on.
5.4 Cleaning the brush roller
NOTICE
Property damages!
Soiling can influence the rotation of the brust roller.
▶ Clear the brush roller regularly.
Follow the action steps listed to clean the brush roller.
- Ensure that the spalance is switched off („4.2 Deactivation“ on page 35).
- Press the lower locking mechanism on the lower end of the section tube (Fig. 1, no. B) to release the floor randle (Fig. 1, no. 1).
- Pull the floor nozzle off the suction tube.
- Release the brush locking mechanism. If the locking mechanism cannot be released, use a coin as a help (Fig. 5A "Ceaming", p. 195).
-
Remove the brush roller (Fig. 58).
-
Fiss the brush seller of dirt. If the dirt cannot be renewed, use tweezers or a pair of scissors or the cleaning tool (Fig. 1, no. 17).
- Insert the cleanest brush roller into the four nozzle.
- Close the locking mechanism.
- Insert the floor nozzle onto the lower end of the section tube
5.5 Replacing the rechargeable battery

CAUTION
Detrimental to health!
In case of unintended use or overgeing, the rechargeable battery may lose acidic liquid.
▶ Use protective gloves for cleaning and disposal and avoid skin contact with rechargeable battery liquid.
▶ Rinse parts of the body with contact using water.
▶ In case of after-effects, consult a physician

CAUTION
Danger of short-circuit of the rechargeable battery!
▶ Never contact both poles simultaneously with electrically conducting items.
▶ Do not immerse the redergentle battery in liquid.
ustuction #2004 Thems 137
Follow the action steps listed to replace the rechargeable battery.
- Ensure that the appliance is switched off (4.2 Deactivation" on page 35).
- Press the rechargeable battery release catch (Fig. 1, no. 7) to release the rechargeable battery compartment (Fig. 4b "Cloning", p. 135).
- Remove the rechangeable battery from the rechangeable battery compartment (Fig. 4B).
- Insert the new rechargeable battery (L6 Spare parts and accessories" or page 41) into the rechargeable battery compartment.
- Close the rechargeable battery compartment.
- Check the control positioning of the rechargeable battery.
5.6 Cleaning the dust sensors
NOTICE
Reduction of the running time!
The dust sensors become heavily soiled during use. In automatic mode, the appliance then vacuars with minimum performance, independent of the extent of soiling. The running time of the appliances is reduced.
▶ Clear the dust sensors regularly at the least when you notice that vacuuming performance in automatic mode is not adapted to the extent of scaling.
The dust sensors are located in the section channel of the 1d (Fig. 1, No. 2.1). They serve automatic performance adaptation in automatic mode.
Follow the action steps listed to clean the dust sources.
- Ensure that the appliance is switched off („4.2 Deactivation“ on page 35).
- Press the upper locking mechanism on the suction tube (Fig. 1, no. 8) to release the sound current set (Fig. 1, no. 10).
- Pull the manual control unit out of the suction tube
- Use a fur-free cloth to remove dust residue from the dust sensors. Insert the cloth over the cover (Fig. 1, no. 2) into the suction channel up to the dust sensors (Fig. 1, no. 2-1) and clean the dust sensors.
- Remove the cloth from the suction channel.
- Attach the manual control unit to the upper end of the suction tube.
Spore parts and accessories
Rectification of faults
6 Spare parts and accessories
You can order spore parts and accessories for the rotary-operated vacuum cleaner. Thomas BX7 in the Internet under www.robert-thomas.net or via our service ("International Services" or page 1).
| Accessory/Spore part Order number | |
| Vole powertrain line | 150 690 |
| Exhaust lines | 150 619 |
| Battery 20.8 V | 787 415 |
| Vole accesser | 150 623 |
| Bus unit (external) | 150 829 |
| Bus unit (solid front/passive front) 150 012 | |
| Door bag port 110+25 187 415 |
7 Rectification of faults

WARNING
Danger of electric shock!
Damp and moisture in the appliance may cause contact with dangerous voltage.
▶ Whether toch the appliance or the muns adapt with wet hands.
▶ Neither immerse the appliance nor the mains adapter in liquid.
▶ Protect the appliance and accessories against moisture.

CAUTION
Danger of injury!
Unintended activation of the appliances may result in injury.
▶ Switch the appliance off before notifying faults.
▶ Secure the appliance against unintended activation before verifying faults.
The appliance may only be used if it is fully in order. If the appliance or part of it is faulty, it must be decommissioned and especially required or disposed of.
Try to notify mine faults yourself. Observe the pertinent safety regulations in the operating instructions here.
If the fault cannot be rectified, decommission the spolance and intem the manufacturer's qualified staff for fault rectification ("International Services" or page 1).
The following table shows an overview of the most important faults as well as their possible causes and rectification measures.
| Problem Possible case Solution | ||
| The appliance cannot be switched on. | The in-susceptible lighting is fully empty. | Switch the appliance off and changing the in-susceptible lighting [1,2,3,4]Changing the in-susceptible lighting" as page 223. |
| The disc disc valves slowly and/or automatic. | The disc valve is locked. | Close the disc valve [5,6]Clearing the disc valve" as page 291. |
| The appliance cannot be changed. The disc valve has been open to them. On the one "A" is changed as the disc functional display. | The disc valve is not more sensitive. | Close the device for the disc valve plus the disc valve plus more closely in their contact. |
| The in-susceptible lighting is not clearly isolated in the upper area. | Because the disc valve does not change the in-susceptible lighting is clearly isolated in the upper. Reasoned the disc valve. | |
| In a disc develops all or more is last turn the appliance when amaging. | The disc ring is part of the disc and contains a common mixture for the opening in dropping amounts were our more connected or dearest. | Close the disc for a film or cord hair. |
| Problem Possible cause Solution | ||
| The exercise may cause a life of the diet. | The diet has a full | Reduce the diet beg (1,5) According to the diet 'ang' on page 27. Close the time (5,3) Clearing the one mother's "one" on page 28. Use the fitting muscle for your user (1,3,3) Clearing the mother's "one" on page 30. |
| The work used is appropriate for the exercise. | Use the fitting muscle for your user (1,3,3) Clearing the mother's "one" on page 30. | |
| The iron: Warming on eat beg (Fig. 1, no. 6/2) in bedget. | The diet beg were not enough or not installed increasingly. | Use the diet over or change whether the diet beg this could be in the appraise. |
| On the bed-inbested clocking, the iron: "Warming, eat beg ##" (Fig. 1, no. 6/2) in bedget. | The diet beg is full | Reduce the diet beg (1,5) Clearing the diet beg" on page 27. |
| On the bed-inbested clocking, the iron: "Warming, eat beg ###" (Fig. 1, no. 6/2) in bedget. | The much rather is blocked. | Cyclin the four were the aborgans. Close the band with an (1,5) Clearing the one mother's" on page 29. |
8 Information on disposal

CAUTION
Detrimental to health!
In case of unimended use or overgoing, the rechangeable battery may lose acidic liquid.
▶ Use protective gloves for cleaning and disposal and avoid skin contact with rechargeable battery liquid.
▶ Rinse parts of the body with contact using water.
▶ In case of after-effects, consult a physician.
NOTICE
Environmental danger!
The rechargeable battery may not be disposed of as domestic waste.
▶ Dispose of the rechargeable battery after removal at regional collection points designated for this purpose.
Packaging
The packaging protects the THOMAS EX7 from damage during transport. It is made of environmentally friendly materials and is therefore recyclable. Do not dispose of packaging that is no longer required in household waste but put it out for recycling.
Used appliances and batteries
Old electrical equipment contains valuable substances and materials which must not be released into the environment. Do not dispose of the THOMAS BX7 and the rechargeable battery it contains in your household under the provisions, the charge and the required battery must be
disposed of separately. You can dispose of it safely and free of charge or your local recycling curta or through appropriate return and collection systems. The component of the THOMAS BX7 may be hazardous to health and the environment if used increasingly or disposed of incorrectly. These components are essential for the correct functioning of the THOMAS BX7. Appliances hearing the symbol shown must not be disposed of in household waste.
9 Guarantee
Independently of the legal guarantee obligations of the dealer arising from the sales contract, we - Robert Thomas Metnil- und Elektroweke & Co. KG - Hellerstasse 6, D 57290 Neunkirchen - offer the following guarantee on the appliance according to the conditions below:
- The guarantee period is 24 months from the day of delivery to the first and user. To pursue a claim, proof of purchase must be submitted.
- Within the guarantee period we will rectify all substantial, verifiable functional inequities due to faulty design or material defects by either repairing the defective parts or replacing them at our discretion; the exchanged parts then become our property. The guarantee does not extend to easily broken parts such as glass, plastic, lights. Batteries and rechargeable batteries which are faulty or whose service life has been sheltered as a result of normal wear, battery ageing
or irrigated handling, are not covered by the guarantee tillor. Defects must be reported to us immediately upon detection within the guarantee period. During the guarantee period, the cost of labour and of spars parts needed to quantify the multifunctions will not be billed. In the case of uncontrolled claims against our customer service centre, the costs incur not be charged to the customer. Repair work at the customer's location or installation site can only be requested in the case of large appliances. Other appliances must be sent to our nearest customer service centre, authorised repair shop, or to the factory.
- There is no guarantee obligation in the case of minor deviations from product specifications which do not affect the value or usability of the product caused by chemical or electro chemical effects, or by water, or damage generally resulting from abnormal ambient conditions. In addition, no guarantee claims are accepted for damage resulting from normal water and water, or from non-observance of the user manual or inappropriate use.
- Any claim under guarantee is also void if persons not authorised by us undertake any modifications or repairs to the appliance.
- Guarantee services neither extend nor renew the guarantee period for the appliance or any installed replacement parts; the guarantee period for installed replacement parts ends along with the guarantee period for the entire appliance.
- Additional or other claims, particularly those for compensation for damage caused outside of the appliance — providing there is no legally stipulated liability for this — are excluded.
We also offer you our customer service beyond the copy of your guarantee period. Please consult your dealer or contact our customer service department directly.
Genukssanwiping Thames 107
Institute about themes 187
Spis treści
Instruction about themes 137
Hired to deliver Thems 137
Hired Inclusive Theory 137
Hired Inclusive Theory 137
| Problem Mainly printon (main) | ||
| Systolic side pass out. | Betrie is one or two. | Systolic subfolic a double beta 1,2,3,4,5,6,7,8,9,10,11,12. |
| Systolic side pass out. pre- and/or the systolic side passout. | Betrie's side a maturing. | Systolic subfolic side 1,2,3,4,5,6,7,8,9,10,11,12. |
| Systolic side pass out. Mammatica apply out of MDD in multimolecular spiny out of spiny 12. | Maced all test spinal report. | Mamminge, the pre- report of a single sample spinal based on a review. |
| Betrie's test spinal answer to spinal. | Other report of a multingly, also be false spinal answer to spinal. Maced all test report. | |
| Pis spinal on spinalhe with a single or two parts. | Betrie's single beta polystyrene, but fully spinal on the beta beta beta. This side spinal is a single, single spinal on the spinal. | Mamminge that has a spinal on one beta beta. |
Hired to deliver Thomas 137
Орой Technology Party Party Party Party Party Party Party Party Party Party Party Party Party Party Party Party Party Party Party Party Party Party Party Party Party Party Party Party Party Party Party Party Party Party Party Party Party Party Party Party Party Party Party Party Party Party Party Party Party Party Party Party Party Party Party Party Party Party Party Party Party Party Party Party Party Party Party Party Party Party Party Party Party Party Party Party Party Party Party Party Party Party Party Party Party Party Party Party Party Party Party Party Party Party Party Party Party Party Party Party
The Ground Truth image displays a single, solid horizontal line. According to Rule 2 (UNDERSCORE & LINE RULES), this is a stylistic or background line, not a placeholder underscore. Therefore, the OCR result must ignore it. The provided OCR content is "____", which consists of four underscores. This is an incorrect interpretation of the line as a placeholder, violating the rule that stylistic lines must be ignored. The OCR has hallucinated text (underscores) where none should exist. Hence, the result is inconsistent with the Ground Truth.


- Table of Contents
- Many thanks
- General
- Target group
- Intended use
- Predictable misuse
- Reasonably predictable misuse includes in particular:
- Safety notices
- Basic safety measures
- Structuring warning notices
- WARNING
- CAUTION
- NOTICE
- General safety notices
- Danger of explosion, bursting!
- Danger of suffocation, choking!
- Prepare use
- Unpacking
- Become acquainted with the displays
- Cleaning and error display
- Assembly
- Wall station installation
- Assembling the nozzles
- Danger of injury!
- Property damages!
- Charging the rechargeable battery
- Operation
- Operation
- Danger of electric shock!
- Vacuum cleaning
- Glare!
- Switching the appliance on
- Change power setting level
- Deactivation
- Keeping and storage
- Keeping the appliance
- Storing the appliance
- Transport and disassembly
- Cleaning and maintenance
- Replacing the dust bag
- Cleaning the pre-motor filter
- Loss of vacuuming performance!
- Cleaning the exhaust filter
- Cleaning and maintenance
- Cleaning the brush roller
- Detrimental to health!
- Danger of short-circuit of the rechargeable battery!
- Cleaning the dust sensors
- Reduction of the running time!
- Spare parts and accessories
- Rectification of faults
- Information on disposal
- Environmental danger!
- Packaging
- Guarantee
- Spis treści
Brand : THOMAS
Model : BX7
Category : Vacuum Cleaner