MR2436D4FPE4R - Storage furniture Robern - Free user manual and instructions
Find the device manual for free MR2436D4FPE4R Robern in PDF.


User questions about MR2436D4FPE4R Robern
0 question about this device. Answer the ones you know or ask your own.
Ask a new question about this device
Download the instructions for your Storage furniture in PDF format for free! Find your manual MR2436D4FPE4R - Robern and take your electronic device back in hand. On this page are published all the documents necessary for the use of your device. MR2436D4FPE4R by Robern.
USER MANUAL MR2436D4FPE4R Robern
natural_image
Three isometric line drawings of a double door frame structure, showing front, side, and top views (no text or symbols)CONTENTS
Safety - 2
Tools needed - 3
Parts - 3
Accessories - 4
Dimensions - 6
Recess Mounting - 7
Final Assembly - 12
Use and Maintenance - 14
Warranty - 14
Scan the QR code to see the entire M2 Series of cabinets.
Use the camera app on your mobile device to look at this and other QR codes. This will allow you to quickly access web pages and other relevant documents.
GENERAL INFORMATION
This instruction manual contains information on how to recess mount the M Series Reserve cabinet. This series comes in many sizes. Refer to the specific model numbers for dimensions. These cabinets are modular and can be mounted with lighting.
Read the specific instruction for how your cabinet(s) will be mounted. The cabinets can be surface mounted or recess mounted.
Save these instructions for future use and reference. An improper installation voids the warranty. Installed cabinets cannot be returned.
If you experience any problems with your cabinet, contact your dealer or Robern directly.
Limited Warranty — One Year Term
SAFETY
IMPORTANT SAFETY INSTRUCTIONS
Installation shall be performed by a qualified licensed electrician.
DANGER: Read all instructions before using this cabinet.
CAUTION MAX SHELF LOAD 34 lbs.
WARNING: Risk of Electric Shock, Fire, and Injury, review the assembly instructions to confirm that the appropriate critical components and accessories are being used with the cabinet.
GROUNDING INSTRUCTIONS
This product must be connected to a grounded metal, permanent wiring system, or an equipment-grounding conductor must be run with the circuit conductors and connected to the equipment-grounding terminal or lead on the product.
WARNING: Electrical option cabinet must be wired to a Class A 20 Amp GFCI (Ground Fault Circuit Interrupter) protected circuit when used in bathrooms and all other locations required by the National Electric Code.
DANGER: To reduce the risk of electric shock, always shut off power before cleaning or servicing.
WARNING: Mount the cabinet at the correct height.
SAVE THESE INSTRUCTIONS
TOOLS NEEDED
PARTS
natural_image
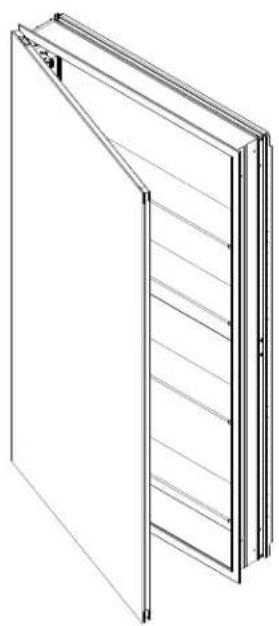
Isometric line drawing of a two-panel wall-mounted panel with diagonal bracing (no text or symbols)(1) M Series Reserve Cabinet
natural_image
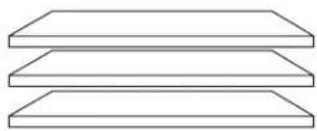
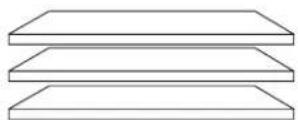
Three horizontal rectangular plates, no text or symbols present(3-4) Glass Shelves
Two door and 72" cabinets (6-8) Glass Shelves
[216-1243] D4 Hardware Bag-30" tall cabinets
natural_image
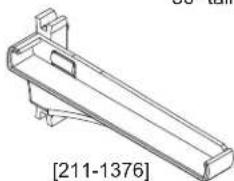
Technical drawing of a mechanical bracket component (no text or symbols)(3) Shelf Clips
natural_image
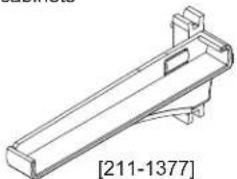
Technical line drawing of a mechanical component with bracket and mounting feet (no text or symbols)(3) Shelf Clips
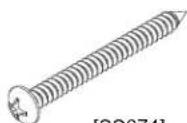
[SS674]
(6) #10 x 2" Screws

[203-1624]
(2) Hinge Clip

[SS134]
(10) Hole Plugs

[SS672]
(6) Screw Caps
Depending on installation, not all parts will be used.
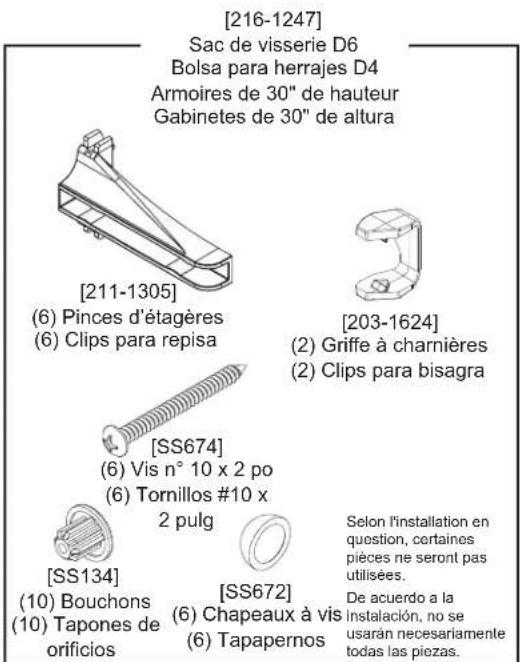
[216-1247] D6 Hardware Bag 30" tall cabinets

[211-1305]
(6) Shelf Clips
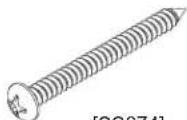
[SS674]
(6) #10 x 2" Screws

[203-1624]
(2) Hinge Clip

[SS134]
(10) Hole Plugs

[SS672]
(6) Screw Caps
Depending on installation, not all parts will be used.
[216-1244] D4 Hardware Bag 36" and taller cabinets
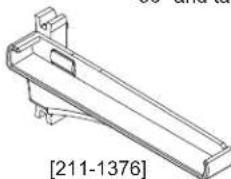
natural_image
Technical line drawing of a mechanical bracket or support structure (no text or symbols)(4) Shelf Clips
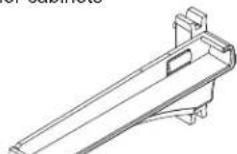
[211-1377]
(4) Shelf Clips
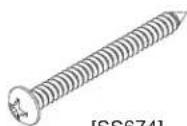
[SS674]
(6) #10 x 2" Screws

[203-1624]
(3) Hinge Clip

[SS134]
(10) Hole Plugs

[SS672]
(6) Screw Caps
Depending on
installation,
not all parts
will be used.
-[216-1248] D6 Hardware Bag 36" and taller cabinets
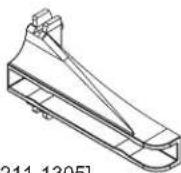
[211-1305]
(8) Shelf Clips
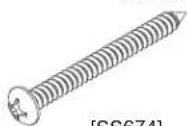
[SS674]
(6) #10 x 2" Screws

[203-1624]
(3) Hinge Clip

[SS134]
(10) Hole Plugs

[SS672]
(6) Screw Caps
Depending on installation, not all parts will be used.
NOTE: Two door and 72" tall cabinets will receive two (2) of the cabinet specific hardware bags above.
ACCESSORIES
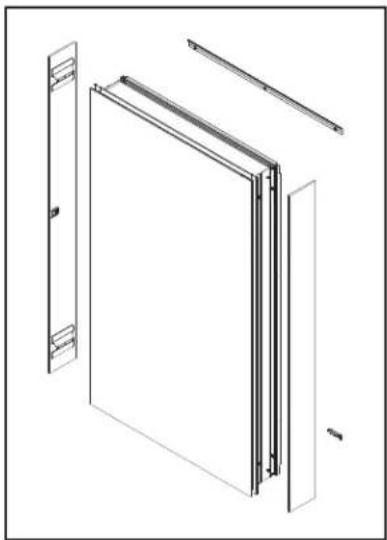
Surface Mount Kit
P2SMKITXXDZP
XX (Height available): 30, 36, 40, 48, 72
Z (Depth available): 4, 6
natural_image
Technical line drawing of a door frame with visible structural components (no text or symbols)Mag Mirror
VT-SPOMM
included w/
E2 cabinets
natural_image
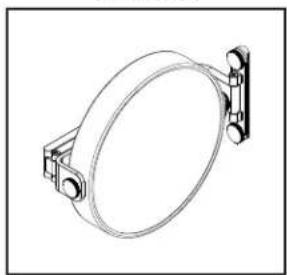
Technical line drawing of a circular mechanical component mounted on a bracket (no text or symbols)Storage Tray
HT-STORAGETRAY
included w/ E0 cabinets
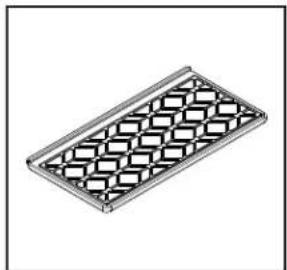
natural_image
Isometric view of a rectangular metal tray with a grid pattern (no text or symbols)Organization Kit
HT-ORGKIT
included w/
E2 cabinets
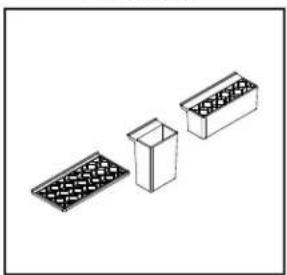
natural_image
Three technical line drawings of rectangular containers with internal grating patterns, no text or symbols presentWire Organizer
VT-WIREORG
included w/
E2 cabinets
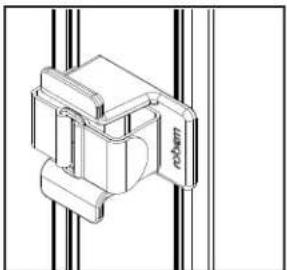
natural_image
Technical line drawing of a mechanical clamp or bracket assembly (no text or symbols)IQ Digital Lock Box
DLB-XXX
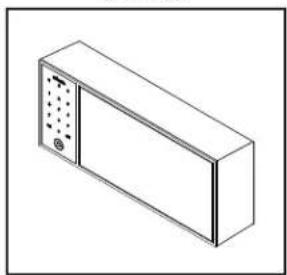
natural_image
Isometric line drawing of a rectangular cabinet or enclosure with a side panel and ventilation slots (no text or symbols)Magnetic Strip
HT-MAGORG
included w/
all cabinets
natural_image
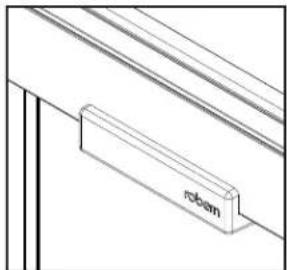
Technical line drawing of a mechanical bracket with labeled part 'robem' (no other text or symbols)ACCESSORIES
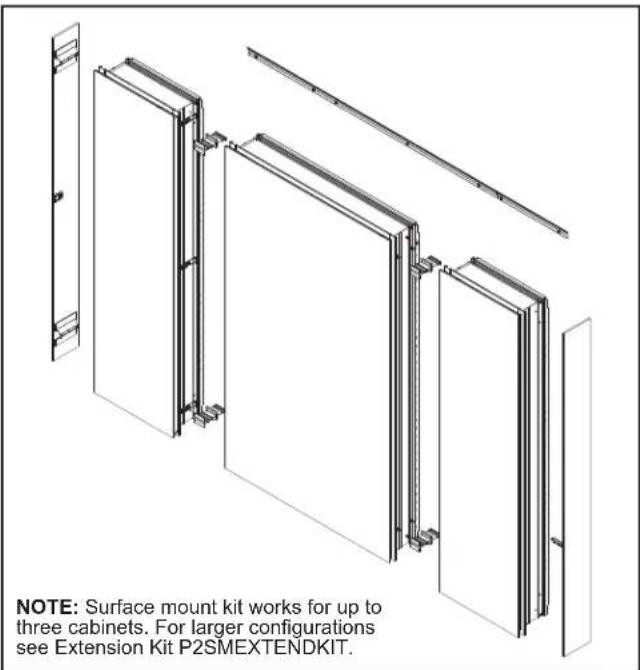
Ganging-Surface Mount Kit P2SM GKITXXDZP XX (Height available): 30, 36, 40, 48, 72 Z (Depth Available): 4, 6
text_image
NOTE: Surface mount kit works for up to three cabinets. For larger configurations see Extension Kit P2SMEXTENDKIT.Ganging-Recess Mount Kit
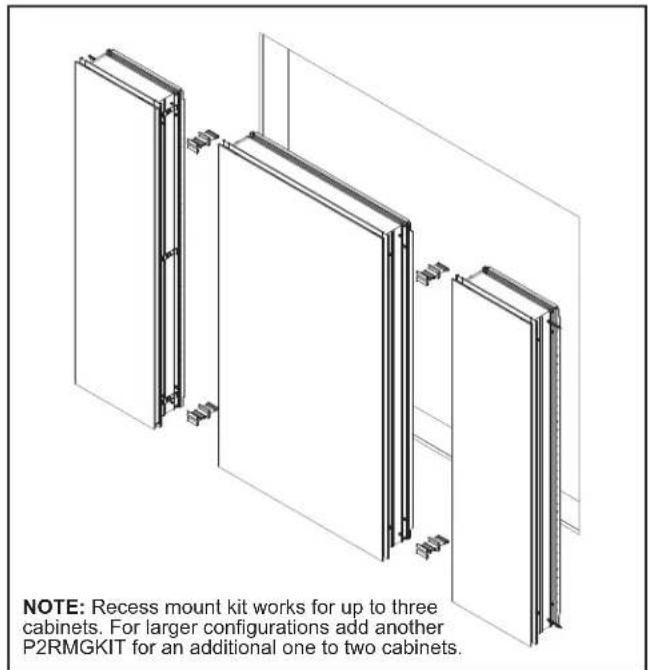
P2RMGKIT
text_image
NOTE: Recess mount kit works for up to three cabinets. For larger configurations add another P2RMGKIT for an additional one to two cabinets.DIMENSIONS
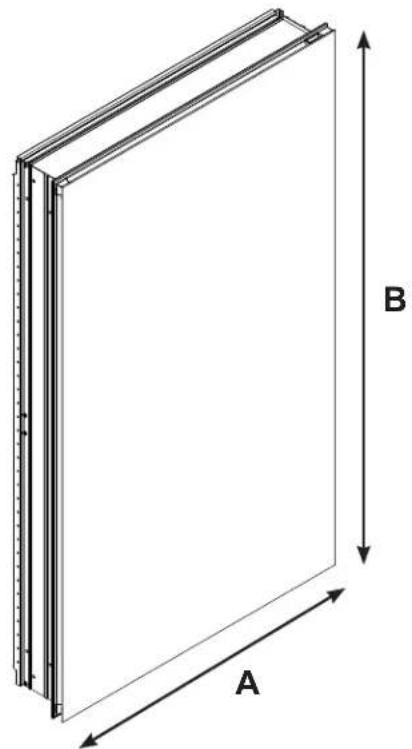
Determine overall cabinet dimensions. If recessing cabinet, determine rough-in dimensions. See chart for specific model dimensions.
natural_image
Technical line drawing of a rectangular panel with labeled dimensions A and B (no text or symbols beyond labels)Rough Opening (RO) for recessed installation in chart below.
Number in the column headings below reference the cabinet dimensions from the model number, width and height (WWHH).
| 1630 16 | 86 1640 16 | 48 1672 20 | 30 2036 20 | 40 2048 20 | 72 2430 24 | 6 2440 24 | 48 2472 | ||||||||
| A | 15-1/4"(388 mm) | 15-1/4"(388 mm) | 15-1/4"(388 mm) | 15-1/4"(388 mm) | 15-1/4"(388 mm) | 19-1/4"(489 mm) | 19-1/4"(489 mm) | 19-1/4"(489 mm) | 19-1/4"(489 mm) | 19-1/4"(489 mm) | 23-1/4"(591 mm) | 23-1/4"(591 mm) | 23-1/4"(591 mm) | 23-1/4"(591 mm) | 23-1/4"(591 mm) |
| B | 30"(762 mm) | 36"(915 mm) | 39-3/8"(1001 mm) | 48"(1219 mm) | 72"(1829 mm) | 30"(762 mm) | 36"(915 mm) | 39-3/8"(1001 mm) | 48"(1219 mm) | 72"(1829 mm) | 30"(762 mm) | 36"(915 mm) | 39-3/8"(1001 mm) | 48"(1219 mm) | 72"(1 829 mm) |
| RO (A) | 14-1/2"(369 mm) | 14-1/2"(369 mm) | 14-1/2"(369 mm) | 14-1/2"(369 mm) | 14-1/2"(369 mm) | 18-1/2"(470 mm) | 18-1/2"(470 mm) | 18-1/2"(470 mm) | 18-1/2"(470 mm) | 18-1/2"(470 mm) | 22-1/2"(572 mm) | 22-1/2"(572 mm) | 22-1/2"(572 mm) | 22-1/2"(572 mm) | 22-1/2"(572 mm) |
| RO (B) | 29-1/4"(743 mm) | 35-1/4"(896 mm) | 38-5/8"(982 mm) | 47-1/4"(1201 mm) | 71-1/4"(1810 mm) | 29-1/4"(743 mm) | 35-1/4"(896 mm) | 38-5/8"(982 mm) | 47-1/4"(1201 mm) | 71-1/4""(1810 mm) | 29-1/4"(743 mm) | 35-1/4"(896 mm) | 38-5/8"(982 mm) | 47-1/4"(1201 mm) | 71-1/4"(1810 mm) |
| 3030 30 | 36 3040 3048 | ||
| A | 29-1/4"(743 mm) | 29-1/4"(743 mm) | 29-1/4"(743 mm) |
| B | 30"(762 mm) | 36"(915 mm) | 39-3/8"(1001 mm) |
| RO (A) | 28-1/2"(724 mm) | 28-1/2"(724 mm) | 28-1/2"(724 mm) |
| RO (B) | 29-1/4"(743 mm) | 35-1/4"(896 mm) | 38-5/8"(982 mm) |
RECESS MOUNTING
These instructions are for recess mounting your cabinet. Make rough opening and frame on all sides. Find the specific model dimensions to make rough opening (page 5).
NOTES: The cardboard sleeve attached to the door protects the edges and corners of the door during installation.
Ensure that the cabinet is mounted so that the door has at least 1" (25mm) clearance from the top of the faucet and at least 1" (25mm) clearance from the ceiling.
- Before beginning installation remove and set the door aside in a safe place. Remove door from cabinet by unclipping the hinges from the mounting plates.
- Electrical Option Cabinets: Provide a separate electrical connection for electrical options and lighting. Pull electric wire through the hole. Be sure to provide enough wire to make proper and safe connections to the cabinet.
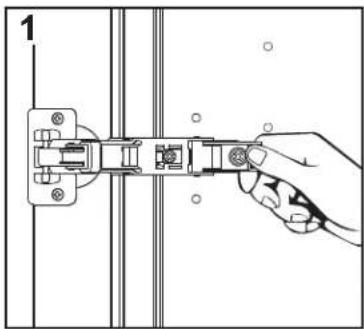
text_image
1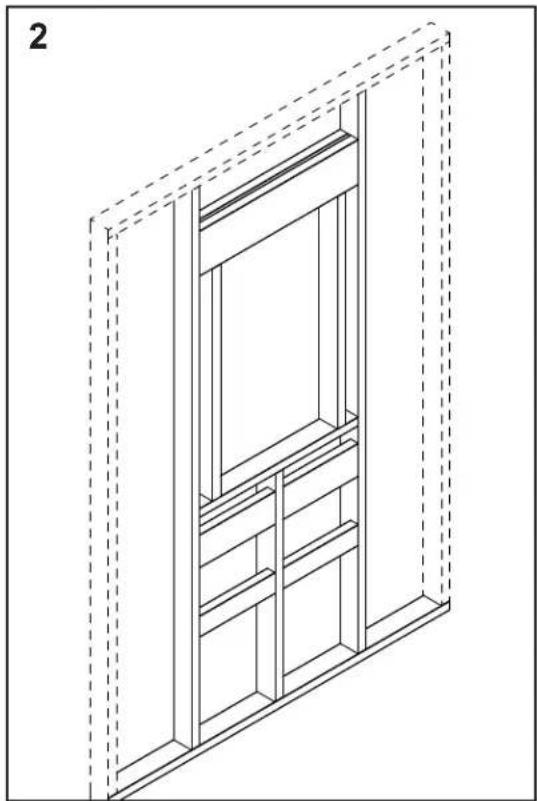
natural_image
Isometric line drawing of a cabinet or shelf assembly with dashed outlines, no text or symbols present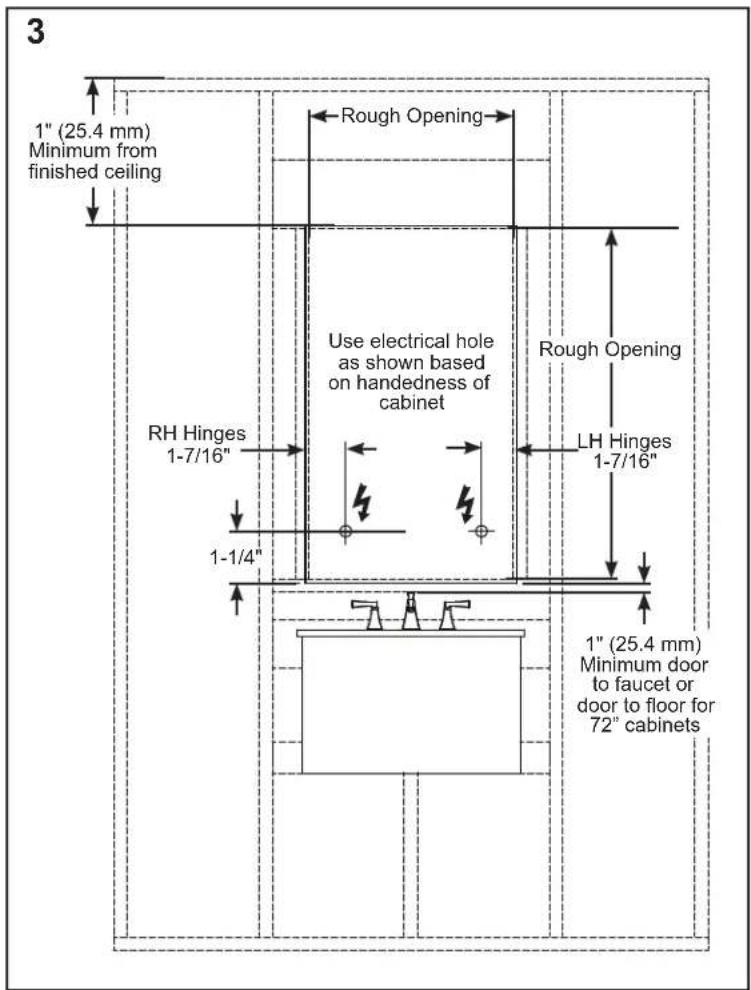
text_image
3 1" (25.4 mm) Minimum from finished ceiling Rough Opening Use electrical hole as shown based on handedness of cabinet Rough Opening RH Hinges 1-7/16" 1-1/4" LH Hinges 1-7/16" 1" (25.4 mm) Minimum door to faucet or door to floor for 72" cabinetsRECESS MOUNTING
- For cabinets with electrical, remove and place aside the two screws [203-1614] securing the column to the cabinet. For 30" wide cabinets there are four screws securing the column.
- Disconnect wiring connectors between column and cabinet for ease of cabinet install, or pull column out of cabinet being mindful of wires and place inside cabinet away from mounting brackets.
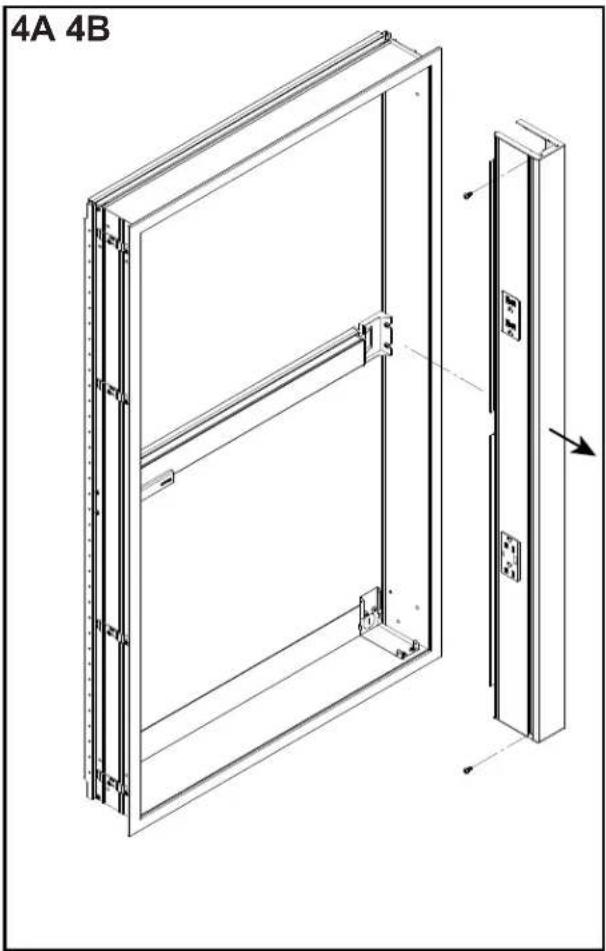
natural_image
Technical line drawing of a two-panel wall-mounted device with mounting brackets and a side panel (no text or symbols)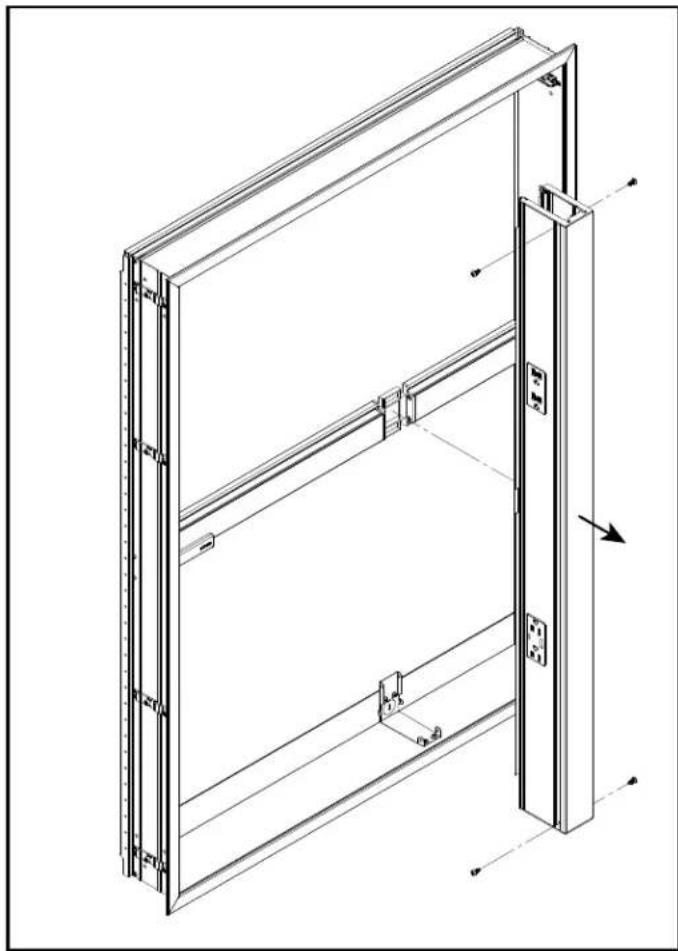
natural_image
Technical line drawing of a two-panel metal enclosure with mounting brackets and structural details (no text or symbols)RECESS MOUNTING
- Place cabinet in rough-in and make sure cabinet is installed square, plumb, and level.
- Install a #10 X 2" screw [SS674] through top mounting hole in cabinet side and screw into wall stud as shown. Do not over-tighten screws or cabinet box may deform.
- Once cabinet is installed square, plumb, and level, install #10 X 2" screws into wall studs through the three (or 7 for 72" tall cabinets) remaining mounting holes. Do not over tighten screws.

text_image
6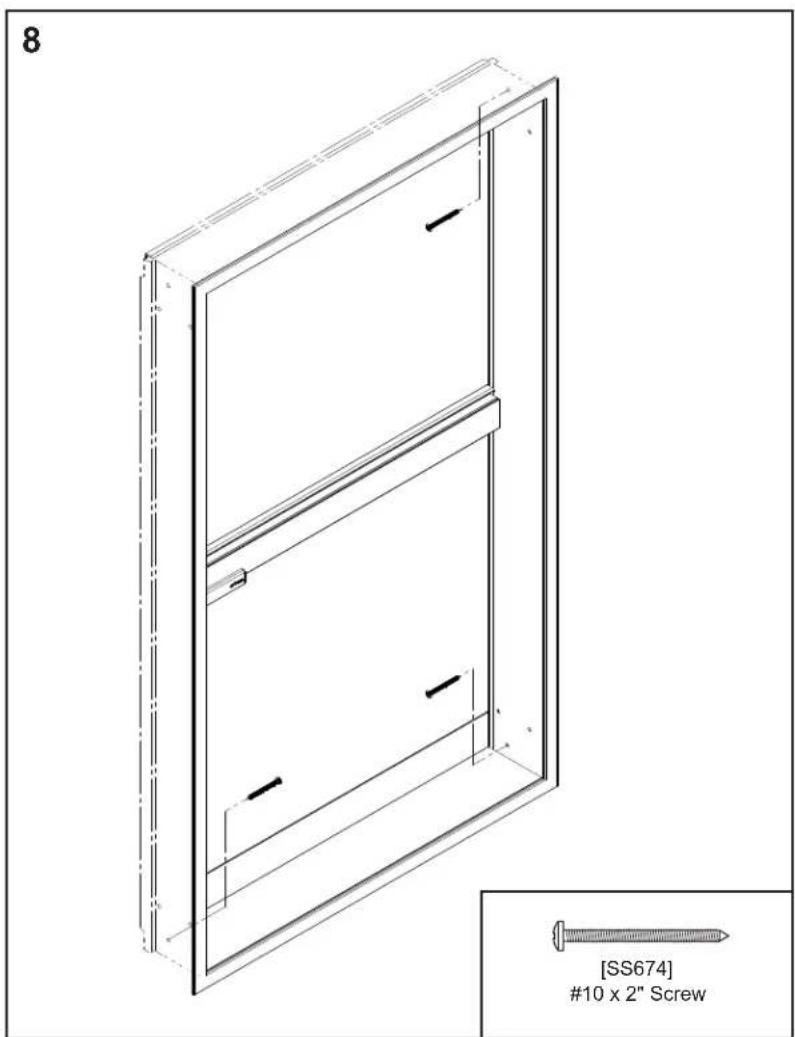
text_image
8 [SS674] #10 x 2" Screw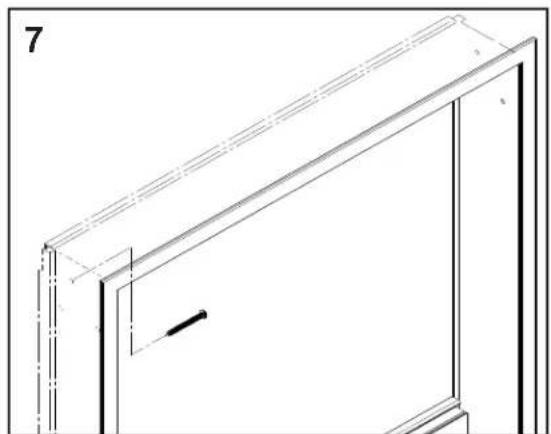
natural_image
Technical line drawing of a door frame with a handle and window (no text or symbols)ELECTRIC OPTION
- For non electric cabinets, proceed to Final Assembly on page 12.
- Make field connections as per wiring diagram for the electrical option being installed.
NOTE: E2 cabinets are non-handed, field wire harness (within the column) can be rotated to allow wiring install at bottom of cabinet.
WARNING: An Electrical option cabinet must be wired to a Class A 20 Amp GFCI (Ground Fault Circuit Interrupter) protected circuit when used in bathrooms and all other locations required by the National Electric Code

flowchart
graph LR
    A["25A Circuit Breaker"] --> B["CIRCUIT BREAKER DISJONCTEUR CORTACICUITOS"]
    B --> C["120VAC 20A GFI"]
    C --> D["FIELD CONNECTION CONNEXION DE CHAMP CONNEXION DE CAMPO"]
    D --> E["M SERIES E2 CABINET M SÉRIE E2 ARMOIRE GABINETE M SERIES E2"]
    C --> F["BLACK NOIR NEGRO"]
    C --> G["WHITE BLANC BLANCO"]
    C --> H["GROUND MISE À LA TERRE BAJADA A TIERRA"]
    E --> I["LINE/BLACK LIGNE/NOIR LINEA/NEGRO"]
    E --> J["WHITE BLANC BLANCO"]
    E --> K["NEUTRAL/WHITE NEUTRE/BLANC NEUTRAL/BLANCO"]
    E --> L["GROUND MISE À LA TERRE BAJADA A TIERRA"]
RECESS MOUNTING
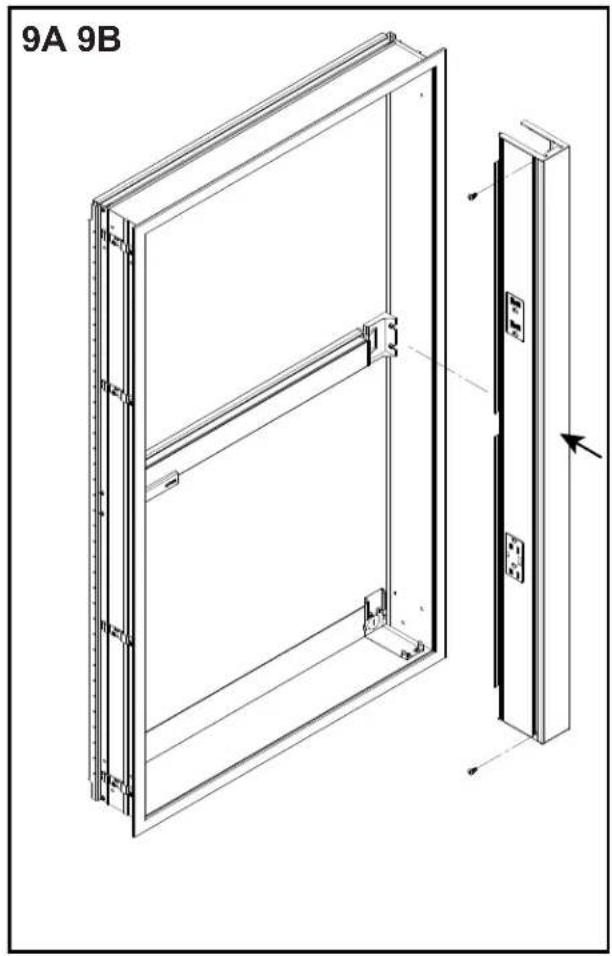
- Reinstall column using the two or four screws [203-1614] removed earlier.
text_image
9A 9B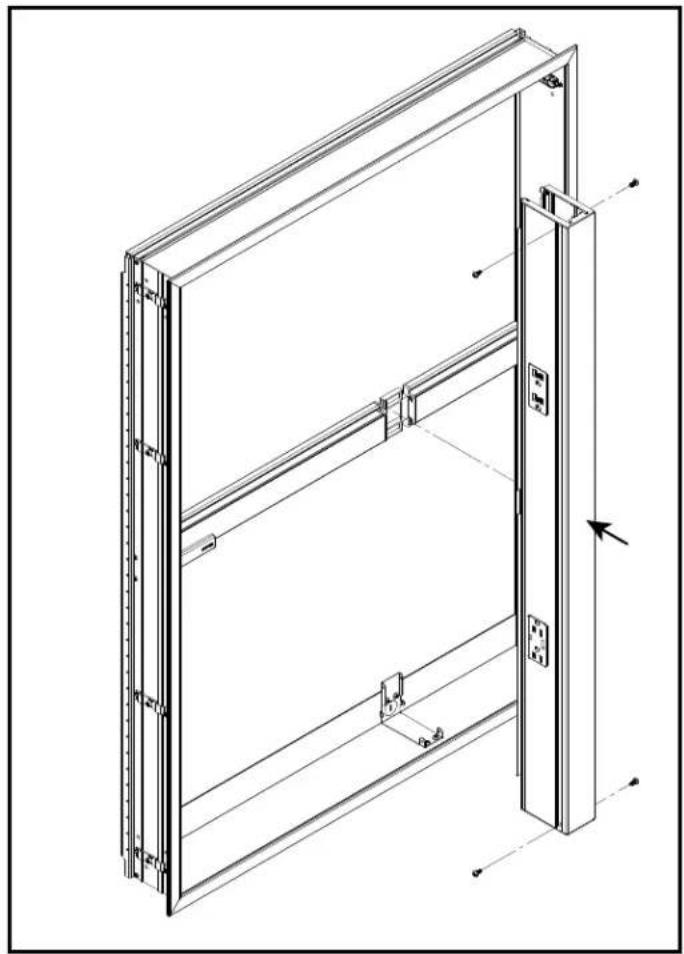
natural_image
Technical line drawing of a two-panel metal-framed cabinet or enclosure with mounting brackets and internal components (no text or symbols)FINAL ASSEMBLY
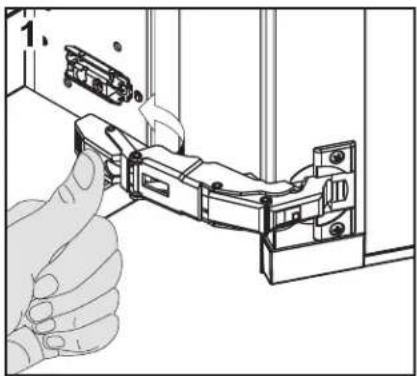
- Align door and reattach hinges to mounting plates until audible click is heard. Ensure all hinges are fully seated before attempting to adjust door.
2A. For small or light doors, the slow close feature can be deactivated on one of the hinges.
2B. Door must be closed once for the deactivation to be complete. To reactivate, move switch back to original position.
natural_image
Illustration of a hand inserting a component into a device (no text or symbols visible)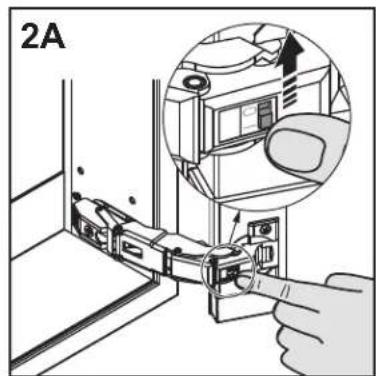
text_image
2A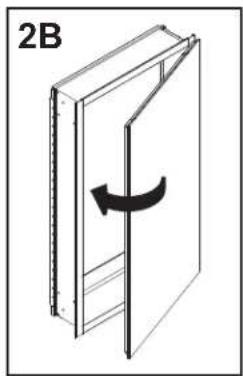
natural_image
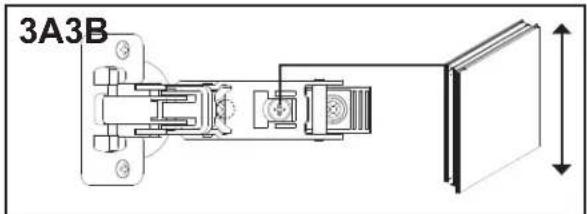
Diagram of a door with a rotating arrow indicating rotation (no text or symbols)NOTE: The door hinges have a three-way adjustment feature. These adjustments can be made using a #2 Phillips Head screwdriver.
3A. With the hinge slightly closed, you can access the middle screw. This screw will move your door front up and down to increase or decrease door overlay.
3B. With the hinge fully extended, you can access the front and back screws. These screws will move your door front from side to side and in and out. Rotate cam screw on mounting plate to adjust door.
text_image
3A3B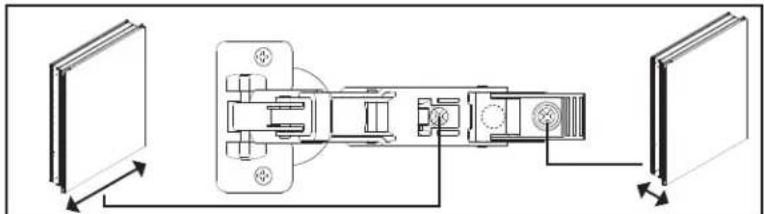
natural_image
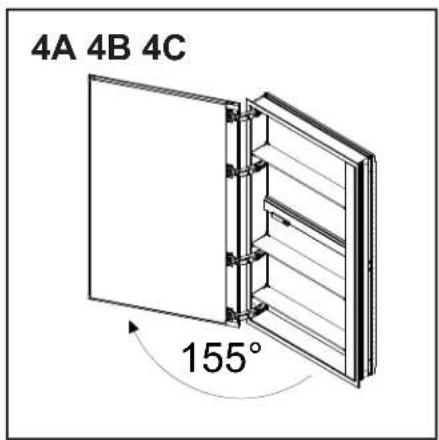
Diagram of a door handle assembly with arrows indicating direction (no text or labels)4A. The door will swing open 155°.
4B. To limit the door to 110° install hinge clip 203-1624 as shown with point facing away from cabinet.
4C. To limit the door to 85° install hinge clip 203-1624 as shown with point facing towards cabinet.
text_image
4A 4B 4C 155°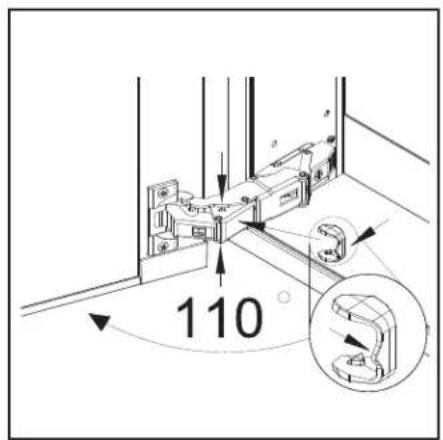
text_image
110°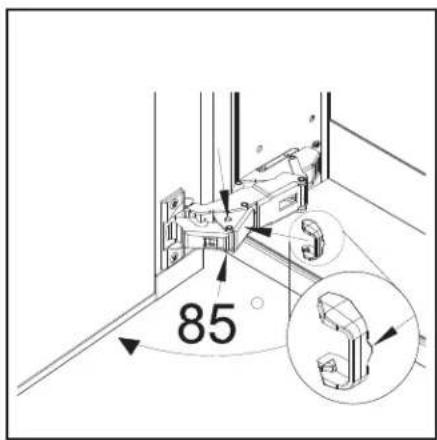
text_image
85°FINAL ASSEMBLY
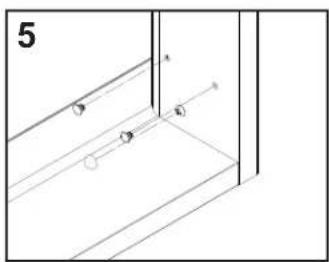
- Press the Shelf Hole Plugs [SS143] into the unused holes inside the cabinet. Place the Screw Head Caps [SS672] over any exposed screw heads.
- For D4 cabinets, insert clear Shelf Clips [211-1376] and [211-1377] into the holes in the back channel on the sides of the cabinet.
6B. Push the back of the shelf into both the left and right clips (A). Snap the shelf down into the clips (B). - For D6 cabinets, insert clear shelf clip [211-1305] into the holes in the back channel on the sides of the cabinet. Push shelf straight into shelf clips.
natural_image
Pure technical line drawing of a mechanical assembly without any text, numbers, or symbols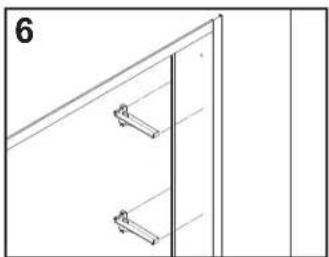
natural_image
Pure architectural line drawing of a window with two hanging fixtures, no text or symbols present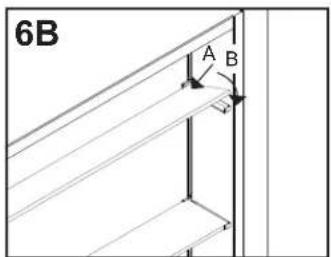
text_image
6B A B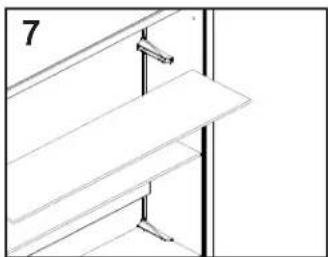
natural_image
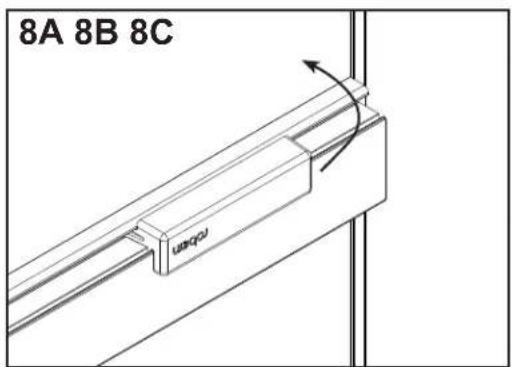
Pure architectural line drawing of a window frame with no text, numbers, or symbols- Cabinet is supplied with magnet installed in accessory rail. If magnet needs to be repositioned horizontally, lightly pull on the magnet while sliding side to side. If cabinet is installed as such to where magnet is upside down (on top of rail) as shown in Figure 8A, pull up on magnet to unhook it from the rail. Reinstall by positioning as shown in Figure 8B, push and rotate magnet into accessory rail until the back of the magnet is flush with the rail.
text_image
8A 8B 8C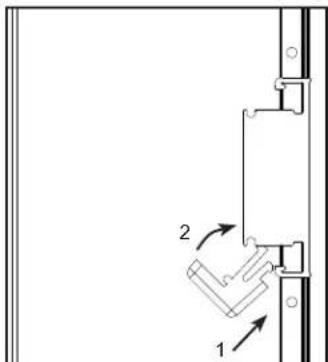
natural_image
Technical diagram showing a mechanical assembly with labeled parts 1 and 2 (no text or symbols beyond labels)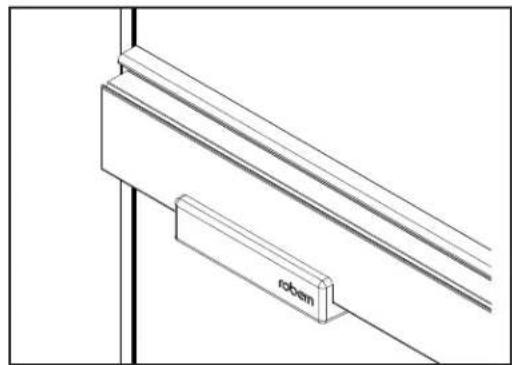
natural_image
Technical line drawing of a structural joint with labeled 'roben' component (no other text or symbols)- Cabinet with electric are supplied with a wire management accessory, installed in the vertical track. To adjust position, rotate the accessory 90 degrees as shown in Figure 9A, slide vertically as shown in Figure 9B to where needed, then rotate 90 degrees to lock it in position. When in position, use the included wire strap to secure wrapped wires as shown in Figure 9C.

text_image
9A 9B 9C 90° roboom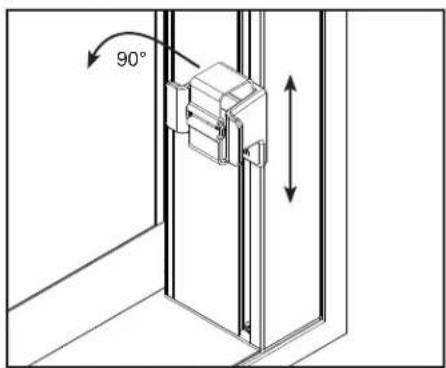
text_image
90°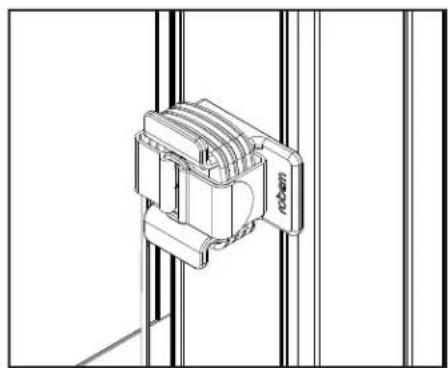
natural_image
Technical line drawing of a mechanical clamp or bracket assembly mounted on a vertical panel (no text or symbols)USE AND MAINTENANCE
CAUTION: Maximum shelf load 34 LBS
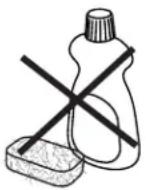
The cabinet door and interior are constructed of mirrored glass and aluminum. Use only a damp cloth to clean. Ammonia or vinegar-based cleaners can damage mirrors.
A 50/50 solution of water and isopropyl alcohol is recommended for cleaning the mirrors. A mild detergent may be used on the surfaces.
When cleaning, spray the cloth, not the cabinet, mirror, or surround surfaces. Do not use abrasive cleansers on any part of the light fixture.
NOTE: Do not store items in the cabinet area directly behind the hinge as damage may occur to cabinet or items.
No Ammonia No Vinegar
WARRANTY
Limited Warranty One Year Term
ROBERN warrants to the original purchaser that, it will, at its election repair, replace, or make appropriate adjustment to products made by this company shown to have significant defects in material or workmanship which are reported to ROBERN in writing within one (1) year from the date of delivery. ROBERN is not responsible for installation costs. The warranty is void in the event the product is damaged in transit, or if damage or failure is caused by abuse, misuse, abnormal usage, faulty installation, damage in an accident, improper maintenance, or any repairs other than those authorized by ROBERN. At the expiration of the one year warranty period, ROBERN shall be under no further obligation under any warranty, expressed or implied, including the implied warranty of merchantability. ROBERN shall not be liable for any consequential damages arising out of or in connection with the use or performance of its products. Some states do not allow limitations on how long an implied warranty lasts or do not allow the exclusion or limitation of incidental or consequential damages, so the above limitation or exclusion may not apply to you. Any liability against ROBERN under any implied warranty, including the warranty of merchantability, is expressly limited to the terms of this warranty. Permission to return any merchandise under this warranty must be authorized by ROBERN and returned prepaid by the purchaser. Claims under this warranty should be sent directly to your dealer.
©2022 ROBERN, INC.
ALL RIGHTS RESERVED
natural_image
Isometric line drawing of a two-panel window or panel with diagonal lines indicating internal structure (no text or symbols)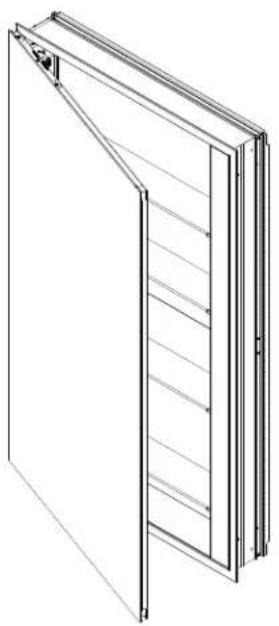
natural_image
Line drawing of a two-panel door or shelf with vertical slats and a handle (no text or symbols)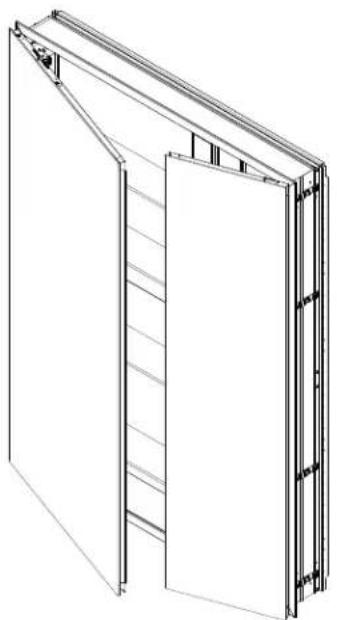
natural_image
Technical line drawing of a multi-panel wall assembly with no text or symbolsCONTENU
Sécurité - 2
natural_image
Isometric line drawing of a two-panel wall-mounted device with diagonal bracing (no text or symbols)(1) (1) Armoire Reserve série M
(1) Gabinete Reserve serie M
(3-4) Étagères en verre
(3-4) Repisas de vidrio
Armoire de 72" et deux portes
(6-8) Étagères en verre
Gabinete de dos puertas y
gabinetes de 72"
(6-8) Repisas de vidrio
text_image
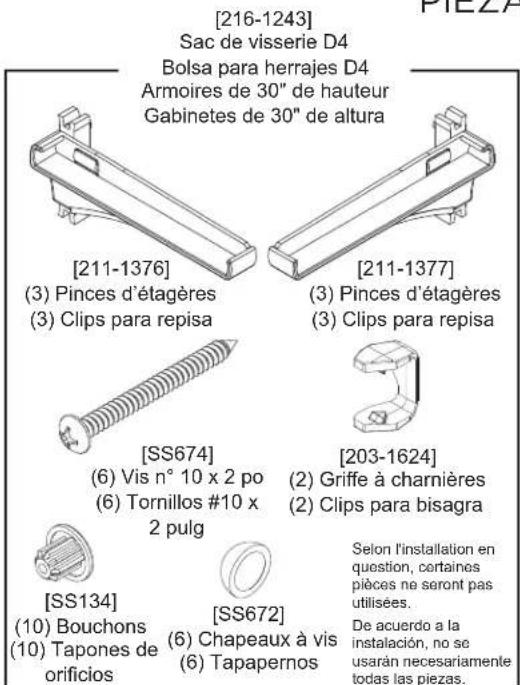
[216-1243] Sac de visserie D4 Bolsa para herrajes D4 Armoires de 30" de hauteur Gabinetes de 30" de altura [211-1376] (3) Pinces d'étagères (3) Clips para repisa [211-1377] (3) Pinces d'étagères (3) Clips para repisa [SS674] (6) Vis n° 10 x 2 po (6) Tornillos #10 x 2 pulg [203-1624] (2) Griffe à charnières (2) Clips para bisagra [SS134] (10) Bouchons (10) Tapones de orificios [SS672] (6) Chapeaux à vis (6) Tapapernos Selon l'installation en question, certaines pièces ne seront pas utilisées. De acuerdo a la instalación, no se usarán necesariamente todas las piezas.PIEZAS
text_image
[216-1247] Sac de visserie D6 Bolsa para herrajes D4 Armoires de 30" de hauteur Gabinetes de 30" de altura [211-1305] (6) Pinces d'étagères (6) Clips para repisa [203-1624] (2) Griffe à charnières (2) Clips para bisagra [SS674] (6) Vis n° 10 x 2 po (6) Tornillos #10 x 2 pulg [SS134] (10) Bouchons (10) Tapones de orificios [SS672] (6) Chapeaux à vis (6) Tapapernos Selon l'installation en question, certaines pièces ne seront pas utilisées. De acuerdo a la instalación, no se usarán necesariamente todas las piezas.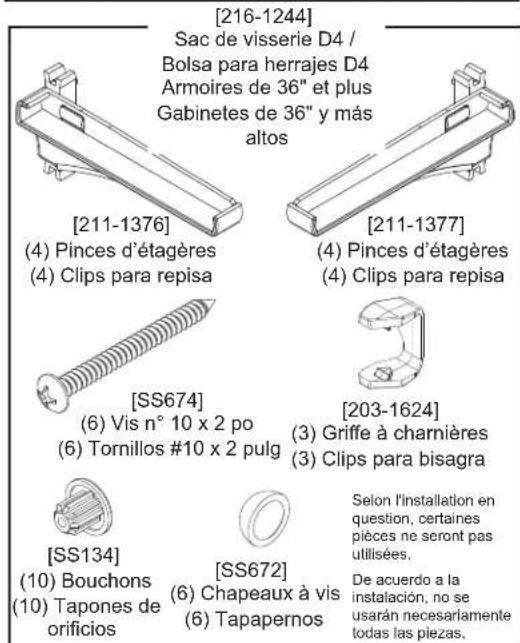
text_image
[216-1244] Sac de visserie D4 / Bolsa para herrajes D4 Armoires de 36" et plus Gabinetes de 36" y más altos [211-1376] (4) Pinces d'étagères (4) Clips para repisa [211-1377] (4) Pinces d'étagères (4) Clips para repisa [SS674] (6) Vis n° 10 x 2 po (6) Tornillos #10 x 2 pulg [203-1624] (3) Griffe à charnières (3) Clips para bisagra [SS134] (10) Bouchons (10) Tapones de orificios [SS672] (6) Chapeaux à vis (6) Tapapernos Selon l'installation en question, certaines pièces ne seront pas utilisées. De acuerdo a la instalación, no se usarán necesariamente todas las piezas.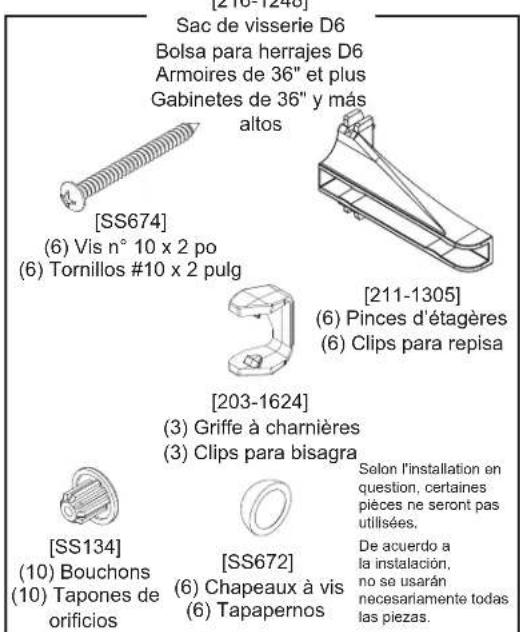
text_image
[210-12-13] Sac de visserie D6 Bolsa para herrajes D6 Armoires de 36" et plus Gabinetes de 36" y más altos [SS674] (6) Vis n° 10 x 2 po (6) Tornillos #10 x 2 pulg [211-1305] (6) Pinces d'etagères (6) Clips para repisa [203-1624] (3) Griffe à charnières (3) Clips para bisagra [SS134] (10) Bouchons (10) Tapones de orificios [SS672] (6) Chapeaux à vis (6) Tapapernos Selon l'installation en question, certaines pièces ne seront pas utilisées. De acuerdo a la instalación, no se usarán necesariamente todas las piezas.REMARQUE : L'armoire à deux portes et armoire de 72" recevra deux (2) des sacs de visserie spécifiques susmentionnés.
NOTA: Con los gabinetes de 2 puertas y gabinetes de 72" se incluyen dos (2) de las bolsas de herrajes, específicas para dichos gabinetes.
natural_image
Technical line drawing of a door frame assembly with no text or symbolsMiroir grossissant
Espejo de aumento
VT-SPOMM
natural_image
Technical line drawing of a circular mechanical component mounted on a bracket (no text or symbols)natural_image
Isometric view of a rectangular metal tray with a grid pattern on the front face (no text or symbols)natural_image
Three simple line drawings of rectangular containers with different internal patterns, no text or symbols present.natural_image
Technical line drawing of a mechanical clamp or bracket assembly mounted on vertical rails (no text or symbols)natural_image
Isometric line drawing of a rectangular cabinet with a side panel and vent slots (no text or symbols)Bande magnétique
Tira magnética
HT-MAGORG
natural_image
Technical line drawing of a mechanical bracket with 'nobem' label (no other text or symbols)ACCESSOIRES
DIMENSIONS DIMENSIONES
natural_image
Isometric view of a rectangular panel with labeled dimensions A and B (no text or symbols beyond labels)natural_image
Hand inserting a component into a vertical panel, no text or symbols visible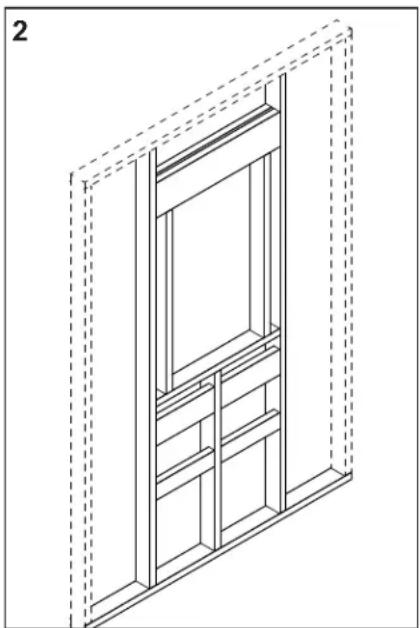
natural_image
Isometric line drawing of a cabinet or wardrobe unit with shelves and drawers, enclosed in a dashed frame (no text or symbols)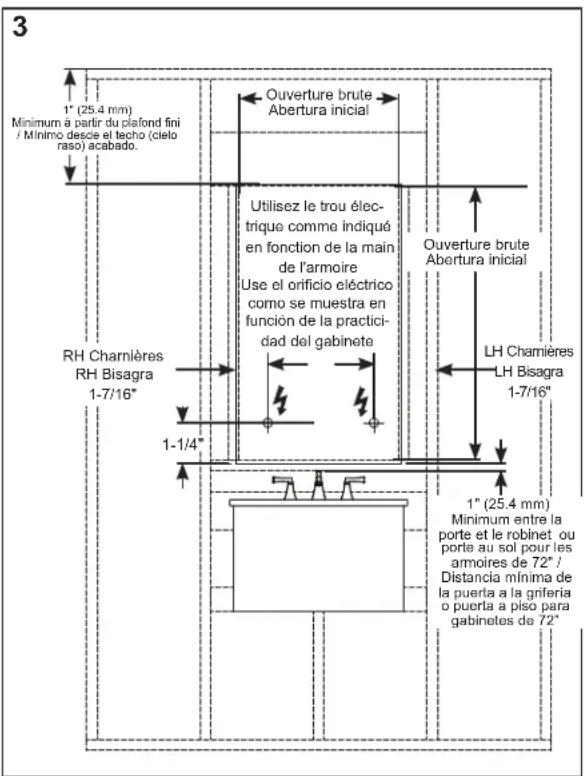
text_image
3 1" (25.4 mm) Minimum à partir du plafond fini / Minimo desce el techo (clelo raso) acabado. Ouverture brute Abertura inicial Utilisez le trou élec- trique comme indiqué en fonction de la main de l'armoire Use el orificio eléctrico como se muestra en función de la practici- dad del gabinete RH Charnières RH Bisagra 1-7/16" 1-1/4" 1" (25.4 mm) Minimum entre la porte et le robinet ou porte au sol pour les armoires de 72" / Distancia mínima de la puerta a la gríferia o puerta a piso para gabinetes de 72"MONTAGE ENCASTRÉ MONTAJE EMPOTRADO
natural_image
Technical line drawing of a two-panel wall-mounted device with mounting brackets and a side panel (no text or symbols)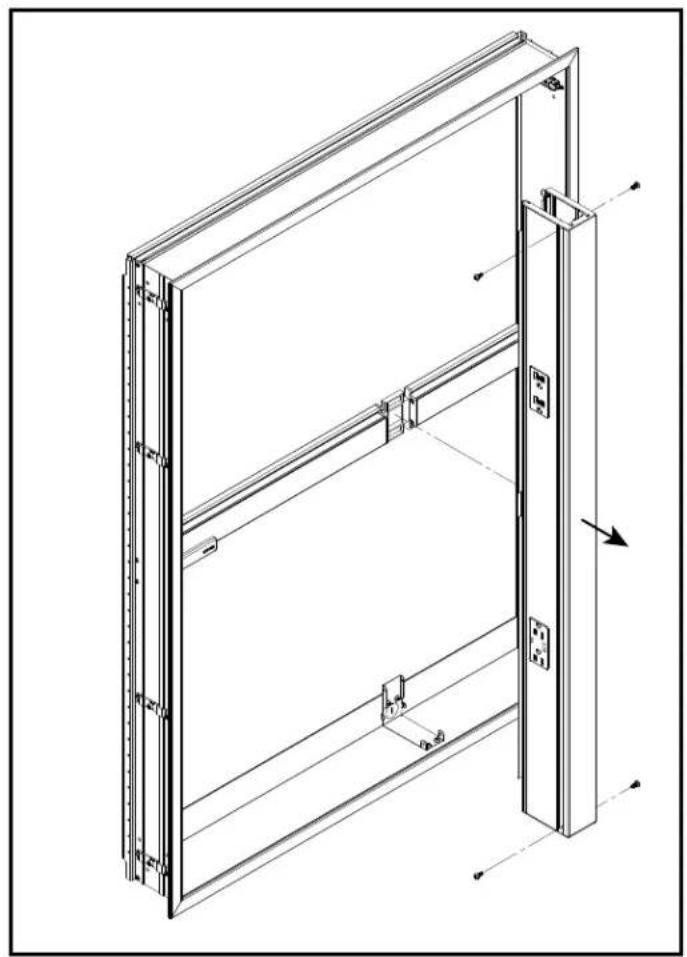
natural_image
Technical line drawing of a two-panel metal-framed cabinet or enclosure with internal components and dimension arrows (no text or symbols)MONTAGE ENCASTRÉ MONTAJE EMPOTRADO
natural_image
Technical line drawing of a mechanical lifting device with a magnified inset showing internal components (no text or symbols)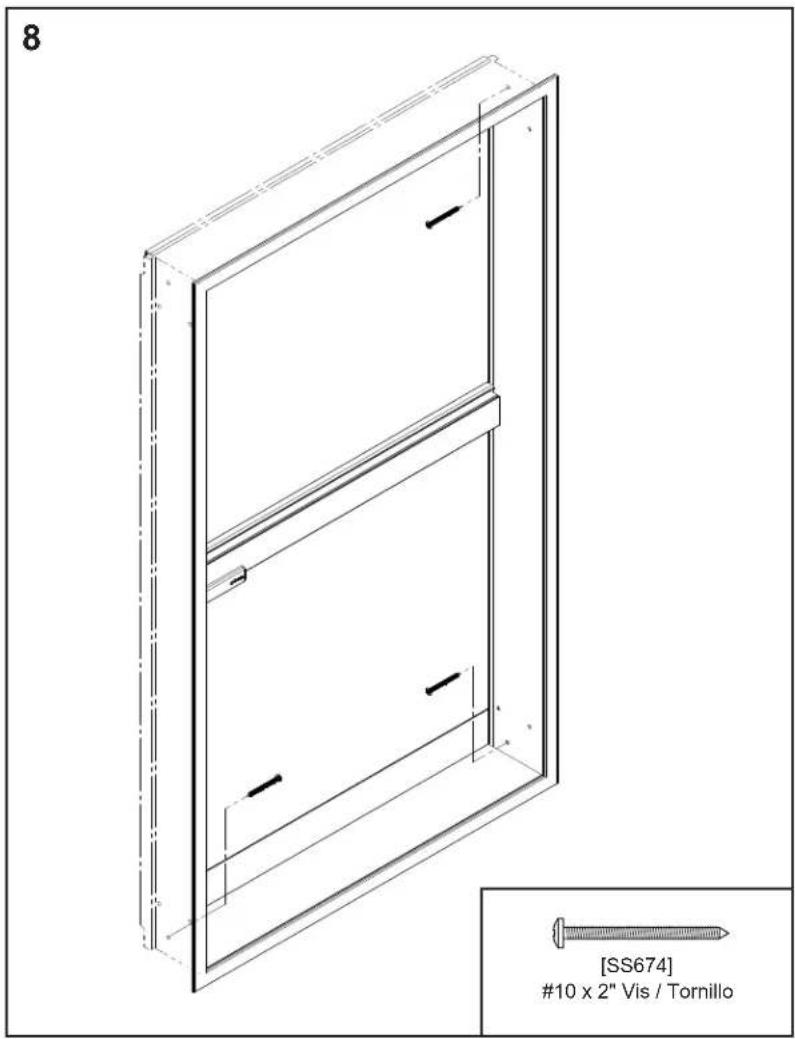
text_image
8 [SS674] #10 x 2" Vis / Tornillo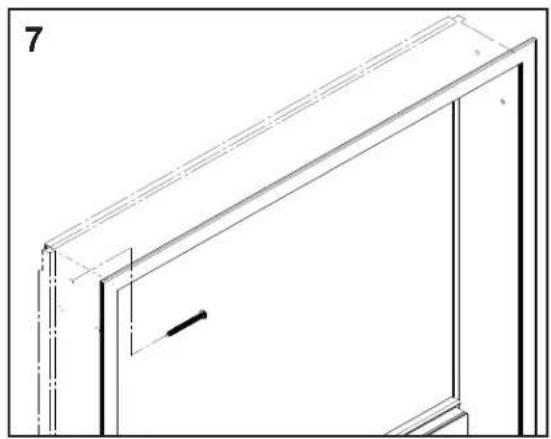
natural_image
Technical line drawing of a door frame with dashed lines indicating hidden edges (no text or symbols)OPTION ÉLECTRIQUE OPCIÓN ELÉCTRICA
natural_image
Technical line drawing of a two-panel door frame structure with mounting brackets and dimension lines (no text or symbols)ASSEMBLAGE FINAL ENSAMBLAJE FINAL
natural_image
Illustration of a hand inserting a component into a wall-mounted device (no text or symbols visible)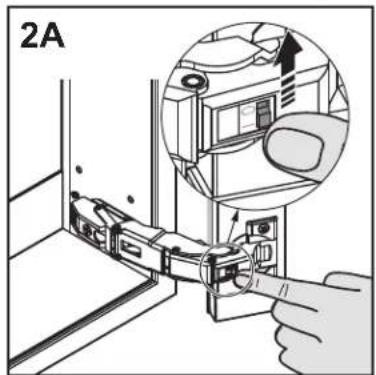
text_image
2A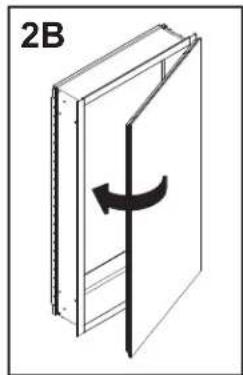
natural_image
Diagram of a door with a rotating arrow indicating rotation, labeled '2B' (no text or symbols on the diagram itself)natural_image
Diagram of a door handle assembly with arrows indicating direction (no text or labels)natural_image
Technical line drawing of a mechanical assembly with a magnified inset showing internal components (no text or symbols)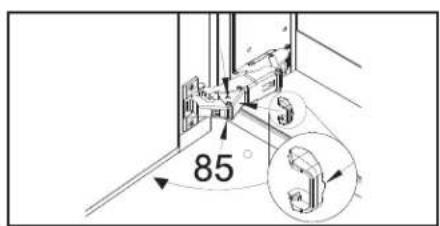
text_image
85°robern
© 2022 Robern, Inc. 701 N. Wilson Ave. Bristol, PA 19007 U.S.A. 800.877.2376 www.robern.com
Instructions d'installation / Instrucciones de instalación
No. de pièce / Pieza n.º CB-209-1428 08/11/2022
Armoire Recess Reserve série M / Gabinete empotrado Reserve serie M
ASSEMBLAGE FINAL ENSAMBLAJE FINAL
natural_image
Pure technical line drawing of a mechanical assembly with no text, numbers, or symbols
natural_image
Simple line drawing of a door with two hanging metal fixtures (no text or symbols)natural_image
Pure architectural line drawing of a window or cabinet with no text, numbers, or symbolsnatural_image
Technical diagram showing a mechanical assembly with labeled parts 1 and 2 (no text or symbols beyond labels)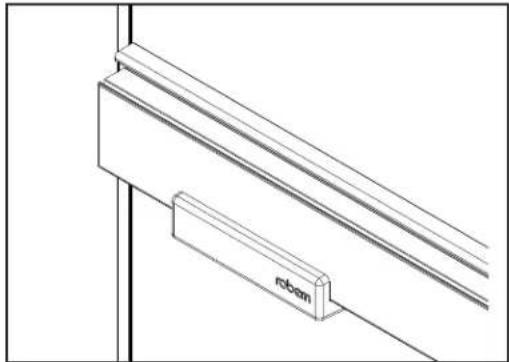
natural_image
Technical line drawing of a structural bracket with 'roben' label, no other text or symbols presenttext_image
9A 9B 9C 90° rohem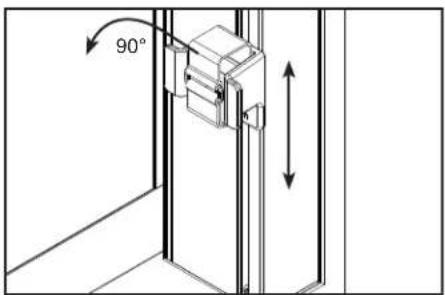
text_image
90°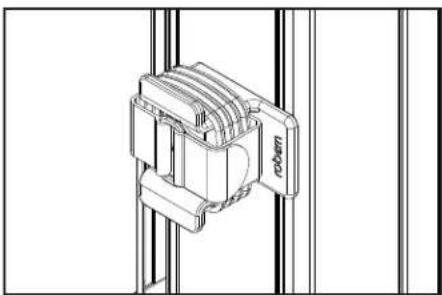
natural_image
Technical line drawing of a mechanical component with no visible text or symbolsrobern
© 2022 Robern, Inc. 701 N. Wilson Ave. Bristol, PA 19007 U.S.A. 800.877.2376 www.robern.com