
H-11909 - Scale Uline - Free user manual and instructions
Find the device manual for free H-11909 Uline in PDF.

User questions about H-11909 Uline
0 question about this device. Answer the ones you know or ask your own.
Ask a new question about this device
Download the instructions for your Scale in PDF format for free! Find your manual H-11909 - Uline and take your electronic device back in hand. On this page are published all the documents necessary for the use of your device. H-11909 by Uline.
USER MANUAL H-11909 Uline
ULINE H-11908, H-11909
EXTREME WASHDOWN PLATFORM SCALE
1-800-295-5510
uline.com
natural_image
Line drawing of a digital scale with a rectangular base and vertical support (no text or symbols)SAFETY
STOP
WARNING! Explosion hazard.

CAUTION! Keep children away from battery.

CAUTION! Do not burn battery.

CAUTION! Corrosion hazard.
- The load placed on the weighing pan must not exceed the maximum weighing capacity of the scale.
- Protect the scale from high temperatures.
- Avoid objects impacting the scale. Do not drop loads onto the scale or subject the weighing pan to any strong shock loads.
- Operate or charge the scale in an open area. Do not squeeze the power cord, which may result in the wire overheating and catching on fire.
- The battery's electrolyte is caustic and causes metal, cotton, etc. to corrode.
- Charge battery in a well-ventilated area away from sparks or open flame.
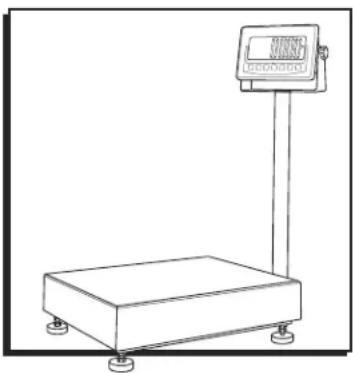
SETUP
- Place the scale on a firm, level surface free from vibrations for accurate weight readings.
- Adjust the four leveling feet (if fitted) to set the scale pan level.
- Avoid operating the scale in direct sunlight or drafts of any kind.
- If possible, avoid connecting the scale to AC power outlet sockets that are adjacent to other appliances to minimize the possibility of interference affecting performance of the scale.
- Remove any weight on the weighing pan before the scale is switched on and avoid leaving weight on the pan for long periods of time.
-
All goods weighed should be placed in the center of the weighing pan for accurate weighing. The overall dimensions of the goods being weighed should not exceed the dimensions of the weighing pan.
-
Once the scale has been powered on, it will go through an LCD display test. Scale is ready for use when the display shows zero.
- The scale requires 15-20 minutes to warm up before operation to ensure best accuracy.

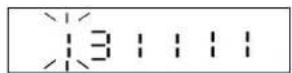
NOTE: When the symbol keeps flashing on the screen, the batteries need to be charged.
BATTERY STORAGE
- Scale uses a fully sealed, maintenance-free battery. Customer does not need to replenish electrolyte.
- The scale should be recharged every three months to prevent failure of the internal rechargeable battery.
• The battery takes 8-10 hours to fully recharge.
• The temperature of battery should not exceed 113°F.
OVERVIEW OF CONTROLS
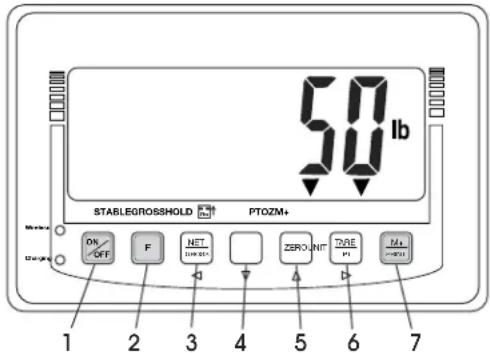
CONTROL PANEL
text_image
50 lb STABLEGROSSHOLD PTOZM+ DN OFF F NET ZEROUNT DARE M 1 2 3 4 5 6 7CONTROL PANEL BUTTONS
| # | DESCRIPTION |
| 1 | ON/OFF Key |
| 2 | Key Functions Key |
| 3 | Net/Gross Weight Key |
| 4 | Unit Key |
| 5 | Zero Key |
| 6 | Tare/PT Key |
| 7 | M+/Print Key |
CONTROL FUNCTIONS
| BUTTON | PRIMARY FUNCTION | SECONDARY FUNCTION |
 | ON/OFFPress the ON/OFF key to switch the indicator on or off. | ---- |
 | KEY FUNCTIONSUse ZERO or UNIT key to set the F key as "MC", "HR" or "T-TP".(See F key Function Settings in the Configurations section on page 12). | WHEN SET TO MC:Press F when weight returns to 0 to clear all totalization data.WHEN SET TO HR:Press F to switch to high resolution display for five seconds.WHEN SET TO T-TP:Press F key to display tare or pre-tare value. |
 | NET/GROSS WEIGHTToggles between gross weight and net weight. Display shift is only available after using tare/pre-tare functions. | CLEARActs as a clear key to reset parameters or other functions. |
UNIT | UNITPress the UNIT key to switch weight units; the display icons will indicate the active units. | ---- |
| ZERO | ZEROThe ZERO key acts as the zero balance function. If the weighing value is within the range of zero balance, it can be re-zeroed and tare cancelled. | ---- |
 | TAREPlace the container onto the scale. When the weight value is stable, press TARE/PT key for zero return and the "NET" indicator is shown on the display. Place the object onto the container and the display shows the net weight value of the object.Remove both object and container, and negative value of the container will show on the display. Press TARE/PT key again to clear tare value. Scale returns to zero and "NET" indicator goes off. | PRE-TAREWhile the scale is unloaded, press TARE/PT key. Use keypad to input pre-tare weight. When the cursor flashes on the rightmost digit, press TARE/PT key again to complete. |
 | M+/PRINTWhen net weight = 0, add new item and press M+/PRINTkey to totalize net weight. Scale will display the totalization numbers for one second and display total net weight for one second, then return to the current weight and print the latest accumulated data. If the previous item is not removed or the new item's weight is less than 20d, totalization is not performed. | CLEAR TOTALIZATION DATAWhen net weight = 0, press M+/PRINT. While displaying totalization numbers, press M+/PRINT again to clear totalization data. RS232 will print out totalization numbers, total net weight, etc. |
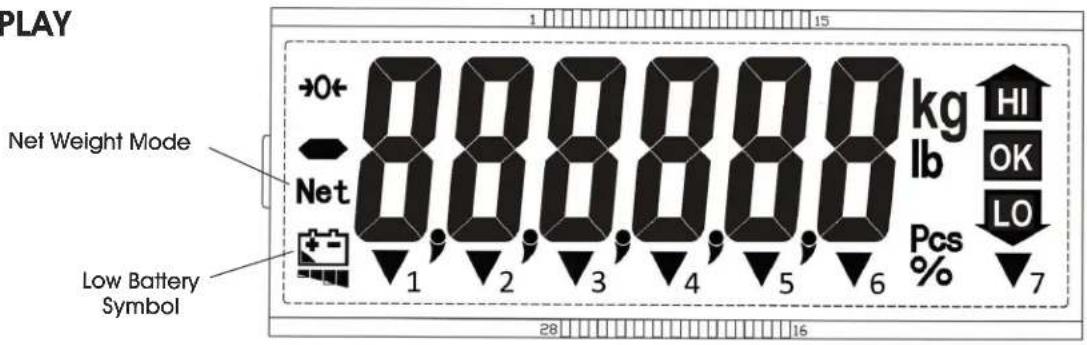
LCD DISPLAY
DISPLAY
text_image
PLAY Net Weight Mode Net Low Battery Symbol 1 2 3 4 5 6 28 16 15 1 kg lb HI OK LO Pcs % 7DISPLAY CHARACTERS
| CHARACTER DISPLAY | |
| HI Upper Limit | |
| OK Value Between HI and LO | |
| LO Lower Limit | |
| kg Unit "kilogram" | |
| lb Unit "pound" | |
| Pcs Counting Mode Indicator | |
| → 0 Zero Point Indicator | |
| Net Net Weight Indicator | |
| Low Power Indicator | |
| CHARACTER DISPLAY | |
| ▼1 Stable Indicator | |
| ▼2 Gross Weight Indicator | |
| ▼3 | Unit Weight Insufficient Indicator |
| ▼4 Pre-tare Indicator | |
| ▼5 | (Hold) Weight Hold Indicator |
| ▼6 M+ Indicator | |
| ▼7 OZ Unit Indicator | |
DISPLAY CONNECTORS U-BRACKET INSTALLATION

text_image
Power Pressure Relief Valve RS-232 Connector Load Cell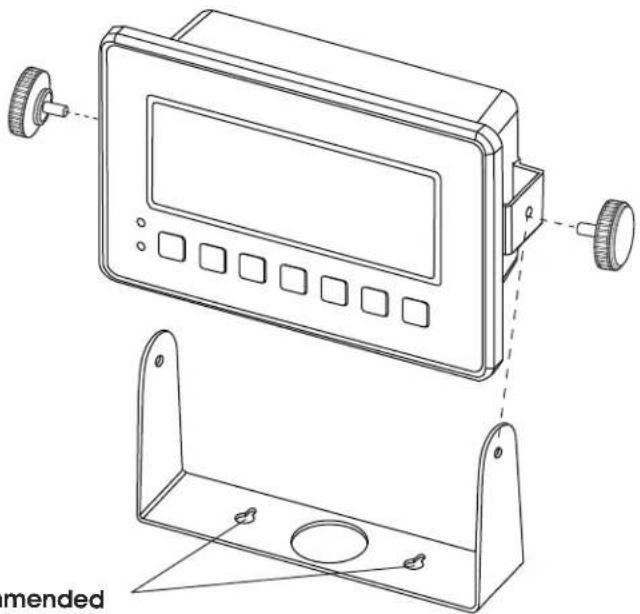
natural_image
Technical line drawing of a device panel with labeled components and a simplified view of its metal bracket (no text or symbols present)
NOTE: Recommended
M8 screws are not included.
OPERATION
ON/OFF KEY
Press the ON/OFF key to switch the indicator on or off.
F KEY
Function key (In FnC I2, select F key as "MC", "HR" or "T-TP")
NET/GROSS KEY
In the Tare mode, the screen displays the "Net Weight" icon; press the NET/GROSS key to switch between the "Net value" and the "Gross value". "GROSS" arrow appears and only NET/GROSS key works here. All other keys become inactive. Gross Weight = Tare Weight + Net Weight.
UNIT KEY
Press the UNIT key to switch weight units. The display icons will indicate the active units.
- After scale is powered on, scale uses the last weighing unit.
ZERO KEY
The ZERO key acts as the zero balance function. If the weighing value is within the range of zero balance, it can be re-zeroed and tare cancelled.
• Zero Range: OIML&NTEP is +/- 2% full scale
TARE/PT KEY (PRE-TARE KEY)
TO TARE
- Place the container onto the scale. When the weight value is stable, press TARE/PT key for zero return and the "NET" indicator is shown on the display.
- Place the object onto the container and the display shows the net weight value of the object.
- Remove both object and container, and negative value of the container will show on the display.
- Press TARE/PT key again to clear tare value. The scale returns to zero and "NET" indicator goes off.
- Tare can be continuously done until tare value = full load capacity.
- Continuous Tare – Press TARE/PT key for continuous weight increase/decrease on platter.
- If there is tare, the pre-tare cannot be done. If there is pre-tare first, and the tare weight is more than pre-tare weight, tare can be done.
- No tare can be done in gross weight display mode.
TO PRE-TARE
There are two types of pre-tare (seven sets of pre-tare total):
- Non-callable Pre-tare (one set) – Use ZERO and UNIT keys to enter value and use TARE/PT and NET/GROSS keys to move cursor. When cursor moves to the rightmost digit, press TARE/PT to confirm. "PT" indicator lights up.
- Callable Pre-tare (six sets) – Press M+/PRINT key to set up or call up.
M+/PRINT KEY
- Totalization function. M+/Print function is available when RS232 is on keypad transmission mode. (rS104 output).
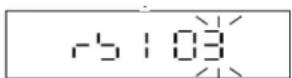
- This key is a composite key. While totalization is shown and weight returns to net zero, press M+/PRINT key to erase memory. RS232 will output MC print format (r-Si03 output).
- If new weight is added on platter, a new item will be added to totalization. If this weight is not taken off, nothing can be added to totalization. Display will show the totalization numbers for one second, then show net weight for one second, then the scale returns to the current weight and prints out the last item for totalization.
- To clear totalization data, press M+/PRINT key to let display show totalization numbers, then press the M+/PRINT key again to clear totalization data. RS232 will print out totalization numbers, total weight, etc.

NOTE: Weight must return to net zero if to perform clear function.
OPERATION CONTINUED
- With no load, press TARE/PT key to enter pre-tare setting.

NOTE: The blinking character on the display indicates that it is selected to enter data.
- Press M+/PRINT key to set or call up callable pre-tare. Display shows last used callable pre-tare. Press UNIT or ZERO key to select desired callable pre-tare; selection is shown by the position of the indicator.

NOTE: At any point, press NET/GROSS to return to Weighing Mode.
- Press UNIT or ZERO key to select desired callable pre-tare. Press M+/PRINT to use the selected pre-tare. "PT" indicator lights up. Press TARE/PT key to modify value. Press NET/GROSS key to return to Weighing Mode.

NOTE: At any point, press M+/PRINT to return to use the selected pre-tare.
- Press TARE/PT key to modify pre-tare value. After new pre-tare value is inputted, press M+/PRINT to confirm or move the cursor to the rightmost digit. Press TARE/PT to confirm. "PT" indicator lights up.
- Press M+/PRINT to confirm or move the cursor to the rightmost digit. Press TARE/PT to confirm.

NOTE: Both types of pre-tares can be cancelled by pressing TARE/PT key when no load is on the scale.
KEY FUNCTIONS FOR PRE-TARE
| KEY | FUNCTION |
| Zero | Upward key (0-9 digit entry). |
| Unit | Downward key (9-0 digit entry). |
| Tare/PT | Moves cursor to right. |
| Net/Gross | Moves cursor to left. |
SELF-TEST MODE
When power is off, hold NET/GROSS key and press ON/OFF key to turn on scale. Wait until display shows 0 / 4dC to enter self-test mode.
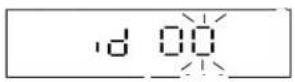
INTERNAL VALUE MODE (0 / Rdc)

NOTE: Must hook up full-bridge load cell to test.
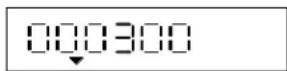
- Press TARE/PT key to enter. Display shows internal value.
- Check if the internal value is within normal range. (0 - 400000) (no load).
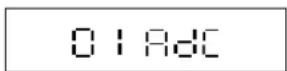
- Check whether the backlight is on.
- Press ZERO key to go back to the last screen. Display shows O I RdC.
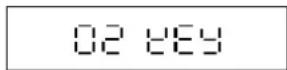
KEYPAD TEST MODE (02 KEY)
- Press TARE/PT key to enter. Display shows KEY 06.
- Keypad's internal code:
• TARE/PT key = 04
- UNIT key = 02
• NET/BG or NET/GROSS key = 01
- M + / PRINT key = 05
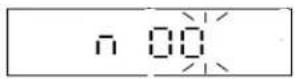
- F key = 00w
- Press ZERO key to return to the last screen. Display shows 02 KEY.
OPERATION CONTINUED
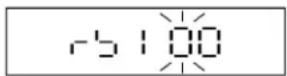
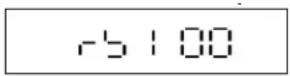
FIRMWARE VERSION DISPLAY MODE (03 GEr)
- Press TARE/PT key to enter. Display shows the firmware version 02052 if software seal is enabled or 02152 if disabled.
- Press TARE/PT key again to display maintenance number 100 (00 ranges from 00 - 99) for two seconds.
- Press ZERO key to back to the last screen. Display shows 03 GEr.
03 08,-
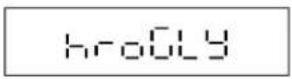
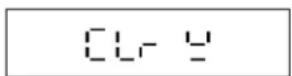
CHECK BACKLIGHT COLOR MODE (04 CLr)
For mono backlight model. It only displays mono.
- Press TARE/PT key to enter and display CL - ω' for white backlight.
- Press ZERO key to enter and display CL r r for red backlight.
- Press ZERO key to enter and display CL - G for green backlight.
- Press ZERO key to enter and display CL - Y for yellow backlight.
- Press TARE/PT key to return to the last screen. Display shows 04 CLr.
04 CL-
CHECK EVENT COUNTER MODE (OS SEL)
Used if software seal is enabled. If software seal is disabled, OS SEL will not appear.
- Press TARE/PT key to display event counter number. Display shows C 000 (000 appears as any three-digit number).
- Press ZERO key to return to the last screen. Display shows OS SEL.
05 SEL
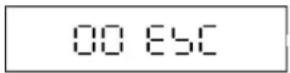
- Press TARE/PT key to exit self-test mode. The scale will re-power on automatically.
00 ESC
SIMPLE COUNTING MODE
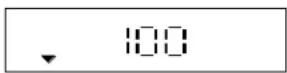
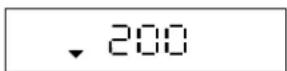
Use UNIT key to switch unit to Pcs to go into simple counting mode.
- Use NET/GROSS key to select a sample number from "10, 20, 50, 100, or 200". Display will show C 10, C 20, C 50, C 100, C 200 in sequential order by pressing NET/GROSS key.
- Select a sampling number and put appropriate weight on platter, then press UNIT key. Display will show ----. The scale will go into counting mode after weight is stable, and display will show the sample number.
- Unit weight insufficient ( ) Sample unit weight is less than 0.2d or total sample weight is less than 20d (d=division).
- While sampling, if there is insufficient sample or unit weight insufficient indication (▼), the scale is still usable, but there may be slight inaccuracy.
- After power-off, the scale automatically memorizes the sampling number, and it is available when "Pcs" unit is selected next time.
- If the setting is "automatic average unit weight", the scale will execute unit weight calibration automatically if the object on platter is greater than the previous sampling number more than 5 pcs, and also less than 100% the previous sampling number.
CONFIGURATIONS
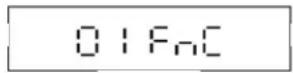
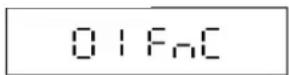
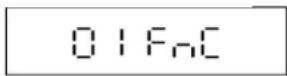
- In the weighing mode, press NET/GROSS key and ZERO key at the same time to enter the configuration mode. The LCD shows O I FnC.
- Press ZERO Key.
- Press ZERO Key.
- Press ZERO Key.
D / FnC: General Function setting mode
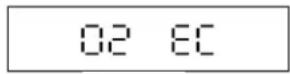
OEIC: External Weight Calibration
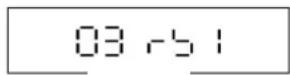
03 r5 l: RS232 Bi-direction Function setting
00 ESC: Exit the Advanced Function setting mode
Refer to the following sections for the detailed operation procedures of each function setting:
GENERAL FUNCTION SETTING (OI FnC)
NAVIGATION
ZERO key: Upward key (0-9 digit entry)
UNIT key: Downward key (9-0 digit entry)
TARE/PT key: Move cursor rightward
NET/GROSS key: Move cursor leftward
- Press TARE/PT key.
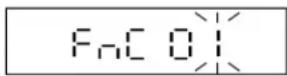
- Key in the parameter "00-15".
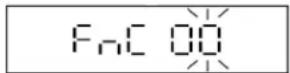
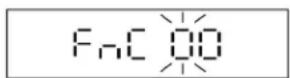
- Key in "00" and press TARE/PT key to return to the advanced function setting menu.
FnC 00: Return to the Advanced setting mode menu
FnC 01: Automatic Backlight settings
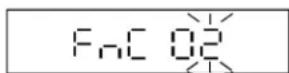
FnC 02: Automatic Power-off Timer settings
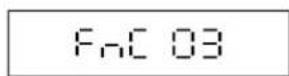
FnC 03: HI/LO/OK settings
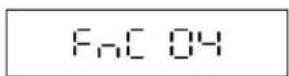
FnC 04: Restore the Default settings
FnC OS: Noise Filter settings
FnC 06: Hold Function settings
FnC 07: Auto Unit Weight Averaging setting
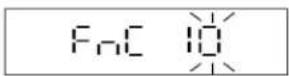
FnC 10: Record Last Zero
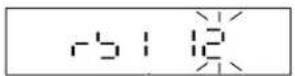
FnC 12: F key function settings
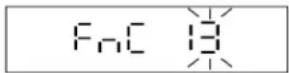
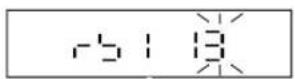
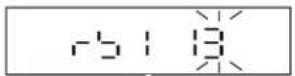
FnC 13: Zero setting
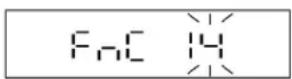
FnC 14: Backlight Color setting
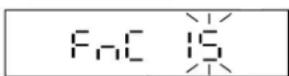
FnC 15: Backlight Brightness setting
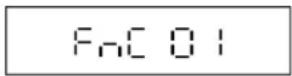
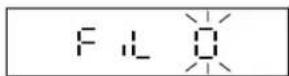
AUTO BACKLIGHT SETTING (FnC 01)
- Select FnC01 in the general function setting mode 01FnC to change the backlight function setting.
- Press TARE/PT key. LCD displays the last status.

NOTE: Default setting = off.

CONFIGURATIONS CONTINUED
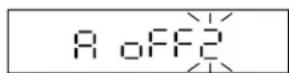
- Use ZERO or UNIT key to select function "on" or "off".
_n = backlight function is on.
Auto = automatic backlight.
OFF = backlight function is off.
- Press TARE/PT key to go back to the advanced function setting menu.
AUTO BACKLIGHT FUNCTION
When the weight is over 10d, the display backlight will be on. After the weight is stable for 10 seconds or when the scale returns to zero, the display backlight switches off.
AUTO POWER-OFF TIMER SETTING (FnC 02)
- Select FnC 02 in the general function setting mode 01 FnC to change the automatic power-off timer setting.

- Press TARE/PT key. LCD displays the last status.

NOTE: Default setting = 0 (no auto power-off).

- Use ZERO or UNIT key to select parameter.
O: No auto power-off
When the scale is idle for one minute, the scale automatically switches off.
2: When the scale is idle for two minutes, the scale automatically switches off.
9: When the scale is idle for nine minutes, the scale automatically switches off.
4. Press TARE/PT key to go back to the advanced function setting menu.
PAGE 8 OF 60 0325 IH-11908
AUTO POWER-OFF FUNCTION
When the weight on weigh pan is less than 10d or keeps idle for the set time, the scale will automatically switch off.
HI/LO/OK SETTINGS (FnC 03)
- Select FnC 03 in the general function setting mode 01 FnC to set the HI/LO/OK function.

NOTE: When the high limit and low limit are both set as "0", the HI/LO/OK function is disabled.
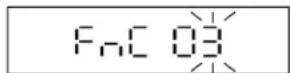
- Press TARE/PT key. LCD displays the last status.
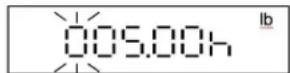
- Key in the desired high limit value. Press TARE/PT key.
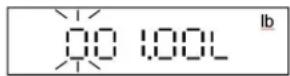
- Press TARE/PT key. LCD displays the last status. Key in the desired low limit value. Press TARE/PT key.
ALARM SETTING
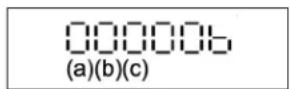
The definition of a, b and c positions:
a. I: alarm on
0: alarm off
b. I: alarm on when stable
O: alarm on when unstable
c. I: alarm on when the weight is between high and low limits
D: alarm on when the weight is not between high and low limits and higher than 10d
CONFIGURATIONS CONTINUED
- Press TARE/PT key. LCD displays the last status.
- Use ZERO or UNIT key to select r, G, Y, Z, o to set HI/LO/OK backlight color.
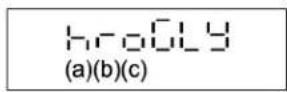
Default setting:
a. Greater than high limit. Backlight is red (r).
b. Between high and low limits (OK range) is green ( ).
c. Lower than limit. Backlight is yellow (y).
r: red y: yellow o: orange G: green y: white

NOTE: If backlight is on, yellow backlight is for low value, green backlight is for OK value and red backlight for high value.
- Press TARE/PT key.
RESTORE TO THE DEFAULT SETTINGS
(FnC 04)
- Select FnC 04 in the general function setting mode 01 FnC to restore to the default settings.
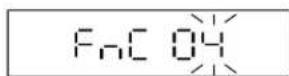
- Press TARE/PT key. Use ZERO or UNIT keys to select "rEturn" or "Format".
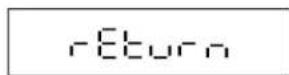
rEturn = Return (Cancel the restoration)
For Rt = Restore the default setting
The defaults include the following:
- External weight calibration
- HI/LO/OK setting values
- Noise filter setting (external)
- Sampling settings for the counting function
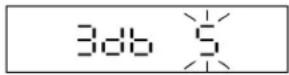
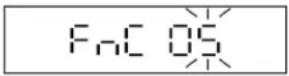
NOISE FILTER SETTINGS (FnC 05)

NOTE: When modifying FnC 05, the parameters of CFn 01 remain un-altered.
- Select FnC OS in the general function setting mode to set the noise filter settings.
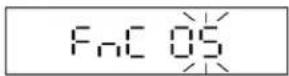
- Press TARE/PT key. LCD displays the last value.
- Use ZERO or UNIT keys to select 0-9 for zero display setting.

NOTE: Default setting = 0.
Activate when weight is over 1/3 max and when object is removed and display is approaching 0. When approaching within 0 and +/- selected value, weight displays 0.
$$ \begin{array}{l} 0: 0 \quad 4: + / - 4 d \quad 7: + / - 7 d \ I: + / - 1 d \quad S: + / - 5 d \quad B: + / - 8 d \ 2: + / - 2 d \quad 8: + / - 6 d \quad 9: + / - 9 d \ 3: + / - 3 d \ \end{array} $$
- Press TARE/PT key. LCD displays the last value.
CONFIGURATIONS CONTINUED
- Use ZERO or UNIT keys to select 0-9 for digital switch and stabilization setting. Default setting = 0. The larger value becomes stable more quickly.
- Press TARE/PT key. LCD displays the last value.
- Use ZERO or UNIT keys to select 0-9 for filter parameter setting. Default setting = 0.
The larger the number the faster the response; therefore more unstable the weight.

NOTE: If set to 9, AD value is not filtered. Input AD value = Output AD value.
- Press TARE/PT key. LCD displays the last value.

NOTE: The larger the number is, the faster the filter responds. Fast response can lead to weighing instability.

NOTE: Parameter 9: the AD value is not filtered. Input AD value = Output AD value
- Press TARE/PT key.
HOLD FUNCTION SETTINGS (FnC 06)

NOTE: When CFn 02 = 1 (OIML or NTEP approval), FnC 06 is fixed to "hold = 0" and cannot be changed.
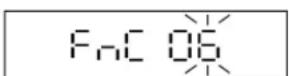
- Press TARE/PT key. LCD displays the last used value.
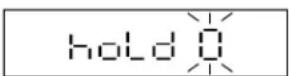
- Use ZERO or UNIT key to select 0-5.

NOTE: Default setting = 0.
O: Hold function disabled
/: "Peak hold" mode
2: "Stable hold 1" mode
3: "Stable hold 2" mode
4: "Animal scale hold 1" mode
5: "Animal scale hold 2" mode
3. Press TARE/PT key
hold0: Hold function disabled
holdl: "Peak hold" mode
- The scale keeps displaying the maximum weight when the weight is continually changing. Press any key to exit this mode.
hold2: "Stable hold 1" mode
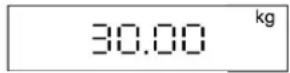
- When the weight is stable, the LCD shows the current weight value. Press any key to exit this mode.
hold3: "Stable hold 2" mode
- When the weight is stable, the LCD shows the current weight value. When the weight returns to zero (<10d), the hold mode is cancelled automatically.
hold4: "Animal scale hold 1" mode
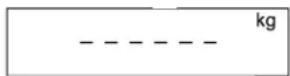
- With no load, the display shows "----". After the animal or object is on the platter and the weight is stable, the display shows the weight value and hold.
- When the animal or object is off the platter, the display shows "----" and the hold function is off.
- If the weight is hardly stable, display shows the average weight in 10 seconds and holds the status, until the weight is less than 10e and display shows "----" or press any key to calculate a new weight.
CONFIGURATIONS CONTINUED
hold5: "Animal scale hold 2" mode
- With no load, the display shows "0.000". After the animal or object is on the platter and the weight is stable, the display shows the weight value and hold.
- When the weight added or removed on the platter is larger than the weight set in hold 5, the hold function release and to calculate a new weight.
- If the weight is hardly stable, the display shows the average weight in 10 seconds and holds the status. In this mode, ZERO and TARE/PT keys are useless. Hold lock speed can be set through SPEEd setting. "1" is the fastest and 5 is the slowest.
ANIMAL SCALE HOLD 1 (hold 4)
- Press TARE/PT key. LCD displays the last used value.
hold 4
- Use ZERO or UNIT keys to select 4. Press the TARE/PT key to enter the hold function setting mode.
□ 10%
- Press TARE/PT key.
-
Use ZERO or UNIT keys to key in the parameters (1, 2, 4, 8, 16, 32, 64). Default setting = 8.
-
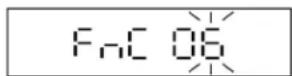
Press TARE/PT key.
FnC 06
ANIMAL SCALE HOLD 2 (hold 5)
- Press TARE/PT key. LCD displays the last used value.
hold 5
- Use ZERO or UNIT key to key in the parameters. Use ZERO or UNIT keys to key in 5. Press TARE/PT key to enter the hold setting.
SPEED
- Press TARE/PT key. LCD displays the last used value. Use ZERO or UNIT keys to enter value (1-5)
/: fastest
5: slowest
- Press TARE/PT key. LCD displays the used value.
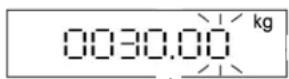
30.00 kg
-
Use ZERO or UNIT keys to enter value (0-max capacity).
-
Press TARE/PT key.
FnC 06

NOTE: When weight returns to zero, hold is released.

NOTE: After weight is HOLD, hold is released only when weight change is more than hold range.
- For example: if hold range = 1 kg. Weight is held at 8.5 kg after buzzer sounds. When weight changes outside the range of 8.5 +/- 1 kg, (for example, when weight is > 9.5 kg or < 7.5 kg), HOLD is released and until new HOLD weight is re-captured (displays weight changes until it enters HOLD).
- Test the same animal more than 10 times to compare the errors. Then finalize the hold speed and hold range setting.
CONFIGURATIONS CONTINUED
AUTO UNIT WEIGHT AVERAGING SETTING (FnC 07)
- Press TARE/PT key. LCD displays the last used value.
- Use ZERO or UNIT key to select 0-1.

NOTE: Default setting = 0.
O = Enable auto unit weight averaging
I = Disable auto unit weight averaging

NOTE: Activate when sample size + 5 ≤ new sample size ≤ 2 x sample size.
- For example: sample size = 20 If new sample size = 25, auto unit weight average activate and sample size is then set to 25. Next time, increase to 30 pcs to activate the function.
- Press TARE/PT key.
- Use ZERO or UNIT key to key in the parameter. Use ZERO or UNIT key to select the setting.

NOTE: Default setting = oFF.
on = Enable record the last zero setting
oFF = Disable record the last zero setting

NOTE: FnC 10 is only for when CFn 02 = 0.
- Press TARE/PT key.
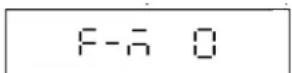
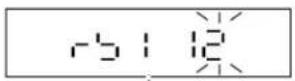
F KEY FUNCTION SETTINGS (FnC12)
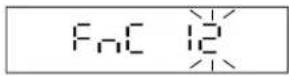
- Press TARE/PT key. F key function represents "MC" function. Display shows last used value.

-
Use ZERO or UNIT key to select F key as MC, hr or t-tP.
-
MC: As "MC" function: Press F key when weight returns to 0 to clear all totalization data
- hr: As "HR" function: Press F key to switch to high resolution display for five seconds.
-
t - tP : As "t-tP" function: Press F key to display tare weight or pre-tare weight for two seconds, and then return to net weight. If both tare and pre-tare weight exist, display tare weight first and then pre-tare weight.
-
Press TARE/PT key.

ZERO KEY SETTING (Foc 13)
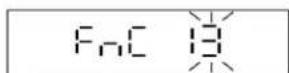
- Press TARE/PT key. LCD displays the last used value.

- Use ZERO or UNIT key to select function "on" or "off".

NOTE: Default setting = off.
_n = enable zero for any height.
OFF = disable.

NOTE: FnC 13 is only for when CFn02 = 0.
CONFIGURATIONS CONTINUED
3. Press TARE/PT key.
BACKLIGHT COLOR SETTING (FnC 14)
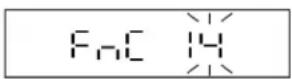
1. Press TARE/PT key. LCD displays the last used value.
2. Use ZERO or UNIT key to select r, G, Y, U, o for backlight.
: white yr: red
y: yellow o: orange
G: green
3. Press TARE/PT key.
3. Press TARE/PT key.
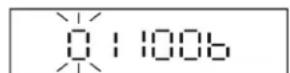
EXTERNAL WEIGHT CALIBRATION (02 EC)
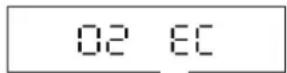
1. Press TARE/PT key. The display shows the calibration value. The right digit keeps flashing.
2. When the right digit is flashing, press TARE/PT key while there is no load on platter.
3. Reading zero. Once stable, display shows the max weight.
4. Put the calibrated weight on platter and press TARE/PT key. After three beep sounds, calibration completes. Remove weight.
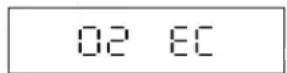

NOTE: The calibrated weight value placed on the platter must be over 100e, and the standard deviation of the weight must be within +/- 10% of the factory's calibrated weight.
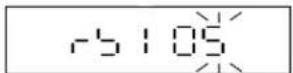
RS232 SERIAL INTERFACE SETTINGS (03 r5 1)
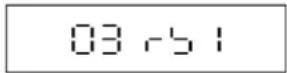
1. Press TARE/PT key.
2. Use ZERO or UNIT key to loop select r-5 l.
CONFIGURATIONS CONTINUED
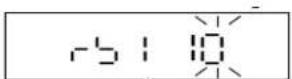
- Select r5 l, then press TARE/PT key.
r51: to set built-in RS232
- Key in "00", then press TARE/PT key to return to previous level.

rS 1 (Built-in RS-232)
r-51 00: Return to to previous level
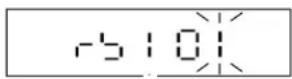
rSI 01: Baud Rate Settings
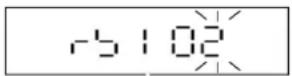
r-51 02: Communication Protocol Settings
r51 03: Output Format Settings
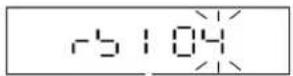
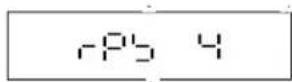
r51 04: Transmission Method
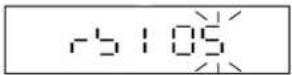
r-SI 05: Continuous Transmission Rate
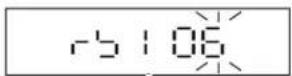
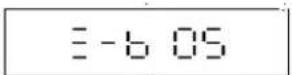
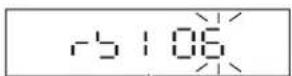
r 51 06: Auto Transmission at Zero
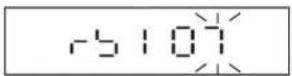
r-SI 07: Reset of Auto Transmission
r51 08: Output Condition Settings
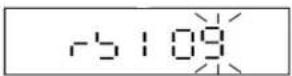
r51 09: RS232 6/7 Digits Setting
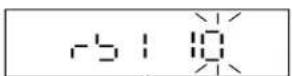
r-SI 10 : RTC Adjustment
rSI II: Y/M/D Print Format Selection
rSI12: MODBUS ID Input
r-S113: Line Feed Input
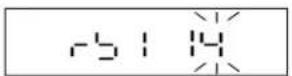
rSI 14: Input Company Name
BAUD RATE SETTINGS (r-SI 01)
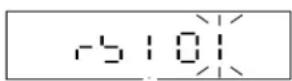
- Press TARE/PT key. LCD displays the last used value.
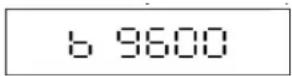
- Use ZERO or UNIT key to select the desired baud rate: 600, 1,200, 2,400, 4,800, 9,600 or 19,200 bits/second.

NOTE: The default value is 9,600 bits/second.
- Press TARE/PT key.
COMMUNICATION PROTOCOL SETTINGS (r 51 02)
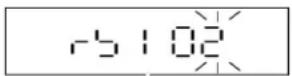
- Press TARE/PT key. LCD displays the last used value.
- Use ZERO or UNIT key to select n 81, E 71, 0 71.

NOTE: The default setting is n 81.
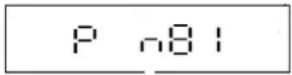
- Press TARE/PT key.
OUTPUT FORMAT SETTINGS (-51 03)
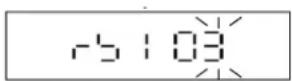
- Press TARE/PT key. LCD displays the last used value.
- Use ZERO or UNIT key to select 0-20.

NOTE: The default setting = 0.
- Press TARE/PT key.
CONFIGURATIONS CONTINUED
O: Synchronize with display
/: Gross weight
2: Net weight
3: Synchronized in simple format
4: Synchronized Gross weight in simple format
5: Synchronized Net weight in simple format
5: Hi/LO/OK status + synchronized in simple format
7: Hi/LO/OK status + synchronized Gross weight in simple format
B: Hi/Lo/OK status + synchronized Net weight in Simple format
9: Tare weight
10: M+ Transmission 1 note 1
//: M+ Transmission 2 note 2
18: Company name + F-M 10, see note 7 and rS1 14

NOTE: Formats 10 and 11 are not available on counting mode
FORMAT 10

NOTE: F= M+ Transmission 1
Ticket No.
Date year/month/day and day/month/year (choose one out of two date formats)
Time
G (Gross)
T (Tare) (PT when only pre-tare, T when tare or both tare and pre-tare)
N (Net)
Total Net (This line will only print when data is erased, showing net weight total of every count)

NOTE: When rS1 13 = 2 (default), three blank lines are inserted between data. After memory is cleared, a summary report of total records and weights will be printed and then insert four blank lines afterward.

NOTE: To add company name, use F-M 18 format and set company name in rS1 14 (see note 7).
FORM AT 11

NOTE: F= M+ Transmission 2
Ticket No.
Date year/month/day and day/month/year (choose one out of two date formats)
Time
G (Gross)
T (Tare) (PT when only pre-tare, T when tare or both tare and pre-tare)
N (Net)
Total Weight (This line will only print when data is erased, showing gross weight total of every count)

NOTE: The When rS1 13 = 2 (default), three blank lines are inserted between data. After memory is cleared, a summary report of total records and weights will be printed and then insert four blank lines afterward.
FORMAT 18

NOTE: F=Company name + F-M 10

NOTE: Company name can be set in r\$1 14.
[Company Name]
Ticket No.
Date year/month/day and day/month/year (choose one out of two date formats)
Time
G (Gross)
T (Tare) (PT when only pre-tare, T when tare or both tare and pre-tare)
N (Net)
Total Net (This line will only print when data is erased, showing net weight total of every count)

NOTE: When rS1 13 = 2 (default), three blank lines are inserted between data. After memory is cleared, a summary report of total records and weights will be printed and then insert four blank lines afterward.
CONFIGURATIONS CONTINUED
TRANSMISSION METHOD (-51.04)
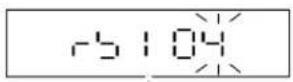
- Press TARE/PT key. LCD displays the last used value.
- Use ZERO or UNIT key to select.

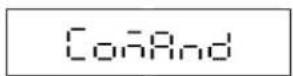
NOTE: The default setting = ConAnd
CorAnd: Command mode
56-88: Continuous transmission
Auto: Auto transmit when stable
A PLUS: M+ Mode
F4-OFF: RS232 is off
Modbus: Modbus RTU
- Press TARE/PT key.

NOTE: Only one of rS 1 04 and rS 2 04 can be set to Modbus. When rS 1 04 is set to Modbus mode, rS 2 04 cannot be set to Modbus or Mobus TCP.

NOTE: To use remote indicator, the first indicator must be set to command mode to connect to the remote indicator via RS-485, and the remote indicator also must be set to remote display.
CONTINUOUS TRANSMISSION RATE (-51.05)
- Press TARE/PT key. LCD displays the last used value.
- Use ZERO or UNIT key to select 1, 2, 4, 8, 16 or Max (times/sec).

NOTE: The default setting = 4.
- Press TARE/PT key.
ZERO BAND SETTING FOR AUTO TRANSMISSION (r51.06)
- Press TARE/PT key. LCD displays the last used value.

NOTE: To auto transmit once, weight must return < zero band first, and then place weight > = zero band.
- Use ZERO or UNIT key to select 00-99 d (d = increment) for zero band.

NOTE: The default setting = 05.

NOTE: To auto transmit once, weight must return < zero band first, and then place weight > = zero band.

NOTE: If rS1 06 set to 00, when the scale is at zero and keeping stable, the data are keeping transmitted as "Continuous Transmission".
- Press TARE/PT key.
CONFIGURATIONS CONTINUED
WEIGHT BAND SETTING FOR AUTO TRANSMISSION (-5/07)
- Press TARE/PT key. LCD displays the last used value.

NOTE: rs1 07 must be used with rs1 06. After data has been sent once and weight is not removed, to send data again, please keep adding weight until: weight is > zero band (rS1 06) + weight band (rS1 07).
- Use ZERO or UNIT key to select 00-99 d (d=increment) for weight band. Default = 00.

NOTE: If rS1 07 set to 00, when the scale is at zero and keeping stable, the data are keeping transmitted as "Continuous Transmission".
- Press TARE/PT key.

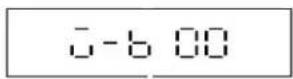
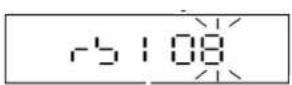
OUTPUT CONDITION SETTINGS (-51.08)
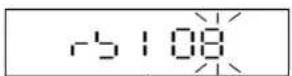
- Press TARE/PT key. LCD displays the last used value.
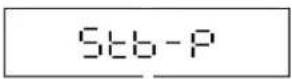
- Use ZERO or UNIT key to select. Default = S£b-P
RLL-P: Output always S£b-P: Output when stable (No output when OL or unstable) S£oL-P: Output when stable (OL included)
- Press TARE/PT key.
RS232 6/7 DIGITS SETTING (-51.09)
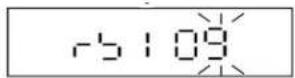
- Press TARE/PT key. LCD displays the last used value.
-
Use ZERO or UNIT key to select. Default = 5, //. 5, //: 6 digits SEGEn: 7 digits
-
Press TARE/PT key.
RTC ADJUSTMENT (r-5110)
- Press TARE/PT key. LCD displays the last value.
- Enter date in YY/MM/D. Use ZERO or UNIT key to select and use TARE/PT key to confirm and move cursor to the right. Move cursor to the rightmost end and press TARE/PT key to save.
-
Press TARE/PT key. LCD displays the last value.
-
Enter time in HH/MM/SS. Use ZERO or UNIT key to select and use TARE/PT key to confirm and move cursor to the right. Move cursor to the rightmost end and press TARE/PT key to save.
-
Press TARE/PT key.
CONFIGURATIONS CONTINUED
- Use ZERO or UNIT key to select. Default = 5E6-P
y_m_d: print as Year/Month/Day d_m_y: print as Day/Month/Year
- Press TARE/PT key.

MODBUS ID INPUT (r5112)
- Press TARE/PT key. LCD displays the last value.
-
Use ZERO or UNIT key to select and press TARE/PT key to move cursor to the right.
-
Press TARE/PT key.
NUMBERS OF LINE FEED FOR RS1 03 = 10 OR 11 (r5/13)
- Press TARE/PT key. LCD displays the last value.
Use ZERO or UNIT key to select.

NOTE: The default setting = 2.

NOTE: When rS1 03 = 2, three blank lines are inserted between data. After memory is cleared, a summary report of total records and weights will be printed and then insert four blank lines afterward.
- Press TARE/PT key.
INPUT COMPANY NAME (-51/4)
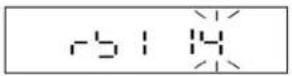
- Press TARE/PT key.
-
Set rS1 03 = 18 and set rS1 04 = M_PLuS (M + Mode)
-
Connect the RS232 to PC, and open the com-port test software to prepare for input.
-
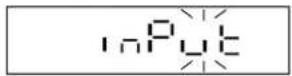
Enter rS1 14 and "input" will display and press NET|GROSS key to return, then you can input strings from the com-port test software. For example: Enter EXCELL corp.[CR][LF] and press send.

NOTE: [CR][LF] must be used after company name to complete.
- Once name is successfully set, indicator display "END" and return to rS1 14.

NOTE: Now rS1 03 = 18 can be used and company name is added before F-M 10. If company name entered is greater than 30 characters, "Error" will display and return back to rS1 14.
NET|GROSS key = return key.
POWER SUPPLY
POWER SUPPLY
| Power | Battery 6 V 4 Ah Rechargeable Battery | ||||
| Plugged In 100 V–230 V AC | |||||
| Power Consumption (mA) with 1X350Ω Load Cell | No Backlight 30–35 | ||||
| White Backlight | 100% 75% 50% 25% | ||||
| 130–140 | 100–110 | 70–80 | 55–60 | ||
| Yellow Backlight | 96 | ---- | ---- | ---- | |
| Green Backlight | 62 | ---- | ---- | ---- | |
| Red Backlight | 66 | ---- | ---- | ---- | |
POWER SUPPLY SELECTION
• Charging voltage: DC 12 V/1 A adapter
• 110/230 V AC +/-15, 60/50 Hz, 10 W (plugged-in)
- 6 V/4 Ah rechargeable battery
BATTERY
NORMAL BATTERY STATUS
- When battery status is normal, the symbol is displayed steadily, indicating battery status from one block to four blocks.
LOW BATTERY WARNING
- When the 📋 symbol keeps flashing on the display, the internal battery should be recharged.
- The scale will turn off automatically after a few hours when the low battery warning symbol is displayed. Scale must be fully charged before operating again.
- When the battery status indication is full, the power is about 6.1 V. Each block is about 0.2 V. When the battery warning symbol is displayed, the power is about 5.6 V.

CAUTION! Ensure the "+" and "-" poles are in the correct position.
- Do not place the battery near hot areas.
- Do not attempt to disassemble the battery.
- Use only the battery supplied with the unit.
TROUBLESHOOTING
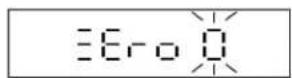
ERROR CODES
| ERROR CODE EXPLANATION | |
| E0 | The EEPROM is not working correctly.The EEPROM is not set yet, or the circuit on PCB is broken. |
| E1 | Zero is higher than the zero range when switching the indicator on. |
| E2 | Zero is lower than the zero range when switching the indicator on. |
| E4 | A/D value is unstable. |
| oL | The weight of the object is over 9 divisions of the maximum capacity. |
| -oL | The weight of the object is under -1/6 maximum capacity. |
| oF | ADIC value is over the maximum range. |
| EIO | The scale is not in level status. NOTE: Only available with level detector equipped. NOTE: Only available with level detector equipped. |
natural_image
Line drawing of a digital balance scale with a square base and vertical scale (no text or symbols)SEGURIDAD

| 0: 0 | 4: +/- 4d | 7: +/- 7d |
| 1: +/- 1d | 5: +/- 5d | 8: +/- 8d |
| 2: +/- 2d | 6: +/- 6d | 9: +/- 9d |
| 3: +/- 3d |
natural_image
Line drawing of a digital balance scale with a control panel on top (no text or symbols)SÉCURITÉ

natural_image
Technical line drawing of a device panel with control buttons and mounting bracket (no text or symbols)10: M+ Transmission 1 note 1
// : M+ Transmission 2 note 2
56-88: Transmission continue
SOURCE D'ALIMENTATION
SOURCE D'ALIMENTATION


