
Maharani K-11000 - Faucet KOHLER - Free user manual and instructions
Find the device manual for free Maharani K-11000 KOHLER in PDF.


User questions about Maharani K-11000 KOHLER
0 question about this device. Answer the ones you know or ask your own.
Ask a new question about this device
Download the instructions for your Faucet in PDF format for free! Find your manual Maharani K-11000 - KOHLER and take your electronic device back in hand. On this page are published all the documents necessary for the use of your device. Maharani K-11000 by KOHLER.
USER MANUAL Maharani K-11000 KOHLER
Ceramic Lavatory Faucet
K-11000, K-11010
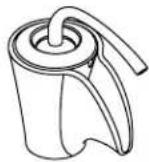

Mproduct numbers are for Mexico (i.e. K-12345M)
Adjustable Wrench Plumbers Putty Sealant Tape
Before You Begin
□ Observe all local plumbing and building codes.
□ Shut off the main water supply.
□ Inspect the supply tubing for damage. Replace as necessary.
☐ If possible, install this faucet to the lavatory before installing the lavatory.
☐ This faucet is for use on single hole lavatories.
☐ Kohler Co. reserves the right to make revisions in the design of faucets without notice, as specified in the Price Book.
text_image
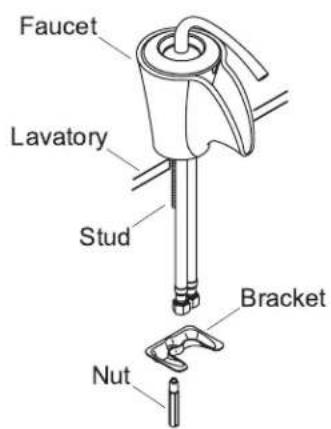
Faucet Lavatory Stud Bracket Nut1. Install the Faucet
☐ Insert the faucet through the top of the lavatory.
□ From underneath the lavatory, slide the bracket up over the stud.
- Tighten the nut securely against the bracket to secure the faucet into place.
text_image
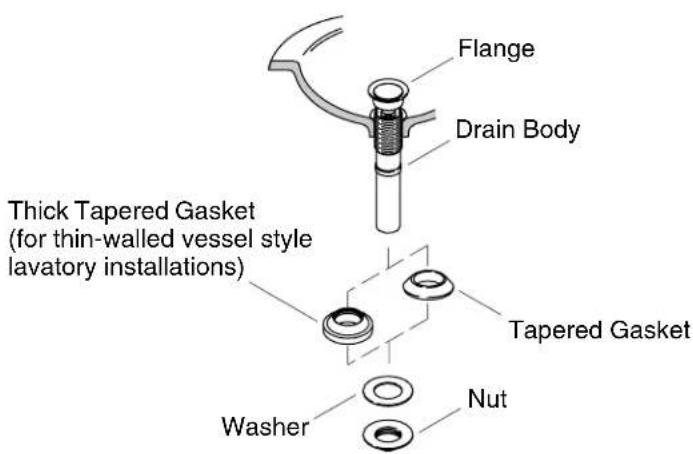
Flange Drain Body Thick Tapered Gasket (for thin-walled vessel style lavatory installations) Tapered Gasket Washer Nut2. Install the Drain
☐ If present, remove the protective plastic cap from the drain and discard.
□ Remove the nut, washer, and gasket from the drain body.
□ Apply a bead of plumbers putty or other sealant around the underside of the flange according to the sealant manufacturer's instructions.
☐ Fordrainswithmetalstoppers: Close the drain and rotate the drain body until the logo is positioned horizontally.
☐ Insert the drain into the drain hole and press into place.
☐ Slide the gasket (tapered side up) onto the drain body.
☐ Slide the washer over the threads on the drain body.
☐ Thread the nut up the drain body until snug against the underside of the lavatory. Use care not to rotate the drain while tightening the nut.
□ Using a wrench, tighten the nut.
□ Remove any excess putty or sealant.
□ Connect the P-trap to the drain body.
text_image
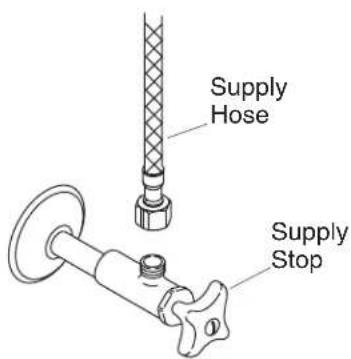
Supply Hose Supply Stop3. Connect the Supplies

CAUTION: Riskofrestrictedwaterflowandproduct damage. Use extreme care when bending the supplies to avoid kinking.

CAUTION: Riskofproductdamage. Do not overtighten the connections.
□ If the lavatory is not installed, install it at this time. Follow the lavatory manufacturer's instructions.
□ Connect the supply tubes to the supply stops. (Left is hot - right is cold.)
□ Tighten the connections with an adjustable wrench.
natural_image
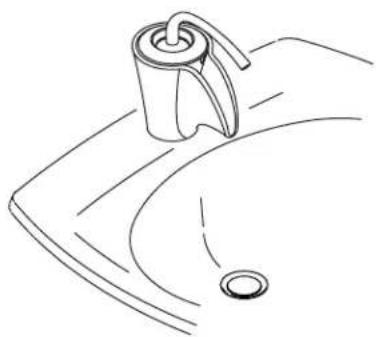
Line drawing of a sink with a faucet and circular drain (no text or symbols)4. Installation Checkout
☐ Connect the drain tailpiece into the trap. The tailpiece should extend 1"(2.5 cm) to 2"(5 cm) into the trap.
□ Ensure all connections are tight.
□ Open the drain.
☐ Turn on the main water supply and check for leaks. Repair as needed.
☐ Lift and rotate the faucet handle to the full hot position, then the full cold position. Run water through the spout for about one minute to remove any debris. Check for leaks and repair as needed.
□ Push the lever handle down to turn off the faucet.




