
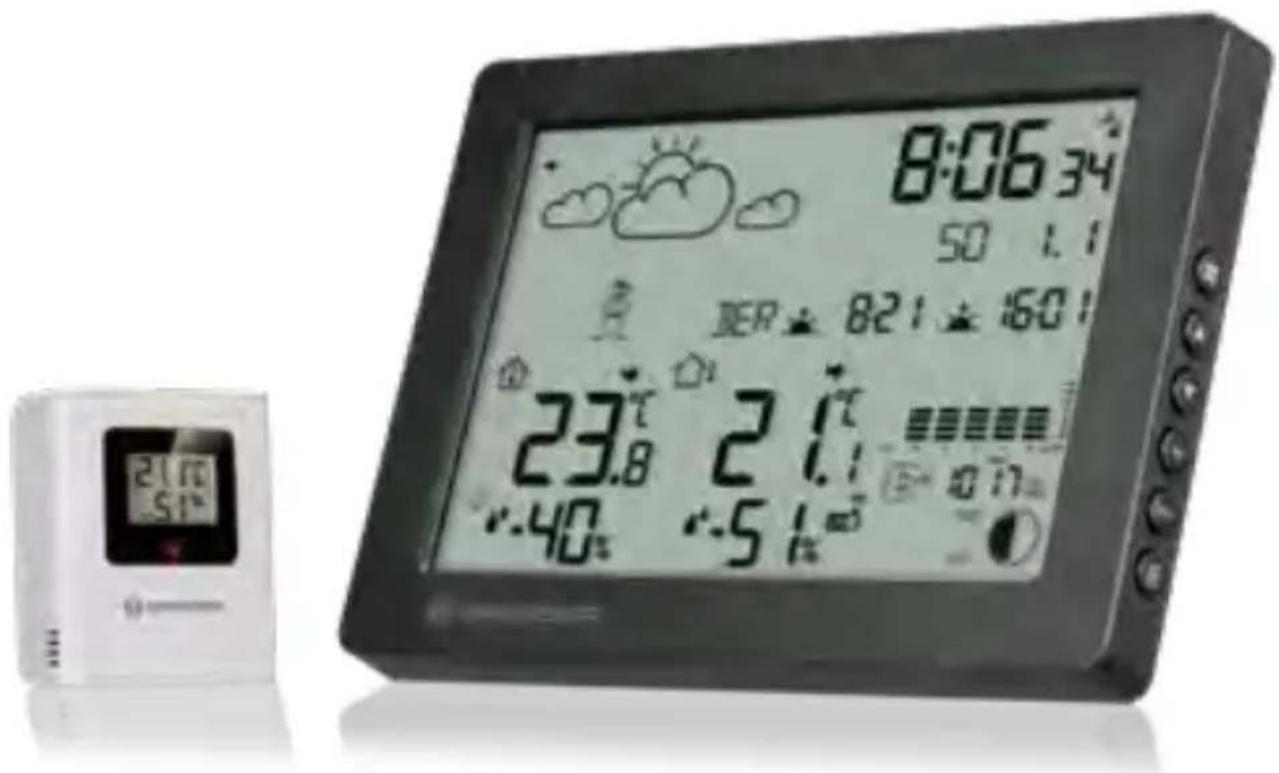
BaroTemp HZ - Weather Station BRESSER - Free user manual and instructions
Find the device manual for free BaroTemp HZ BRESSER in PDF.

| Product Type | Weather station with wireless sensor |
| Brand | Bresser |
| Model | BaroTemp HZ |
| Dimensions (base station) | 159 x 112 x 26 mm (L x H x D) |
| Weight (base station) | 268 g (without batteries) |
| Weight (wireless sensor) | 50 g (without batteries) |
| Power supply (base station) | 3 AAA/LR03 1.5 V batteries |
| Power supply (wireless sensor) | 2 AAA/LR03 1.5 V batteries |
| Time reception | DCF radio-controlled (automatic) |
| Max number of sensors | 3 (1 included) |
| Transmission frequency | 433 MHz |
| Transmission range | 30 m (in open field) |
| Temperature units | °C or °F (selectable) |
| Indoor temperature measurement range | 0 °C to 50 °C |
| Outdoor temperature measurement range | -40 °C to 70 °C |
| Humidity measurement range | 20 % to 90 % RH |
| Humidity resolution | 1 % RH |
| Barometric measurement range | 800 hPa to 1100 hPa |
| Main functions | Weather forecast (6 symbols), 12h weather trend, barometer with 12h histogram, moon phases, tides, sunrise/sunset, dual alarm with snooze, 3-level backlight, comfort indicator, temperature and frost alerts |
| Care and cleaning | Wipe with a soft dry cloth. Do not immerse in water. Avoid abrasive products. |
| Safety | Keep out of reach of children (choking hazard). Do not disassemble the device. Use only recommended batteries. Avoid shocks and excessive humidity. |
| Spare parts and repairability | Contact the retailer or customer service (sav@bresser.fr). Do not disassemble yourself. |
| General information | 2-year legal warranty. CE compliance. Manual available in multiple languages. |
Frequently Asked Questions - BaroTemp HZ BRESSER
User questions about BaroTemp HZ BRESSER
0 question about this device. Answer the ones you know or ask your own.
Ask a new question about this device
Download the instructions for your Weather Station in PDF format for free! Find your manual BaroTemp HZ - BRESSER and take your electronic device back in hand. On this page are published all the documents necessary for the use of your device. BaroTemp HZ by BRESSER.
USER MANUAL BaroTemp HZ BRESSER
Wetterstation BaroTemp HZ Weather Station BaroTemp HZ
DE BEDIENUNGSANLEITUNG
EN INSTRUCTION MANUAL
FR MANUEL D'INSTRUCTION
NL HANDLEIDING
ES MANUAL DE INSTRUCCIONES
ES MANUALE DI ISTRUZIONI

Visit our website via the following QR Code or web link to find further information on this product or the available translations of these instructions.

natural_image
Blue circular icon with a white person holding a document (no text or symbols)HINWEIS

GEFAHR
Erstickungsgefahr!
natural_image
Blue circular warning sign with a white exclamation mark (no text or symbols beyond the icon)For any warranty claims or service inquiries, please refer to the information on "Warranty" and "Service" in this documentation. We ask for your understanding that unsolicited returns cannot be processed.
Errors and technical changes excepted.
All rights reserved.
The reproduction of this documentation - even in extracts - in any form (e.g. photocopy, print, etc.) as well as the use and distribution by means of electronic systems (e.g. image file, website, etc.) without the prior written permission of the manufacturer is prohibited.
The designations and brand names of the respective companies used in this documentation are generally protected by trade, trademark and/or patent law in Germany, the European Union and/or other countries.
2 Validitynote
This documentation is valid for the products with the following article numbers: 6312
Manual version: 1025
Always provide information when requesting service.
3 Features
• Radio-controlled with DCF signal reception
- 6 different weather forecast symbols
• Barometric recording over 12 hours
• 5 languages of the weekday display
• 12/24H
- °C/°F selectable
- Indoor/outdoor temperature
• Humidity indoor/outdoor
- Recording of the maximum and minimum temperature and humidity
- Low battery indicator
• Temperature and humidity trend
• Outdoor temperature alert
- Weather trend display
- Dual alarm clock with snooze function
- Sunrise and sunset time
- Time zone
• 3-level backlight
4 About this Instruction Manual

natural_image
Blue circular icon with a white human figure reading a document (no text or symbols)NOTICE
These operating instructions are to be considered a component of the device.
Read the safety instructions and the instruction manual carefully before using this device.
Keep these instruction manual in a safe place for future reference. If the device is sold or passed on, the instruction manual must be passed on to any subsequent owner/user of the product.
5 General safety instructions


DANGER
Danger of suffocation!
Improper use of this product may result in suffocation, especially for children. It is therefore imperative that you observe the following safety information.
- Keep packaging materials (plastic bags, rubber bands, etc.) away from children! There is a danger of choking!
- This product contains small parts that can be swallowed by children! Choking hazard!

DANGER
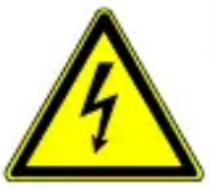
Risk of an electric shock!
This device contains electronic parts that are powered by a power source (AC adapter and/or batteries). Improper use of this product may result in electric shock. Electric shock can cause serious or fatal injuries. It is therefore imperative that you observe the following safety information.
- Never leave children unattended when handling the device! Follow the instructions carefully and do not attempt to power this device with anything other than power sources recommended in this instruction manual, otherwise there is a danger of an electric shock!
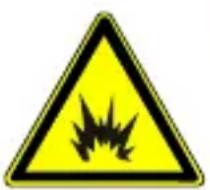

DANGER
Explosion hazard!
Improper use of this product may result in fire. It is essential that you observe the following safety information in order to avoid fires.
- Do not expose the device to high temperatures. Use only the recommended batteries. Do not short-circuit the device or batteries, or throw them into a fire! Excessive heat or improper handling could trigger a short-circuit, a fire or an explosion!

NOTICE
Danger of material damage!
Improper handling may result in damage to the unit and/or accessories. Therefore, use the device only in accordance with the following safety information.
- Do not disassemble the device! In the event of a defect, please contact your dealer. They will contact the Service Center and can arrange the return of this device for repair if necessary.
- Do not immerse the unit in water!
- Do not expose the device to impacts, vibrations, dust, constant high temperatures or excessive humidity. This can result in malfunctions, short-circuits or damage to the batteries and components.
- Use only the recommended batteries. Always replace weak or empty batteries with a new, complete set of batteries at full capacity. Do not use batteries from different brands or types or with different capacities. Remove batteries from the device if it is not to be used for a longer period of time!

natural_image
Blue circular warning sign with a white exclamation mark (no text or symbols beyond the icon)NOTICE
Risk of voltage damage!
The manufacturer is not liable for damage related to improperly installed batteries!
6 Parts overview and scope of delivery
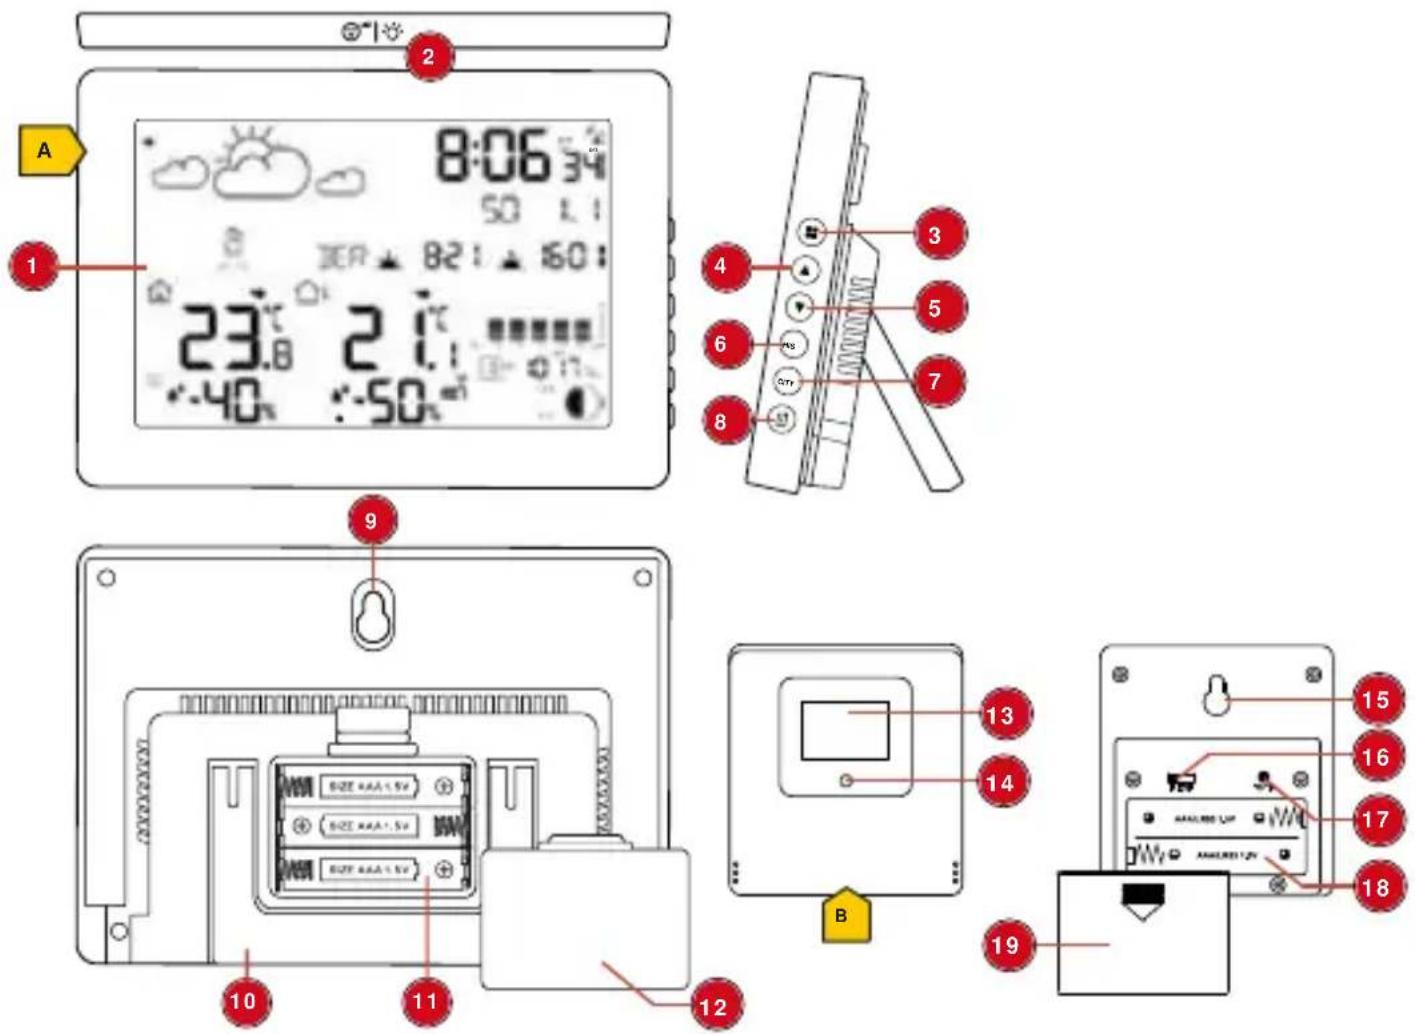
Illustration 1: All parts of the base station and the sensor
| 1 Display 2 SNOOZE/LIGHT button (set | |
| snooze function / adjust display brightness) | |
| 3 MODE button (display alarm 1, alarm 2) | 4 UP button (increase value or MAX/MIN display) |
| 5 DOWN button (reduce value or activate/deactivate temperature/ frost alarm) | 6 HIS button (barometer reading of the last 12 hours) |
| 7 CITY button (for moon phases, tides, sunset and sunrise) | 8 CHANNEL button (channel selection, CH1, CH2, CH3, channel cycle) |
| 9 Wall mount hole 10 Stand | |
| 11 Battery compartment 12 Battery compartment cover | |
13 Display (wireless sensor) 14 Function indicator
15 Wall mount bracket 16 Slide control for channel selection
17 °C/°F button (display change between °C and °F)
18 Battery compartment (wireless sensor)
19 Battery compartment cover (wireless sensor)
Scope of delivery:
Weather station (A), thermo/hygro sensor (B), 5 pcs. batteries 1.5V type AAA/LR03
7 Screendisplay
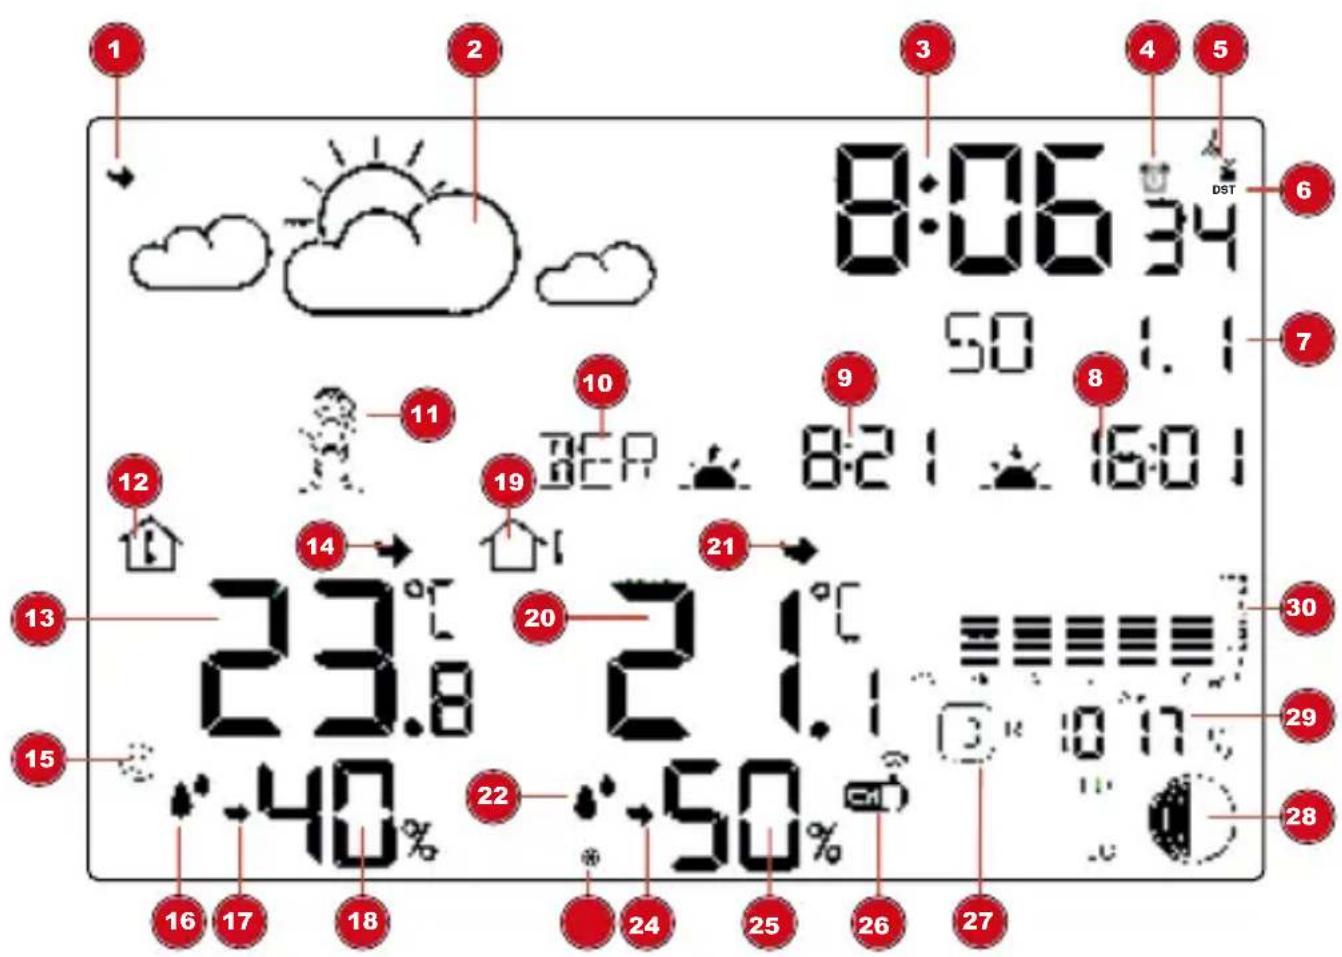
Illustration 2: Screen display of the base station
1 Trend arrow weather forecast 2 Graphical weather trend display for the next 12 hours
3 Current time 4 Alarm active
5 Icon for the radio signal 6 Icon for active daylight saving time (DST)
7 Weekday, day, month 8 Time of sunset
9 Time of sunrise 10 City selection (for moon phases, tides, sunset and sunrise)
11 Icon weather frog 12 Icon indoor temperature
13 Indoor temperature 14 Trend arrow indoor temperature
15 Comfort indicator (climate) 16 Icon humidity
17 Trend arrow humidity (indoor) 18 Humidity (indoor)
19 Icon outdoor temperature 20 Outdoor temperature
21 Trend arrow outdoor temperature 22 Icon humidity (outdoor)
23 Ice alert (frost warning) 24 Trend arrow humidity (outdoor)
25 Humidity (outdoor) 26 Selected channel of the wireless sensor
27 Hour display for barometer reading 28 Moon phases / tides
29 Barometer (air pressure) 30 Histogram
8 Powersupply
Base unit
- Remove the battery compartment cover.
- Insert batteries into the battery compartment. Make sure that the batteries are correctly aligned (+/- poles).
- Replace the battery compartment cover.
- Wait until indoor temperature is displayed on the base unit.
Wireless sensor
- Remove the battery compartment cover.
- Insert batteries into the battery compartment. Make sure that the batteries are correctly aligned (+/- poles).
- Move the channel slider to the desired channel.
NOTICE! This weather station can be operated with one or more wireless sensors. Each connected wireless sensor must be operated on a different channel. If only one wireless sensor is connected, it should be operated on channel 1.
- Replace the battery compartment cover.
9 Connecting remote sensors
The weather station can display the readings from up to 3 wireless sensors* of the same type. Each radio sensor must be set to a separate channel. Proceed as follows to set the channel:
- Remove the battery compartment cover of the wireless sensor.
- Set the channel selection switch to the desired channel (1, 2 or 3).
- Re-attach the battery compartment cover.
- Press the CHANNEL button on the base station several times to display the measured values for the individual channels or alternate between them. The selected channel is shown in the display each time.
- Press the CHANNEL button for approx. 3 seconds to initiate the search for a sensor.
NOTICE! Each connected wireless sensor must be set to a different channel. If only one wireless sensor is connected, it should be set to channel 1.
*one wireless sensor included, others optionally available
10 Battery level indicator
-
When the level of the batteries in the base station or in the wireless sensor reaches a critical level, the battery level symbol appears in the appropriate area on the display.
-
When replacing one set of batteries, always remove the batteries from the other part of the unit and reinsert them in the correct order (see chapter "Setting up power supply"). Replace the batteries to be changed in the corresponding part of the device with a completely new set with full capacity. This ensures that the connection between the devices will be reestablished again correctly.
11 Automatic time setting
After the power has been restored, the unit automatically searches for the radio signal. It takes approximately 3-8 minutes for this process to be completed.
If the radio signal is received correctly, the date and time are set automatically and the reception symbol is displayed.
If no radio signal has been received, proceed as follows:
-
Press the UP button for approx. 2 seconds to initiate the reception of the radio signal again.
-
Press the UP button for approx. 2 seconds to initiate the reception of the radio signal again.
-
If still no radio signal is received, the time must be set manually.
12 Manual time setting
-
Press and hold the MODE button for about 3 seconds to enter the time setting mode.
-
Digits to be set are flashing.
-
Press the UP or DOWN button to change the value.
-
Press the MODE button to confirm and proceed to the next setting.
-
Settings order:
-
12/24h format > Temperature unit > Barometer unit > Time zone > Hour > Minute > Year > Month > Date > Language for weekday display (GE, EN, IT, FR, SP)
-
Finally, press the MODE button to save the settings and exit the settings mode.
- In normal mode, press the MODE button to check the alarm time.
13 Time zone setting
To set a different time zone, proceed as follows:
- Press and hold MODE button for approx. 3 seconds to change to time setting mode.
- Press the MODE button multiple times until the display shows the time offset 00 Hr.
- Press UP or DOWN button to select the desired time deviation in hours (-12 up to +12 hours).
- Finally press the MODE button to save the settings and exit the setting mode.
14 Time zone setting
To set a different time zone, proceed as follows:
- Press the MODE button for approx. 3 seconds to enter the time setting mode.
- Press the MODE button several times until the time offset setting 00 Hr (time offset) appears in the display.
- Press UP or DOWN button to select the desired time deviation in hours (-2 to +2 hours).
- Finally, press the MODE button to save the settings and exit settings mode.
15 Alarmsetting
- In normal mode, press the MODE button to check the alarm time.
-
When you have checked the alarm time, press the UP button to turn the alarm on or off.
-
When you enter the alarm mode, press and hold the MODE button for about 3 seconds to enter the alarm setting mode. The digits to be set will flash. Press the UP or DOWN button to change the value. Press the MODE button to confirm and proceed to the next setting. Sequence of settings: Hour> Minute. Press the MODE button to save the settings and exit the alarm setting mode.
16 Snoozefunction
- When the alarm sounds, press SNZ button to activate the snooze function. The alarm will sound again in 5 minutes.
- Press any other button when the alarm sounds to interrupt the alarm until the alarm time will be reached again.
17 Display change °C/°F
- Base station
In normal display mode, press the °C/°F button to switch the temperature display between °C and °F.
- Wireless sensor
Open the battery compartment.
Press the °C/°F button to switch the temperature display between °C and °F.
Close the battery compartment.
18 Setcity
Manually set the city near you as follows to ensure that the moon phases, tides, and sunset and sunrise are displayed correctly.
- Press the [CITY] button.
- Press the [UP] or [DOWN] button to set the desired city.
- Press the [CITY] button again.
Setting your own city
- In Normal mode, press and hold the [CITY] button for about 3 seconds to enter the setting mode. The field to be set will flash.
- Press the [UP] or [DOWN] button to change the value.
- Press the [CITY] button to proceed to the next setting.
- Order of settings: first letter of city name (A-Z) > second letter of city name (A-Z) > third letter of city name (A-Z) > time zone (difference from GMT) > longitude > latitude
- Finally, press the [CITY] button to save the settings and exit the settings mode.
City abbreviation
A list of cities can be found as a PDF file at: www.bresser.de/download/city_codes
19 Moonphases
In the Northern hemisphere, the moon waxes (the part of the moon we see that glows after New Moon) from the right. This is because the side of the moon illuminated by the sun moves from right to left in the northern hemisphere. In the southern hemisphere, however, it moves from left to right. The two tables below show the representations of the moon phases.
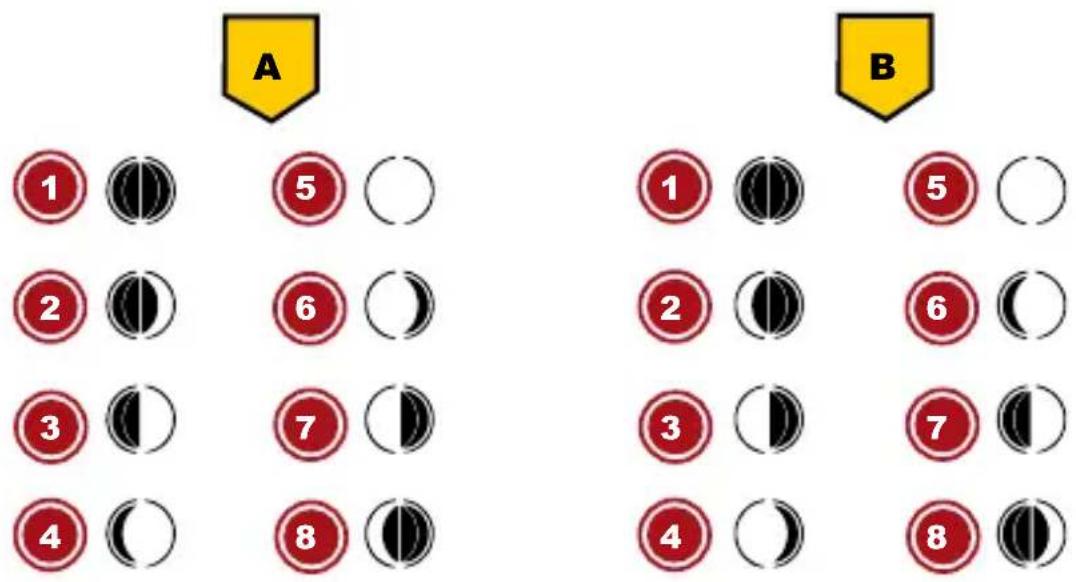
Illustration 3: (A) northern hemisphere, (B) southern hemisphere
1 New Moon 2 Waxing Crescent
3 First quarter 4 Waxing Gibbous
5 Full Moon 6 Waning Gibbous
7 Last quarter 8 Waning Crescent
20 Sunrise/sunset
The sunrise and sunset times are displayed besides the icons for 🎨 (sunrise) and 🎨 (sunset) according to the set location.
21 Tides
The tides are the water movements of the oceans caused by the tidal forces generated by the moon and sun in conjunction with the rotation of the earth.
The current tide level is displayed next to the moon phase according to the set location as follows:
HI Highest tidal water level (flood)
MID Mean tidal water level
LO Lowest tide water level (ebb)
22 Weathertrend
A weather trend for the next 12-24 hours is calculated from the measured values and graphically displayed as follows:

Illustration 4: The weather trend indicators on the base station display
Meaning of the icons (from left to right):
sunny / partly cloudy / cloudy / rain / thunderstorm / snow
Weather frog

Illustration 5: The weather frog icon as weather trend indicator on the base station display
Meaning of the icons (from left to right):
summer temperatures, heat / comfortable temperatures / uncomfortable temperatures / winter temperatures, cold
23 Barometric / Atmospheric pressure
Atmospheric pressure (hereinafter referred to as "air pressure") is the pressure at any place on earth caused by the weight of the layer of air above it. Air pressure is proportional to average pressure and decreases gradually with altitude. Meteorologists use barometers to measure air pressure. Because the weather is highly dependent on changes in air pressure, it is possible to make a weather forecast from the measured changes in air pressure.
To obtain a generally valid air pressure, this is converted to sea level. This calculated value is then the generally known barometric air pressure.
Find out the value of the air pressure above sea level (also corresponds to the relative air pressure of your location) from the local weather service, the internet or other sources.
- In the normal display mode, press the HISTORY button to check the barometer reading for the last 12 hours.
- In normal mode, press and hold the HISTORY button to select the type of air pressure and press the UP or DOWN buttons to select between absolute pressure and relative pressure.
- When entering the relative pressure mode, press the HISTORY button once to change the barometer value. Press the UP or DOWN button to change the value.
NOTE
- The built-in barometer registers changes in absolute air pressure caused by the environment. Based on the collected data, a forecast for the weather conditions in the next 12 hours can be made. The weather indicators change according to the determined absolute air pressure after only one hour of operation.
- High air pressure is always associated with nice weather, while low air pressure indicates rainy weather.
24 Switching on temperature alert and/or ice alert
- In normal display mode, press the DOWN button to activate or deactivate the temperature alert, the ice alert or both in succession.
- In normal mode, press and hold DOWN button for about 3 seconds to enter the outdoor temperature alert setting mode, the digits to be set will flash, press UP or DOWN button to change the value, press MODE button to move to the next setting. The sequence of settings is outdoor HI temperature > outdoor LO temperature.
25 Icepre-alert
If the ice alert is activated, an alarm will sound for approx. 3 seconds and the icon will flash as long as the outside temperature is between -1.0 and +3.0 °C.
26 MAX/MIN temperature values
The maximum and minimum readings for indoor and outdoor temperature as well as for the humidity are stored by the base station over a period of 24 hours:
- In normal mode, press the UP button to check the record of maximum and minimum temperature and humidity.
- When checking the Max/Min record, press and hold the UP button to delete the record.
27 Backlight/Displaydimming
- In battery mode, press the SNZ/LIGHT button to enable the backlight for about 5 seconds.
- In mains operation, press the SNZ/LIGHT button several times if necessary to dim the backlight in three steps (weak/middle/strong) or to disable the backlight.
28 Disposal

Dispose of the packaging materials according to its type. Information on proper disposal can be obtained from the municipal waste disposal service provider or environmental agency.
Do not dispose of electronic devices in the household garbage! According to the European Directive 2012/19/EU on Waste Electrical and Electronic Equipment and its transposition into national law, used electrical equipment must be collected separately and recycled in an environmentally sound manner.

Batteries and rechargeable batteries must not be disposed of with household waste. You are legally obliged to return used batteries and accumulators and can return them after use either at our sales outlet or in the immediate vicinity (e.g. in the trade or in municipal collection points) free of charge.
Batteries and accumulators are marked with a crossed-out dust-bin and the chemical symbol of the pollutant, "Cd" stands for cadmium, "Hg" stands for mercury and "Pb" stands for lead.
Cd'
Hg"
Pb ^1
29 Technicaldata
Base station
| Power supply | 3x batteries, AAA/LR03 1.5 V |
| Radio time signal DCF | |
| Number of sensors maximum 3 (1 sensor included) | |
| Temperature unit °C/°F | |
| Temperature measuring range -0°C ~ 50°C | |
| Humidity measuring range 20% to 90% (RH) | |
| Humidity resolution 1% HR | |
| Barometer measuring range | 800 hPa to 1100 hPa (23.62 inHg to 32.49 inHg |
| Time display HH:MM | |
| Time format 12 or 24 hours | |
| Dimensions 159 x 112 x 26 mm (W x H x D) | |
| Weight 268 g (without batteries) | |
Wireless sensor
| Power supply 2x batteries, AAA/LR03 1.5 V |
| Transmission frequency 433 MHz |
| RF transmission range 30 m |
| Maximum RF power under 10mW |
| Temperature unit °C/°F |
| Temperature measuring range -40°C – 70°C |
| Humidity measuring range 20% to 90% (RH) |
| Humidity resolution 1% HR |
| Dimensions 65 x 71 x 23 mm (W x H x D) |
| Weight 50g (without batteries) |
30 Warranty
The regular warranty period is 2 years and starts on the day of purchase. To benefit from an extended voluntary warranty period as indicated on the gift box, registration on our website is required.
You can consult the full guarantee terms as well as information on extending the guarantee period and details of our services at www.bresser.de/warranty_terms.
31 CE declaration of conformity
CE hereby declares that the radio equipment type with item number 16312 is in compliance with Directive 2014/53/EU. The full text of the CE Declaration of Conformity is available at the following web address: www.bresser.de/download/16312/CE/16312_CE.pdf
Table des matières
natural_image
Blue circular icon with a white human figure reading a document (no text or symbols)REMARQUE

DANGER
REMARQUE
natural_image
Blue circular warning sign with a white exclamation mark (no text or symbols beyond the icon)REMARQUE
Dimensions 65 x 71 x 23 mm (L x H x P)
natural_image
Blue circular icon with a white person using a laptop (no text or symbols)OPMERKING
GEVAAR

GEVAAR
Explosiegevaar!
natural_image
Blue circular warning sign with a white exclamation mark (no text or symbols beyond the icon)OPMERKING
natural_image
Four cartoon characters in a row, each showing a different movement: sun, surprised, falling, and waving (no text or symbols)natural_image
Blue circular icon with a white human figure reading a document (no text or symbols)AVISO
PELIGRO

PELIGRO

PELIGRO
AVISO
natural_image
Blue circular warning sign with a white exclamation mark (no text or symbols beyond the icon)AVISO
natural_image
Blue circular icon with a white human figure reading a document (no text or symbols)AVVISO
PERICOLO
PERICOLO
AVVISO
natural_image
Four cartoon characters in different poses, one holding a sun and another waving with a red ball (no text or symbols)Dimensioni 65 x 71 x 23 mm (L x A x P)
Please contact the service centre fi rst for any questions regarding the product or claims, preferably by e-mail.
E-Mail: service@bresseruk.com
Telephone*: +44 1342 837 098
BRESSER UK Ltd.
Suite 3G, Eden House
Enterprise Way
Edenbridge, Kent TN8 6HF
Great Britain
*Number charged at local rates in the UK (the amount you will be charged per phone call will depend on the tariff of your phone provider); calls from abroad will involve higher costs.
FR BE

- Wetterstation BaroTemp HZ Weather Station BaroTemp HZ
- HINWEIS
- GEFAHR
- Erstickungsgefahr!
- Validitynote
- Features
- About this Instruction Manual
- NOTICE
- These operating instructions are to be considered a component of the device.
- General safety instructions
- DANGER
- Danger of suffocation!
- Risk of an electric shock!
- Explosion hazard!
- Danger of material damage!
- Risk of voltage damage!
- Parts overview and scope of delivery
- Scope of delivery:
- Powersupply
- Base unit
- Wireless sensor
- Connecting remote sensors
- Battery level indicator
- Automatic time setting
- Manual time setting
- Time zone setting
- Time zone setting
- Alarmsetting
- Snoozefunction
- Display change °C/°F
- - Base station
- - Wireless sensor
- Setcity
- Setting your own city
- City abbreviation
- Moonphases
- Sunrise/sunset
- Tides
- Weathertrend
- Weather frog
- Barometric / Atmospheric pressure
- NOTE
- Switching on temperature alert and/or ice alert
- Icepre-alert
- MAX/MIN temperature values
- Backlight/Displaydimming
- Disposal
- Technicaldata
- Warranty
- CE declaration of conformity
- Table des matières
- REMARQUE
- OPMERKING
- GEVAAR
- Explosiegevaar!
- AVISO
- PELIGRO
- AVVISO
- PERICOLO
- BRESSER UK Ltd.
- FR BE
Brand : BRESSER
Model : BaroTemp HZ
Category : Weather Station