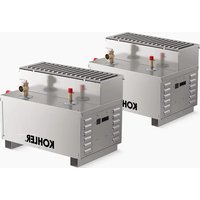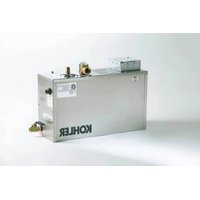
K-1694 - Steam cleaner KOHLER - Free user manual and instructions
Find the device manual for free K-1694 KOHLER in PDF.


User questions about K-1694 KOHLER
0 question about this device. Answer the ones you know or ask your own.
Ask a new question about this device
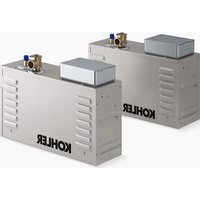
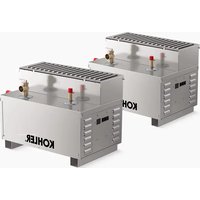
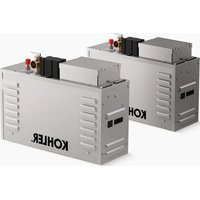
Download the instructions for your Steam cleaner in PDF format for free! Find your manual K-1694 - KOHLER and take your electronic device back in hand. On this page are published all the documents necessary for the use of your device. K-1694 by KOHLER.
USER MANUAL K-1694 KOHLER
natural_image
Technical line drawing of a rectangular industrial device with ports and control panel (no text or symbols)Mproduct numbers are for Mexico (i.e. K-12345M)
Thank You For Choosing Kohler Company
We appreciate your commitment to Kohler quality. Please take a few minutes to review this manual before you start installation. If you encounter any installation or performance problems, please don't hesitate to contact us. Our phone numbers and website are listed on the back cover. Thanks again for choosing Kohler Company.
Tools and Materials
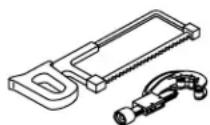
Hacksaw or Tube Cutter
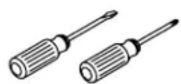

Screwdrivers Tape
Measure
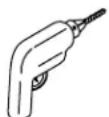
Drill w/ 1-1/4" & 2-1/2" Hole Bit
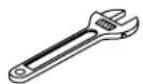
Adjustable Wrench

Solder

Sealant Tape
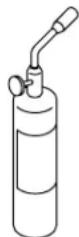
Propane Torch
Plus:
- Conventional woodworking tools and materials
- Drain/spill pan
- 1/2" copper tubing
• Assorted copper fittings
•1/2" & 3/4" NPT unions
Before You Begin
IMPORTANT!Whenusingthisunit,basicprecautionsshouldalwaysbefollowed.

WARNING: Riskofpersonalinjury. If you become uncomfortable while taking a steam bath, you should power off the unit. Cool off with the shower, open the door, or exit the unit.

WARNING: Risk of allergic reaction. Before adding any oils, aromatic therapies, or skin care products to the aromatherapy well, make sure they will not cause an allergic reaction to the user.

WARNING: Risk of personal injury. A steam bath can put undue stress on the body, as does any hot bath, shower, or sauna. Therefore, the steam bath may not be suitable for use if you are pregnant, have a heart condition, have high blood pressure, have circulatory problems, are under the influence of alcohol, are taking drugs or are under the care of a physician.

WARNING: Riskofpersonalinjury. DONOT consume alcoholic beverages or take medications/drugs prior to or when using the steam bath. Alcohol and drugs affect mental judgement and inhibit bodily functions such as heartbeat and respiration, resulting in potentially dangerous effects.

WARNING: Risk of injury to children. The steam generator is not designed to be used by children. Do not allow children to use this unit unless they are closely supervised at all times.

WARNING: Risk of scalding. Do not locate the steam head near a seat or bench, as the steam head is hot during operation and may scald the user if touched.

DANGER: Risk of electrocution. Disconnect the electricity to the working area at the main breaker panel before performing these installation steps.

WARNING: Risk of property damage. There should be a minimum of 12" (30.5 cm) of air space around the steam generator at all times. This provides an area for the heat generated by the unit to dissipate.

WARNING: Risk of personal injury or property damage. Do not direct the pressure relief valve to the enclosure. In the event the pressure relief valve activates, the hot water may spray causing burns to the user and/or damage to the enclosure. Therefore, the pressure relief valve should be directed to an area
Before You Begin (cont.)
where damage will not occur from contact with hot water and conform to national and local plumbing codes.

WARNING: Riskofpersonalinjury. Do not plumb a trap in the steam line or plumb the pressure relief valve into the steam line. Plumbing the pressure relief valve into the steam line can be hazardous if the steam outlet is capped.

WARNING: Riskofpersonalinjuryorpropertydamage. The steam generator operates at high temperatures. Avoid coming in contact with the water tank and/or steam discharge line while the generator is operating or shortly after shutdown. Wear eye protection and protective clothing when servicing the steam generator.
IMPORTANT! Use this unit only for its intended use as specified in this manual. DO NOT use attachments not recommended by Kohler Co.
IMPORTANT! Do not apply excessive heat to the generator connections when you solder connections. Do not apply flux or acids directly to the generator, as damage to the seals, plastic components, and trim finish may result. Do not apply petroleum-based lubricants to the generator components, as damage may result.
☐ Follow all local plumbing and electrical codes. All electrical work should be done by a licensed electrician.
☐ Do not install a GFCI to this unit. This will prevent nuisance tripping.
□ Disconnect all power before making any electrical connections.
- Connect the steam generator to water supply lines that meet all applicable plumbing codes. Use of supply lines that do not meet code may void the warranty.
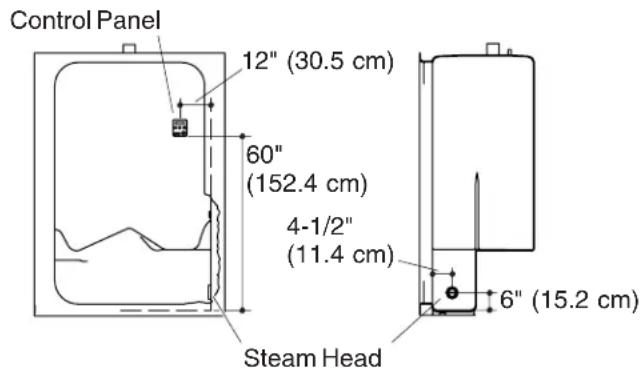
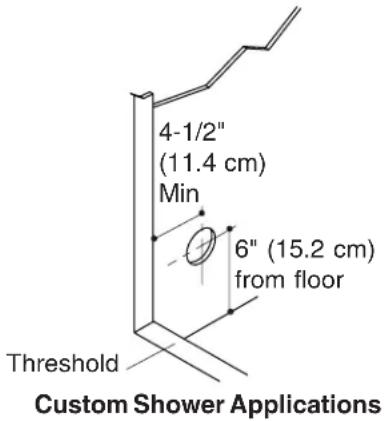
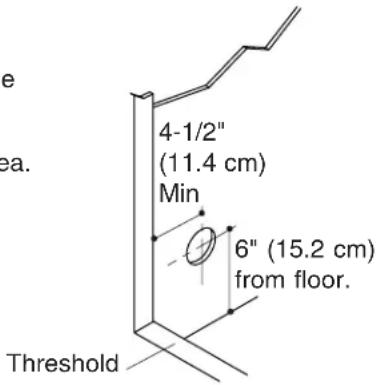
☐ For custom installations, or installations not covered in the "Recommended Layout Options" section, locate the steam head 6" (15.2 cm) from the floor and 4-1/2" (11.4 cm) from the inside of the threshold.
NOTE: For service and installation issues and concerns, call 1-800-585–STEAM (7832).
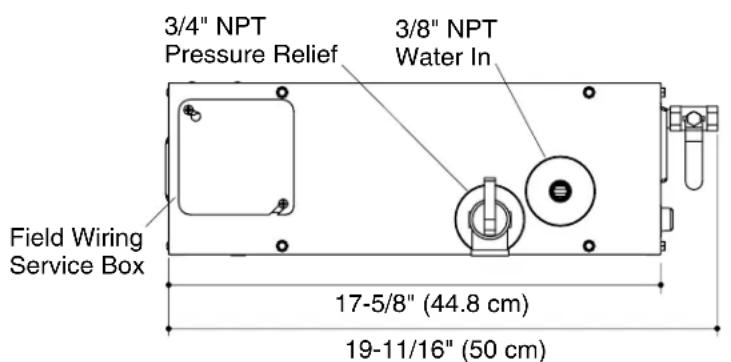
text_image
3/4" NPT Pressure Relief 3/8" NPT Water In Field Wiring Service Box 17-5/8" (44.8 cm) 19-11/16" (50 cm)Minimum required access is 20" (50.8 cm) L x 13" (33 cm) H x 6-1/2" (16.5 cm) W.
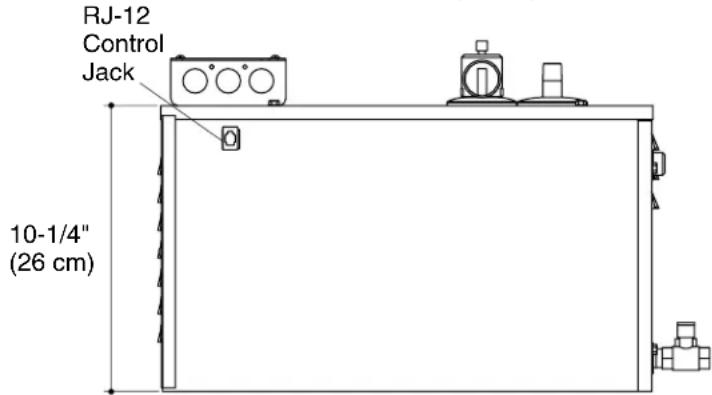
text_image
RJ-12 Control Jack 10-1/4" (26 cm)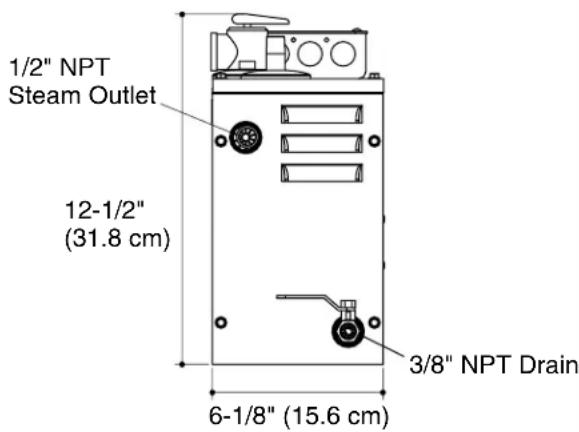
text_image
1/2" NPT Steam Outlet 12-1/2" (31.8 cm) 3/8" NPT Drain 6-1/8" (15.6 cm)- Installation Requirements
| ModelK-1679-PCK | -1691-PCK-1692-PCK-1694-PC | |||
| OrderingInformation | ||||
| Steam Control Kit with Power Clean (required) | K-1647-PC K-1647-PC | K-1647-PC K-1647-PC | ||
| RequiredElectricalService | ||||
| Generator - Dedicated Circuit Required | 5 kW, 240 V 30 A, 50/60 Hz | 7 kW, 240 V, 50 A, 50/60 Hz | 9 kW, 240 V, 50 A, 50/60 Hz | 11 kW, 240 V, 75 A, 50/60 Hz |
| ProductInformation | ||||
| Weight | 19-1/2 lbs. (8.8 kg) | 19-1/2 lbs. (8.8 kg) | 19-1/2 lbs. (8.8 kg) | 19-1/2 lbs. (8.8 kg) |
| Electrical Rating | 240 V, 25 A, 60 Hz | 240 V, 45 A, 60 Hz | 240 V, 45 A, 60 Hz | 240 V, 55 A, 60 Hz |
| Water supply | 3/8"copper line (3/8"NPT female thread) | 3/8"copper line (3/8"NPT female thread) | 3/8"copper line (3/8"NPT female thread) | 3/8"copper line (3/8"NPT female thread) |
| Steam Line | 1/2"copper line (1/2"NPT thread) | 1/2"copper line (1/2"NPT thread) | 1/2"copper line (1/2"NPT thread) | 1/2"copper line (1/2"NPT thread) |
| Pressure Relief Valve (supplied) | 3/4"NPT female thread | 3/4"NPT female thread | 3/4"NPT female thread | 3/4"NPT female thread |
| Drain Line Valve | 3/8"copper line, (3/8"NPT female thread) | 3/8"copper line, (3/8"NPT female thread) | 3/8"copper line, (3/8"NPT female thread) | 3/8"copper line, (3/8"NPT female thread) |
| InstallationNotes | ||||
| Acrylic or Gel Coat | 190 cu. ft. (5.4 cu. m) | 340 cu. ft. (9.6 cu. m) | 500 cu. ft. (14.2 cu. m) | 650 cu. ft. (18.4 cu. m) |
| Installation Requirements (cont.) | ||||
| Corian, ceramic tile on sheetrock | 125 cu. ft. (3.5 cu. m) 225 cu. ft. (6.4 cu. m) 500 cu. ft. (14.2 cu. m) | 650 cu. ft. (18.4 cu. m) | ||
| Natural stone tile 3/8"(1 cm) to 1/2"(1.3 cm) | 75 cu. ft. (1.8 cu. m) 135 cu. ft. (3.8 cu. m) 195 cu. ft. (5.5 cu. m) 255 cu. ft. (7.2 cu. m) | |||
| Natural stone slab 3/4"(1.9 cm) to 1"(2.5 cm) | 65 cu. ft. (1.8 cu. m) 120 cu. ft. (3.4 cu. m) 175 cu. ft. (4.9 cu. m) 230 cu. ft. (6.5 cu. m) | |||
| Glass Tile 95 cu. ft. | (2.7 cu. m) 165 cu. ft. (4.7 cu. m) 240 cu. ft. (6.8 cu. m) 315 cu. ft. (8.9 cu. m) | |||
text_image
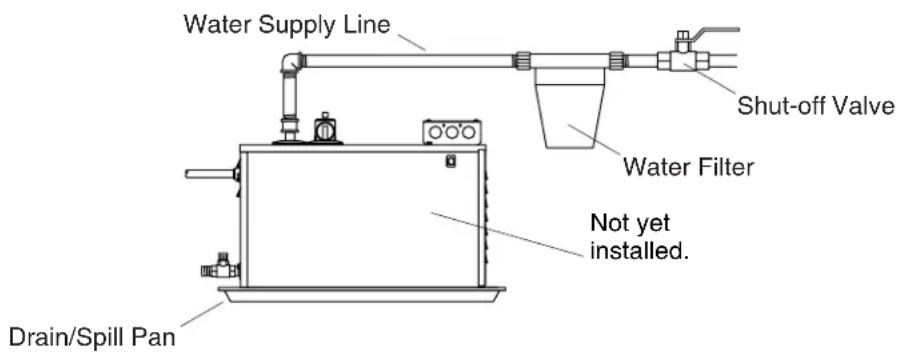
Water Supply Line Shut-off Valve Water Filter Not yet installed. Drain/Spill Pan2. Roughing-In

WARNING: Risk of burns or property damage. Do not plumb the pressure relief valve into the steam line. Plumbing the pressure relief valve into the steam line can create a hazard if the steam line is blocked or obstructed.

WARNING: Risk of personal injury or property damage. Do not direct the pressure relief valve to the enclosure. In the event the pressure relief valve activates, the hot water may spray causing burns to the user and/or damage the enclosure. Therefore, the pressure relief valve should be directed to an area where damage will not occur from contact with hot water and should conform to national and local plumbing codes.
IMPORTANT! When installing the control pad, allow room in the control cable for a drip loop. The drip loop will discourage moisture from following the control cable to the steam generator.
IMPORTANT! The steam generator will perform best when installed as close as possible to the steam head. The unit should be installed within 25' (7.62 m) of the steam head.
IMPORTANT! For optimum performance install the steam generator below the level of the steam head.
☐ Determine the location of the steam generator. Allow for a 12" (30.5 cm) air gap on all sides of the generator(s). Allow for the drain/spill pan.
☐ The drain pan is not supplied. Choose a drain pan to fit your installation.
□ Connect a tee to the existing cold water line.
IMPORTANT! The in-line water filter (recommended) must be installed between the shut-off valve and the steam generator inlet.
☐ If applicable, install the recommended in-line water filter to the shut-off valve.
☐ Install a shut-off valve on the water inlet line in an accessible area before the recommended in-line filter.
☐ Install copper tubing from the in-line water filter (if applicable) to the inlet on the steam generator(s).
- Connect the pressure relief valve to a drain line. The drain line should meet all applicable codes.
Before connecting the water inlet line, flush the water line into a large pail to remove any silt or other materials that may be in the line.
□ Make the final connection of the water supply to the steam generator. Check for leaks.
NOTE: All Kohler steam generators are equipped with an automatic water fill system. The water will stop after the unit is full.
Roughing-In (cont.)
□ Turn on the water to fill the unit.
☐ If the steam outlet piping run exceeds 10' (3 m) or is exposed to cold areas, insulate the piping with steam rated insulation.
text_image
Control Panel 12" (30.5 cm) 60" (152.4 cm) 4-1/2" (11.4 cm) Steam Head 6" (15.2 cm)K-1569/1669 Steam Hardware Locations
text_image
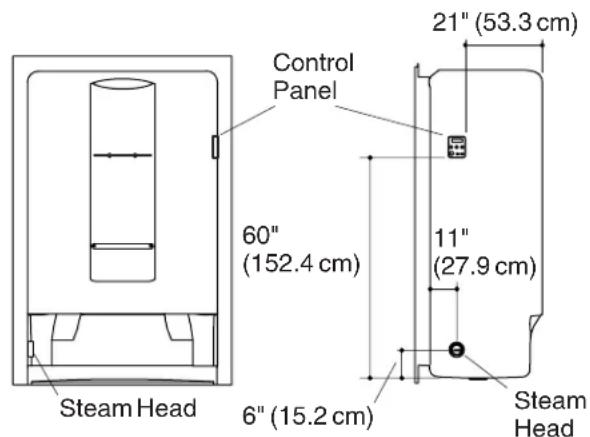
Control Panel 60" (152.4 cm) 21" (53.3 cm) 11" (27.9 cm) Steam Head 6" (15.2 cm) Steam HeadK-1687/1688 Steam Hardware Locations
text_image
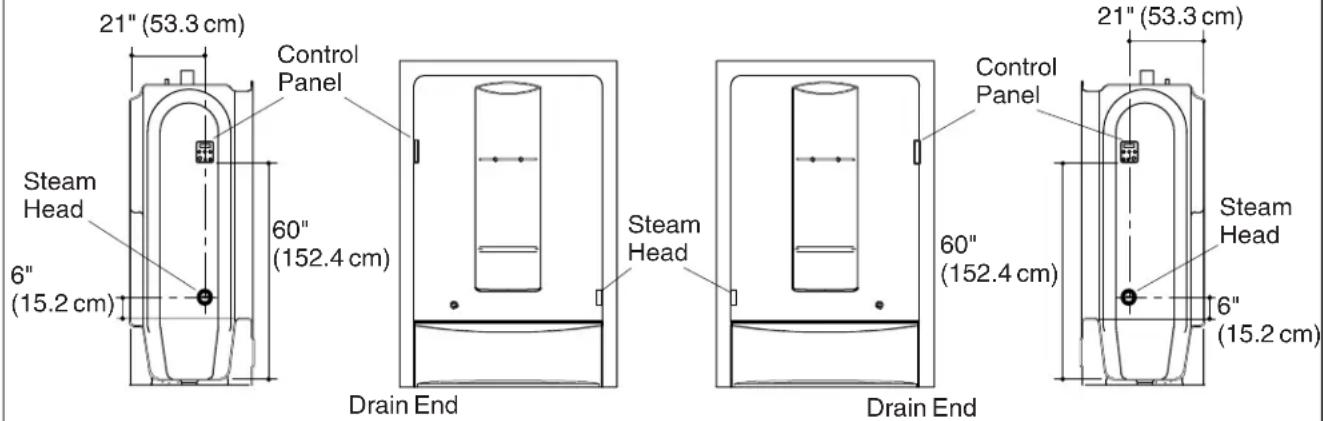
21" (53.3 cm) Control Panel Steam Head 6" (15.2 cm) 60" (152.4 cm) Drain End Steam Head Drain End Control Panel 60" (152.4 cm) 21" (53.3 cm) Steam Head 6" (15.2 cm)K-1681/1683 Steam Hardware Locations K-1682/1684 Steam Hardware Locations
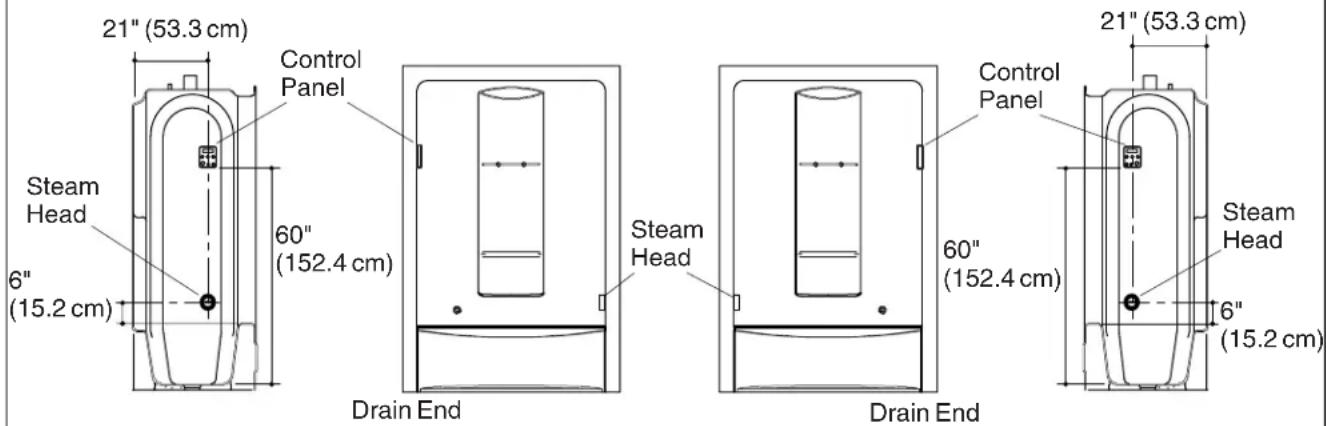
Locate the steam control inside the shower module on the same wall as the shower controls. Locate the steam head on the opposite wall. All measurements are from the inside of the module.
For custom shower applications: Install the steam head 6" (15.2 cm) above the floor and away from any sitting area.
text_image
4-1/2" (11.4 cm) Min 6" (15.2 cm) from floor Threshold Custom Shower Applications3. Recommended Layout Options
text_image
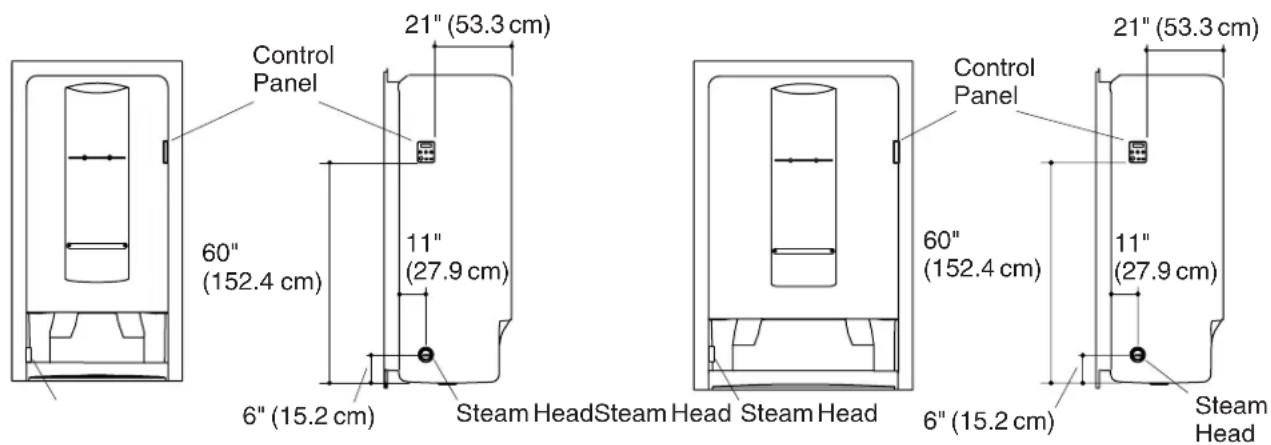
Control Panel 60" (152.4 cm) 21" (53.3 cm) 11" (27.9 cm) 6" (15.2 cm) Steam HeadSteam Head Steam Head Control Panel 60" (152.4 cm) 21" (53.3 cm) 11" (27.9 cm) 6" (15.2 cm) Steam HeadK-1673 & 1677 Steam Hardware Locations K-1678 & 1651 Steam Hardware Locations
text_image
21" (53.3 cm) Control Panel Steam Head 6" (15.2 cm) 60" (152.4 cm) Drain End Steam Head Drain End 60" (152.4 cm) Control Panel 21" (53.3 cm) Steam Head 6" (15.2 cm)K-1641/1643 Steam Hardware Locations K-1642/1644 Steam Hardware Locations
Locate the steam control inside the shower module on the same wall as the shower controls. Locate the steam head on the opposite wall. All measurements are from the inside of the module.
For custom shower applications
Locate the steam control inside the shower module on the same wall as the shower controls. Locate the steam head on the opposite wall. Install the steam head 6" (15.2 cm) above the floor and away from any sitting area.
text_image
e ea. 4-1/2" (11.4 cm) Min 6" (15.2 cm) from floor. Threshold4. Recommended Layout Options
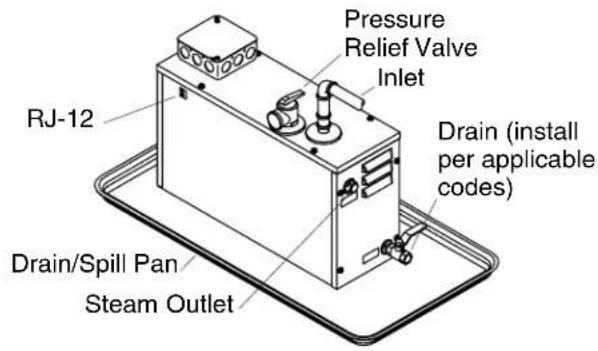
Maintain a 12" (30.5 cm) space around the unit.
text_image
Pressure Relief Valve Inlet Drain (install per applicable codes) RJ-12 Drain/Spill Pan Steam Outlet5. Install the Main Unit

WARNING: Risk of fire. There should be a minimum of 12" (30.5 cm) of air space around the steam generator at all times. This provides an area for the heat generated by the unit to dissipate.

WARNING: Risk of personal injury. Do not plumb a trap or pressure relief valve into the steam line. Plumbing the pressure relief valve into the steam line can be hazardous if the steam outlet is capped.
□ Install the desired drain/spill pan under the unit.
☐ We recommend that the pressure relief valve be connected to a drain line. The drain line should meet all applicable codes.
□ Attach the water supply line to the water inlet.
text_image
Pitch toward generator. Steam Head Drain/Spill Pan 1" (2.5 cm) Min Provide clearance from wall. 6" (15.2 cm) from Floor Wall Stud 2-1/2" (6.4 cm) Do not run pipes down and then up. Steam Trap6. Install the Piping

WARNING: Risk of scalding. Do not plumb a trap, shut-off valve, or pressure relief valve into the steam line. Plumbing the pressure relief valve into the steam line can be hazardous, if the steam outlet is capped.

WARNING: Risk of scalding. Do not locate the steam head near a seat or bench or scalding may occur upon contact with the steam head.
IMPORTANT! The steam head must be installed at least 6" (15.2 cm) from the floor in an area where contact with occupants is unlikely.
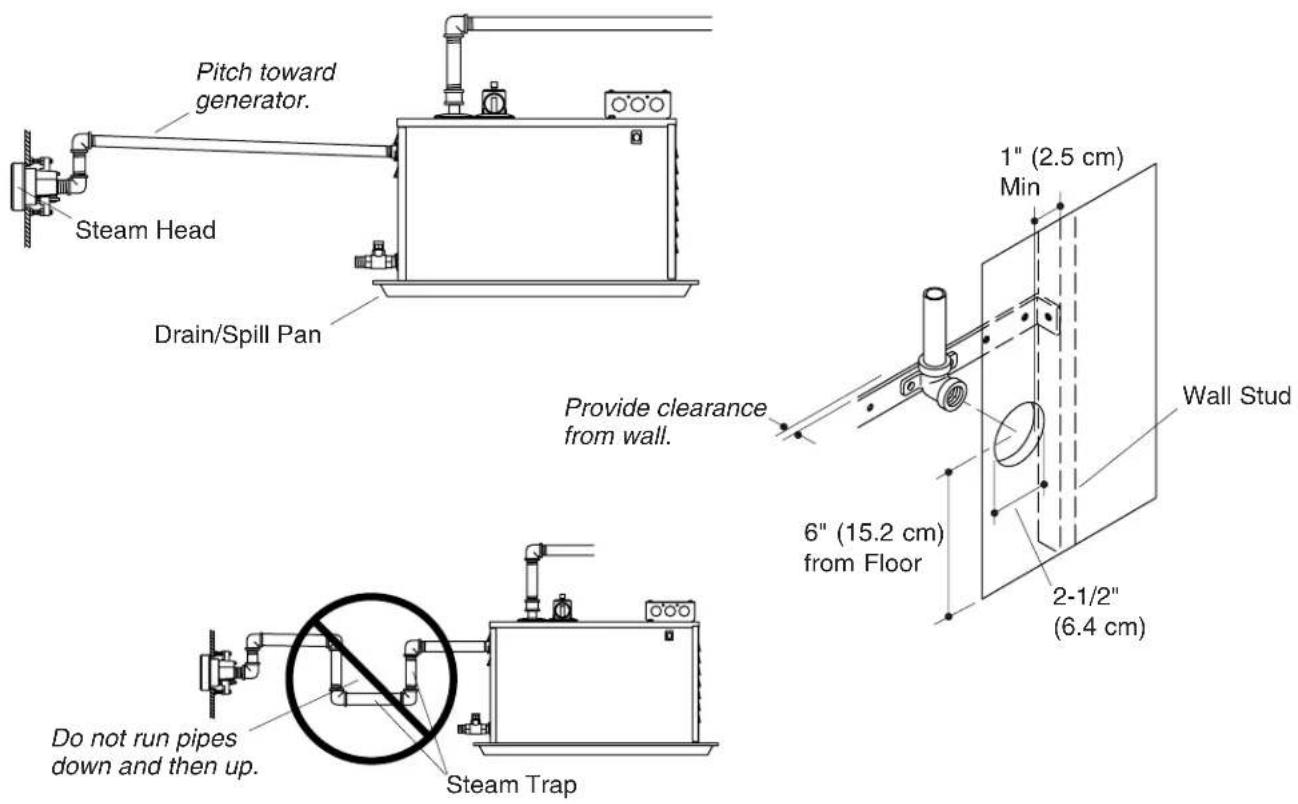
IMPORTANT! Provide clearance between the back wall and the elbow. The elbow should not contact the back wall.
NOTE: The edge of the hole should be at least 1" (2.5 cm) away from all wall studs.
□ Drill a 2-1/2"(6.4 cm) diameter hole in the wall at the desired steam head location.
NOTE: For all the connections, use thread sealant tape and do not overtighten the fittings.
☐ Connect 1/2" NPT copper pipe or copper tubing and a 1/2" copper union to the steam outlet of the steam generator.
IMPORTANT! Never run the steam line down, then up. Running the steam line down and then up will create a steam trap, blocking the flow of steam. The steam line should run up to the steam head from the generator, at a pitch of 3/8" (1 cm) to 1/2" (1.3 cm) per 12" (30.5 cm) of pipe.
IMPORTANT! Never run the steam line perfectly horizontal. Each line should contain a pitch of 3/8" (1 cm) to 1/2" (1.3 cm) per 12" (30.5 cm) of pipe, running up from the steam generator to the steam head.
Install the Piping (cont.)
☐ Install 1/2" copper tubing or pipe from the union to the steam head housing assembly installation location.
- Install a 1/2"NPT connection on the end of the steam housing assembly.
- Secure the connection to the framing whenever possible.
NOTE: The steam generator(s) will not operate without water and a connected control.
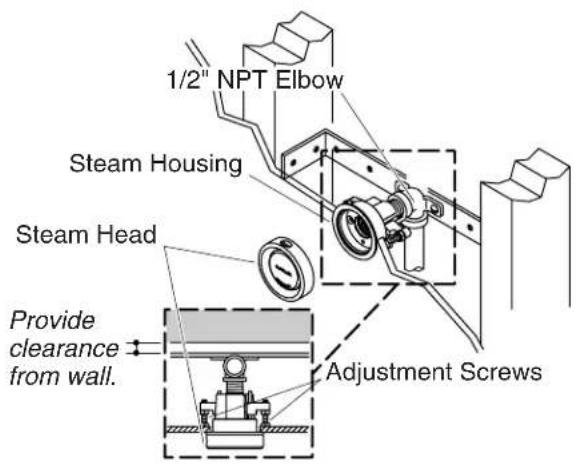
text_image
1/2" NPT Elbow Steam Housing Steam Head Provide clearance from wall. Adjustment Screws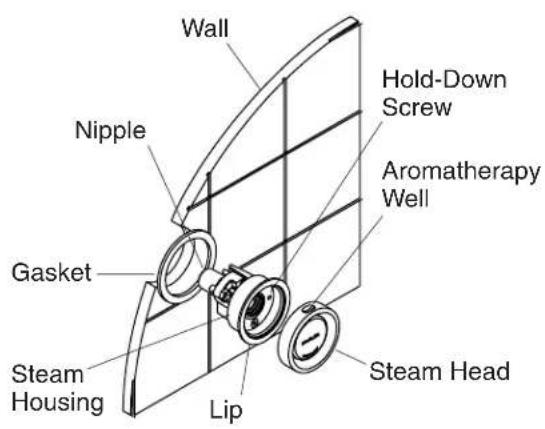
text_image
Wall Nipple Hold-Down Screw Aromatherapy Well Gasket Steam Housing Lip Steam Head7. Install the Steam Head

WARNING: Risk of scalding. Do not locate the steam head near a seat or bench, as the steam head is hot during operation and may scald the user if touched.
IMPORTANT! Do not obstruct the steam head with shut-off valves, plugs, or caps.
NOTE: The steam housing can be adjusted for a wall thickness of 3/16" (5 mm) to 1-1/2" (3.8 cm) using the adjustment screws located on the steam head housing.
☐ Position the gasket (provided) around the base of the steam housing so the gasket is between the wall and the lip of the steam housing.
☐ Turn the adjustment screws on the steam housing until the distance between the back edge of the steam housing and the head of each adjustment screw is equal to the wall thickness.
□ Tighten the adjustment screws securely. Do not overtighten.
- Secure the steam housing to the wall by carefully tightening the hold-down screws.
☐ Thread the steam head clockwise onto the steam housing assembly until it is hand-tight.
☐ Turn the steam head counterclockwise until the aromatherapy well is located at the 12 o'clock position.
□ Apply thread sealant tape to the 1/2"NPT male threads on the steam housing.
□ Push the steam housing assembly through the installation hole from inside the shower.
□ Complete the connection of the steam line to the steam housing.
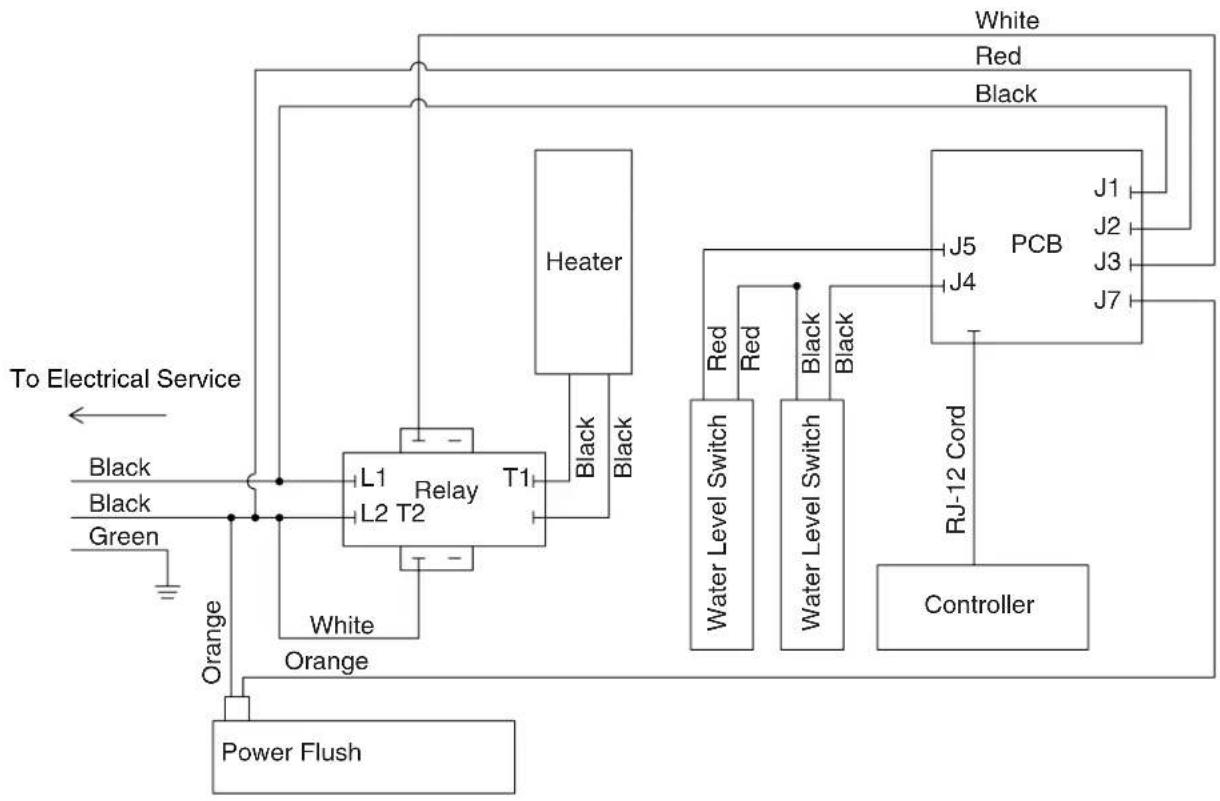
flowchart
graph TD
    A["Power Flush"] --> B["Orange"]
    B --> C["L1 L2 T2 Relay T1"]
    C --> D["Heater"]
    D --> E["White"]
    D --> F["Black"]
    C --> G["White"]
    C --> H["Black"]
    I["Controller"] --> J["PCB"]
    K["Water Level Switch"] --> L["Red"]
    K --> M["Black"]
    N["Water Level Switch"] --> O["Black"]
    P["RJ-12 Cord"] --> Q["J1"]
    P --> R["J2"]
    P --> S["J3"]
    P --> T["J7"]
8. Make Electrical Connections

DANGER: Riskofelectrocution. Disconnect all power before performing these installation steps.
IMPORTANT! All electrical work should be done by a licensed electrician.
IMPORTANT! Do not install a GFCI to this unit. This will prevent nuisance tripping.
IMPORTANT! All electrical wiring must be done in accordance with local codes.
□ Turn off all electricity to the working area at the main breaker panel.
□ Connect 240-volt AC electrical lines to the wires labeled 1 and 2 coming out of the steam generator.
☐ The steam generator should have a dedicated circuit breaker.
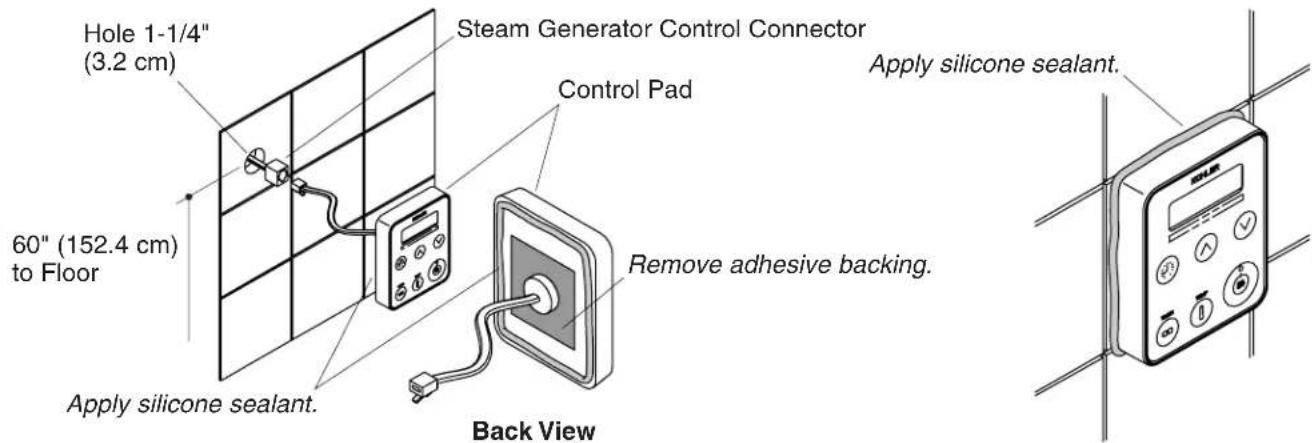
text_image
Hole 1-1/4" (3.2 cm) 60" (152.4 cm) to Floor Steam Generator Control Connector Control Pad Apply silicone sealant. Remove adhesive backing. Back View Apply silicone sealant. SOLR9. Install the Steam Control
IMPORTANT! Do not locate the control kit directly above the steam outlet.
☐ Make sure that the power is turned off at the main breaker panel before proceeding.
- Locate the control kit on the wall 60"(152.4 cm) up from the floor.
☐ At the selected location, drill a 1-1/4"(3.2 cm) hole.
IMPORTANT! Do not pinch, nail, wedge or use undue force on the generator control wire and the control pad wire. Any damage to these wires may result in control kit failure. If the control kit is not installed immediately, protect the end connectors of the wires with tape or other shielding material.
☐ Pull the generator control wire through the drilled hole.
- Restore the power at the main breaker panel.
□ Turn on both water and power to the generator.
☐ Test the control unit to ensure it is functioning properly. Refer to the "Operating the Steam Control" section of this guide to properly test the unit.
□ Remove the adhesive backing from the back of the control pad.
□ Apply a continuous bead of silicone sealant around the back edge of the control pad and around the perimeter of the adhesive area.
□ Press the control pad firmly onto the wall.
□ Apply a bead of silicone sealant around the outside edge of the control pad.
□ Allow the silicone sealant to cure for 24 hours before use.
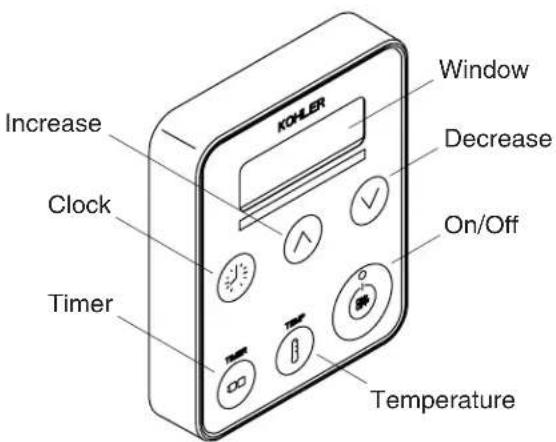
text_image
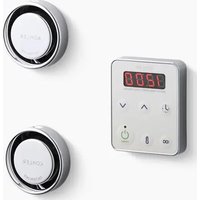
KOHLER Window Decrease On/Off Temperature Timer Clock Increase10. Operating the Steam Control
Steam Control Operation
NOTE: The clock is always displayed in the LED window when the steam is not in use.
☐ Push the "On/Off" button to start the steam.
☐ When the button is pushed the green LED light on the "On/Off" button turns on and remains on until the unit is turned off. The LED window reads "On" for the first three minutes of operation if the factory settings are not changed.
☐ The current temperature is then displayed until the target temperature is reached.
☐ Push the "On/Off" button again to stop the steam. The green LED "On/Off" button turns off and the LED window reads "Off" for 5 seconds, then returns to the time of day.
NOTE: When turning the unit on, the steam duration and temperature settings will be based upon the previous user settings. The settings of a new control unit are 113^ (45^) for 15 minutes.
Steam Control Adjustments
☐ Push the "On/Off" button to start the steam. The control window will display "On" for three minutes. If nothing else is adjusted, the clock time will then be displayed.
□ Push the temperature icon and the LED flashes the previous setting.
☐ To adjust the setting press the up arrow to increase the temperature and the down arrow to decrease the temperature. The maximum allowed temperature is 125^ F ( 52^ C). The minimum operating temperature is 90^ F ( 32^ C).
□ After 5 seconds, the flashing stops and ambient temperature is displayed as it changes to the target temperature.
☐ Push the timer icon and the LED flashes the previous setting. Press the up or down icons to adjust the setting up or down. After 5 seconds the flashing stops and the timer setting is displayed. If the up or down icons are not pushed the time will continue to count down. The minimum operating time is 10 minutes, the maximum operating time is 20 minutes.
☐ Push the clock icon and the LED flashes the current time of day setting. Press the up or down icons to adjust the clock. After 5 seconds, the flashing stops and the set time is displayed.
☐ Press the "On/Off" button to stop the steam and exit at any time. The control window will display "Off" for five seconds and default to the clock time.
☐ To toggle the temperature reading between Fahrenheit and Celsius, push and hold the temperature icon in 3 seconds.
The Power Clean Function
Operating the Steam Control (cont.)

WARNING: Risk of personal injury. Stay out of the showering area when the power clean function is activated.
IMPORTANT!Users will be automatically reminded to use power clean after 600 minutes of steam generator use. The LED window will display "run" "PCLn". The steam generator may be run three times before the power clean function must be run.
NOTE: When the power clean function is activated, water will typically discharge from the steam head.
NOTE: The power clean cycle must be completed before normal steam operation may be resumed.
☐ Toactivatethepowercleanfunction: Push the timer icon, up arrow, and down arrow at the same time for five seconds. The LED window will display "PCLn," "On," then count down the cycle time until the power clean function is complete. The power clean function runs for approximately 45 minutes and shuts off automatically when complete.
NOTE: If electrical power to the steam generator is interrupted during the power clean function, the cycle must be restarted when the electrical power is restored.
11. Troubleshooting Guide
This troubleshooting guide is for general aid only. For service and installation issues and concerns, call 1-800-585–STEAM (7832).
| SymptomsProbableCausesRecommendedAction | ||
| 1."Err 1"appears on the control pad. | A.The power button is stuck. A.Reset the power at the breaker. | |
| 2."Err 2"appears on the control pad. | A. "Up button" is stuck. | A. Reset the power at the breaker. |
| 3."Err 3"appears on the control pad. | A. "Down button" is stuck. | A. Reset the power at the breaker. |
| 4."Err 4"appears on the control pad. | A. "Time" button is stuck. | A. Reset the power at the breaker. |
| 5."Err 5"appears on the control pad. | A.The float switch was tripped for 10 seconds. The generator is not getting enough water.B. Water feed assembly is blocked.C. Water supply to generator is shut off. | A.Check the water supply for proper flow and check that the water supply to generator is turned on.B. Remove and inspect the water feed assembly in the generator.C. Check for a clogged water line and check that the water supply to generator is turned on. |
| 6."Err 6"appears on the control pad. | A.The maximum heat has been exceeded. | A.Shut off the system and allow it to cool. Reset the power at the breaker. |
| 7."Err 7"appears on the control pad. | A. "Temperature" button is stuck. | A. Reset the power at the breaker. |
| 8."Err 8 "appears on the control pad. | A. "Clock" button is stuck. | A. Reset the power at the breaker. |
| 9. Unit shuts off. | A. Unit has been in operation for more than 20 minutes. | A.Turn unit back on. |
| 10. No steam is being generated. | A. Piping not properly attached.B. Steam head blocked. | A. Reattach the pipes properly.B. Remove the steam head (after cooling) and check that the plunger slides freely in the cap. |
| Troubleshooting Guide (cont.) | ||
| SymptomsProbableCausesRecommendedAction | ||
| 11.There is a continuous flow of water from the steam head. (Water flow during automatic purge cycle is normal.) | A.Water supply is incorrectly attached to steam generator.B.Water feed assembly is stuck. B.Remove and inspect the water feed assembly in the generator. | A.Connect the water supply to the proper inlet. |