
Bella Evo - Food Processor Klarstein - Free user manual and instructions
Find the device manual for free Bella Evo Klarstein in PDF.

| Product type | Food Processor |
| Brand | Klarstein |
| Model | Bella Evo |
| Power supply | 220-240 V ~ 50/60 Hz |
| Power | 1500 W |
| Bowl capacity | 5.0 L |
| Included accessories | Dough hook, egg whisk, mixing blade |
| Planetary mixing function | Yes |
| Number of speeds | 12 speeds + pulse (P) |
| Maximum continuous use | 4 minutes, then let cool |
| Cleaning | Wipe base with damp cloth, accessories washable in warm water |
| Safety | Unplug before cleaning, do not immerse base |
| Spare parts available | Flexible mixing blade, whisk, dough hook, mixing blade, mixing bowl |
| Repairability | Repairs by qualified specialist only |
| Warranty | See manufacturer |
Frequently Asked Questions - Bella Evo Klarstein
User questions about Bella Evo Klarstein
0 question about this device. Answer the ones you know or ask your own.
Ask a new question about this device
Download the instructions for your Food Processor in PDF format for free! Find your manual Bella Evo - Klarstein and take your electronic device back in hand. On this page are published all the documents necessary for the use of your device. Bella Evo by Klarstein.
USER MANUAL Bella Evo Klarstein
area
| Category | Value | | -------- | ----- | | 1 | 100 | | 2 | 100 | | 3 | 100 | | 4 | 100 | | 5 | 100 | | 6 | 100 | | 7 | 100 | | 8 | 100 | | 9 | 100 | | 10 | 100 | | 11 | 100 | | 12 | 100 | | 13 | 100 | | 14 | 100 | | 15 | 100 | | 16 | 100 | | 17 | 100 | | 18 | 100 | | 19 | 100 | | 20 | 100 | | 21 | 100 | | 22 | 100 | | 23 | 100 | | 24 | 100 | | 25 | 100 | | 26 | 100 | | 27 | 100 | | 28 | 100 | | 29 | 100 | | 30 | 100 | | 31 | 100 | | 32 | 100 | | 33 | 100 | | 34 | 100 | | 35 | 100 | | 36 | 100 | | 37 | 100 | | 38 | 100 | | 39 | 100 | | 40 | 100 | | 41 | 100 | | 42 | 100 | | 43 | 100 | | 44 | 100 | | 45 | 100 | | 46 | 100 | | 47 | 100 | | 48 | 100 | | 49 | 100 | | 50 | 100 | | 51 | 100 | | 52 | 100 | | 53 | 100 | | 54 | 100 | | 55 | 100 | | 56 | 100 | | 57 | 100 | | 58 | 100 | | 59 | 100 | | 60 | 100 | | 61 | 100 | | 62 | 100 | | 63 | 100 | | 64 | 100 | | 65 | 100 | | 66 | 100 | | 67 | 100 | | 68 | 100 | | 69 | 100 | | 70 | 100 | | 71 | 100 | | 72 | 100 | | 73 | 100 | | 74 | 100 | | 75 | 100 | | 76 | 100 | | 77 | 100 | | 78 | 100 | | 79 | 100 | | 80 | 100 | | Note: The actual values are not provided in the code. I have used the label 'Value' as a placeholder for the value detection. You would need to run the code to get the actual values from the code list. Please note that the actual values would be the result of this example. You would need to run the code to get the actual values from the code list. You would need to run the code to get the actual values from the code list. You would need to run the code to get the actual values from the code list. You would need to run the code to get the actual values from the code list. You would need to run the code to get the actual values from the code list. You would need to run the code to get the actual values from the code list. You would need to run the code to get the actual values from you would need to run the code. You would need to run the code to get the actual values from you would need to run the code.INHALT

natural_image
Three technical line drawings of mechanical components or parts, labeled ⑨, ⑩, and ○, with no visible text or symbols.natural_image
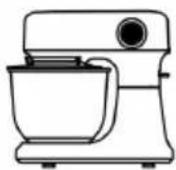
Line drawing of a kitchen mixer with a bowl (no text or symbols)Abb. 1

natural_image
Line drawing of a kitchen mixer with a side view showing the cup (no text or symbols)Abb. 2

natural_image
Line drawing of a kitchen mixer with a bowl (no text or symbols)Abb. 3
natural_image
Line drawing of a kitchen mixer with a bowl (no text or symbols)Abb. 4

natural_image
Line drawing of a kitchen mixer with bowl and stand (no text or symbols)Abb. 5
natural_image
Symbol of a trash bin with crossed lines indicating no waste or discharge (no text or labels)Congratulations on purchasing this equipment. Please read this manual carefully and take care of the following hints on installation and use to avoid technical damages. Any failure caused by ignoring the items and cautions mentioned in the operation and installation instructions are not covered by our warranty and any liability. Scan the QR code to get access to the latest user manual and more product information.

CONTENTS
Safety Instructions 16
Product Overview 18
Operation 19
Use of Attachments 21
Recommendations for Speed Levels 22
Cleaning 23
Disposal Considerations 24
Manufacturer & Importer (UK) 24
TECHNICAL DATA
| Article number 10047841, 10047842, 10047843, 10047844, 10047845 | |
| Power supply 220-240 V ~ 50/60 Hz | |
| Power consumption 1500 W | |
| Bowl capacity 5.0 L | |
OPTIONAL ACCESSORIES
| Item number Item | |
| 10036472 Flexi-Mixing blade | |
| 10036473 Whisk | |
| 10036474 Dough hook | |
| 10036475 Mixing Blade | |
| 10047846 Mixing bowl |
SAFETY INSTRUCTIONS
- Before use, check the voltage on the device badge and connect the device only to sockets which correspond to the voltage of the device. If you are not sure whether your connections meet the requirements, consult an electrician or your power supplier.
• Always turn the motor off before plugging the motor into an electrical outlet.
- To prevent electric shock, never completely immerse the base in water or other liquids.
- If the power cord is damaged, it must be replaced by the manufacturer, the Klarstein service centre, or a similarly qualified person.
- Do not bend the power cord or allow it to hang over the work surface to prevent it from getting caught.
- Do not place the appliance near open stoves, hot ovens, or easily flammable materials such as curtains or textiles.
- Before use, place the appliance on a stable, level surface.
• Children 8 years of age and older, mentally, sensory and physically impaired persons may only use the device if they have been thoroughly familiarized with its functions and safety precautions by a supervisor responsible for them and understand the associated risks.
- Ensure that children do not play with the device.
- Place the device as close as possible to the power source so that you can pull the plug quickly and easily if necessary.
- Check the power cord regularly for damage. Do not use the unit with the power cord damaged.
- Only use the unit indoors and for the specified purpose.
- Keep children away from the unit and stow it out of the reach of children.
- Do not use the device without contents and only under supervision.
- Do not touch any moving parts with your hands during use.
- Keep the operating instructions and pass on the device only with the operating instructions.
- Only use original accessories.
- Unplug the appliance from the wall outlet before cleaning or discontinuing use.
- Switch off the appliance and disconnect the plug before changing or removing any moving parts.
- The unit contains parts that are not accessible to the user. Do not remove any covers and do not attempt to repair the unit yourself. Repairs may only be carried out by qualified specialists.
- Do not connect the unit to multiple sockets, external timers or remotely controlled sockets.
- This appliance is intended to be used in household and similar applications such as:
- Staff kitchen areas in shops, offices and other working environments;
- Farm houses:
- By clients in hotels, motels and other residential type environments;
- Bed and breakfast type environments.
Note: The device is only designed for short-term operation, i.e. it should not be operated continuously for more than 4 minutes. Then switch off the unit and let the motor cool down before switching it on again.
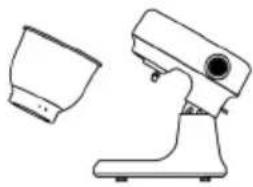
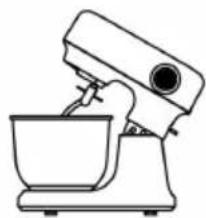
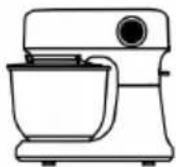
PRODUCT OVERVIEW
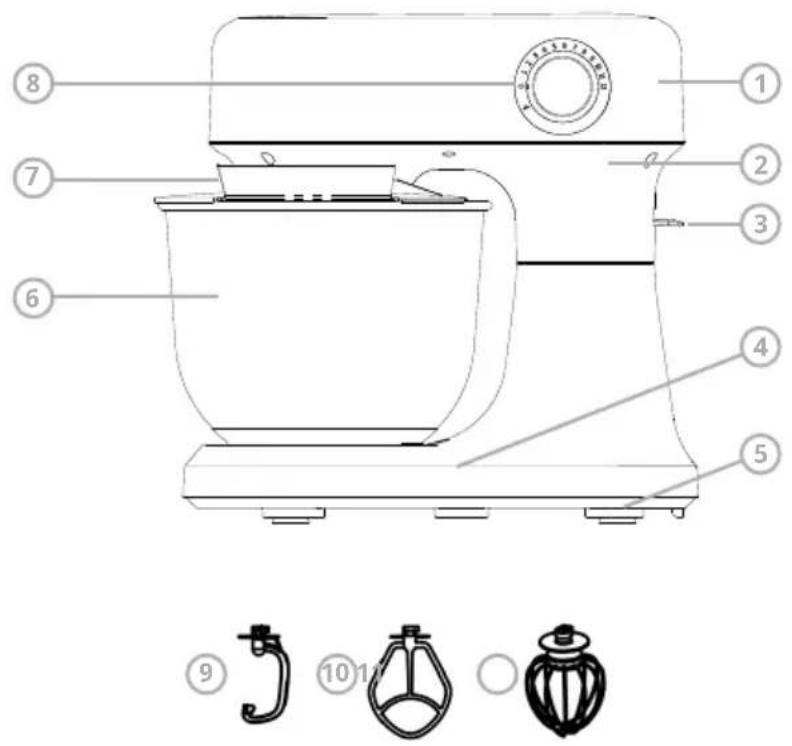
1 Top cover
7 Bowl cover
2 Upper housing
8 Speed switch
3 Unlock lever
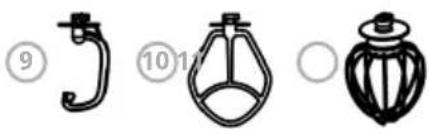
9 Dough hook
4 Lower body
10 Mixing blade
5 Suction feet
11 Egg whisk
6 Mixing bowl
OPERATION
Before the appliance is used for the first time, all attachments and accessory parts must be cleaned as described in the section Cleaning and care.
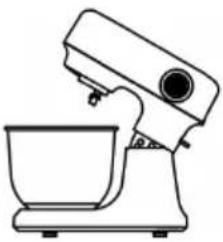
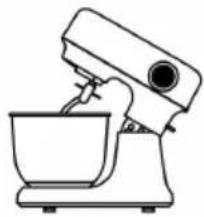
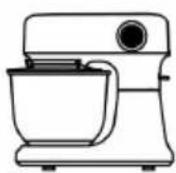
- Mix the food ingredients thoroughly in accordance with the detail in the recipe. Then lift up the unlock lever(3) and swing up the drive arm (see Fig 1&2).
natural_image
Line drawing of a kitchen mixer with a bowl (no text or symbols)Fig. 1

natural_image
Line drawing of a kitchen mixer with a separate bowl (no text or symbols)Fig. 2

natural_image
Line drawing of a kitchen mixer with bowl (no text or symbols)Fig. 3
-
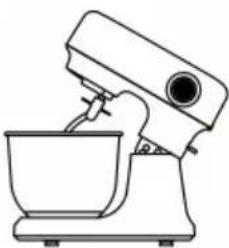
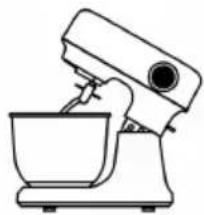
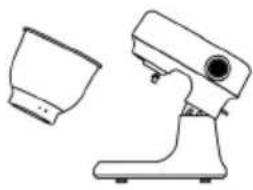
Place the mixing bowl (6) on the device plate, and turn the mixing bowl unit in clockwise direction until it is fixed. (see Fig. 4)
-
Fix the dough hook (9) or the egg whisk (11) or the mixing blade (10) on the blade connector and rotate the blade connector anticlockwise until it engages firmly. (see Fig. 4&5)
natural_image
Line drawing of a kitchen mixer with a bowl (no text or symbols)Fig. 4

natural_image
Line drawing of a kitchen mixer with bowl and mixing bowl (no text or symbols)Fig. 5

-
Then lift up the unlock lever (3) and press the top cover (1) downwards with one hand. (see Fig.4&5)
-
Insert the power plug in the power socket and speed switch (8) in the "P" setting for short usage or set the operating switch to the desired position 1-12 for longer usage.
-
Turn the speed switch (8) in the "0" setting.
-
Lift up the top cover (1) by the lifting handle.
-
You can now remove the mixing bowl (6) from the device plate.
Notes on commissioning
- Before fitting, changing, removing or cleaning any attachments, ensure that the appliance has been switched off and disconnected from the mains.
- Caution: After switching off, always wait until the motor has come to a complete standstill. Do not touch any moving parts.
- Press the release button to release the drive head. Tilt the head upwards until it is heard locking safely into place.
- Fit the main bowl and lock it by turning it clockwise.
- Place the splash-guard ring onto the bowl with the filler opening to the left.
- When fitting the attachments, ensure that the pin on the mounting fits safely into the corresponding recess in the attachment.
- Push the attachment all the way up, then lock it by turning it anti-clockwise (about 90^ ).
- Caution: If an attachment should touch the splash-guard ring when being fitted, lower the tilt-arm again and switch the unit briefly on; this will bring the drive head in a centred position inside the bowl.
USE OF ATTACHMENTS
To mix or knead dough
- Suggestion flour and water at a ratio of 5:3, and the maximum quantity of flour is 0.6 kg.
- From speed 1 for mix 20 second, and speed 2 for mix 20 second, speed 3 for mix 20 second afterwards speed 4 for about 3 minutes.
- When filling the mixing bowl, please ensure that the maximum quantity is not exceeded.
- Maximum quantity of mixture is not exceeded 0.96 kg.
- The dough hook or mixing blade should be used.
- Please do not use it in low speed for a long time
Whipping egg whites or cream
- Switch on speed 12, whip the egg whites without stopping for about 4 minutes, according to the size of the eggs, until stiff.
- For whipping cream, whip 250ml fresh cream at speed 12 for about 4 minutes.
- When filling the mixing bowl with fresh milk, cream or other ingredients, please ensure that the maximum quantity is not exceeded.
- The egg whisk should be used.
Mixing shakes, cocktails or other liquids:
- Mix the ingredients according to the available recipe, from speed 5 to 11 for about 4 minutes.
- Do not exceed the maximum quantity for the mixing bowl.
- The mixer beater should be used.
Planetary action
The attachments (whisk, kneading hooks etc.) are fitted off-centre, causing them to rotate round their own axis as well as round the main drive axis. This action ensures thorough mixing of the ingredients from the side of the bowl towards the centre.
Appropriate speed settings
- Always start with a low speed setting, especially when processing liquid or creamy ingredients, or any mixture containing flour.
- Settings 1 to 4 are suitable for slow blending, mixing, stirring in of ingredients and processing liquid ingredients as well as making dough.
- Settings 5 to 11 is suitable for making cake or pastry dough.
- Settings12 are suitable for beating with the whisk.
Whisk
The egg whisk is suitable for light blending of liquid mixtures such as sauces, egg-white and cream. The egg whisk can be used with the settings 12.
Mixing blade
For medium mixtures
This blade is useful for medium mixtures such as thick batter-mix and mashed potatoes, using the speed settings 1-11.
Dough hook
For heavy dough
This hook is suitable for processing heavy dough using the speed settings 1-4. Please do not use it in low speed for a long time.
RECOMMENDATIONS FOR SPEED LEVELS
| Gear range Attachment Description | ||
| 1-4 Dough hook | Kneading and mixing firm dough or ingredients.Ingredients0.6 kg plain flour0.36 kg lukewarm waterPreparation1. Put the ingredients in the mixing bowl.2. Fit the splash guard and dough hook.3. Speed:On level 1: knead for 20 sec.On level 2: knead for 20 sec.On level 3: knead for 20 sec .On level 4: knead for 3 min . | |
| 5-12Pulse button | Egg whisk - Whipping cream- Egg whites- Mayonnaise- Beating butter until fluffyIngredients6 egg whitesPreparation1. Put the egg whites in the mixing bowl.2. Fit the splash guard and the balloon whisk.3. Beat the egg whites at level 12 for 4 minutes until stiff. | |
CLEANING

WARNING!
Danger of electric shock
Disconnect the power supply plug from the mains socket before cleaning. Never immerse the base unit in water.
- Disconnect the power supply plug from the mains socket before cleaning.
- Never immerse the base unit in water.
- Never use scouring, corrosive or abrasive cleaning materials as these could damage the appliance.
Cleaning the base unit
- Clean the base unit with a damp cloth. A little detergent may also be used.
- Wipe over with clean water.
- Do not use the base unit again until it is completely dry.
Cleaning the accessories
- Put the parts in cold or lukewarm water to soften dough residues. You can also add a little detergent to the water.
- Remove softened dough residues with a washing-up brush.
- Rinse off with clean water.
- Allow parts to dry completely before using them again.
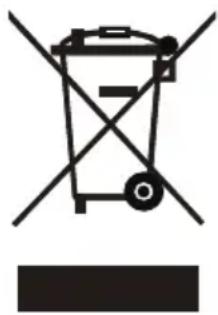
DISPOSAL CONSIDERATIONS
natural_image
Symbol of a trash bin with crossed lines indicating no waste, and a solid black rectangle below (no text or labels)If there is a legal regulation for the disposal of electrical and electronic devices in your country, this symbol on the product or on the packaging indicates that this product must not be disposed of with household waste. Instead, it must be taken to a collection point for the recycling of electrical and electronic equipment. By disposing of it in accordance with the rules, you are protecting the environment and the health of your fellow human beings from negative consequences. For information about the recycling and disposal of this product, please contact your local authority or your household waste disposal service.
MANUFACTURER & IMPORTER (UK)
Chal-Tec GmbH, Mühlenstrasse 25, 10243 Berlin, Germany.
Contact: info@electronic-star.de
Estimado cliente:
ÍNDICE

natural_image
Three technical line drawings of mechanical components or parts, labeled ⑨, ⑩, and ○, with no visible text or symbols.natural_image
Line drawing of a kitchen mixer with a bowl (no text or symbols)Fig. 1
natural_image
Line drawing of a kitchen stand with a side view showing a bowl and handle (no text or symbols)Fig. 2
natural_image
Line drawing of a kitchen mixer with bowl (no text or symbols)Fig. 3
natural_image
Line drawing of a kitchen mixer with a bowl (no text or symbols)Fig. 4

natural_image
Line drawing of a kitchen mixer with a bowl (no text or symbols)Fig. 5

natural_image
Symbol of a trash bin with crossed lines indicating no waste, and a solid rectangle below (no text or labels)SOMMAIRE

natural_image
Three technical line drawings of mechanical components or parts, labeled ⑨, ⑩, and ○, with no visible text or symbols.natural_image
Line drawing of a kitchen mixer with a bowl (no text or symbols)Fig. 1

natural_image
Line drawing of a kitchen mixer with a side view showing the cup (no text or symbols)Fig. 2
natural_image
Line drawing of a kitchen mixer with bowl and mixing bowl (no text or symbols)Fig. 3
natural_image
Line drawing of a kitchen mixer with a bowl (no text or symbols)Fig. 4
natural_image
Line drawing of a kitchen mixer with a bowl (no text or symbols)Fig. 5
natural_image
Symbol of a trash bin with crossed x and y axes, no text or labels presentINDICE
natural_image
Three technical line drawings of mechanical components or parts, labeled ⑨, ⑩, and ○, with no visible text or symbols.natural_image
Line drawing of a kitchen mixer with a bowl (no text or symbols)Fig. 1
natural_image
Line drawing of a kitchen mixer with a separate bowl (no text or symbols)Fig. 2

natural_image
Line drawing of a kitchen mixer with a bowl (no text or symbols)Fig. 3
natural_image
Line drawing of a kitchen mixer with a bowl (no text or symbols)Fig. 4

natural_image
Line drawing of a kitchen mixer with a bowl (no text or symbols)Fig. 5
natural_image
Symbol of a trash bin with crossed lines indicating no waste, and a solid rectangle below (no text or labels)area
| Category | Value | | -------- | ----- | | 1 | 100 | | 2 | 100 | | 3 | 100 | | 4 | 100 | | 5 | 100 | | 6 | 100 | | 7 | 100 | | 8 | 100 | | 9 | 100 | | 10 | 100 | | 11 | 100 | | 12 | 100 | | 13 | 100 | | 14 | 100 | | 15 | 100 | | 16 | 100 | | 17 | 100 | | 18 | 100 | | 19 | 100 | | 20 | 100 | | 21 | 100 | | 22 | 100 | | 23 | 100 | | 24 | 100 | | 25 | 100 | | 26 | 100 | | 27 | 100 | | 28 | 100 | | 29 | 100 | | 30 | 100 | | 31 | 100 | | 32 | 100 | | 33 | 100 | | 34 | 100 | | 35 | 100 | | 36 | 100 | | 37 | 100 | | 38 | 100 | | 39 | 100 | | 40 | 100 | | 41 | 100 | | 42 | 100 | | 43 | 100 | | 44 | 100 | | 45 | 100 | | 46 | 100 | | 47 | 100 | | 48 | 100 | | 49 | 100 | | 50 | 100 | | 51 | 100 | | 52 | 100 | | 53 | 100 | | 54 | 100 | | 55 | 100 | | 56 | 100 | | 57 | 100 | | 58 | 100 | | 59 | 100 | | 60 | 100 | | 61 | 100 | | 62 | 100 | | 63 | 100 | | 64 | 100 | | 65 | 100 | | 66 | 100 | | 67 | 100 | | 68 | 100 | | 69 | 100 | | 70 | 100 | | 71 | 100 | | 72 | 100 | | 73 | 100 | | 74 | 100 | | 75 | 100 | | 76 | 100 | | 77 | 100 | | 78 | 100 | | 79 | 100 | | 80 | 100 | | Note: The actual values are not provided in the code. I have used the label 'Value' as a placeholder for the value detection. You would need to run the code to get the actual values from the code list. Please note that the actual values would be the result of this example. You would need to run the code to get the actual values from the code list. You would need to run the code to get the actual values from the code list. You would need to run the code to get the actual values from the code list. You would need to run the code to get the actual values from the code list. You would need to run the code to get the actual values from the code list. You would need to run the code to get the actual values from the code list. You would need to run the code to get the actual values from you would need to run the code. You would need to run the code to get the actual values from you would need to run the code.
KLARSTEIN

- INHALT
- CONTENTS
- TECHNICAL DATA
- OPTIONAL ACCESSORIES
- SAFETY INSTRUCTIONS
- PRODUCT OVERVIEW
- OPERATION
- Notes on commissioning
- USE OF ATTACHMENTS
- To mix or knead dough
- Whipping egg whites or cream
- Mixing shakes, cocktails or other liquids:
- Planetary action
- Appropriate speed settings
- Whisk
- Mixing blade
- Dough hook
- CLEANING
- WARNING!
- Danger of electric shock
- Cleaning the base unit
- Cleaning the accessories
- DISPOSAL CONSIDERATIONS
- MANUFACTURER & IMPORTER (UK)
- Estimado cliente:
- ÍNDICE
- SOMMAIRE
- INDICE
- KLARSTEIN
Brand : Klarstein
Model : Bella Evo
Category : Food Processor