ProGuard LI 3 Cordless - Vacuum Cleaner ProTeam - Free user manual and instructions
Find the device manual for free ProGuard LI 3 Cordless ProTeam in PDF.


User questions about ProGuard LI 3 Cordless ProTeam
0 question about this device. Answer the ones you know or ask your own.
Ask a new question about this device
Download the instructions for your Vacuum Cleaner in PDF format for free! Find your manual ProGuard LI 3 Cordless - ProTeam and take your electronic device back in hand. On this page are published all the documents necessary for the use of your device. ProGuard LI 3 Cordless by ProTeam.
USER MANUAL ProGuard LI 3 Cordless ProTeam
ProGuard LI, 3-Gallon Cordless Wet/Dry Vacuum
Important Safety Instructions .... 3
Important Safety Instructions for Battery and Charger . . . 4
Product Specifications .... 5
Carton Contents 5
Preparation For Operation .... 6
Filter Assembly/Replacement 7
Hose and Accessory Storage 8
Operation 9
Battery Installation/Removal. 12
Filter Maintenance 13
Preventive Maintenance .... 15
Troubleshooting 15
ProGuard LI Assembly 16
ProGuard LI Replacement Parts 17
Limited Warranty 18
Spanish 21
French 41
Go to www.pro-team.com to register your new vacuum.
INSPECTION
Carefully unpack and inspect your new ProTeam vacuum for shipping damage. Each unit is tested and thoroughly inspected before shipping. All returns must have a Return Authorization Number (RAN). To request a RAN or to ask questions regarding any shipping damage, contact ProTeam at 866.888.2168 or customerservice.proteam@emerson.com.
This Owner's Manual has important information for the use and safe operation of this machine. Read this manual carefully before starting the machine. Keep this manual available at all times and instruct all operators to read this manual. If instructions are not followed, an injury may occur, or equipment, furniture, or buildings may become damaged.
For new manuals please contact ProTeam, Inc. at: customerservice.proteam@emerson.com 8100 W. Florissant Ave., Building T., St. Louis, MO 63136 866.888.2168
or visit www.pro-team.com for a downloadable version.
The contents of this manual are based on the latest product information available at the time of publication. ProTeam reserves the right to make changes or improvements to its machines without notice.
IMPORTANT SAFETY INSTRUCTIONS
Safety is a combination of common sense, staying alert, and knowing how your Wet/Dry vacuum cleaner (“Vacuum”) works.
Safety Signal Words
▲ DANGER: Indicates a hazardous situation which, if not avoided, will result in death or serious injury.
⚠ WARNING: Indicates a hazardous situation which, if not avoided, could result in death or serious injury.
CAUTION: Indicates a hazardous situation which, if not avoided, could result in minor or moderate injury.
When using your Vacuum, always follow basic safety precautions including the following:
WARNING
To reduce the risk of fire, electric shock, or injury:
- Read and understand this manual and all labels on the Wet/Dry Vacuum before operating.
- Use only as described in this manual.
- Do not leave the Vacuum running while unattended - you may fail to notice important signs indicating abnormal operation such as loss of suction, debris/liquid exiting exhaust, or abnormal motor noises. Immediately stop using the Vacuum if you notice these signs.
- Use only the batteries specified in this manual. See "Battery Installation" section.
- Sparks inside the motor can ignite flammable vapors or dust. To reduce the risk of fire or explosion, do not use near combustible liquids, gases, or dusts, such as gasoline or other fuels, lighter fluid, cleaners, oil-based paints, natural gas, coal dust, magnesium dust, grain dust, aluminum dust, or gun powder.
- Do not vacuum anything that is burning or smoking, such as cigarettes, matches, or hot ashes.
- To reduce the risk of inhaling toxic vapors, do not vacuum or use near toxic or hazardous materials.
- To reduce the risk of electric shock, do not expose Vacuum or batteries to rain. Store indoors.
- Do not allow to be used as a toy. Close attention is necessary when used by or near children.
- Do not use with a torn filter or without the filter installed except when vacuuming liquids as described in this manual. Dry debris ingested by the impeller may damage the motor or be exhausted back into the air.
- Do not handle the switch, Vacuum, or battery with wet hands.
- Do not put any object into ventilation openings. Do not vacuum with any ventilation openings blocked; keep free of dust, lint, hair or anything that may reduce air flow.
- Keep hair, loose clothing, fingers, and all parts of body away from openings and moving parts.
- To reduce the risk of falls, use extra care when cleaning on stairs.
VACUUM SAFETY (Continued)
- To reduce the risk of personal injury or damage to Vacuum, use only ProTeam recommended accessories.
-
When using as a blower:
-
Direct air discharge only at work area.
- Do not set down in liquid; electric shock could occur.
- Do not direct air at bystanders.
- Keep children away when blowing.
- Do not use blower for any job except blowing dirt and debris.
- Do not use as a sprayer.
-
Wear safety eyewear.
-
To reduce the risk of eye injury, wear safety eyewear. The operation of any utility Vacuum or blower can result in foreign objects being blown into the eyes, which can result in severe eye damage.
CAUTION:
To reduce the risk of hearing damage, wear ear protectors when using for extended time or in a noisy area.
• For dusty operations, wear dust mask.
- Static shocks are common when the relative humidity of the air is low. Vacuuming fine debris with your Vacuum can deposit static charge on the hose or Vacuum. To reduce the frequency of static shocks or when using this Vacuum, add moisture to the air with a humidifier.
Observe the following warnings that appear on the Wet/Dry Vacuum: WARNING:
• Only use ProTeam Battery Number R840087 (107496)
- For your own safety, read and understand Owner's Manual. Do not run unattended. Do not pick up hot ashes; coals; toxic, flammable or other hazardous materials. Do not use around explosive liquids or vapors.
- Do not expose to rain. Store indoors. To reduce the risk of electric shock, do not handle battery with wet hands or place wet battery into charger.
IMPORTANT SAFETY INSTRUCTIONS FOR BATTERY AND CHARGER
- Read all instructions in the charger's and battery's manuals and on the charger and battery before using.
-
Use only battery specified in this manual with this Vacuum.
-
Recharge battery only with the specified charger.
- Ensure the switch is in the OFF pos before connecting to battery pack, picking up or carrying the Vacuum.
SAVE THESE INSTRUCTIONS
PRODUCT SPECIFICATIONS
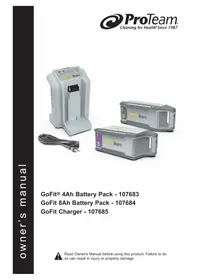
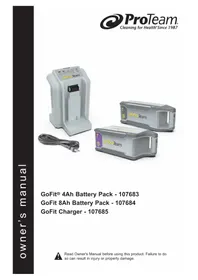
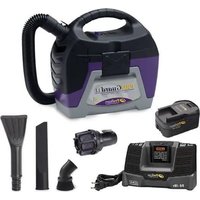
This Wet/Dry Vacuum is shipped with 1 battery and a charger. Additional batteries or chargers can be purchased from your authorized ProTeam distributor.
Continuous Vacuum Run Time: Approximately 14 minutes per charge
Recharge Time: Approximately 60 minutes
Battery Type: Model No. R840087 (107496)
Battery Technology: Lithium Ion
Battery Charger: Charger Model No. R840093 (107490)
These are typical characteristics based on product testing. You may experience greater or lesser times and cycles based upon depth of discharge during run period, charging regimen and run period duty cycle.
PROGUARD LI 3 CARTON CONTENTS
OVERVIEW
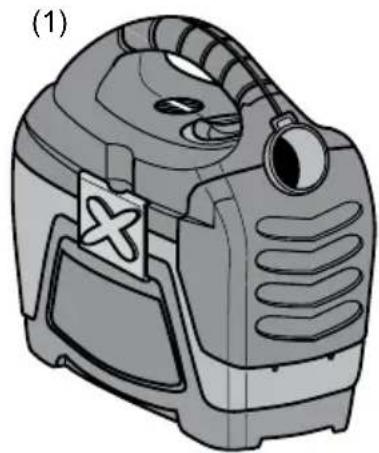
• 3-Gallon Cordless Wet/Dry Vacuum (1)
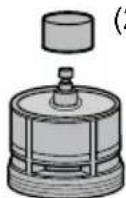
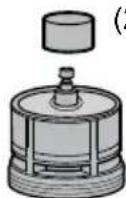
- Float (2)
- Filter Cage (3)
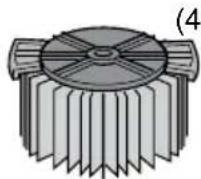
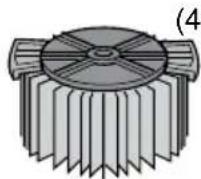
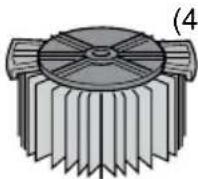
- Filter (4)
- Expandable Hose (5)
- Dusting Brush (6)
- Crevice Tool (7)
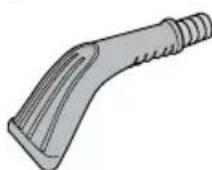
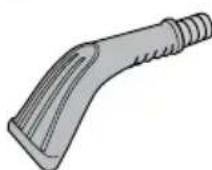
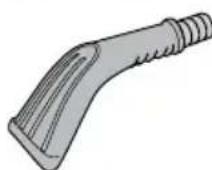
- Claw Nozzle (8)
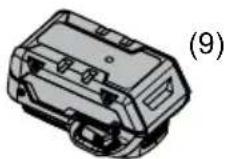
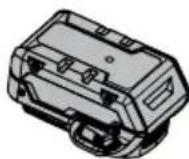
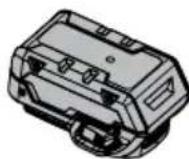
- Battery (9)
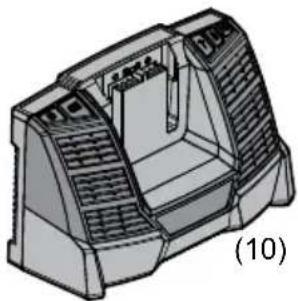
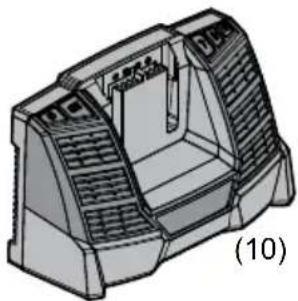
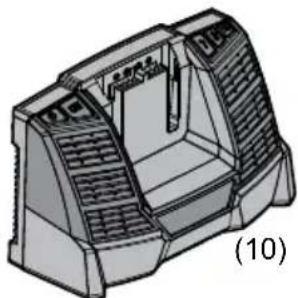
- Charger (10)
• Owner's Manuals (11)
natural_image
Illustration of a portable device with a cross symbol on its side panel (no text or symbols present)
natural_image
Illustration of a coiled, flexible hose or tube with no text or symbols(5)

(6)

(7)
natural_image
Technical line drawing of a mechanical component with no visible text or symbols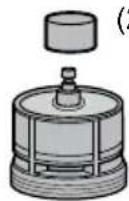
(2)
(3)
(4)
(8)

natural_image
Three overlapping gray rectangular sheets with black outlines, no text or symbols present(11)
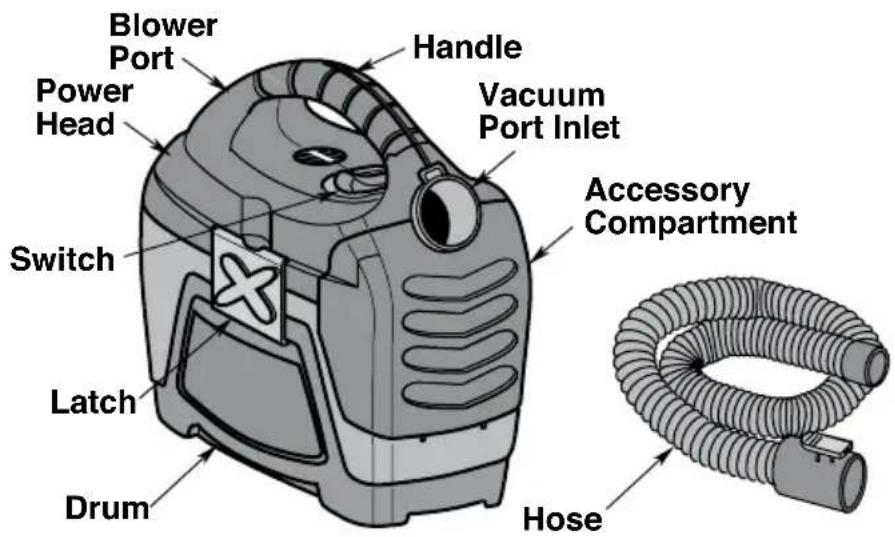
This Cordless Wet/Dry Vacuum is intended for commercial use. It may be used for light vacuuming of wet or dry media and may be used as a blower. The lightweight and cordless design provides versatility and access to areas where electrical outlets are not readily available.
Familiarize yourself with the controls and features of your cordless Wet/Dry Vacuum and read the entire Owner's Manual for specific usage before operating (Figure A).
text_image
Blower Port Power Head Switch Latch Drum Handle Vacuum Port Inlet Accessory Compartment HoseFigure A
FILTER ASSEMBLY/REPLACEMENT
WARNING - To reduce the risk of injury from accidental starting, remove battery before removing the filter.
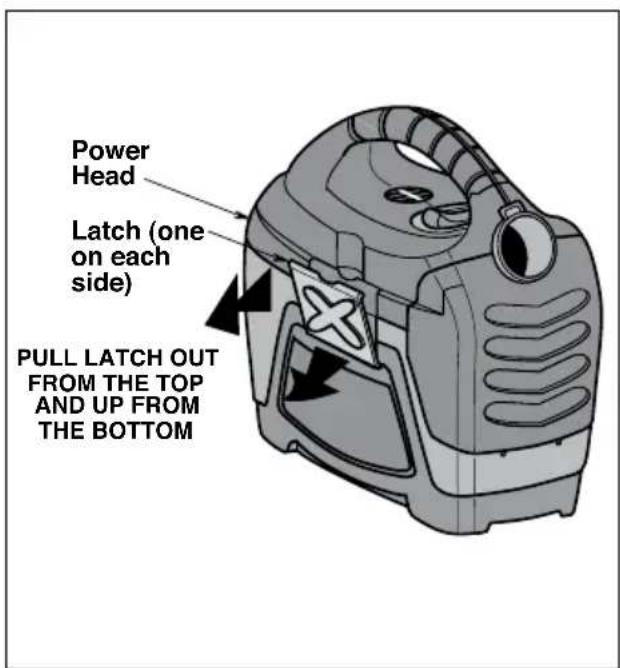
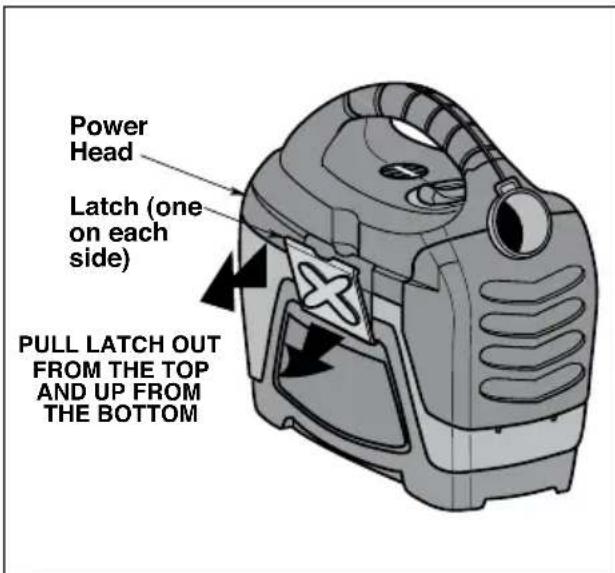
- Grasp the drum latches on both the right and left side of the power head. Slowly pull the drum latches out and up from the drum. Lift the power head off the drum. Place the lid assembly of the Vacuum upside down (Figure B).
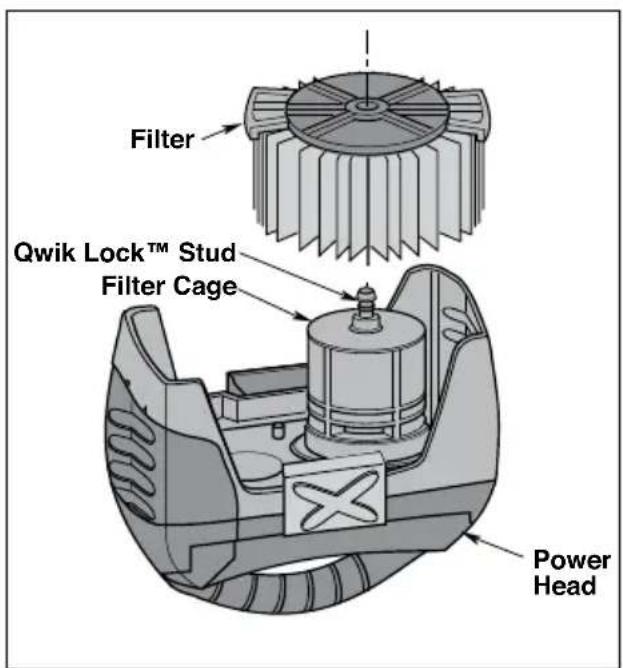
- Carefully slide the Qwik Lock™ filter over the filter cage and press down on the outside edge of the filter until the rubber gasket on the bottom of the filter seats securely around the base of the filter cage and against the lid (Figure C).
- Align the small center hole in the top of the filter over the Qwik Lock™ stud on the filter cage. Press firmly on top of the filter near the stud to allow the filter to snap over the ball on the end of the stud. The filter is now attached.
NOTE: Failure to properly seat the bottom gasket could result in debris bypassing the filter.
- To assemble the power head to the drum, position power head over drum, with drum latches lined up with recess in drum. (The power head will only fit on the drum one way.)
- Position bottom of the latch in drum recess. Push top of latch towards power head to lock.
- Your Vacuum is now ready to use. Read the instructions on the following pages to operate your Vacuum safely.
text_image
Power Head Latch (one on each side) PULL LATCH OUT FROM THE TOP AND UP FROM THE BOTTOMFigure B
text_image
Filter Qwik Lock™ Stud Filter Cage Power HeadFigure C
HOSE AND ACCESSORY STORAGE
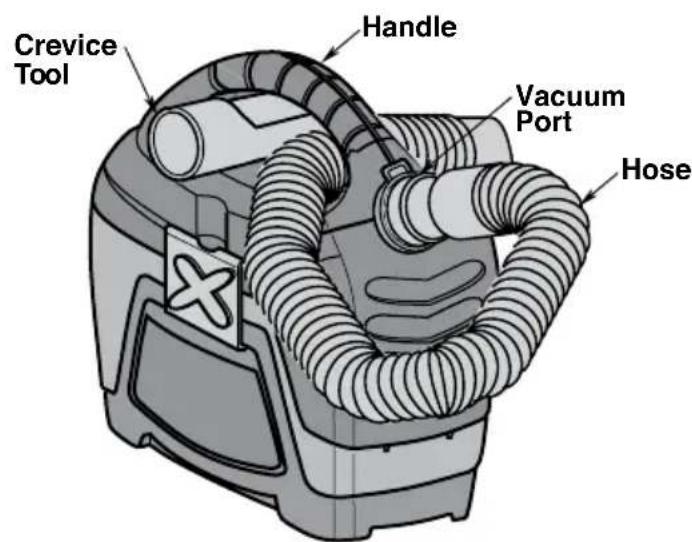
- Your Vacuum's hose can be conveniently stored as shown in Figure D.
- Wrap one end of the hose under the handle of the power head and slide into the hose storage area. Snap the other end of the hose into the inlet port of the power head.
- Place the crevice tool into the depressed storage area under the handle.
text_image
Crevice Tool Handle Vacuum Port HoseFigure D
OPERATION
WARNING - To reduce the risk of fire, explosion, or damage to Vacuum:
- Do not leave Vacuum running while unattended - you may fail to notice important signs indicating abnormal operation such as loss of suction, debris/liquid exiting exhaust, or abnormal motor noises. Immediately stop using Vacuum if you notice these signs.
• Use only the recommended battery with this Vacuum.
- Do not continue running when float has cut off suction.
- Do not operate Vacuum in areas with flammable gases, vapors, or explosive dust in the air. Sparks inside the motor can ignite airborne flammables. Flammable gases and vapors include: lighter fluid, solvent-type cleaners, oil-based paints, gasoline, alcohol, and aerosol sprays. Flammable dusts include: coal, magnesium, aluminum, grain, and gun powder.
- Do not vacuum up explosive dusts, flammable liquids, or hot ashes.
• Do not use Vacuum as a sprayer.
WARNING - To reduce the risk of electric shock or injury:
- Do not expose to rain or allow liquid to enter motor or battery compartment. Store indoors.
- Do not handle switch, Vacuum, or batteries with wet hands.
- If your Vacuum is not working as it should, has missing parts, has been dropped, damaged, left outdoors, or dropped into water, return it to an authorized service center or call customer service.
- Do not vacuum toxic materials to reduce the risk of inhaling the vapors or dust.
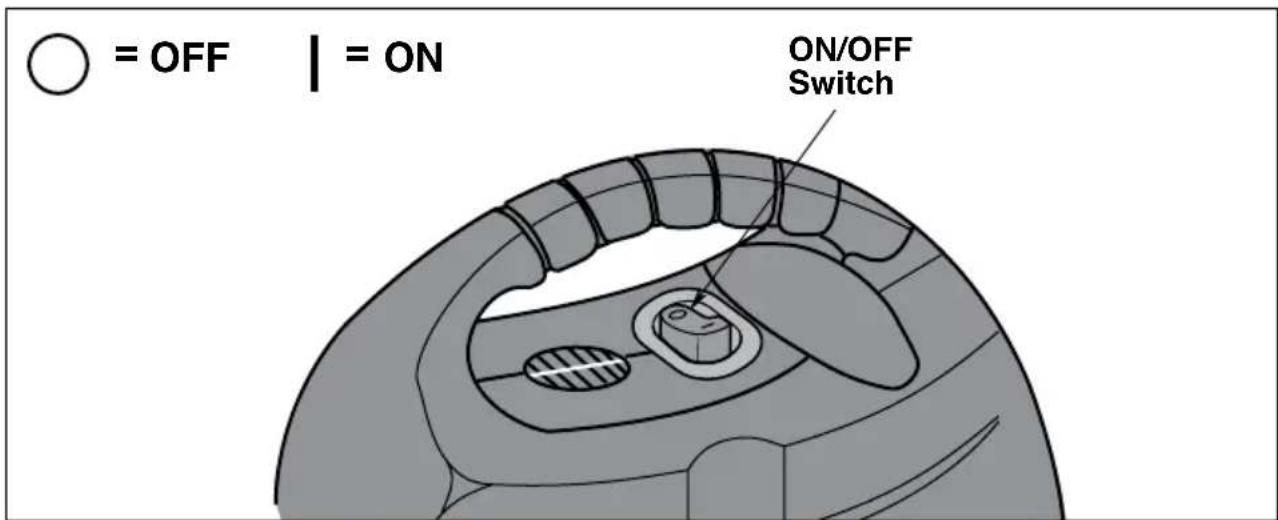
Turn the unit on by pushing the switch from position “O” to position “l”. The symbols used on the switch actuator are international “On and Off” symbols (Figure E).
text_image
○ = OFF | = ON ON/OFF SwitchFigure E
OPERATION (Continued)
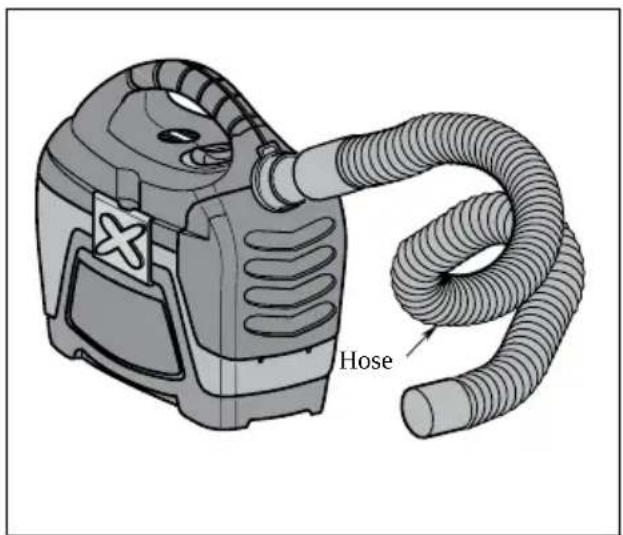
- Familiarize yourself with the accessories included with the Vacuum. Each accessory may be used in various ways for vacuuming and blowing debris. Here is a list of the accessories and their uses (Figure F).
Crevice Tool - Used to pick up debris in hard to reach locations.
Dusting Brush - Used for detailed cleaning in small spaces.
Claw Nozzle - Used to vacuum furniture, fabric, and upholstery.
Hose - Provides transfer of vacuum or blowing capability to work site.
Vacuuming Dry Materials
-
The filter must be in correct position at all times to avoid leaks and possible damage to Vacuum.
-
When using your Vacuum to pick up very fine dust, it will be necessary for you to empty the drum and clean the filter at more frequent intervals to maintain peak Vacuum performance.
text_image
HoseFigure F
NOTE: A dry filter is necessary to pick up dry material. If you use your Vacuum to pick up dust when the filter is wet, the filter will clog quickly and will be very difficult to clean.
Vacuuming Liquids
- When picking up small amounts of liquid the filter may be left in place.
- When picking up large amounts of liquid we recommend that the filter be removed. If the filter is not removed, it will become saturated and misting may appear in the exhaust.
- When the liquid in the drum reaches a predetermined level, the float mechanism will rise automatically to cut off airflow. You will know that the float has risen because Vacuum airflow ceases and the motor noise will become higher in pitch, due to increased motor speed. When this happens, turn off the Vacuum and empty the drum.
WARNING - Do not remove the filter cage and float. The float prevents water from entering the impeller and damaging the motor. The cage prevents fingers from touching the moving impeller.
- After using the Vacuum to pick up liquids, the filter must be dried to avoid possible mildew and damage to the filter.
IMPORTANT: To avoid damage to the Vacuum, do not run motor with float in raised position.
OPERATION (Continued)
text_image
Power Head Latch (one on each side) PULL LATCH OUT FROM THE TOP AND UP FROM THE BOTTOMFigure G
natural_image
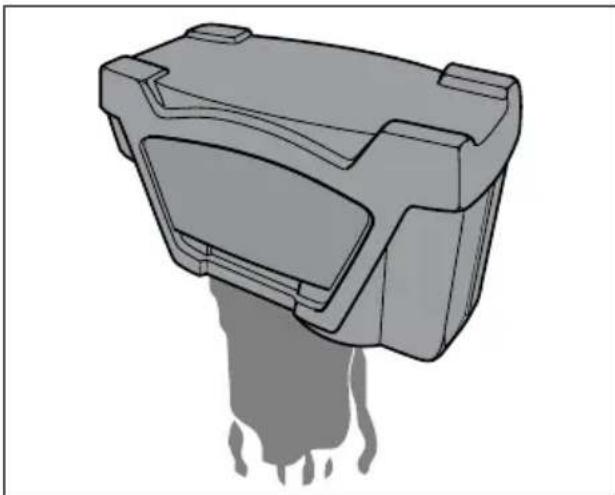
3D rendered mechanical component with no visible text or symbolsFigure H
Emptying the Dust Drum
- To remove the lid to empty contents of the dust drum, simply lift the two drum latches on the side of the Vacuum and lift the power head up and off the dust drum and set to the side (Figure G).
⚠ WARNING - To reduce the risk of injury from accidental starting, remove battery before emptying the drum. - Lay the power head on a clean dry area while emptying the drum or changing the filter.
- Dump the drum contents into the proper waste disposal container (Figure H).
Blowing Feature
Your Wet/Dry Vacuum has the capability to blow sawdust and other debris and to be used as a blower for yard work, patio cleanup and workshop applications.
NOTE: The blowing port is located opposite the vacuum port.
WARNING - Always wear safety eyewear complying with ANSI Z87.1 (or in Canada, CSA Z94.3) before using as a blower.
WARNING - To reduce the risk of injury to bystanders, keep them clear of blowing debris.
CAUTION - Wear a dust mask if blowing creates dust which might be inhaled. (Use N95 or P100 masks when using the vacuum as a blower.)
CAUTION - To reduce the risk of hearing damage, wear ear protectors when using the Vacuum/Blower for extended time or in a noisy area.
BATTERY INSTALLATION/REMOVAL
⚠ WARNING - Turn unit OFF before removing/installing the battery.
Installation of Battery
NOTE: ProGuard LI is intended to be used with only the ProTeam 18V Battery No. R840087 (107496).
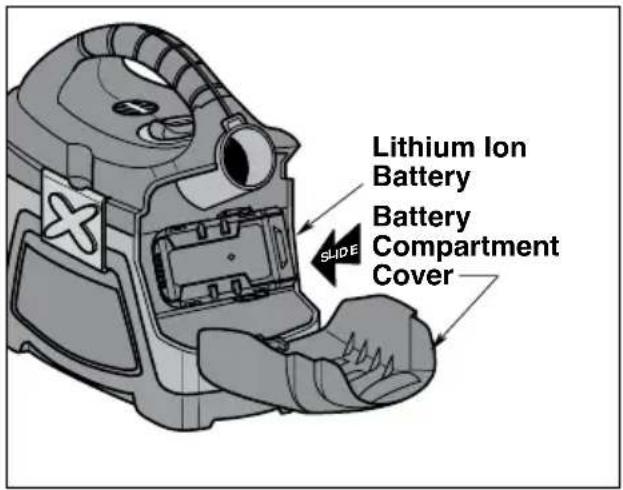
- While holding the Wet/Dry Vacuum's handle with one hand, pull open the battery compartment cover.
- Slide the fully charged battery into the battery receptacle until you hear an audible click. Do not push the release buttons on the battery at this time (Figure 1).
Removal of Battery
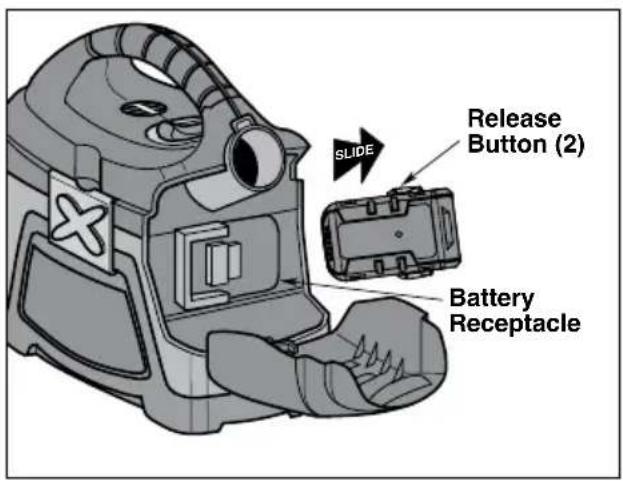
- Press both release buttons, located on each side of the battery, at the same time and slide battery out of the battery receptacle (Figure J).
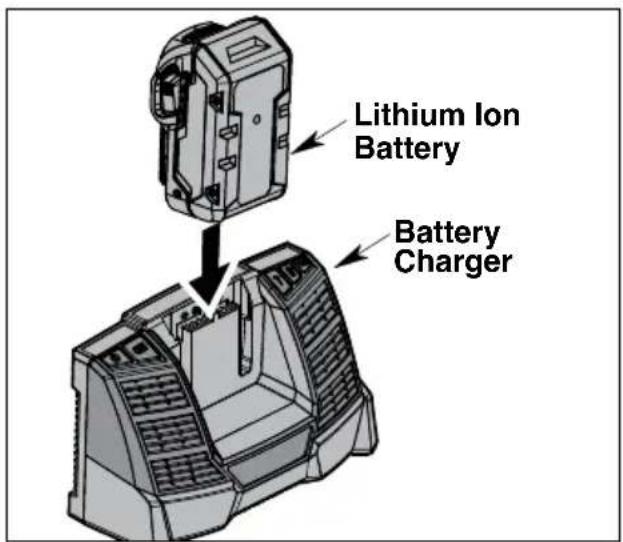
- Plug charger into a wall receptacle and place battery into the charger to recharge the battery (Figure K).
WARNING - To reduce the risk of electric shock, do not handle battery with wet hands or place wet battery into charger.
Battery Pack Preparation for Recycling

text_image
RECYCLE RBRC Li-ion 7.800.822.8837This product contains a Lithium Ion battery. Local, state or federal laws prohibit disposal of Lithium Ion batteries in ordinary trash.
Recycling your old
batteries is free and easy with the Call2Recycle® program. Call2Recycle® is a product stewardship program providing no-cost battery and cellphone recycling solutions across the U.S. and Canada.
text_image
Lithium Ion Battery Battery Compartment CoverFigure I
text_image
SLIDE Release Button (2) Battery ReceptacleFigure J
text_image
Lithium Ion Battery Battery ChargerFigure K
For more information about the Call2Recycle® program, or for more information about a local collection site visit www.call2recycle.org/locator or call the Call2Recycle® toll free number 1-800-822-8837.
MAINTENANCE
text_image
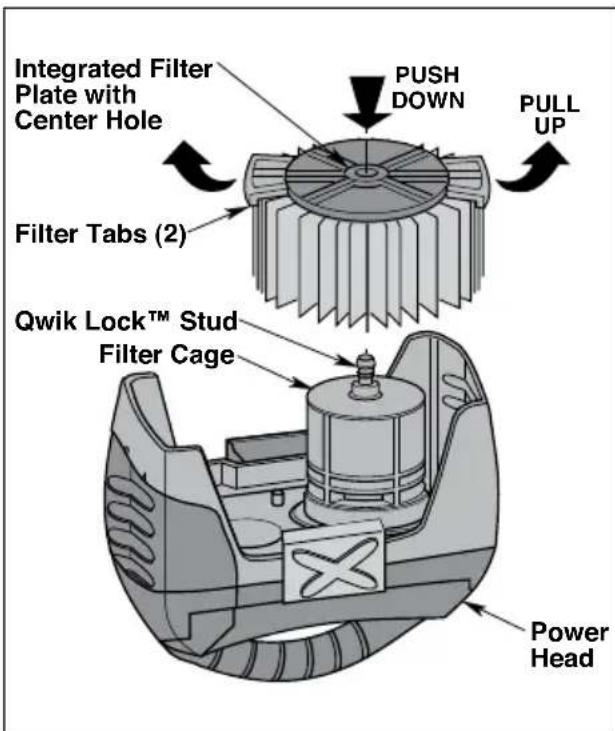
Integrated Filter Plate with Center Hole Filter Tabs (2) Qwik Lock™ Stud Filter Cage PUSH DOWN PULL UP Power HeadFigure L
Cleaning Vacuum Filter
WARNING - To reduce the risk of injury from accidental starting, disconnect the battery pack from the Vacuum before changing the filter.
IMPORTANT: After cleaning, check the filter for tears or small holes. Do not use a filter with holes or tears in it. Even a small hole can allow a lot of dust to pass through the filter. Replace it immediately.
Filter Removal
-
Hold the filter tabs of the Qwik Lock™ filter in each hand (Figure L).
-
With one thumb on the Qwik Lock™ stud, which protrudes through the integrated filter plate, lift up on the filter tabs while pushing down on the stud.
-
This action will cause the filter to release from the filter cage. Slide filter off cage.
IMPORTANT: To avoid damage to the blower wheel and motor, always reinstall the filter before using the Vacuum for dry material pick-up.
WARNING - Do not remove the filter cage and float. The float prevents water from entering the impeller and damaging the motor. The cage prevents fingers from touching the moving impeller.
Cleaning a Dry Filter
NOTE: Clean the filter in an open area. Cleaning SHOULD be done outdoors.
- Light cleaning of some dry debris from the filter can be accomplished without removing the filter from the Vacuum. Simply slap your hand on top of the handle while the Vacuum is turned off.
- Remove filter from Vacuum. Gently tap the filter against the inside wall of your dust drum and the debris will loosen and fall.
- For thorough cleaning of a dry filter with fine dust (no debris) you may run water through it as described under "Cleaning a Wet Filter" Section.
Cleaning a Wet Filter
After filter is removed, run water run water from a hose or spigot through the filter. Take care that water pressure from the hose is not strong enough to damage filter. Be sure to air dry the filter before storing or picking up dry debris.
Installation
MAINTENANCE (Continued)
Refer to "Filter Assembly/Replacement" Section of this manual.
Allow the filter to dry before reinstalling and storing the Vacuum.
Cleaning and Disinfecting the Wet/Dry Vacuum
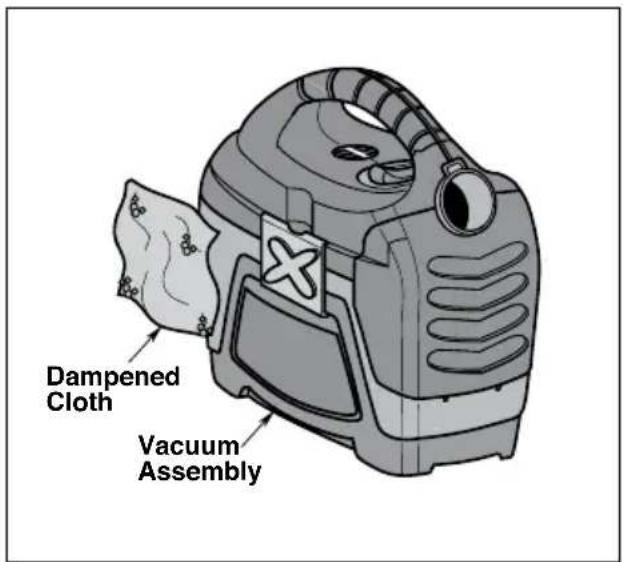
To keep your Wet/Dry Vacuum looking its best, clean the outside with a cloth dampened with warm water and mild soap (Figure M).
To clean the drum:
- Dump out debris.
- Wash drum thoroughly with warm water and mild soap.
- Wipe out with dry cloth.
text_image
Dampened Cloth Vacuum AssemblyFigure M
Before prolonged storage or as needed (e.g., waste water pick up) the drum should be disinfected.
To disinfect the drum:
- Pour 1 gallon of water and 1 teaspoon of chlorine bleach into the drum.
- Let solution stand for 20 minutes, carefully swishing every few minutes, making sure to wet all inside surfaces of the drum.
- Empty drum after 20 minutes. Rinse with water until bleach smell is gone. Allow drum to dry completely before sealing the motor on the drum.
WARNING - To assure product SAFETY and RELIABILITY, repairs and adjustments should be performed by Authorized Service Centers, always using ProTeam replacement parts.
▲ WARNING:
The following information is for use by qualified service personnel only and provides guidance for troubleshooting and maintenance.
• DO NOT lubricate the motor.
CARING FOR YOUR VACUUM
- To ensure a valid vacuum warranty, optimal performance and improved indoor air quality, be sure to use genuine ProTeam Filters.
- Check all filters before each use. Empty or replace the filters as necessary.
- Rinse, air dry, and reinsert the foam/filter diffuser each week.
- Wipe the inside and outside of the vacuum with a household cleaning agent after each use.
PROPER STORAGE
When the Vacuum is not in use, the Vacuum, charger, and battery should be stored indoors and in a dry place. Before storing your Vacuum, the drum should be emptied and cleaned. The hose should be stored as described in this manual. Accessories should be kept in the same area as the Vacuum so they can be readily available. The Vacuum should be stored indoors to avoid temperature extremes that may shorten the useful life of the battery. Disconnect the battery pack from the Vacuum before storing. Such preventive safety measures reduce the risk of starting accidentally.
TROUBLESHOOTING
- If the Vacuum will not operate, check the following:
a. That the switch is in the “on” position and functioning properly.
b. Ensure the battery is properly connected to the Vacuum.
c. Ensure the battery is charged. - If loss of suction occurs, check the following:
a. Check that debris is not plugging the hose, wand, and/or floor tool.
b. Check and/or clean the filter.
c. Check that the hose cuffs fit tightly on the hose and are not cracked.
d. Check that the power head is properly latched to the drum, without gaps or openings.
e. Check bleeder valve at the end of the hose.
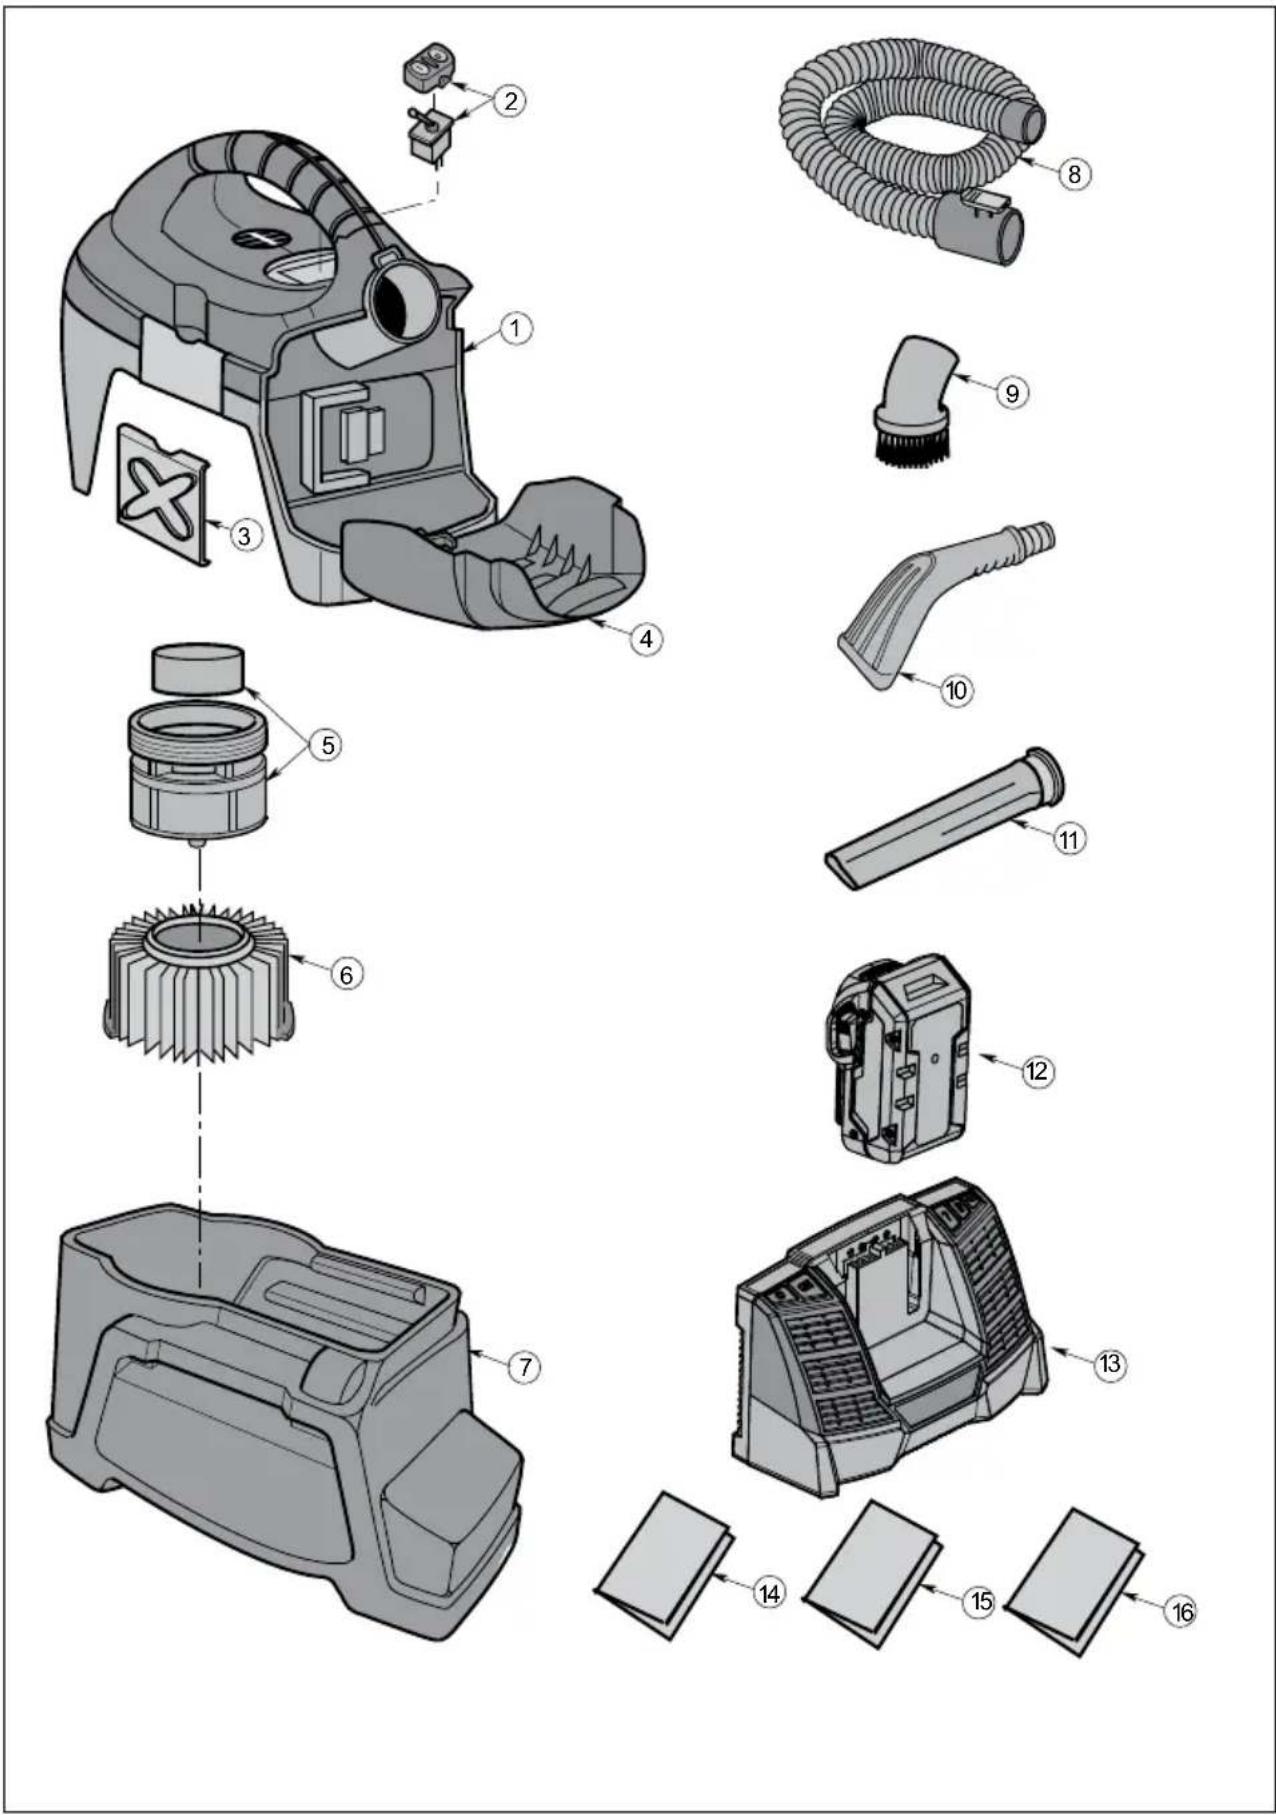
PROGUARD LI 3 ASSEMBLY
text_image
Exploded view diagram of a cleaning device with numbered parts for identificationPROGUARD LI 3 REPLACEMENT PARTS
Repair Parts Assembly
All items sold as individual unless otherwise identified
ProGuard LI 3 Cordless
| ORDER# | PRODUCT NAME | QTY.NEEDED | |
| 1 51 | 0121 Power | Head 1 | |
| 2 51 | 0127 Switch | and Switch Cover (Set) 1 | |
| 3 833367 | Drum Latch with Hinge (Set) 1 | ||
| 4 51 | 0122 Battery | Cover/Hinge 1 | |
| 5 832048 | Filter Cage and Float Assembly 1 | ||
| 6 107178 | Qwik LockTM Fine Dust Cartridge Filter 1 | ||
| 7 833371 | Drum with Labels 1 | ||
| 8 107197 | Hose Assembly | 1 | |
| 9 107195 | Dusting Brush | 1 | |
| 10 | 107196 Claw Nozzle | 1 | |
| 11 | 107194 Crevice Tool | 1 | |
| 12 | 107496 Battery | 1 | |
| 13 | 107490 | Battery Charger | 1 |
| 14 | SP6989 Vacuum Owner's Manual | 1 | |
| 15 | SP6990 Battery Owner's Manual | 1 | |
| 16 | SP6971 Battery Charger Owner's Manual | 1 | |
WARRANTY
This limited warranty applies to the following ProTeam, Inc. commercial PROGUARD® Wet/Dry Vacuums: ProGuard LI 3.
If you have any questions or need assistance regarding the warranty of your product, please call ProTeam Customer Service department at (866) 888-2168 during the hours of 8:00 a.m. - 5:00 p.m. Central Time.
PROGUARD® - Limited Warranty
ProTeam, Inc., located at 8100 W. Florissant Ave., Building T., St. Louis, MO 63136 (“ProTeam”) warrants to the original purchaser only (“you”) subject to the exclusions described below, that the ProGuard Product component parts and motors listed below will be free from defects in material and workmanship beginning on the original date of purchase and continuing for the period set forth below (each a “Warranty Period”). This limited warranty terminates if the original purchaser transfers the ProGuard Product to any other person or entity.
Parts Warranties - All ProGuard Products
- Molded body parts on all ProGuard Products - Expected lifetime of the ProGuard Product.
- All other component parts (excluding the motor) on all ProGuard Products - 3 years.
Motor Warranties - Specific to each ProGuard Product
• ProGuard LI 3 - Vacuum Motor - 1 Year, Including Battery and Charger.
What is Not Covered - Warranty Exclusions
This limited warranty does not extend to and expressly excludes:
- Normal wear and tear and/or replacement attachments or accessories, including, without limitation, extension cords, hoses, filters, switches, carbon motor brushes and other attachments to the ProGuard Product.
- Damage or burnout of the ProGuard Product motor resulting from failure to clear a blockage occurring during the normal course of use.
- Loss or damage to the ProGuard Product resulting from conditions beyond ProTeam's control including without limitation, misuse, accident, abuse, neglect, negligence (other than ProTeam's), overuse beyond intended capacity, or unauthorized modification or alteration.
- Loss or damage to the ProGuard Product resulting from failure to follow the required maintenance schedule, or failure to use the ProGuard Product in accordance with ProTeam's written instructions, guidelines or the terms of its Owner's Manual.
What We Will Do to Correct Problems
If a claim made during the Warranty Period is covered under this limited warranty, ProTeam or your local ProTeam authorized dealer will, at ProTeam's sole option, (a) repair the defective portion of the ProGuard Product or (b) replace the entire ProGuard Product. THE SOLE AND EXCLUSIVE REMEDY FOR BREACH OF THIS LIMITED WARRANTY SHALL BE LIMITED TO REPAIR OR REPLACEMENT OF THE PROGUARD PRODUCT.
No Other Express Warranty Applies
THE LIMITED WARRANTIES PROVIDED ABOVE ARE THE SOLE AND EXCLUSIVE WARRANTIES PROVIDED BY PROTEAM TO THE ORIGINAL PURCHASER, AND ARE IN LIEU OF ALL OTHER WARRANTIES, WRITTEN OR ORAL, EXPRESS OR IMPLIED, WHETHER ARISING BY OPERATION OF LAW OR OTHERWISE, INCLUDING, WITHOUT LIMITATION, WARRANTIES OF MERCHANTABILITY OR FITNESS FOR A PARTICULAR PURPOSE, WHETHER OR NOT THE PURPOSE HAS BEEN DISCLOSED AND WHETHER OR NOT THE PROGUARD PRODUCT HAS BEEN SPECIFICALLY DESIGNED OR MANUFACTURED FOR YOUR USE OR PURPOSE. No employee, agent, dealer, or other person is authorized to alter this limited warranty or make any other warranty on behalf of ProTeam. The terms of this limited warranty shall not be modified by ProTeam, the original owner, or their respective successors or assigns.
WARRANTY
How to Notify Us
If you discover that your ProGuard Product has a defect that you believe is covered by this limited warranty, you must notify ProTeam or the ProTeam authorized dealer who sold you the ProGuard Product within the applicable Warranty Period. You may contact ProTeam Customer Service department at (866) 888-2168 during the hours of 8:00 a.m. and 5:00 p.m. Central Time or at any time via the fax number or the email address listed in your Owner's Manual or on our website. In order for a warranty claim to be processed as quickly as possible, we suggest that you complete the “Registration Card” made available to you on the ProTeam website at www.pro-team.com. If you do not choose to register your ProGuard Product, in order to make a warranty claim, you will need to provide a copy of your sales receipt or other proof of purchase showing the purchase date to ProTeam or your local ProTeam authorized dealer.
Repair and Replacement Procedures
Please call the Customer Service department number above or visit the ProTeam website to find the ProTeam authorized dealer nearest you. If there is no local ProTeam authorized dealer, our Customer Service department will give you the name and address of the nearest field service representative or will provide you with instructions for shipping your ProGuard Product to the ProTeam repair facility. ProTeam or your local ProTeam authorized dealer will determine whether your claim is covered by this limited warranty, subject to the limitations or exclusions described in this limited warranty, or has exceeded the applicable Warranty Period. Your local ProTeam authorized dealer will repair your ProGuard Product, ship your ProGuard Product to the dealer's or ProTeam's repair facility, or contact ProGuard for a replacement ProGuard Product. The decision to replace your ProGuard Product is at the sole discretion of ProTeam. Repairs or modifications made to the ProGuard Product by other than ProTeam, its authorized repair facility or a local authorized dealer will nullify this limited warranty. Coverage under this limited warranty is conditioned at all times upon the original purchaser's compliance with these required notification and repair procedures.
Limitation of Liability
TO THE EXTENT PERMITTED BY LAW, IN NO EVENT SHALL PROTEAM BE LIABLE FOR ANY INCIDENTAL, SPECIAL, INDIRECT, OR CONSEQUENTIAL DAMAGES, INCLUDING ANY ECONOMIC LOSS, WHETHER RESULTING FROM NONPERFORMANCE, USE, MISUSE OR INABILITY TO USE THE PROGUARD PRODUCT OR PROTEAM'S NEGLIGENCE. SELLER SHALL NOT BE LIABLE FOR DAMAGES CAUSED BY DELAY IN PERFORMANCE AND IN NO EVENT, REGARDLESS OF THE FORM OF THE CLAIM OR CAUSE OF ACTION (WHETHER BASED IN CONTRACT, INFRINGEMENT, NEGLIGENCE, STRICT LIABILITY, OTHER TORT OR OTHERWISE), SHALL PROTEAM'S LIABILITY TO BUYER AND/OR ITS CUSTOMERS EXCEED THE PRICE PAID BY THE ORIGINAL OWNER FOR THE PROGUARD PRODUCT. The term “consequential damages” shall include, but not be limited to, loss of anticipated profits, business interruption, loss of use or revenue, cost of capital or loss or damage to property or equipment.
Some states do not allow the exclusion or limitation of incidental or consequential damages, so the above limitation may not apply to you. This limited warranty gives you specific legal rights, and you may also have other rights which vary from State to State.
MANUAL DEL USUARIO
text_image
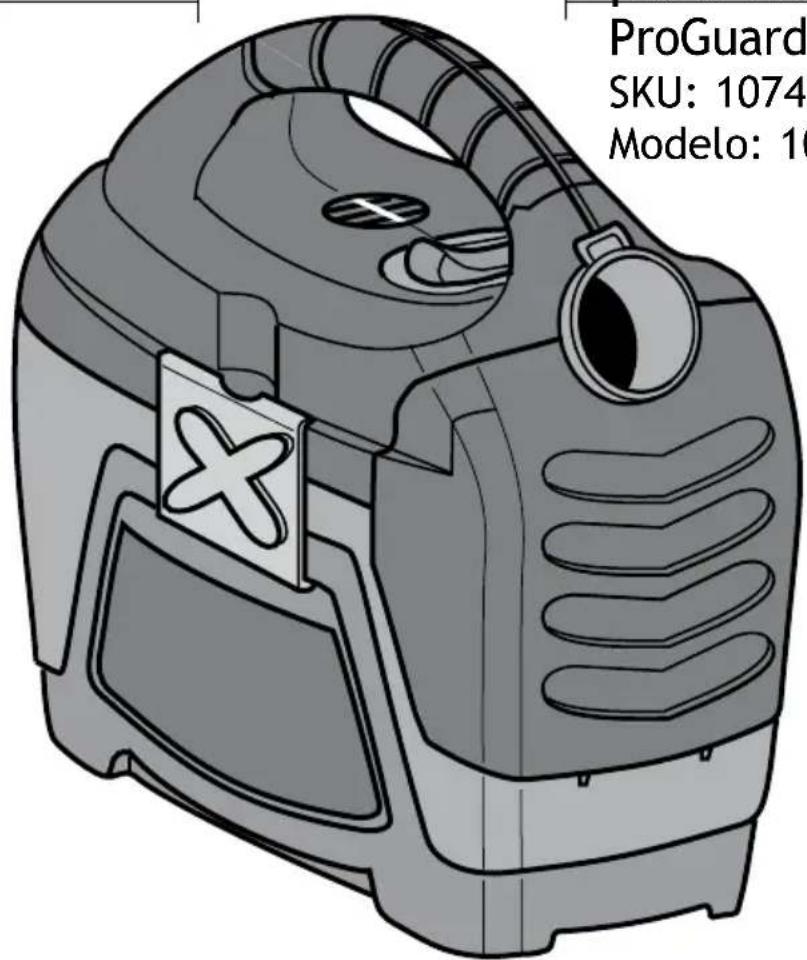
ProGuard SKU: 1074 Modelo: 10Aspiradora
para mojado/seco
ProGuard® LI 3 inalámbrica
SKU: 107495
Modelo: 1074950
8100 W. Florissant Ave., Building T., St. Louis, MO 63136
866.888.2168
natural_image
Illustration of a portable device with a cross symbol on its side panel (no text or symbols present)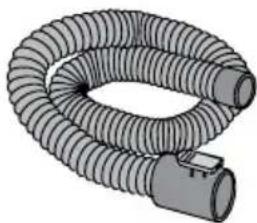
natural_image
Illustration of a coiled, flexible hose or tube with no text or symbols(5)
(9)

(6)
natural_image
Technical line drawing of a mechanical component with no visible text or symbols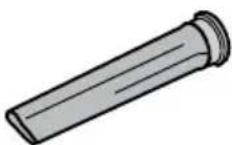
(7)
(2)
(3)
(4)
(8)

natural_image
Three overlapping gray rectangular sheets with black outlines, no text or symbols present(11)
natural_image
3D rendered mechanical component with internal structure and textured base (no text or symbols)Figura H
text_image
RECYCLE RBRC Li-ion™ 7.800.822.8837text_image
Exploded view diagram of a cleaning device with numbered parts for identification and assembly reference.PIEZAS DE REPUESTO DE LA PROGUARD LI 3
8100 W. Florissant Ave., Building T., St. Louis, MO 63136
866.888.2168
SPÉCIFICATIONS DU PRODUIT
natural_image
Illustration of a portable device with a cross symbol on its side panel (no text or symbols present)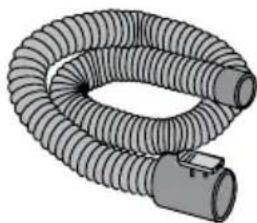
natural_image
Illustration of a coiled, flexible hose with multiple tubes and a small connector (no text or symbols)(5)
(9)

(6)
natural_image
3D technical illustration of a mechanical component with no visible text or symbols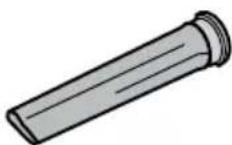
(7)
(3)
(8)

(11)
PRÉPARATION POUR LE FONCTIONNEMENT
LES PREMIERS PAS
natural_image
Diagram of a biological structure with internal components, no visible text or labelsFigure E
ProTeam
FONCTIONNEMENT (suite)
natural_image
3D rendered mechanical component with no visible text or symbolsFigure H