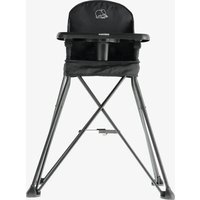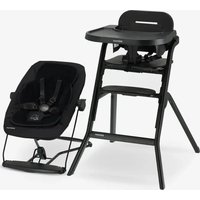
High Chair - High chair Deryan - Free user manual and instructions
Find the device manual for free High Chair Deryan in PDF.


User questions about High Chair Deryan
0 question about this device. Answer the ones you know or ask your own.
Ask a new question about this device
Download the instructions for your High chair in PDF format for free! Find your manual High Chair - Deryan and take your electronic device back in hand. On this page are published all the documents necessary for the use of your device. High Chair by Deryan.
USER MANUAL High Chair Deryan
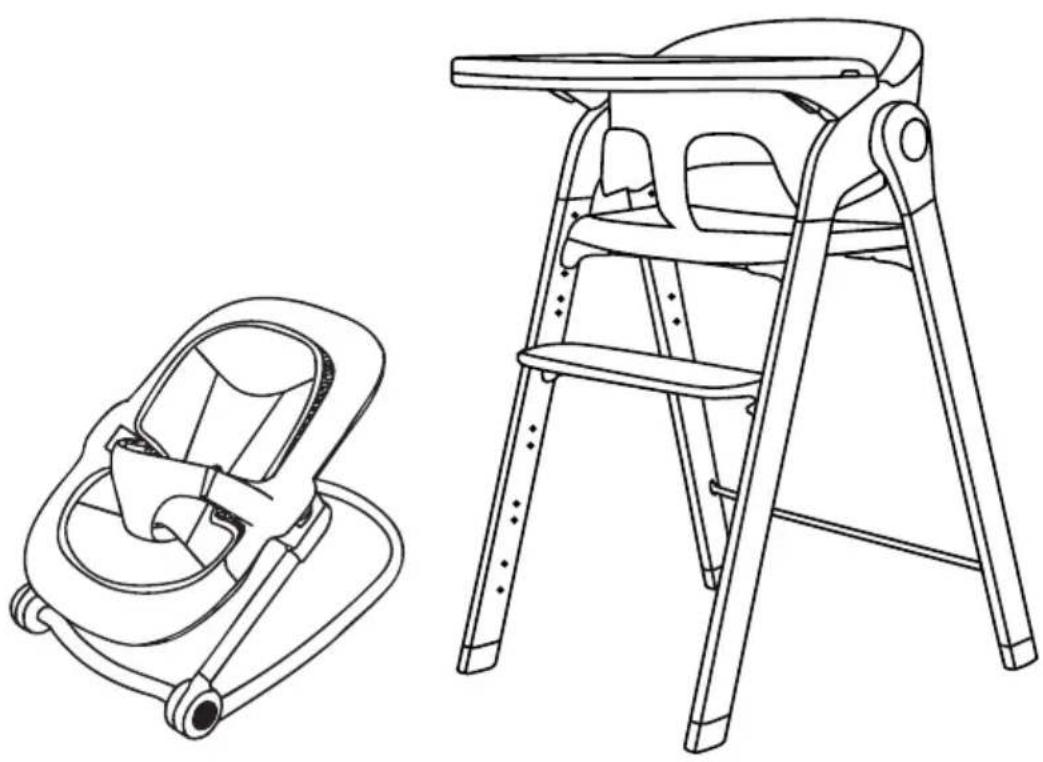
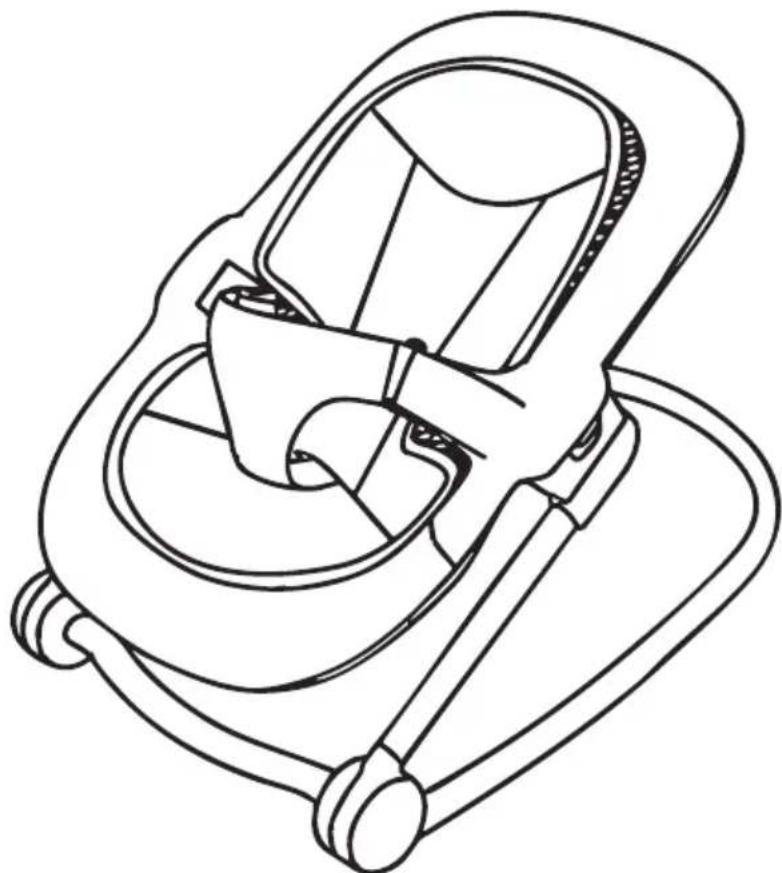
High Chair with Bouncer
User manual
natural_image
Line drawings of two baby car seat components: one with a side seat and the other a high chair (no text or symbols)IMPORTANT FOR FUTURE REFERENCE.
Read the following instructions carefully before use.
IMPORTANT ! À CONSERVER POUR TOUTE RÉFÉRENCE ULTÉRIEURE.
- If you do not follow this instruction manual, it may affect the safety of children.
• Never leave the child unattended. - When the children are sitting in the chair, don't leave him unattached.
• This product is suitable for children who are 6-36 months old. - Don't use when the chair parts are broken, tearing of missing.
- Be sure all users are familiar with operation and the chair can be opened and closed easily. If not, don't operate forcibly and read the instruction to do it in right way.
- FALL HAZARD: Children have suffered severe head injuries including skull fractures when falling from high chairs. Fails can happen suddenly if child is not restrained properly.
• Always use restraints, and adjust to fit snugly. - Please carefully check that all parts can be normally installed are adjusted. Be sure all safety locks are operational.
- Children must be use safety belt when sit in the chair, in order to prevent falling or sliding.
- Please do not use this product when your baby is unable to sit independently.
- Please do not remove any part of the chair or adjust any part of the chair while your baby sit in it.
- The product can only be used on flat, stable ground. Avoid the chair from turning over, don't put overweight goods on the tray.
• Use a damp, soft cloth to clean. - Please clean the chair, dry the water when not use it and store in a dry, cool environment.
- Avoid placing the chair near any heat sources, such as electric heater, gas heater, or any places that are dangerous for children.
- Do not place the high chair in a place where the sun can directly shine, to avoid aging and fading of the plastic.
- Please repair them in time when the shrapnel, screws and other parts of the chair are loose of lost.
- Be aware of the risk of tilting when your child can push its feet against a table or any other structure.
- Discontinue use of this high chair accessory when child is able to sit upright unassisted or weights more than 20 lb (9.1 kg)
- Tray is not designed to hold child in chair.
- The child should be secured in the high chair at all times by the restraining system.
- It is recommended that the high chair be used only by children capable of sitting up right unassisted.
* The figures in the instruction are to illustrate the right operation and product structure. when there is a small difference between the real and the picture, please refer to real one.
WAARSCHUWINGEN
text_image
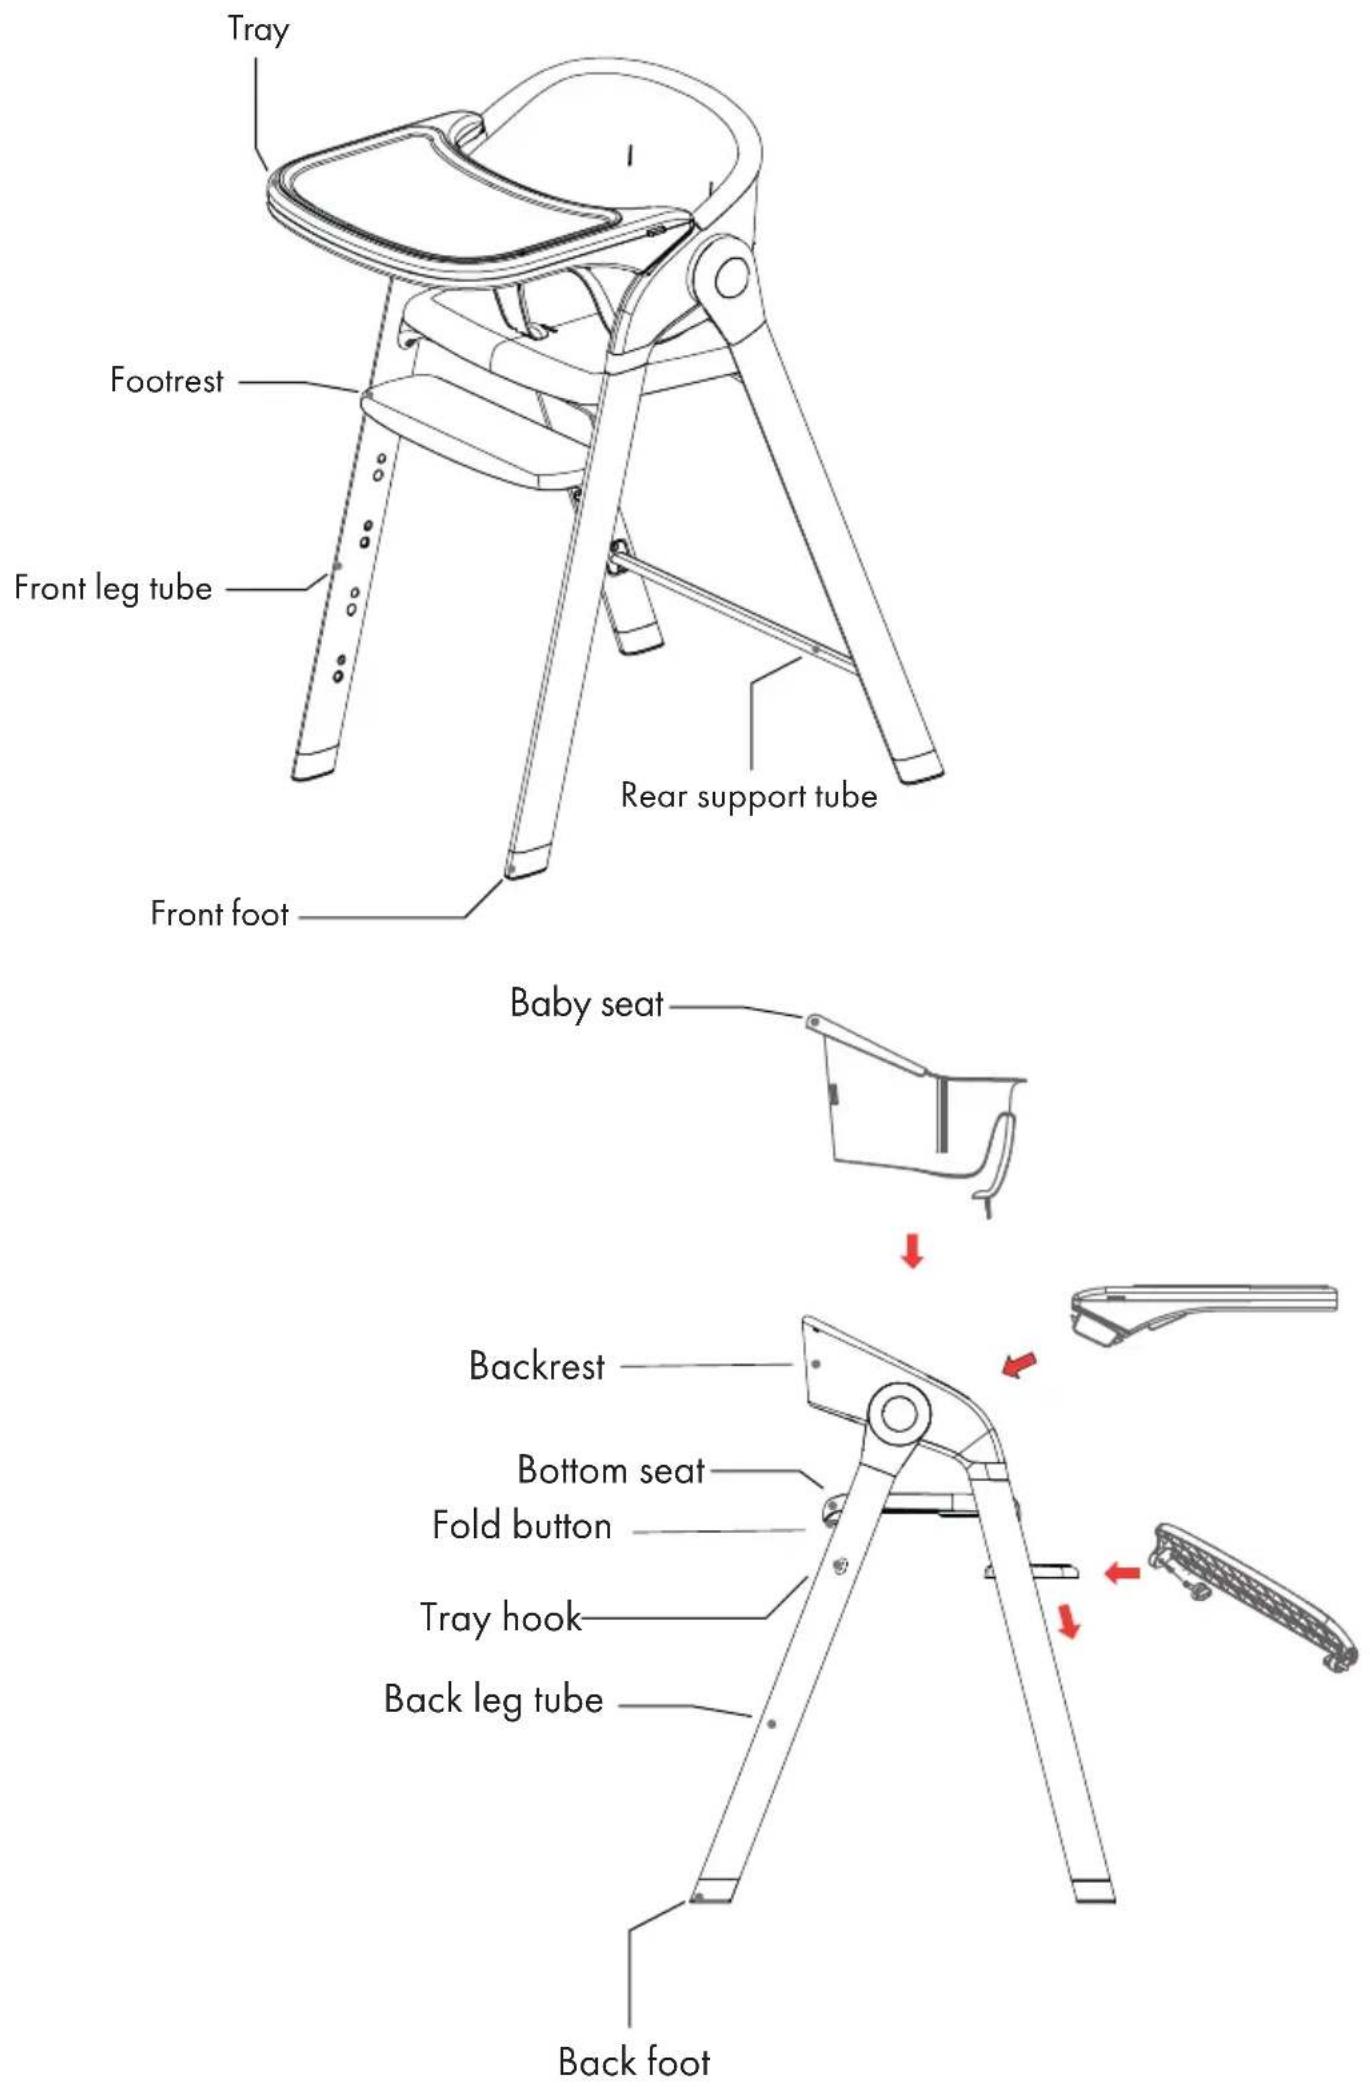
Screwdriver Supporting Tubes (under the seat) Rear Supporting Tube Front Leg Tubes Backrest Baby seat Rear Leg Tubes Tray Leather case Footrest Seat plate Screws (for tubes)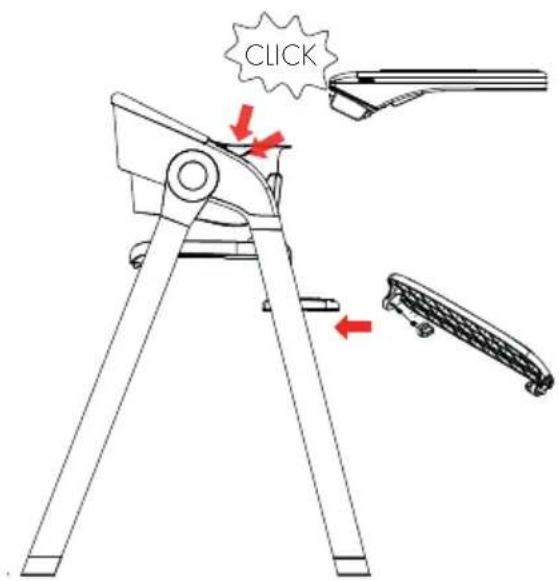
text_image
CLICKInsert the tray into the corresponding hole, once you hear a "click", the tray is correctly fitted and locked. Insert the footrest into the hole on the inside of the front leg tube. Then fix the footrest with two screws. The footrest can be adjusted with positions.
text_image
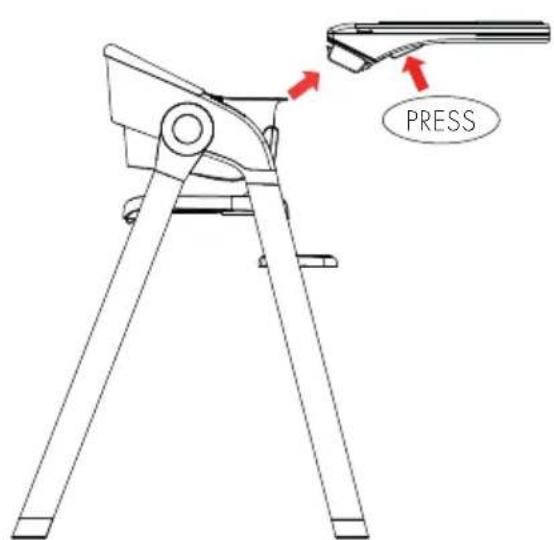
PRESSPress the two buttons on both sides of the bottom of the tray, then remove it upward.
text_image
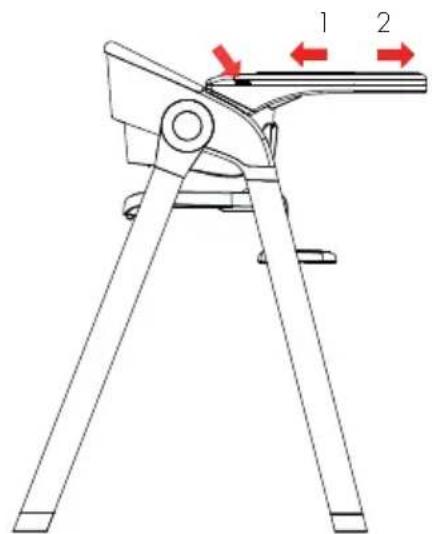
Technical diagram of a folding chair with labeled parts and directional arrows indicating movement or forcePress the buttons on the both sides of the plate simultaneously, which can be adjusted in 2 positions.
text_image
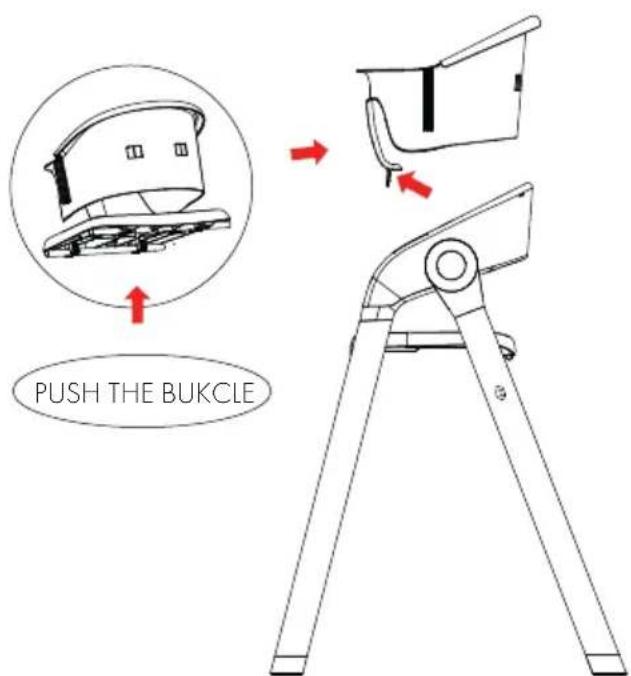
PUSH THE BUKCLEPress the buttons on the both sides of the plate simultaneously, which can be adjusted in 2 positions.
text_image
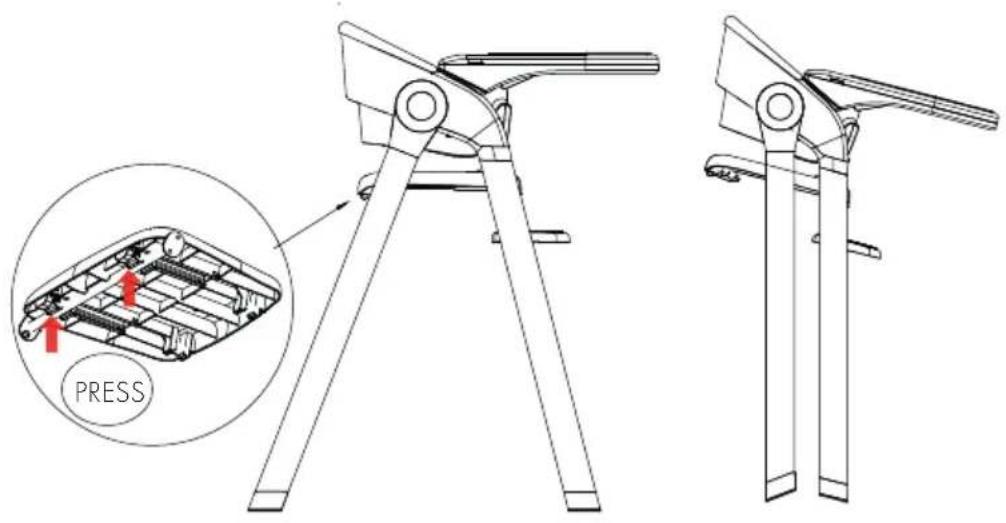
PRESSPress the both buttons on the bottom of the seat simultaneously, then fold the rear leg tube forward.
natural_image
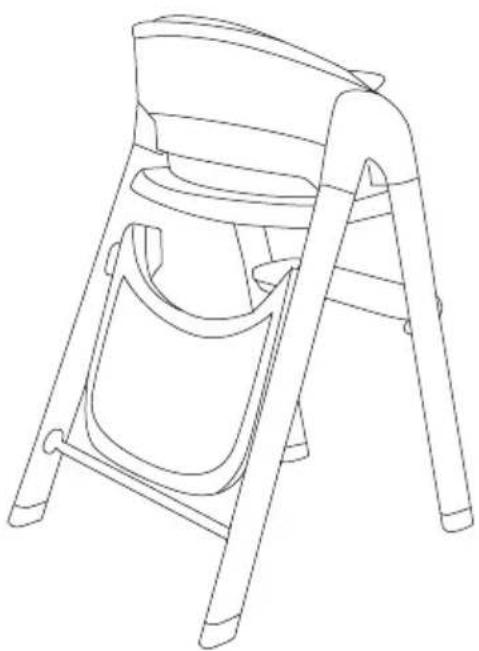
Line drawing of a simple chair with a bucket and seat (no text or symbols)To fix the removed tray, hooking the tray on the back of legs as the beloved pic.
natural_image
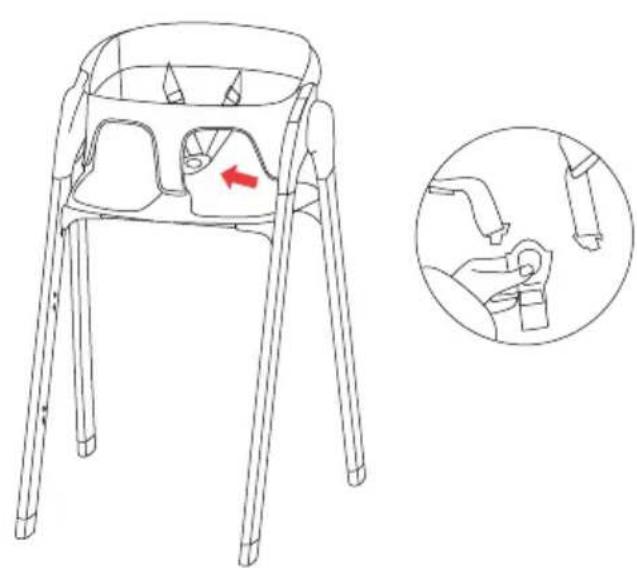
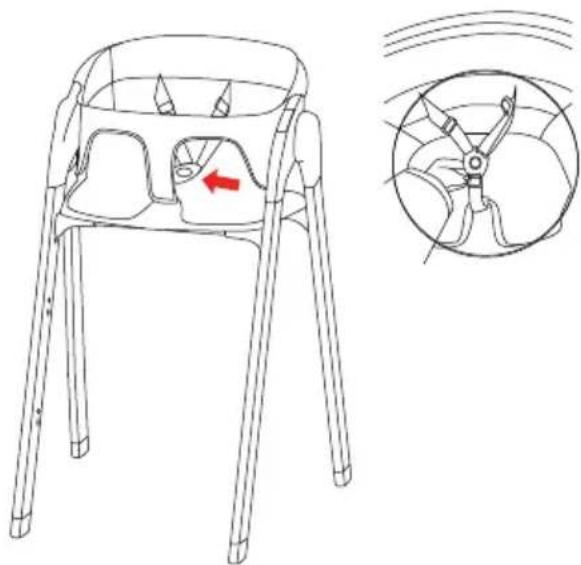
Line drawing of a baby chair with a red arrow pointing to the seat area, shown in an inset detail (no text or symbols)Press the buckle of harness to open it.
LEATHER CASE INSTALLATION
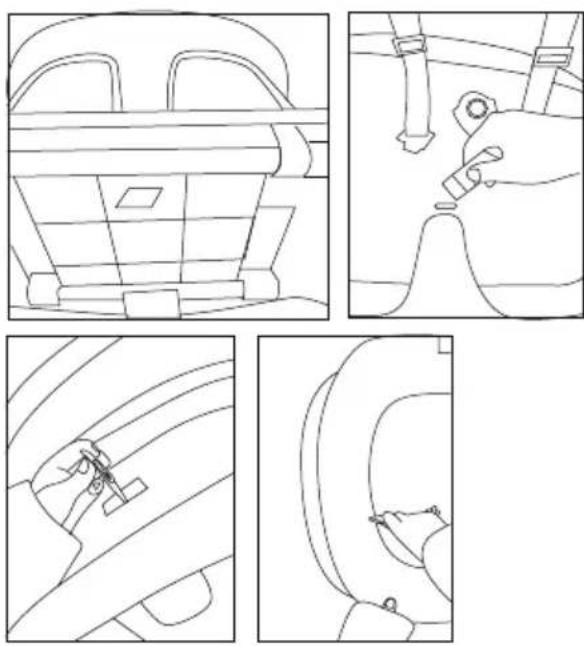
Then remove the crotch strap form the bottom hole. Also remove the shoulder straps from the backrest holes.
natural_image
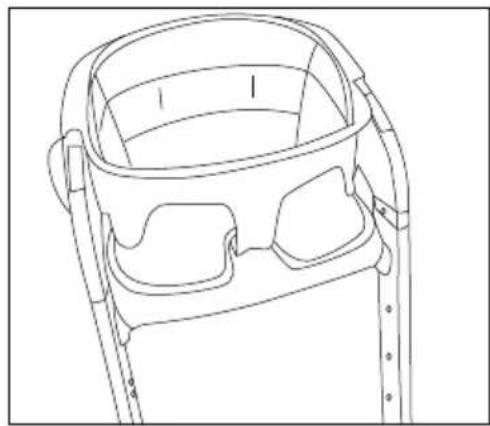
Line drawing of a car front panel with no text or symbolsPut the leather case on seat plate.
Re-thread the straps back into the hole of the leather case and the seat.
natural_image
Line drawing of a baby chair with a red arrow indicating the seat area, alongside an inset showing a mechanical component (no text or symbols)Re-thread the straps back into the hole of the leather case and the seat.
Use of the safety belt
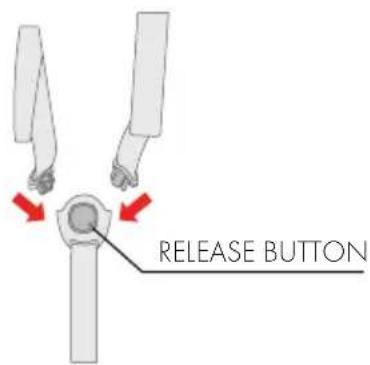
Insert the plug into the buckles until you hear 'click': Press the buckles of harness to open it.
text_image
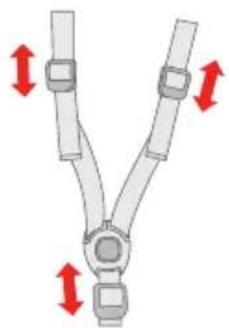
RELEASE BUTTONShoulder strap height adjustment
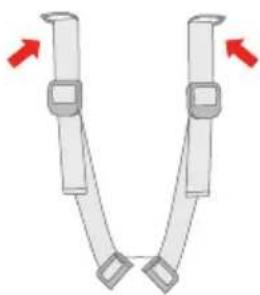
The button on the shoulder strap can be put through the hole of the corresponding height according to the child's height, and check whether it is fixed firmly.
natural_image
Diagram of two U-shaped cable clips with red arrows indicating direction (no text or symbols)Seat belt length adjustment
The seat belt has an adjustable buckle to adjust the length of the seat belt according to the height of the child.
natural_image
Diagram of a Y-shaped mechanical or electrical component with two arms and directional arrows indicating rotation (no text or symbols)Warning: Children must use safety harness when using chairs.
natural_image
Line drawing of a car steering wheel assembly (no text or symbols)USE WITH BOUNCER
text_image
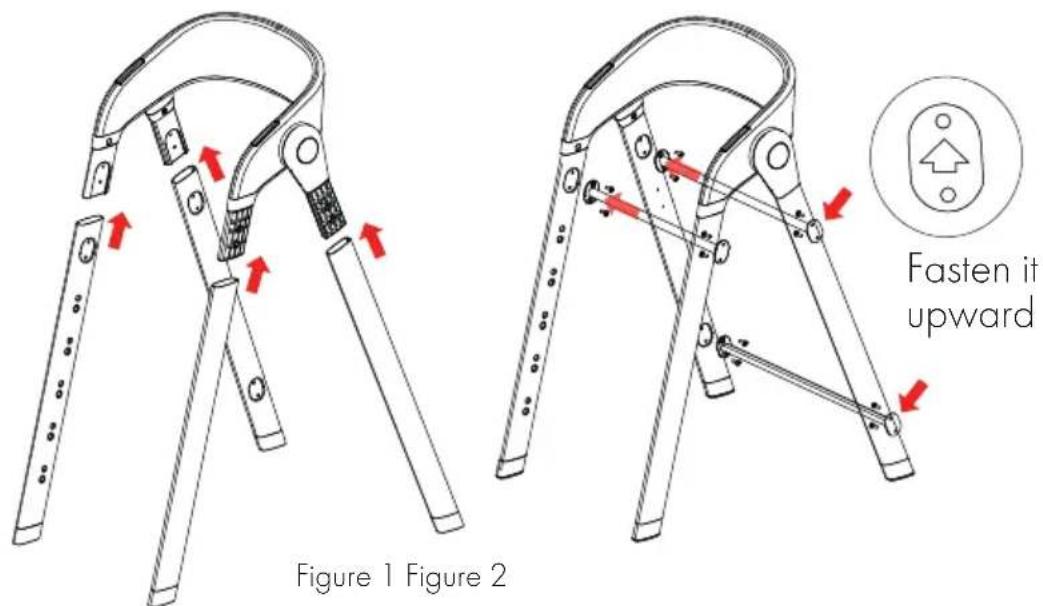
Fasten it upward Figure 1 Figure 2Insert 2 front leg tubes and 2 rear leg tubes into the corresponding connectors at backrest.(Figure 1)
Place the 3 supporting tubes on the corresponding hole of the leg tube, as shown by arrow in figure 2. Then fasten 3 tubes with screws.
text_image
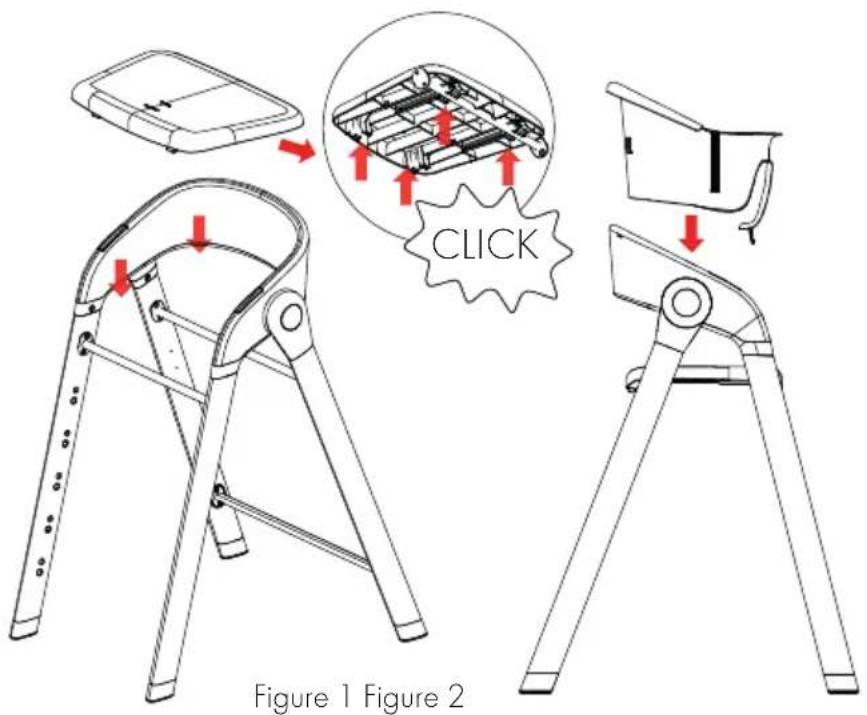
CLICK Figure 1 Figure 2Fasten the seat plate to the support tube Buckle the baby seat into the backrest and the bottom seat
INDEX
Warnings (EN) 3
Leather case installation 14
Use of the safety belt 15
Use with bouncer 16
Company info 26
text_image
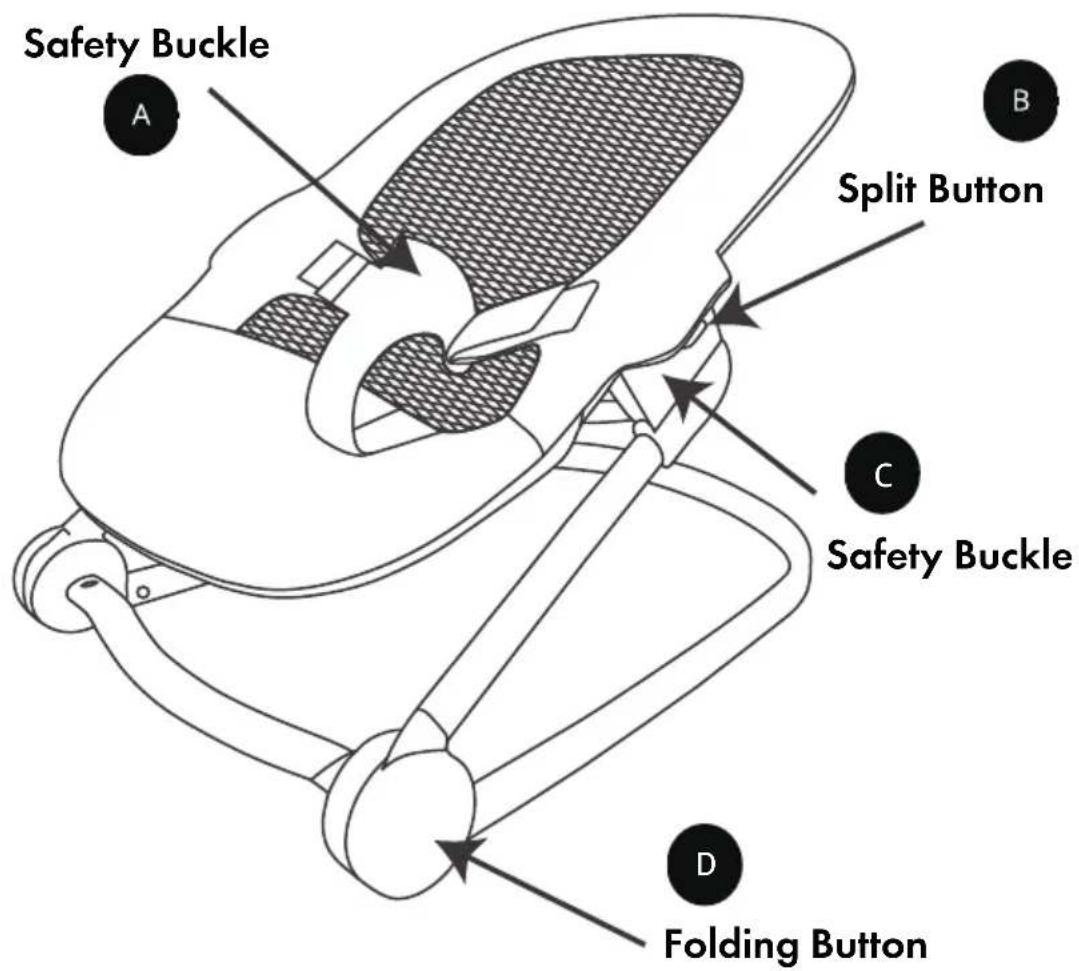
Safety Buckle A Split Button C Safety Buckle D Folding ButtonINSTALLATION
text_image
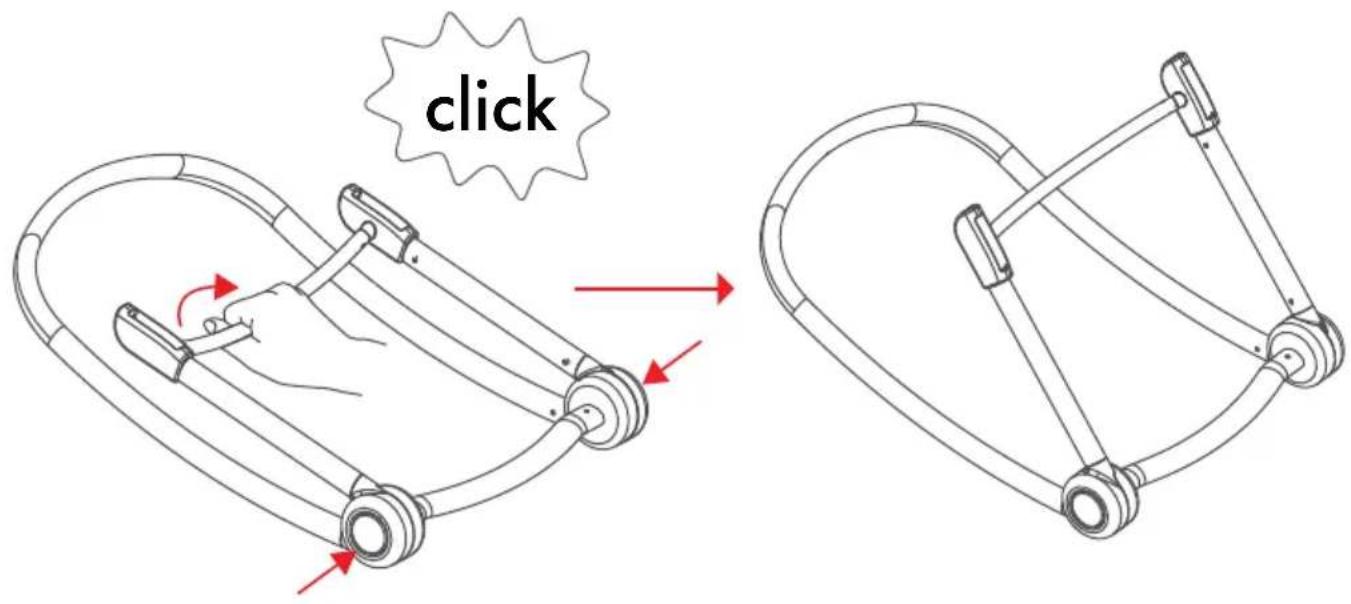
clickGrab the horizontal bar and rotate it upward. You will hear a "click" once the bar reaches the position shown in picture 2.
text_image
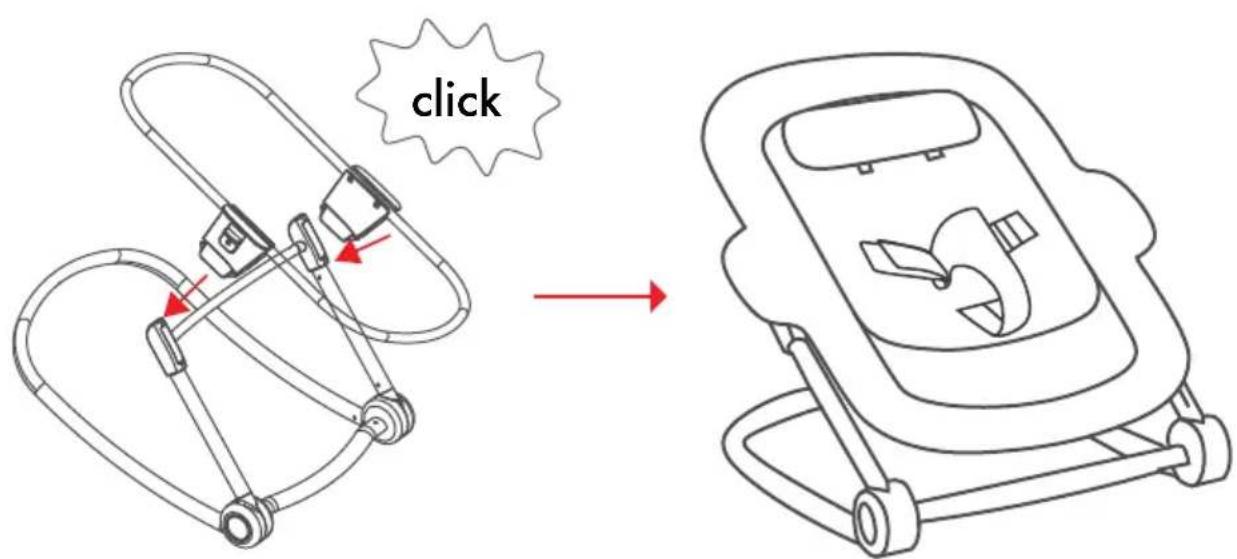
clickInsert the baby seat into the holes of the stand in the arrow's direction, complete when you hear a "click", like picture 2.
natural_image
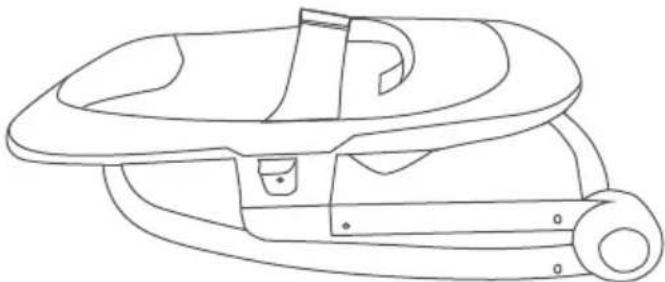
Line drawing of a mechanical component with no text or symbolsPress and hold the side buttons on the rocker base simultaneously, then the rocker will be folded.
natural_image
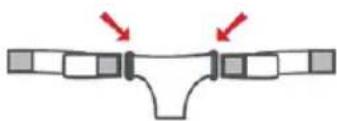
Diagram of a symmetrical mechanical or structural component with two red arrows pointing to specific sections (no text or symbols present)Use of the safety belt Thread the belt through the metal ring, then secure the velcro.
text_image
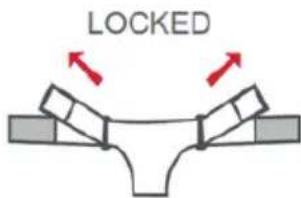
LOCKEDCrotch strap adjustment The crotch belt can be adjusted for tightness according to the baby's size.

text_image
OPENSeat belt lenght adjustment Tear the belt from the velcro, and the belt can be completely removed from the metal ring.
natural_image
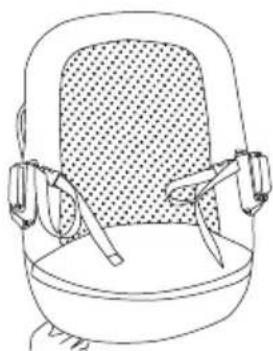
Line drawing of a baby seat with straps and a dotted backrest (no text or symbols)There is a buckle on each side of the rocker.
natural_image
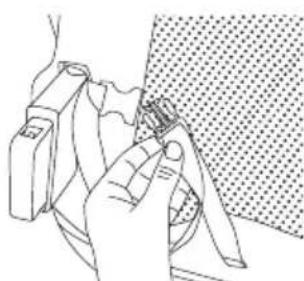
Line drawing of a hand holding a small object near a textured surface (no text or symbols)Before assembling the rocker to the high chair, open the buckles on each side.
natural_image
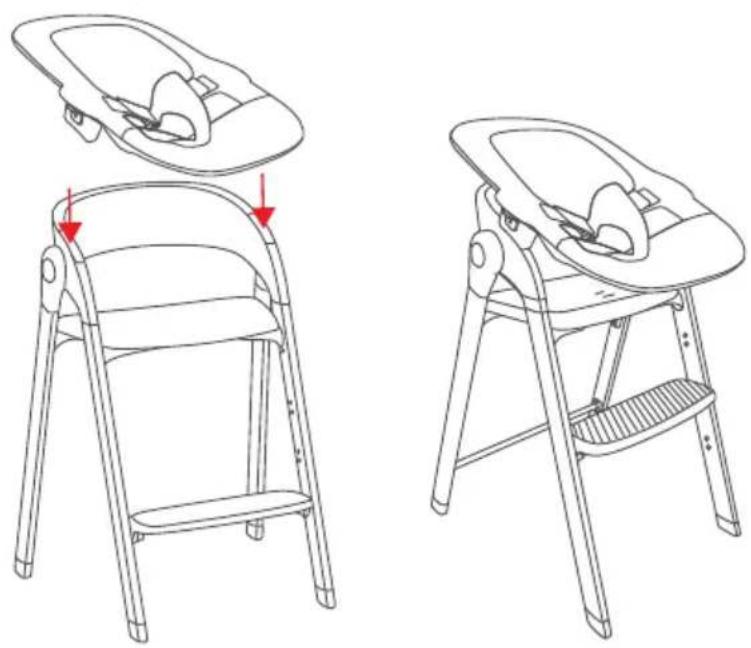
Line drawings of a baby in a baby boom chair, showing front and side views with no text or symbolsPress and hold the side buttons of the baby seat simultaneously, then insert to the holes of the growth chair in the arrow's direction, complete when you hear a "click".
natural_image
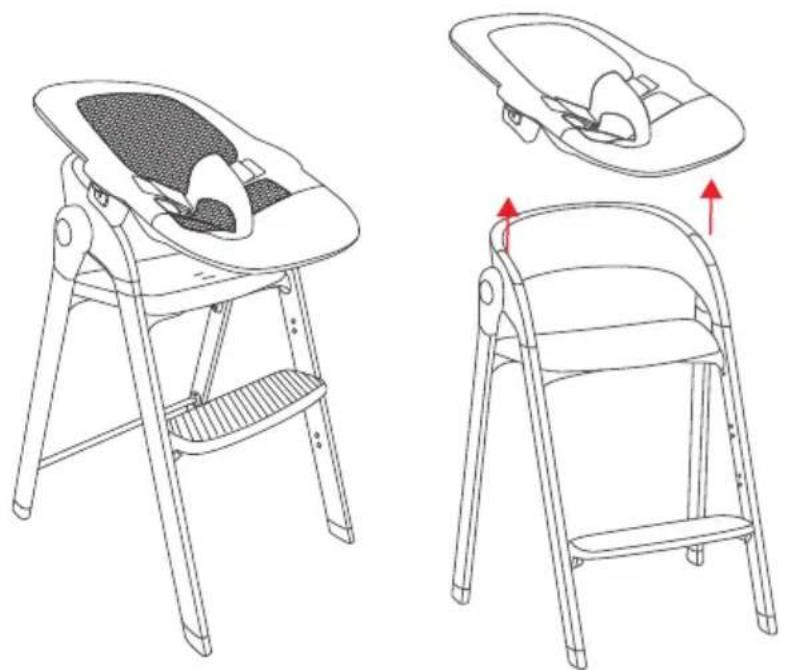
Line drawings of a baby in a baby boom seat and backrest, showing front and side views with red arrows indicating changes (no text or symbols)Unfasten the buckle between the rocker and high chair first. Next, press and hold the side buttons of the baby seat simultaneously, then remove the baby seat upward to separate it from the growth chair.
natural_image
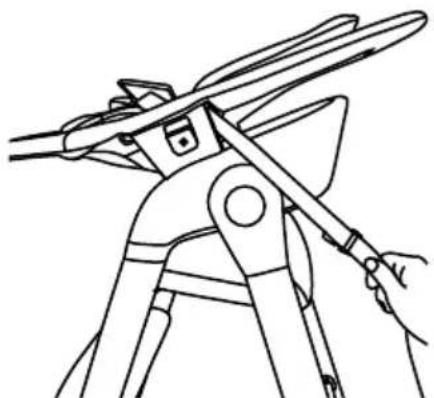
Line drawing of a mechanical device with hands operating it (no text or symbols)Once the rocker is properly assembled to the high chair, pull the belt from the outside of the high chair in the direction shown in the picture.
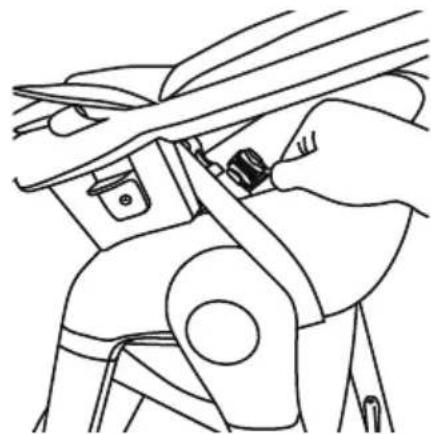
natural_image
Line drawing of a mechanical device with clamps and lever mechanism (no text or symbols)Next, wrap the belt around the arms of the high chair.
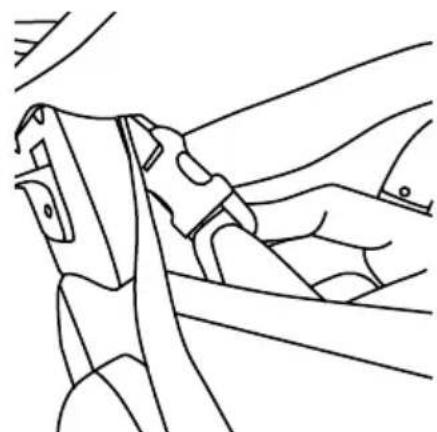
natural_image
Line drawing of a car seatbelt mechanism (no text or symbols)Then fix the buckle. The status of the installation completion is shown in the image.
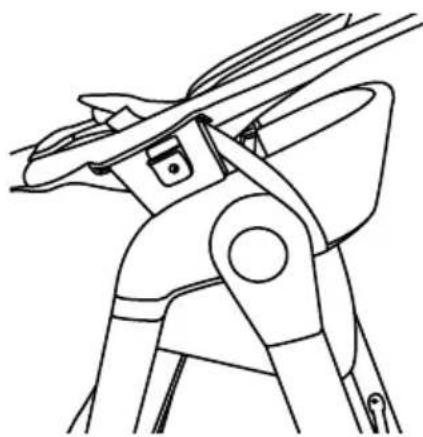
natural_image
Line drawing of a mechanical device with clamps and a handle (no text or symbols)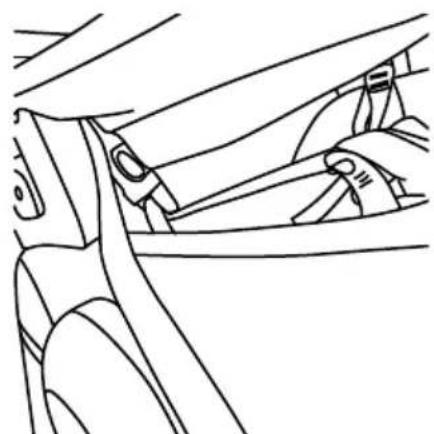
natural_image
Line drawing of a car seatbelt mechanism (no text or symbols)Finally, pull the webbing to tighten it fully. Repeat the above operation to complete the installation on the other side of the buckle.
INSTALLATION
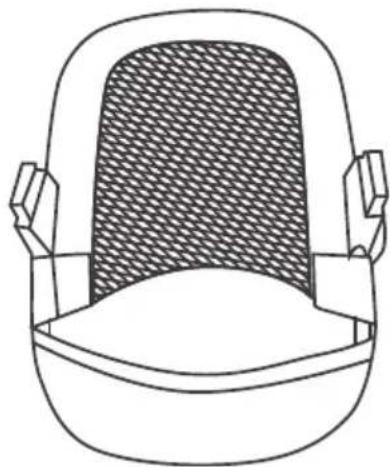
natural_image
Line drawing of a bathtub seat with shaded interior and side brackets (no text or symbols)1. Remove the rocker from the base:
Detach the baby seat from its base and place it on a flat surface, such as a table on the floor, to make the process easier.
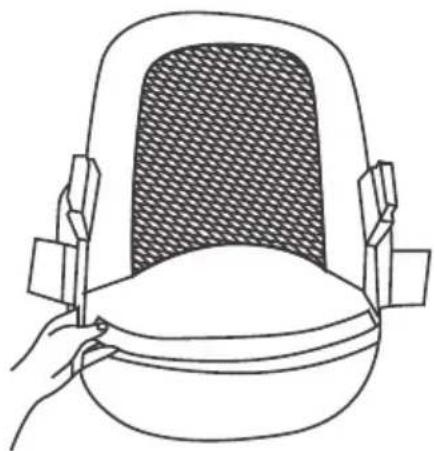
natural_image
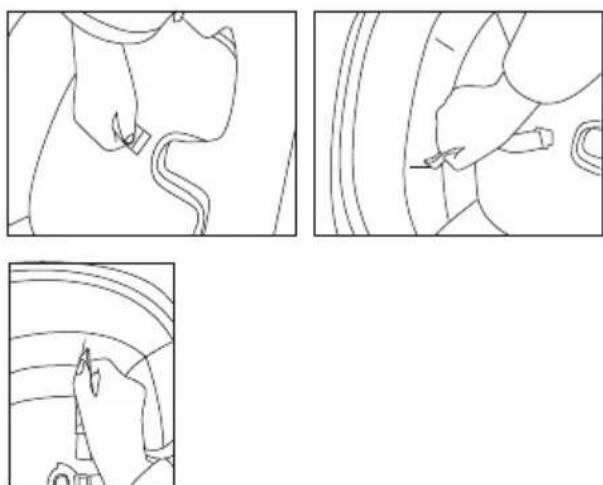
Line drawing of a hand holding a small container with a mesh lid (no text or symbols)- Locate and detach velcro tapes: Find the Velcro tapes that secure the cover on both sides of the chair. Gently pull apart the Velcro tapes on both sides and near the bottom edge.
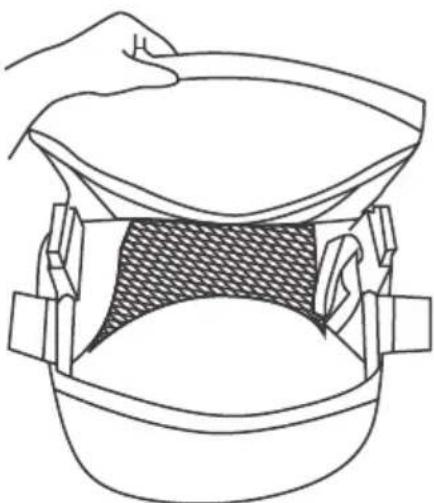
natural_image
Line drawing of a hand opening a container with a patterned lid (no text or symbols)3. Remove the top layer cover:
Starting from the bottom, gently lift and pull the top layer cover upwards. Handle with care to avoid tearing the fabric.
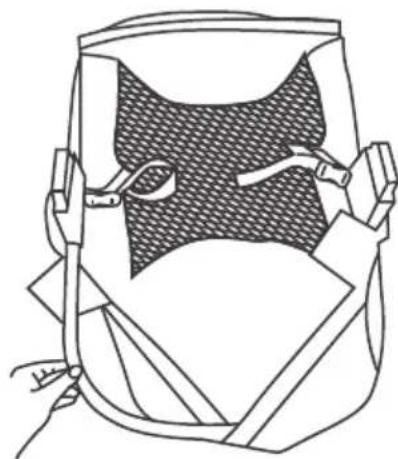
natural_image
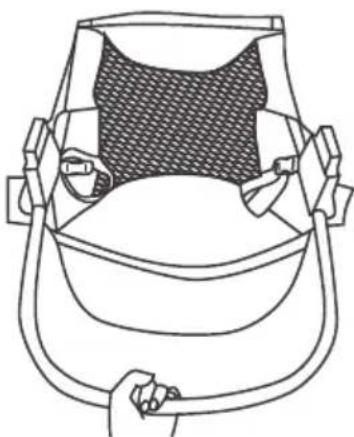
Line drawing of a person wearing a helmet with straps and straps (no text or symbols)4. Detach the bottom fabric:
From the bend in the frame, begin to rotate and peel the cover outward until the entire bottom fabric is removed.
natural_image
Line drawing of a person wearing a seatbelt device (no text or symbols)5. Complete separation:
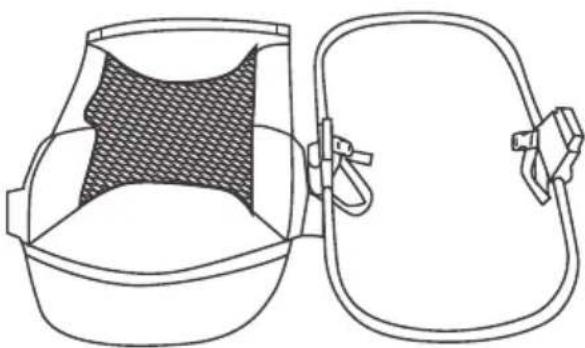
Once the bottom part is detached, continue pulling the frame out until the fabric and frame are completely separated. If you encounter any resistance, double-check for any hidden fasteners or safety straps that might be still connected.
natural_image
Line drawing of a two-part container with a mesh pattern on the side, enclosed in an open frame (no text or symbols)6. Inspect the cover:
After removing the cover, inspect it for any signs of wear or damage and clean it according to the instructions in the manual.
7. Store or reinstall the cover:
If you do not need to reinstall the cover immediately, fold it neatly and store it in a clean, dry place to prevent any damage or discoloration. If you plan to reinstall the cover, refer to these steps in reverse order to make the installation process easier.

WARNING
Please read the instruction manual before assembly and using this product. Failure to follow the instructions correctly may result in serious injury or death!
GENERAL WARNINGS
• Never leave the child unattended.
- Stop using the product when the child starts trying to sit up.
• Always use the restraint system. Do not move or lift this product with the baby inside it.
- Never let the child sleep in this product. This product does not replace a cot or a crib. Should the child fall asleep, then it should be placed in a suitable cot or crib.
- Do not use the product if any components are broken or missing.
- Do not use accessories or replacement parts other than those approved by the manufacturer.
- Always verify that the crotch strap and harness are correctly adjusted and locked even if the child is set for a short time
- Be sure to check that your childcare article does not contain any loose screws or any part which might injure the child or catch or trap his or her clothing (ribbon, dummy, necklace, etc ...) and thus cause strangulation
- Check that the locking mechanisms are correctly engaged and ajusted before using your bouncer.
- Ensure that the product is on a solid surface and is positioned at a safe distance from any device capable of producing an open flame, sources of intense heat, electrical sockets, extension leads, cookers, stoves, .. etc or any object within child's reach.
• Clean the baby chair regularly
• To wash the fabric seat, wash separately, warm/40°C. Do not tumble-dry.