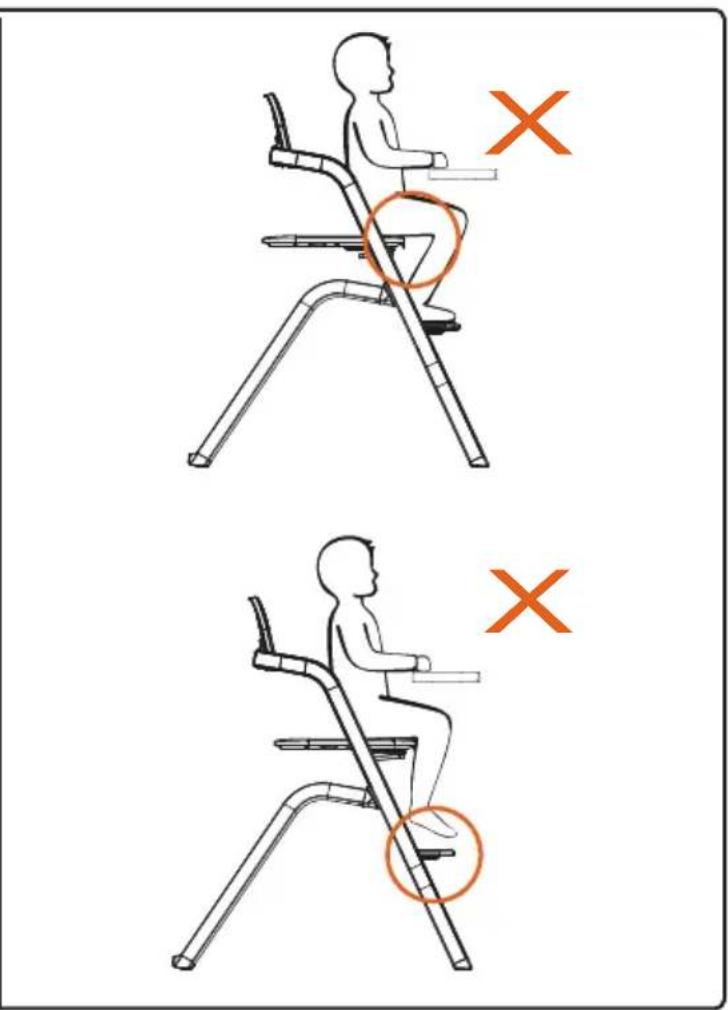
Curve - High chair Deryan - Free user manual and instructions
Find the device manual for free Curve Deryan in PDF.


User questions about Curve Deryan
0 question about this device. Answer the ones you know or ask your own.
Ask a new question about this device
Download the instructions for your High chair in PDF format for free! Find your manual Curve - Deryan and take your electronic device back in hand. On this page are published all the documents necessary for the use of your device. Curve by Deryan.
USER MANUAL Curve Deryan
natural_image
Line drawing of a baby boom chair with adjustable legs and seat (no text or symbols)!IMPORTANT! READ CAREFULLY! AND
KEEP FOR FUTURE REFERENCES!
LANGUAGES
Nederlands 3
English 6
Deutsch 9
Français 12
WAARSCHUWINGEN
• Make sure all latches are locked before use.
• Always keep your child in sight.
- Do not use the product until all parts are properly installed and adjusted.
• Fall danger! Make sure that your king does not climb on the product.
- Be aware of the dangers of strong heat in the vicinity of the product.
• Never place hot food or drinks on the tray.
- Be aware that your child may try to hang onto the safety bar of the tray, which may cause the chair to tip over.
• The chair is suitable for children age: 6 months to 36 months.
• Make sure that all parts of the seat are correctly adjusted before placing your child in the seat.
• Only place the chair on solid ground.
- Reduce the risk of injury! Always place the chair away from furniture, walls, hot surfaces and liquids, window cords and electrical cables.
- Move the chair away from furniture when: A) the chair is not being used at the table and B) the tray has been removed from the chair.
- Only use the chair if your child can sit up reliably and consistently on their own.
- Do not use the product if any part of the product is broken, torn, lost or if the product itself is not working. Seek repair if any of these cases occur.
WARNINGS
- The user is responsible for the regular maintenance of the product.
- Maintain the chair regularly and carefully.
- All connecting parts must be tight and tight.
- Tighten the screws regularly.
- When replacing, use only DERYAN parts, it may be unsafe to use other replacements.
- Do not make any changes to the product.
- Never store the product in a damp environment.
- In case of complaints or problems, please contact your supplier or importer.
- Clean the chair with a damp cloth and mild detergent and dry thoroughly.
- Please refer to the product's care label for detailed washing instructions.
- Remove water or liquids immediately with a dry cloth.
- Do not expose the chair to direct sunlight to dry.
Never let your child play around the product when it is not in the intended use position.
This product is designed for a 72-77 CM dining table.
To prevent the product from slipping when pushed backwards, it has wheels under the rear legs. Its function is to allow the chair to move backwards and return to the upright position when pushed backwards. To ensure that the wheels are used as intended, the chair must be placed on a flat and stable surface; uneven and rough surfaces such as some tiled floors, soft carpets or carpets with loose ends are generally not suitable for use with this chair. Although the chair is recognized for its stability, these conditions also apply here.
Both the wheels and the floors must be kept clean.
WARNINGS
In this instruction manual you will find photos that describe the assembly of the chair and the cross system. The crotch system and harness should only be used with the seat plate in the first and rearmost position from the top of the seat when used as a highchair.
Table of Approximate Age and Adjustments.
This table is a rough guide to seat height adjustment. Children differ in size according to age, so always make sure your child is seated correctly according to the instructions in this manual.
natural_image
Line drawing of a baby car seat with no text or symbolsBouncer seat intended for baby's 0-6 months of age. It is the top of model HV-B901
natural_image
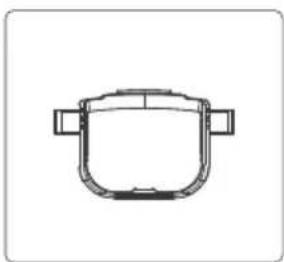
Simple line drawing of a symmetrical mechanical or architectural component with two side brackets (no text or symbols)Crotch system with harness intended for children from 6 to 36 months of age.
natural_image
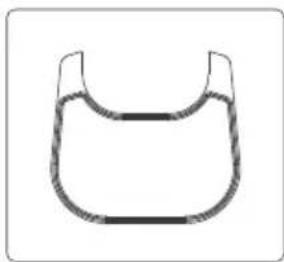
Simple line drawing of a U-shaped object with a horizontal seam, resembling a stylized bag or container (no text or symbols)Tray intended for highchair mode when used separately from dinner table.
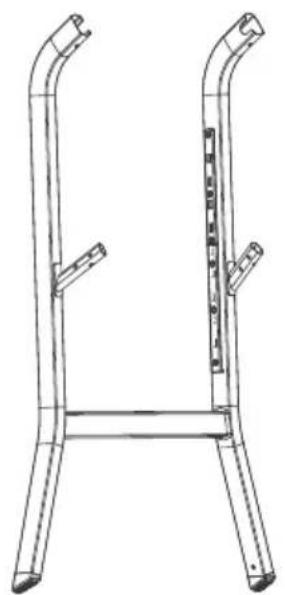
natural_image
Technical line drawing of a dual-angle metal frame structure with support legs and a central base (no text or symbols)(front legs) (Rear legs)
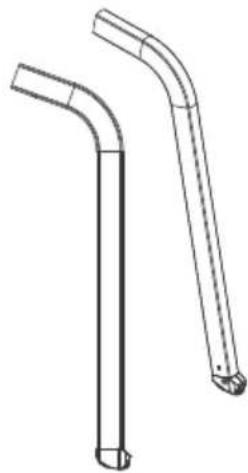
natural_image
Technical line drawing of two curved pipe fittings (no text or symbols)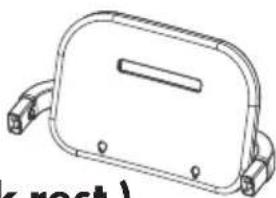
natural_image
Line drawing of a rectangular electronic component with mounting holes and a slot (no text or symbols)(back rest)
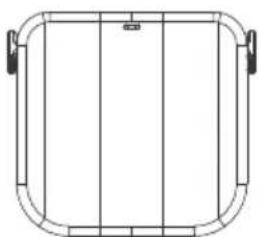
natural_image
Simple line drawing of a rectangular frame with rounded corners and a central vertical divider (no text or symbols)(seat plate)
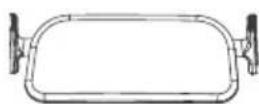
(foot plate)
ASSEMBLY
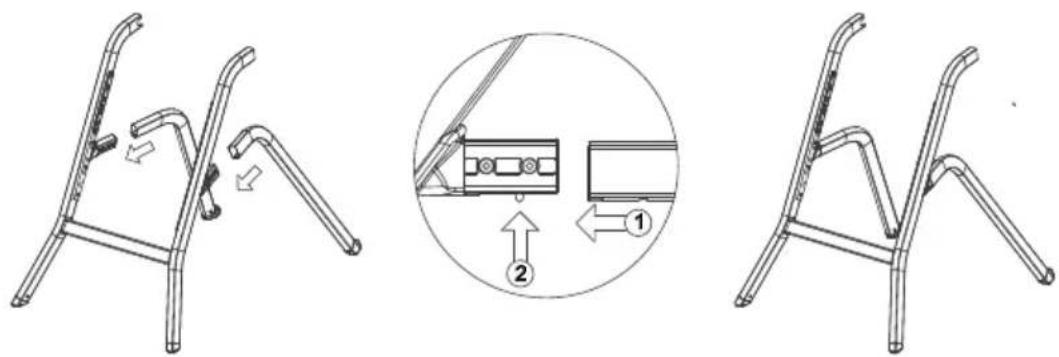
Assembling two rear legs to the front legs frame
Step 1: Insert the rear legs into the front legs, make sure the holes in these two parts can be aligned
Step 2: Try pushing the rear legs backwards to make sure it is assembled properly.
text_image
Technical diagram showing three stages of a folding chair mechanism with labeled parts and directional arrowsAssembling the foot plate
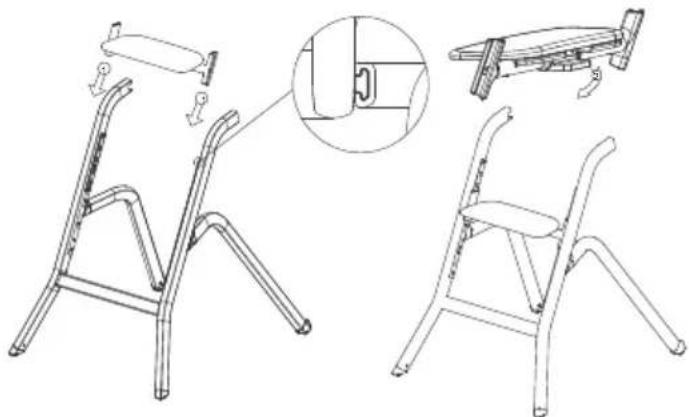
Step 1: Insert the foot plate to the guide rail on both sides of frame A.
Step 2: Pull down the button underneath the foot plate, and adjust the foot plate to the position you want.
natural_image
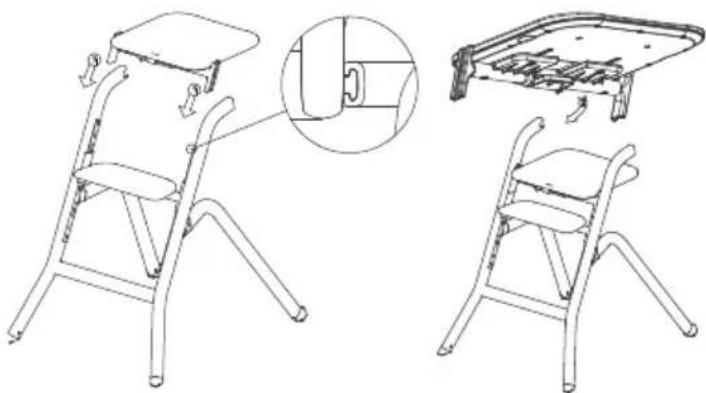
Line drawing of a chair with folding legs and seat, showing structural details and a close-up inset (no text or symbols)Step 3: Use the same method to assemble the seat plate.
natural_image
Line drawings of a children's high school chair with an inset showing the side panel detail (no text or symbols present)ASSEMBLY
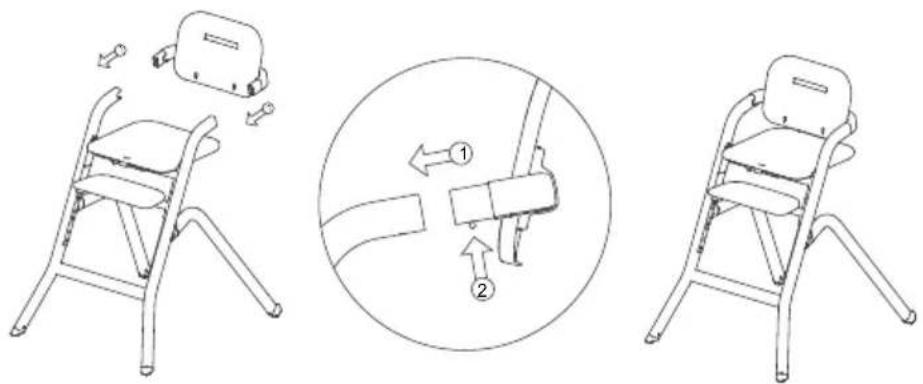
Assembling the back rest
Step 1: Insert the back rest tinto frame B until the back rest touches the velcro spring head. Step 2: Press the velcro spring head and at the same time push the back rest to the end. Assemble one side and then assemble the other side.
text_image
Diagram illustrating the folding and positioning of a chair with labeled parts and directional arrows.Assembling the crotch system
When assembling the crotch system, the seat plate needs to be at the rear position. To adjust the seat plate, slide the button of the left side. The seat can be adjusted front or backwards
natural_image
Technical line drawing of a mechanical device with no visible text or symbols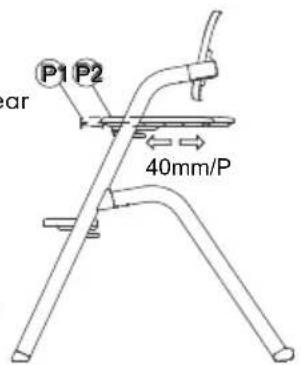
text_image
P1 P2 ar 40mm/PStep 1: Put the crotch system to cling to the backrest and make the T shape washers align with the two lower holes in the backrest. The upper hook of the crotch system goes into the upper hole of the backrest. Make the slot align with the hole's edge.
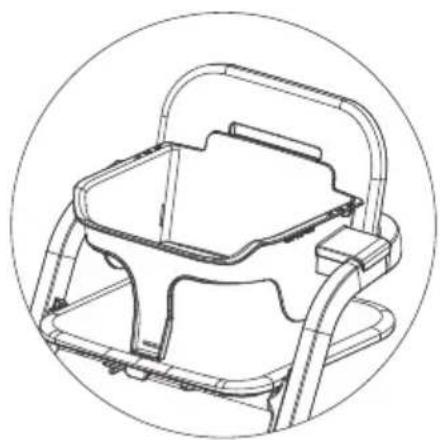
Step 2: Use your thumb to press the upper edge of the crotch system down. Then at the same time press the two arms of the crotch system down until you hear a "CLICK". Then the crotch system assembly is done. Lift up the chair frame by holding onto the crotch system to verify it is assembled properly.
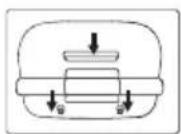
Step 3: Pull the button at the front of the seat forwards and insert the front part of the crotch system in the slot in the seat plate.
text_image
Technical diagram of a mechanical device with labeled parts and directional arrows indicating motion or force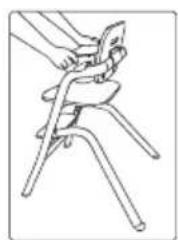
natural_image
Line drawing of a hand holding a chair with legs raised (no text or symbols)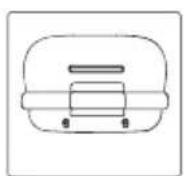
natural_image
Simple line drawing of two mechanical components connected by rods, no text or symbols present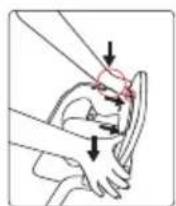
Step 2
natural_image
Technical line drawing of a mechanical device with a circular outline (no text or symbols)ASSEMBLY
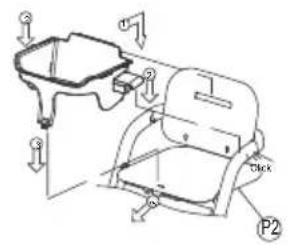
Assembling the tray
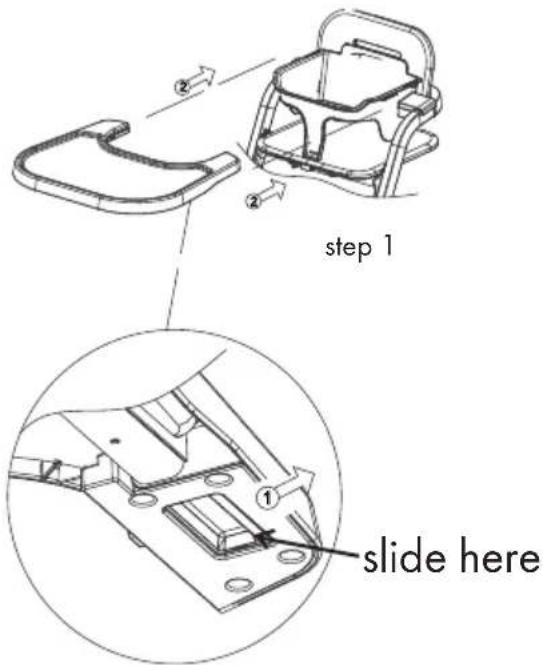
Step 1: Slide the button outwards on both sides underneath the tray.
Step 2: Make sure spring button which is under the tray goes into the hole of crotch system.
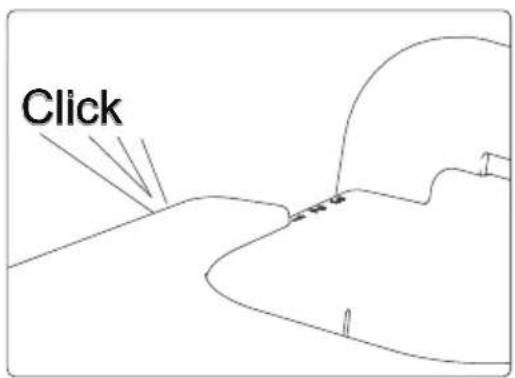
Step 3: Hold the button outwards then attach the tray to the crotch system by sliding in on the rim of the crotch system on both sides until to the positon you need, then release both hands. Make sure there is a "Click" sound.
text_image
step 1 slide here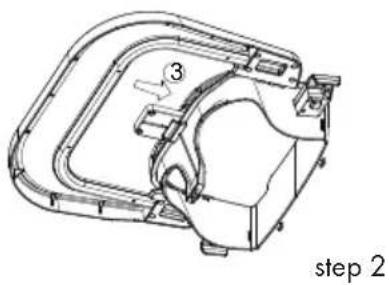
text_image
step 2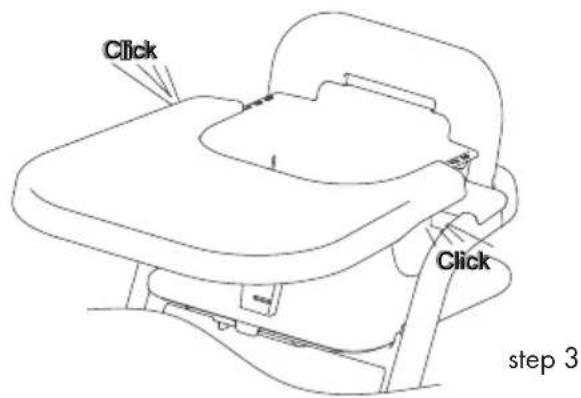
text_image
Click Click step 3DISASSEMBLY
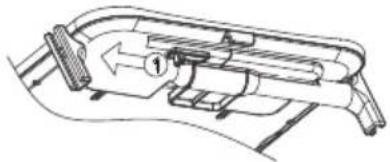
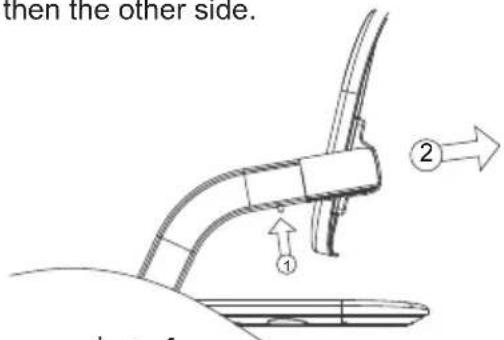
Removing the back rest
Step 1: Press the velcro spring underneath the arm of the chair.
Step 2: At the same time pull the back rest backwards.
Remove one side then the other side.
Refer to photo 1
text_image
then the other side. ① ②photo 1
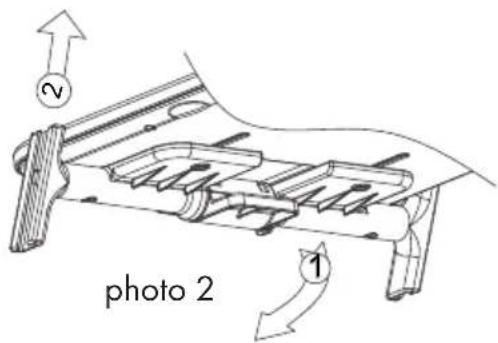
Remove the seat plate
Step 1: Pull down the button underneath the seat.
Step 2: At the same time lift up the seat from the frame.
Refer to photo 2
text_image
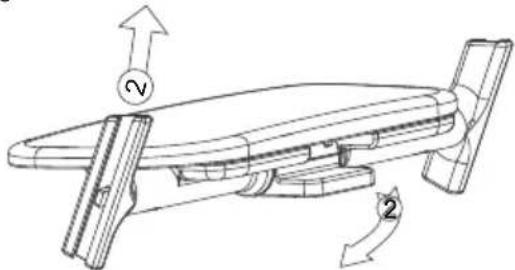
photo 2Remove the foot plate
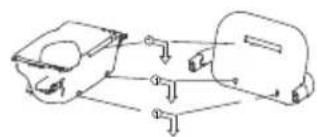
Step 1: Pull down the button underneath the foot plate.
Step 2: At the same time lift up the foot plate from the frame.
Refer to photo 3
natural_image
Technical line drawing of a mechanical device with labeled components (no text or symbols)photo 3
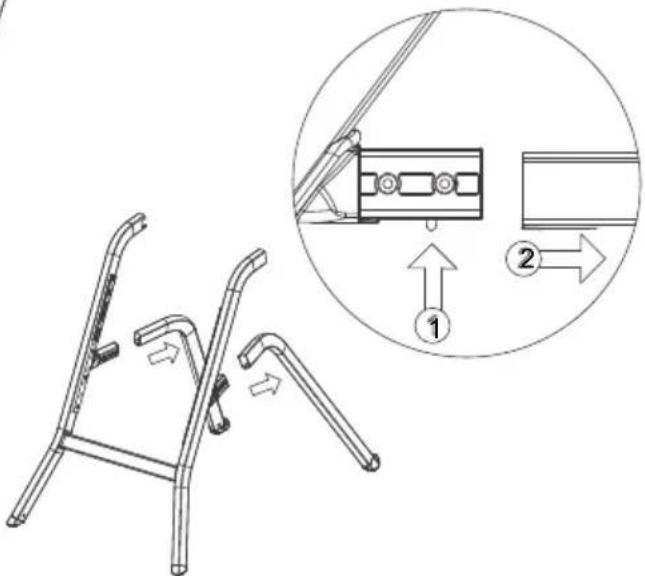
Remove the rear leg
Step 1: Press the velcro button
Step 2: At the same time,
separate rear leg top and rear leg lower halves.
Refer to photo 4
text_image
Technical diagram showing a mechanical assembly with labeled parts and directional arrows indicating motion or assembly.photo 4
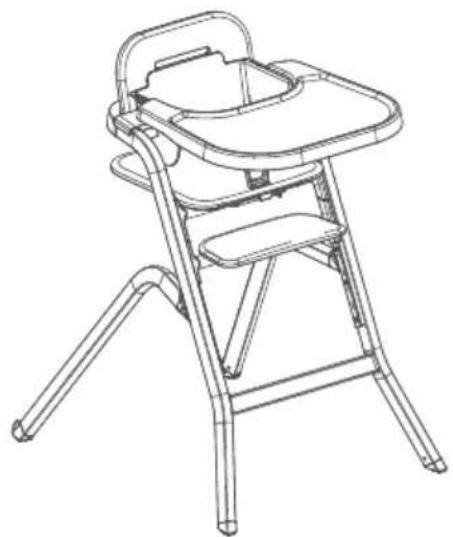
HIGH CHAIR MODE
natural_image
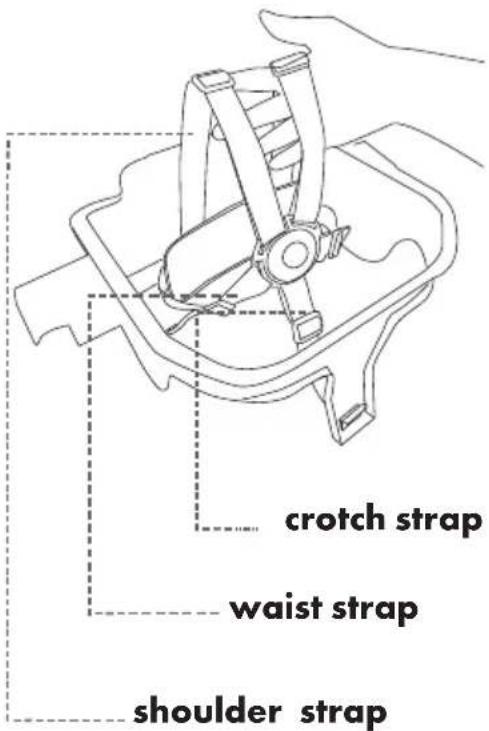
Line drawing of a baby boom chair with seat, legs, and armrest (no text or symbols)When using the chair, always use the harness.
Make sure the seat plate is in the 1st position from the top of the chair.
Make sure the crotch is attached to the seat.
There are 6 positions for the foot plate in total.
There is a 31mm difference for each position.
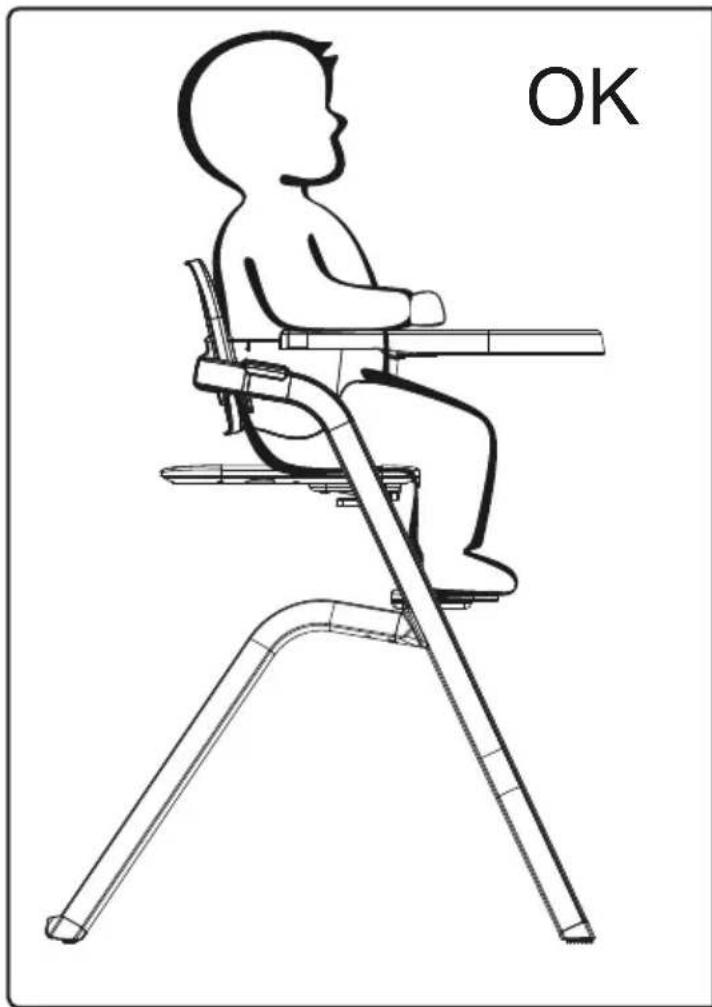
Adjust the foot plate to support the foot of your child.
text_image
ClickThere are 3 position for the tray.
To adjust the right position for your child refer to Page 17.
text_image
crotch strap waist strap shoulder strap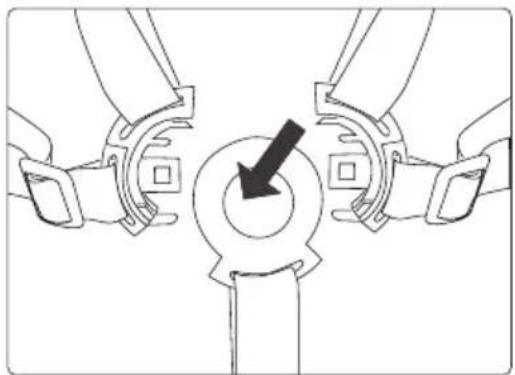
natural_image
Diagram of two hands adjusting a mechanical component with a black arrow indicating direction (no text or symbols)Press the center button to release the buckle. The child must be secured in the high chair at all times by both the harness and crotch system.
BOUNCER MODE
Assembling the bouncer seat
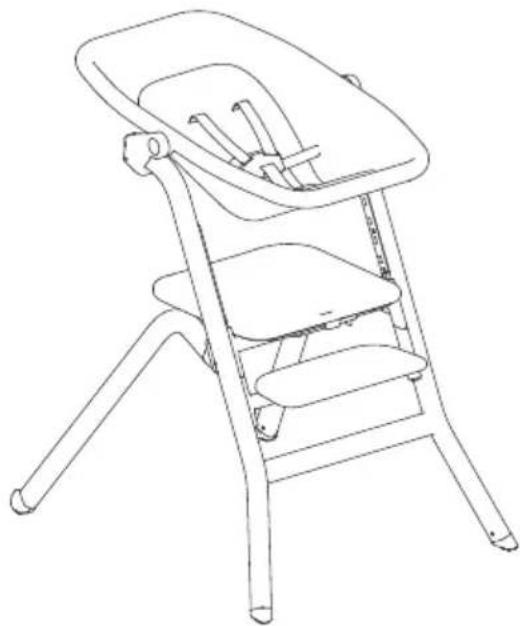
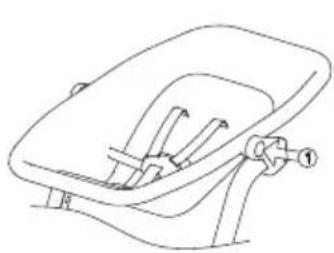
Insert the bouncer seat into frame B until you hear a "Click".
Remove the seat to use the product in other modes.
Press thr button and push, then remove the seat.
Remove one side then the other side.
natural_image
Line drawing of a baby boom chair with seat, legs, and side arm (no text or symbols)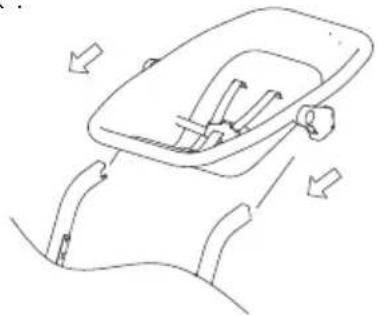
natural_image
Line drawing of a car seatbelt with arrows indicating movement or force (no text or symbols)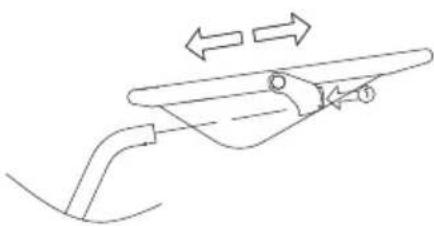
natural_image
Diagram of a mechanical component with two opposing arrows indicating motion or force direction (no text or symbols)Bouncer Mode
When using the high chair with B901 seat, the seat of G201 should be adjusted to the lowest position.
natural_image
Line drawing of a car seatbelt device with no text or symbols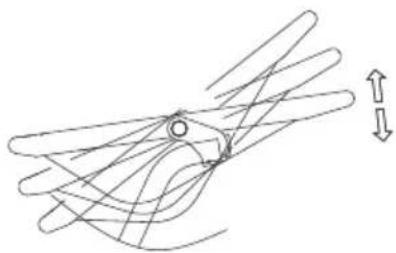
natural_image
Abstract line drawing with intersecting curved lines and a central circular element, no text or symbols presentThe bouncer seat can be positioned in 3 different ways.
Press the button on both sides to change the position of the bouncer seat.
Always use the harness and make sure the bouncer seat is attached to frame B securely.
CHAIR MODE
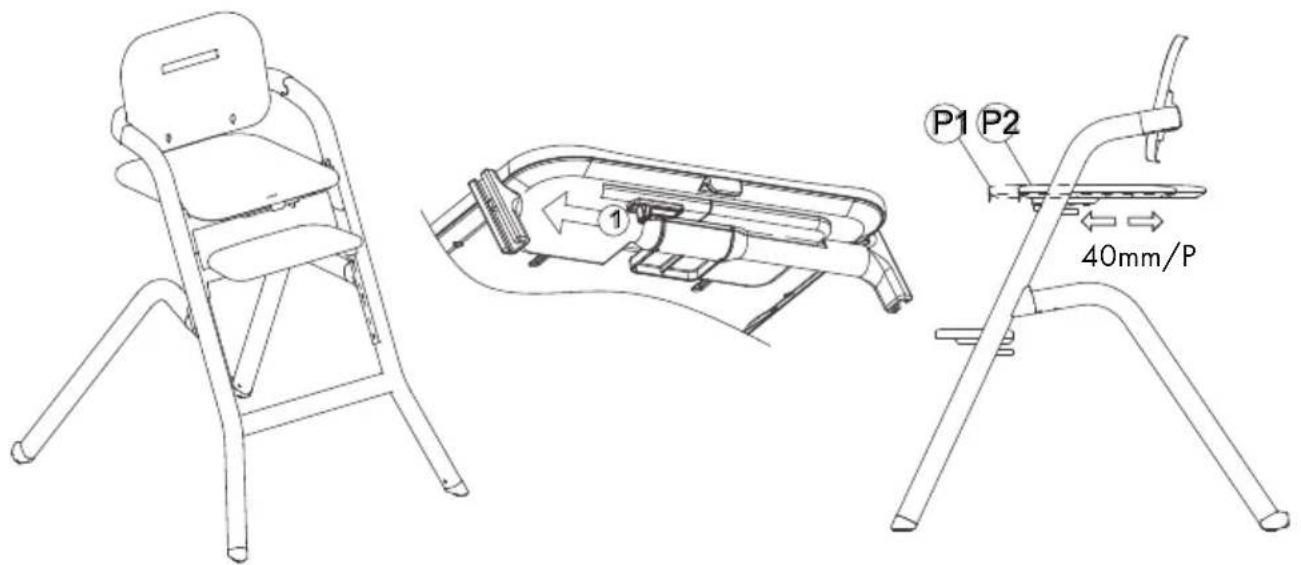
Adjusting the seat in the front position
Slide the button underneath the seat to the side and at the same time pull the seat frontwards.
text_image
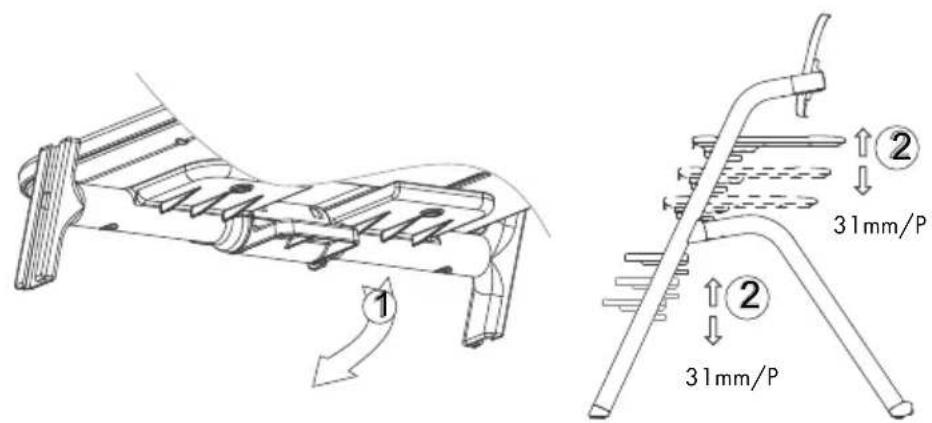
P1 P2 40mm/PAdjusting the seat and foot pannel to the suitable position stated in the Table of age and approximate adjustment on pages 5, 8, 11 and 14.
text_image
1 2 31mm/P 2 31mm/PThere are a total of 6 different positions There is a 31 mm difference for each position.
Warning! Maximum weight for the 6th position is 80kgs.
text_image
OK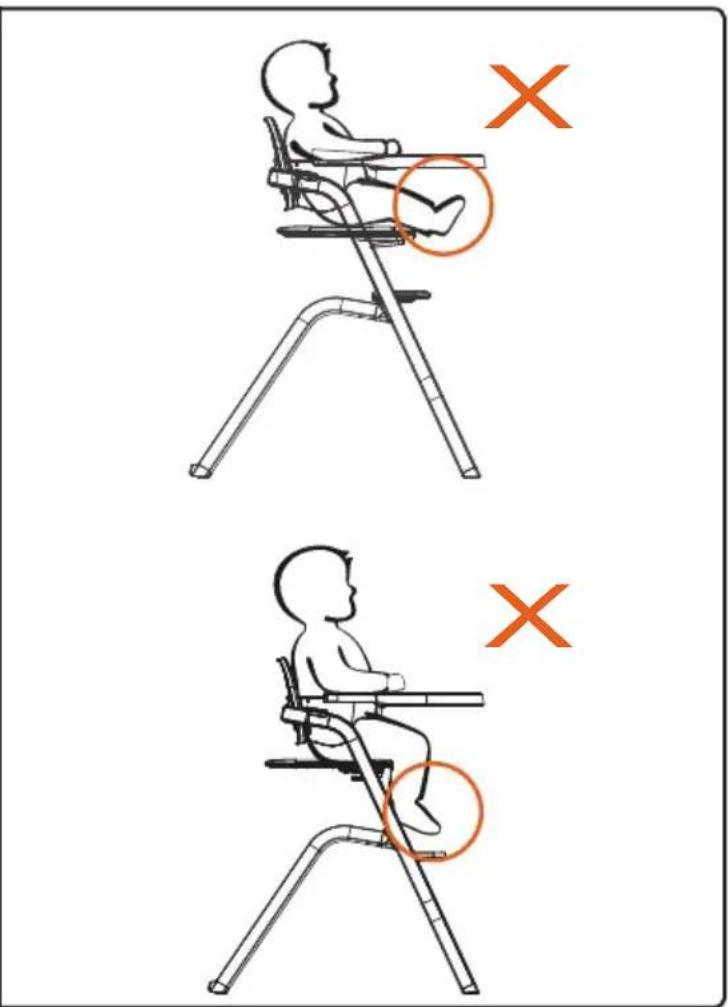
text_image
Illustration showing two scenarios of a child sitting in a chair, with orange X marks indicating the foot and seat positions.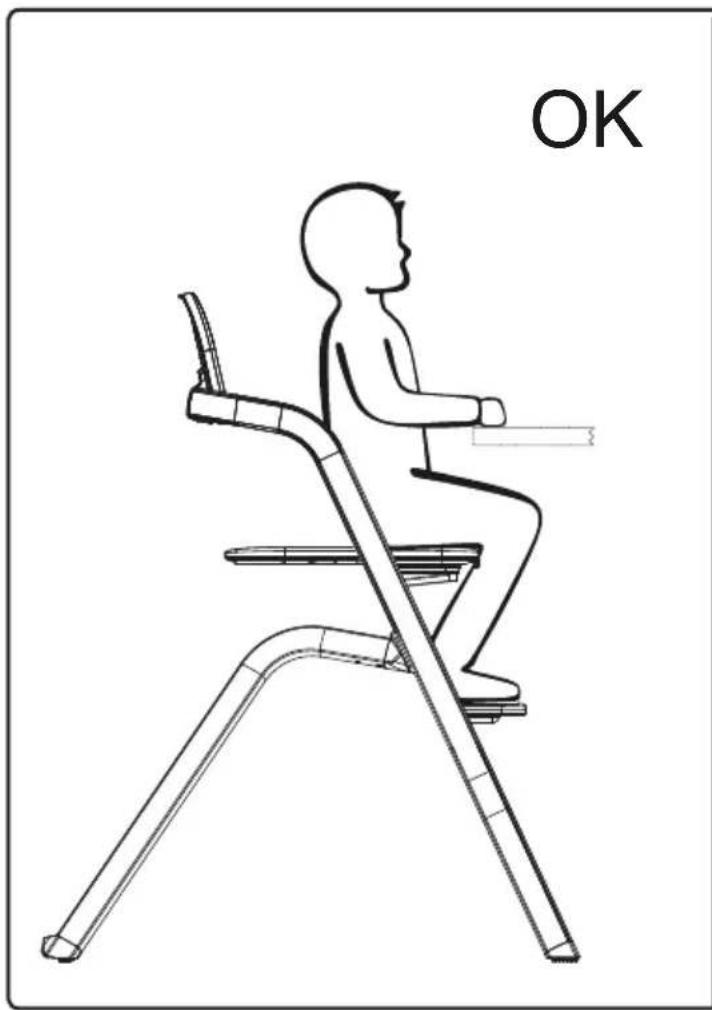
natural_image
Line drawing of a child sitting on a treadmill, no text or symbols present