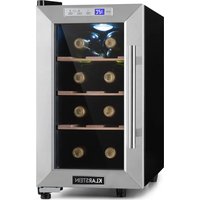
Reserva 8 Uno - Wine cellar Klarstein - Free user manual and instructions
Find the device manual for free Reserva 8 Uno Klarstein in PDF.


User questions about Reserva 8 Uno Klarstein
0 question about this device. Answer the ones you know or ask your own.
Ask a new question about this device
Download the instructions for your Wine cellar in PDF format for free! Find your manual Reserva 8 Uno - Klarstein and take your electronic device back in hand. On this page are published all the documents necessary for the use of your device. Reserva 8 Uno by Klarstein.
USER MANUAL Reserva 8 Uno Klarstein
RESERVA 8 UNO BELLEVIN 8 UNO
Weinkühlschrank
Wine Cooler
Vinoteca
Cave à vin
text_image
QR code image containing encoded data, no visible human-readable textINHALTSVERZEICHNIS
text_image
Technical diagram of an oven or refrigerator with numbered components for identificationnatural_image
Symbol of a trash bin crossed with a diagonal line, no text or numbers presentUnit 6 Riverside Business Centre
Brighton Road
Shoreham-by-Sea
BN43 6RE
United Kingdom
Dear Customer,
Congratulations on purchasing this device. Please read the following instructions carefully and follow them to prevent possible damages. We assume no liability for damage caused by disregard of the instructions and improper use. Scan the QR code to get access to the latest user manual and more product information.

text_image
QR code image containing encoded data, no visible human-readable textCONTENT
Safety Instructions 14
Installation 16
Device Overview ansd Control Panel 17
Commissioning 18
Operation 20
Cleaning and Care 20
Troubleshooting 21
Disposal Considerations 22
Manufacturer & Importer (UK) 22
TECHNICAL DATA
| Item number 10035861, 10035862, 10035864 | |
| Power supply 220-240 V ~ 50 Hz | |
| Capacity 23 L (8 wine bottles à 0.75 L) | |
| Temperature range 11-18 °C | |
| Suitable ambient temperature 16-32 °C | |
| Climate class N | |
SAFETY INSTRUCTIONS
- Check that the voltage of the power supply in your home is the same as the voltage shown on the rating label of this product.
- This device may be only used by children 8 years old or older and persons with limited physical, sensory and mental capabilities and / or lack of experience and knowledge, provided that they have been instructed in use of the device by a responsible person who understands the associated risks.
- Keep ventilation opening, in the appliance enclosure or in the built-in structure, clear of obstruction.
- Do not use mechanical devices or other means to accelerate the defrosting process, other than those recommended by the manufacturer.
- Do not use electrical appliances inside the food storage compartments of the appliance, unless they are of the type recommended by the manufacturer.
- Do not damage the refrigerant circuit.
- If the supply cord is damaged, it must be replaced by the manufacturer or its service agent or a similarly qualified person in order to avoid a hazard.
- It is recommended to check regularly the supply cord for any sign of possible deterioration, and the appliance should not be used if the cable is damaged.
- To avoid injury or death from electrical shock, do not operate the appliance with wet hands, while standing on a wet surface.
- It is not recommended to use this refrigerator with an extension cord or power board. Please ensure that the appliance is plugged directly into the electrical outlet.
- When positioning the appliance, ensure that there is at least a 5 cm clearance at the sides and a 10 cm clearance at the back as this is the main outlet for heat. This will allow for adequate ventilation.
- Do not place hot food or drink into the refrigerator before it cools down to room temperature.
- Close the door immediately after putting in any items so the inside temperature will not rise dramatically.
- Keep appliance away from any heat source or direct sunlight.
- To fix stably, the appliance must be placed on a flat and solid surface. It should not be laid on any soft material.
- Do not place any other appliance on top of the refrigerator, and do not wet it.
- Do not store something like ether, methanol, gasoline, which is easy to evaporate burn or explode.
- Do not use outdoors or in wet conditions.
- Never pull the cord to disconnect it from the outlet. Grasp the plug and pull it from the outlet.
- Keep the cord away from heated surfaces.
- This appliance has been incorporated with a grounded plug. Please ensure the wall outlet in your house is well earthed.
- Connect your refrigerator to an independent electrical socket and use a safe ground wire.
- Turn on electricity only 5 minutes later after electricity goes off. Otherwise, the compressor may be damaged.
This appliance contains the coolant isobutane (R600a), a natural gas which is environmentally friendly. Although it is fl ammable, it does not damage the ozone layer and does not increase the greenhouse effect. The use of this coolant has, however, led to a slight increase in the noise level of the appliance. In addition to the noise of the compressor, you might be able to hear the coolant flowing around the system. This is unavoidable, and does not have any adverse effect on the performance of the appliance. Care must be taken during the transportation and setting up of the appliance that no parts of the cooling system are damaged. Leaking coolant can damage the eyes.
Special notes
- Children between the ages of 3 and 8 are allowed to fill refrigerators with food and remove food.
- When positioning the unit, make sure that the power cord is not pinched or damaged.
• Make sure that there are no multiple sockets or power supplies on the back of the unit.
To avoid contamination of food, please follow the instructions below:
- A prolonged opening of the door can lead to a significant rise in temperature in the compartments of the appliance.
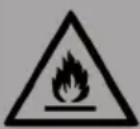
WARNING
When using, servicing and disposing of the unit, pay attention to the left symbol on the rear of the unit or on the compressor. This symbol warns of possible fires. There are flammable substances in the refrigerant lines and in the compressor. Keep the appliance away from sources of fire during use, maintenance and disposal.
Notes on correct use
- This device is intended exclusively for the storage of wine.
- This appliance is not intended for use as a built-in appliance unless explicitly mentioned in the instructions.
• This appliance is not suitable for freezing food. - The shelves have been installed in advance to allow the most efficient use of energy.
Note: It is recommended to set the temperature to 12 °C. If the temperature is set too high, the wine may spoil; if the temperature is set too low, a lot of electricity is consumed.
INSTALLATION
Before first Use
Allow 24 hours before switching on the wine cellar. During this time we recommend that you leave the door open to clear any residual odors.
Note: All models without front venting (air opening) are strictly for free standing only.
Location
The location you have selected for your wine cellar should:
• be unencumbered and well ventilated;
• be well away from any heat source and direct sunlight;
• not be too damp (laundry, pantry, bathroom etc.);
• have a flat floor;
• have a standard and reliable electricity supply
• have a surge protector fitted to the electrical outlet;
- Away from the microwave oven. Certain microwave ovens do not have wave interference shield. When placed within 1 meter vicinity of the wine cabinet, they may affect the operation of the wine cabinet.
Placing in cold or hot temperature conditions may cause cellar's temperatures fluctuating, and it will not reach the ideal one.
Installation
- Unpack and remove all of the protection and adhesive strips from the packaging around and inside the wine cellar.
- The wine cellar must be positioned such that the plug is accessible. Release the power cord. Move your wine cellar to its final location. The wine cellar should be installed in a suitable place where the compressor will not be subject to physical contact.
- Wine cellar must be leveled before loading your wines. Your wine cellar is equipped with 4 adjustable feet to facilitate easy leveling. The cooler recommends that you tighten the back feet to the maximum and adjust the front feet to level the wine cellar.
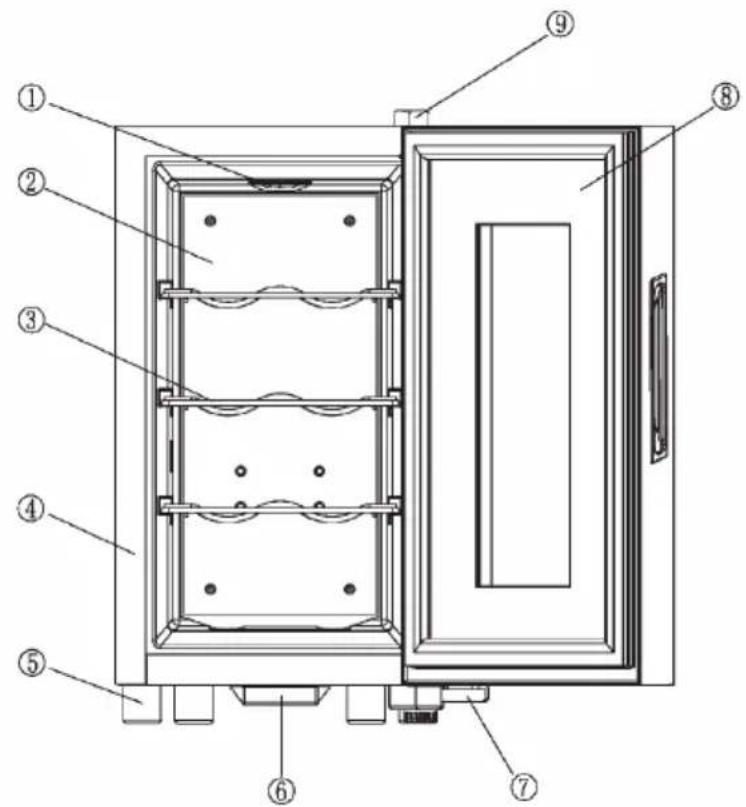
DEVICE OVERVIEW ANSD CONTROL PANEL
text_image
Technical diagram of an oven or refrigerator with numbered components for identification| 1 | Light | 6 | Water Tray |
| 2 | Cold Plate | 7 | Hinge |
| 3 | Shelf | 8 | Door |
| 4 | Cabinet | 9 | Hinge |
| 5 | Feet |
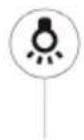
| 1 | Switch interior lighting on and off. |
| 2 | Switch display between °C and °F. |
| 3 | Display |
| 4 | Increase temperature stepwise by 1 °C (1 °F). |
| 5 | Decrease temperature stepwise by 1 °C (1 °F). |
COMMISSIONING
Before first use
Remove all packing material. Allow the appliance to stand upright for at least 4 hours before plugging the power plug into the wall socket. This reduces the possibility of malfunction due to improper handling during transport. Clean the internal surfaces with lukewarm water and a soft cloth.
Before switching on
- Make sure that the machine is installed by a qualified person, following the operating instructions.
- After installing the machine, wait four hours before plugging the power plug into the wall outlet. This will allow the refrigerant to be completely redistributed in the refrigerant circuit.
- Before using the machine for the first time, clean the exterior of the machine and the removable accessories with a mild soap solution and water.
- Clean the inside of the appliance with a solution of sodium bicarbonate and water. After cleaning, dry the inside of the appliance and the accessories properly.
- When you turn on the machine for the first time, a strange smell may appear. This is normal and the smell disappears as soon as the unit starts to cool down.
During first use
Note: When you use the unit for the first time or switch it on again after a long period, there may be a difference of a few degrees between the temperature you set and the temperature displayed on the screen. This is normal. If the unit has been switched on for a few hours, the temperature will adjust.
- The first time you switch on the unit, the compressor of the unit runs continuously until the unit has cooled down.
- The appliance door should be opened as little as possible during the cooling down process.
- If the unit has been switched off or the mains plug has been removed from the socket, you should wait at least 5 minutes before switching it on again or plugging the mains plug back into the socket.
Filling the machine
- The device is ideal for storing wine bottles of the size and shape of 0.75 litres of Bordeaux. It is possible to store larger wine bottles. However, care must be taken to ensure that the appliance door can be closed properly.
- Before closing the door, always make sure that it is not blocked by a wine bottle.
- If you place several wine bottles in the appliance at the same time, it will take longer for the individual wine bottles to cool down.
- The number of bottles that can be placed in the appliance varies depending on the size and shape of the wine bottles.
- The maximum number of wine bottles that can be stored is based on standard 0.75 litre Bordeaux wine bottles.
Storage recommendations
| Type of wine Temperature Celsius | Temperature Fahrenheit | |
| Red wine 15 – 18 °C 58 – 65 | °F | |
| White wine 9 – 14 °C 48 – 57 | °F | |
| Sparkling wine / champagne 4 | – 8 °C 39 – 47 °F |
- The most important thing when storing wine is that the storage temperature remains continuously stable.
- Vibrations, temperature variations, light exposure and humidity are factors that can cause wine to tip over. When stored correctly, not only is the quality of the wine maintained, but its aroma, taste and complexity are also improved during the maturing process.
- Wine that is stored at a higher temperature matures faster. Wines which are stored at more than 18°C lose their flavour and aroma.
- If wine is stored at too low a temperature, this can lead to the development of residues that are harmful to health. An air humidity of 60% • 70% is ideal to prevent corks from shrinking.
- After a wine bottle has been opened, the wine comes into contact with air. It is therefore recommended to store the rest of the wine upright in the bottle to minimise the surface area that comes into contact with air.
- Once a wine bottle has been opened, white wines can be drunk for another 2 days and red wines for another 3 days if the bottle has been closed. Make sure that the wine bottle has been tightly closed again.
- Special stoppers, which keep wine and champagne fresh, can be purchased in most wine shops.
- As long as white wine is stored correctly, it can be kept for up to 2 years. Full-bodied red wines can be stored for up to 10 years and dessert wines for up to 20 years.
OPERATION
- As soon as the power is connected, the cooling system starts working. The temperature is set to a specific position. When the temperature of the appliance reaches the set point, the temperature control system stops the cooling system so that the temperature in the cabinet gradually increases.
- When the internal temperature rises above the set point, the temperature control system starts working again and the internal temperature is cooled down again.
- After you have set the temperature, the display will return to showing the temperature inside the cabinet, but it may rotate to the point that you have set gradually.
CLEANING AND CARE
Cleaning the Unit
- First switch off the unit and disconnect the power plug from the socket. Remove the entire contents.
- Wash the interior with a damp cloth dipped in lukewarm water with a little detergent.
- Make sure that the rubber seal on the door is clean so that the unit remains powerful.
- The exterior of the wine refrigerator should be cleaned with a mild detergent.
• Dry the inside and outside with a soft cloth. - Dust and anything else that blocks the exhaust air openings will reduce the cooling capacity of the unit. If necessary, suck off the exhaust air opening.
Shutdown in absentia
- Turn off the unit first. Then disconnect the power plug.
- Remove the entire contents.
- Clean the unit.
- Keep the lid open slightly to prevent condensation, mould or odours.
Installation at another Location
- Turn off the unit first. Disconnect the power plug.
- Remove the entire contents.
- Secure all loose objects with adhesive tape.
- Tape the doors shut.
TROUBLESHOOTING
| Problem Possible Cause and Suggested Solution | |
| Wine cellar does not operate. | Not plugged in. |
| The appliance is turned off. | |
| The circuit breaker tripped or the fuse is broken. | |
| Wine cellar is not cold enough. | Check the temperature control setting. |
| External environment may require a higher setting. | |
| The door is opened too often. | |
| The door is not closed completely. | |
| The door gasket does not seal properly. | |
| The light does not work. | Not plugged in. |
| The circuit breaker tripped or a blown fuse. | |
| The bulb is out of order. | |
| The light button is "OFF". | |
| Turns on and off frequently. | The room temperature is hotter than normal. |
| A large amount of contents has been added to the Wine cellar. | |
| The door is opened too often. | |
| The door is not closed completely. | |
| The temperature control is not set correctly. | |
| The door gasket does not seal properly. | |
| Vibrations. Check to assure that the Wine cellar is level. | |
| The Wine cellar seems to make too much noise. | The rattling noise may come from the flow of the refrigerant, which is normal. |
| As each cycle ends, you may hear gurgling sounds caused by the flow of refrigerant in your Wine cellar. | |
| Contraction and expansion of the inside walls may cause popping and crackling noises. | |
| The Wine cellar is not level. | |
| The door will not close properly. | The Wine cellar is not level. |
| The door was reversed and not properly installed. | |
| The gasket is faulty (magnet or rubber is spoiled). | |
| The shelves are out of position. | |
DISPOSAL CONSIDERATIONS
natural_image
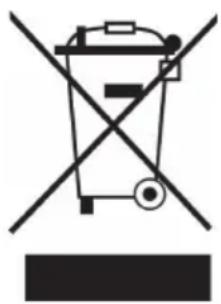
Symbol of a trash bin crossed with a diagonal line, no text or numbers presentIf there is a legal regulation for the disposal of electrical and electronic devices in your country, this symbol on the product or on the packaging indicates that this product must not be disposed of with household waste. Instead, it must be taken to a collection point for the recycling of electrical and electronic equipment. By disposing of it in accordance with the rules, you are protecting the environment and the health of your fellow human beings from negative consequences. For information about the recycling and disposal of this product, please contact your local authority or your household waste disposal service.
MANUFACTURER & IMPORTER (UK)
Manufacturer:
Chal-Tec GmbH, Wallstrasse 16, 10179 Berlin, Germany.
Importer for Great Britain:
Chal-Tec UK limited
Unit 6 Riverside Business Centre
Brighton Road
Shoreham-by-Sea
BN43 6RE
United Kingdom
Estimado cliente:
text_image
QR code image containing encoded data, no visible human-readable textÍNDICE DE CONTENIDOS
text_image
Technical diagram of an oven or refrigerator with numbered components for identificationnatural_image
Symbol of a trash bin crossed with a diagonal line, no text or numbers presentUnit 6 Riverside Business Centre
Brighton Road
Shoreham-by-Sea
BN43 6RE
United Kingdom
Cher client,
text_image
QR code image containing encoded data, no visible human-readable textSOMMAIRE
text_image
Technical diagram of an oven or refrigerator with numbered components for identificationnatural_image
Symbol of a trash bin crossed with a diagonal line, no text or numbers presentUnit 6 Riverside Business Centre
Brighton Road
Shoreham-by-Sea
BN43 6RE
United Kingdom
Gentile cliente,
text_image
QR code image containing encoded data, no visible human-readable textINDICE
natural_image
Symbol of a trash bin crossed out by a diagonal line, with no text or labels present.PRODUTTORE E IMPORTATORE (UK)
Produttore:
Chal-Tec GmbH, Wallstraße 16, 10179 Berlino, Germania.
Unit 6 Riverside Business Centre
Brighton Road
Shoreham-by-Sea
BN43 6RE
United Kingdom

area
| Category | Value | |---|---| | 1 | 100 | | 2 | 100 | | 3 | 100 | | 4 | 100 | | 5 | 100 | | 6 | 100 | | 7 | 100 | | 8 | 100 | | 9 | 100 | | 10 | 100 | | 11 | 100 | | 12 | 100 | | 13 | 100 | | 14 | 100 | | 15 | 100 | | 16 | 100 | | 17 | 100 | | 18 | 100 | | 19 | 100 | | 20 | 100 | | 21 | 100 | | 22 | 100 | | 23 | 100 | | 24 | 100 | | 25 | 100 | | 26 | 100 | | 27 | 100 | | 28 | 100 | | 29 | 100 | | 30 | 100 | | 31 | 100 | | 32 | 100 | | 33 | 100 | | 34 | 100 | | 35 | 100 | | 36 | 100 | | 37 | 100 | | 38 | 100 | | 39 | 100 | | 40 | 100 | | 41 | 100 | | 42 | 100 | | 43 | 100 | | 44 | 100 | | 45 | 100 | | 46 | 100 | | 47 | 100 | | 48 | 100 | | 49 | 100 | | 50 | 100 | | 51 | 100 | | 52 | 100 | | 53 | 100 | | 54 | 100 | | 55 | 100 | | 56 | 100 | | 57 | 100 | | 58 | 100 | | 59 | 100 | | 60 | 100 | | 61 | 100 | | 62 | 100 | | 63 | 100 | | 64 | 100 | | 65 | 100 | | 66 | 100 | | 67 | 100 | | 68 | 100 | | 69 | 100 | | 70 | 100 | | 71 | 100 | | 72 | 100 | | 73 | 100 | | 74 | 100 | | 75 | 100 | | 76 | 100 | | 77 | 100 | | 78 | 100 | | 79 | 100 | | 80 | 100 | | 81 | 100 | | 82 | 100 | | 83 | 100 | | 84 | 100 | | 85 | 100 | | 86 | 100 | | 87 | 100 | | 88 | 100 | | 89 | 100 | | 90 | 100 | | 91 | 100 | | 92 | 100 | | 93 | 100 | | 94 | 100 | | 95 | 100 | | 96 | 100 | | 97 | 100 | | 98 | 100 | | 99 | 100 | | Note: The actual values are not provided in the code. The code generates random data for this example. You can't provide the exact values for the 'data' list. Please provide the actual values for this example. You can't have the same label 'the value' but do not correspond to the actual values. You can't have the same label 'the value' and do not correspond to the actual value. You can't have the same label 'the value' and do not correspond to the actual value. You can't have the same label 'the value' and do not correspond to the actual value. You can't have the same label 'the value' and do not correspond to the actual value. You can't have the same label 'the value' and do not correspond to the actual value. You can't have the same label 'the value' and do not correspond to the actual values. You can't have the same label 'the value' and do not correspond to the actual values. You can't have the same label 'the value' and do not correspond to the actual values. You can't have the same label 'the value' and do not correspond to the actual values. You can't have the same label 'the value' and do not correspond to the actual values. You can't have the same label 'the value' and do not correspond to the actual value. You can't have the same label 'the value' and do not correspond to the actual value. You can't have the same label 'the value' and do not correspond to the actual value. You can't have the same label 'the value' and do not correspond to the actual value. You can't have the same label 'the value' but do not correspond to the actual value. You can't have the same label 'the value' and do not correspond to the actual value. You can't have the same label 'the value' and do not correspond to the actual value. You can't have the same label 'the value' and do not correspond to the actual value. You can't have the same label 'the value' and do not correspond to the actual value. You can't have the same label 'the value' but do not correspond to the actual values. You can't have the same label 'the value' and do not correspond to the actual values. You can't have the same label 'the value' and do not correspond to the actual values. You can't have the same label 'the value' and do not correspond to the actual values. You can't have the same label 'the value' and do not correspond to the actual values. You can't have the same label 'the value' but do not correspond to the actual values. You can't have the same label 'the value' and do not correspond to the actual values. You can't have the same label 'the value' and do not correspond to the actual values. You can't have the same label 'the value' and do not correspond to the actual values. You can't have the same label 'the value' but do not correspond to the actual values. You can't have the same label 'the value' but do not correspond to the actual values. You can't have the same label 'the value' and do not correspond to the actual values. You can't have the same label 'the value' but do not correspond to the actual values. You can't have the same label 'the value' and do not correspond to the actual values. You can't have the same label 'the value' but do not correspond to the actual values. You can't have the same label 'the value' and do not correspond to the actual values. You can't have the same label 'the value' and do not correspond to the actual values. You can't have the same label 'the value' but do not correspond to the actual values. You can't have the same label 'the value' and do not correspond to the actual values. You can't have the same label 'the value' but do not correspond to the actual values. You can't have the same label 'the value' but do not correspond to the actual values. You can't have the same label 'the value' and do not correspond to the actual values. You can't have the same label 'the value' and do not correspond to the actual values. You can't have the same label 'the value' but do not correspond to the actual values. You can't have the same label 'the value' but do not correspond to the actual values. You can't have the same label 'the value' but do not correspond to the actual values. You can't have the same label 'the value' but do not correspond to the actual values. You can't have the same label 'the value' but do not correspond to the actual values. You can't have the same label 'the value' and do not correspond to the actual values. You can't have the same label 'the value' but do not correspond to the actual values. You can't have the same label 'the value' but do not correspond to the actual values. You can't have the same label 'the value' but do not correspond to the actual values. You can't have the same label 'the value' and do not correspond to the actual values. You can't have the same label 'the value'but no corresponding data points from this image frame (e.g., bar, line, or pie charts). The data is presented in a table format with columns for categories labeled as "Value" (e.g., "Bar", "Line", etc.).