
NP08001SEC - Popcorn machine Vevor - Free user manual and instructions
Find the device manual for free NP08001SEC Vevor in PDF.
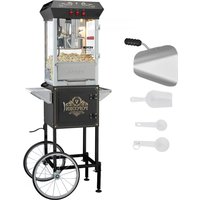


| Brand | Vevor |
| Model | NP08001SEC |
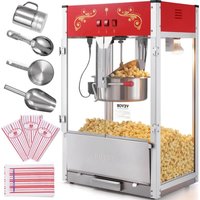
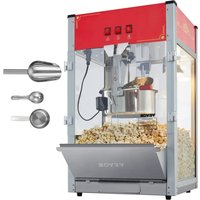
| Product type | Popcorn machine |
| Supply voltage | 120 V AC, 60 Hz |
| Power | 850 W |
| Plug type | US (NEMA 5-15) |
| Main functions | Light and warmer, stirrer, stainless steel kettle heater |
| Kettle capacity | Approx. 100 g corn (max. 15 g oil) |
| Kettle material | Stainless steel |
| Glass door | Yes, to view popping |
| Crumb tray | Yes, removable |
| Included accessories | Popcorn scoop, grain scoop, oil scoop, screwdriver, wrench |
| Mobility | Wheels and carry handle |
| Care and cleaning | Clean with a damp cloth; do not immerse the kettle; hot water cleaning for the kettle |
| Safety | Do not use unattended; do not immerse; hot surface; do not leave children unattended |
| Usage | Indoor only |
| Certifications | CE, UKCA |
| Disposal | Complies with WEEE Directive 2012/19/EC |
| Weight | Approx. 12 kg (estimated) |
| Dimensions (approx.) | W 60 x D 45 x H 80 cm |
Frequently Asked Questions - NP08001SEC Vevor
User questions about NP08001SEC Vevor
0 question about this device. Answer the ones you know or ask your own.
Ask a new question about this device
Download the instructions for your Popcorn machine in PDF format for free! Find your manual NP08001SEC - Vevor and take your electronic device back in hand. On this page are published all the documents necessary for the use of your device. NP08001SEC by Vevor.
USER MANUAL NP08001SEC Vevor
Technical Support and E-Warranty Certificate www.vevor.com/support
POPCORN MACHINE
MODEL: NP08001SEC
We continue to be committed to providing you with tools at competitive prices. "Save Half", "Half Price", or any other similar expressions used by us only represent an estimate of savings you might benefit from buying certain tools with us compared to the major top brands and do not necessarily mean to cover all categories of tools offered by us. You are kindly reminded to verify carefully when placing an order with us if you are actually saving half in comparison with the top major brands.
MODEL: NP08001SEC
NEED HELP? CONTACT US!
Have product questions? Need technical support? Please feel free to contact us:
Technical Support and E-Warranty Certificate www.vevor.com/support
This is the original instruction. Please read all manual instructions carefully before operating. VEVOR reserves a clear interpretation of the user manual. The appearance of the product shall be subject to the product you received. Please forgive us that we won't inform you again if there are any technology or software updates on our product.
 | Warning-To reduce the risk of injury, user must read instructi manual carefully. |
 | Indoor use only. |
 | Pay attention to high temperatures to prevent burns. |
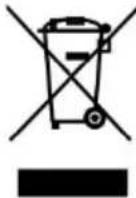 | CORRECT DISPOSALThis product is subject to the provision of European Directive 2012/19/EC. The symbol showing a wheelie bin crossed throu indicates that the product requires separate refuse collection i European Union. This applies to the product and all accesso marked with this symbol. Products marked as such may not discarded with normal domestic waste, but must be taken to collection point for recycling electrical and electronic devices |
 | Compliance is a North America security certification. |
 | Compliance is a EC & UK security certification. |
SAFETY WARNINGS AND PRECAUTIONS
Thank you for using this product. In order to make sure that you can operate the machine correctly, read this instruction carefully before operation and keep it properly for future reference. Please read the precautions and safety rules on page to ensure your safe use. This manual will outline safety warnings and precautions, operating, maintenance, and cleaning. The warnings and instructions
reviewed in this manual cannot cover all possible conditions and situations that may occur. Caution and common sense are not built into this product, since we believe that the users will comply with these codes. Before starting a training program or engaging in strenuous endurance activity on the device, please consult a doctor.
Please read ALL the instructions before using your machine.
- Make sure the voltage in your outlet is the same as the voltage indicated by the appliance's rating label.
- Do not let children, minors, and pets get close to or touch the machine.
- Do not touch the hot surface directly with your hands. Always use the hat knob for operation.
- To prevent electrical shock, do not immerse the cord or plug into water or other liquids.
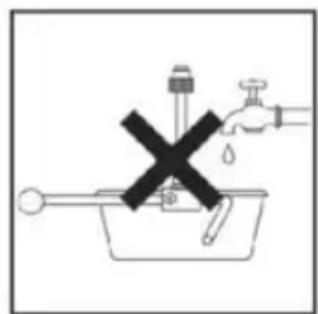
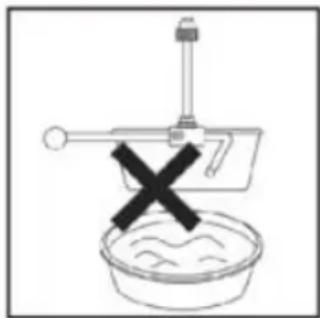
- Do not immerse the appliance in water or any other liquid.
- Unplug the machine from the outlet when not in use and before cleaning. Also unplug the appliance before installing or removing parts and before cleaning.
- Cool down the HOT parts before operation and cleaning.
- Do not operate the device with a damaged cord or plug, if it malfunctions, or if it has mechanical damage. Send it to your nearest authorized service center for examination and repair (ONLY technicians should open up the unit).
- Using any accessories or attachments that are not provided or recommended by the manufacturer may cause injury.
- If the machine is not to be used for a long period of time, unplug it, cover it, and store it in a dry and safe place.
- Do not leave the power cord hanging over the edge of a table or counter, or come into contact with any hot surfaces.
- Do not place the unit on or near hot air, electric burners, or heaters.
- Always switch off the power to the socket before plugging in or unplugging. Hold the plug instead of pulling on the cord.
- Do not apply this unit to any other purposes than the indicated usage.
- KEEP IT OUT OF CHILDREN'S REACH. Never leave it unattended while in use.
- DO NOT CLEAN IT WITH ANY ABRASIVE MATERIAL.
- Always check that this machine is plugged into a grounded outlet with the appropriate electrical supply. Ensure that the wall outlet being used is properly grounded. If not, you must install a grounded outlet. Have the work performed by a certified electrician who is properly qualified to meet local safety and electrical codes.
- Ensure that the power outlet, plug and cord being used are in good working condition. Damaged components should be repaired by a certified electrician who is qualified to meet local safety and electrical codes. Even if your power connection is functioning properly, keep it away from water and avoid letting it run over cords or heating devices.
- Avoid using it in the presence of flammable liquids, gases, dust or other explosive situations.
- Do not move the machine before cooling and during heating.
- Do not operate the machine in an appliance garage or under a wall cabinet. Always unplug the unit from the electrical outlet when storing in an appliance garage. Otherwise, it would cause a risk of fire, especially if the machine touches the garage wall or the door touches it as it closes.
- Type Y attachment: If the supply cord is damaged, it must be replaced by the manufacturer, its service agent or similarly qualified persons in order to avoid a hazard.
- Children shall not play with the appliance. Cleaning and user maintenance shall not be made by children without supervision.
- Inspect before every use.
- DO NOT CLEAN IT WITH ANY ABRASIVE MATERIAL.
- Never leave it unattended while in use. Never leave a child unattended.
- Pet urine and feces can damage the product, please keep away.
- Do not pop the kernels with a dry pot (without oil).
- Do not immerse the popping pot set into water.
- Since the pot surface is hot during popping or just after use, do not touch it directly with your hands.
- To avoid overheating, always add oil before putting kernels in.
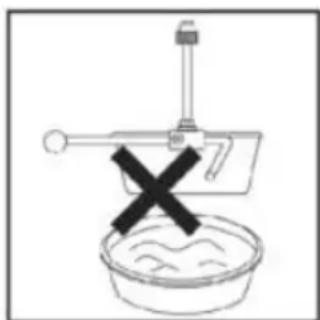
- Extreme care must be taken when unloading popcorn.
- This popper will not shut off automatically. To avoid overheating, add corn and oil before operating.
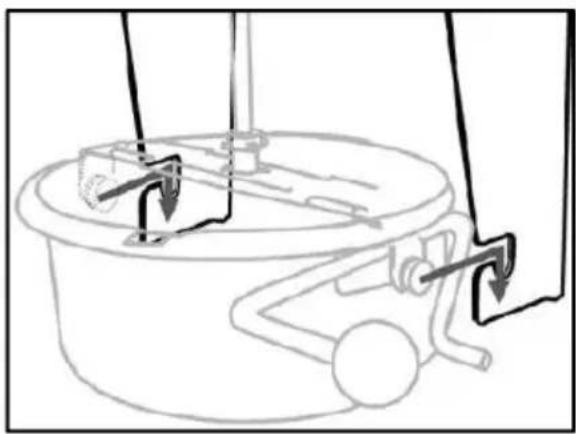
- Extreme caution must be used when unloading popcorn. Always turn the unit over a countertop so that residual hot oil or water running out will not cause injury.
WARNING: This appliance is not intended for use by young or infirm persons unless supervised by a responsible person to ensure that they use the appliance safely. Young children should be supervised to ensure that they do not play with the product. Pets should stay away from the product.
PRODUCT PARAMETERS
| MODEL | Region | Voltage | Power | Plug Type |
| NP08001SEC | North America | AC120V60Hz | 850W | American PLUG |
| Europe | AC220-240V 50H | 850W | European PLUG | |
| Australia | AC220-240V 50H | 850W | Australia PLUG |
Attention:
- The voltage used for this device must be the same as the power supply.
- Users need to install it near the power switch and fuse.
- If the machine is not powered, remove the plug from the electrical outlet and check whether the fuse is blown.
- It is recommended that products use separate lines and sockets to avoid breaker or time delay fuse overload.
PRODUCT COMPONENTS
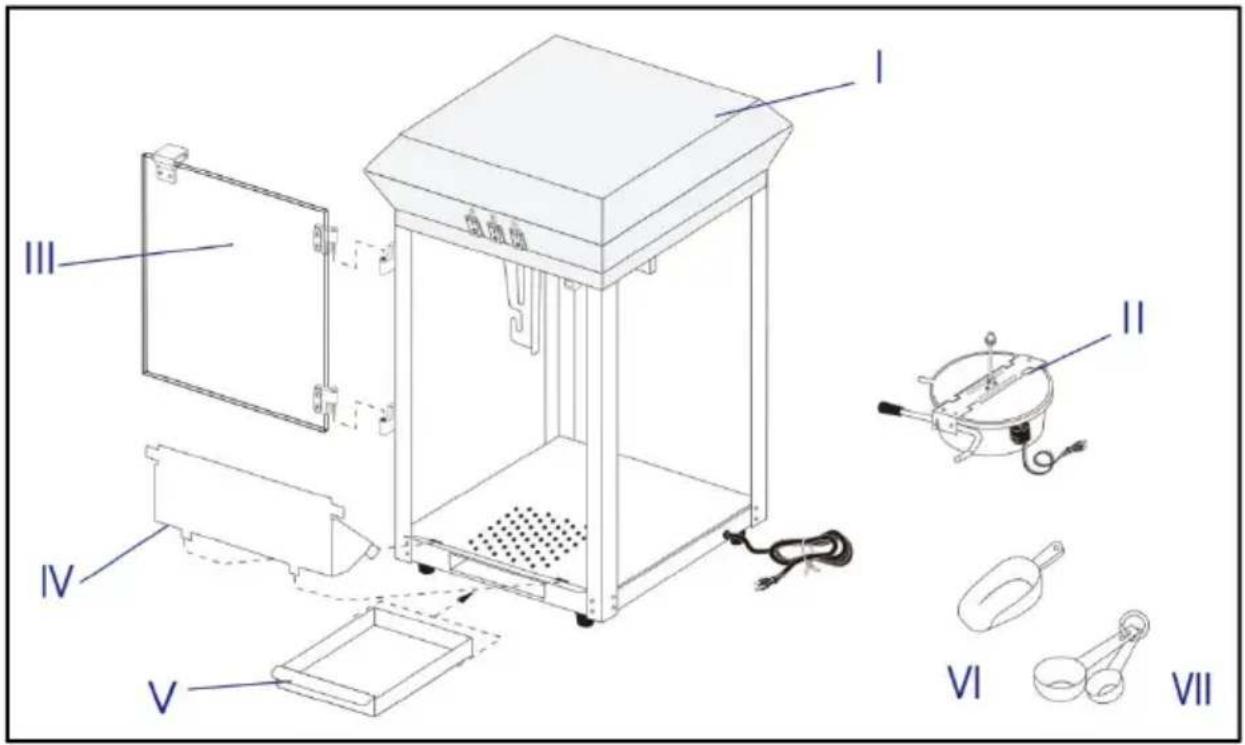
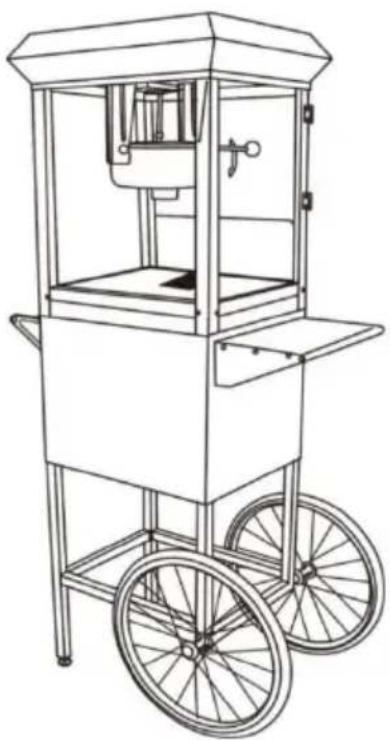
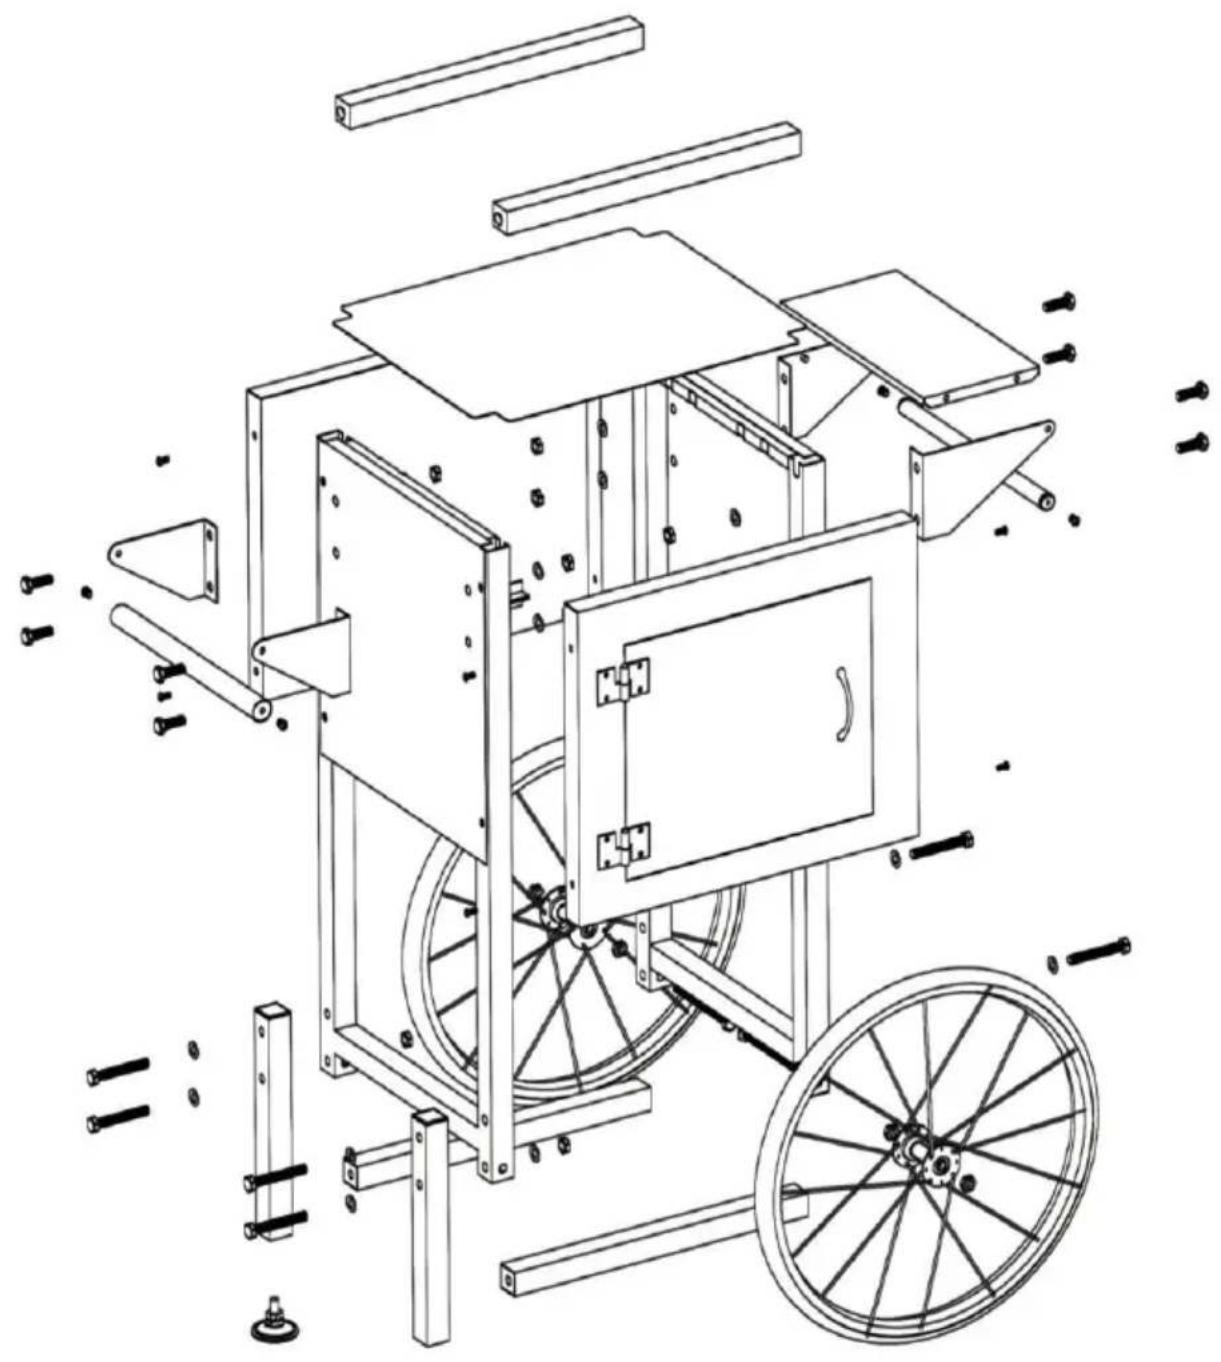
I. Main unit II. Kettle III. Glass door IV. Block plate V. Crumb Tray VI. Popcorn scoop VII. Kernel scoop + Oil spoon
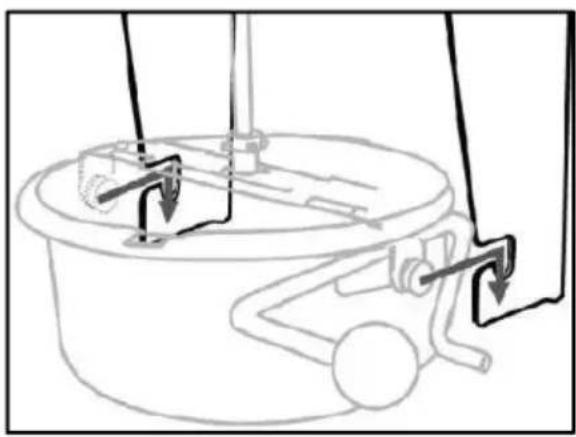
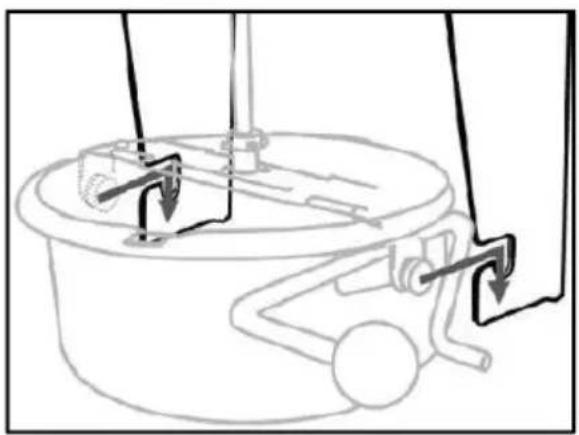
Attention: Assemble the kettle on the supporters which are built into the main unit, and then connect the socket.
| [AWHT] | [WY82] |  | 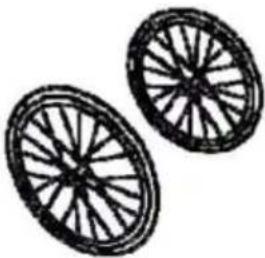 |
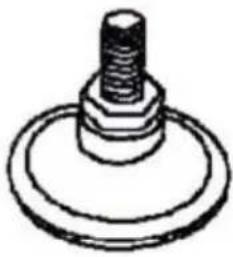
| Rubber Feet(A)x2 pcs | Support Legs(B)x2pcs | Support Stands(C)x2pcs | Wheels(D)x2 pcs |
 |  |  | 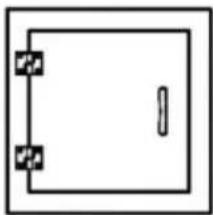 |
| Horizontal Supports Base(E) | Horizontal Supports with Screws(F)x2 pcs | Cabinet Base(G)x1 pc | Cabinet Front with Door (H)x1 pc |
 | 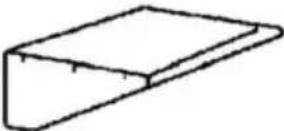 |  |  |
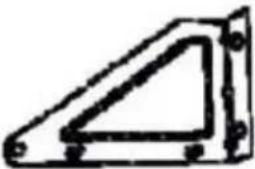
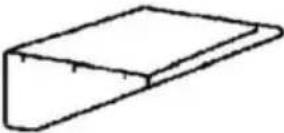
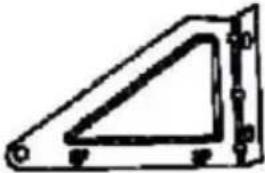
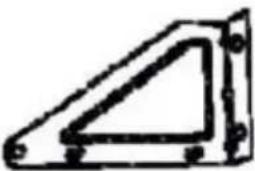
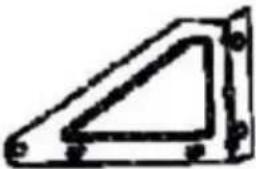
| Cabinet Back(I)x1 pc | Working Platform(J)x1 pc | Working Platform Brackets (Large)(K)x2 pCS | Push Handle(L)x1 pc |
 |  | ||
| Handrail Brackets (Small) (M)-2pcs | Handrail (N)-1pc | ||
Screwdriver (1 pcs) and Wrench (2 pcs) are also included.
 |  |  |  |
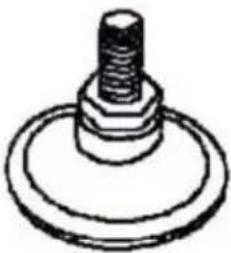
| Wheel Bolt M8x(0)x2 pcs | Nyloc Nut M8(P)x2 pcs | Nut M8(Q)x12 pcs | Washer (R)x18 pcs |
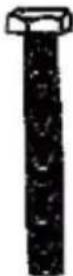 | 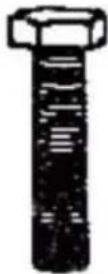 | 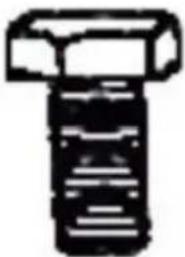 |  |
| Bolt M8x60(S)x4 pcs | Bolt M8x35(T)x2 pcs | Bolt M8x16(U)x8 pcs | Screw M4x8(V)x8 pcs |
Note: the quantity of parts shown in the manual is the actual usage; unused parts are spare parts.
POPCORN CART ASSEMBLY
STEP 1
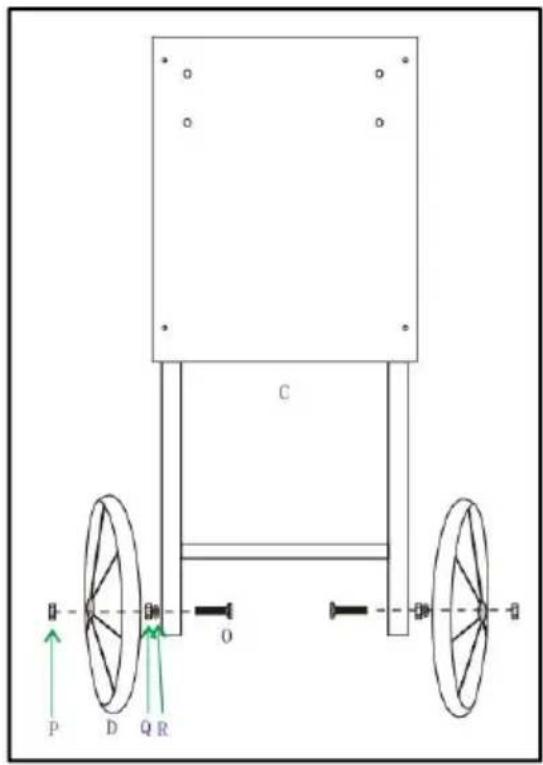
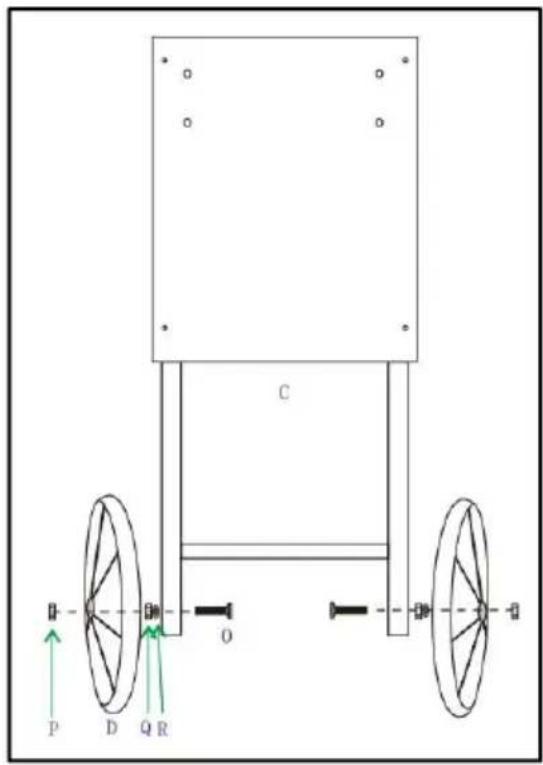
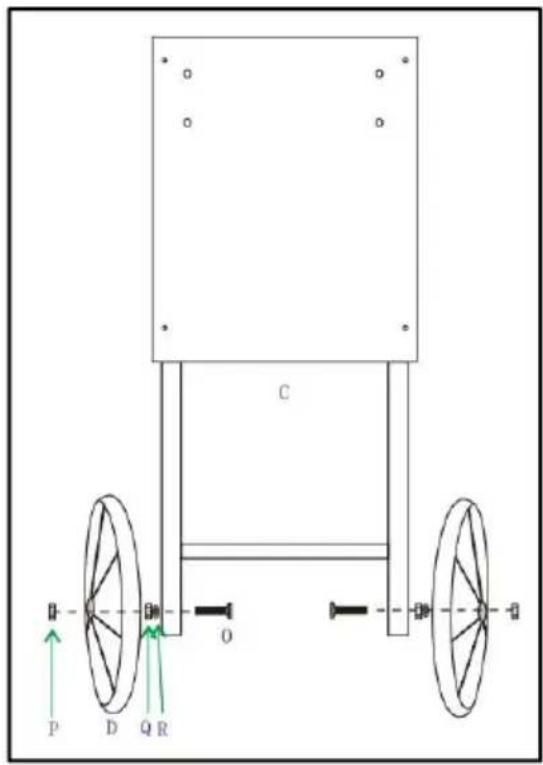
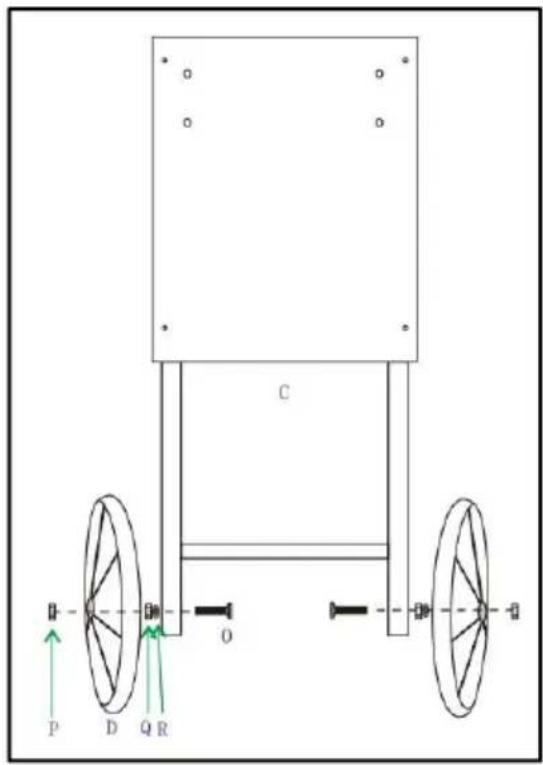
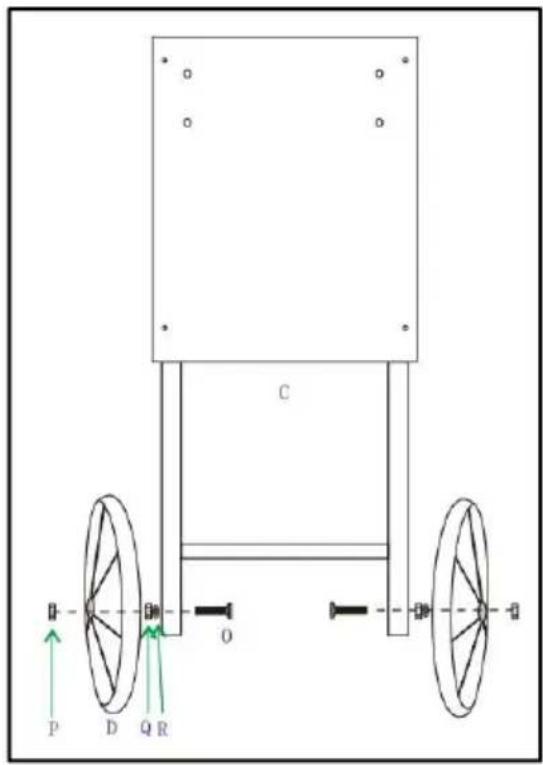
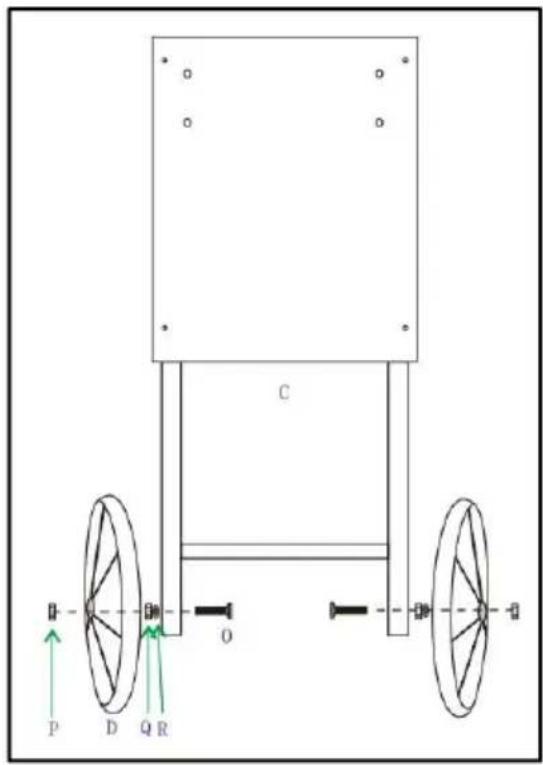
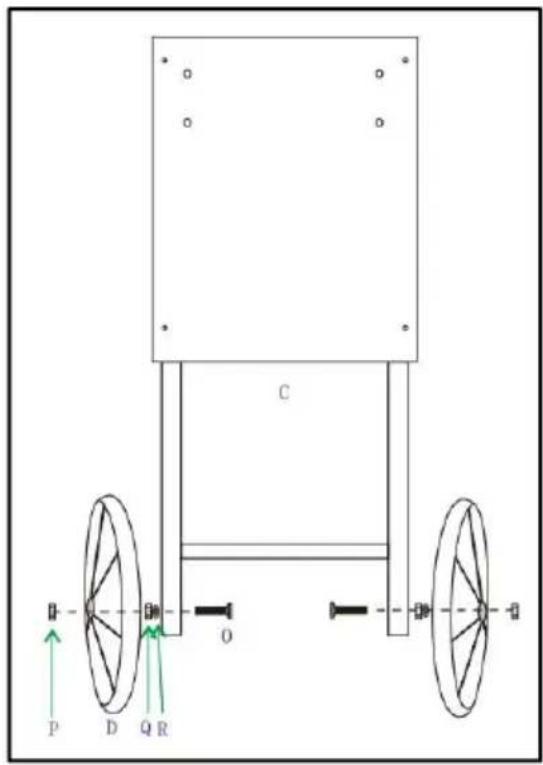
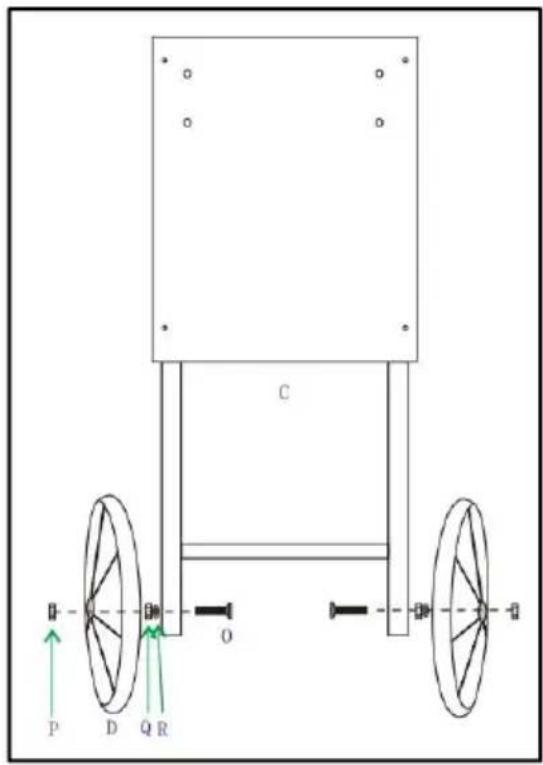
Insert one WHEEL BOLT (O) into the bottom holes located on each side of the SUPPORT STAND (C).
NOTE: Insert the bolt from the inside out, then secure the wheel bolts with one NUT (Q) and WASHER (R) on each side and tighten them with the wrench.
Hang one WHEEL (D) onto one WHEEL BOLT (O) and secure it with one NYLOC NUT (P). Tighten them with the wrench. Then, repeat this step for the other wheel.
NOTE: Do not over tighten. Make sure both wheels can spin freely.
STEP 2
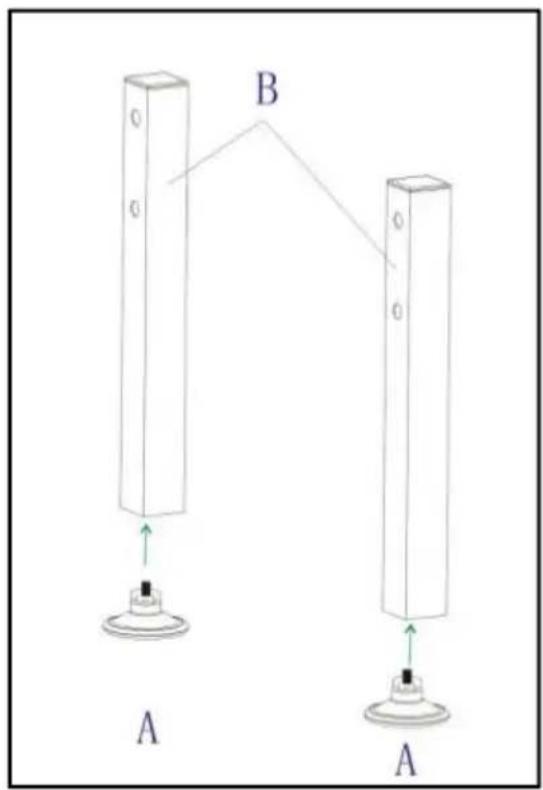
Screw one of the RUBBER FEET (A) into the bottom of each SUPPORT LEG (B). Tighten both rubber feet.
STEP 3
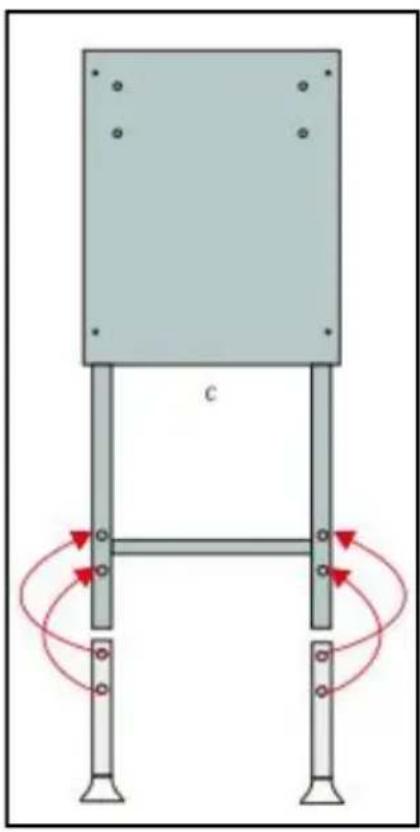
Put the assembled SUPPORT LEG (B) together with the SUPPORT STAND (C). The holes should be aligned.
STEP 4
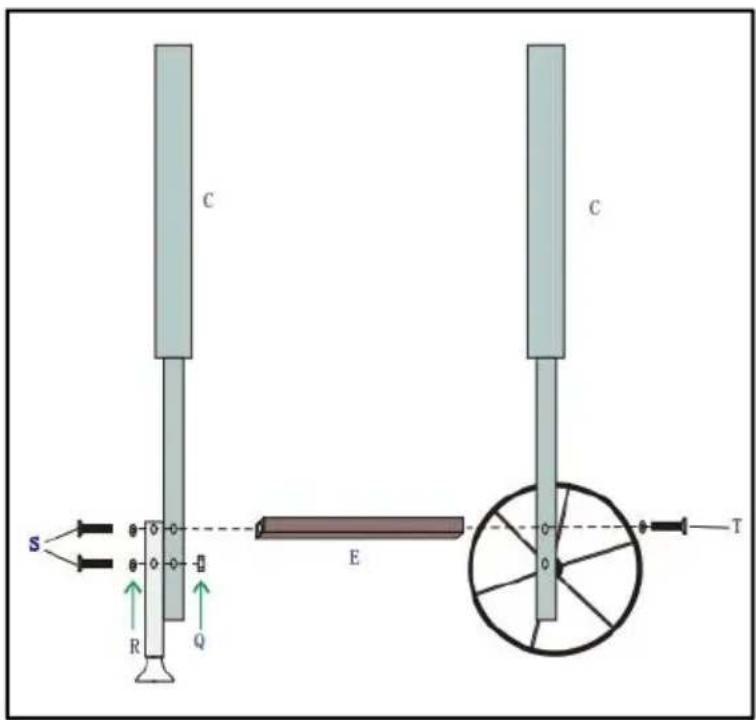
Insert the BOLTS (S) into the holes of the stand and secure them with NUT (Q).
Attach both HORIZONTAL
SUPPORTS-BASE (E) to the assembled stand. The other side connects with the other support stand. Secure them with two BOLTS (T) and one WASHER (R) each.
STEP 5
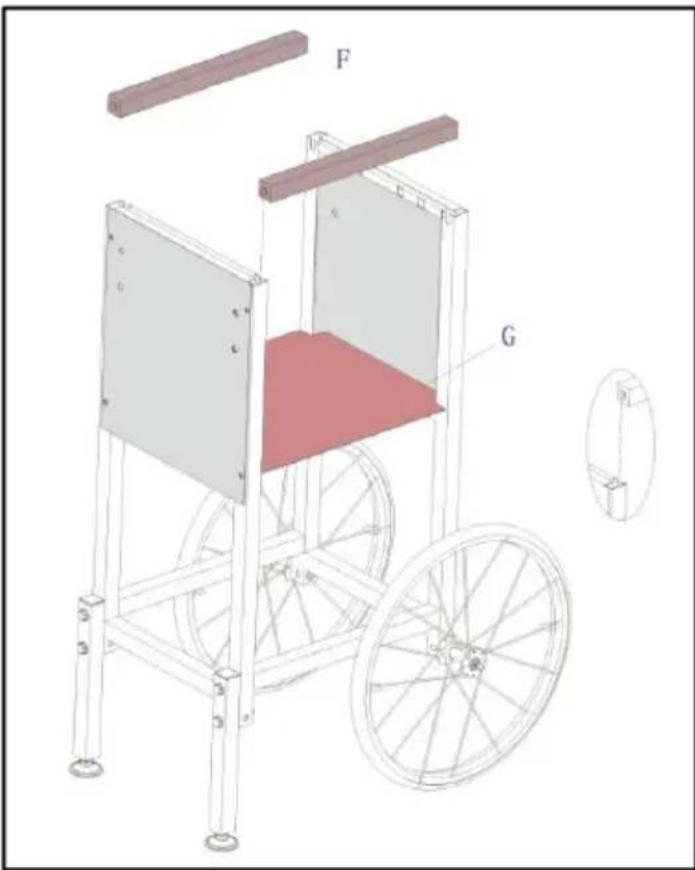
Insert both HORIZONTAL
SUPPORTS - WITH SCREWS (F) in the grooves at the ends of each
SUPPORT STAND (C), as shown. Insert the CABINET BASE (G).
NOTE: Place the lipped side facing down and line the cabinet base up between the SUPPORT STANDS (C).
STEP 6
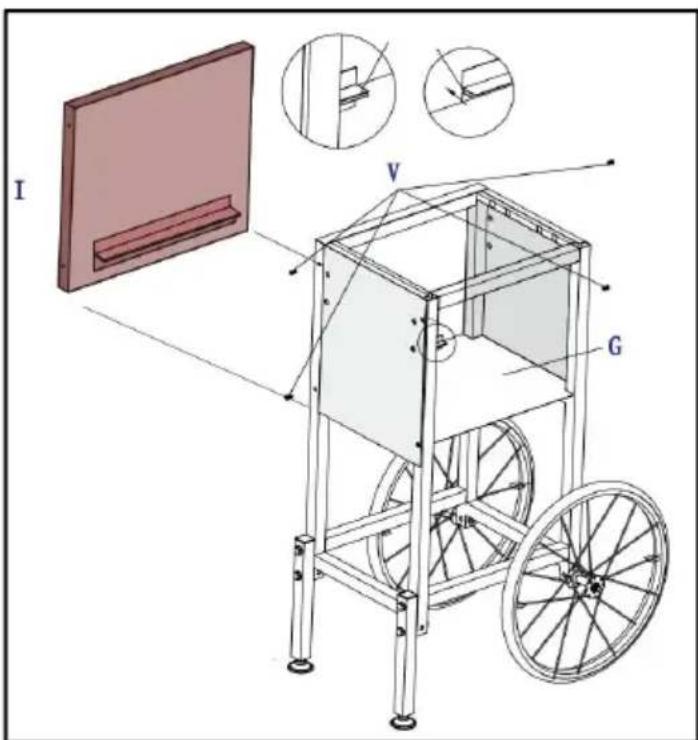
NOTE: Before assembling the front and back panels, determine which side you want the cabinet door facing outward. Insert the CABINET BACK (I). Secure the panel to the support stands with SCREWS (V) as shown in the figure. Tighten the screws with the screwdriver.
STEP 7
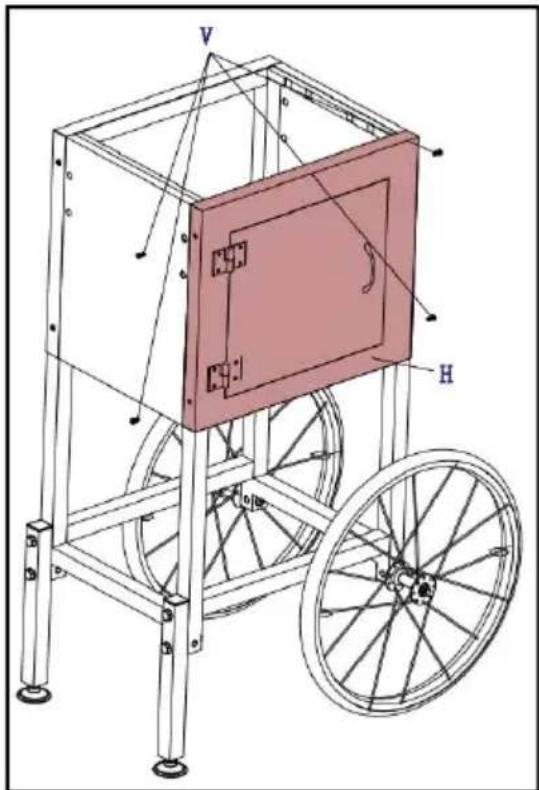
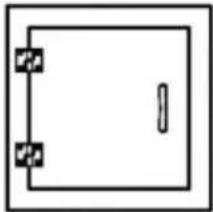
Insert the CABINET FRONT (H). Secure the panel to the support stands with SCREWS (V) as shown in the figure.
Tighten the screws with the screwdriver.
STEP 8
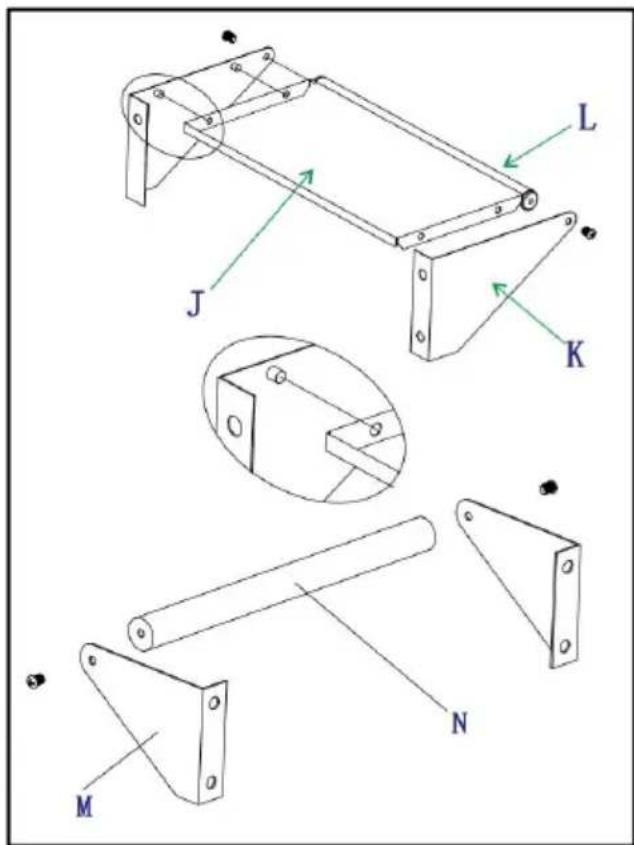
Remove the pre-assembled screws from the PUSH HANDLE (L).
Attach one of the WORKING PLATFORM BRACKETS (K) to one end of the handle. Insert the WORKING PLATFORM (J) to the same bracket using the pre-assembled screws. Repeat the steps above to attach the remaining bracket on the other side.
STEP 9
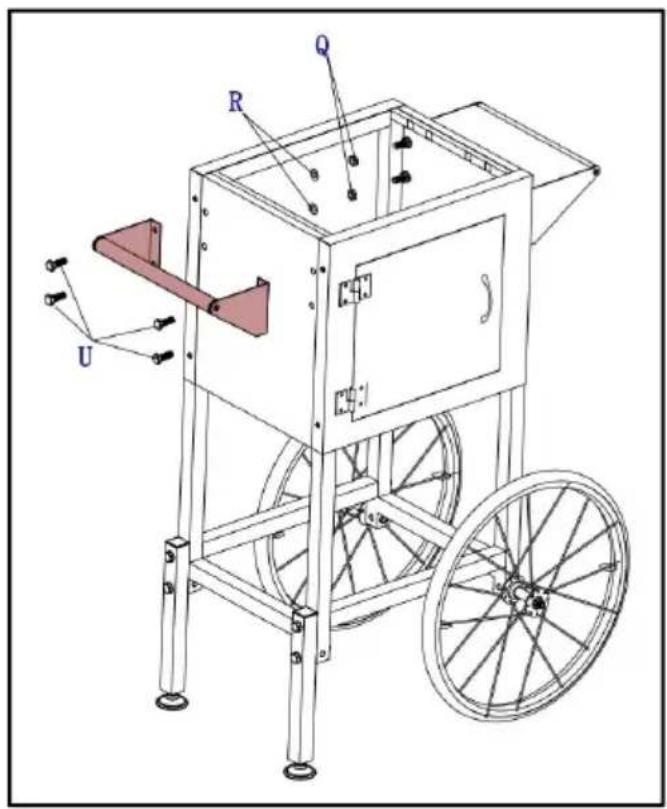
Remove the pre-assembled screws from the HANDRAIL (N). Attach one of the HANDRAIL BRACKETS
(M) to one end of the handle. Insert screw and tighten them. Repeat the steps above to attach the remaining bracket on the other side.
STEP 10
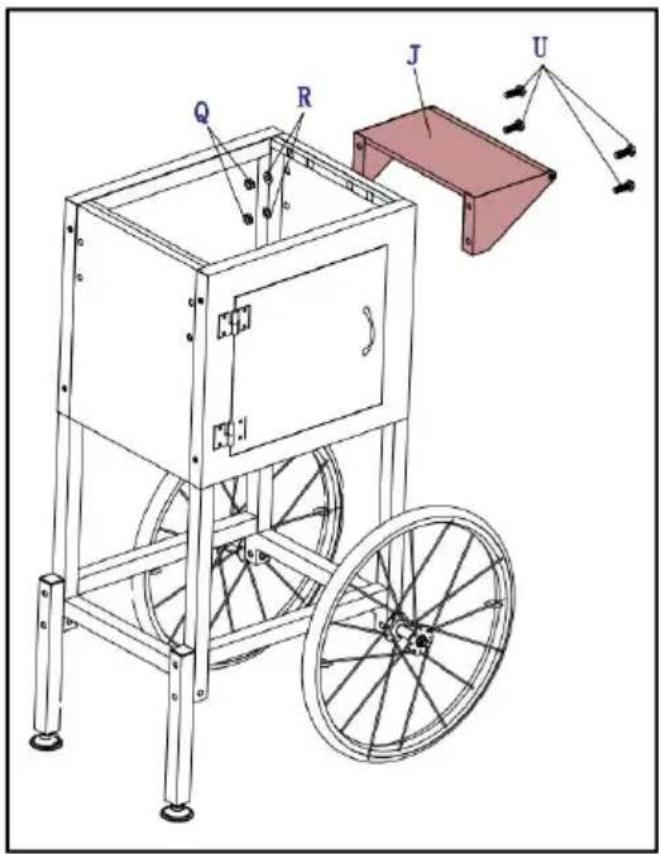
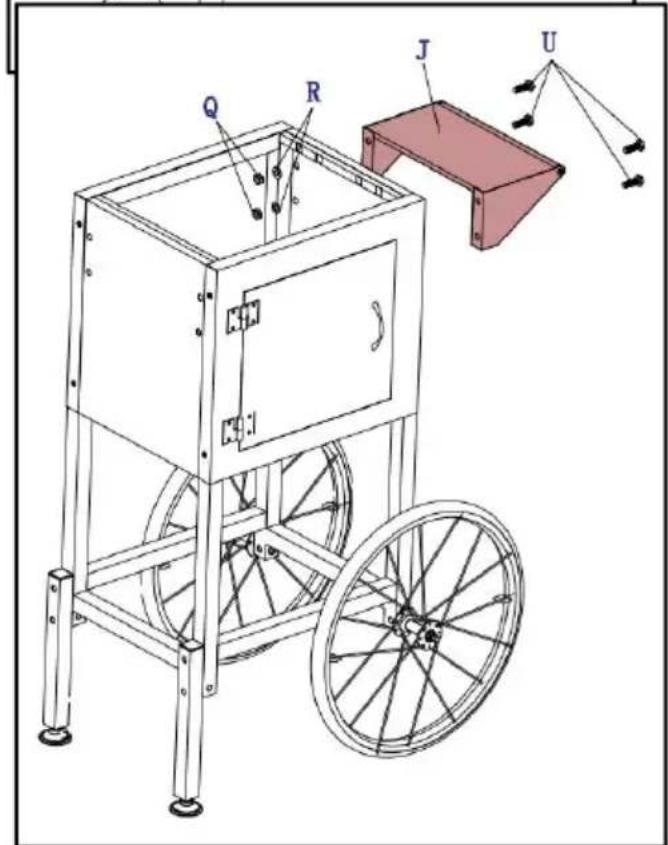
Insert the assembled WORKING PLATFORM on the right side of the cart (same side as wheels) with four BOLTS (U), WASHERS (R) and NUTS (Q).
STEP 11
Insert the assembled HANDLE on the left side of the cart (opposite the wheels) with four BOLTS (U), WASHERS (R) and NUTS (Q).
OPERATING INSTRUCTIONS
Before using the appliance for the first time, peel off any promotional material and packaging materials, and check that the product is clean and free of dust. If necessary, wipe it over with a damp cloth. Spread over with an absorbent kitchen towel and wipe off any excess oil. When your appliance is heated for the first time, it may emit slight smoke or odor, which is normal for many appliances, and will not affect the safety of your appliance. Place the machine on a clean, dry, level surface near a plug socket outlet.
- Make sure the popcorn maker is unplugged before you do any of the following.
- Before operation, please check carefully if its voltage is suitable for your country. (Please check if the voltage matches the rating label specified next to the power cord).
- Clean the internal surface of the kettle and the external surface of the machine. The main unit has 3 function switches as follows:

Spot Light and Warmer ( I )

Stirrer ( II )

Stainless Steel Kettle Heater (III)
- Hook up the kettle onto the hanger of the main unit.
- Plug in the power cord to the popcorn maker.
- Switch on the light and heater (I & III), and then fill in suitable amount of oil (Shown as Fig.1). You can fill the amount of oil (Max. 15g) subject to your preference.
- The kettle should be pre-heated for 3 to 4 minutes with oil (until steam comes from it). Please prepare kernels with sugar. You can measure the amount of kernels with the measuring scoop provided and the amount of sugar according to your own preference. Liquid sugar and honey are prohibited.
- Open the lid and then pour in pre-mixed kernel and sugar (as shown in Fig.2). Caution: The lid might be hot and it is recommended to use an oven mitten.
- Switch on the Stirrer (II) to let it start stirring (as shown in Fig.3).
- Close the door carefully.
- Popcorn starts popping out through the lid after about 2 minutes (as shown in Fig.4).
- Switch off the stirrer & heater (II & III) when popping is completed (no more popping sound from kettle). Rotate the roller bar of the kettle and pour out remaining popcorn from kettle.
- Keep heater switch (III) off if the unit is not continuously running. Keep spot light and warmer on to keep
the popcorn warm, dry and tasty.
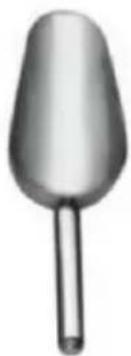
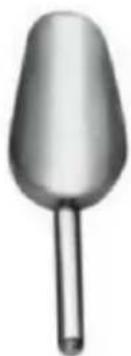
- Serve your popcorn with the popcorn scoop provided.
- Remove plug from power supply if the unit is not being used for a long time.
- Repeat steps 7 to 10 for continuous popping.
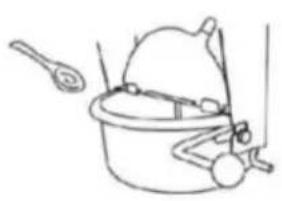
Fig.1

Fig.2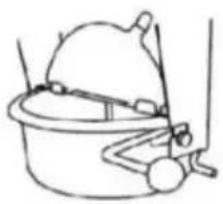
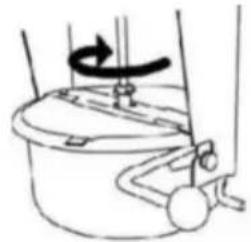
Fig.3
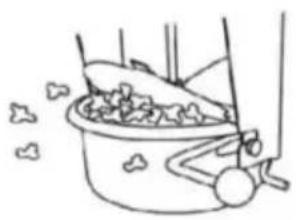
Fig.4
USING YOUR POPCORN MACHINE
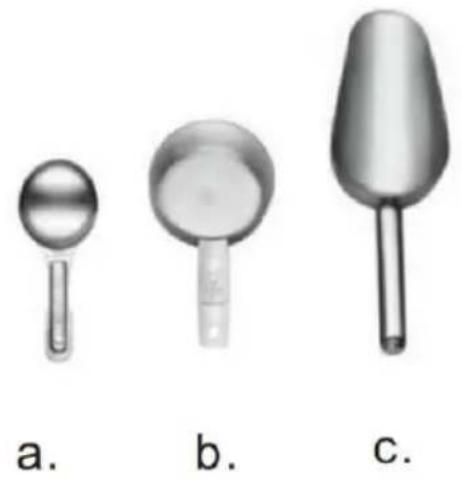
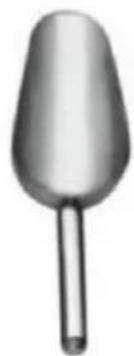
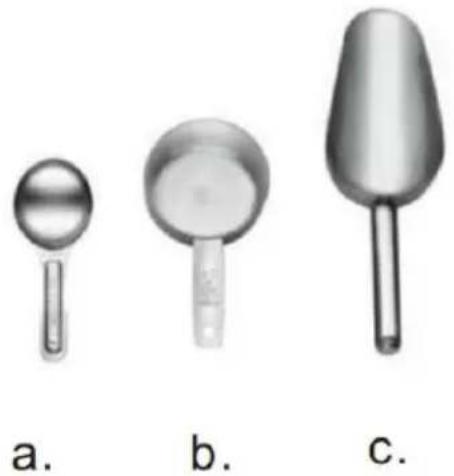
We recommend following the measurement equivalents list below. Measure the amount of kernels and oil with the scoops provided.
TIPS: General rule for quantities of oil and popcorn kernels is 3:1
| KETTLE | KERNELS | OIL |
| 2.5oz | 1/3 cup | 3/4 Tp (12ml) |
| 4oz | 1/2 cup | 1-1/2 Tp (20ml) |
| 6oz | 3/4 cup | 2 Tp (30ml) |
| 8oz | 1 cup | 2-1/2 Tp (40ml) |
| 10oz | 1-1/4 cup | 3 Tp (50ml) |
| 12oz | 1-1/2 cup | 4 Tp (60ml) |
| 16oz | 2 cup | 5 Tp (80ml) |
| 20oz | 2-1/2 cup | 6-1/2 Tp (100ml) |
1 person = (+/-) 1 oz

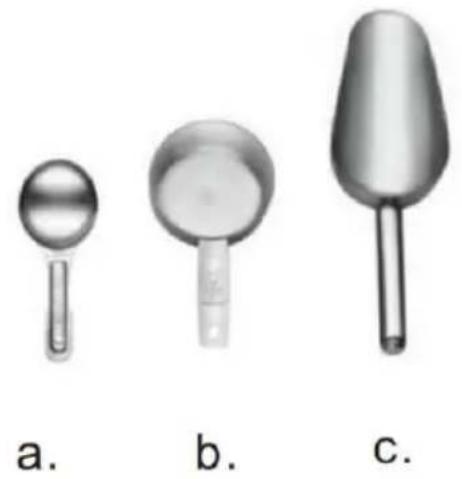
a. b.
C.
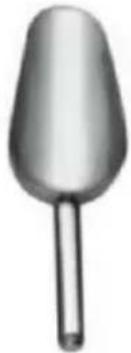
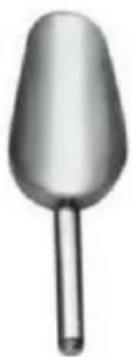
a. Oil Spoon
b. Kernel Scoop
c. Popcorn Scoop
TROUBLESHOOTING
| Kettle Not Heating | -Kettle need to be replace |
| Popcorn is buring | -Check the oil quantity (refer to operating instru section 13) |
| Popcorn doesn't come off | -Check the temperature of the kettle |
| -Check the HEAT SWITCH POSITION (ON) | |
| No light on the switches | -Check if the plug is fully inserted into to wall |
| -Check your circuit breaker tripped | |
| Popcorn remains | -Check if the plastic gear housing is broken |
| trapped | (inside the top of the machine)-Check if the kernels quantity is not exede the capacity |
| Stirrer jumps | -Check if the plastic gear housing is broken (inside the top of the machine) |
| Stirrer doesn't work | -Check if the Stir button is turned at the ON-Check if the Stir button is glowing |
CLEANING AND MAINTENANCE
- Wipe the doors, glass, and metal surfaces with a clean damp cloth. DO NOT use any acidic, citrus-based, or abrasive cleaners on the acrylic doors, as they might cause scratching or dullness.
- Frequently empty the catch tray of unpopped popcorn kernels and clean it with soap and water. Dry it thoroughly afterwards.
- Frequent cleaning of the popcorn kettle is strongly recommended. This will prevent burning of excess oils on the bottom of the kettle.
- Let the unit cool down before cleaning.
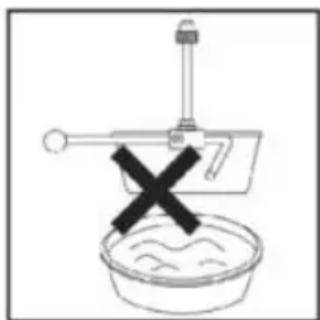
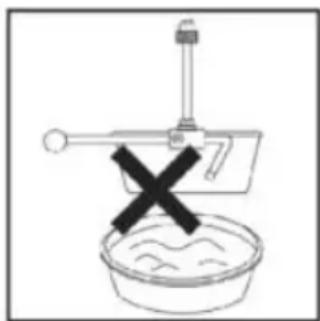
- Clean the kettle surface inside and out with a wet cloth. To thoroughly clean the popcorn kettle, turn off the unit and add 1-1/2 to 2 cups of hot water into the kettle (no detergent is necessary), then place a towel at the bottom of the main unit and place a large bowl or container on the towel (the container must be large enough to easily pour water from the popcorn kettle). Turn on the Stirrer & Heater (2) and boil the water for 1 to 2 minutes. After that, turn off the stirrer and heater and carefully pour the water from the popcorn kettle into the bowl or container. Repeat the same procedure 2 to 3 times for the best cleaning effect.
CAUTION:
- Kettle and water will be HOT!
- Never immerse the kettle in water or place it in the dishwasher.
VEVOR®
TOUGH TOOLS, HALF PRICE
Technical Support and E-Warranty Certificate
www.vevor.com/support
VEVOR®
TOUGH TOOLS, HALF PRICE
NEED HELP? CONTACT US!
SAFETY WARNINGS AND PRECAUTIONS
ABRASIVE.
| Nord | ||||
| Europe | CA220-240 V 50 Hz | 850 W | européen PRISE | |
| Australie | CA220-240 V 50 Hz | 850 W | Australie PRISE |
Attention:
 |  |  | |
| Rubber Feet(A)x2 pcs | Support Legs(B)x2pcs | Support Stands(C)x2pcs | Wheels(D)x2 pcs |
| | | |
| Horizontal Supports Base(E) | Horizontal Supports with Screws(F)x2 pcs | Cabinet Base(G)x1 pc | Cabinet Front with Door (H)x1 pc |
| | | |
| Cabinet Back(I)x1 pc | Working Platform(J)x1 pc | Working Platform Brackets (Large)(K)x2 pCS | Push Handle(L)x1 pc |
| | ||
| Handrail Brackets (Small) (M)-2pcs | Handrail (N)-1pc | ||
| | | |
| Wheel Bolt M8x(0)x2 pcs | Nyloc Nut M8(P)x2 pcs | Nut M8(Q)x12 pcs | Washer (R)x18 pcs |
| | | |
| Bolt M8x60(S)x4 pcs | Bolt M8x35(T)x2 pcs | Bolt M8x16(U)x8 pcs | Screw M4x8(V)x8 pcs |
POPCORN CART ASSEMBLY
STEP 1
STEP 3
STEP 4
STEP 5
STEP 7
STEP 8
STEP 11
Fig.1
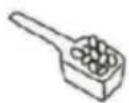
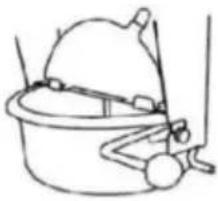
Fig.2

Fig.3
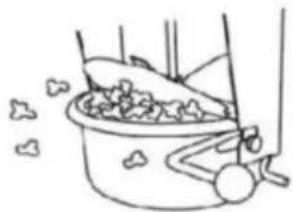
Fig.4
USING YOUR POPCORN MACHINE
| KETTLE | KERNELS | OIL |
| 2.5oz | 1/3 cup | 3/4 Tp (12ml) |
| 4oz | 1/2 cup | 1-1/2 Tp (20ml) |
| 6oz | 3/4 cup | 2 Tp (30ml) |
| 8oz | 1 cup | 2-1/2 Tp (40ml) |
| 10oz | 1-1/4 cup | 3 Tp (50ml) |
| 12oz | 1-1/2 cup | 4 Tp (60ml) |
| 16oz | 2 cup | 5 Tp (80ml) |
| 20oz | 2-1/2 cup | 6-1/2 Tp (100ml) |
1 person = (+/-) 1 oz
a. Oil Spoon
b. Kernel Scoop
c. Popcorn Scoop
TROUBLESHOOTING
CLEANING AND MAINTENANCE
SAFETY WARNINGS AND PRECAUTIONS
| [DTX] | [RWS1] | | |
| Rubber Feet(A)x2 pcs | Support Legs(B)x2pcs | Support Stands(C)x2pcs | Wheels(D)x2 pcs |
| | | |
| Horizontal Supports Base(E) | Horizontal Supports with Screws(F)x2 pcs | Cabinet Base(G)x1 pc | Cabinet Front with Door (H)x1 pc |
| | | |
| Cabinet Back(I)x1 pc | Working Platform(J)x1 pc | Working Platform Brackets (Large)(K)x2 pCS | Push Handle(L)x1 pc |
| | ||
| Handrail Brackets (Small) (M)-2pcs | Handrail (N)-1pc | ||
| [kc6x] | | | |
| Wheel Bolt M8x(0)x2 pcs | Nyloc Nut M8(P)x2 pcs | Nut M8(Q)x12 pcs | Washer (R)x18 pcs |
| | [z22G] | |
| Bolt M8x60(S)x4 pcs | Bolt M8x35(T)x2 pcs | Bolt M8x16(U)x8 pcs | Screw M4x8(V)x8 pcs |
POPCORN CART ASSEMBLY
STEP 1
STEP 3
STEP 4
STEP 5
STEP 7
STEP 8
STEP 10
Fig.1
Fig.2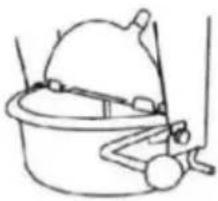
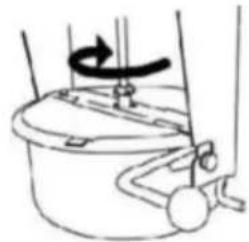
Fig.3
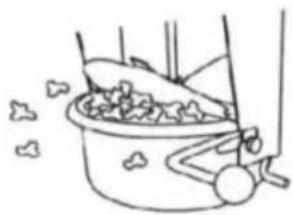
Fig.4
USING YOUR POPCORN MACHINE
| KETTLE | KERNELS | OIL |
| 2.5oz | 1/3 cup | 3/4 Tp (12ml) |
| 4oz | 1/2 cup | 1-1/2 Tp (20ml) |
| 6oz | 3/4 cup | 2 Tp (30ml) |
| 8oz | 1 cup | 2-1/2 Tp (40ml) |
| 10oz | 1-1/4 cup | 3 Tp (50ml) |
| 12oz | 1-1/2 cup | 4 Tp (60ml) |
| 16oz | 2 cup | 5 Tp (80ml) |
| 20oz | 2-1/2 cup | 6-1/2 Tp (100ml) |
1 person = (+/-) 1 oz
a. Oil Spoon
b. Kernel Scoop
c. Popcorn Scoop
TROUBLESHOOTING
CLEANING AND MAINTENANCE
www.vevor.com/support
VEVOR®
TOUGH TOOLS, HALF PRICE
SAFETY WARNINGS AND PRECAUTIONS
| | |
| Rubber Feet(A)x2 pcs | Support Legs(B)x2pcs | Support Stands(C)x2pcs |
| | |
| Horizontal Supports Base(E) | Horizontal Supports with Screws(F)x2 pcs | Cabinet Base(G)x1 pc |
| | |
| Cabinet Back(I)x1 pc | Working Platform(J)x1 pc | Working Platform Brackets (Large)(K)x2 pCS |
 |  | |
| Handrail Brackets (Small) (M)-2pcs | Handrail (N)-1pc |
| [GVD3] | | | |
| Wheel Bolt M8x(0)x2 pcs | Nyloc Nut M8(P)x2 pcs | Nut M8(Q)x12 pcs | Washer (R)x18 pcs |
| | | |
| Bolt M8x60(S)x4 pcs | Bolt M8x35(T)x2 pcs | Bolt M8x16(U)x8 pcs | Screw M4x8(V)x8 pcs |
POPCORN CART ASSEMBLY
STEP 1
STEP 3
STEP 4
STEP 5
Insert both SUPPORTS
STEP 7
Insert the FRONT PANEL (H).
STEP 8
STEP 11
Fig.1
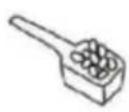
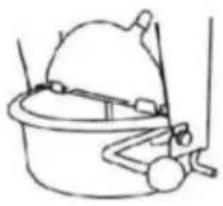
Fig.2
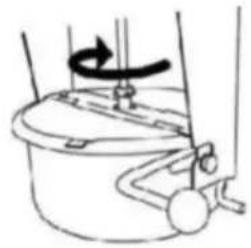
Fig.3
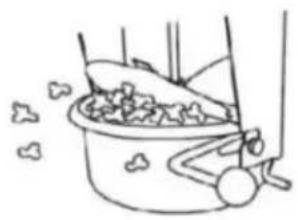
Fig.4
USING YOUR POPCORN MACHINE
| KETTLE | KERNELS | OIL |
| 2.5oz | 1/3 cup | 3/4 Tp (12ml) |
| 4oz | 1/2 cup | 1-1/2 Tp (20ml) |
| 6oz | 3/4 cup | 2 Tp (30ml) |
| 8oz | 1 cup | 2-1/2 Tp (40ml) |
| 10oz | 1-1/4 cup | 3 Tp (50ml) |
| 12oz | 1-1/2 cup | 4 Tp (60ml) |
| 16oz | 2 cup | 5 Tp (80ml) |
| 20oz | 2-1/2 cup | 6-1/2 Tp (100ml) |
1 person = (+/-) 1 oz

a. b.
C.
a. Oil Spoon
b. Kernel Scoop
c. Popcorn Scoop
TROUBLESHOOTING
CLEANING AND MAINTENANCE
www.vevor.com/support
VEVOR®
TOUGH TOOLS, HALF PRICE
SAFETY WARNINGS AND PRECAUTIONS
 | [GTZA] | | |
| Rubber Feet(A)x2 pcs | Support Legs(B)x2pcs | Support Stands(C)x2pcs | Wheels(D)x2 pcs |
| | | |
| Horizontal Supports Base(E) | Horizontal Supports with Screws(F)x2 pcs | Cabinet Base(G)x1 pc | Cabinet Front with Door (H)x1 pc |
|  | | |
| Cabinet Back(I)x1 pc | Working Platform(J)x1 pc | Working Platform Brackets (Large)(K)x2 pCS | Push Handle(L)x1 pc |
| | ||
| Handrail Brackets (Small) (M)-2pcs | Handrail (N)-1pc | ||
Handrail Brackets (Small) (M)-2pcs
| [325y] | | | |
| Wheel Bolt M8x(0)x2 pcs | Nyloc Nut M8(P)x2 pcs | Nut M8(Q)x12 pcs | Washer (R)x18 pcs |
| | | |
| Bolt M8x60(S)x4 pcs | Bolt M8x35(T)x2 pcs | Bolt M8x16(U)x8 pcs | Screw M4x8(V)x8 pcs |
POPCORN CART ASSEMBLY
STEP 1
STEP 3
STEP 4
STEP 5
STEP 7
STEP 8
Remove the pre-assembled screws from the PUSH HANDLE (L).
STEP 11
Fig.1
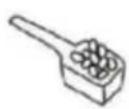
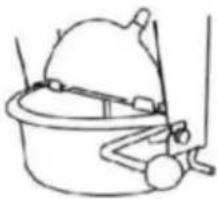
Fig.2
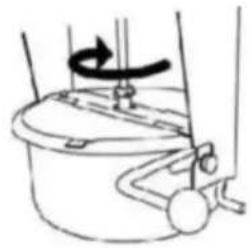
Fig.3
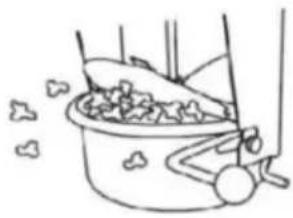
Fig.4
USING YOUR POPCORN MACHINE
| KETTLE | KERNELS | OIL |
| 2.5oz | 1/3 cup | 3/4 Tp (12ml) |
| 4oz | 1/2 cup | 1-1/2 Tp (20ml) |
| 6oz | 3/4 cup | 2 Tp (30ml) |
| 8oz | 1 cup | 2-1/2 Tp (40ml) |
| 10oz | 1-1/4 cup | 3 Tp (50ml) |
| 12oz | 1-1/2 cup | 4 Tp (60ml) |
| 16oz | 2 cup | 5 Tp (80ml) |
| 20oz | 2-1/2 cup | 6-1/2 Tp (100ml) |
1 person = (+/-) 1 oz

a. b.
C.
a. Oil Spoon
b. Kernel Scoop
c. Popcorn Scoop
TROUBLESHOOTING
CLEANING AND MAINTENANCE
NEED HELP? CONTACT US!
SAFETY WARNINGS AND PRECAUTIONS
| Północna | ||||
| Europa | AC220-240V 50H | 850 W | EuropejskiWTYCZKA | |
| Australia | AC220-240V 50H | 850 W | AustraliaWTYCZKA |
Warning:
| [0647] | [A24X] | | |
| Rubber Feet(A)x2 pcs | Support Legs(B)x2pcs | Support Stands(C)x2pcs | Wheels(D)x2 pcs |
| | | |
| Horizontal Supports Base(E) | Horizontal Supports with Screws(F)x2 pcs | Cabinet Base(G)x1 pc | Cabinet Front with Door (H)x1 pc |
| | | |
| Cabinet Back(I)x1 pc | Working Platform(J)x1 pc | Working Platform Brackets (Large)(K)x2 pCS | Push Handle(L)x1 pc |
| | ||
| Handrail Brackets (Small) (M)-2pcs | Handrail (N)-1pc | ||
| | | |
| Wheel Bolt M8x(0)x2 pcs | Nyloc Nut M8(P)x2 pcs | Nut M8(Q)x12 pcs | Washer (R)x18 pcs |
| | |  |
| Bolt M8x60(S)x4 pcs | Bolt M8x35(T)x2 pcs | Bolt M8x16(U)x8 pcs | Screw M4x8(V)x8 pcs |
POPCORN CART ASSEMBLY
STEP 1
STEP 3
STEP 4
STEP 5
STEP 7
STEP 8
STEP 11
Fig.1
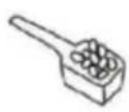
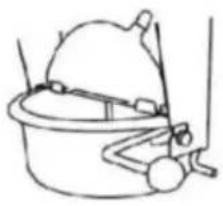
Fig.2
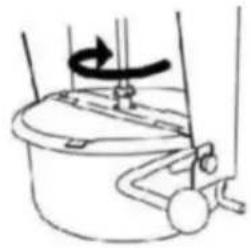
Fig.3
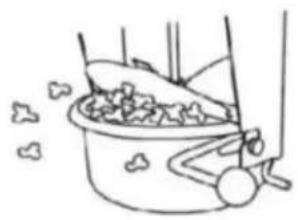
Fig.4
USING YOUR POPCORN MACHINE
| KETTLE | KERNELS | OIL |
| 2.5oz | 1/3 cup | 3/4 Tp (12ml) |
| 4oz | 1/2 cup | 1-1/2 Tp (20ml) |
| 6oz | 3/4 cup | 2 Tp (30ml) |
| 8oz | 1 cup | 2-1/2 Tp (40ml) |
| 10oz | 1-1/4 cup | 3 Tp (50ml) |
| 12oz | 1-1/2 cup | 4 Tp (60ml) |
| 16oz | 2 cup | 5 Tp (80ml) |
| 20oz | 2-1/2 cup | 6-1/2 Tp (100ml) |
1 person = (+/-) 1 oz
a.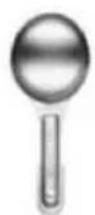
b.
c.
a. Oil Spoon
b. Kernel Scoop
c. Popcorn Scoop
TROUBLESHOOTING
CLEANING AND MAINTENANCE
www.vevor.com/support
VEVOR®
TOUGH TOOLS, HALF PRICE
Technical Support and E-warranty Certificate www.vevor.com/support
POPCORN MACHINE
MODEL: NP08001SEC
NEED HELP? CONTACT US!
SAFETY WARNINGS AND PRECAUTIONS
I. Main unit II. Kettle III. Glass door IV. Base plate V. Crumb tray VI. Popcorn scoop VII. Kernel scoop + Oil spoon
| [74TY] | | |
| Rubber Feet(A)x2 pcs | Support Legs(B)x2pcs | Support Stands(C)x2pcs | Wheels(D)x2 pcs |
| | | |
| Horizontal Supports Base(E) | Horizontal Supports with Screws(F)x2 pcs | Cabinet Base(G)x1 pc | Cabinet Front with Door (H)x1 pc |
| |  | |
| Cabinet Back(I)x1 pc | Working Platform(J)x1 pc | Working Platform Brackets (Large)(K)x2 pCS | Push Handle(L)x1 pc |
 | | ||
| Handrail Brackets (Small) (M)-2pcs | Handrail (N)-1pc | ||
| [9W57] | | | |
| Wheel Bolt M8x(0)x2 pcs | Nyloc Nut M8(P)x2 pcs | Nut M8(Q)x12 pcs | Washer (R)x18 pcs |
| | [77X0] | |
| Bolt M8x60(S)x4 pcs | Bolt M8x35(T)x2 pcs | Bolt M8x16(U)x8 pcs | Screw M4x8(V)x8 pcs |
POPCORN CART ASSEMBLY
STEP 1
STEP 3
STEP 4
STEP 5
STEP 7
STEP 8
STAP10
Fig.1
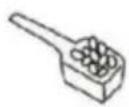
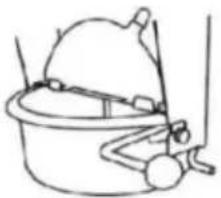
Fig.2
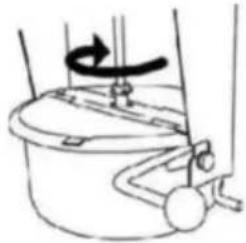
Fig.3
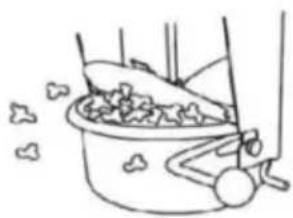
Fig.4
USING YOUR POPCORN MACHINE
| KETTLE | KERNELS | OIL |
| 2.5oz | 1/3 cup | 3/4 Tp (12ml) |
| 4oz | 1/2 cup | 1-1/2 Tp (20ml) |
| 6oz | 3/4 cup | 2 Tp (30ml) |
| 8oz | 1 cup | 2-1/2 Tp (40ml) |
| 10oz | 1-1/4 cup | 3 Tp (50ml) |
| 12oz | 1-1/2 cup | 4 Tp (60ml) |
| 16oz | 2 cup | 5 Tp (80ml) |
| 20oz | 2-1/2 cup | 6-1/2 Tp (100ml) |
1 person = (+/-) 1 oz
a.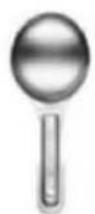
b.
c.
a. Oil Spoon
b. Kernel Scoop
c. Popcorn Scoop
TROUBLESHOOTING
CLEANING AND MAINTENANCE
www.vevor.com/support
VEVOR®
TOUGH TOOLS, HALF PRICE
NEED HELP? CONTACT US!
SAFETY WARNINGS AND PRECAUTIONS
I. Main Unit II. Kettle III. Glass Door IV. Block Plate V. Crumb Tray VI. Popcorn Scoop VII. Kernel Spoon + Oil Spoon
| (D32H) | (Z2ZY) | | |
| Rubber Feet(A)x2 pcs | Support Legs(B)x2pcs | Support Stands(C)x2pcs | Wheels(D)x2 pcs |
| | |  |
| Horizontal Supports Base(E) | Horizontal Supports with Screws(F)x2 pcs | Cabinet Base(G)x1 pc | Cabinet Front with Door (H)x1 pc |
| | |  |
| Cabinet Back(I)x1 pc | Working Platform(J)x1 pc | Working Platform Brackets (Large)(K)x2 pCS | Push Handle(L)x1 pc |
 | | ||
| Handrail Brackets (Small) (M)-2pcs | Handrail (N)-1pc | ||
| | |  |
| Wheel Bolt M8x(0)x2 pcs | Nyloc Nut M8(P)x2 pcs | Nut M8(Q)x12 pcs | Washer (R)x18 pcs |
| | | |
| Bolt M8x60(S)x4 pcs | Bolt M8x35(T)x2 pcs | Bolt M8x16(U)x8 pcs | Screw M4x8(V)x8 pcs |
STEP 1
STEP 4
STEP 6
STEP 8
STEP 11
Stainless Steel Kettle ( III )
Fig.1
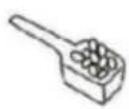
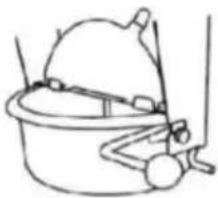
Fig.2
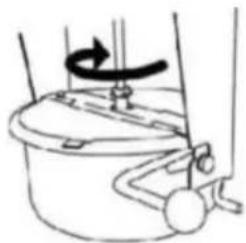
Fig.3
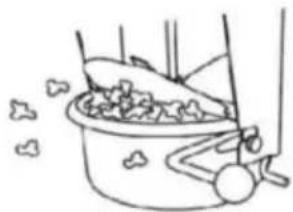
Fig.4
USING YOUR POPCORN MACHINE
| KETTLE | KERNELS | OIL |
| 2.5oz | 1/3 cup | 3/4 Tp (12ml) |
| 4oz | 1/2 cup | 1-1/2 Tp (20ml) |
| 6oz | 3/4 cup | 2 Tp (30ml) |
| 8oz | 1 cup | 2-1/2 Tp (40ml) |
| 10oz | 1-1/4 cup | 3 Tp (50ml) |
| 12oz | 1-1/2 cup | 4 Tp (60ml) |
| 16oz | 2 cup | 5 Tp (80ml) |
| 20oz | 2-1/2 cup | 6-1/2 Tp (100ml) |
1 person = (+/-) 1 oz
a.
b.
C.
a. Oil Spoon
b. Kernel Scoop
c. Popcorn Scoop
TROUBLESHOOTING
CLEANING AND MAINTENANCE
www.vevor.com/support
- POPCORN MACHINE
- NEED HELP? CONTACT US
- SAFETY WARNINGS AND PRECAUTIONS
- PLEASE READ ALL THE INSTRUCTIONS BEFORE USING YOUR MACHINE
- ATTENTION
- PRODUCT COMPONENTS
- POPCORN CART ASSEMBLY
- STEP
- OPERATING INSTRUCTIONS
- SPOT LIGHT AND WARMER ( I )
- STIRRER ( II )
- STAINLESS STEEL KETTLE HEATER (III)
- USING YOUR POPCORN MACHINE
- CLEANING AND MAINTENANCE
- CAUTION
- VEVOR®
- TOUGH TOOLS, HALF PRICE
- ABRASIVE
- WARNING
- TROUBLESHOOTING
- MODEL: NP08001SEC
- STAINLESS STEEL KETTLE ( III )
Brand : Vevor
Model : NP08001SEC
Category : Popcorn machine