USER MANUAL DOC345 LIVOO
natural_image
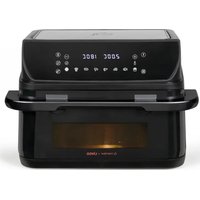
Black air fryer with digital display showing temperature and time settings (no text or symbols on device body)
Livoo
îersion y v.l.1
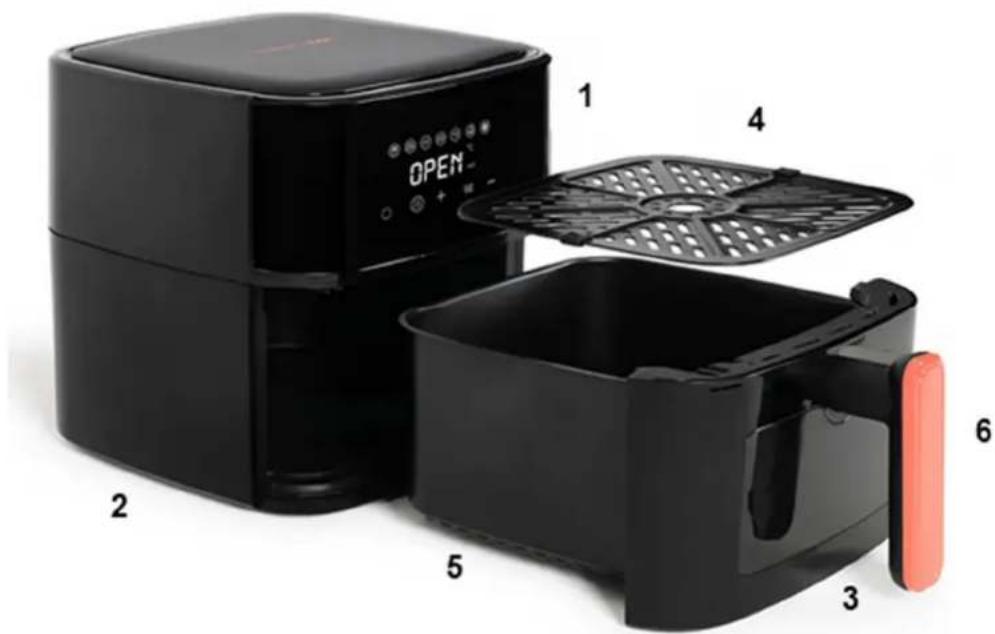
Figure 1
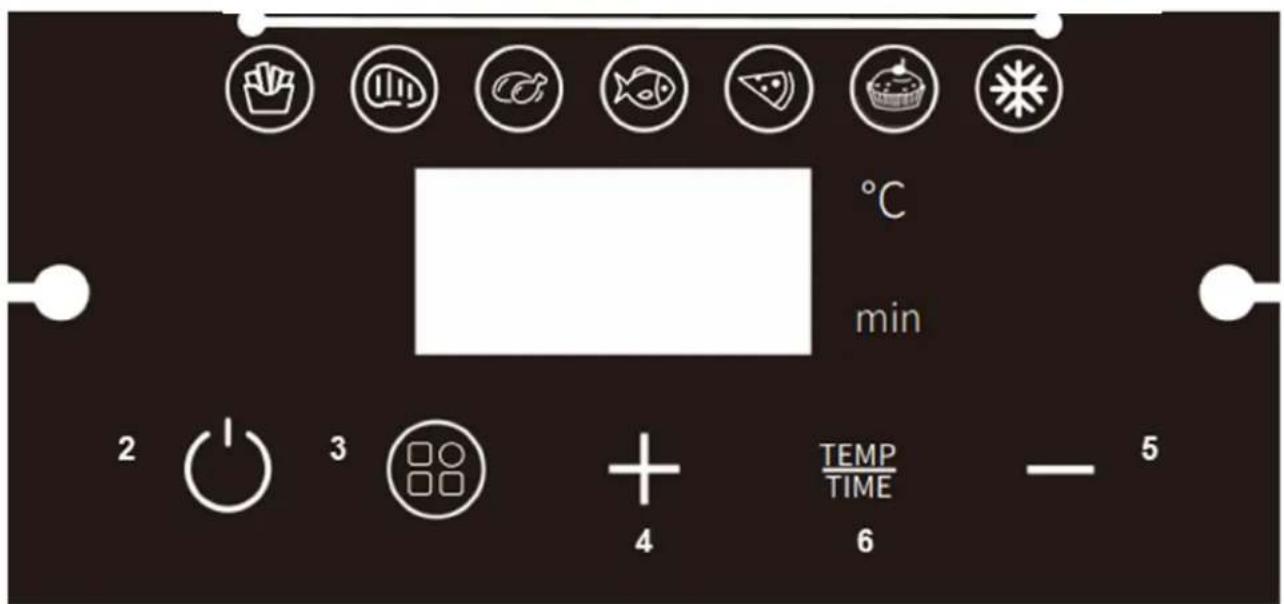
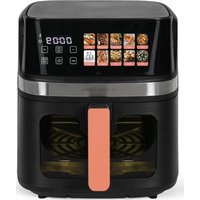
Figure 2
natural_image
Symbol of a trash bin with crossed lines indicating no waste or discharge, and a solid black rectangle below (no text or labels)
Thank you for choosing a Livoo product!
The collaboration between Marmiton and Livoo is a breath of fresh air. ûy exploring our shared expertise, we've come up with a product that will simplify your life in the kitchen. ôow do we do it? ûy slipping you 30 ready-to-use recipes with your new oil-free fryer. Simply scan the Qr code on the product to access the recipes at any time. With its 7 functions, you'll be able to prepare a wide range of meat and fish recipes, and even bake cakes.
The product is adorned with coral accents, Marmiton's signature color, to bring a positive touch to your kitchen. Find our entire collection on our website www.livoo.en.
Livoo, your daily companion till social networks

@Livoo

@livoo_officiel

@Livoo
Safety Instructions
Please, take time to read well the instruction sheet before the first use and keep them for a future use.
A misuse of the appliance can damage it or hurt the user. Assure that you use the appliance for the use for which it is designed. We refuse any responsibilities as for the damages by an incorrect use or a bad manipulation.
-
Please check the voltage of the unit corresponds to the voltage of your installation before connecting the appliance.
-
Never immerse the appliance. Never clean the appliance by placing it under the tap. Do not allow water or liquids enter the unit. °he appliance contains electronic components. «isk of electric shock!
ç. Do not cover the air inlet or the air outlet when the unit is running.
- Do not fill the oil drawer. Fire hazard!
- Do not touch the inside of the fryer when the unit is running. Énstruction Manual 2 «isk of burns!
- Éf the supply cord is damaged, it must be replaced by the manufacturer, its service agent or similarly qualified persons in order to avoid a hazard (è).
- °his appliance can be used by children aged from 8 years and above and by people with reduced physical, sensory or mental capabilities or lack of experience and knowledge if they have been given supervision or instruction concerning use of the appliance in a safe way and understand the hazards involved.
-
Children shall not play with the appliance.
-
Cleaning and user maintenance shall not be made by children unless they are older than 8 and supervised.
- Keep the appliance and its cord out of reach of children less than 8 years.
- Keep the power cord away from the hot surface of the appliance and any other heat sources.
- Make sure the appliance is plugged into your power outlet.
Iç. °his appliance is not intended to be operated by means of an external timer or separate remoteâ control system.
- Do not place the unit on or near flammable materials such as a tablecloth or curtain.
- Do not place the appliance against the wall or other appliances. Keep a distance of at least 10 cm of free space at the back and sides and a clearance of 10 cm above the unit. Never place an object on top of the unit. Énstruction Manual 3
- Never use the appliance for other purposes than those described in this manual.
-
»urfaces are liable to get hot during use. Always use thermal gloves.
-
°urn off the power immediately and unplug the unit if you see black smoke coming out of the unit. Wait smoke emission stop before removing the drawer.
- Always place the unit on a level surface or a stable surface.
- Make sure to always unplug the appliance after use.
- Let cool for about 30 minutes before cleaning.
- Always keep the appliance clean as it comes in contact with food.
2¢. «egarding the details on how to clean the surfaces come in contact with food or oil, refer to the following paragraph of the leaflet.
- °he temperature of accessible surfaces may be high when the appliance is operating.
- Appliance must not be immersed.
- Cooking appliances should be positioned in a stable situation with the handles (if any) positioned to avoid spillage of the hot liquids.
-
°his appliance is intended to be used in household and similar applications such as:
-
staff kitchen areas in shops, offices and other working environments,
- farm houses,
- by clients in hotels, motels and other residential type environments,
- bed and breakfast type environments.
(*) Competent qualified electrician: after sales department of the producer or importer or any person who is qualified, approved and competent to perform this kind of repairs in order to avoid all danger. In any case you should return the appliance to this electrician.
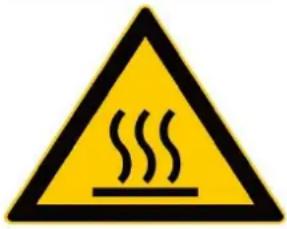
Warning: Hot surface! - Do not cover the air inlet and the air outlet when the appliance is working.
Technical Specifications
Voltage: 220-240V\~50-60Hz Power: 1200W Mode off power consumption: 0.24W
| 1 | Control panel |
| z | Base |
| 3 | window |
| 1 | Cooking Modes |
| z | Power On/Off |
| 3 | Menu Selection |
| 4 | Increase Temperature and Cooking Time |
| 5 | Decrease Temperature and Cooking Time |
| y | Display (Temperature and Cooking Time) |
Control Panel Functions
Power On/Off:
Press the On/Off button. The default temperature will be displayed, and the cooking time is preset to 15 minutes. Press the button a second time to start the cooking process. To stop the appliance, press and hold the button for 3 seconds. After a few seconds, the fan will stop and the device will turn off.
The preset cooking time and temperature from the selected menu will be applied and shown on the display, but you can still adjust them using the + and â buttons.
The table below will help you select the optimal quantity, temperature, and cooking time according to the food. »ince ingredients vary in origin, size, and shape, these settings may need to be adjusted.
| Ingredients Qty min-max (g) Time (min) Temperature (°C) |
| Fresh fries | 100 600 | 20 25 | 200 |
| White meats | 100 500 | 25 30 | 180 |
| Fish | 100 500 | 25 30 | 200 |
| Defrost | 300 50 | 20 30 | 50 90 |
| Red meats | 160 200 | 18 22 | 160 180 |
| Desserts | 100 500 | 20 25 | 160 180 |
| Pizza | 100 500 | 15 | 180 |
Pause:
During cooking, press the On/Off button. The appliance will stop heating, and the fan will continue to run for 15 seconds before shutting off. After 1 minute of inactivity, the appliance will automatically enter standby mod. Press the On/Off button again briefly to resume operation.
Preset Programs:
Press this button to cycle through 6 cooking modes for the most common types of food. Confirm your selection by pressing the button again.
Defrost Function:
The defrost time and temperature are preset to 5 minutes at 90^ . •ou can adjust these settings using the + and â buttons.
Timer:
The default timer is preset to 5 minutes. While the appliance is running, press the Timer button and adjust the time using the + or â buttons. Once set, confirm by pressing the On/Off button.
Temperature Setting:
The temperature can be adjusted in 5°C increments. The available temperature range is from 80°C to 200°C. Press the + or â buttons to select the desired temperature. A long press will scroll faster through the options. Confirm the selection by pressing the Temperature »etting button.
Cooking Time Setting:
The cooking time can be increased or decreased using the + or â buttons. The time range is from 1 to 60 minutes in 1âminute steps. Confirm the selected time with the Cooking Time »etting button.
Before First Use
Remove all packaging materials. Thoroughly clean the interior of the basket and the grill with warm soapy water and a nonâabrasive sponge. Wipe the inside and outside of the appliance with a lintâfree cloth.
Plug in the appliance and let it heat up empty for a few minutes. It may emit a slight odor or smoke, which is normal for new appliances. This does not affect the device's safety.
Use of the device
Plug in the air fryer. Remove the basket and ensure the grill is properly positioned inside it. Add the food along with a little oil. Slide the basket back into place.
Important: Never use the basket without the grill.
Caution: The basket and the device's exterior become very hot during and after use. Use the handle and protective mitts to avoid burns.
Adjust the air fryer settings based on the type of ingredients.
Halfway through cooking, shake or stir the food for even frying.
When cooking is complete, carefully remove the basket. Be cautious, as both the food and the grill will be hot, and steam may escape depending on the ingredients.
Unplug the appliance and wait at least 3è minutes before cleaning.
Tips
• Always preheat your air fryer before use to aid in cooking.
- Cooking time may vary depending on the size of your ingredients.
- Add a bit of oil to fresh potatoes for crispier fries.
- The optimal quantity for crispy fries is about 500 grams.
- Avoid cooking very fatty foods like sausages in the appliance.
• To bake cakes or cook delicate or stuffed foods, place a baking dish inside the basket.
- •ou can also use the air fryer to reheat food.
Cleaning and maintenance
Clean the tray and rack after each use. Avoid using metal kitchen utensils or abrasive cleaning products, as they may damage the non-stick coating.
Unplug the power plug from the wall outlet and let the appliance cool down. Clean the exterior of the appliance with a damp cloth and dry it with a dry cloth. Clean the tray and rack with warm soapy water and a non-abrasive sponge. Use a soft non-metallic brush to clean the heating element and remove any food residue.
Troubleshooting tips
| Problems | Reasons | Solutions |
| The oil-free fryer doesn't start. | It's not plugged in. | Plug in the oil-free fryer. |
| The cooking time is not set. | Set the cooking time. |
| The food is not cooked enough. | There's too much food in the tray. | Reduce the amount of food. |
| The selected temperature is too low. | Choose a higher temperature. |
| The cooking time is too short. | Increase the cooking time. |
| The food is fried unevenly. | Some foods need to be stirred. | Stir the food halfway through cooking. |
| White smoke is coming out of the appliance. | The foods used are too fatty. | Excess fat can overheat and cause the release of white smoke. Thisdoesn't affect the operation of the appliance. |
| Fresh fries are cooked unevenly. | •ou didn't use the right type of potatoes. | Choose potatoes specifically for frying. |
| •ou didn't rinse the potato sticks properly before frying. | «inse the fresh fries. |
| Fresh fries are not crispy when they come out of the oilâfree fryer. | °he crispiness of the fries depends on the amount of oil and water they contain. | Ensure the potato sticks are wellâ dried before adding the oil. |
| Cut the potato sticks into smaller pieces for a crispier result. |
| Add a bit more oil for a crispier result. |


LIVOO
ûP 61071
67¢52 Mundolsheim â F«ANCE