HS-QX-009B - Fitness Equipment Vevor - Free user manual and instructions
Find the device manual for free HS-QX-009B Vevor in PDF.

| Product Type | Bike Trainer (Home Trainer) |
| Brand | Vevor |
| Model | HS-QX-009B |
| Wheel Compatibility | 26 to 29 inches (MTB, road 700C, fixed gear) |
| Maximum User Weight | 120 kg (265 lbs) |
| Resistance Type | Fluid, adjustable via tire pressure regulator |
| Included Parts | Trainer body, fluid motor mount, quick release lever, pressure regulator assembly, open-end wrench, hex key, front riser block |
| Dimensions (approx.) | 50 x 50 x 30 cm |
| Weight (approx.) | 12 kg |
| Power Supply | None (mechanical) |
| Installation | On flat, level surface; secure with quick release lever |
| Safety Precautions | Do not leave children unattended; avoid pinching; use only as intended |
| Maintenance | Clean with a damp cloth; store in a dry place |
| Spare Parts | Contact the manufacturer or authorized dealer |
| Warranty | Electronic warranty certificate available at www.vevor.com/support |
Frequently Asked Questions - HS-QX-009B Vevor
User questions about HS-QX-009B Vevor
0 question about this device. Answer the ones you know or ask your own.
Ask a new question about this device
Download the instructions for your Fitness Equipment in PDF format for free! Find your manual HS-QX-009B - Vevor and take your electronic device back in hand. On this page are published all the documents necessary for the use of your device. HS-QX-009B by Vevor.
USER MANUAL HS-QX-009B Vevor
Technical Support and E-Warranty Certificate www.vevor.com/support
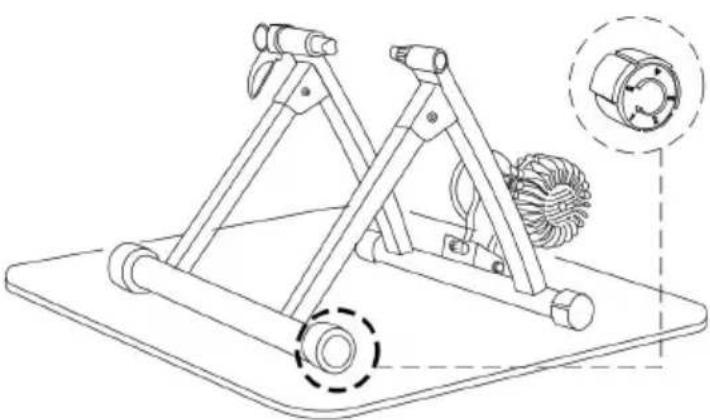
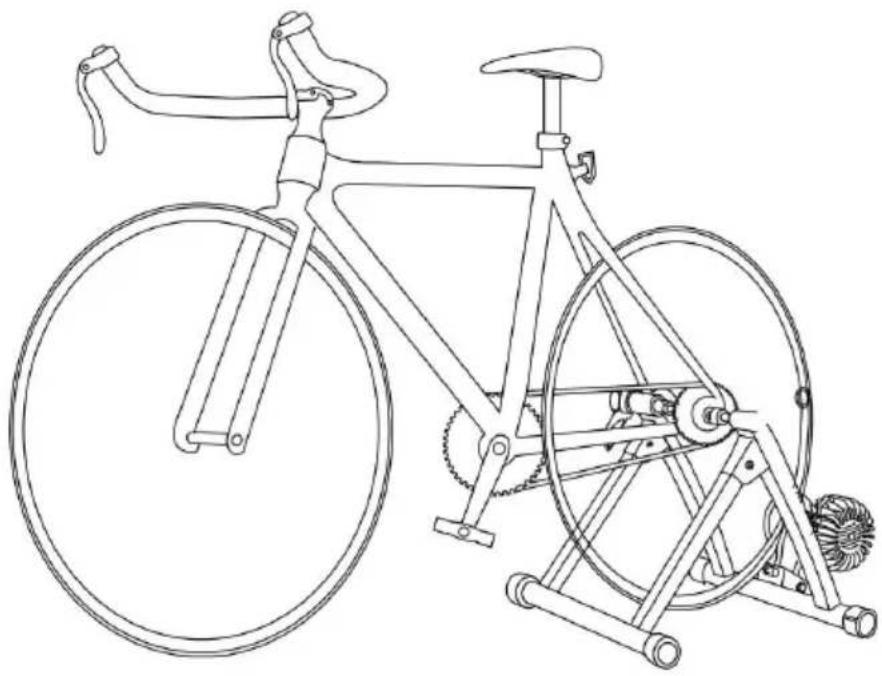
BIKE TRAINER
MODEL: HS-QX-009B
We continue to be committed to provide you tools with competitive price. "Save Half", "Half Price" or any other similar expressions used by us only represent the estimate of savings you might benefit from buying certain tools with us compared to top brands and does not necessarily mean to cover all categories of tools offered. Are kindly reminded to verify carefully when you are placing an order with us actually saving half in comparison with the top major brands.
MODEL: HS-QX-009B

NEED HELP? CONTACT US!
Have product questions? Need technical support? Please feel fr contact us:
Technical Support and E-Warranty Certificate www.vevor.com/support
This is the original instruction, please read all manual instruction carefully before operating. VEVOR reserves a clear interpretation user manual. The appearance of the product shall be subject to product you received. Please forgive us that we won't inform you there are any technology or software updates on our product.
NOTICE
The product is suitable for bicycles with 26-to-29-inch wheels (Mountain Bike, 700C Road Bike, and Fixed Gear Bicycle) and is more suitable for road bicyc bicycles with smooth tires. When using mountain bikes, the running noise will higher. It is recommended to place a yoga mat or carpet between the traine the ground to reduce noise.
Installation precautions
- Install only according to these instructions. Improper installation can create hazards.
- Keep the installation area clean and well-lit.
- Do not install when tired or when under the influence of alcohol, drugs or medication.
- Product capabilities apply to properly and completely installed product only.
WARNING!
To prevent serious injury, securely install and use it according to manufacture instructions.
- Incorrect installation can be dangerous.
- Danger to older children if climbing over the product.
- Never leave the toddler unattended when using this product.
- Take care to avoid pinching at all joint locations.
- Additional or replacement parts shall only be obtained from the manufacturer distributor.
- Use as intended only.
DO NOT let comfort or familiarity with product (gained from repeated use) restrict adherence to the product safety rules. You can suffer serious personal if you use this product unsafely or incorrectly.
SAVE THESE INSTRUCTIONS
DETAILED PRODUCT DESCRIPTION
| Model | HS-QX-009B |
| Suitable wheel size | 26-29 in |
| Load-Bearing | 265 lbs |
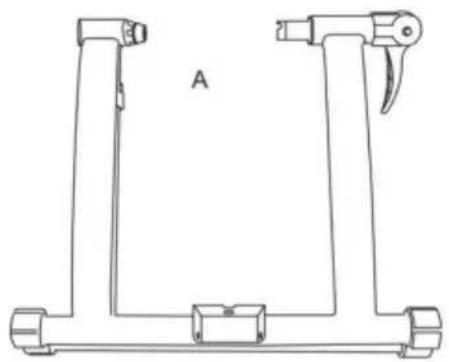
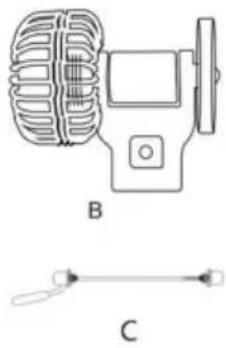
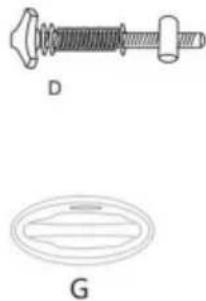
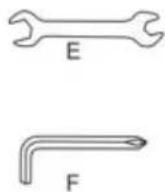
PART LIST
| ITEM | DESCRIPTION | QTY | ITEM | DESCRIPTION | QTY |
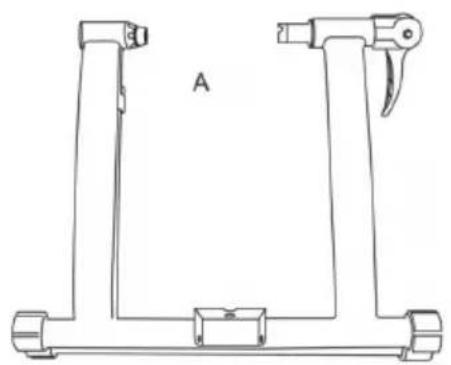
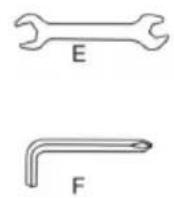
| A | Bike trainer body | 1 | E | Open Wrench | 1 |
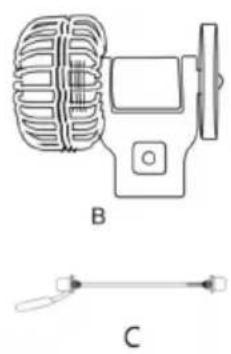
| B | Fluid motor holder | 1 | F | Hexagon wrench | 1 |
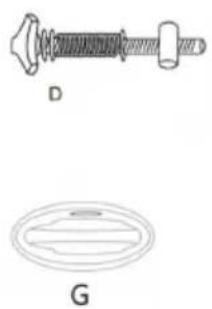
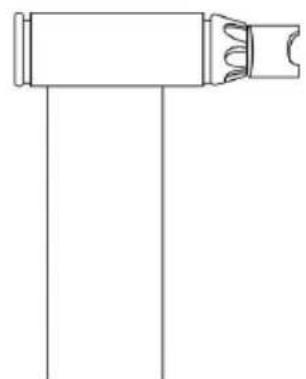
| C | Quick release lever | 1 | G | Front tyre tray | 1 |
| D | Tire Pressure Regulator S | 1 |
INSTALLATION
- First, fully open the legs a place it on a flat and horizon floor to ensure there are no obstacles and dangerous goods around.
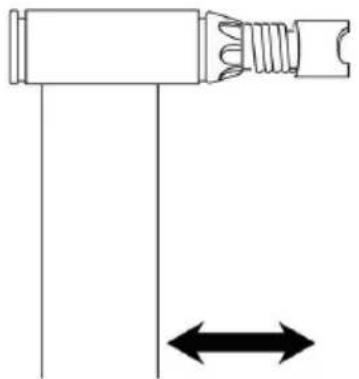
Pull the movable legs to themaximum angle and adjust thebottom foot pads to ensure thbike trainer is fixed and does
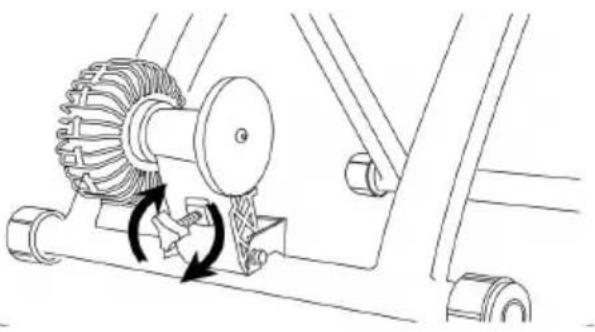
- Installing the tire pressure regulator set and fluid motor holde
2-1. According to belk explosive view to iner related pressure regulator, gaskets,
spring and barrel nut cross the hole on the motor and motor hold one by one.
2-2. According to bel

explosive view to insert bolt, gasket and nut cross the holder hole on one to fix the motor, use Allen Wrench to fasten the bolt tightly.
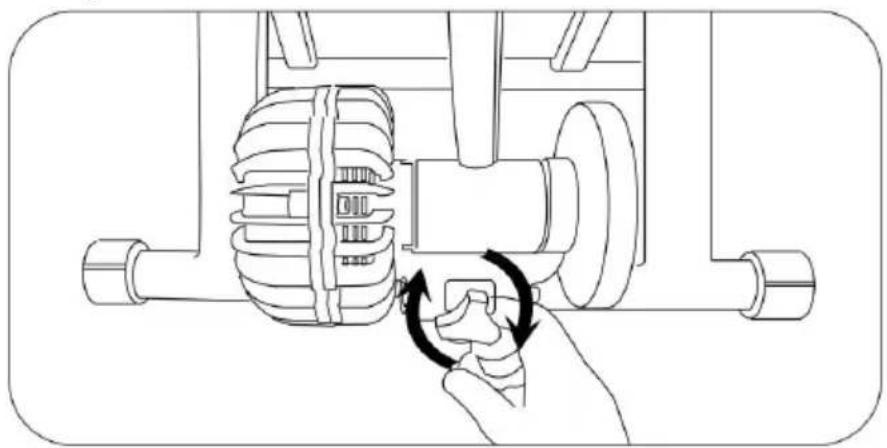
- You can increase or decrease resistance by adjusting tire pressure regulator.
- This installation step is suitable for users who need to replace quick release lever. If you don't need to replace it, please ignore this item.
If the rear axle is not suitable the bike trainer's two holders, disassemble bike rear axle and replace the Quick Release Skew which is together with bike trail (PIs note that whether there's QR skewer together with the k
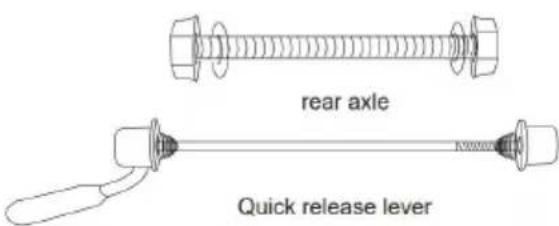
trainer depends on each order's requirement, it is not a necessary accessory.)
- Hang the left side of t rear axle on the left bayo of the bike trainer, tighten left knob, and then tighten locking knob to ensure the stability of the bike.
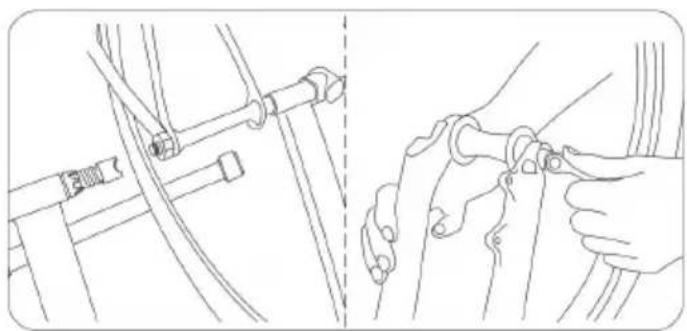
- Put your bike on the bike trainer, pull the black handle to fasten wheel of the bicycle, adjust the knob on the other side slightly.
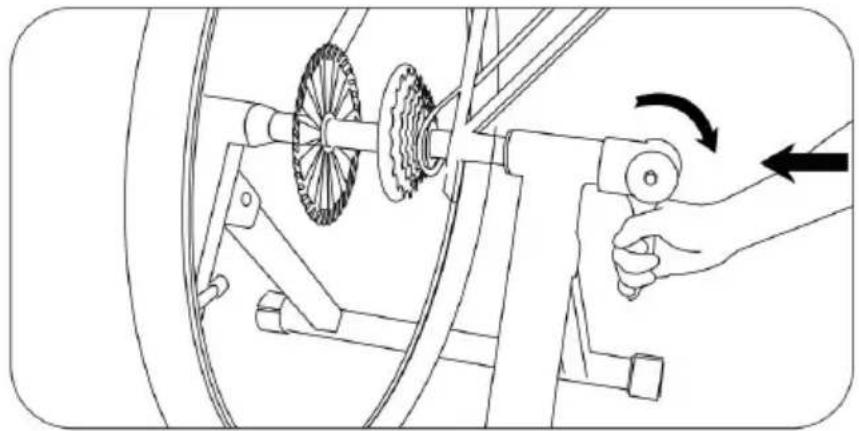
- Tighten the pressure touch to contact the tire.
- Front tyre tray Put the bike front wheel on the front wheel pad to effectively prevent the bike from swing inadvertently.
Address: Baoshanqu Shuangchenglu 803long 11hao 1602A-1609shi Shanghai
Imported to AUS: SIHAO PTY LTD. 1 ROKEVA STREETEASTWOOD NSW 2122 Australia
Imported to USA: Sanven Technology Ltd. Suite 250, 9166 Anaheim Place, Rancho Cucamonga, CA 91730
| UK | REP |
Pooledas Group Ltd Unit 5 Albert Edward House, The Pavilion Preston, United Kingdom
| EC | REP |
SHUNSHUN GmbH
Römeräcker 9 Z2021, 76351
Linkenheim-Hochstetten, Germany
Made In China
VEVOR®
TOUGH TOOLS, HALF PRICE
Technical Support and E-Warranty Certificate www.vevor.com/support
VEVOR®
TOUGH TOOLS, HALF PRICE
Assistance technique et certificate de garantie electronique www.vevor.com/support
ENTRAINEUR DE VÉLO
MODELE:HS-QX-009B
in AUS: SIHAO PTY LTD. 1 ROKEVA STREETEASTWOOD NSW 2122 Australia
SIHAO PTY LTD. 1 ROKEVA STREETEASTWOOD NSW 2122 Australia
Import do USA: Sanven Technology Ltd. Suite 250, 9166 Anaheim Place, Rancho Cucamonga, CA 91730
HULP NODIG? NEEM CONTACT MET ONS OP!
GEDTAILLEERDE PRODUCTBESCHRIJVING
| Model | HS-QX-009B |
| Geschikte wielmaat | 26-29 inch |
| Dragend | 265 pond |
ONDERDELEN LIJST