
TX-B7123-14FT - Trampoline Vevor - Free user manual and instructions
Find the device manual for free TX-B7123-14FT Vevor in PDF.
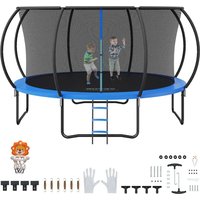


| Product Type | Trampoline with Safety Net |
| Brand | Vevor |
| Model | TX-B7123-14FT |
| Diameter | 14 feet (approx. 4.27 m) |
| Maximum User Weight | 204 kg (450 lb) |
| Number of Springs | 80 |
| Frame Material | Steel |
| Jumping Mat Material | Resistant Fabric |
| Safety Net | Included, with Zipper Closure |
| Assembly Required | Yes, by two adults |
| Recommended Age | From 3 years (adult supervision up to 12 years) |
| Usage | Outdoor only |
| Care and Cleaning | Wipe with a soft dry cloth; do not use abrasive cleaners |
| Safety | No somersaults; one person at a time; remove jewelry and sharp objects |
| Warranty | Technical support via www.vevor.com/support |
| Included Accessories | Ladder, spring tool, frame pad, poles and net |
| Country of Manufacture | China (Shanghai) |
Frequently Asked Questions - TX-B7123-14FT Vevor
User questions about TX-B7123-14FT Vevor
0 question about this device. Answer the ones you know or ask your own.
Ask a new question about this device
Download the instructions for your Trampoline in PDF format for free! Find your manual TX-B7123-14FT - Vevor and take your electronic device back in hand. On this page are published all the documents necessary for the use of your device. TX-B7123-14FT by Vevor.
USER MANUAL TX-B7123-14FT Vevor
Technical Support and E-Warranty Certificate www.vevor.com/support
OUTDOOR ENTERTAINMENT
TRAMPOLINE
MODEL: TX-B7123-10FT
TX-B7123-12FT
TX-B7123-14FT
We continue to be committed to providing you with tools at competitive prices. "Save Half", "Half Price", or any other similar expressions used by us only represent the savings you might benefit from buying certain tools with us compared to top brands, and do not necessarily mean that all categories of tools offered are covered. We kindly remind you to verify carefully when placing an order with us to ensure you are actually saving half in comparison with the top major brands.
MODEL: TX-B7123-10FT / TX-B7123-12FT / TX-B7123-14FT
NEED HELP? CONTACT US!
Have product questions? Need technical support? Please feel free to contact us:
Technical Support and E-Warranty Certificate www.vevor.com/support
This is the original instruction. Please read all manual instructions carefully before operating. VEVOR reserves the right to interpret the user manual. The appearance of the product shall be subject to the product you received. Please forgive us that we won't inform you of any technology or software updates on our product.
 | Warning-To reduce the risk of injury, user must read instructi manual carefully. |
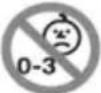 | Not suitable for children under 36 months |
 | Do not use during pregnancy! |
 | Do not use when suffering from high blood pressure! |
 | Only one person on the trampoline! |
 | Use only bare feet! |
 | No somersaults! |
 | No smoking! |
 | Remove all sharp objects from trampoline and jumper! |
 | Do not bring watches, glasses, rings, scissors, phone etc. |
SAFETY WARNINGS AND PRECAUTIONS
Thank you for using this product. In order to ensure that you can operate the machine correctly, read this instruction carefully before operation and keep it properly for future reference. Please read the precautions and safety rules on page to ensure your safe use. This manual will outline safety warnings and precautions, operating, maintenance, and cleaning. The warnings and instructions reviewed in this manual cannot cover all possible conditions and situations that may occur. Caution and common sense are not built into this product, since we believe that the users will comply with these codes. Before starting a training program or engaging in strenuous endurance activity on the device, please call a doctor.
Please read ALL the instructions before using your machine.
- Assemble needs to follow these instructions. Incorrect assembly can be a hazard. Wear heavy-duty work gloves during assembly.
- Do not assemble and use when tired or when under the influence of alcohol drugs or medication.
- Elastic and other product properties only apply to correctly and completely assembled products.
- Keep the assembly area clean and well-lit.
- Keep bystanders out of the area during assembly.
- The trampoline must be set up by an adult following the instructions. Do allow children and pets to play alone or approach this item. Don't Climb Pro
- Use as intended only. Always zip up the net before jumping. Make sure is securely zipped before bouncing.
- Inspect before every use. Do not use it if Part are loose or damaged. Be aware of the following potential hazards:
- Missing, damaged or improperly positioned frame padding.
- Punctures, tears, frays, or holes in the fabric of the bed. Deterioration of stitching, fabric, or webbing.
- Bent or broken frame.
- Loose or missing bolts. Loosened legs.
- Bumper cotton cracked, damaged, lost
- People or objects hanging on the product will cause the product to fall.
- Pay attention to pedestrians and vehicles when using.
- Do not use this unit for any purpose other than the indicated usage. Changes to any part or structure of the product are allowed.
- Do not place items on the trampoline net to avoid damage.
- Do not use it for commercial purposes.
- DO NOT CLEAN IT WITH ANY ABRASIVE MATERIAL.
- Never leave it unattended while in use.
- Pet urine and feces can damage the product; please keep them away.
- Do not place the product on or near hot air, electric burners, or heaters. Fireworks, cigarettes, flares, and other items can ignite the product. Please keep them away from it.
- The product should be placed on a flat surface. It should be installed in an open and safe place, at least 2m from any structure or obstruction, avoiding places near windows, roads, railways, rivers, fences, garages, houses, overhanging branches, electrical wires, swimming pools, swings, slides, climbing frames, walls, furniture, wires, ceiling fans, etc.
- The trampoline is intended for outdoor use only. Do not place it in a damp environment.
- Must use the designed access points to climb in and out of the trampoline.
- Do not eat or drink while jumping. It is advisable not to bounce immediately after a meal.
- This appliance is not intended for use by persons (including children) with reduced physical, sensory, or mental capabilities, or lack of experience or knowledge, unless they have been given supervision or instruction concerning use of the appliance by a person responsible for their safety. Not suitable for children under 36 months - small parts, choking hazard.
- Always jump in the middle of the mat and practice bounce techniques under adult supervision and guidance.
- Take your shoes off while jumping. Empty pockets and hands before jumping. Do not wear glasses.
- Do not allow more than one person at a time on the trampoline. Do not allow multiple people at the same time.
- Max user weight limit: check size chart.
- DO NOT bury the trampoline in the ground.
- Do not install the trampoline over concrete, asphalt, or any other hard surface. Make sure there are no children, pets, animals, or obstructions underneath the trampoline.
- Do not intentionally jump against the protection net as this will weaken it.
- Artificial illumination may be required for indoor or shady areas.
- The metal frame of the trampoline can conduct electricity. All lamps, extension cords, and similar electronic devices must not come into contact with the frame.
- Check the trampoline before and after each use to make sure that all parts are properly and securely in place. If necessary, tighten the screws and replace any worn, defective, or missing parts.
- Wear comfortable clothing in which you can move around easily when using the device. Do not wear hooks, snaps, drawstrings, or similar items that could get caught in the trampoline. Before use, remove all necklaces and earrings.
- Please only wear suitable trampoline shoes or socks to avoid slipping. Shoes with smooth leather soles are not suitable for trampoline use.
- The minimum age for using the trampoline is 3 years. Children under the age of 12 should only use the trampoline under the supervision of an adult who is able to assess the risks.
- If you have heart disease, high blood pressure, or other physical diseases, you should not use this product. We accept no liability for consequential damage caused by non-compliance.
⚠ WARNING: 37. This appliance is not intended for use by young children or infirm persons unless supervised by a responsible person to ensure that they use the appliance safely. Young children should be supervised to ensure that they do not play with the product. Pets should stay away from the product. Do not use outdoors on rainy and cloudy days and in strong wind conditions, avoid lightning strikes and falls. People or pets hanging on the product will cause injury or death.
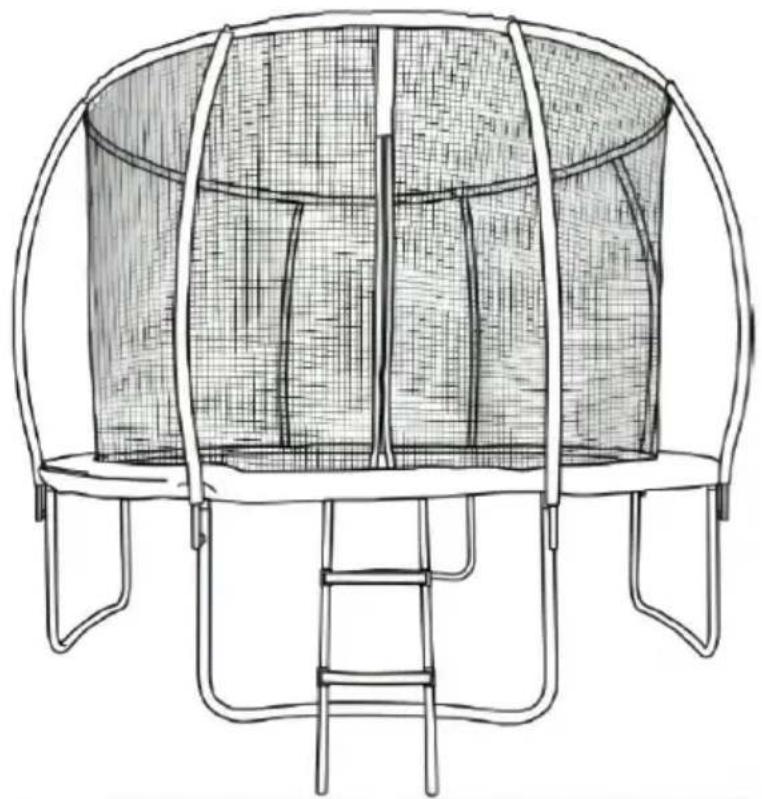
- The manufacturer strongly recommends assembling the enclosure net before using the trampoline, this will reduce the risk of falling off and offer safety for children.
- Do not try to do somersaults on the trampoline. Landing on the head or neck, even if it happens in the middle of the trampoline, can result in injuries such as paralysis and, in the worst case, death.
PRODUCT PART
- Please dispose of all plastic bags carefully and keep them away from children and pets.
- Check all components provided according to the list in this manual. Make sure you have all the parts listed.
- Although particular attention is paid when manufacturing this product, you should be careful during the assembly process to avoid being scratched by sharp edges.
- Wear protective gloves during assembly and use.
- The product should be placed on a flat surface.
- The product requires two people to assemble.
NOTE: The quantity of parts shown in the manual is the actual usage, and the unused parts are spare parts.
| Model | TX-B7123-10FT | TX-B7123-12FT | TX-B7123-14FT | ||
| Max user weight limit | 330 Pound (150Kg) | 400 Pound (181Kg) | 450 Pound (204Kg) | ||
| A | 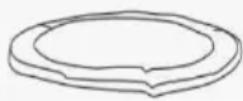 | Frame Cover | 2PCS | 2PCS | 4PCS |
| B | 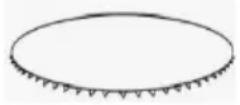 | Jumping Mat | 1PCS | 1PCS | 1PCS |
| C | 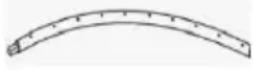 | Frame | 8PCS | 8PCS | 8PCS |
| D | 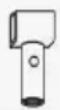 | Steel T-Connector | 8PCS | 8PCS | 8PCS |
| E | 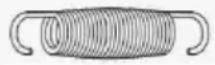 | Spring | 64PCS | 72PCS | 80PCS |
| F |  | Leg Extension | 8PCS | 8PCS | 8PCS |
| G | 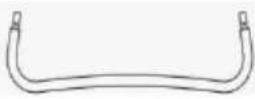 | W Shaped Leg | 4pc | 4pc | 4pc |
| H | 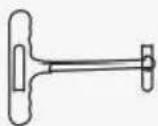 | Spring Tool T-Hook | 2pc | 2pc | 2pc |
| I | 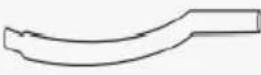 | Bottom Pole | 8pc | 8pc | 8pc |
| J | 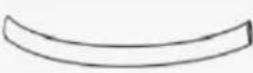 | Upper Pole | 8pc | 8pc | 8pc |
| K | 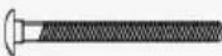 | Long Screw | 16pc | 16pc | 16pc |
| L | 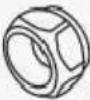 | Nut | 16pc | 16pc | 16pc |
| M | 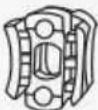 | Plastic Pad | 16pc | 16pc | 16pc |
| N | 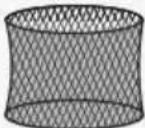 | Enclosure Net | 1pc | 1pc | 1pc |
| O |  | Fiberglass Stick | 8pc | 8pc | 8pc |
| P | 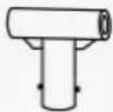 | Plastic T-Connector | 8pc | 8pc | 8pc |
| Q | 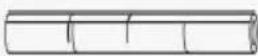 | Pole Foam | 16pc | 16pc | 16pc |
| R | 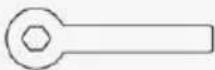 | Wrench | 1pc | 1pc | 1pc |
| S | 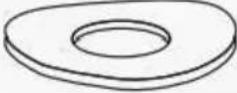 | Screw Nut | 16pc | 16pc | 16pc |
| T | 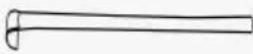 | Ladder Pipe | 2pc | 2pc | 2pc |
| U | 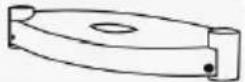 | Ladder Steps | 2pc | 2pc | 2pc |
| V | 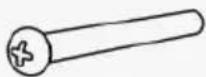 | Ladder Screw | 4pc | 4pc | 4pc |
| W | 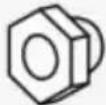 | Ladder Nut | 4pc | 4pc | 4pc |
ASSEMBLY STEPS
Step 1
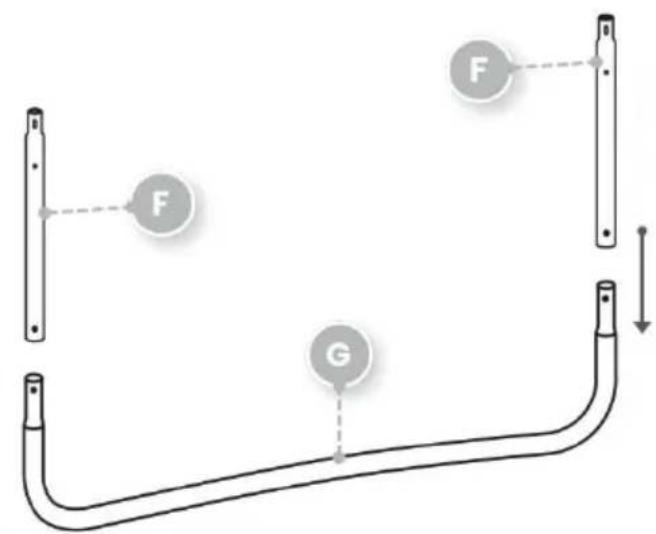
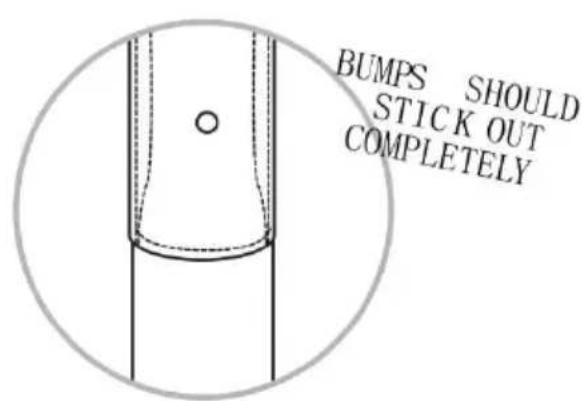
- Insert the Leg Extension (F) into the W-Shaped Legs (G). Make sure the bumps are aligned with the holes in the bars and stick out through them correctly. Bumps should face back and front.
Step 2
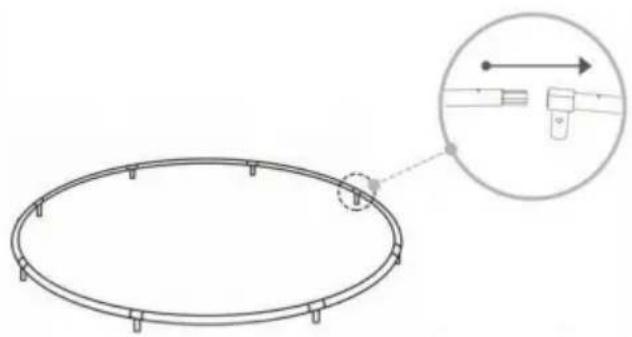
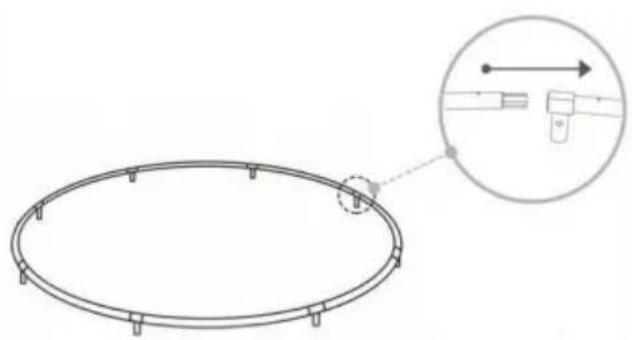
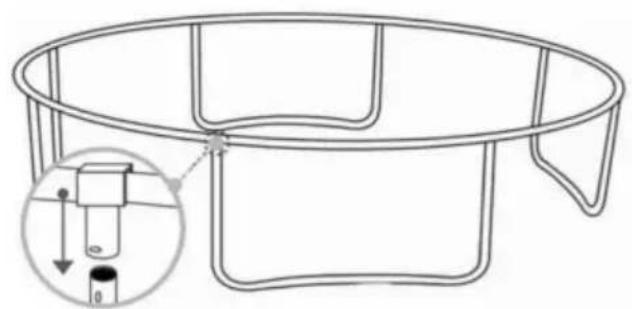
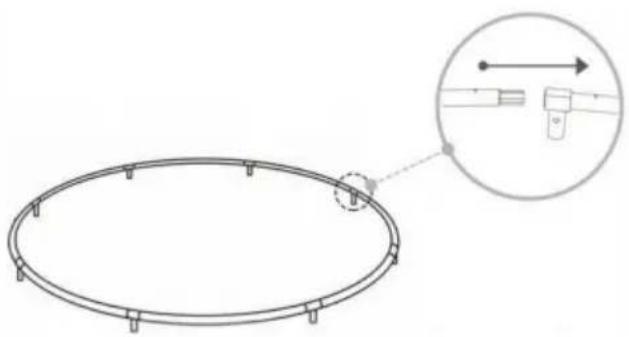
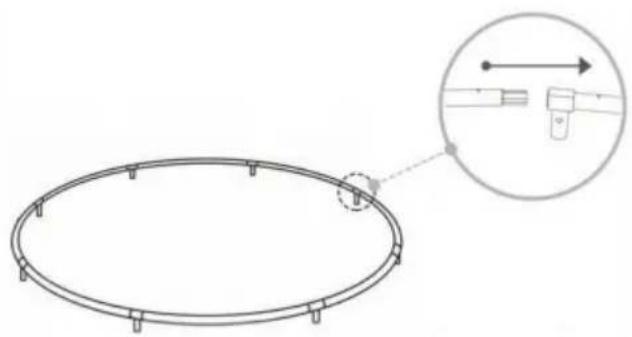
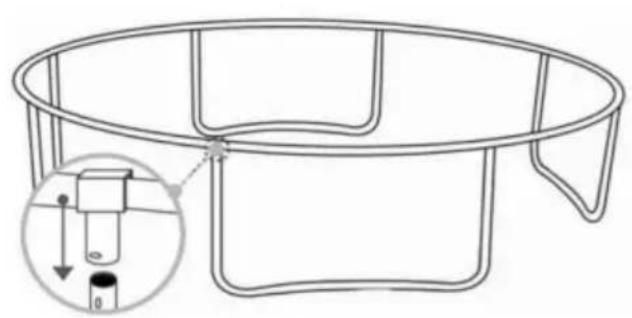
- Attach the frame (C) to the T-connectors (D). Continue until you form the
![graph TD A["Component D"] --> B["Component C"] B --> C["End"]](/content/2026/04/737700/images/a83b018ed2aa37a093377c98582241b6d82f0839f673f58a944ca0082c6ade70.jpg)
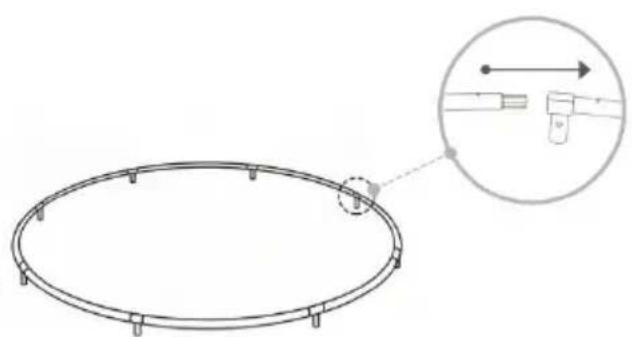
Tip: Have a second person or use a wall to apply some resistance against the frame to help it shift into place.
Step 3
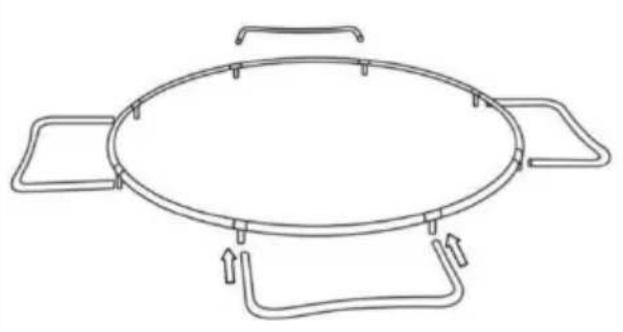
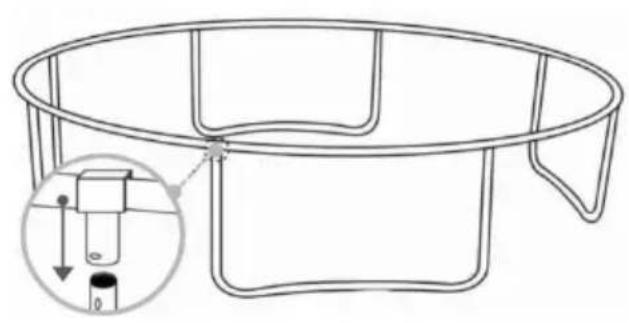
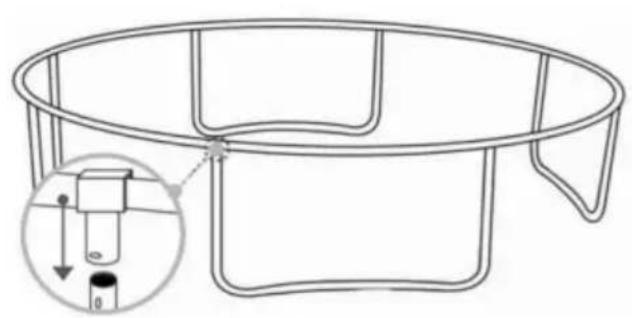
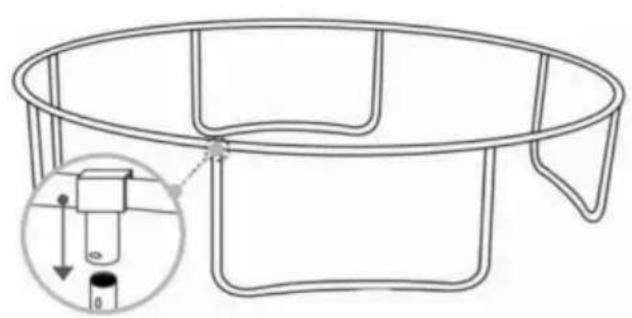
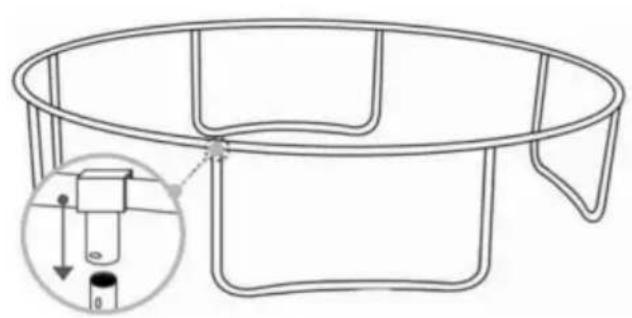
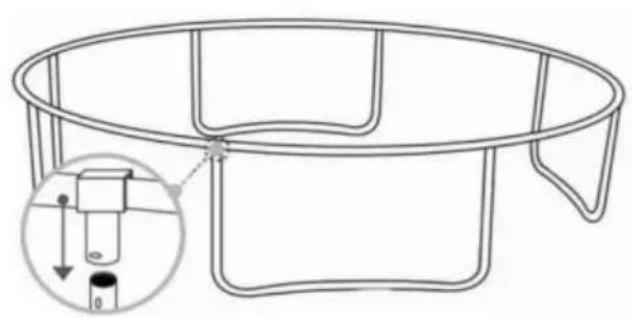
- Two people will be necessary at this point to install the trampoline. One lifts up the circle frame, while the other lifts the W-shaped leg tubes to a (vertical) position and inserts the Steel T-Connectors (D) into a W-shaped leg tube. Ensure the locking holes are aligned.
Step 4
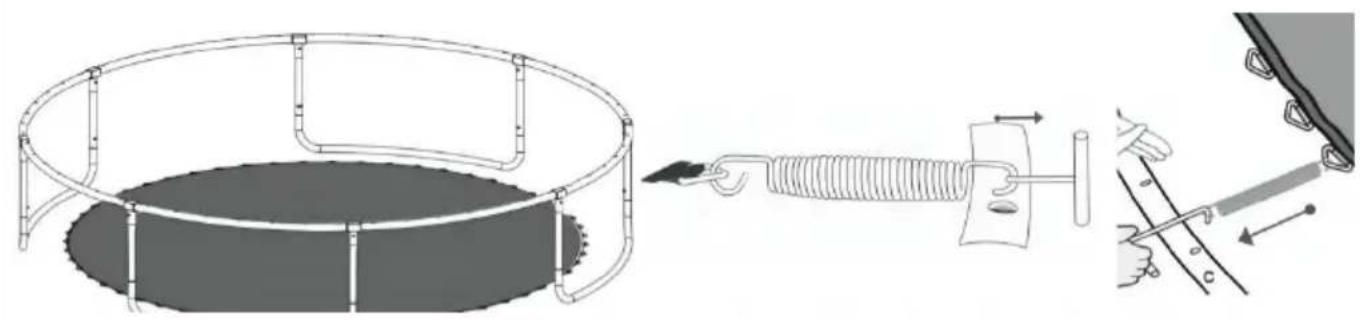
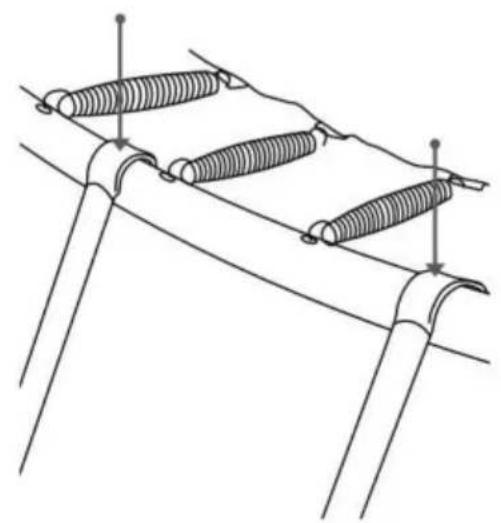
- Layout the jumping mat (B) inside the circle frame. Insert one end of the (E) in the triangle ring of the jumping mat (B) and the other end pull it with spring tool (H) and insert it into the frame hole.
Step 5
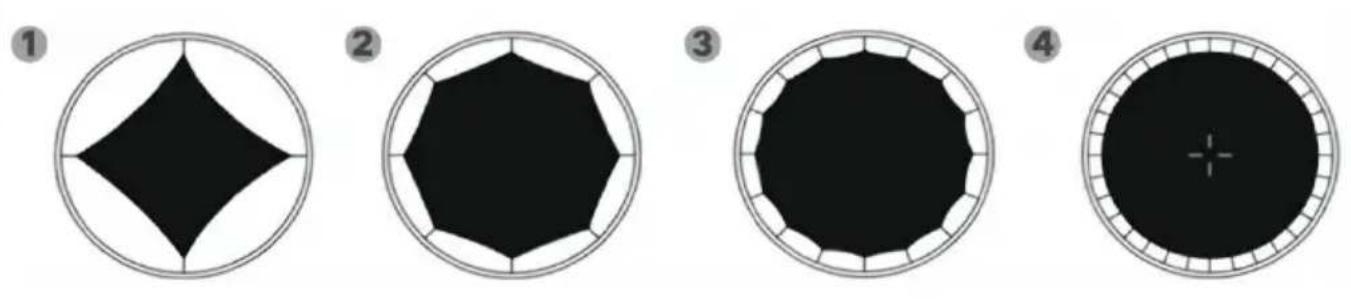
- Start installing the springs in an X shape. The tension needs to be distributed evenly for the net to be installed correctly. Gently tap down against the spring hook if it is not completely in the hole. Springs will create high levels of tension when assembled. Please take care not to pinch your fingers.
Step 6
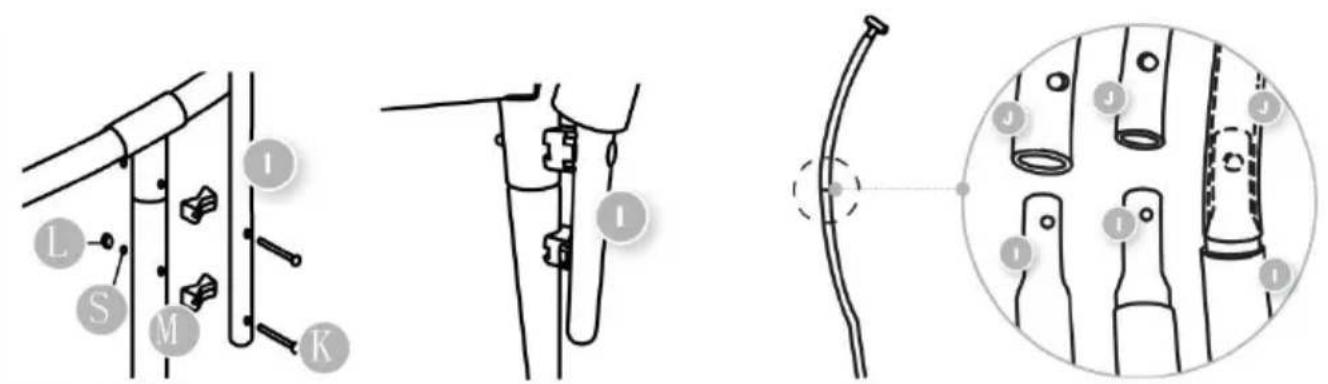
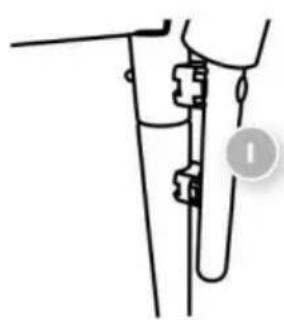
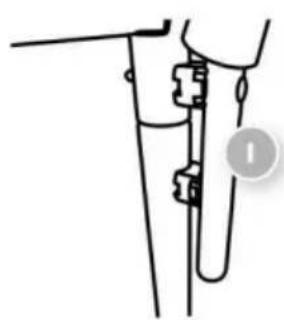
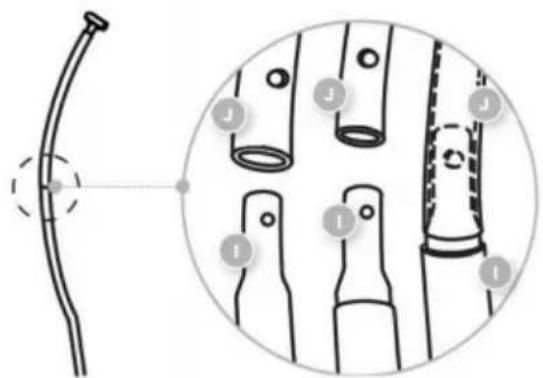
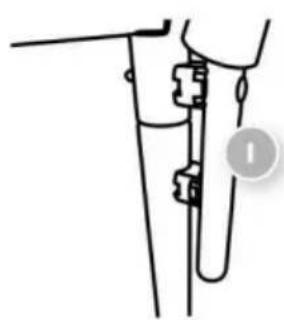
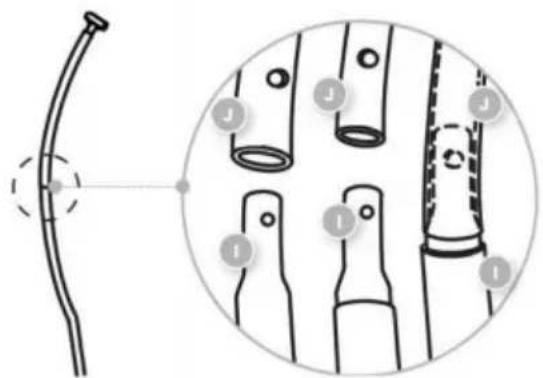
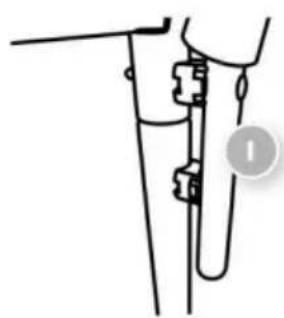
- Firmly fix the bottom pole (I) to the plastic pad (M) then insert a long path through the pole, plastic pad, and leg extension then secure it at the end with (L). Then insert the Upper Pole (J) into the Bottom Pole (I).
Step 7
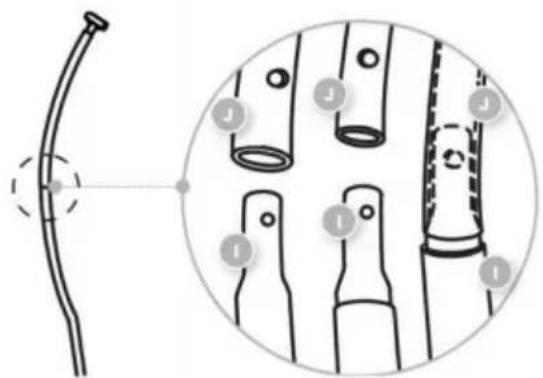
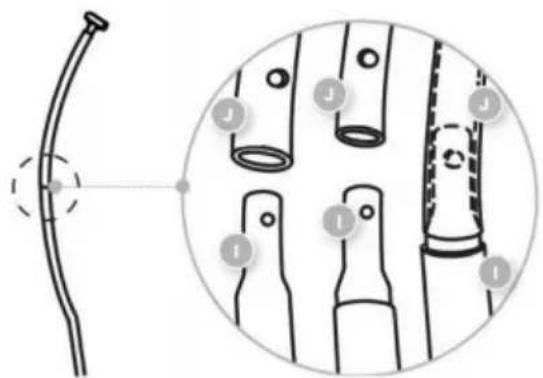
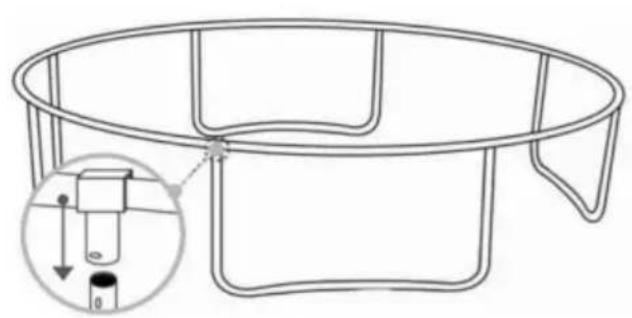
- Insert the Plastic T-Connector (P) into the top of the upper pole (bumps face left and right). Press down with your fingers on the bumps on each side. T-Connector. Make sure the cylinders are securely installed. The T-Connector bumps should stick out through the pole holes.
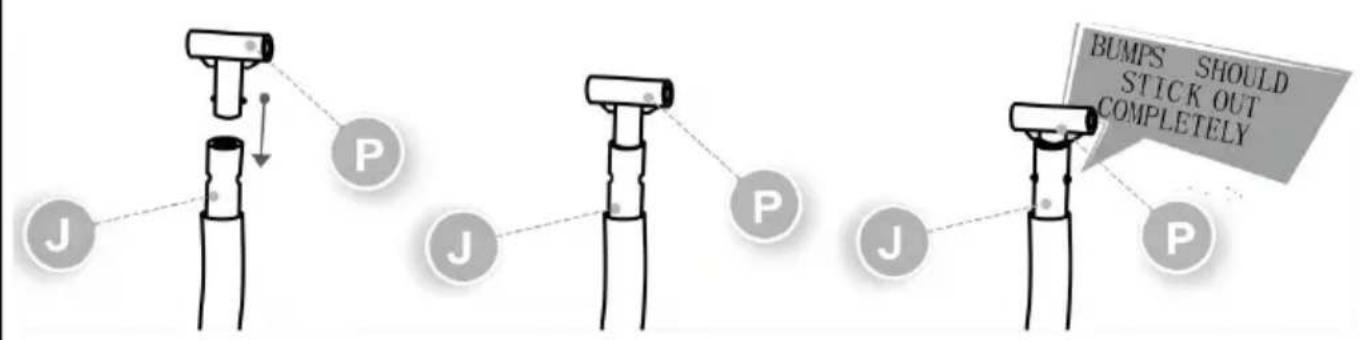
Step 8
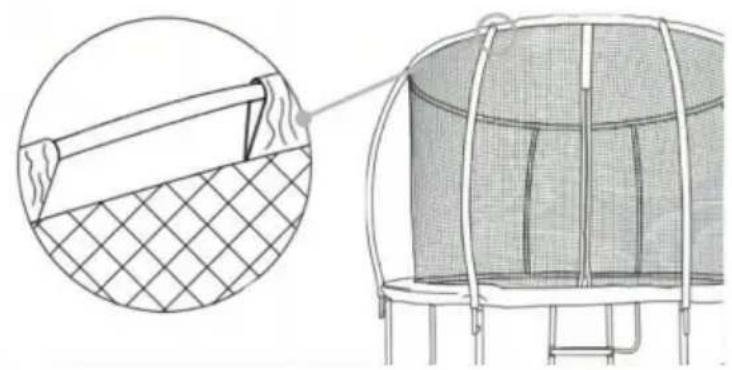
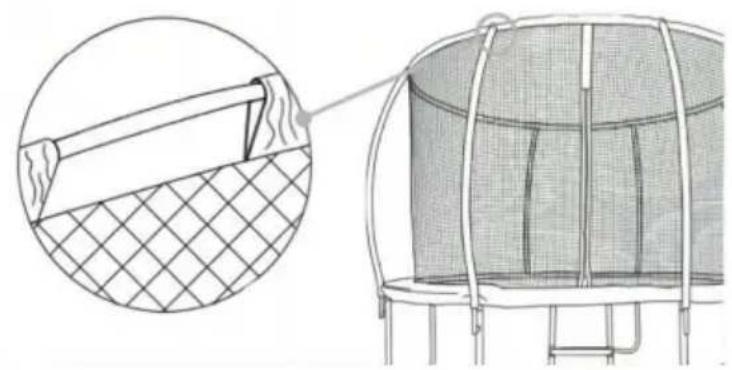
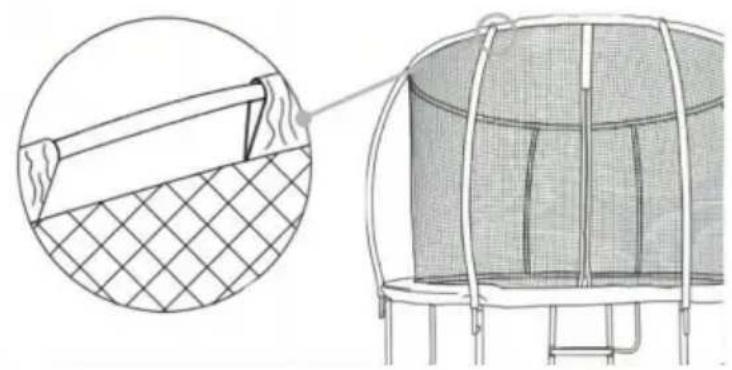
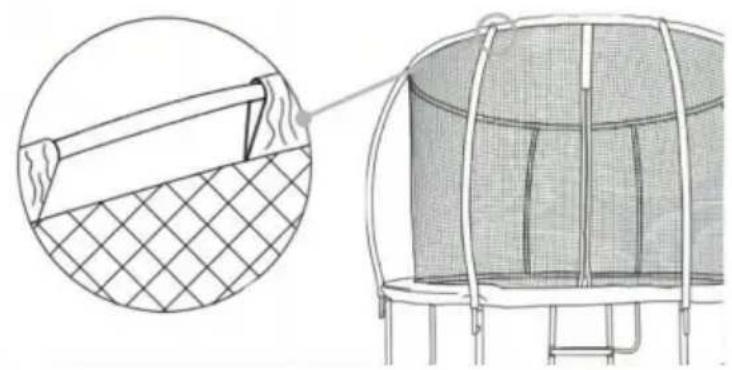
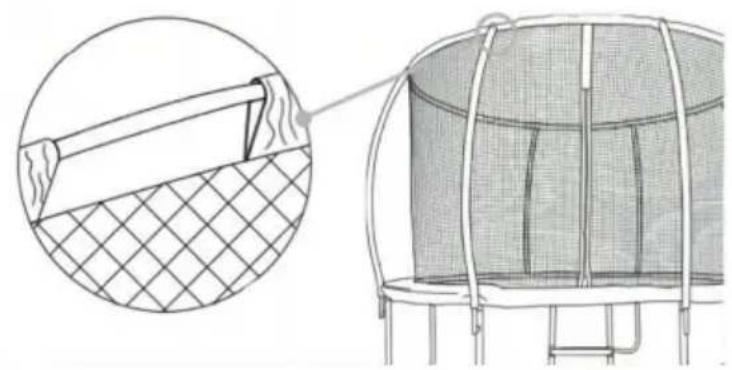
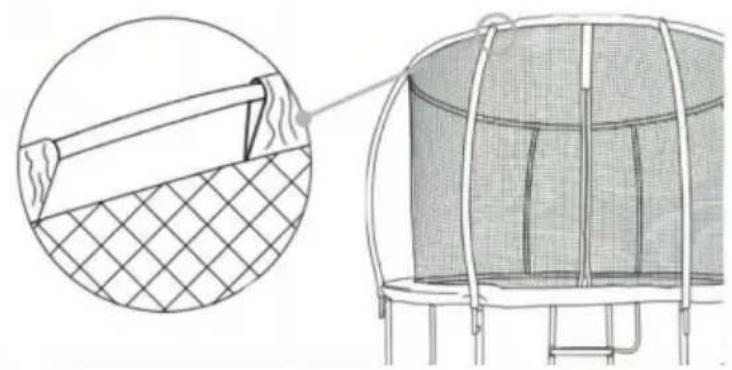
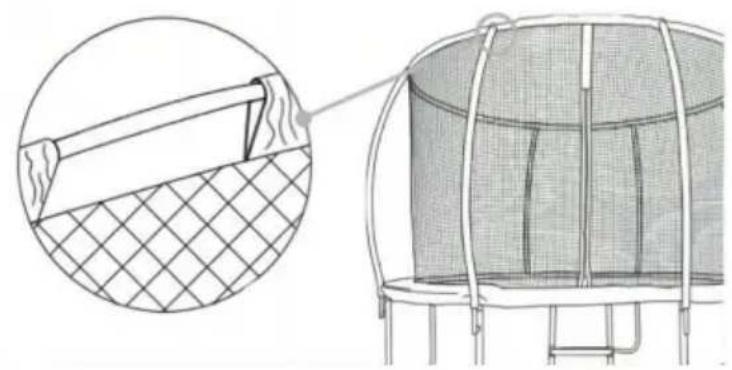
- Insert the fiberglass stick through the designed area in the safety net and connect it to the T-Connector.
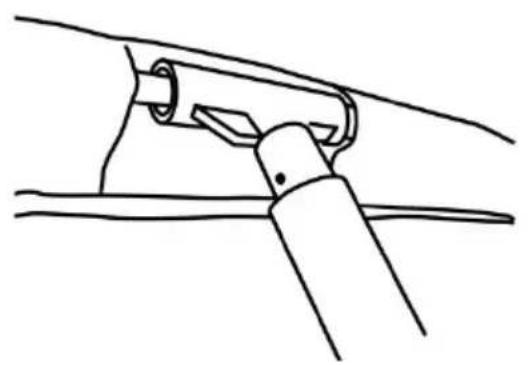
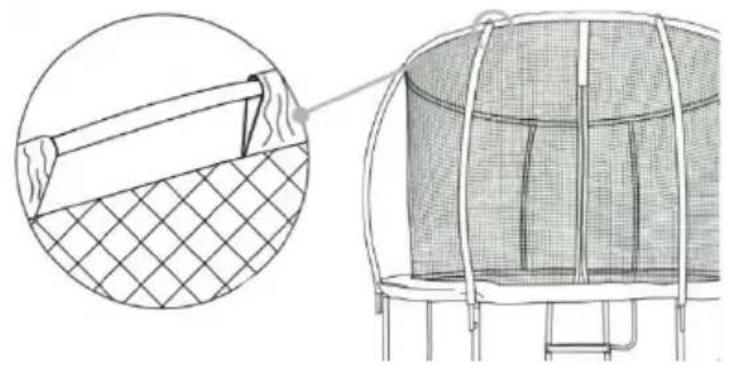
TIPS: You can connect all the fiberglass sticks through the safety net and to the T-connectors until you have a circle. After this, you all the T-Connectors into the Pole. 2 people are needed.
Step 9
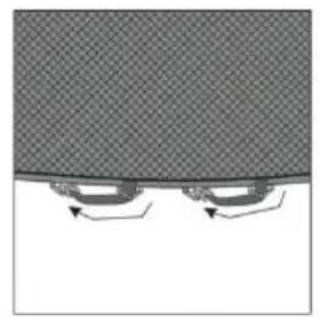
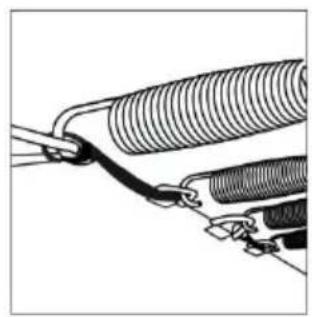
● Pass every strip of the safety net through the metal triangles of the spring, and secure it with the snap hook around the next triangle on the left. Continue in the same way. When you secure the clip, make sure to pass it through the loops of the net.
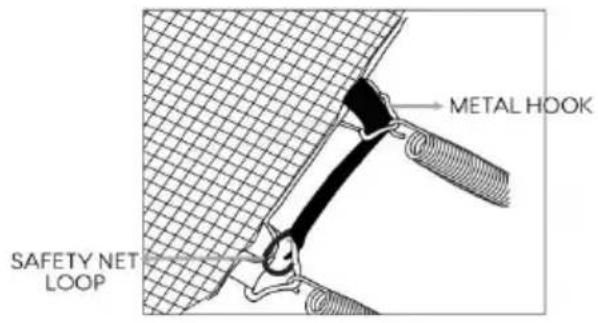
Step 10
- Cover the spring frame with the soft padding Frame Cover (A). Secure the padding parts together using the Velcro on each side, and tie the straps underneath. Lay down the Frame Cover (A) so all the springs are covered. It should be fitted like a shower cap. Make sure it covers all metal parts.
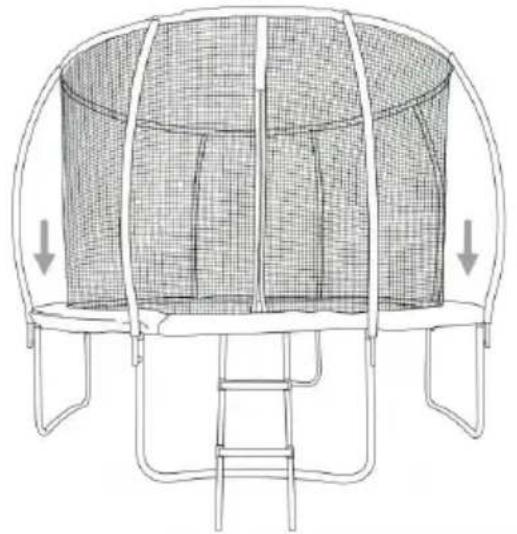
ATTENTION: If the thread is not correctly installed, it might stop the zipper from closing properly. Please make sure the thread goes around the net and is securely tightened.
STEP LADDER
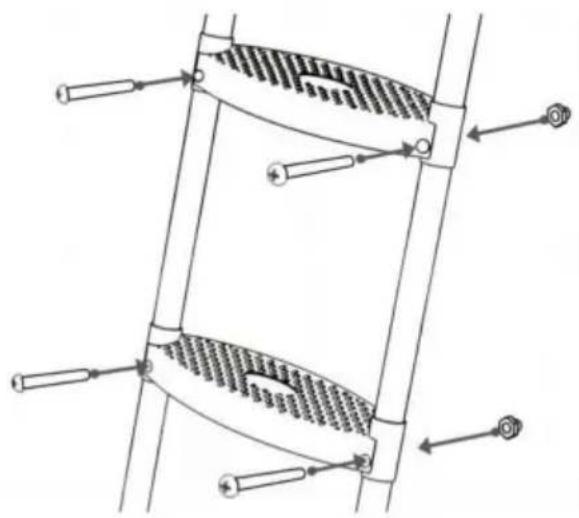
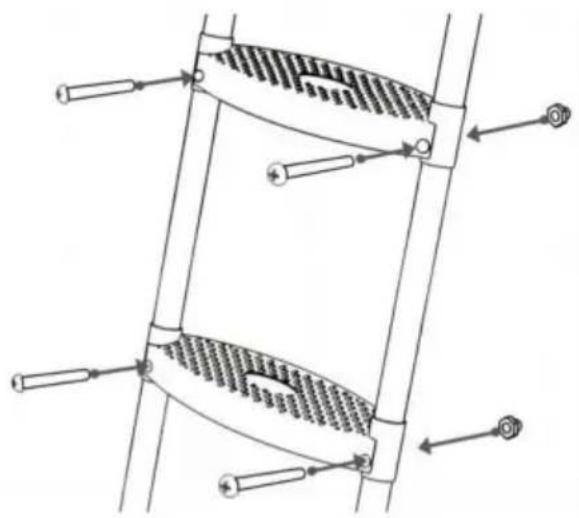
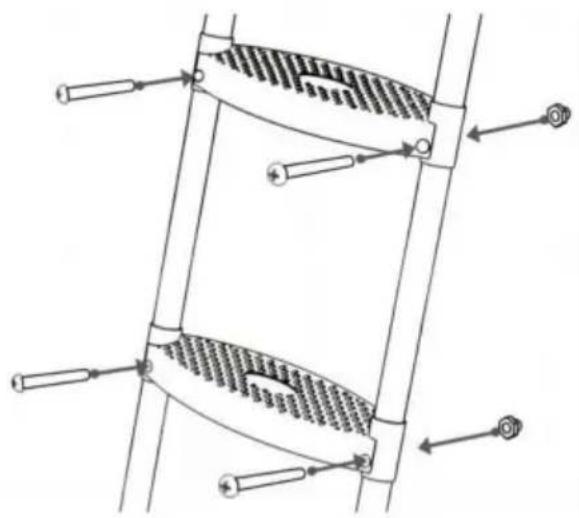
Step 11
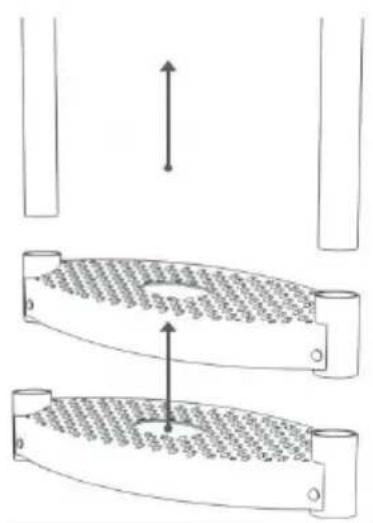
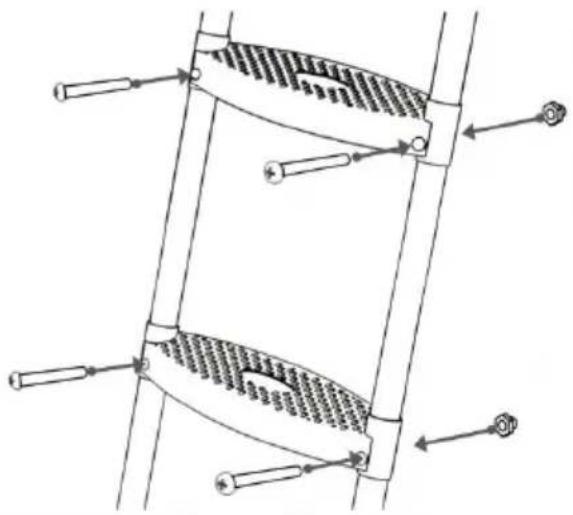
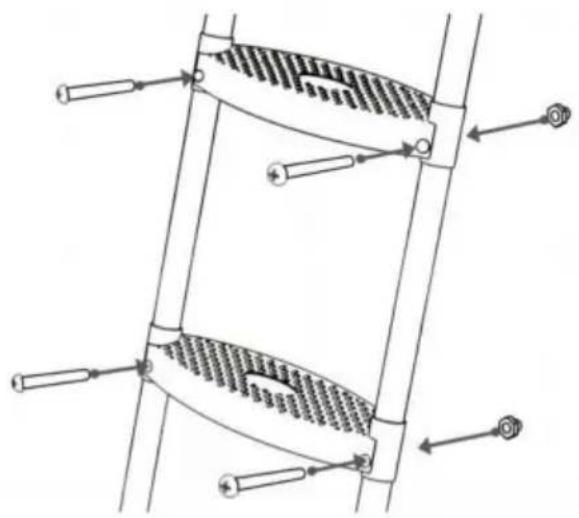
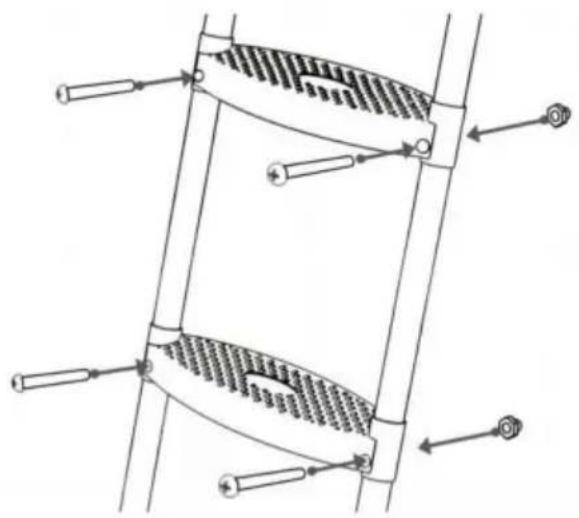
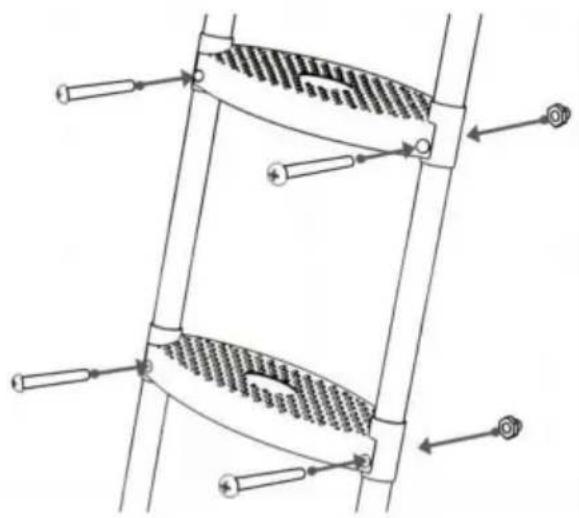
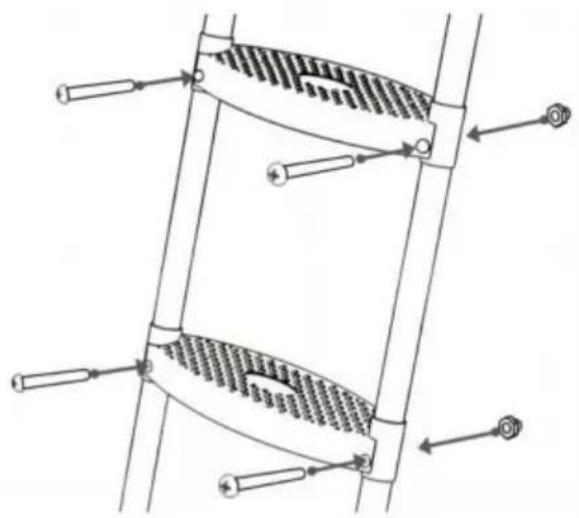
- Align the two Ladder Pipes (T) and slide up the Steps one by one (U), securing them with the screws (V) and Ladder Nuts (W).
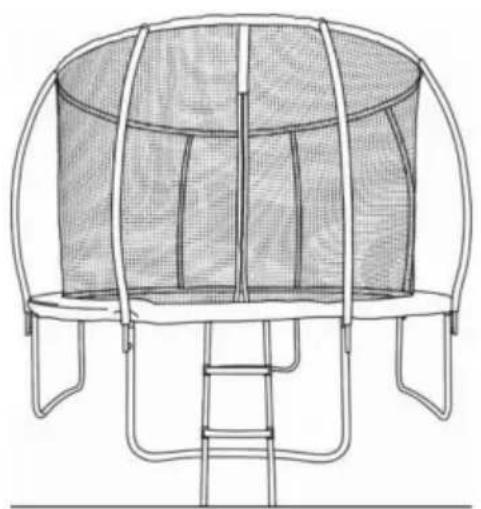
Step 12
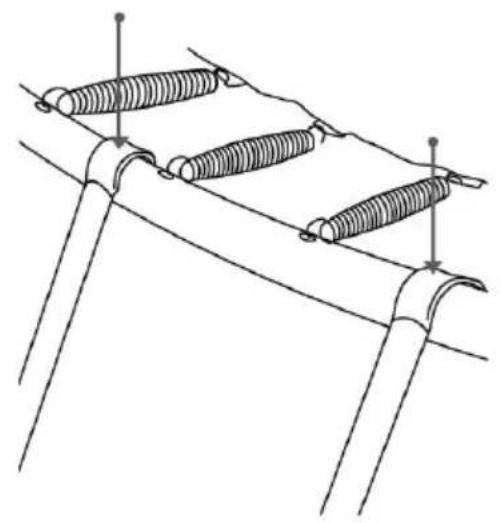
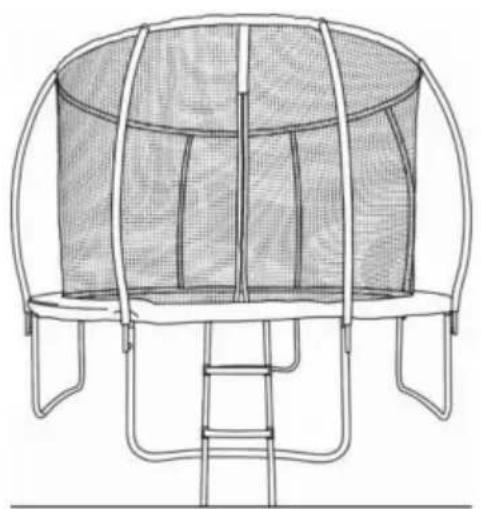
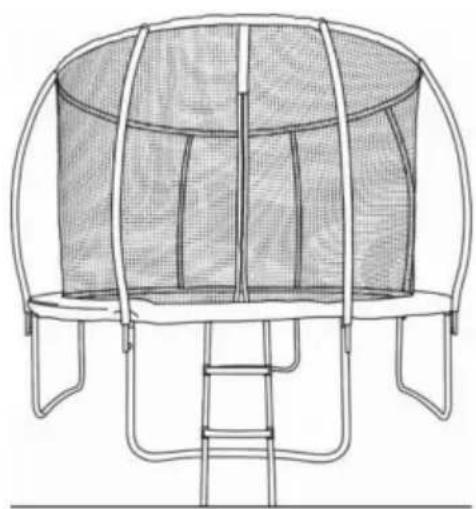
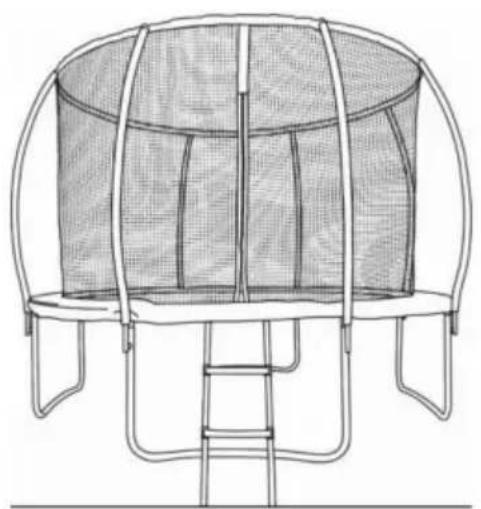
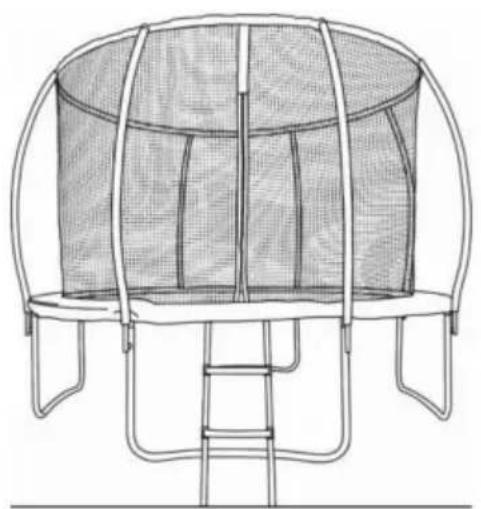
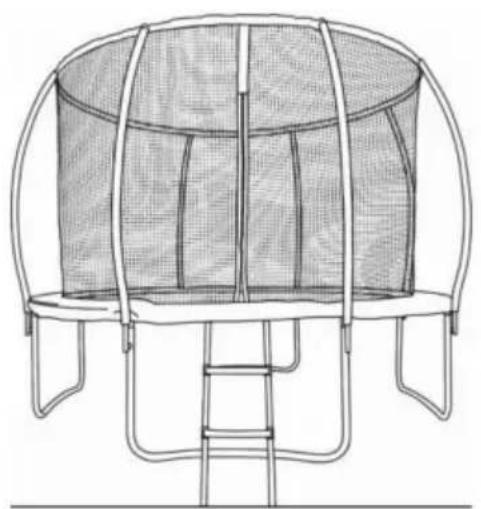
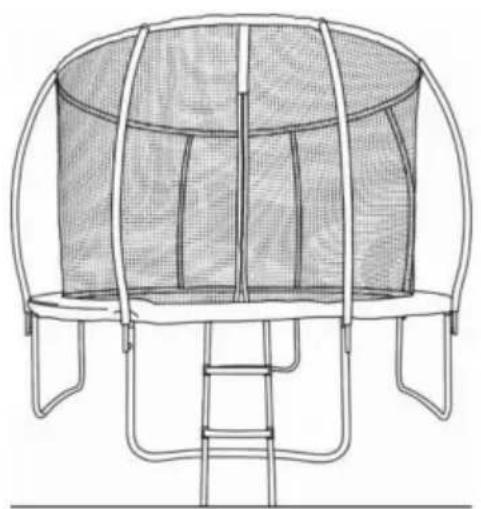
- Hook the step ladder to the Metal Frame (C) of the trampoline under the Cover (A).
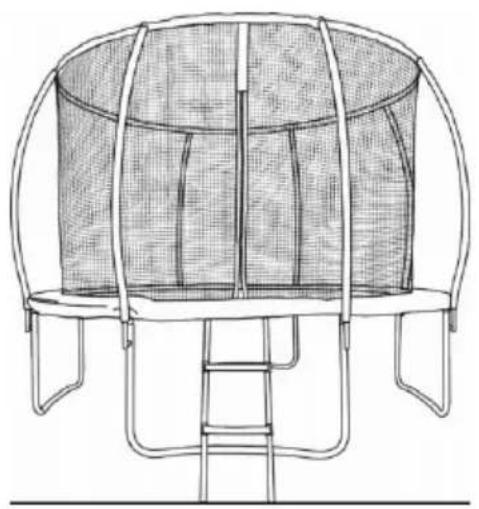
- Please check whether the product is installed correctly and firmly, and review the safety information in the manual again.
- The product should be placed on a flat surface. Make sure the net zipper is closed before use. Follow the manual safety information and enjoy your trampoline.
CLEANING AND STORAGE
- Wipe with a soft, dry cloth. Never use an abrasive cleanser or harsh pad.
- Children are not allowed to wipe the product to avoid tipping and falling.
- After disassembling the product, please assemble the parts and accessories. Be sure to keep the product dry.
- Please clean regularly to avoid dirt.
Notes: Before using it again, reassemble according to the instructions.
TIPS
- Always step on and off the trampoline carefully, do not jump.
- Stay in the center of the trampoline when jumping. Don't jump on the edge of the net.
- Stop bouncing by flexing your knees as your feet come in contact with the trampoline bed.
- For safety, it's suggested that lessons from a professional should be acquired before using this trampoline.
Notice: Before anyone uses this trampoline, it is imperative that you read all instructions carefully and make sure that the assembly went without any error.
Manufacturer: Shanghai Muxin Muye Youxian Gongsi
Address: Shuangcheng Lu 803 Nong 11 Hao 1602A-1609 Shi, Baoshan Qu, Shanghai 200000 CN.
Imported to AUS: SIHAO PTY LTD. 1 ROKEVA STREET EASTWOOD NSW 2122 Australia
Imported to USA: Sanven Technology Ltd. Suite 250, 9166 Anaheim Place, Rancho Cucamonga, CA 91730
| UK | REP |
YH CONSULTING LIMITED.
C/O YH Consulting Limited Office 147,
Centurion House, London Road,
Staines-upon-Thames, Surrey, TW18 4AX
| EC | REP |
E-CrossStu GmbH
Mainzer Landstr.69,
60329 Frankfurt am Main.
VEVOR®
TOUGH TOOLS, HALF PRICE
Technical Support and E-Warranty Certificate
www.vevor.com/support
VEVOR®
TOUGH TOOLS, HALF PRICE
NEED HELP? CONTACT US!
Step 4
Step 5
Step 7
Step 12
A/S YH Consulting Limited Bureau 147,
Centurion House, London Road,
Staines-upon-Thames, Surrey, TW18 4AX
E-CrossStu GmbH
Mainzer Landstr.69,
Step 4
Step 5
Step 6
Step 7
Step 12
C/O YH Consulting Limited Office 147,
Centurion House, London Road,
Staines-upon-Thames, Surrey, TW18 4AX
www.vevor.com/support
VEVOR®
TOUGH TOOLS, HALF PRICE
Step 4
Step 5
Step 7
Step 12
Imported into AUS: SIHAO PTY LTD. 1 ROKEVA STREETEASTWOOD
New South Wales 2122 Australia
C/O YH Consulting Limited Office 147,
Centurion House, London Road,
Staines-upon-Thames, Surrey, TW18 4AX
electronics www.vevor.com/support
VEVOR®
TOUGH TOOLS, HALF PRICE
Step 4
Step 5
Step 7
Step 12
Centurion House, London Road,
Staines-upon-Thames, Surrey, TW18 4AX
| REPRESENTANTE CE |
E-CrossStu GmbH
Mainzer Landstr.69,
NEED HELP? CONTACT US!
Step 4
Step 5
Step 7
Step 12
C/O YH Consulting Limited Office 147,
Centurion House, London Road,
Staines-upon-Thames, Surrey, TW18 4AX
| Przedstawiciel UE |
E-CrossStu GmbH
Mainzer Landstr.69,
60329 Frankfurt am Main.
VEVOR®
TOUGH TOOLS, HALF PRICE
NEED HELP? CONTACT US!
Step 4
Step 5
Step 7
Step 12
C/O YH Consulting Limited Office 147,
Centurion House, London Road,
Staines-upon-Thames, Surrey, TW18 4AX
E-CrossStu GmbH
Mainzer Landstr. 69,
60329 Frankfurt am Main.
VEVOR®
TOUGH TOOLS, HALF PRICE
warranty certificate www.vevor.com/support
VEVOR®
TOUGH TOOLS, HALF PRICE
NEED HELP? CONTACT US!
Step 4
Step 5
Step 12
- Hook the ladder onto the metal frame (C) of the trampoline under the frame Lock (A).
C/O YH Consulting Limited Office 147,
Centurion House, London Road,
Staines-upon-Thames, Surrey, TW18 4AX
| EC | REP |
E-CrossStu GmbH
Mainzer Landstr.69,
60329 Frankfurt am Main.
VEVOR®
TOUGH TOOLS, HALF PRICE
www.vevor.com/support
Brand : Vevor
Model : TX-B7123-14FT
Category : Trampoline