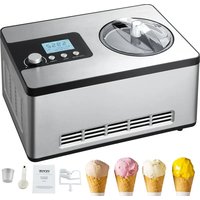
ICE2032 - Ice machine Vevor - Free user manual and instructions
Find the device manual for free ICE2032 Vevor in PDF.


User questions about ICE2032 Vevor
0 question about this device. Answer the ones you know or ask your own.
Ask a new question about this device
Download the instructions for your Ice machine in PDF format for free! Find your manual ICE2032 - Vevor and take your electronic device back in hand. On this page are published all the documents necessary for the use of your device. ICE2032 by Vevor.
USER MANUAL ICE2032 Vevor
Technical Support and E-Warranty Certificate www.vevor.com/support
ICE CREAM MAKER
MODEL:ICE2032
We continue to be committed to provide you tools with competitive price. "Save Half", "Half Price" or any other similar expressions used by us only represent of savings you might benefit from buying certain tools with us compared top brands and does not necessarily mean to cover all categories of tools offered are kindly reminded to verify carefully when you are placing an order with us actually saving half in comparison with the top major brands.
VEVOR®
TOUGH TOOLS, HALF PRICE
ICE CREAM MAKER
MODEL:ICE2032-UL
natural_image
Line drawing of a microwave oven with control panel and display (no text or symbols)NEED HELP? CONTACT US!
Have product questions? Need technical support? Please feel fr contact us:
Technical Support and E-Warranty Certificate www.vevor.com/support
This is the original instruction, please read all manual instruction carefully before operating. VEVOR reserves a clear interpretation user manual. The appearance of the product shall be subject to product you received. Please forgive us that we won't inform you there are any technology or software updates on our product.
IMPORTANT NOTICES
When using an electrical appliance, basic safety precautions should always be followed to reduce the risk of fire, electric shock, and/or in including the following:
- Read all instructions before using.
- Ensure the voltage is compliant with the voltage range stated on rating label, and ensure the earthing of the socket is in good co
-
If the supply cord is damaged, it must be replaced by the manufacturer or its service agent or a similarly qualified person in order to avoid hazard.
-
This appliance is not intended for use by persons (including children with reduced physical, sensory or mental capabilities, or lack of experience and knowledge, unless they have been given supervision or instruction concerning use of the appliance by a person response for their safety. Children should be supervised to ensure that they not play with the appliance.
This appliance can be used by children aged from 8 years and persons with reduced physical, sensory or mental capabilities lack of experience and knowledge if they have been given superv or instruction concerning use of the appliance in a safe way and understand the hazards involved. Children shall not play with the appliance. Cleaning and user maintenance shall not be made by children without supervision.
- This appliance is intended to be used in household and similar applications such as
–staff kitchen areas in shops, offices and other working environment –farm houses and by clients in hotels, motels and other residential type environments;
—bed and breakfast type environments;
—catering and similar non-retail applications
- –Warning: Do not use electrical appliances inside the food storage
compartments of the appliance, unless they are of the type recommended by the manufacturer
- WARNING: When positioning the appliance, ensure the supply coil is not trapped or damaged.
- WARNING: Do not locate multiple portable socket-outlets or portal power supplies at the rear of the appliance.
- The refrigerant (R600a) is flammable.

Caution: risk of fire /Flammable materials
The refrigerant isobutene (R600a) is contained within the refrigerant circle of the appliance, a natural gas with a high level of environmental compatibility, which is nevertheless flammable. During transportation and installation of the appliance, ensure that none of the components of the refrigerant circuit becomes damaged.
If the refrigerant circuit should be damaged:
-
Avoid opening flames and sources of ignition.
● Thoroughly ventilate the room in which the appliance is situated. -
The plug must be removed before cleaning, maintaining or filling the appliance
-
Do not upend this product or incline it over a 45 °C angle.
-
To protect against risk of electric shock, do not pour water on cord, plug and ventilation, immerse the appliance in water or any other liquid.
-
Unplug the appliance after using or before cleaning.
- Keep the appliance 8cm from other objects to ensure the good heat releasing.
- Do not use the accessories which are not recommended by Manufacturer.
-
Do not use the appliance close by flames, hot plates or stoves.
-
Do not switch on the power button frequently (ensure 5min. interval at least) to avoid the damage of compressor.
- Metal sheet or other electric objects are not allowed to be inserted into the appliance to avoid fire and short circuit.
- When take out the ice cream, do not knock the barrel or edge of barrel to protect the barrel from damage.
- Do not switch on the power before install well the barrel or blender blade.
- The initial temperature of the ingredients is 20 ± 3^ . Do not put the ingredients into freezer for pre-freeze, as it will easily make the blender blade blocked before the ice cream is in good condition.
- Do not remove the blender blade when the appliance is on working.
- Do not use outdoors.
- Never clean with scouring powders or hard implements.
- Please keep the instruction manual.
SAVE THESE INSTRUCTIONS
SPECIFICATIONS
Model: ICE2032
Capacity: 2L
Voltage: 220-240V/50Hz
Power Consumption: 180W
Unit Dimensions: 425 (L) *285 (W) *262 (H) mm
Packing Dimensions: 495 (L) *352 (W) *320 (H) mm
N.W.: 11.2kg
G.W.: 12.7kg
PARTS & FEATURES
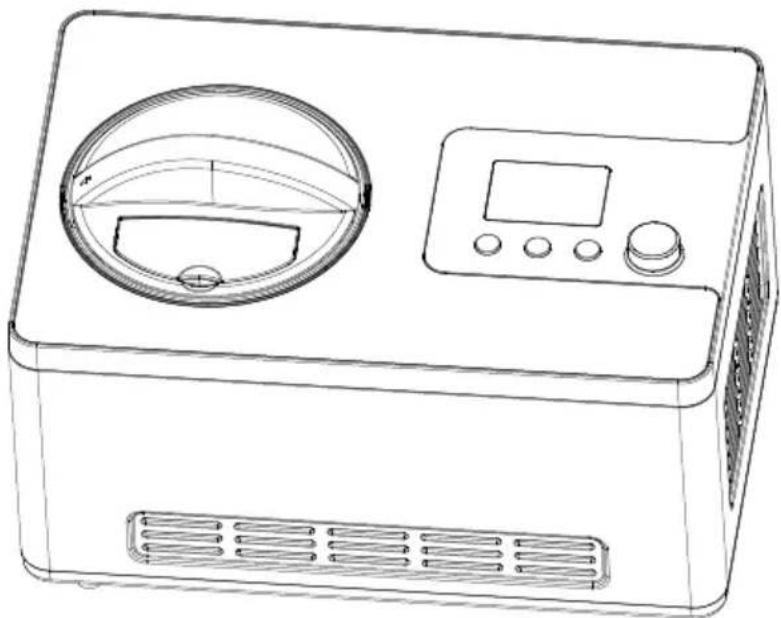
1) Structure
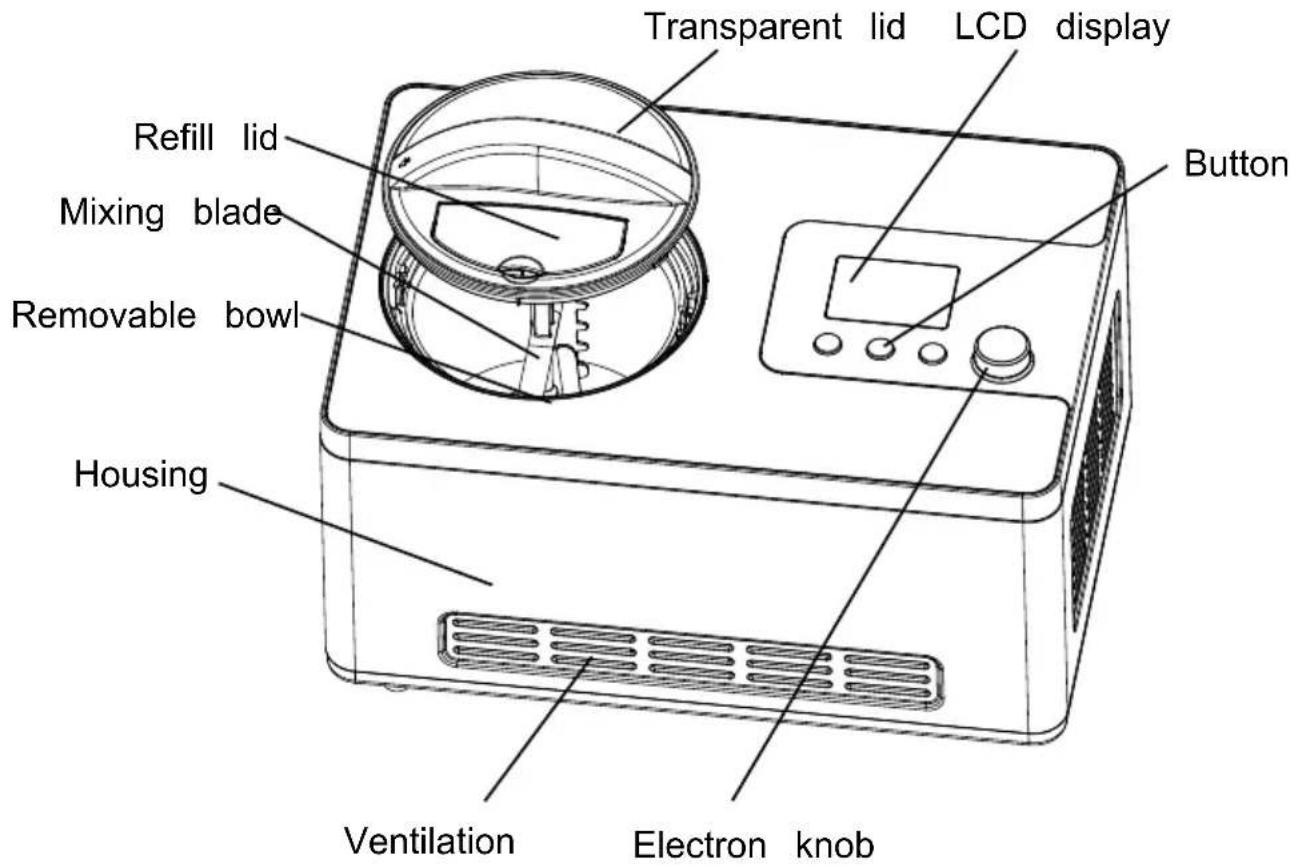
text_image
Transparent lid LCD display Button Refill lid Mixing blade Removable bowl Housing Ventilation Electron knob2) Function buttons
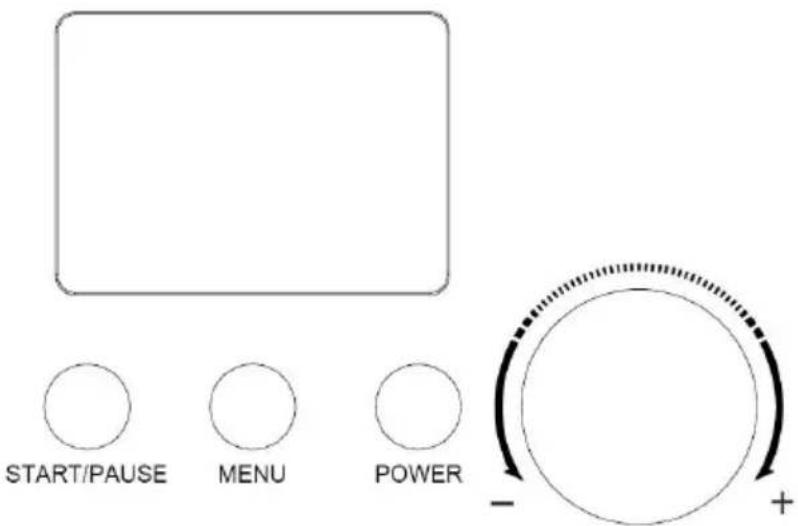
text_image
START/PAUSE MENU POWER - +[POWER]: After power up, the machine enters standby mode. Then p the [POWER] button to enter the setting mode, and LCD will display "60: 00". Press the [POWER] button during setting mode, the machine will enter the standby mode again.
[Menu]: By pressing this button, there are 3 working modes for optio including: [ICE CREAM] [COOLING ONLY] and [MIXING ONLY]. Hold button for 3 seconds during operation; the machine will enter back th menu selection.
Electron knob: Turn the knob to set working time, the default working to [ICE CREAM] [COOLING ONLY] and [MIXING ONLY] is 60min, 30min, 10min, respectively. Rotating the knob to left can decrease the working time. Contrarily; rotating to right can increase time.
[START/PAUSE]: After setting the menu and time, press this button to the working mode. During operation, by pressing this button, the mixing pause and the time countdown will pause also. At pause mode, press button again, the machine will continue the previous unfinished operation
Making Ice Cream:
Cleanness: Before use, thoroughly wash all parts that will come into contact with the ice cream (including the fixed bowl, removable bowl, mixing blade, transparent lid, refill lid, measuring cup and spoon).
Warning: Please be sure the power cord is unplugged.
Important: Always place the Ice Cream Maker upright on a flat surfa order that the build-in COMPRESSOR can provide best performance.
Step 1. Prepare recipe ingredients:
Prepare recipe ingredients from your own recipe or from the recipe b here. Note: You do not need to freeze the bowl for hours in a free advance, as this machine has a BUILT-IN COMPRESSOR that freezes recipe ingredients in operation thus ensure the output of ice cream.
Step 2. Pour the well prepared recipe ingredients and warm water into the removable bowl, then have a uniform mixing (See below picture).
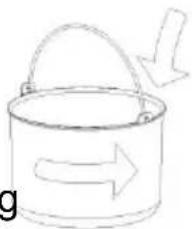
natural_image
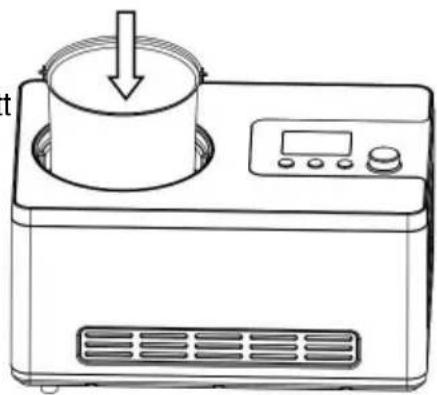
Simple line drawing of a bucket with a handle and directional arrows (no text or symbols)Step 3. Put the removable bowl into the machine and slightly turn around the bowl make it fitted well with the fixed bowl (Se below picture).
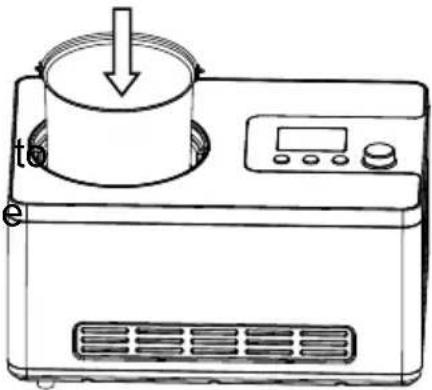
natural_image
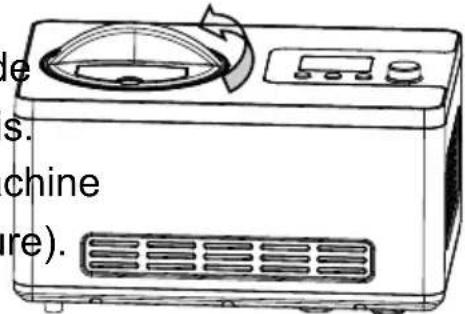
Line drawing of a microwave oven with a lid and control panel (no text or symbols)Step 4. Place the mixing blade into the removable bowl and keep the mixing blade bottom hole fitted well with the motor axis. Then put the transparent lid onto the machine and lock it anticlockwise (See below picture).
text_image
le s. chine re).Step 5. Plug in power, and press the [POWER] button to make the machine electrified.
Step 6. Press the [MENU] button to choose the working mode.
Step 7. Turn the knob to set the working time.
Step 8. Press the [START/PAUSE] button to start working.
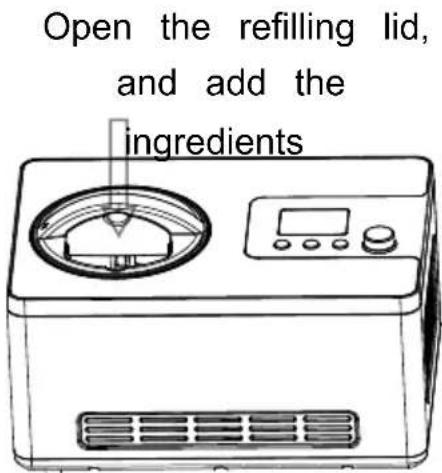
Step 9. You can add the favorite ingredients by opening the refill co (See below picture).
text_image
Open the refilling lid, and add the ingredientsStep 10. After the operation is over, turn off the machine first, and the removable bowl out.
OPERATION
Keep cool function
To avoid melting when the ice cream is not placed well in time, the following design is supported: After the ice cream is finished and with any other operation, the machine will start up the keep cool function automatically, which can keep cool for ten minutes. Ten minutes later, machine will enter standby state.
Motor self-protection function
When the ice cream becomes harder, the mixing motor might be blocked. Then the motor protection device makes the mixing motor stop working to detect its temperature to ensure the life of the motor.
Controlling the Volume of the Ingredients
To avoid overflow and waste, please make sure that the ingredients exceed 60% of capacity of the removable bowl (Ice cream expands w being formed)
The Differences Among These Three Working Mode
- Ice cream mode: the default working time is 60 minutes. The detail operation is instructed as above.
- Cooling only mode, the default working time is 30 minutes. The operation is similar with that of ice cream mode, but there isn't m function.
- Mixing only mode, the default working time is 10 minutes. The op is similar with that of ice cream mode, but there isn't freezing fun
STORAGE OF ICE CREAM
Remove finished ice cream into another container using a plastic scoop or a wooden spoon, do not use a metal scoop avoiding scratch on the inside removable bowl.
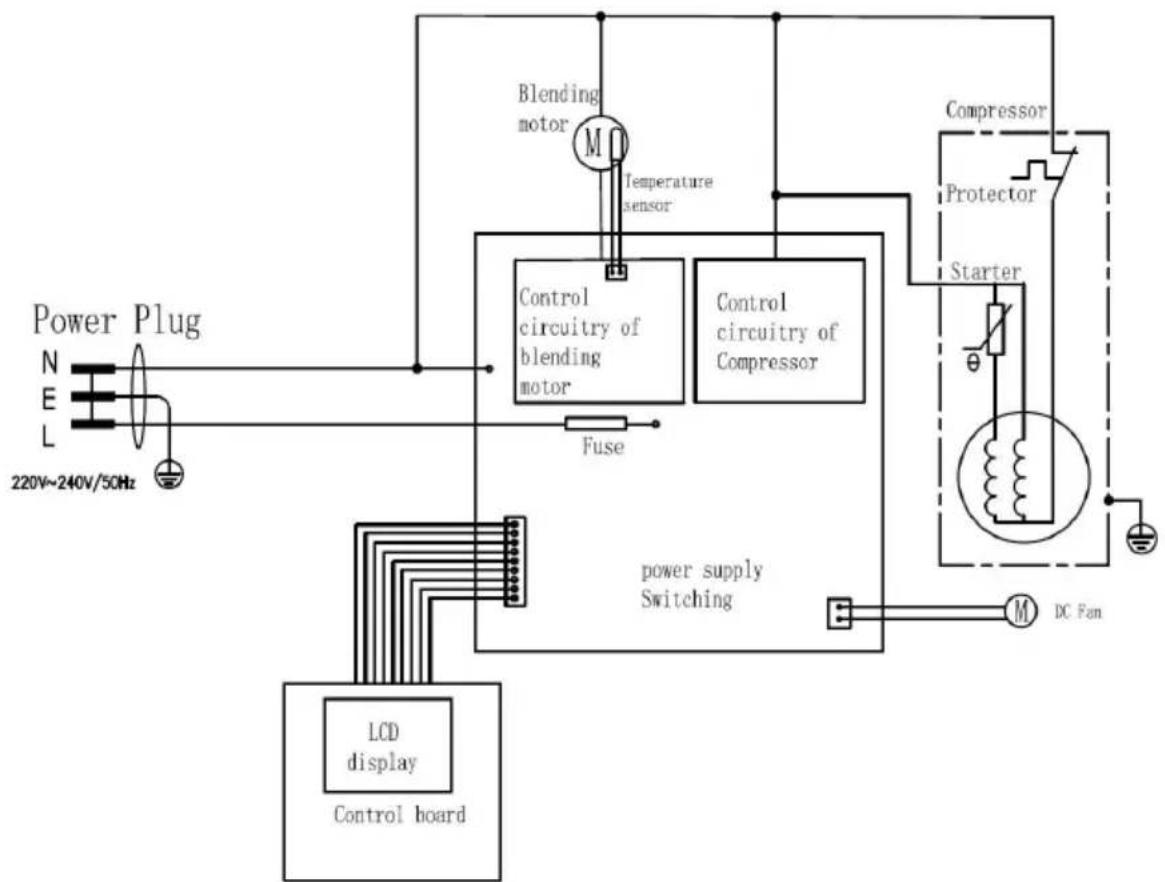
ELECTRICAL DIAGRAM
flowchart
graph TD
    A["Power Plug"] --> B["220V~240V/50Hz"]
    B --> C["Control circuitry of blending motor"]
    C --> D["Fuse"]
    D --> E["LCD display Control board"]
    E --> F["Control circuitry of Compressor"]
    F --> G["Blending motor"]
    G --> H["Temperature sensor"]
    H --> I["Control circuitry of Blending motor"]
    I --> J["Power supply Switching"]
    J --> K["DC Fan"]
    L["Condenser"] --> M["Protector"]
    M --> N["Starter"]
    N --> O["Compressor"]
    O --> P["DC Fan"]
MAINTENANCE
Caution: The plug must be removed before cleaning to avoid electric shock.
(1) Take out the mixing blade, wipe it with a dampened cloth
(2) Take out the removable bowl, clean it with a dampened soft clc
(3) Wipe the transparent lid and refill lid with a dampened cloth
(4) Remove the dirty on the body or other places with a dampened and do not pour water on cord, plug and ventilation, immerse the appliance in water or any other liquid
(5) Allow drying thoroughly with a dry cloth, then return the component to the home position.
ICE CREAM RECIPE MANUAL
BASIC ICE CREAM
Make according to the following formula. After mixing the formula mixt evenly, it can be made into ice cream within 60 minutes.
375g cream
250g powdered milk
375g water
VANILLA ICE CREAM
320g whole milk
152g granulated sugar
240g heavy cream, well chilled
2 - 3 teaspoons pure vanilla extract, to taste
In a medium bowl, use a hand mixer or a whisk to combine the m granulated sugar until the sugar is dissolved, about 1 – 2 minutes or speed. Stir in the heavy cream and vanilla to taste. Turn machine or mixture into freezer bowl through ingredient spout and let mix until thickened, about 50 – 60 minutes.
BASIC CHOCOLATE ICE CREAM
320g whole milk
152g granulated sugar
320g semi-sweet chocolate (your favorite), broken into 1.2cm pieces
320g heavy cream, well chilled
1.2 teaspoon pure vanilla extract
Heat the whole milk until it is just bubbling around the edges (this may be done on the stovetop or in a microwave). In a blender or food processor fitted with the metal blade, pulse to process the sugar with the chocolate until the chocolate is very finely chopped. Add the hot milk, process until
well blended and smooth. Transfer to a medium bowl and let the chocolate mixture cool completely. Stir in the heavy cream and vanilla to taste. It is best to pre-cooled in the refrigerator for about 15 minutes before making.
Turn the machine on, pour mixture into removable bowl through ingredient spout and let mix until thickened, about 30 – 40 minutes.
FRESH STRAWBERRY ICE CREAM
334g fresh ripe strawberries, stemmed and sliced
70g freshly squeezed lemon juice
152g granulated sugar
320g whole milk
320g heavy cream
1.2 teaspoon pure vanilla extract
In a small bowl, combine the strawberries with the lemon juice and 80g granulated sugar, stir gently and allow to the strawberries to macerate in the juices for 2 hours.
In a medium bowl, use a hand mixer or a whisk to combine the milk and granulated sugar until the sugar is dissolved.
Stir in the heavy cream plus any accumulated juices from the strawberries and vanilla. Turn the machine on, pour mixture into removable bowl through ingredient spout and let mix until thickened, about 30 – 40 minutes. Add the sliced strawberries during the last 5 minutes of freezing.
FRESH LEMON SORBET
470g granulated sugar
560g pure water
160g freshly squeezed lemon juice
0.5 tablespoon finely chopped lemon zest *
Combine the granulated sugar and water in a medium saucepan and bring to a boil over medium-high heat. Reduce heat to low and simmer without
stirring until the sugar dissolves, about 3 – 5 minutes. Cool completely. This is called a simple syrup, and may be made ahead in larger quantities to have on hand for making fresh lemon sorbet. Keep refrigerated until ready to use.
After cooling, add the lemon juice and zest; stir to combine. Turn the machine on, pour the lemon mixture into freezer bowl through ingredient spout and mix until thickened, about 50 – 60 minutes.
CHOCOLATE FROZEN YOGURT
320g whole milk
180g bittersweet or semisweet chocolate, chopped
536g low-fat vanilla yogurt
66g granulated sugar
Combine the milk and chocolate in a blender or food processor fitted with the metal blade and process until well blended and smooth, 15 seconds. Add the yogurt and sugar; process until smooth, about 15 seconds. Turn the machine on, pour mixture into removable bowl through ingredient spout and let mix until thickened, about 50 – 60 minutes.
Correct Disposal of this product
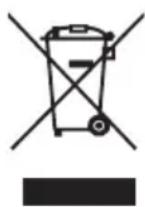
This product is subject to the provision of European Directive 2012/19/EC. The symbol showing a wheelie bin crossed through indicates that the product requires separate refuse collection in the European Union. This applies to the product and all
accessories marked with this symbol. Products marked as such may be discarded with normal domestic waste, but must be taken to a co-point for recycling electrical and electronic devices
VEVOR®
TOUGH TOOLS, HALF PRICE
Technical Support and E-Warranty Certificate www.vevor.com/support
VEVOR®
TOUGH TOOLS, HALF PRICE
natural_image
Line drawing of a microwave oven with control panel and display (no text or symbols)BESOIN D'AIDE? CONTACTEZ-NOUS!
natural_image
Simple line drawing of a bucket with a handle and arrow, no text or symbols presentnatural_image
Line drawing of a kitchen appliance with a lid and control panel (no text or symbols)natural_image
Line drawing of a microwave oven with a digital display and fan (no text or symbols)GLACE AU CHOCOLAT DE BASE
natural_image
Line drawing of a microwave oven with control panel and display (no text or symbols)natural_image
Simple line drawing of a bucket with handle and arrow (no text or symbols)natural_image
Line drawing of a microwave oven with a cylindrical lid and digital display (no text or symbols)natural_image
Line drawing of a microwave oven with a digital display and fan (no text or symbols)FRISCHES ERDBEEREISEIS
natural_image
Line drawing of a microwave oven with control panel and display (no text or symbols)natural_image
Simple line drawing of a bucket with a handle and arrow indicating direction (no text or symbols)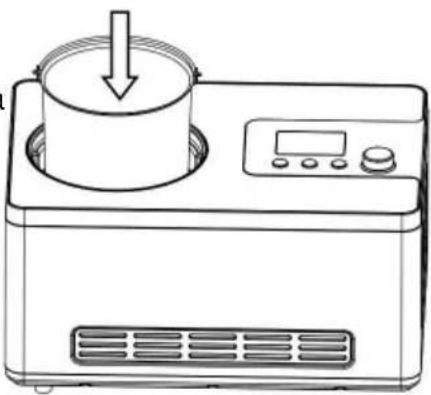
natural_image
Line drawing of a microwave oven with a lid and control panel (no text or symbols)natural_image
Line drawing of a microwave oven with a digital display and fan (no text or symbols)natural_image
Line drawing of a microwave oven with control panel and display (no text or symbols)natural_image
Simple line drawing of a bucket with handle and arrow indicating direction (no text or symbols)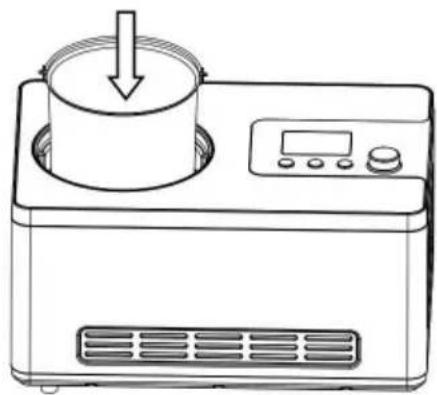
natural_image
Line drawing of a microwave oven with a lid and control panel (no text or symbols)natural_image
Line drawing of a microwave oven with a digital display and fan (no text or symbols)natural_image
Line drawing of a microwave oven with control panel and display (no text or symbols)POTRZEBUJESZ POMOCY? SKONTAKTUJ SIĘ Z NAMI!
natural_image
Simple line drawing of a bucket with handle and arrow (no text or symbols)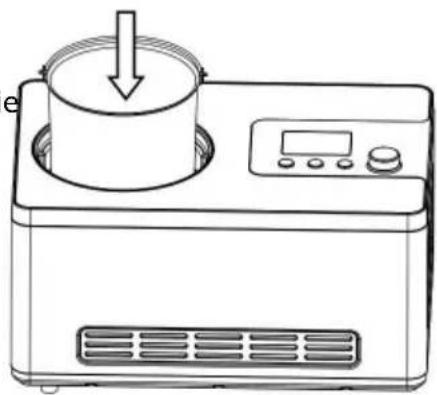
natural_image
Line drawing of a microwave oven with a cylindrical lid and digital display (no text or symbols)natural_image
Line drawing of a microwave oven with a digital display and fan (no text or symbols)natural_image
Line drawing of a microwave oven with control panel and display (no text or symbols)HULP NODIG? NEEM CONTACT MET ONS OP!
natural_image
Simple line drawing of a bucket with handle and arrow (no text or symbols)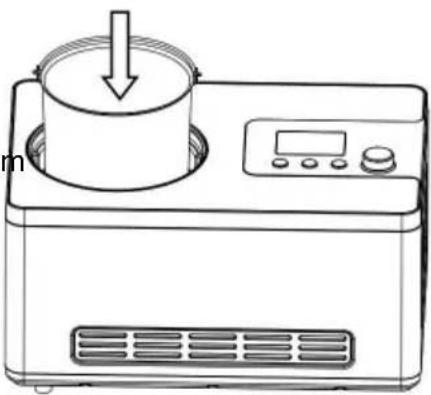
natural_image
Line drawing of a microwave oven with a lid and control panel (no text or symbols)natural_image
Line drawing of a microwave oven with a digital display and fan (no text or symbols)natural_image
Line drawing of a microwave oven with control panel and display (no text or symbols)BEHÖVER HJÄLP? KONTAKTA OSS!
natural_image
Simple line drawing of a bucket with a handle and arrow indicating direction (no text or symbols)