
GN-2000R2 - Refrigerator Vevor - Free user manual and instructions
Find the device manual for free GN-2000R2 Vevor in PDF.
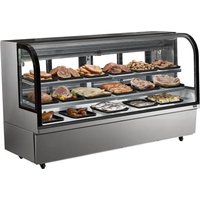


| Product Type | Refrigerated Display Cabinet |
| Brand | Vevor |
| Model | GN-2000R2 |
| Power Supply | 110-120 V / 220-240 V |
| Door Type | Sliding Door |
| Minimum Distance from Wall | 10 cm |
| Maximum Tilt Angle During Transport | 45° |
| Grounding | Required (three-prong plug) |
| Main Functions | Refrigeration, interior lighting, manual defrost |
| Capacity | Not specified |
| Dimensions | Not specified |
| Weight | Not specified |
| Refrigerant | Not specified |
| Climate Class | Not specified |
| Adjustable Temperature | Yes (thermostat) |
| Maintenance and Cleaning | Clean with a damp cloth and mild detergent; do not use corrosive solvents; cut off power before cleaning |
| Safety | Do not store hazardous materials; do not use electrical appliances inside; defrost regularly |
| Spare Parts and Repairability | Replacing the light strip possible; call a professional for electrical repairs |
| General Information | User manual provided; technical support at www.vevor.com/support |
Frequently Asked Questions - GN-2000R2 Vevor
User questions about GN-2000R2 Vevor
0 question about this device. Answer the ones you know or ask your own.
Ask a new question about this device
Download the instructions for your Refrigerator in PDF format for free! Find your manual GN-2000R2 - Vevor and take your electronic device back in hand. On this page are published all the documents necessary for the use of your device. GN-2000R2 by Vevor.
USER MANUAL GN-2000R2 Vevor
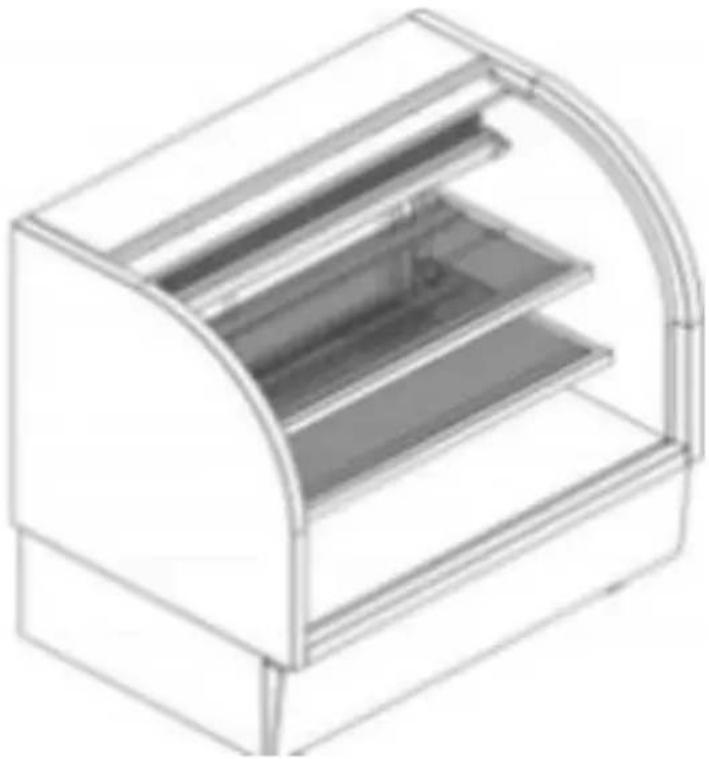
REFRIGERATED SHOWCASE
MODEL: GN-1200R2, GN-2000R2
We continue to be committed to providing you with tools at competitive prices. "Save Half", "Half Price", or any other similar expressions used by us only represent an estimate of savings you might benefit from buying certain tools with us compared to the major top brands, and do not necessarily mean to cover all categories of tools offered by us. You are kindly reminded to verify carefully when placing an order with us if you are actually saving half in comparison with the top major brands.
MODEL: GN-1200R2, GN-2000R2
NEED HELP? CONTACT US!
Have product questions? Need technical support? Please feel free to contact us:
This is the original instruction. Please read all manual instructions carefully before operating. VEVOR reserves a clear interpretation of the user manual. The appearance of the product shall be subject to the product you received. Please forgive us that we won't inform you if there are any technology or software updates on our product.
 | Warning-To reduce the risk of injury, user must re instructions manual carefully. |
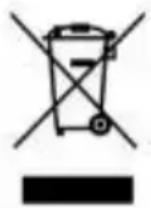 | This product is subject to the provision of European D 2012/19/EC. The symbol showing a wheelie bin cross through indicates that the product requires separate re collection in the European Union. This applies to the and all accessories marked with this symbol. Products as such may not be discarded with normal domestic w must be taken to a collection point for recycling electr electronic devices |
Cautions
- A separate single-phase three-pole power socket must be used, and the socket ground terminal (E) must be reliably grounded. Never use water or gas pipes as grounding terminals. Otherwise, if an unexpected malfunction occurs in the electrical system, grounding protection will be lost, endangering personal and property safety.
- Do not place the power cord directly on the bottom surface or on pedestrian walkways. Use a groove plate with a certain strength for protection. Or introduce grooves and cover them to avoid heavy pressure and damage from sharp tools.
- It is strictly prohibited to store hazardous materials that are volatile, corrosive, radioactive, flammable, explosive, toxic, or contaminating food inside the cabinet.
- When cleaning the product, be sure to cut off the power supply. Rinse with water to prevent electrical appliances from getting damp, leading to electricity after soaking in water, or other accidents.
- If there is an electrical and refrigeration system malfunction with the product, non-professional electricians and personnel without sufficient refrigeration technology and experience should not tamper with or disassemble it for repair without authorization, in order to avoid expanding the accident and even causing greater losses.
Please note that our company shall not be held responsible for any electrical damage or other accidents and losses caused by non-compliant operation and use.
Precautions for use
- When handling, gently push and place, and the inclination should not exceed 45 degrees.
- The product should be placed in a ventilated, cool, dry place, away from heat sources and dust. Avoid direct sunlight to avoid affecting the cooling effect, and the ground should be flat and sturdy. The distance between the perimeter of the cabinet and walls and other objects should not be less than 10 centimeters to ensure good heat dissipation of the condenser. Display cabinets should be placed at designated points to prevent displacement of the cabinet body under external forces.
- The applicable power supply of this product is 110V~120V /220V~240V. If the voltage does not meet the requirements, please install a power stabilizer with a capacity that matches the power of the display cabinet. After confirming that the voltage is correct, you can plug in the plug and turn on the appliance. After turning on the appliance for 20 minutes, check whether the appliance is running normally and whether the cooling effect is obvious.
- Before using it, it is necessary to run it for a period of time to confirm that the refrigeration system is working properly. Only when the temperature inside the cabinet drops to the normal requirements, can food be placed in the food tray for refrigeration.
- Too much overheated food should not be placed on the surface of a cabinet to prevent excessive instantaneous load.
- When the product is not used for a long time, it should be cleaned inside and outside, then air dried and placed in a dry, cool and ventilated place, and checked regularly to prevent rodent damage. When restarting, it is necessary to strictly check whether the electrical circuit has been bitten by mice. After inspection, it can be restarted for use.
- Non-professionals are not allowed to open or replace components, electrical components, and refrigeration units on the refrigerator without authorization.
- If the power cord is damaged, to avoid danger, it must be replaced by professional electrical maintenance personnel.
- If you believe that you cannot troubleshoot the problem on your own, please promptly seek professional assistance or notify our technical personnel for troubleshooting.
Common Faults and Troubleshooting
If you think this product has a malfunction, please check and eliminate the cause according to the table below. If it still does not work properly, please contact our company immediately. Non-professionals should not dismantle or maintain the product structure, electrical components, or refrigeration system without authorization. When checking and eliminating malfunctions, be sure to ask professional technicians to inspect and repair it; otherwise, it is easy to cause accidents and greater losses. If you find that the product is charged, please cut off the power supply immediately and then ask professionals to check and handle it.
Common Troubleshooting
| Faults | Fault Causes | Scope of Examination | Troubleshooting |
| Compressor or not working | Power off | Check by multimeter | Switch on |
| Plug loose | Check | Plug in tightly | |
| Starter relay sockeloose | Dismount shroud for check | Plug the pin tigh | |
| Over high temperature Inside the showcase | The storied goods are too much inside the showcase. | Reduce food | |
| Ambient temperature too high | Test by thermometer | Change ambient temperature | |
| Too loud noise | The showcase is r placed stable. | Check | Placed stable |
| Fan and compress castors footing loos | Check | Fasten the footing screws |
Non-faults
- The surface temperature of the air outlet panel of the unit box is high, and the surface will become hot. This part cannot be blocked, as it would affect the normal operation of the refrigeration system.
- The surface will become hot when the compressor is running: When the compressor is working normally, the surface temperature is high, which is a normal phenomenon. Do not touch it with your hands.
- Condensation on the glass surface: When the ambient temperature is high and the humidity is high, dew is easy to form on the outer surface of the glass. Please wipe it dry with a soft dry cloth, or turn on the heating wire defog function.
- The room temperature is lower than the temperature controlled by the thermostat, causing the compressor not to operate: Because the room temperature is lower than the temperature set by the thermostat, the data collected by the temperature sensor is not enough to start the compressor.
About Sliding Door Positioning Slot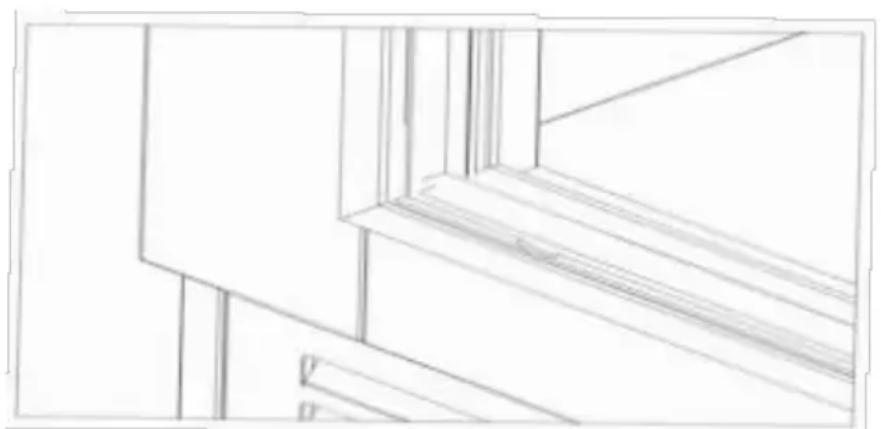
The sliding door positioning groove is an important design in the sliding door system, which is mainly used to ensure that the sliding door remains stable and accurately positioned during use. The groove on the lower slide is not a defect of the product, but a necessary design to achieve the sliding door positioning function.
Function and role
Positioning function: The sliding door positioning groove can effectively prevent the sliding door from deviating on the track, ensuring that the sliding door is always in the correct position when opening and closing. Stability: The positioning groove enhances the overall stability of the sliding door and prevents the sliding door from shaking or derailing during use.
Frequently Asked Questions and Answers
Will the positioning groove affect the appearance of the sliding door?
The positioning groove is usually located in the lower slide of the sliding door, which will not affect the appearance design and overall appearance of the sliding door.
Is the lower slide easy to damage?
The lower slide is designed to be sturdy and durable, and will not be damaged under normal use. However, it is necessary to avoid heavy impact and excessive wear.
How to clean the lower slide?
Use a clean soft cloth or brush to gently clean the dust and debris from the lower slide. Avoid using corrosive detergents.
The lower slide groove design is an indispensable part of the sliding system, which is mainly used to achieve the stability and positioning function of the sliding door. It is not a defect of the product, but is provided to give users a better experience and safety guarantee. Therefore, during use and maintenance, please correctly understand and treat the role and importance of the sliding door positioning groove.
Guidelines for shelf adjustment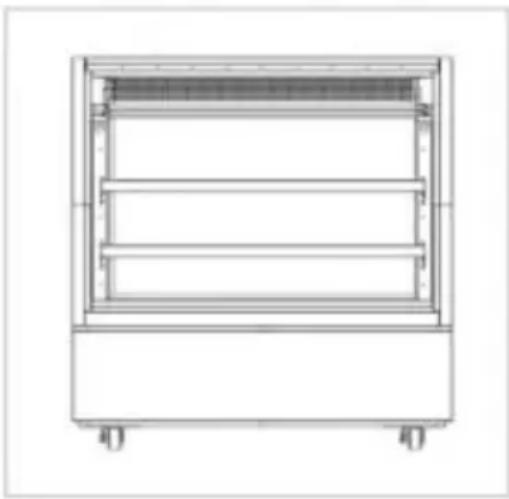
1. Empty the display cabinet
Remove all food and decorations: Make sure the interior of the display cabinet is empty for easy operation.
Clean the shelves: Wipe the shelves with a clean damp cloth to ensure that they are dust-free and stain-free.
2. Adjust the height of the shelves
Release the fixing clips: There are usually fixing clips on both sides of each shelf, which can be loosened for adjustment.
Move the shelves: According to the predetermined cake height, move shelves down to the hole position.
Fix the shelves: After adjusting to the required height, re-fix the clips to ensure that the shelves are stable.
3. Safety inspection
Check the stability of the shelves: Make sure that each shelf is firmly fixed and not loose.
4. Regular inspection and maintenance
Regularly check the fixing of the shelves: Avoid accidents caused by looseness.
Keep clean: Clean the shelves after the end of business every day to ensure hygiene.
Precautions
Avoid overloading: Each shelf has a certain load-bearing limit to avoid overloading cakes.
Keep the cabinet door closed: After adjustment, make sure the display cabinet door is closed to maintain temperature and humidity.
Packing List
| No. | Item | Qty | Remark |
| 1 | Display Refrigerator | 1 set | |
| 2 | Manual | 1 pcs |
Warning!
- To maintain ventilation, the cabinet should be at least 10 cm away from the wall and other objects.
- When cleaning, the power supply must be cut off. Use detergent, water and wet cloth to wipe. Do not use solvents that are harmful to human body or corrosive to the cabinet. It is strictly forbidden to use spray to
avoid damaging electrical components and causing leakage accidents.
- Electrical appliances such as high-temperature sterilizers and ozone generators are not allowed to be used in the food storage room inside a cabinet.
- When replacing lighting fixtures, first disconnect the power supply, unplug
the light strip lead from the connector, then unscrew the lampshade screws, disassemble the side cover of the lampshade, pull the light strip out of the buckle, then insert the new light strip into the buckle, install the side cover, fix the lampshade, and then insert the lead into the connector and turn on the power. Check whether it is working properly. If it is not working properly, please troubleshoot it according to the troubleshooting method.
- If the power cord is damaged, it must be replaced by a professional electrical maintenance personnel to avoid danger.
- Adults with physical or mental disabilities and minors are prohibited from using this product.
VEVOR®
TOUGH TOOLS, HALF PRICE
Technical Support and E-Warranty Certificate
www.vevor.com/support
VEVOR®
TOUGH TOOLS, HALF PRICE
NEED HELP? CONTACT US!
1. Empty the display case
1. Empty the display case
www.vevor.com/support
VEVOR®
TOUGH TOOLS, HALF PRICE
NEED HELP? CONTACT US!
1. Empty the showcase
1. Empty the showcase
www.vevor.com/support
VEVOR®
TOUGH TOOLS, HALF PRICE
MODEL: GN-1200R2, GN-2000R2
MODEL: GN-1200R2, GN-2000R2
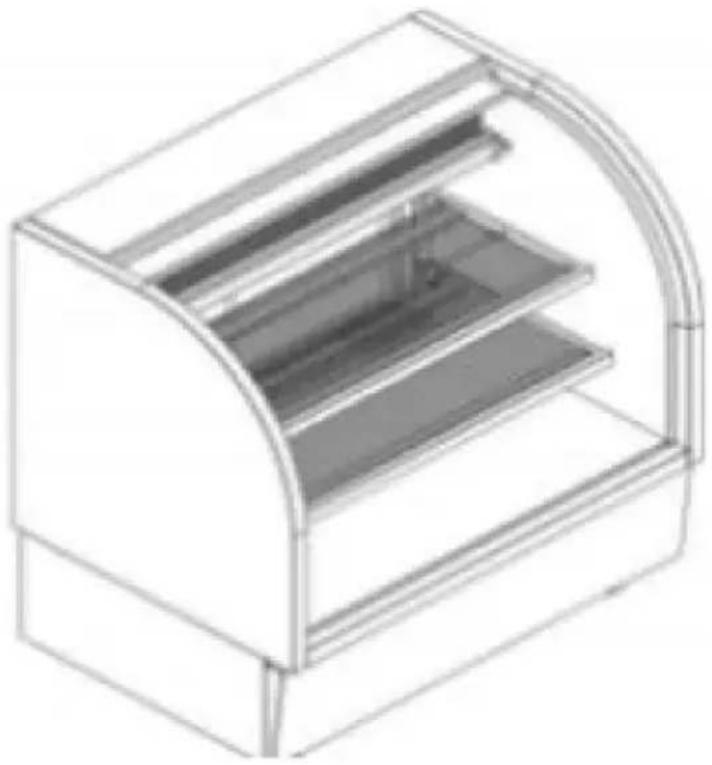
NEED HELP? CONTACT US!
1. Empty the showcase
www.vevor.com/support
VEVOR®
TOUGH TOOLS, HALF PRICE
Technical support and e-warranty certificate www.vevor.com/support
REFRIGERATED DISPLAY CASE
MODEL: GN-1200R2, GN-2000R2
NEED HELP? CONTACT US!
1. Empty the display case
www.vevor.com/support
VEVOR®
TOUGH TOOLS, HALF PRICE
NEED HELP? CONTACT US!
1. Empty the display case
www.vevor.com/support

- REFRIGERATED SHOWCASE
- MODEL: GN-1200R2, GN-2000R
- NEED HELP? CONTACT US
- CAUTIONS
- PRECAUTIONS FOR USE
- COMMON FAULTS AND TROUBLESHOOTING
- NON-FAULTS
- EMPTY THE DISPLAY CABINET
- ADJUST THE HEIGHT OF THE SHELVES
- SAFETY INSPECTION
- REGULAR INSPECTION AND MAINTENANCE
- PRECAUTIONS
- WARNING
- VEVOR®
- TOUGH TOOLS, HALF PRICE
- EMPTY THE DISPLAY CASE
- EMPTY THE SHOWCASE
- REFRIGERATED DISPLAY CASE
Brand : Vevor
Model : GN-2000R2
Category : Refrigerator