FBL900631 - Toilet Vevor - Free user manual and instructions
Find the device manual for free FBL900631 Vevor in PDF.

| Product Type | Toilet Safety Rail |
| Brand | Vevor |
| Model | FBL900631 |
| Maximum Load Capacity | 300 lb (136 kg) |
| Width Adjustment | 440 - 590 mm |
| Height Adjustment | 620 - 770 mm |
| Net Weight | 2.55 kg |
| Dimensions (L x W x H) | 505-655 x 525 x 620-770 mm |
| Main Material | Welded Steel |
| Included Accessories | 2 rail tubes, 2 cross connection tubes, 4 rail connectors, 4 protruding inner tubes, 2 rotary knobs, 2 suction cup foot pads, 2 plantar pads, gaskets, 2 storage bags |
| Intended Use | Toilet Lifting Aid |
| Cleaning Instructions | Clean with mild detergent and warm water, rinse and dry thoroughly |
| Safety Precautions | Do not exceed weight capacity, use on stable surface, inspect assembly regularly |
| Warranty | Electronic warranty certificate available |
| Technical Support | www.vevor.com/support |
| Number of Manual Pages | 96 pages |
| Adjustment Type | Height and width adjustable via rotary knobs |
| Pad Material | Non-slip rubber (suction cup) |
| Color | Not specified |
Frequently Asked Questions - FBL900631 Vevor
User questions about FBL900631 Vevor
0 question about this device. Answer the ones you know or ask your own.
Ask a new question about this device
Download the instructions for your Toilet in PDF format for free! Find your manual FBL900631 - Vevor and take your electronic device back in hand. On this page are published all the documents necessary for the use of your device. FBL900631 by Vevor.
USER MANUAL FBL900631 Vevor
Technical Support and E-Warranty Certificate www.vevor.com/support
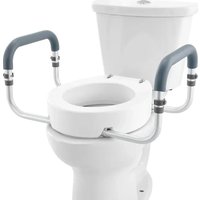
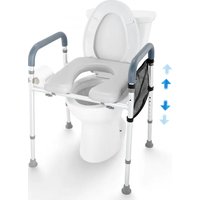
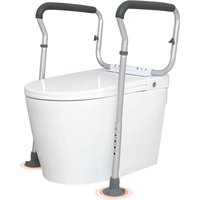
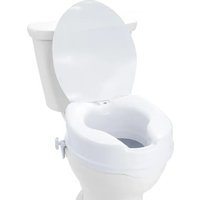
TOILET SAFETY RAILS
MODEL: FBL900631
We continue to be committed to provide you tools with competitive price.
"Save Half", "Half Price" or any other similar expressions used by us only represents an estimate of savings you might benefit from buying certain tools with us compared to the major top brands and does not necessarily mean to cover all categories of tools offered by us. You are kindly reminded to verify carefully when you are placing an order with us if you are actually saving half in comparison with the top major brands.
MODEL: FBL900631
natural_image
Technical line drawing of a mobile walkway with vertical pipes and a horizontal panel (no text or symbols)NEED HELP? CONTACT US!
Have product questions? Need technical support? Please feel fr contact us:
Technical Support and E-Warranty Certificate www.vevor.com/support
This is the original instruction, please read all manual instruction carefully before operating. VEVOR reserves a clear interpretation user manual. The appearance of the product shall be subject to product you received. Please forgive us that we won't inform you there are any technology or software updates on our product.

Warning-To reduce the risk of injury, users must read instructions manual carefully.
WARNING:
Read the manual completely to avoid harm product damage. Seek professional help if you encounter discomfort, pain, or worsening symptoms. If necessary, supervision in order to assemble and use this product correctly and safely. Exceed the 300lb weight limit.
Regularly check for secure assembly and contact support if in doubt. Ensure product's legs are even and locked before use, and discontinue usage if there are signs of wear, damage, or missing parts. The product is to be used on stable surfaces. Do not disassemble if not necessary, as it might compromise the longevity of the product. Do not modify the product unless specified in the manual. Use only parts approved by VEVOR for this specific product. Confirm compatibility of the toilet rail with your toilet before first use. The product isn to withstand pressure or impact and isn't to be used as a ladder or loaded heavy objects.
Keep away from children and pets. Contains potentially hazardous small parts choking hazard. Exercise caution during operation and assembly. Avoid extrem temperatures or open flames. If an allergic reaction occurs, cease use immediately and consult a healthcare professional.
IMPORTANT
- Don't exceed the weight capacity - 300 lb max.
- Use on stable surface only.
- Regularly inspect for signs of wear, damage, or loose parts.
- Clean regularly using a mild detergent and warm water, rinse Off any soap residue. After cleaning, dry thoroughly.
- Before use, confirm with your healthcare provider that the product meets specific needs. The following guidelines are not a substitute for medical advice
SAVE THESE INSTRUCTION
| Model | FBL900631 |
| Rated bearing capacity (lbs) | 300 |
| Width adjustment range (mm) | 440-590 |
| Height adjustment range (mm) | 620-770 |
| Net weight | 2.55kg |
| Product size (mm) | 505-655*525*620-770 |
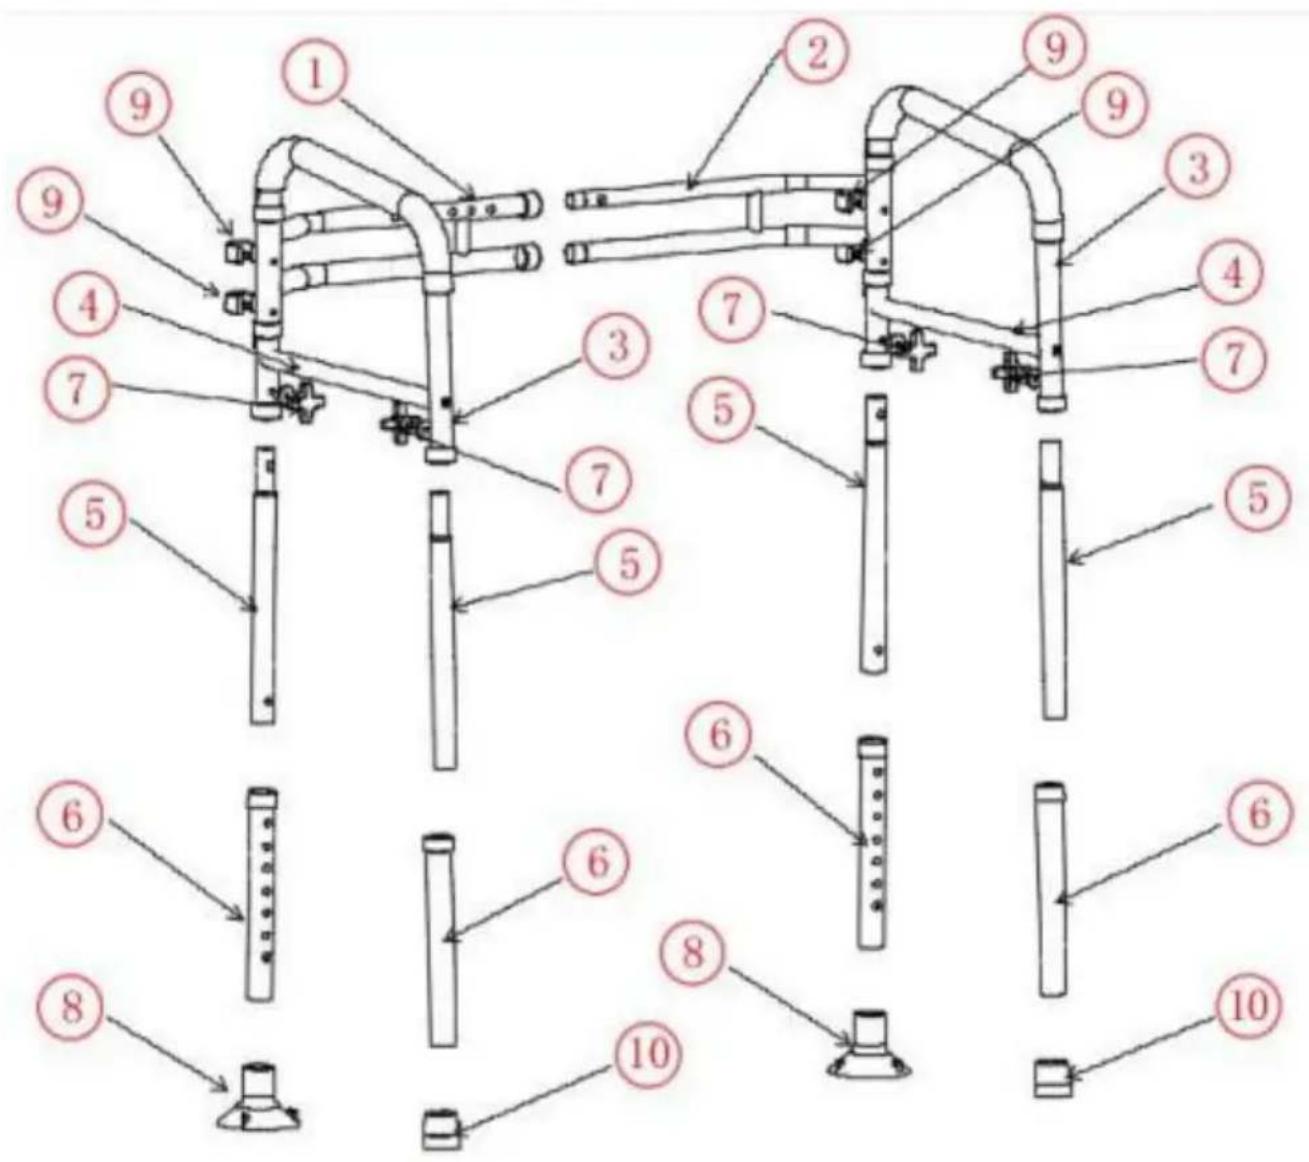
When unpacking this product, check to make sure the parts listed below are included and carefully inspect for any damage that may have occurred during transit. If any part is missing or damaged, do not attempt to assemble or use product.
| NO | PICTURE | PART NUMBER | QTY | NO | PICTURE | PART NUMBER | QTY |
| 1 | 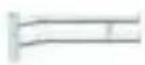 | H rod welded assembly - outside | 1 | 7 | 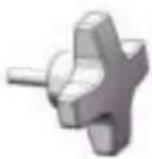 | rotary knob | 4 |
| 2 |  | H rod welded assembly - inside | 1 | 8 | 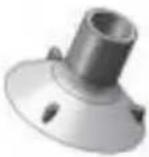 | Suction cup foot pad | 2 |
| 3 | 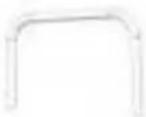 | pipe handrail | 2 | 9 | 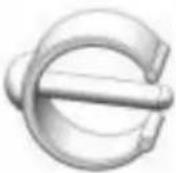 | Proximity Card | 4 |
| 4 |  | Cross bar connection tube | 2 | 10 | 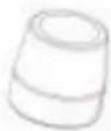 | foot pad | 2 |
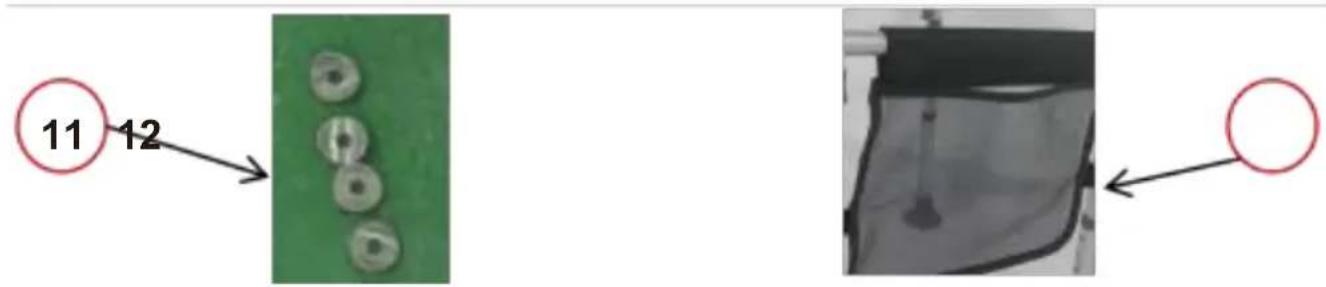
| 5 | Handrail connector | 4 | 11 |  | gasket | 4 | |
| 6 | 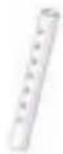 | inner jut pipe | 4 | 12 | 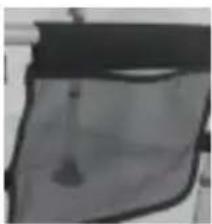 | storage bag | 1 |
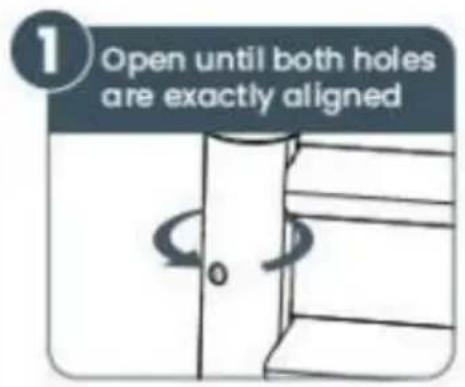
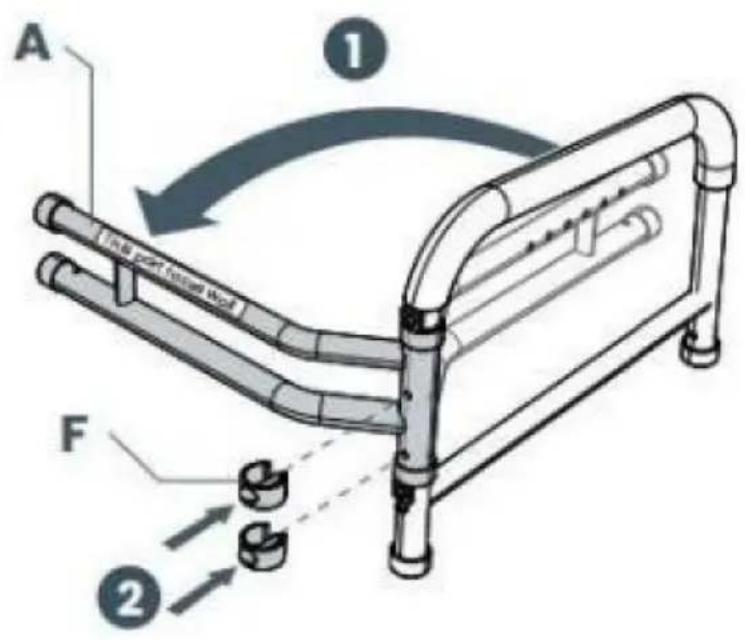
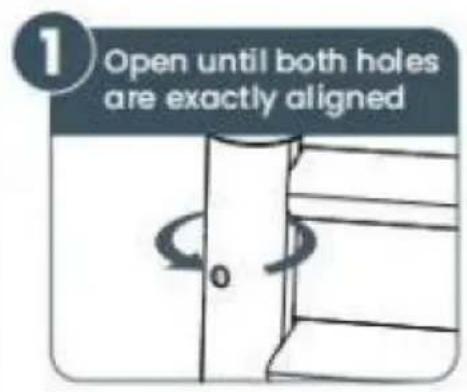
1. Open the Handrests
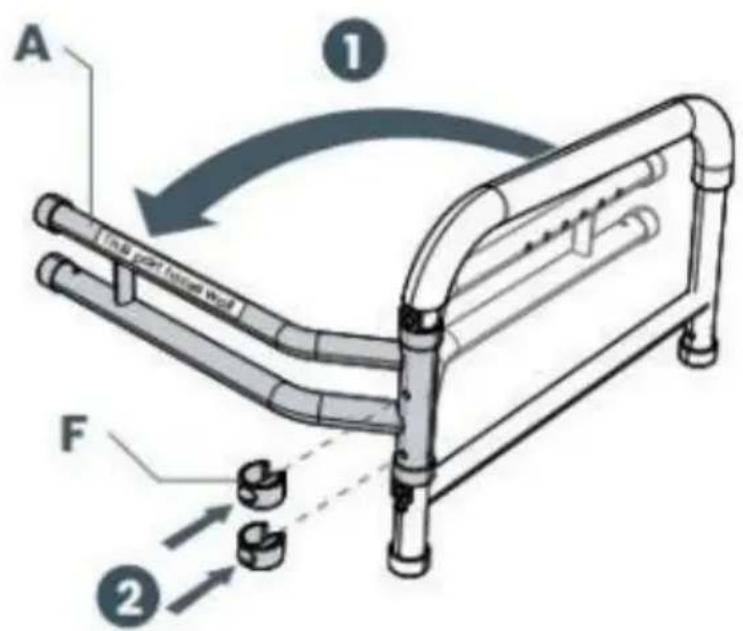
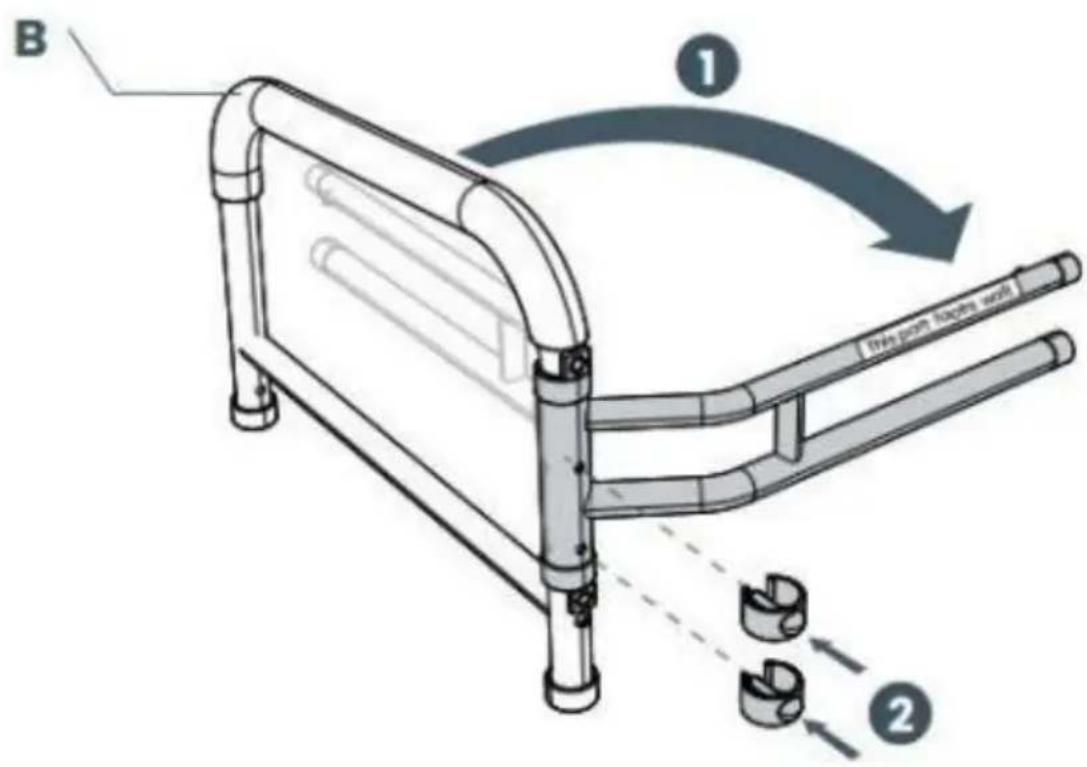
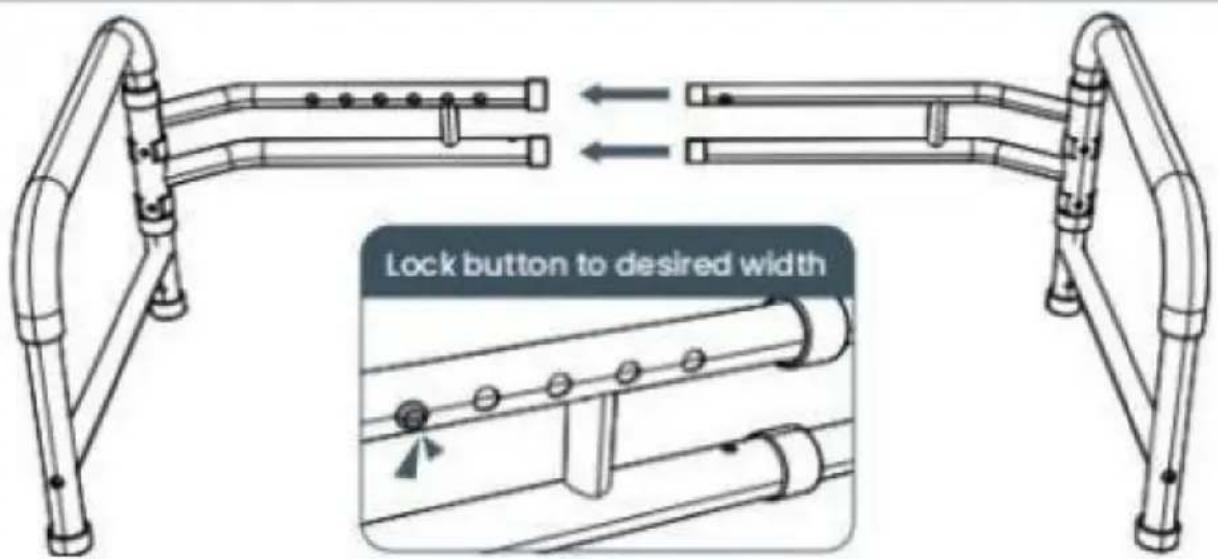
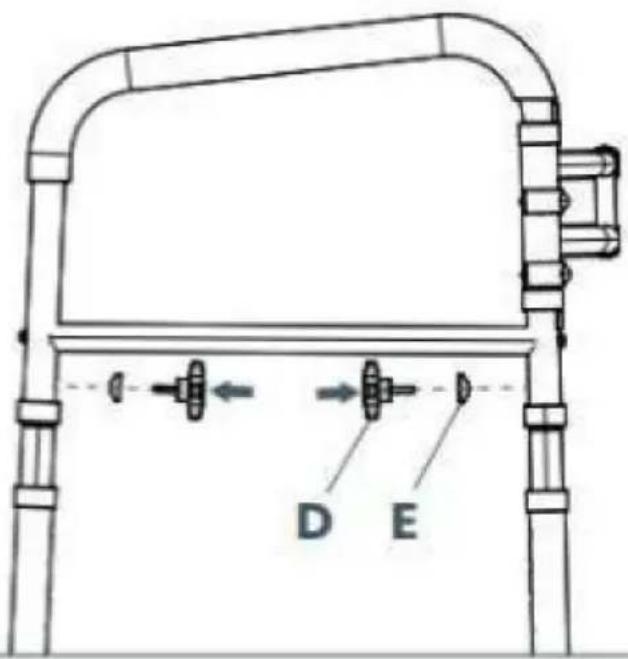
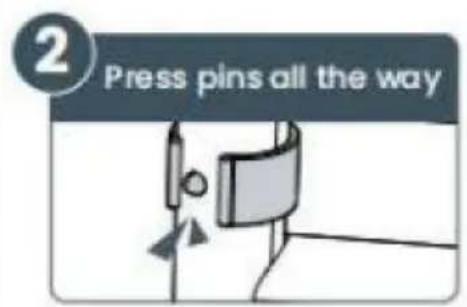
2. Adjust the Width
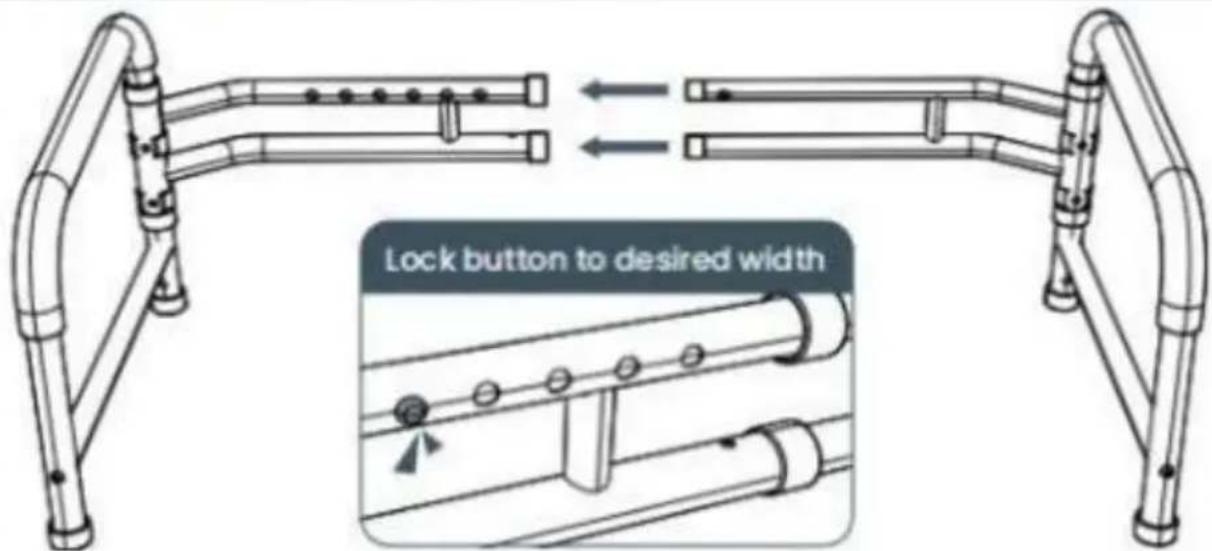
Don't worry, you will be able to easily adjust width after assembly too
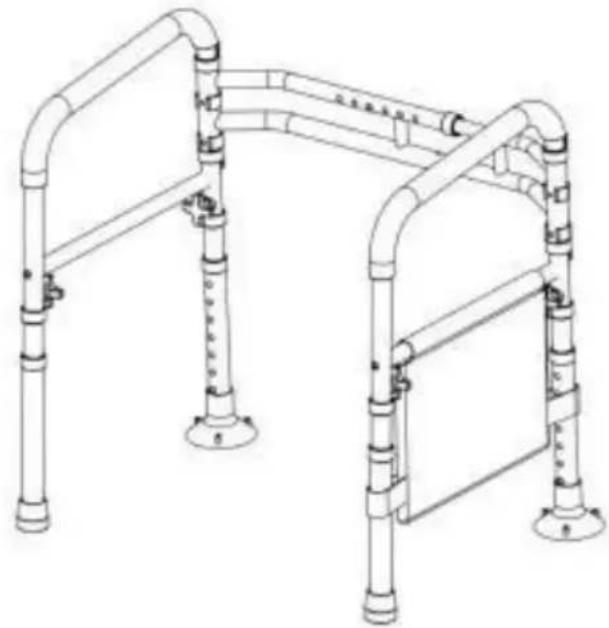
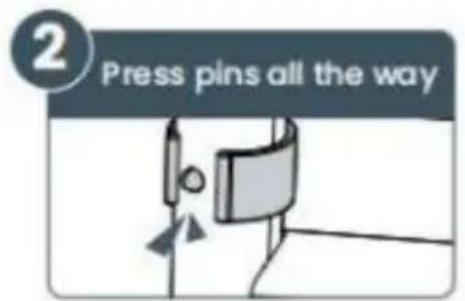
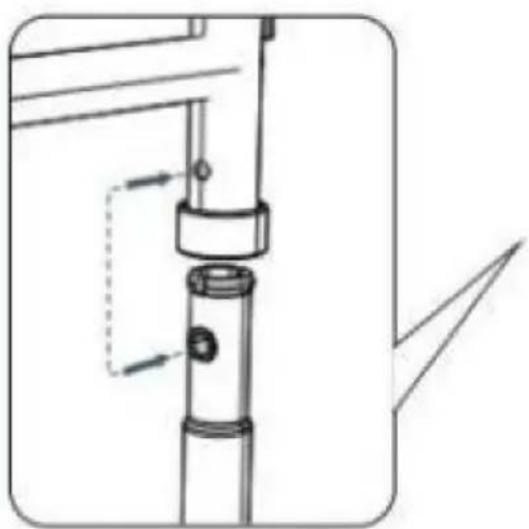
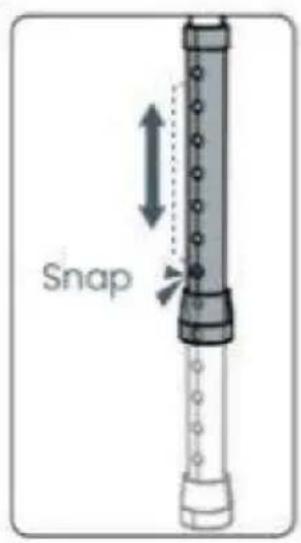
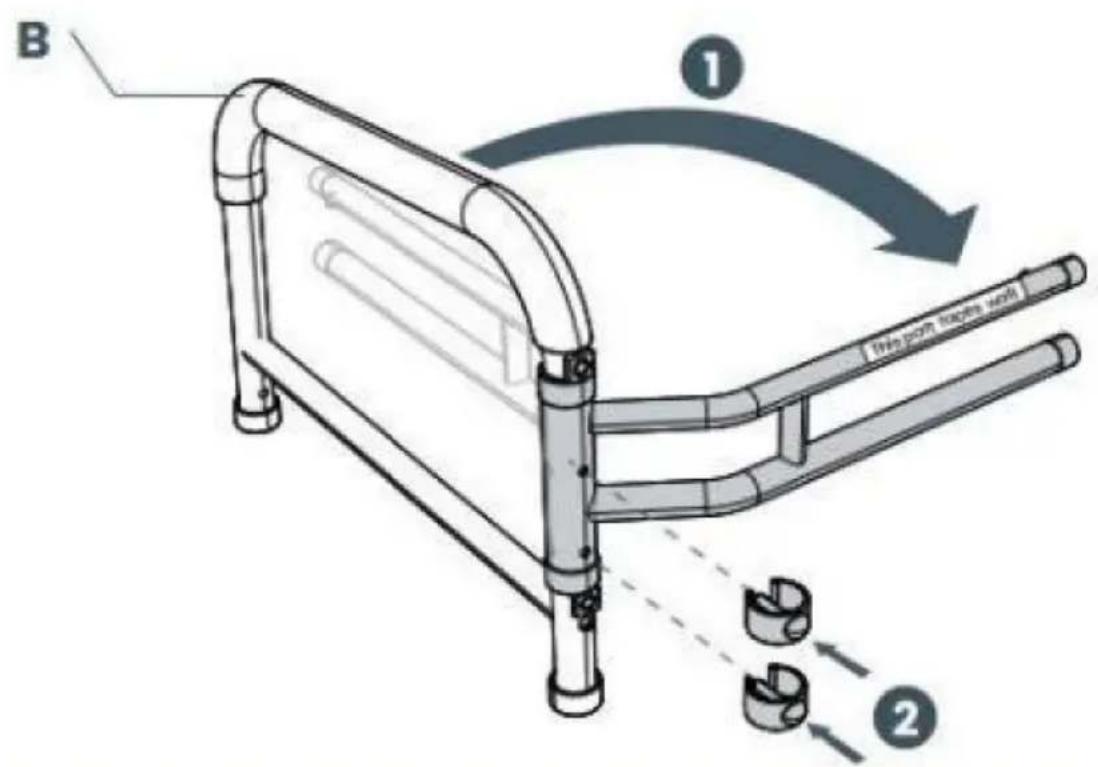
3. Attach All Four Legs
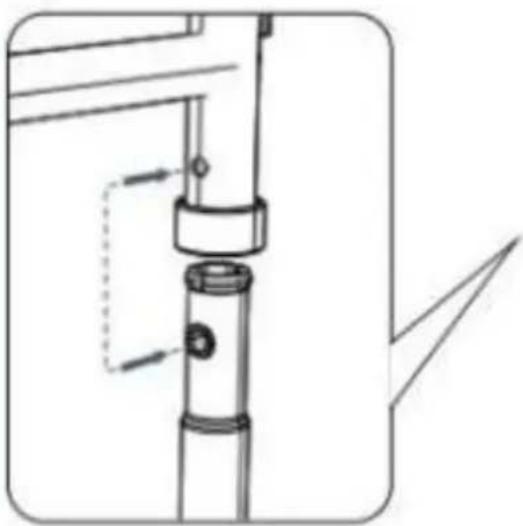
natural_image
Technical line drawing of a mechanical assembly with no visible text or symbolsAlign the two holes while inserting legs

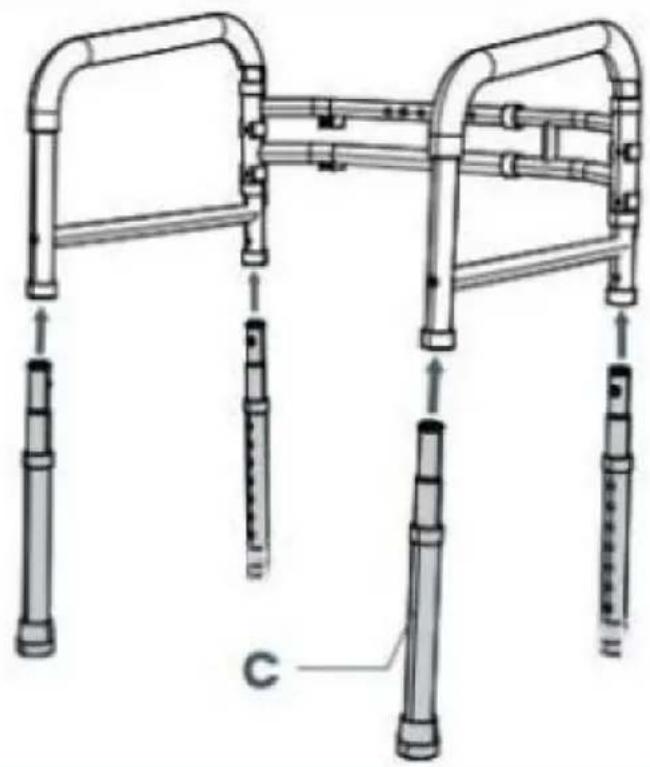
natural_image
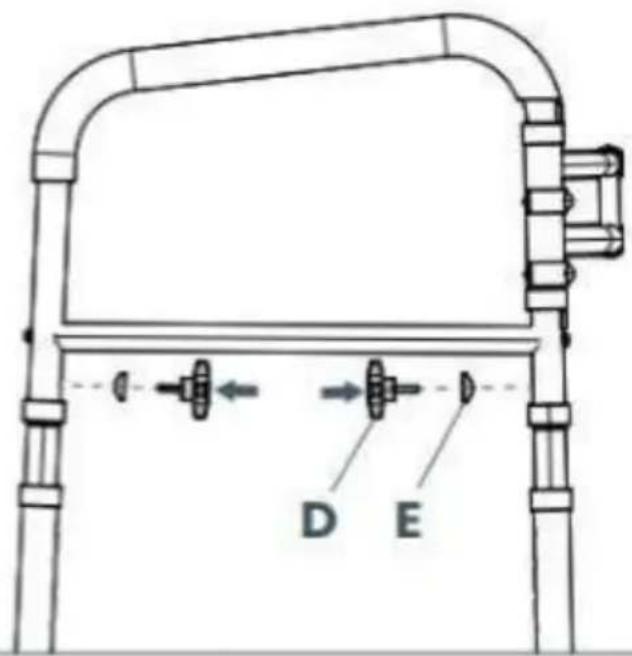
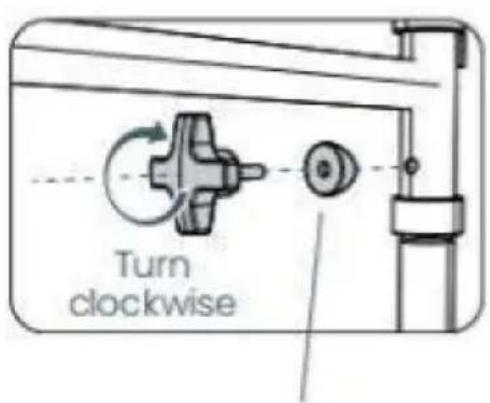
Technical line drawing of a mobility device with multiple vertical supports and a handle (no text or symbols)4. Secure All Four Legs

Flat part faces the screw
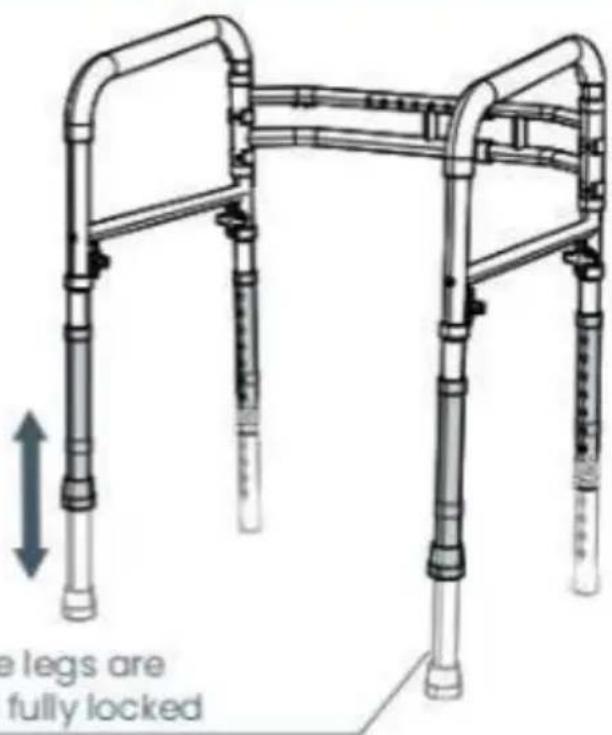
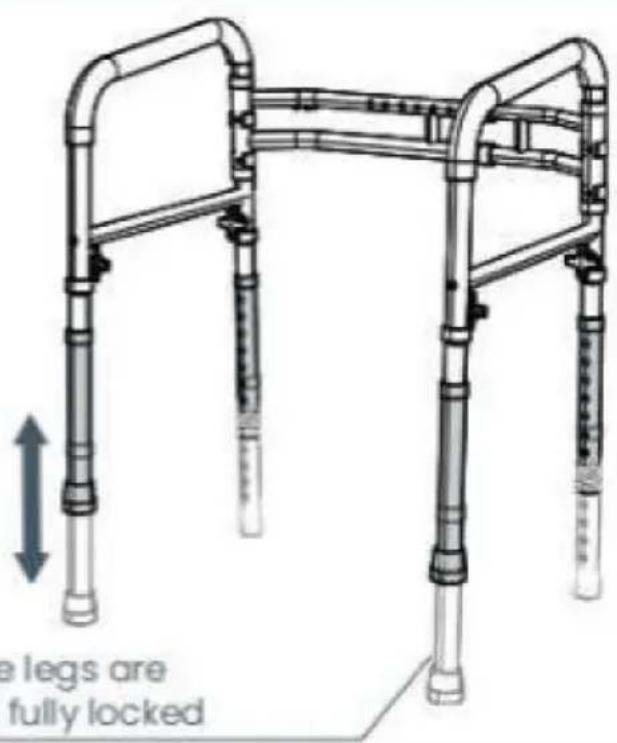
5. Adjust the Height


- Remove the original straight foot pad and install the sucker foot pad into the foot tube as shown

natural_image
Diagram of a mobility device with pipes and a valve, showing no text or symbols- Install storage bags as shown in the following figure.

natural_image
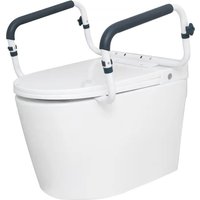
Close-up of a metal ladder with a mesh cover and handle, no visible text or symbols- Place the assembled toilet rail on the toilet, as shown in the picture
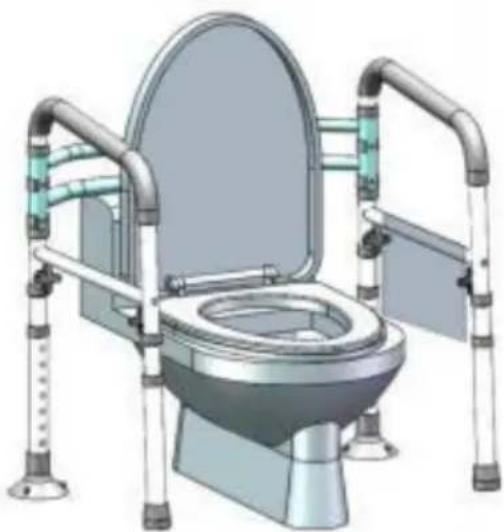
natural_image
Illustration of a standard night toilet with dual vertical supports and open lid (no text or symbols)Physiotherapist
- Before first use, adjust the height and the width of the rail to your toilet.
- Back up to the toilet with your assistive device (if available) until the back your legs are touching the toilet.
- Reach back for the rail, hold firmly, and slowly lower yourself into a seat position on the toilet.
- To return to a standing position, place your hands on the rails firmly and yourself up into a standing position.
- Once you are standing, gradually let go of the rails, and only then, grab handle of your assistive device (if available).
VEVOR®
TOUGH TOOLS, HALF PRICE
Technical Support and E-Warranty Certificate
www.vevor.com/support
VEVOR®
TOUGH TOOLS, HALF PRICE
natural_image
Technical line drawing of a four-way mobile walkway structure with pipes and feet (no text or symbols)BESOIN D'AIDE? CONTACTEZ-NOUS!
1. Open the Handrests


2. Adjust the Width
Don't worry, you will be able to easily adjust width after assembly too
3. Attach All Four Legs

natural_image
Technical line drawing of a mechanical assembly with no visible text or symbolsAlign the two holes while inserting legs

natural_image
Technical line drawing of a mobility device with multiple vertical supports and a labeled component 'C' (no text or symbols beyond label)4. Secure All Four Legs

Flat part faces the screw

5. Adjust the Height


Ensure the legs are even and fully locked

natural_image
Illustration of a mobility device with pipes and a valve, showing no text or symbolsnatural_image
Close-up of a metal ladder with a mesh bag attached, no visible text or symbolsnatural_image
Illustration of a medical toilet with adjustable arms and legs (no text or symbols)Physiothérapeute
natural_image
Technical line drawing of a mobile walkway with vertical pipes and a horizontal panel (no text or symbols)1. Open the Handrests


2. Adjust the Width

Don't worry, you will be able to easily adjust width after assembly too
3. Attach All Four Legs
natural_image
Technical line drawing of a mechanical assembly with no visible text or symbolsAlign the two holes while inserting legs

natural_image
Technical line drawing of a mobility device with multiple vertical supports and a labeled component 'C' (no text or symbols beyond label)4. Secure All Four Legs

Flat part faces the screw

5. Adjust the Height


Ensure the legs are even and fully locked

Machine Translated by Google
natural_image
Illustration of a mobility device with pipes and a valve, showing no text or symbolsnatural_image
Close-up of a metal ladder with a mesh bag attached, no visible text or symbolsnatural_image
Illustration of a medical toilet with adjustable arms and legs (no text or symbols)Physiotherapeut
natural_image
Technical line drawing of a four-way public restroom accessibility structure (no text or symbols)1. Open the Handrests


2. Adjust the Width

Don't worry, you will be able to easily adjust width after assembly too
3. Attach All Four Legs

natural_image
Technical line drawing of a mechanical assembly with no visible text or symbolsAlign the two holes while inserting legs

natural_image
Technical line drawing of a mobility device with multiple vertical supports and a labeled component 'C' (no text or symbols beyond label)4. Secure All Four Legs
Flat part faces the screw

5. Adjust the Height


Ensure the legs are even and fully locked

natural_image
Illustration of a mobility device with pipes and a valve, showing no text or symbolsnatural_image
Close-up of a metal ladder with a mesh bag attached, no visible text or symbolsnatural_image
Illustration of a standard open toilet with metal railings and adjustable legs (no text or symbols)Fisioterapista
natural_image
Technical line drawing of a mobile walkway with vertical pipes and a horizontal panel (no text or symbols)1. Open the Handrests


2. Adjust the Width

Don't worry, you will be able to easily adjust width after assembly too
3. Attach All Four Legs

natural_image
Technical line drawing of a mechanical assembly with no visible text or symbolsAlign the two holes while inserting legs

natural_image
Technical line drawing of a mobility device with multiple vertical supports and a labeled component 'C' (no text or symbols beyond label)4. Secure All Four Legs

Flat part faces the screw

5. Adjust the Height

Ensure the legs are even and fully locked

natural_image
Illustration of a mobility device with pipes and a valve, showing no text or symbolsnatural_image
Close-up of a metal ladder with a mesh bag attached, no visible text or symbolsnatural_image
Illustration of a standard open toilet with metal railings and adjustable legs (no text or symbols)Fisioterapeuta
www.vevor.com/support
VEVOR®
TOUGH TOOLS, HALF PRICE
natural_image
Technical line drawing of a mobile walkway with vertical pipes and a horizontal panel (no text or symbols)POTRZEBUJESZ POMOCY? SKONTAKTUJ SIĘ Z NAMI!
1. Open the Handrests


2. Adjust the Width

Don't worry, you will be able to easily adjust width after assembly too
3. Attach All Four Legs

natural_image
Technical line drawing of a mechanical assembly with no visible text or symbolsAlign the two holes while inserting legs

natural_image
Technical line drawing of a mobility device with multiple vertical supports and a labeled component 'C' (no text or symbols beyond label)4. Secure All Four Legs

Flat part faces the screw
5. Adjust the Height


Ensure the legs are even and fully locked
Machine Translated by Google
natural_image
Illustration of a mobility device with pipes and a valve, showing no text or symbolsnatural_image
Close-up of a metal ladder with a mesh bag attached, no visible text or symbolsnatural_image
Illustration of a standard open toilet with metal railings and adjustable legs (no text or symbols)Fizjoterapeuta
natural_image
Technical line drawing of a mobile walkway with vertical pipes and a horizontal panel (no text or symbols)HULP NODIG? NEEM CONTACT MET ONS OP!
1. Open the Handrests


2. Adjust the Width

Don't worry, you will be able to easily adjust width after assembly too
3. Attach All Four Legs

natural_image
Technical line drawing of a mechanical assembly with no visible text or symbolsAlign the two holes while inserting legs

natural_image
Technical line drawing of a mobility device with multiple vertical supports and a labeled component 'C' (no text or symbols beyond label)4. Secure All Four Legs

Flat part faces the screw

5. Adjust the Height


Ensure the legs are even and fully locked

natural_image
Illustration of a mobility device with pipes and a valve, showing no text or symbolsnatural_image
Close-up of a metal ladder with a mesh bag attached, no visible text or symbolsnatural_image
Illustration of a medical toilet with adjustable arms and girders (no text or symbols)Fysiotherapeut
www.vevor.com/support
VEVOR®
TOUGH TOOLS, HALF PRICE
natural_image
Technical line drawing of a four-way public transit walkway with pipes and railings (no text or symbols)BEHÖVER HJÄLP? KONTAKTA OSS!
1. Open the Handrests


2. Adjust the Width

Don't worry, you will be able to easily adjust width after assembly too
3. Attach All Four Legs

natural_image
Technical line drawing of a mechanical assembly with no visible text or symbolsAlign the two holes while inserting legs
natural_image
Technical line drawing of a mobility device with multiple vertical supports and a labeled component 'C' (no text or symbols beyond label)4. Secure All Four Legs

Flat part faces the screw

5. Adjust the Height


Ensure the legs are even and fully locked

natural_image
Illustration of a mobility device with pipes and a valve, showing no text or symbolsnatural_image
Close-up of a metal ladder with a mesh cover and handle, no visible text or symbolsnatural_image
Illustration of a medical toilet with adjustable arms and legs (no text or symbols)Fysioterapeut
www.vevor.com/support