
XMZ-L-D4 - Heating Vevor - Free user manual and instructions
Find the device manual for free XMZ-L-D4 Vevor in PDF.
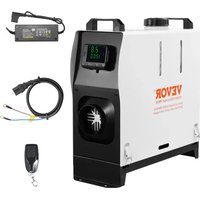


| Product type | Diesel heater for vehicles and spaces |
| Model | XMZ-L-D4 (vertical) |
| Brand | Vevor |
| Heating power | 8 kW |
| Heating means | Air |
| Fuel | Light diesel |
| Power supply | 12-24 V DC, 40 W |
| Required current | ≥ 12 A |
| Operating modes | Manual (10 power levels) and automatic (temperature adjustment 8-36 °C) |
| Switch types | Standard (without Bluetooth) and high-end (with Bluetooth) |
| Starting temperature | ≥ -40 °C |
| Installation | Vertical, inside the cabin or luggage compartment, exhaust hole 70 mm |
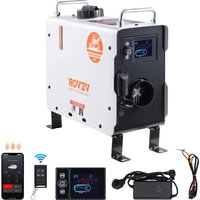
| Package contents | Main body, air and exhaust ducts, burner, remote control, silencer, clamps, air filter, adapter, screws |
| Safety | Overheat protection, automatic shutdown, flame detection, temperature sensor |
| Maintenance | Clean the air filter and spark plug, check fuel lines |
| Fault display | Codes E-01 to E-10 for voltage, spark plug, pump, fan, etc. |
| Special features | Manual fuel pumping, timer, time adjustment, language selection (silent, English, German, Russian) |
| Repairability | Spare parts available (spark plug, pump, fan, sensors, motherboard) |
| Compliance | FCC Part 15, European directive 2012/19/EU (WEEE) |
Frequently Asked Questions - XMZ-L-D4 Vevor
User questions about XMZ-L-D4 Vevor
0 question about this device. Answer the ones you know or ask your own.
Ask a new question about this device
Download the instructions for your Heating in PDF format for free! Find your manual XMZ-L-D4 - Vevor and take your electronic device back in hand. On this page are published all the documents necessary for the use of your device. XMZ-L-D4 by Vevor.
USER MANUAL XMZ-L-D4 Vevor
Technical Support and E-Warranty Certificate www.vevor.com/support
DIESEL HEATER
We continue to be committed to provide you tools with competitive price. "Save Half", "Half Price" or any other similar expressions used by us only represent of savings you might benefit from buying certain tools with us compared major top brands and does not necessarily mean to cover all categories of tools. You are kindly reminded to verify carefully when you are placing an order that are actually saving half in comparison with the top major brands.
VEVOR®
TOUGH TOOLS, HALF PRICE
DIESEL HEATER
MODEL:XMZ-L-D4 XMZ-W-D4
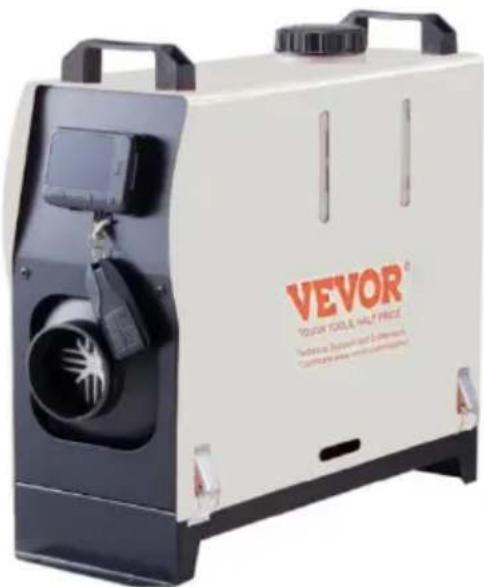
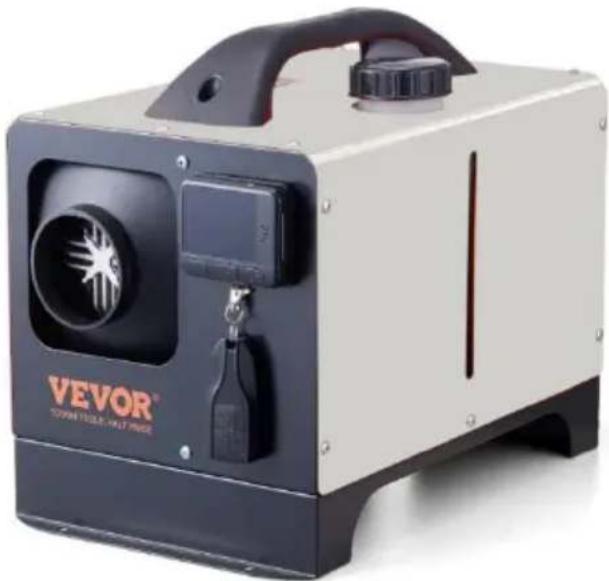
NEED HELP? CONTACT US!
Have product questions? Need technical support? Please feel free to contact us: Technical Support and E-Warranty Certificate
www.vevor.com/support
This is the original instruction, please read all manual instruction carefully before operating. VEVOR reserves a clear interpretation user manual. The appearance of the product shall be subject to product you received. Please forgive us that we won't inform you there are any technology or software updates on our product.
| Symbol | Symbol Description |
 | Warning: To reduce the risk of injury, the user must rea instructions manual carefully. |
 | This symbol, placed before a safety comment, indicates a kind of precaution, warning, or danger. Ignoring this warn may lead to an accident. To reduce the risk of injury, fi electrocution, please always follow the recommendations shown below. |
 | CORRECT DISPOSAL: This product is subject to the pro of European Directive 2012/ 19/EC. The symbol showing wheelie bin crossed through indicates that the product rec separate refuse collection in the European Union. This ap the product and all accessories marked with this symbol. Products marked as such may not be discarded with nor domestic waste, but must be taken to a collection point recycling electrical and electronic devices. |
 | Warning: Toxic material. Take care to avoid coming into with toxic material. |
 | Warning: Flammable material. Take care to avoid causing by igniting flammable material. |
SAFETY INSTRUCTION


WARNING:
Read all safety warnings, instructions, illustrations, and specifications provided with this diesel heater. Failure to follow all instructions listed below may result in electric shock, fire, and/or serious injury.
- The following measures shall not be adopted
- Change the important component of the diesel heater.
- Make use of spare parts from other manufacturers without permission.
- Disobey the instruction and guide during installation or operation.
- Only allow using original attachments and spare parts during installation and maintenance.
- The heaters shall not be used in places where they may form flammable or dust, for example:
- Fuel depot
- Carbon storehouse
- Timber storehouse
- Granary and similar sites
- Diesel/petrol station
And keep away from fuel tanks, compression tanks, fire extinguishers, clothes, and other flammable objects.
- Do not use a cigarette lighter for startup.
- Do not use the heater in closed and/or unventilated places.
- The heaters shall be turned off when filling fuel.
- Do not cut off the electric power during operation.
- If fuel leaks or discharges from the fuel system of the heaters, please contact VEVOR for repair.
- Place the exhaust outlet outside to prevent any penetration of exhaust fumes.
- During operation, it is forbidden to cut off the electric power to directly stop the heater from working.
- Seal all gaps between the mounting plate and the car body.
- The machine will stop heating after over-temperature protection. Please do not power off. After the machine has naturally cooled down and turned off, it can be restarted.
- After turning off the machine, please do not immediately disconnect the power supply. It takes 3-5 minutes for the machine to stop working completely.
- After starting the machine, it will take 3-5 minutes to work normally and heat up. Please wait patiently.
- When the heater is just started, the current is relatively high, so an adapter with a voltage of 12-24V and a current of 12A or greater is required for the power supply.
- This appliance can be used by children aged from 8 years and above and persons with reduced physical, sensory or mental capabilities or lack of experience and knowledge if they have been given supervision or instruction concerning use of the appliance in a safe way and understand the hazards involved. Children shall not play with the appliance. Cleaning and user maintenance shall not be done by children without supervision.
17. WARNING: Flammable material

During installation/use, service, and disposal of the appliance, please pay attention that there should be no flammable substances around exhaust pipe. The temperature of the exhaust pipe is very high when it is working. Take care to avoid causing a fire by igniting flammable material.
18. WARNING: Toxic material
- During installation/use, service, and disposal of the appliance, please install

the appliance with space for ventilation to prevent carbon monoxide poisoning. Place the exhaust outlet outdoors to prevent exhaust gas from seeping in.
SAVE THESE INSTRUCTIONS
FCC INFORMATION
CAUTION: Changes or modifications not expressly approved by the party responsible for compliance could void the user's authority to operate the equipment!
This device complies with Part 15 of the FCC Rules. Operation is subject to the following two conditions:
1) This product may cause harmful interference. 2) This product must accept any interference received, including interference that may cause undesired operation.
WARNING: Changes or modifications to this product not expressly approved by the party responsible for compliance could void the user's authority to operate the product.
Note: This product has been tested and found to comply with the limits for a Class B digital device pursuant to Part 15 of the FCC Rules. These limits are designed to provide reasonable protection against harmful interference in a residential installation.
This product generates, uses and can radiate radio frequency energy, and if installed and used in accordance with the instructions, may cause harmful interference to radio communications. However, there is no guarantee that interference will not occur in a particular installation. If this product does cause harmful interference to radio or television reception, which can be determined by turning the product off and on, the user is encouraged to try to correct the interference by one or more of the following measures.
- Reorient or relocate the receiving antenna.
- Increase the distance between the product and the receiver.
- Connect the product to an outlet on a circuit different from that to which a receiver is connected.
- Consult the dealer or an experienced radio/TV technician for assistance.
PRODUCT FUNCTION
- The diesel heater (hereinafter referred to as the heater) is independent of the original engine system. It makes use of a 12-24V direct current to drive. The two kinds of control modes for the heater: Automatic control mode and Manual control mode. The heater adopts light diesel, which corresponds to the environmental temperature as fuel, and it can be started and operated normally at a temperature of above 40°C. The inhaled fresh air is heated to hot air through a heat exchanger by the energy that comes from burning fuel, then blown to where water is needed. This type of heater has the advantage of compact structure, lightweight, high thermal efficiency, economy of electricity and fuel, and easy installation.
- The heater gets rid of damage to the car caused by the sudden drop in temperature, improves the temperature inside the car, and preheats the engine coolant to avoid engine wear at low temperature. It is conducive to car interior heating, car start, and car glass defrosting and defogging.
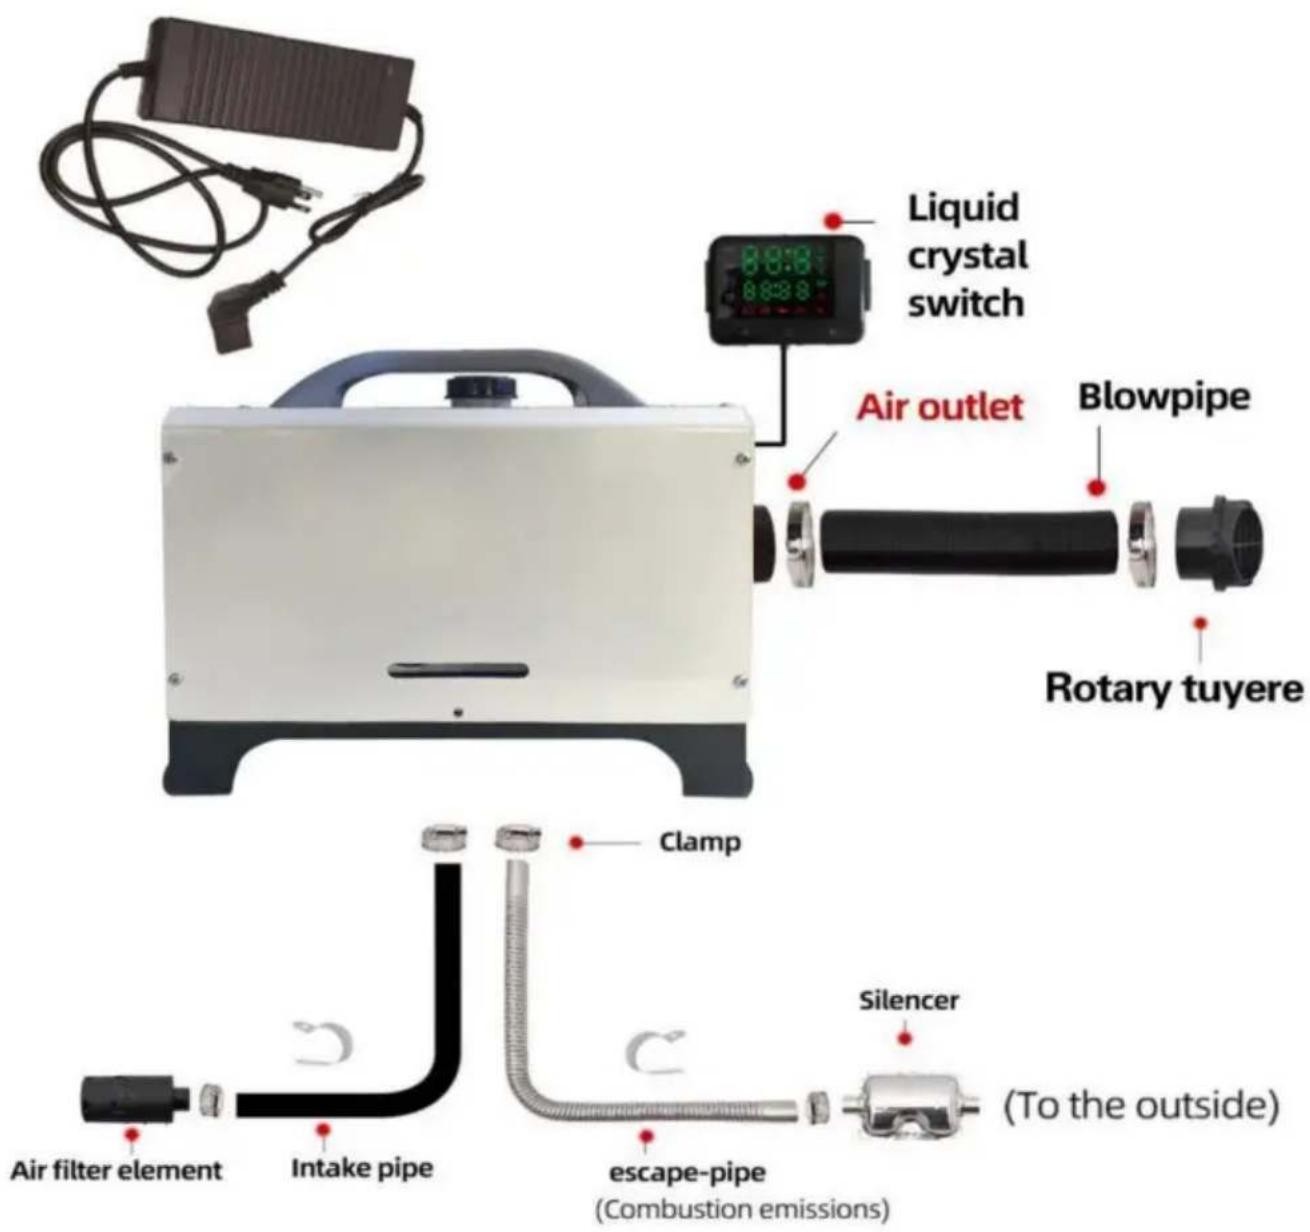
INTERNAL STRUCTURE
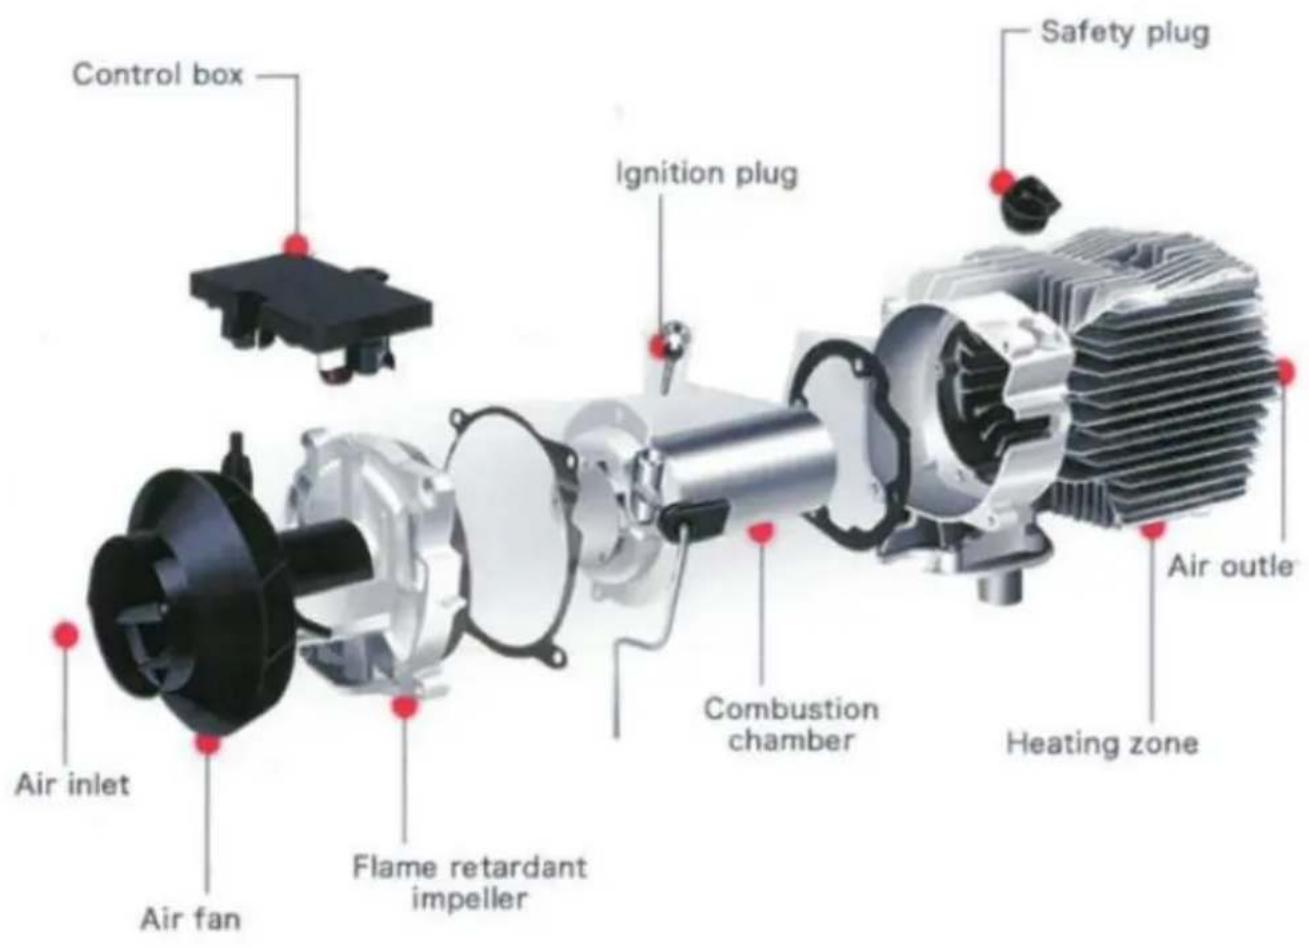
INSTALLATION POSITION
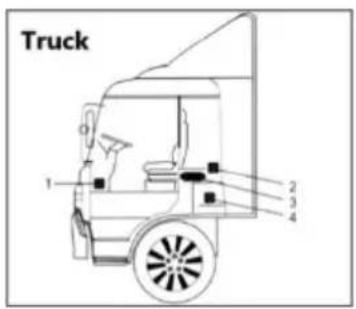
- On the co-driver's legroom.
- On the back wall of the cab.
- Driver's seat backrest.
- Within the tool box.
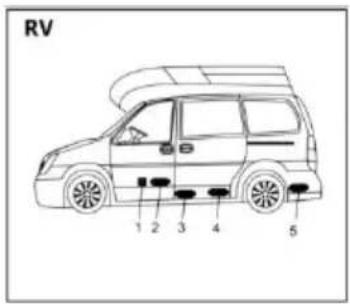
- In front of the passenger seat.
- Between the driver seat and passenger seat.
- 3&4 under the container.
- In the trunk.
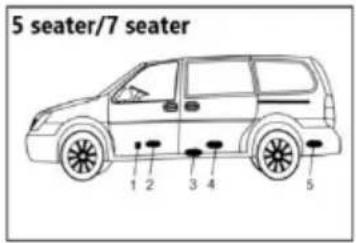
The heater is mainly installed in the passenger room or baggage room of the vehicle. If it is installed, fix the heater under the underside of the vehicle, but beware of splashing.
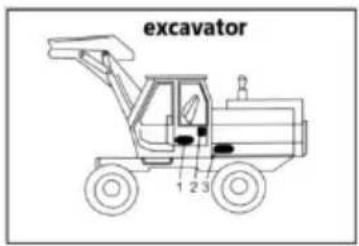
- Inside the driver's seat.
- On the back wall of the car.
- Inside the protection box.
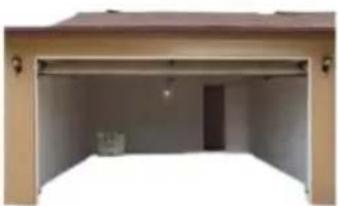
- Installed in the garage against the wall.
- There should be no foreign objects blocking the front and rear air vents.
- No flammable materials around the exhaust pipe.
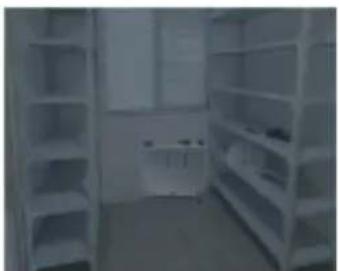
- Installed against the wall of the warehouses.
- There should be no foreign objects blocking the front and rear air vents.
- No flammable materials around the exhaust.

The installation of the machine requires professional personnel to install it.
MODEL
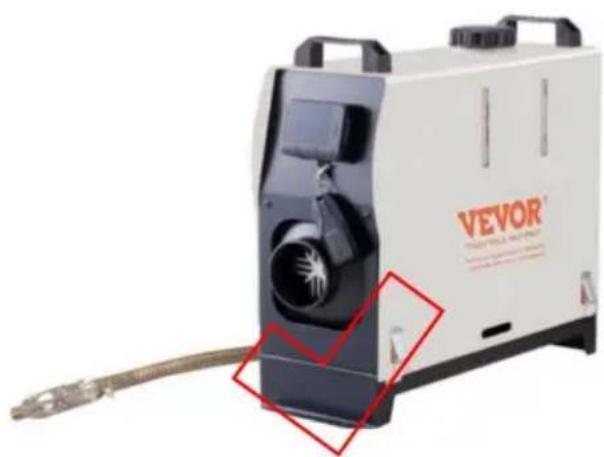
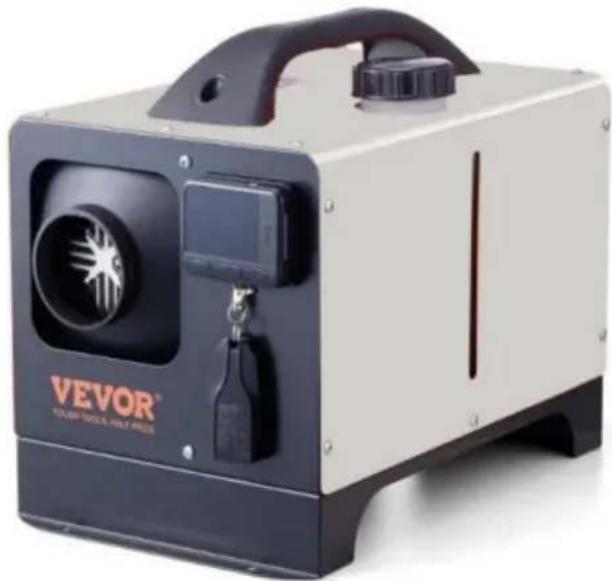
| Model | XMZ-W-D4 | XMZ-L-D4 |
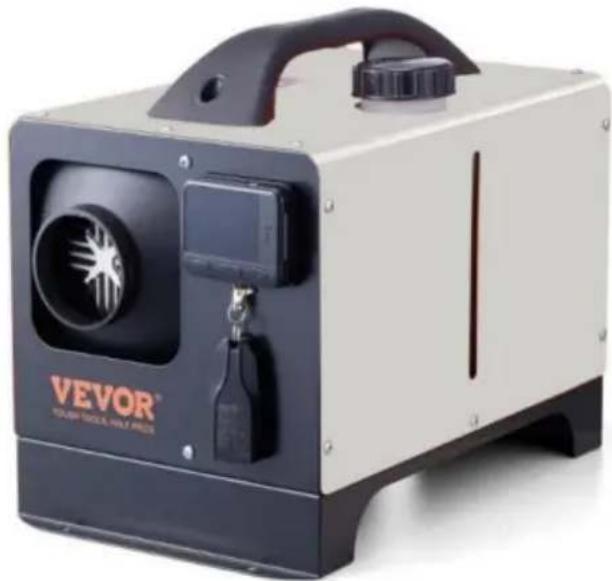
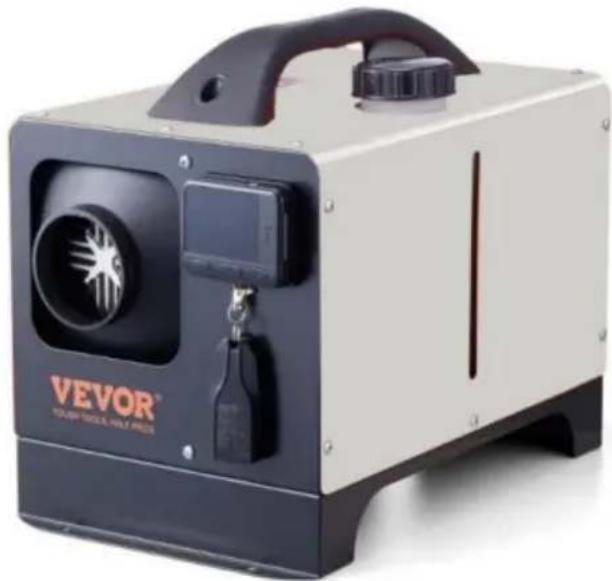
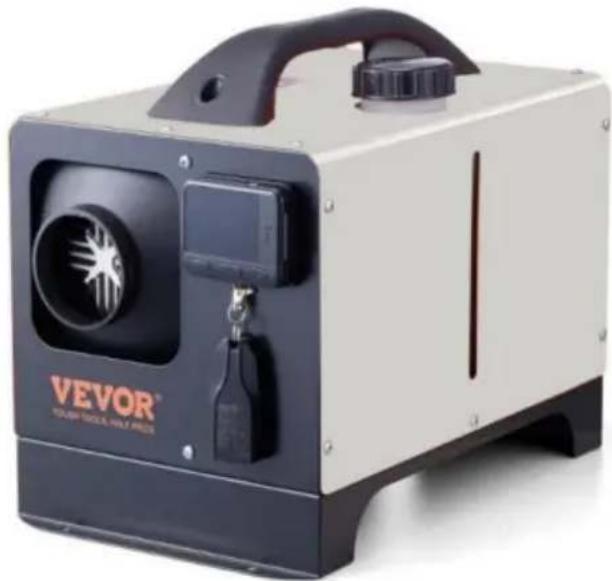
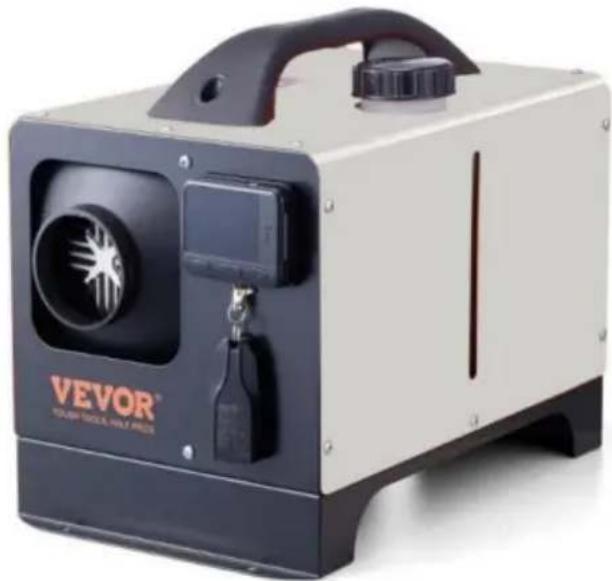
| Appearance | 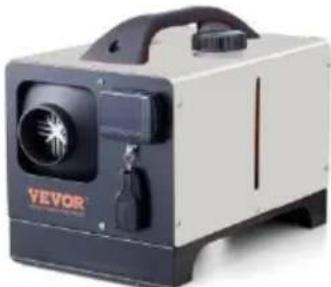 | 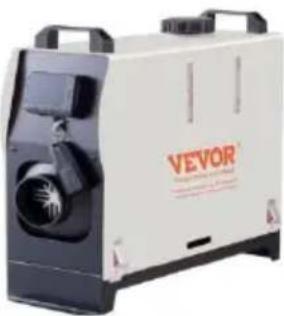 |
| Power ZWH | 8KW | 8KW |
| Heating medium | Air | Air |
| Fuel | Diesel | Diesel |
| Ratings | DC12-24V/40W | DC12-24V/40W |
PACKING LIST
| Model | XMZ-W-D4 | XMZ-L-D4 | |
| Main engine | 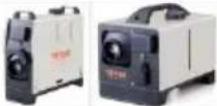 | 1 | 1 |
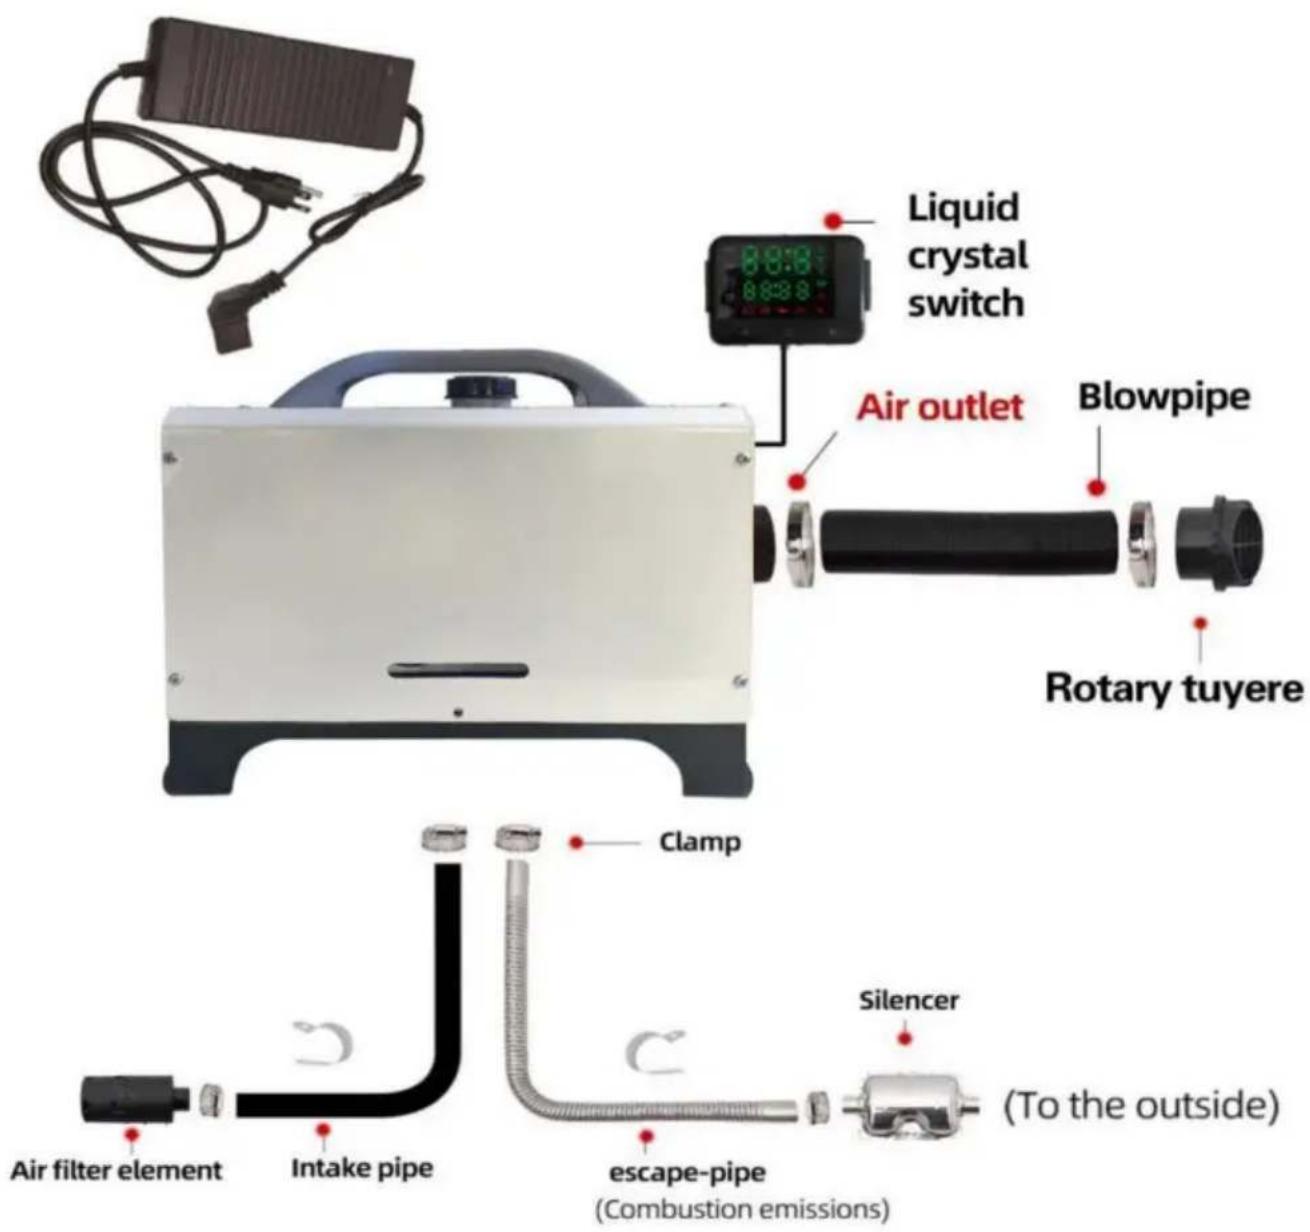
| Intake pipe |  | 1 | 1 |
| Exhaust pipe |  | 1 | 1 |
| Blowpipe |  | 1 | 1 |
| Remote control |  | 1 | 1 |
| Silencer with 1 fixing piece 2 screws | 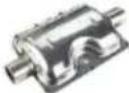 | 1 | 1 |
| Blowpipe clamp |  | 2 | 2 |
| Clamp |  | 4 | 4 |
| Pipe clip |  | 2 | 2 |
| Air filter element |  | 1 | 1 |
| Nut |  | 4 | 4 |
| Screw for the lock catch |  | 10 | 10 |
| Adapter |  | 1 | 1 |
| Exhaust pipe fixing seat | 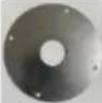 | 1 | 1 |
| External wiring | 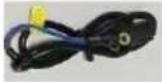 | 1 | 1 |
| Screw rod | 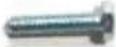 | 4 | 4 |
| Silencer retaining screw |  | 1 | 1 |
| Air vent | 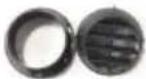 | 1 | 1 |
| Silencer bracket |  | 1 | 1 |
Refer to the installation diagram below and carefully read the precautions when installing or using:
1. No Side Installation:
※ Side installation of the diesel heater will result in oil leaks inside the machine after a period of use, producing a large amount of smoke and carbon monoxide poisoning. During installation, leave a space of 10cm around the heater to ensure good ventilation.
※ If installing the heater inside a building: ① With the heater placed indoors: Make holes in the wall for the exhaust pipe to be placed outdoors. Pay attention to insulating the exhaust pipe as it can become very hot and could cause a fire.
With the heater placed outdoors: It's necessary to extend the exhaust pipe to prevent the exhaust from being sucked into the building from the back fan position of the heater, which can lead to carbon monoxide poisoning.
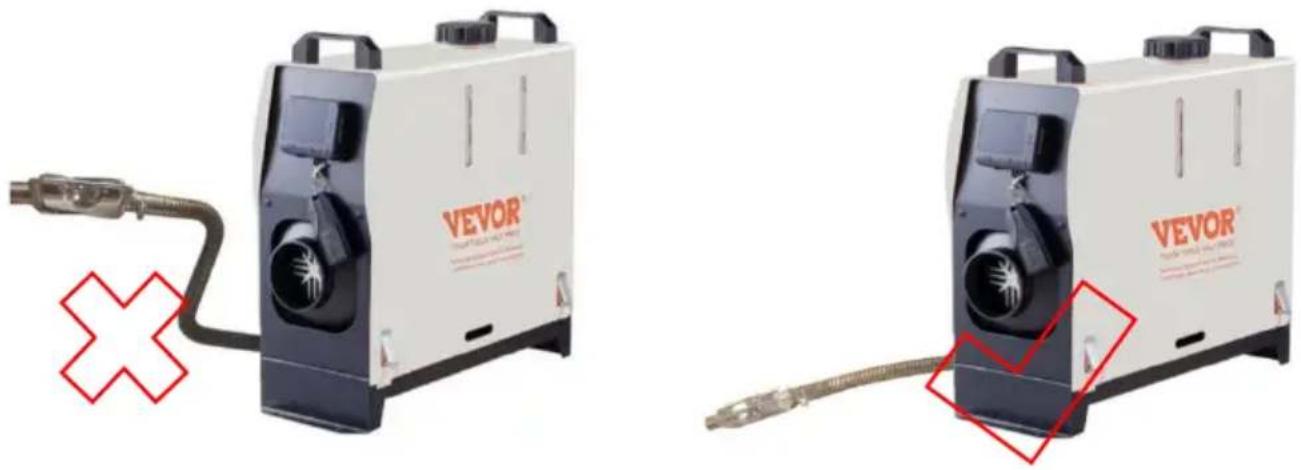
Incorrect Installation Direction Correct Installation Direction
2. Precautions for the power supply:
※ The power supply for the diesel heater must meet the following requirements: Voltage: 12-24V; Current: ≥12A, either from a direct power source or a battery. When powered by a battery, do not charge the battery while using the heater, as insufficient current can cause malfunction. Ensure a firm and secure connection to the battery. Using clamps for fixation can result in poor contact.
※ When extending the power cable for the diesel heater, the wire diameter must be >2 mm². Using a thin wire can lead to insufficient current, causing the heater to not work. After connecting, use insulating tape to protect the connection and prevent electrical leakage, which might lead to fires.
※ Do not disconnect the power when the diesel heater is operating at high temperatures. This can cause backfire due to high temperatures. Repeatedly doing so can cause permanent damage. Solutions:
- If power is cut and you immediately turn on the heater: Wait until the internal temperature of the heater has completely dissipated before turning it on for normal operation.
- If the heater is turned on a long time after a power cut: Incomplete combustion inside may produce a large amount of smoke. Wait for the smoke to clear, the heater will automatically start and operate normally.
3. After the heater is installed, you need to manually pump before turning it on:
※ The fuel line of the heater is long. Before initially starting the heater, manually pump oil up to the fuel inlet. Otherwise, when turned on, the heater will take 30 minutes to detect the fuel (during this time, it will continuously check for signal). Once the ignition plug detects the fuel, it will ignite and heat. Refer to the LCD switch user guide for detailed instructions on manual fuel pumping.
※ When manually pumping fuel, pump just up to the fuel inlet. Over-pumping may result in the heater emitting a large amount of white smoke. Quick solution: disconnect the fuel line, turn on the heater and let it stop naturally, then restart it. Repeat the process until no smoke is emitted. Reconnect the fuel line and turn the heater on to resume normal operation.
※ After starting the diesel heater, continuously blow air into the air pipe using an air pump or a high-speed blower until the heater starts and functions normally. If white smoke appears after operating for a period: This indicates that the atomizing net is clogged. Remove the ignition plug, take out the atomizing net, clean its surface or replace it with a new one.
Cautions for Diesel Heater Power Supply:
※ Diesel heater power supply requirements: Voltage: 12-24V; Current: ≥12A; either a power source or a battery. (Avoid charging the battery while supplying power to the heater, as low current may lead to malfunctions. Ensure a secure battery connection without using clamps to prevent poor contact. Using the car cigarette lighter as a power source is not recommended due to insufficient current.)

It is recommended to use high-grade diesel fuel when refueling the diesel heater. Other types of fuels, such as kerosene, vegetable oil, gasoline, waste oil, etc., cannot be used. Otherwise, the heater will have an unpleasant odor and malfunction during operation.
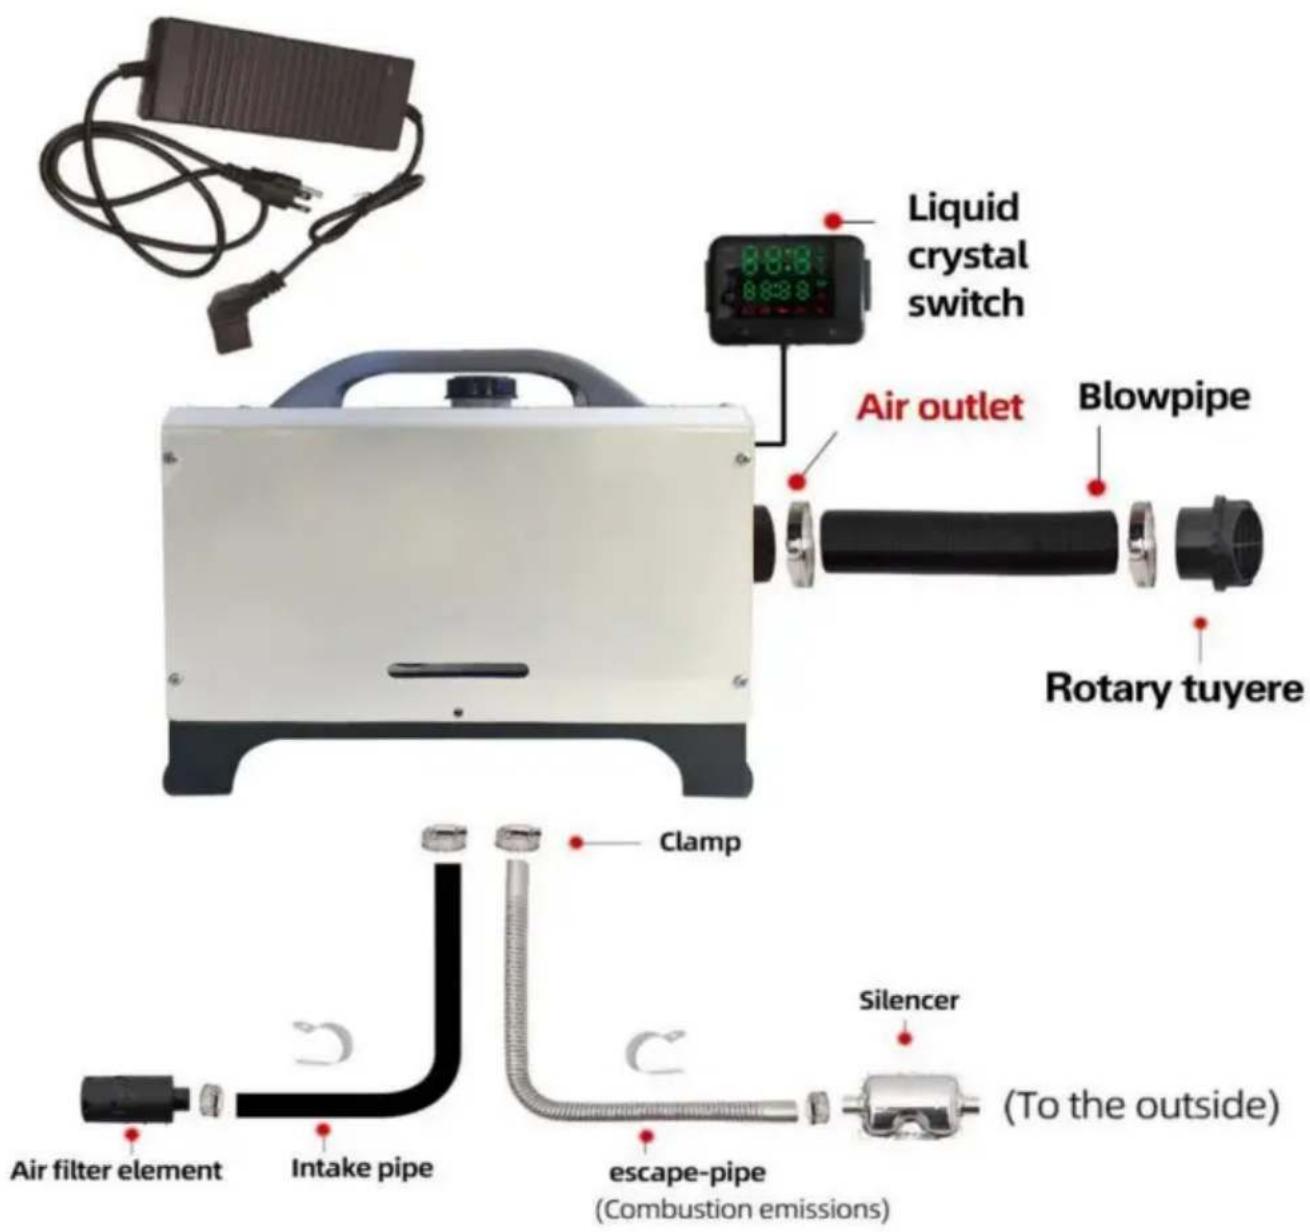
XMZ-W-D4 (Horizontal type)
Parking heater
installation details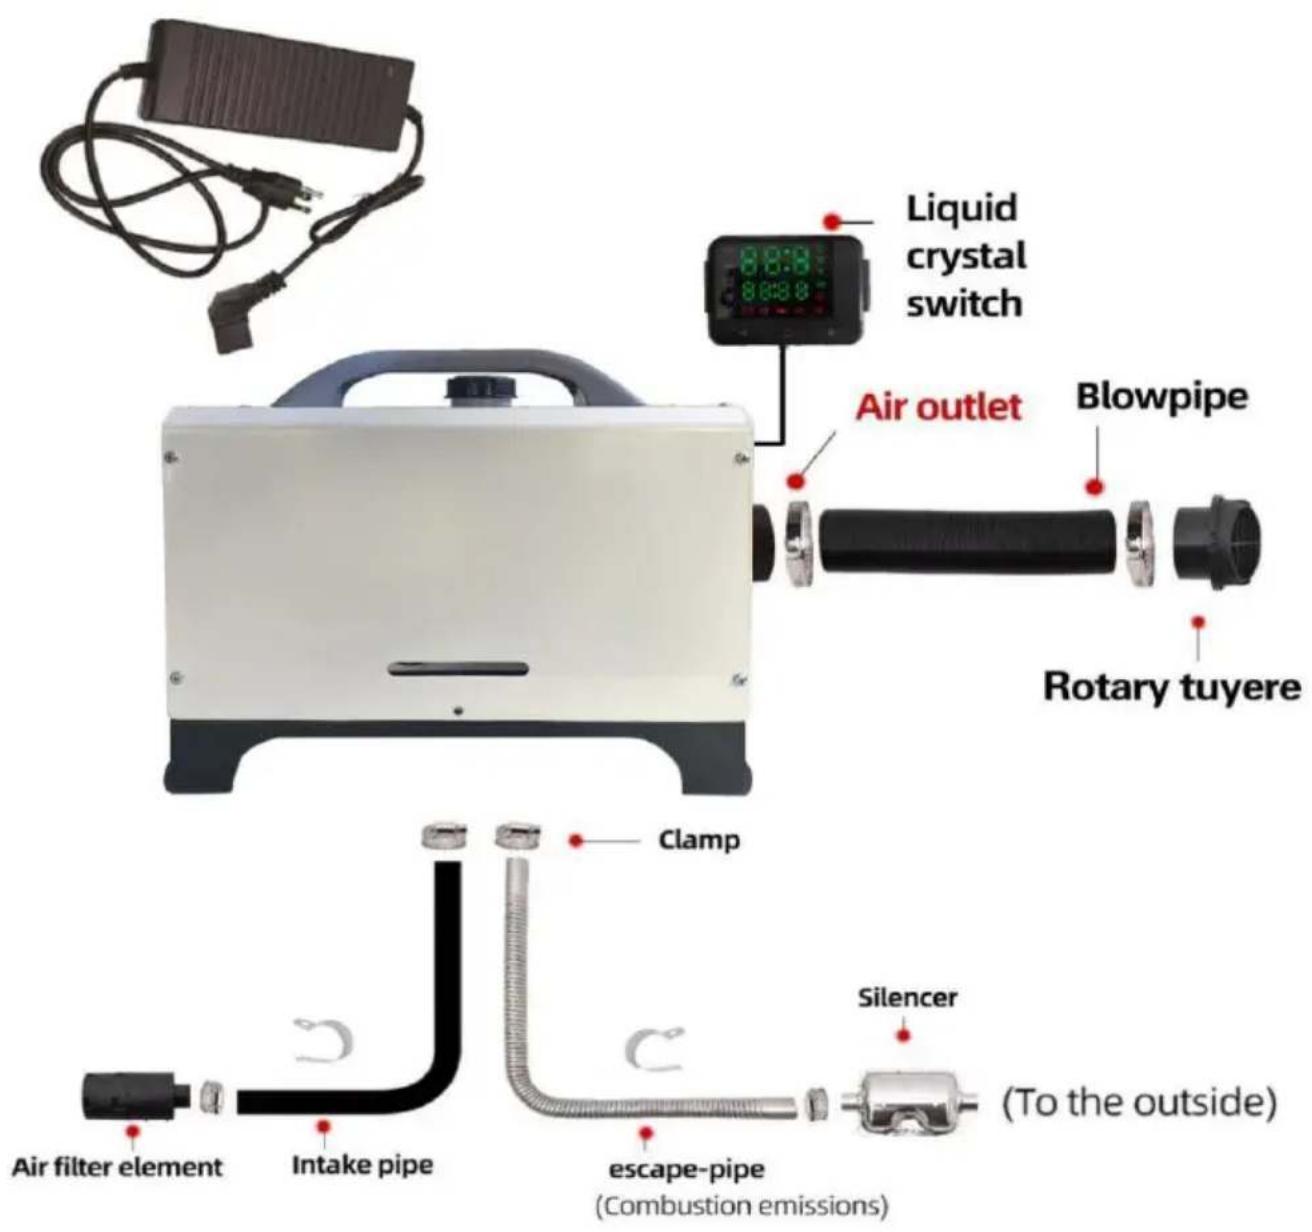

When the heater is just started, the current is relatively high, so an adapter with a voltage of 12-24V and a current of 12A or greater is required for the power supply.
XMZ-L-D4
(Vertical type)
Parking heater
installation details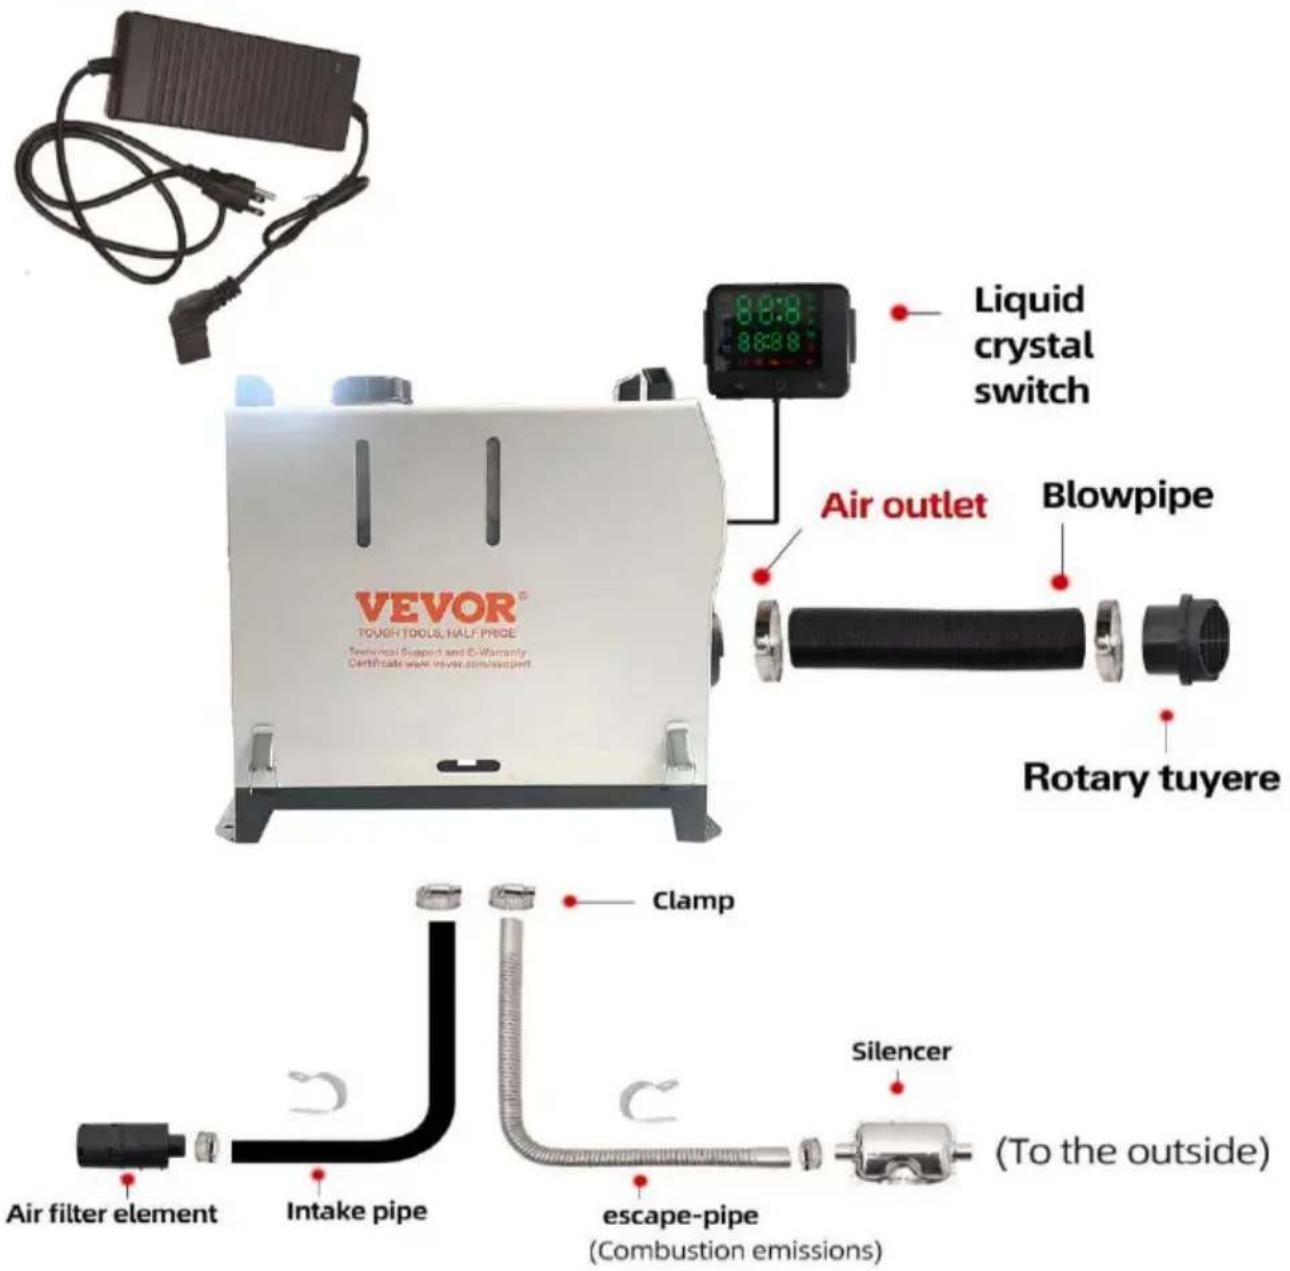

When the heater is just started, the current is relatively high, so an adapter with a voltage of 12-24V and a current of 12A or greater is required for the power supply.
For specific installation, please scan the QR code to view the installation video


Split video QR code Horizontal/Vertical video QR code
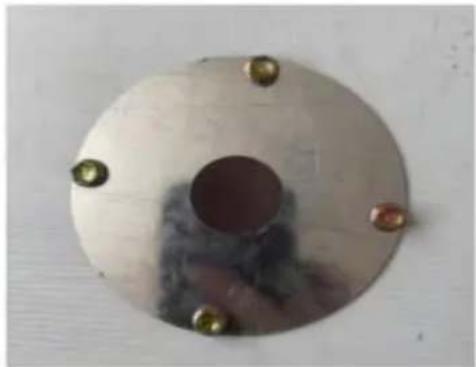
Exhaust Pipe Fixture Installation
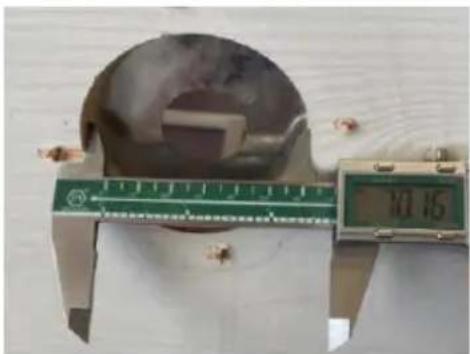
Step 1: Drill a 70mm hole

Step 2: Secure the parts together
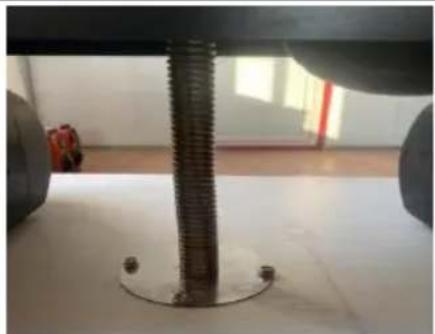
Step 3: Create a dovetail joint and secure the fixture
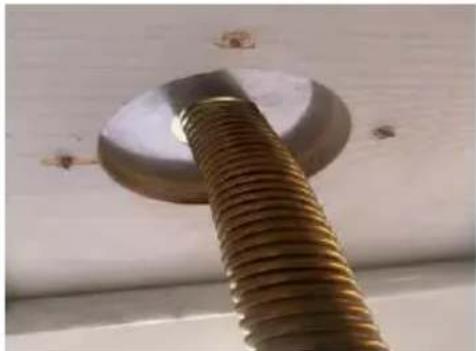
Step 4: Installation complete
Warning:
- The air inlet shall not be blocked, and keep the inlet open and clear.
- Keep the exhaust pipe clear. The exhaust pipe outlet shall be kept away from anything flammable to avoid heating and igniting the flammable goods and
cargo on the ground.
- To ensure optimal combustion, please remember that the smoke exhaust pipe cannot be placed upward but must be placed horizontally or downward.
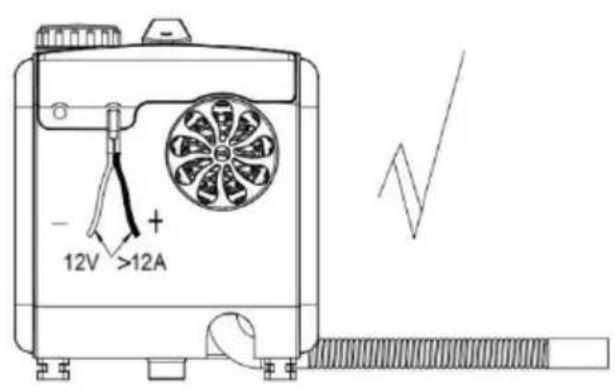
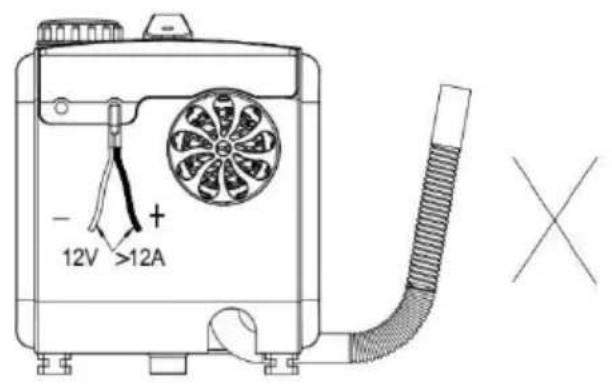
REMOTE CONTROL OPERATION INSTRUCTIONS
After starting the machine for 3-5 minutes, it works normally and heats up. Please wait patiently. There are two types of switches: the standard without Bluetooth function and the high-end with Bluetooth function.
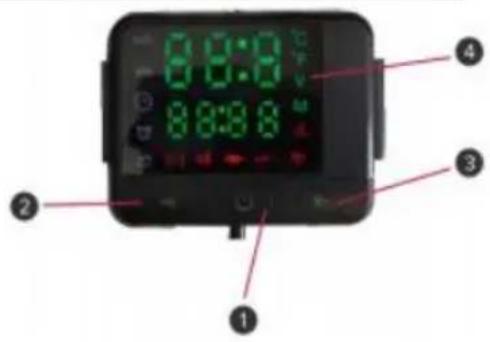
Standard one without Bluetooth function:
Run Mode declaration:
The heater has a manual set, an output power mode, and an automatic constant temperature mode. In the automatic mode, according to the temperature difference between the setting and the room, the heater automatically adjusts output power. In the manual mode, the adjustable power range for Level 1 - and in the automatic mode, the setting temperature is adjustable for 8 \~ 36 (46.4°F \~ 96.8°F).
Instructions:
Turn the heater ON/OFF: Press the ON/OFF key to turn the heater on or off.
- Change the run mode: Press and hold the ON/OFF key for more than 3 seconds to change the run mode. It will cycle between manual mode and automatic mode.
- Adjust temperature units (°C and °F): In automatic mode, press and hold the UP key for more than 3 seconds to switch between °C and °F.
- Adjust output power level or set temperature: In manual mode, use the UP and DOWN keys to adjust the output power. In automatic mode, use the UP and DOWN keys to adjust the temperature setting.
- Remote controller authorization: When the controller is in the "Off" status, press and hold the UP key for more than 2 seconds until the display shows "rte," then release the UP key. Next, press any key on the remote controller. When the controller returns to the off status, authorization has been successful. If not, repeat the above operation.
- Time setting: When the controller is in the "On" status, press and hold the DOWN key for more than 2 seconds until the screen displays "S01," then click the
- DOWN key to select a set project. It will cycle through the projects.
![graph LR A["Local time\nS01\neg: 12:18"] --> B["appointment time\nS02\neg: 07:00"] B --> C["running time\nS03\neg: 05:00"] C --> D["Timer switch\nS04\neg: t - oF"]](/content/2026/04/734756/images/f5e6d7a9d6cc9dafc8673d0b4b293631098cac60514f0cffbb277e3f9573b2d4.jpg)
- Press and hold the ON/OFF key for more than 2 seconds to enter edit mode, and press the ON/OFF key again to exit edit mode. In edit mode, the display blinks the set data. The running time can be set from 0.5 to 10 hours, in 0.5-hour increments. When the timer switch displays "t-oF," the timer is disabled; when it displays "t-oN," the timer is enabled.
- Select language: While the controller is on, press and hold the ON/OFF key and the DOWN key for more than 3 seconds to change the language of the speaker. It will cycle through options such as "u-OF" (mute), "u-En" (English), "u-Ge" (German), and "u-Ru" (Russian).
- Executing independent fuel pumping program: When the controller is in the OFF status, first power it on and press and hold the DOWN key for more than 7 seconds until the display shows "300." Release the DOWN key, and the pump will start pumping fuel. The display will show the remaining time (in seconds) for this program. When the remaining time reaches "0," the pump program is complete. Pressing the ON/OFF key will stop the program.
Warning:
When executing this program, be careful not to pump too much fuel into the heater.
Fault display:
When the heater fails, the display area flashes a fault code, and the fault type is shown in the table below:
| code | Fault Message | Handling Method |
| E-01 | Abnormal voltage | 1. Check that the heater supply voltage type matches actual vehicle voltage.2. Check that the supply voltage is not higher than lower than 9V.3. Check that the main harness connector is not lo connected. |
| E-03 | Ignition plug abnormality | 1. Check whether the ignition plug is connected fals2. The ignition plug is faulty; replace the ignition plus3. Main board is faulty; replace the main board. |
| E-04 | Oil pump abnormality | 1. Check whether the oil pump plug is loose and of falsely.2. Check the main wiring harness for disconnection.3. Oil pump is faulty; replace the oil pump. |
| E-05 | High temperature protection | 1. Incorrect or faulty furnace temperature sensor type replace the sensor.2. Main board is faulty; replace the main board. |
| E-06 | Fan abnormality | 1. Check whether the fan impeller of the car is jan2. Check whether the fan plug is loose and falsely connected.3. The fan is faulty; replace the fan.4. Check whether the wind wheel induction magnet missing or has the wrong polarity.5. Check whether the main board wind speed sensonormal.6. The main board is faulty. Replace the main board |
| E-08 | Flame out due to lack of oil | Checking the fuel tank for lack of oil. |
| E-09 | Overheat protection sensor | 1. Detect whether the outlet air temperature sensor connector is loose and connected falsely.2. The air outlet sensor is faulty, replace the main3. The main board is faulty; replace the main board |
| E-10 | Secondary startup failed | 1. Check whether the oil pump works.2. Check whether the interfaces of the oil circuit are wax and blocked. |
Manufacturer: Shanghai Muxin Muye Youxian Gongsi
Address: Shuangchenglu 803nong11hao1602A-1609shi, Baoshanqu, Shanghai 200000 CN.
Imported to AUS: SIHAO PTY LTD. 1 ROKEVA STREET EASTWOOD NSW 2 Australia
Imported to USA: Sanven Technology Ltd. Suite 250, 9166 Anaheim Place, Rancho Cucamonga, CA 91730
| UK | REP |
YH CONSULTING LIMITED.
C/O YH Consulting Limited Office 147, Cent
House, London Road, Staines-upon-Thames,
Surrey, TW18 4AX
| EC | REP |
E-CrossStu GmbH
Mainzer Landstr.69,
60329 Frankfurt am Main.
VEVOR®
TOUGH TOOLS, HALF PRICE
Technical Support and E-Warranty Certificate
www.vevor.com/support
VEVOR®
TOUGH TOOLS, HALF PRICE
XMZ-W-D4
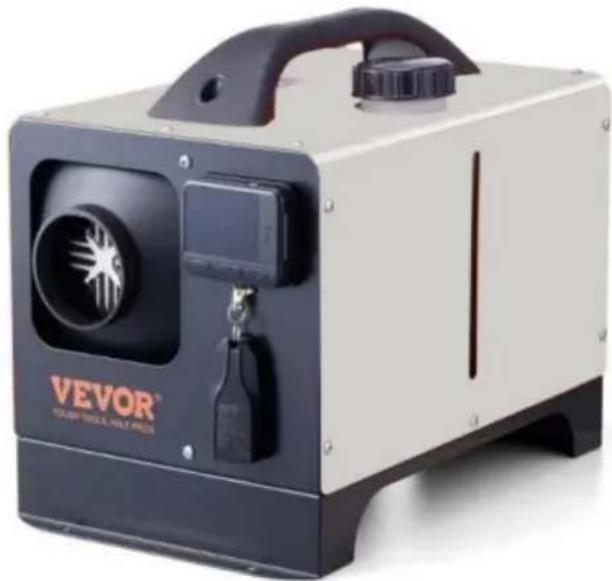
NEED HELP? CONTACT US!
Parking heater installation details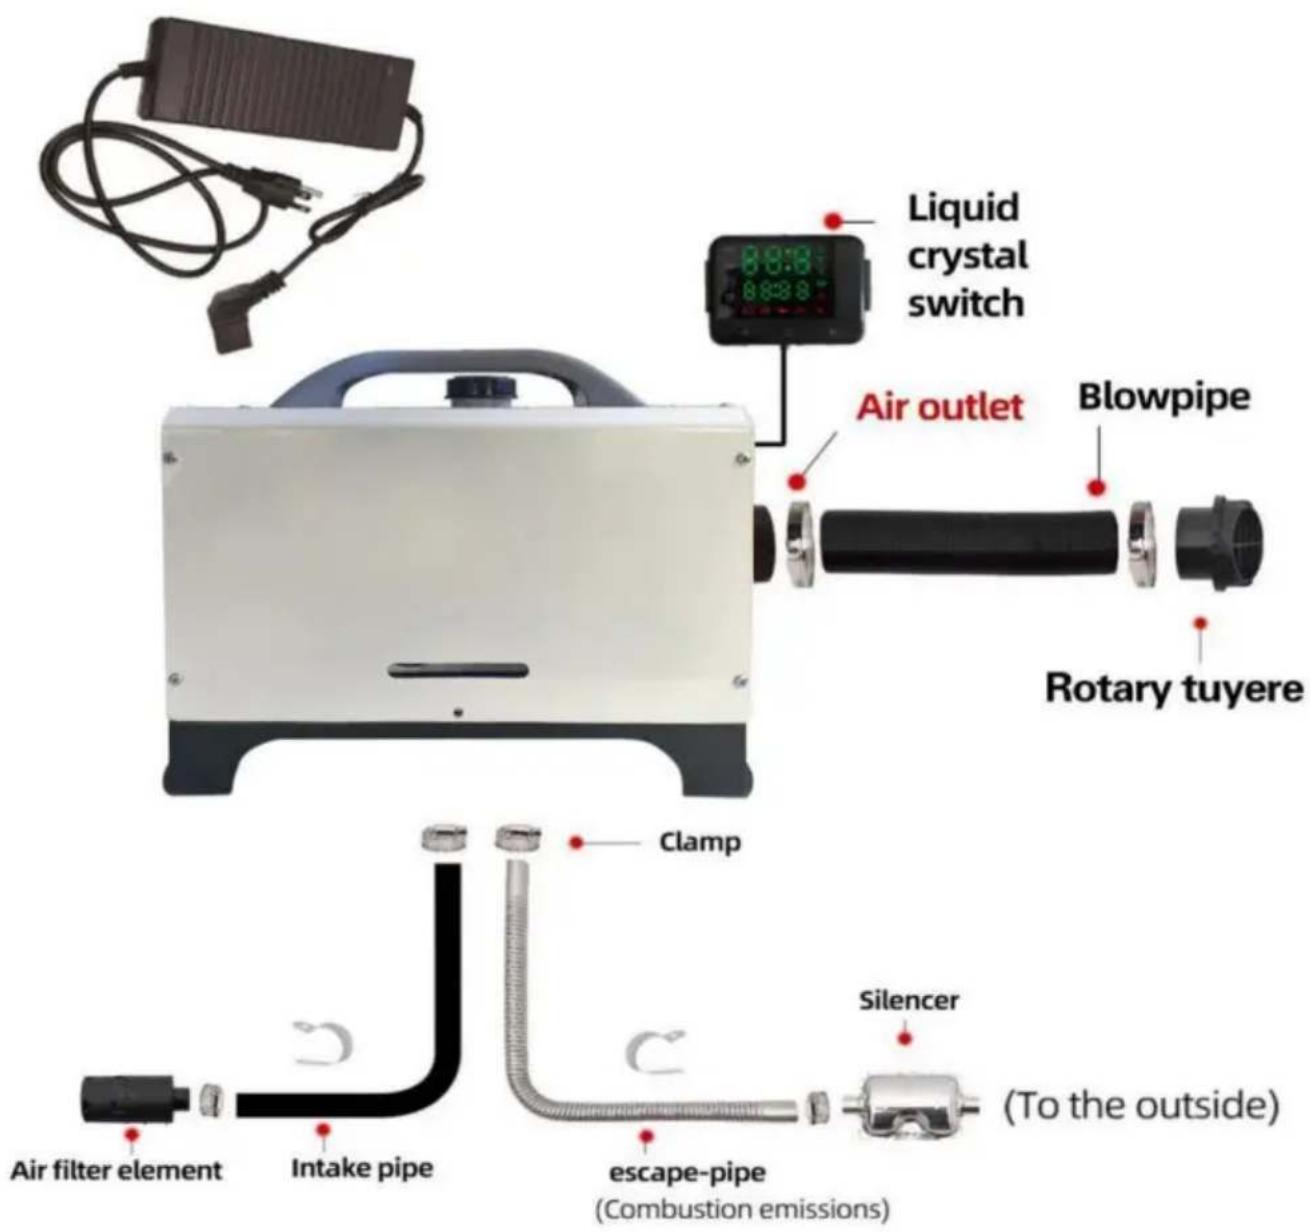

Parking heater installation details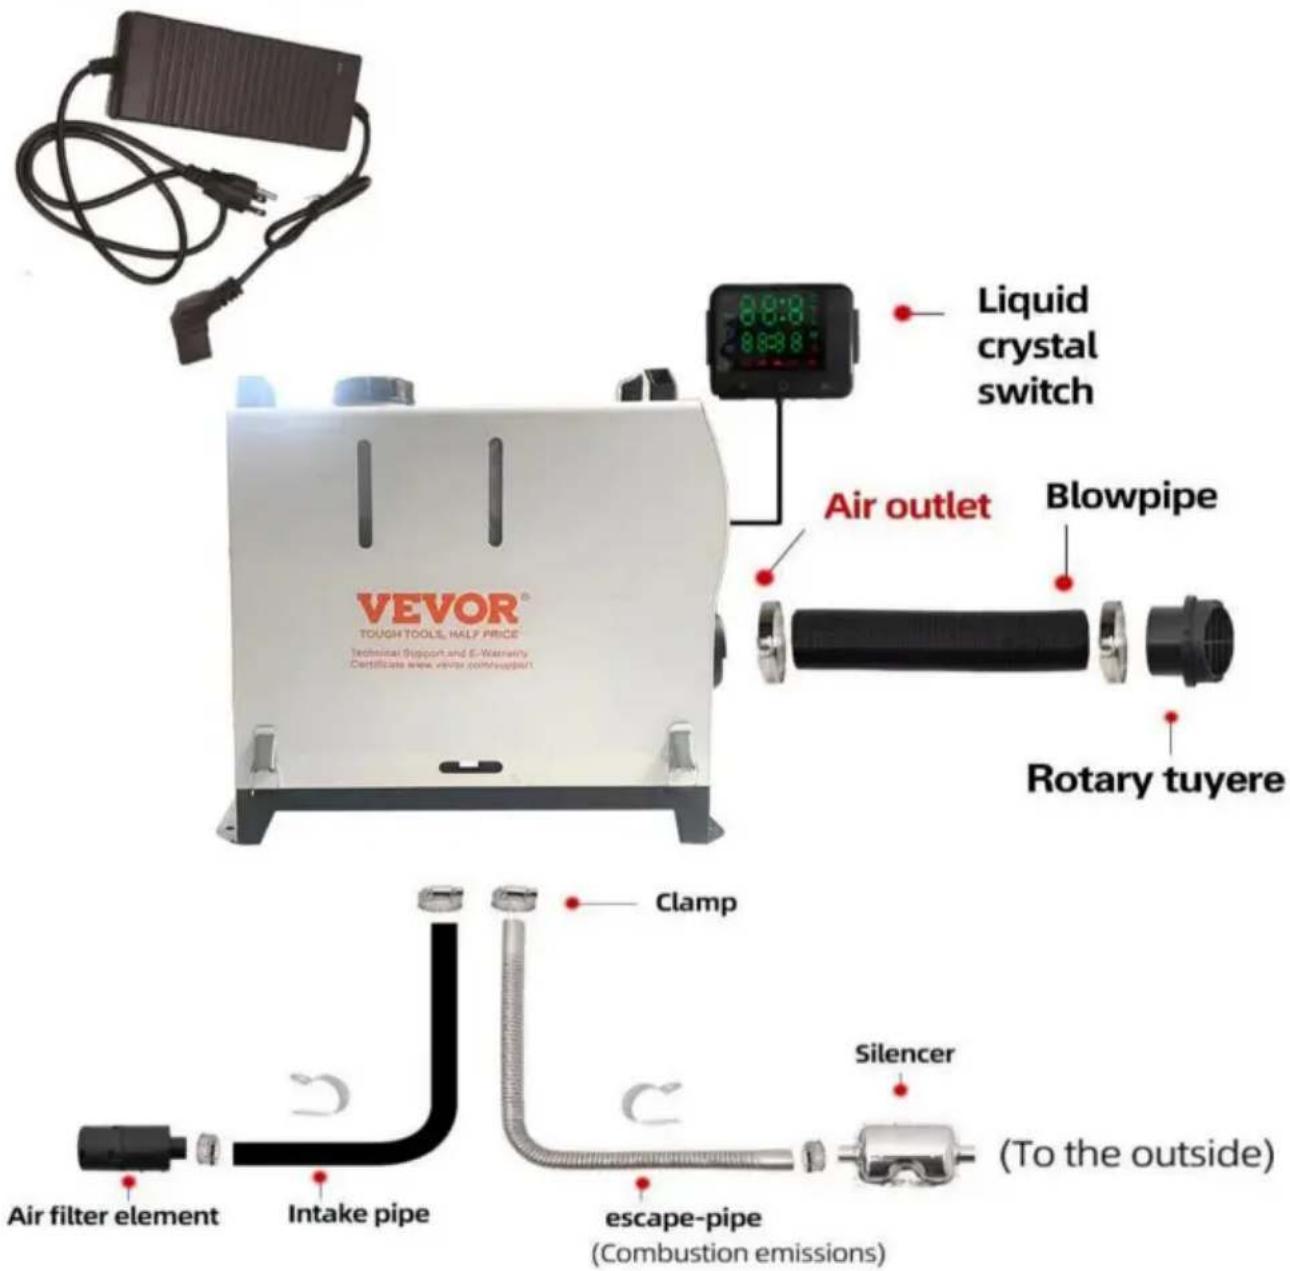

C/O YH Consulting Limited Office 147, Centurion
House, London Road, Staines-upon-Thames,
Surrey, TW18 4AX
| Przedstaw ciel UE |
E-CrossStu GmbH
Mainzer Landstr.69,
60329 Frankfurt am Main.
VEVOR®
TOUGH TOOLS, HALF PRICE
XMZ-W-D4
Parking heater installation details

Parking heater installation details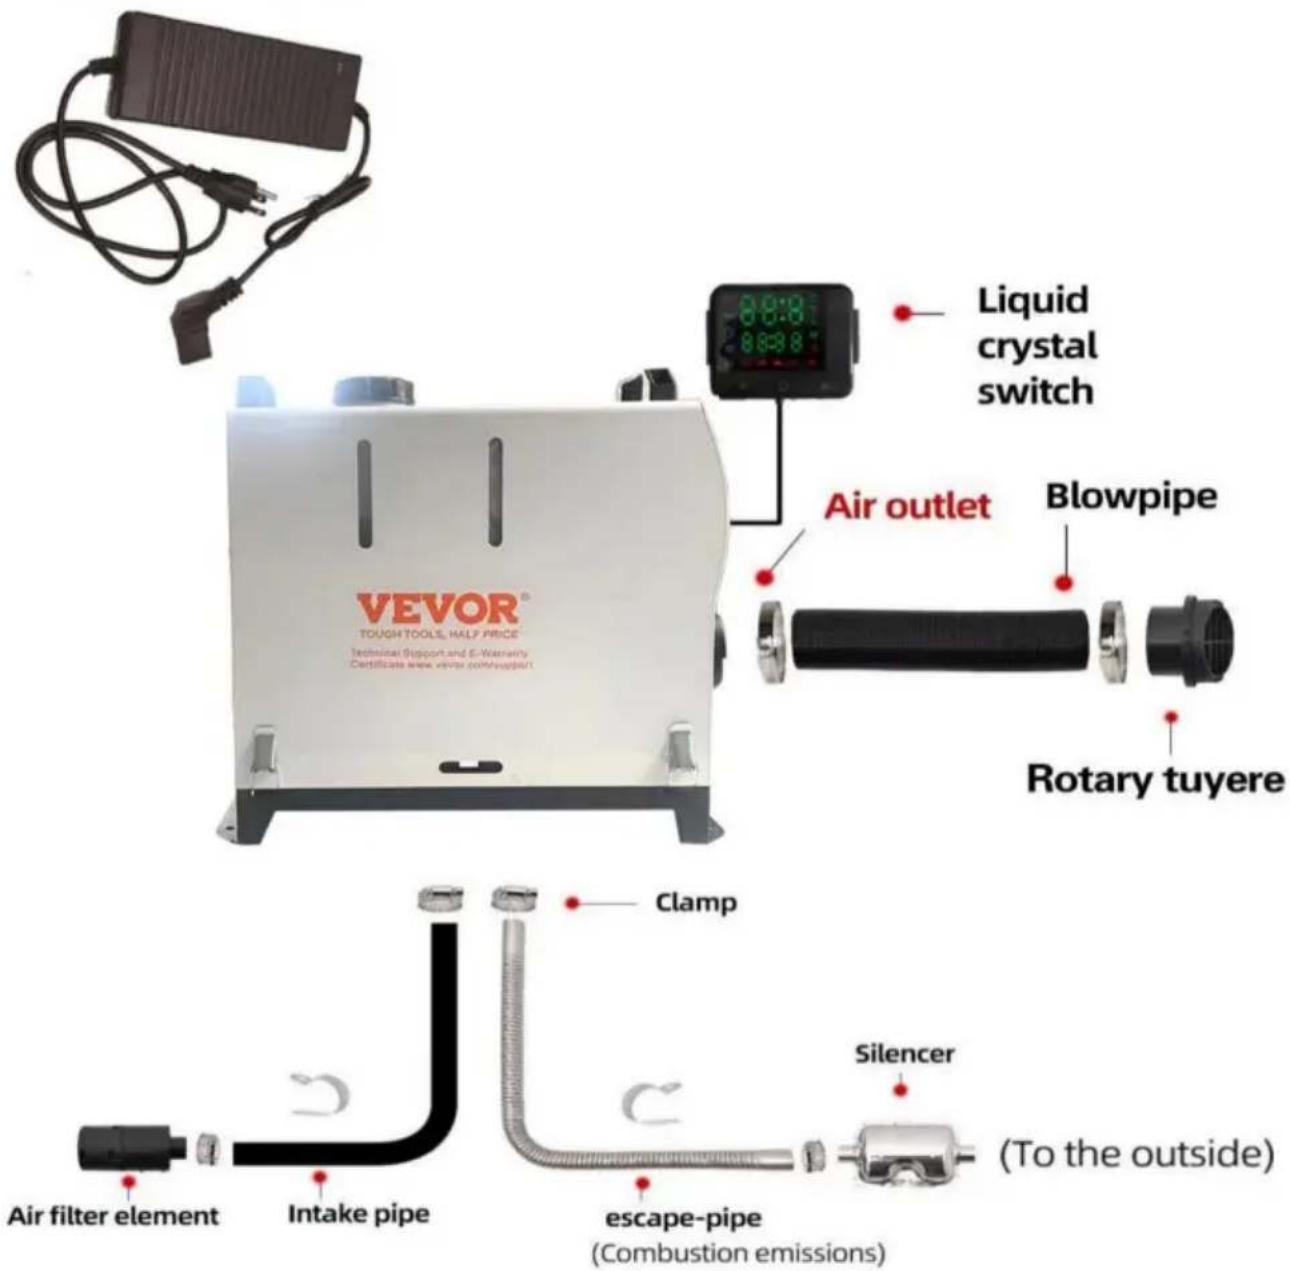

C/O YH Consulting Limited Office 147, Centurion
Haus, London Road, Staines-upon-Thames,
Surrey, TW18 4AX
www.vevor.com/support
VEVOR®
TOUGH TOOLS, HALF PRICE
NEED HELP? CONTACT US!
www.vevor.com/support
Parking heater installation details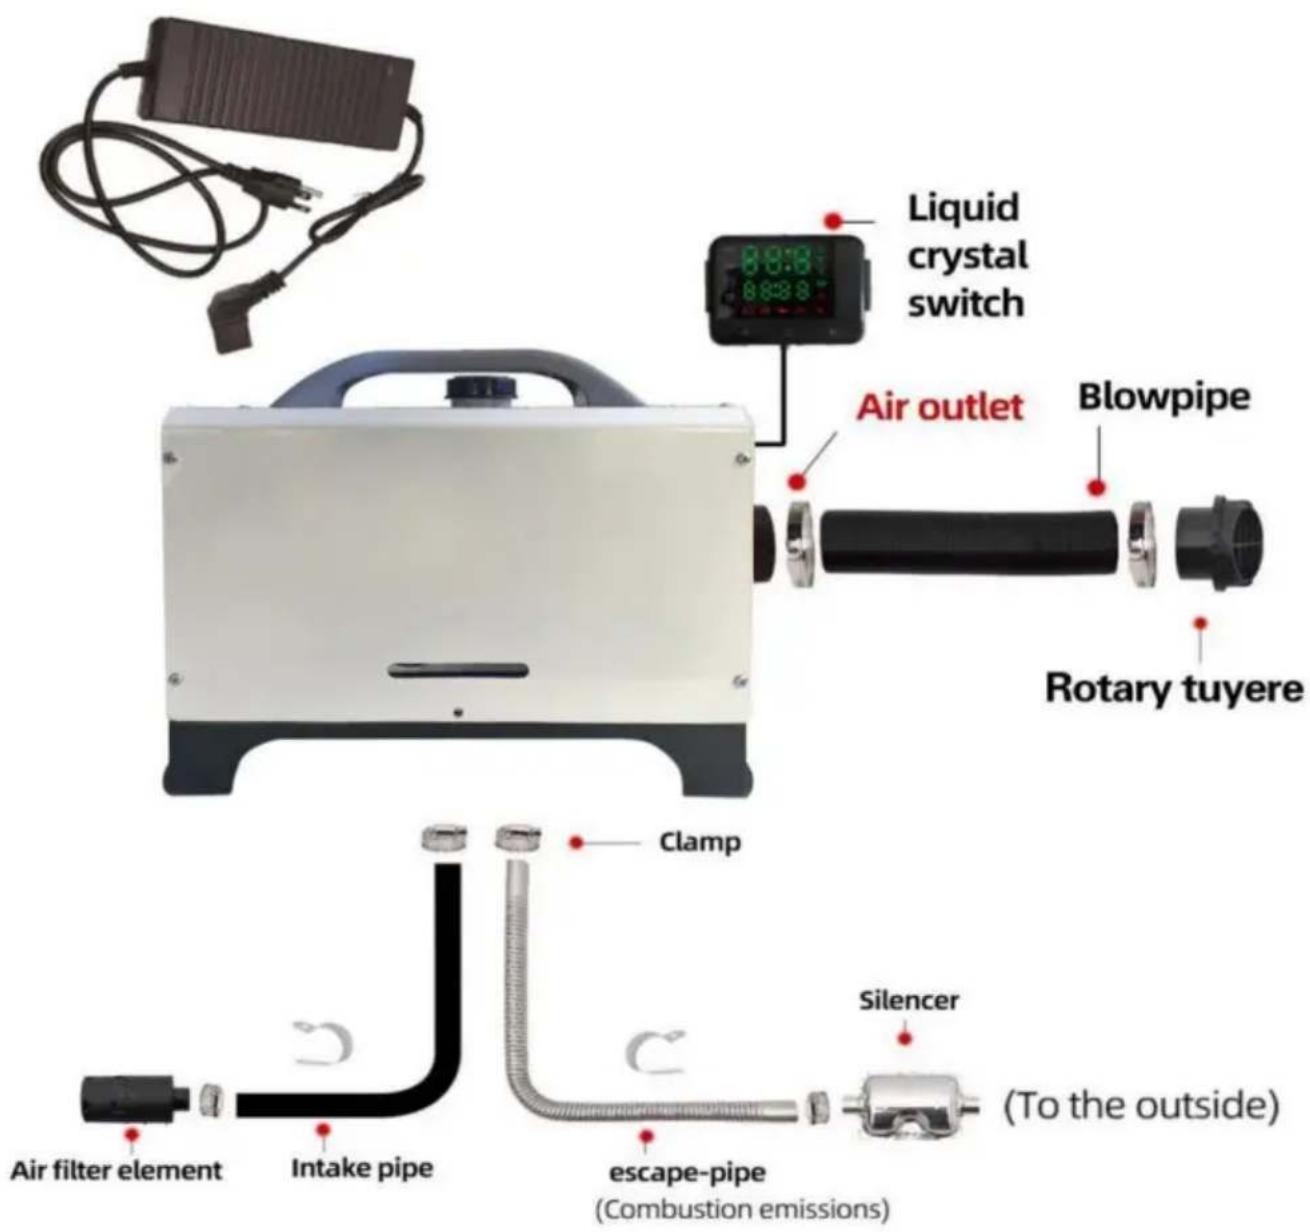

Parking heater installation details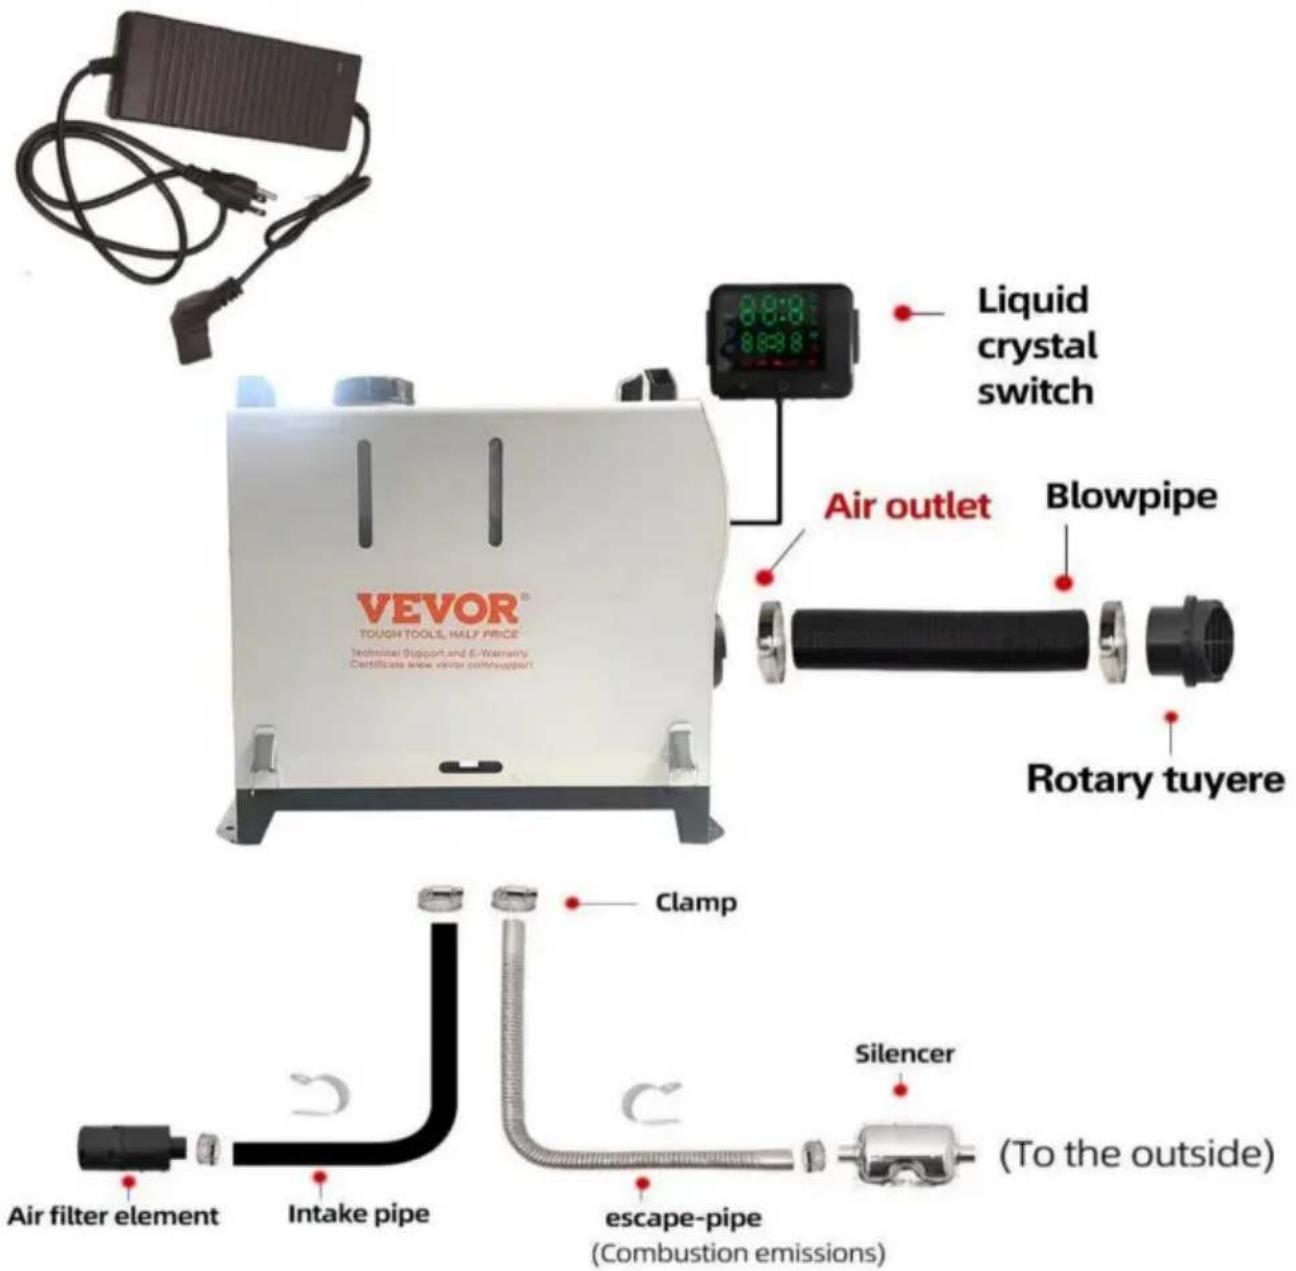

A/S YH Consulting Limited Office 147, Centurion
House, London Road, Staines-upon-Thames,
Surrey, TW18 4AX
| REPRÉSENTANT | DE LA CE |
E-CrossStu GmbH
Mainzer Landstr.69,
XMZ-W-D4
NEED HELP? CONTACT US!
Diesel/petrol station
Parking heater installation details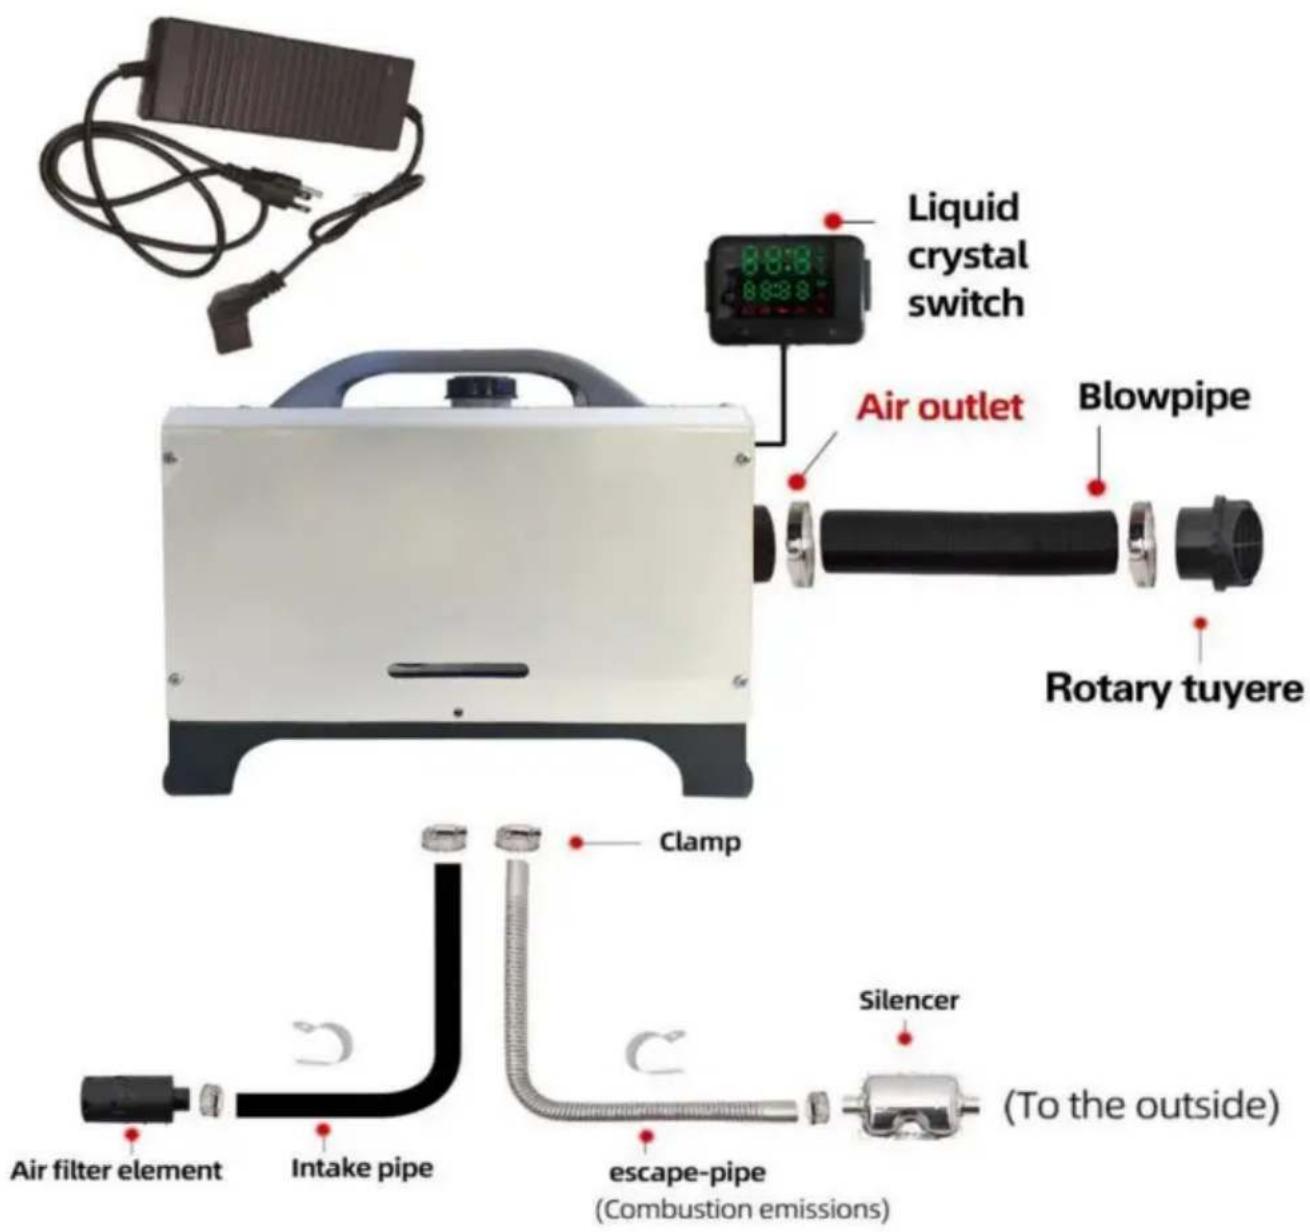

Parking heater installation details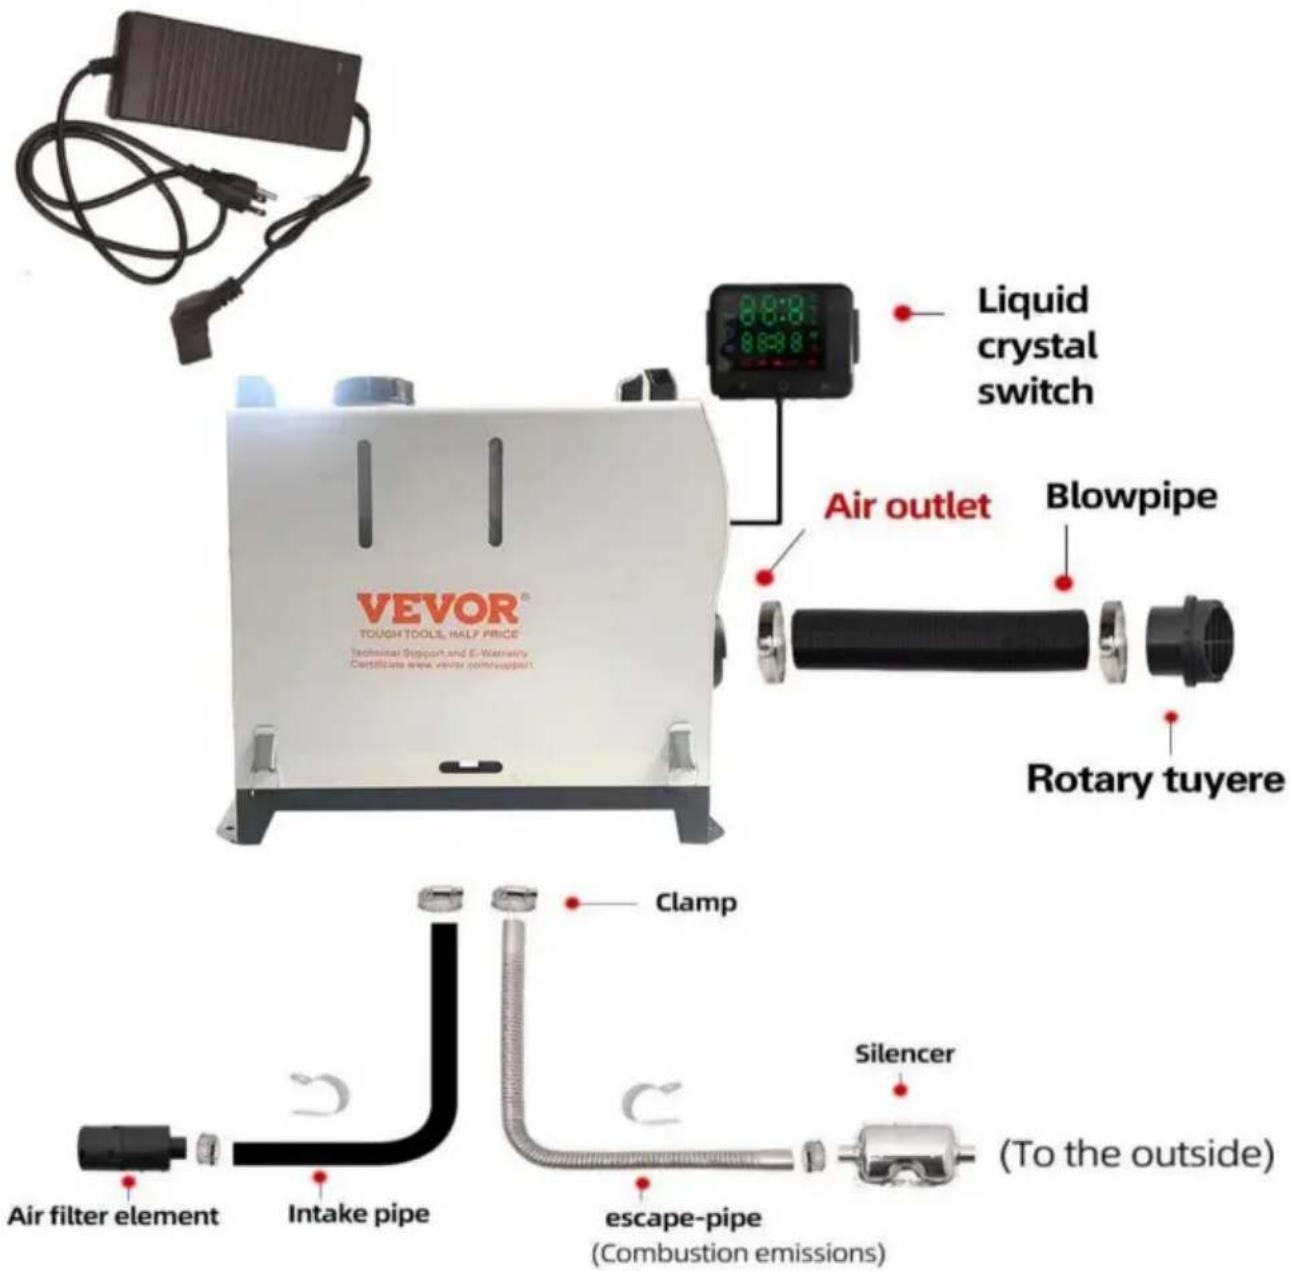

Split video QR code

Horizontal/Vertical video QR code
Step 4: Installation complete
Warning:
C/O YH Consulting Limited Office 147, Centurion
House, London Road, Staines-upon-Thames,
Surrey, TW18 4AX
E-CrossStu GmbH
Mainzer Landstr.69,
60329 Frankfurt am Main.
VEVOR®
TOUGH TOOLS, HALF PRICE
warranty certificate www.vevor.com/support
VEVOR®
TOUGH TOOLS, HALF PRICE
XMZ-W-D4
NEED HELP? CONTACT US!
www.vevor.com/support
Parking heater installation details

Parking heater
installation details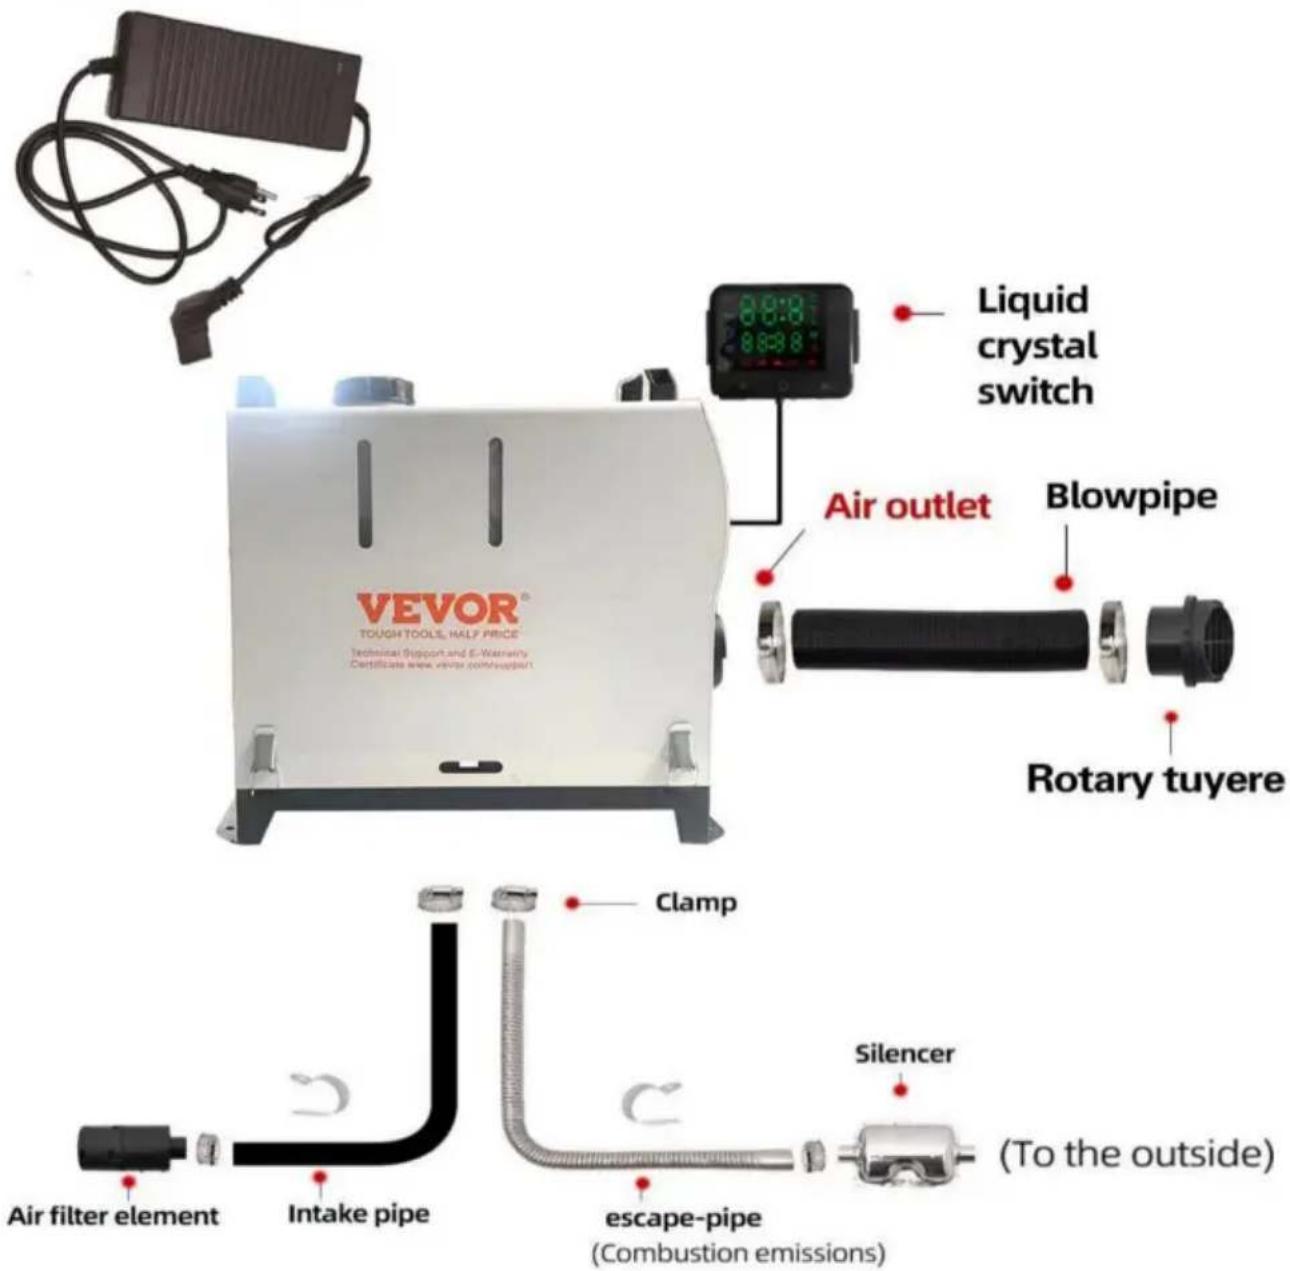

Share video QR code

Horizontal/Vertical video QR code
C/O YH Consulting Limited Office 147, Centurion
House, London Road, Staines-upon-Thames,
Surrey, TW18 4AX
| EC | REP |
E-CrossStu GmbH
Mainzer Landstr.69,
60329 Frankfurt am Main.
VEVOR®
TOUGH TOOLS, HALF PRICE
www.vevor.com/support
VEVOR®
TOUGH TOOLS, HALF PRICE
www.vevor.com/support
Parking heater
installation details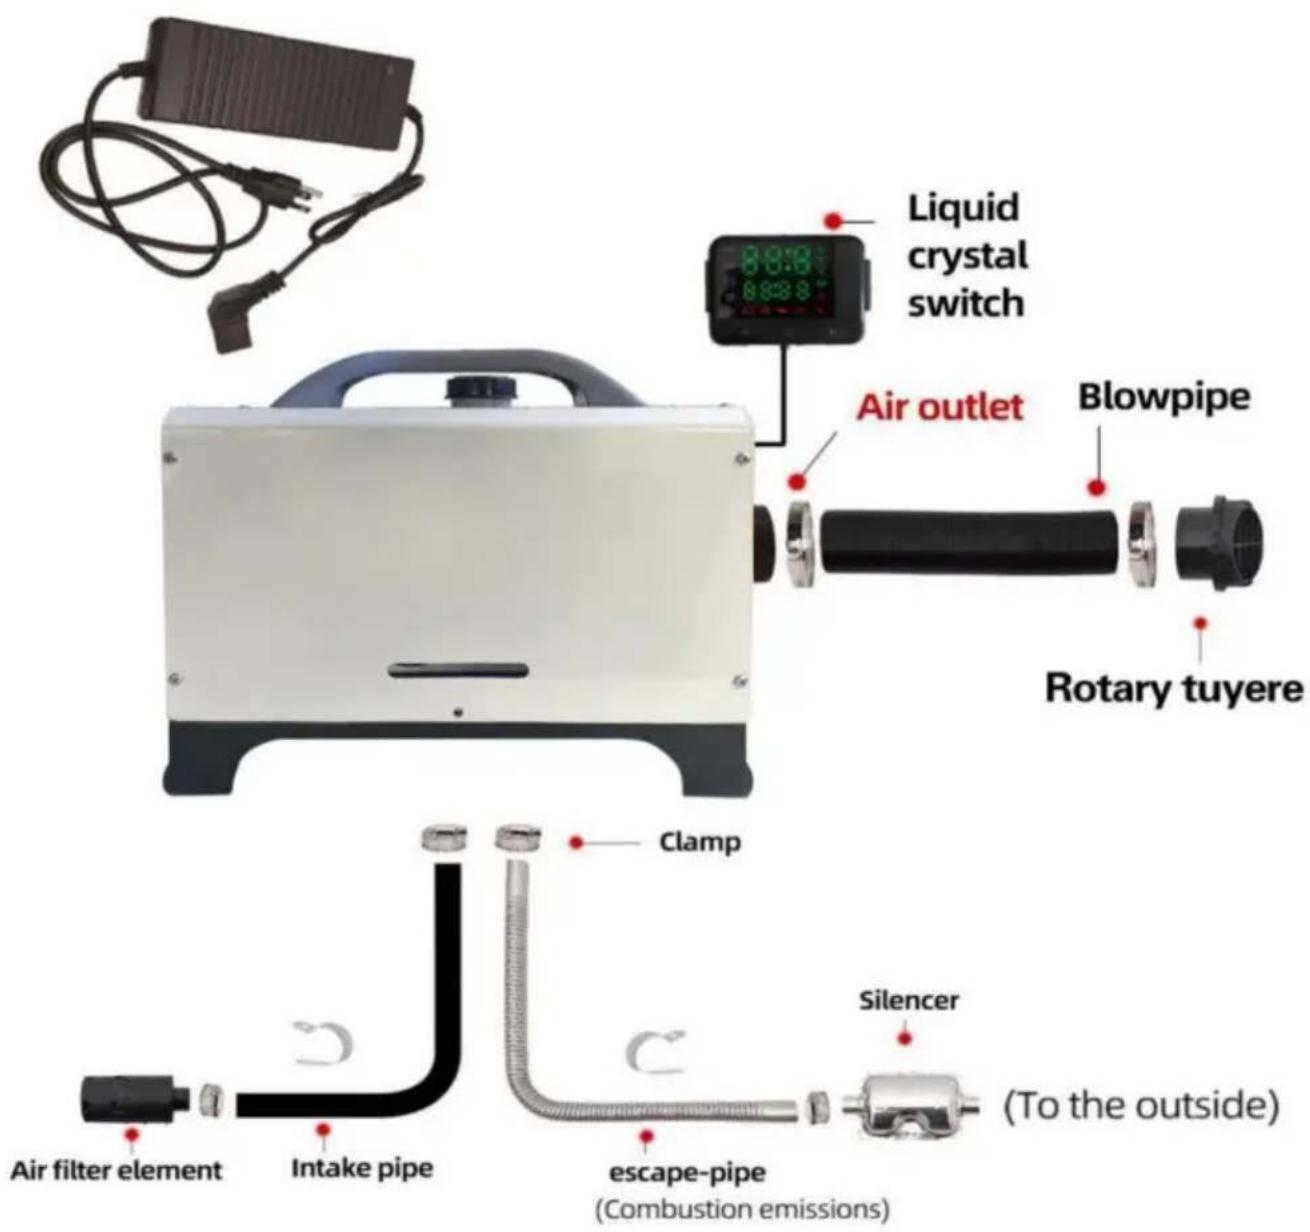

Parking heater
installation details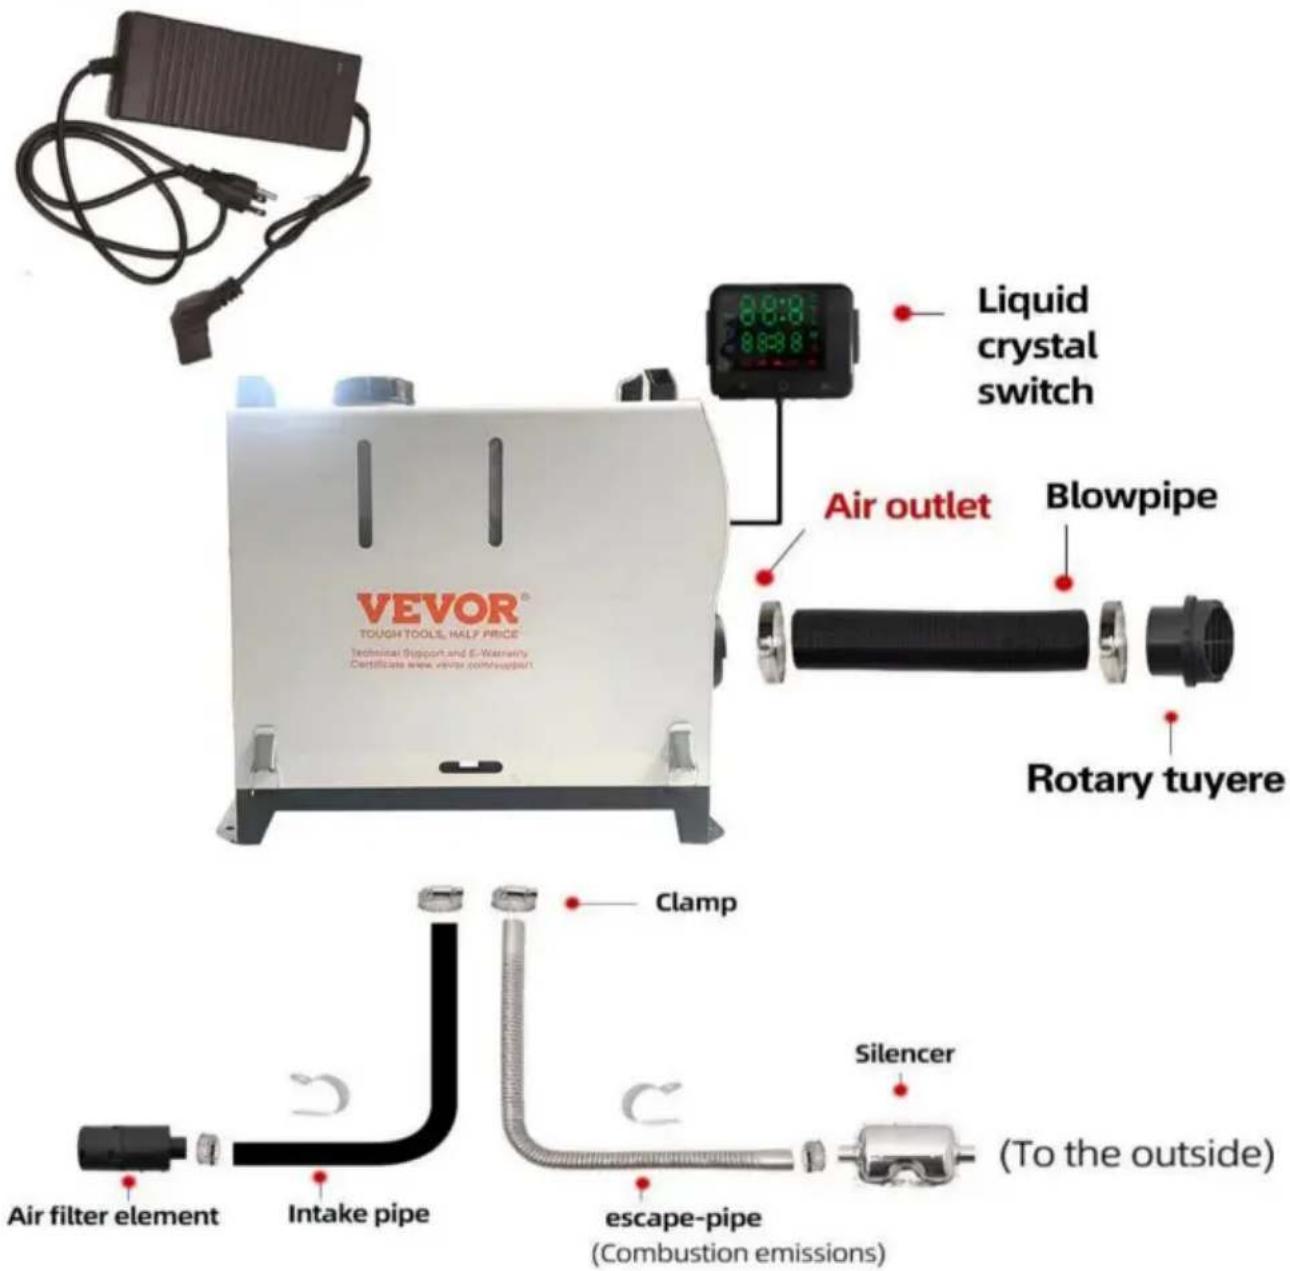

Horizontal/vertical video QR code
House, London Road, Staines-upon-Thames,
Surrey, TW18 4AX
E-CrossStu GmbH
Mainzer Landstr.69,
Model XMZ-W-D4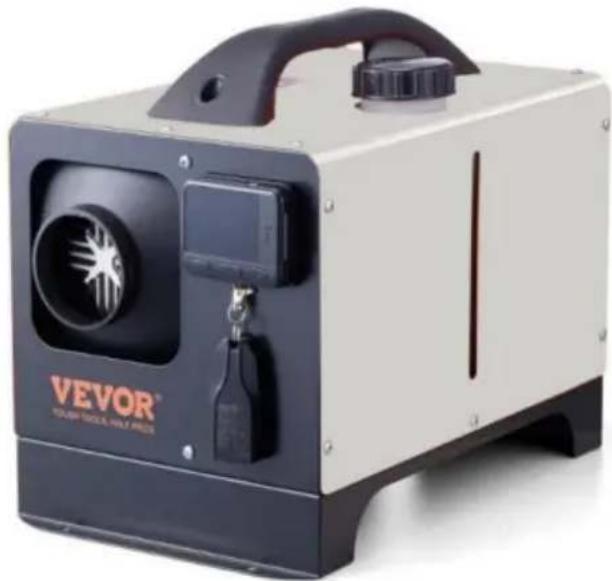
Parking heater installation details

Parking heater installation details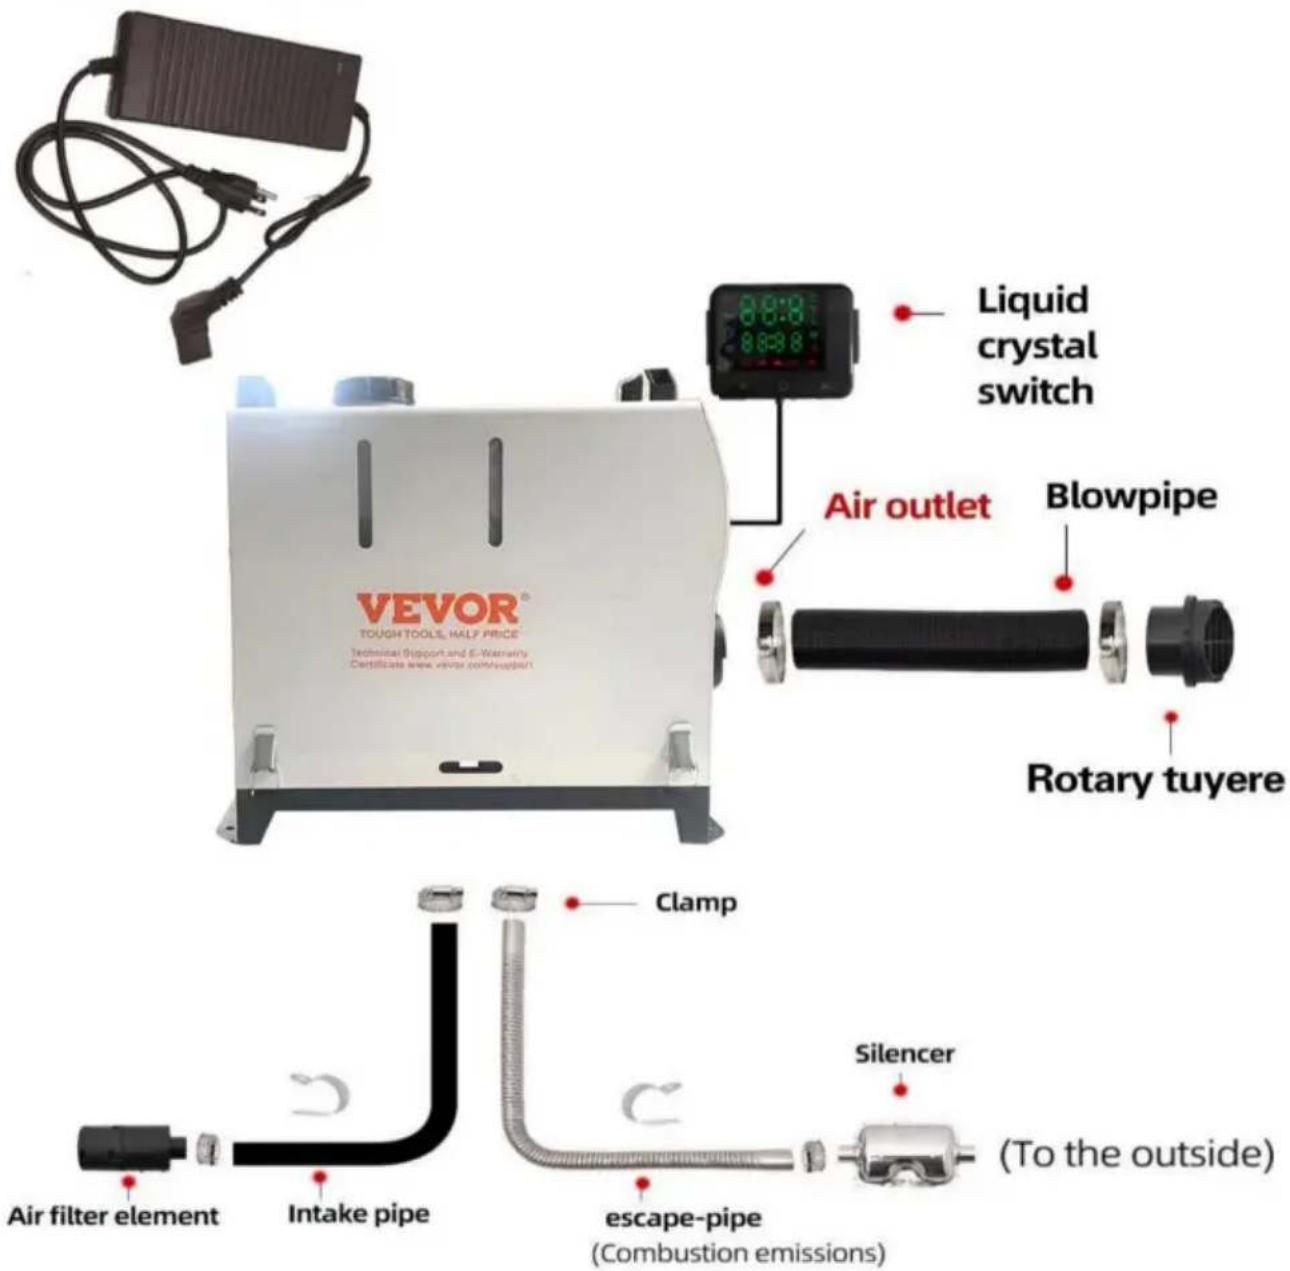

Step 1: drill a 70 mm hole
Imported in AUS: SIHAO PTY LTD. 1 ROKEVA STREETEASTWOOD NSW 2122 Australia
Imported in the USA: Sanven Technology Ltd. Suite 250, 9166 Anaheim Place, Rancho Cucamonga, CA 91730
| RAPPRESENTANZA DEL REGNO UNITO |
YH CONSULTING LIMITED.
C/O YH Consulting Limited Office 147, Centurion
House, London Road, Staines-upon-Thames,
electronics www.vevor.com/support

- DIESEL HEATER
- VEVOR®
- MODEL:XMZ-L-D4 XMZ-W-D
- NEED HELP? CONTACT US
- SAFETY INSTRUCTION
- WARNING
- WARNING: FLAMMABLE MATERIAL
- WARNING: TOXIC MATERIAL
- SAVE THESE INSTRUCTIONS
- FCC INFORMATION
- PRODUCT FUNCTION
- INTERNAL STRUCTURE
- INSTALLATION POSITION
- MODEL
- PACKING LIST
- NO SIDE INSTALLATION
- PRECAUTIONS FOR THE POWER SUPPLY
- AFTER THE HEATER IS INSTALLED, YOU NEED TO MANUALLY PUMP BEFORE TURNING IT ON
- CAUTIONS FOR DIESEL HEATER POWER SUPPLY
- XMZ-L-D
- EXHAUST PIPE FIXTURE INSTALLATION
- REMOTE CONTROL OPERATION INSTRUCTIONS
- STANDARD ONE WITHOUT BLUETOOTH FUNCTION
- RUN MODE DECLARATION
- INSTRUCTIONS
- FAULT DISPLAY
- TOUGH TOOLS, HALF PRICE
- PARKING HEATER INSTALLATION DETAILS
Brand : Vevor
Model : XMZ-L-D4
Category : Heating