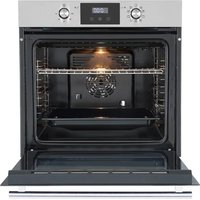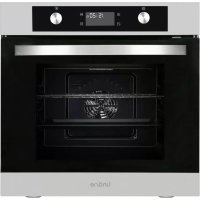
Arnas LABO73MX2 - Oven Linarie - Free user manual and instructions
Find the device manual for free Arnas LABO73MX2 Linarie in PDF.


User questions about Arnas LABO73MX2 Linarie
0 question about this device. Answer the ones you know or ask your own.
Ask a new question about this device
Download the instructions for your Oven in PDF format for free! Find your manual Arnas LABO73MX2 - Linarie and take your electronic device back in hand. On this page are published all the documents necessary for the use of your device. Arnas LABO73MX2 by Linarie.
USER MANUAL Arnas LABO73MX2 Linarie
natural_image
Line drawing of a standard oven with control knobs and a digital timer (no text or symbols)FR
natural_image
Line drawing of an oven with an open door and a lit fuse, shown in 3D perspective (no text or symbols)Vérification finale
text_image
Technical diagram of an oven with numbered parts for identificationtext_image
Labeled diagram of an oven with numbered parts for identificationnatural_image
Technical line drawing of a rectangular electronic component with mounting holes and internal cavity (no text or symbols)Grille de fer
natural_image
Isometric view of a metal grate with slats and central grating (no text or symbols)Tablette latérale
natural_image
Pure diagram of a coiled spring or heat exchanger structure without any text, labels, or symbolsRails télescopiques
This appliance have 9 functions available.

natural_image
Technical line drawing of a mechanical assembly with no visible text or symbolsnatural_image
Technical line drawing of a mechanical assembly with no visible text or symbolsnatural_image
Technical line drawing of a layered electronic device with a directional arrow indicating rotation (no text or symbols)Installer
natural_image
Symbol of a trash bin crossed with a diagonal line, no text or numbers presenthello@linarie.com.au
www.linarie.com.au
Suivez nous sur
@Linarie.Appliances

© Linärie
Electric Built-in Oven
LABO73MX2
LABO73MB2
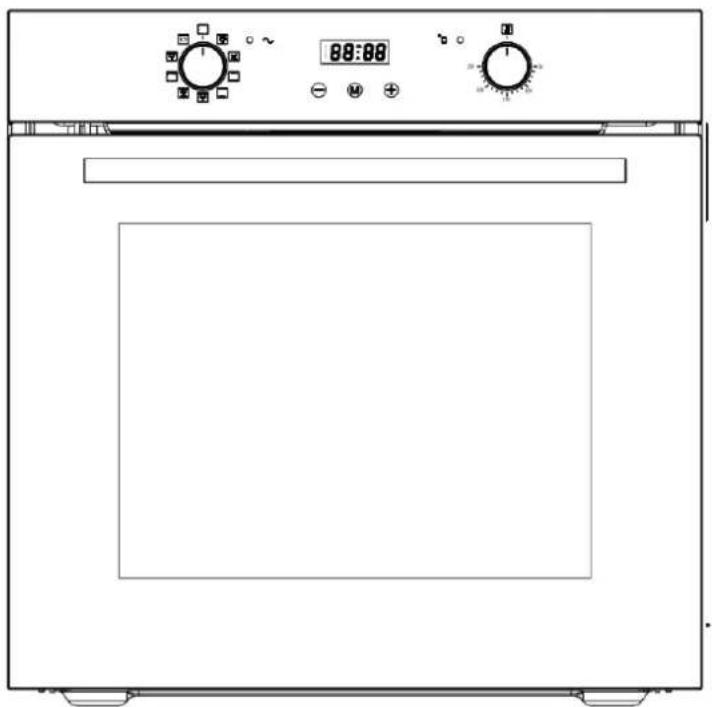
natural_image
Line drawing of a standard oven with digital gauges and control panel (no text or symbols)CONGRATULATIONS
Congratulations and thank you for choosing Linärie to introduce a new comfort of cooking in your home. We are sure you will find your new appliance a pleasure to use and a great asset to your kitchen.
This appliance complies with all relevant safety requirements in Australia. Inappropriate use can, however, lead to personal injury and damage to property.
In order to operate the unit correctly and safely, please read this instruction manual carefully before installation and usage. This user manual which provides you with all required instructions related to safety, installation, use and maintenance of the appliance.
For future reference, please store this booklet in a safe place and ensure that all users are familiar with the contents. Pass them on to any future owner of the appliance.
Record Model & Serial Number
Model
Serial Number ....
Register your product www.linarie.com.au

IMPORTANT
Adherence to the directions for use in this manual is extremely important for health and safety. Failure to strictly adhere to the requirements in this manual may result in personal injury, property damage and affect your ability to make a claim under Linärie's manufacturer's warranty provided with your product. Products must be used, installed and operated in accordance with this manual. You may not be able to claim on Linärie's manufacturer's warranty in the event that your product fault is due to failure to adhere this manual.
Correct Conditions of Use
- The appliance is intended for use in the home and similar environments only. It is not intended for commercial use.
- Danger of fire: do not store items on the cooking surface.
- A steam cleaner is not to be used.
- The appliance is not intended to be operated by means of an external timer or separate remote control system.
- Ensure that the appliance is switched off before replacing the lamp to avoid the possibility of electric shock. Regarding the instructions for installation and electric connection of the appliance, thanks to refer to the below paragraph of the manual.
i Linärie do not assume any liability for damage arising from non-adherence to these documents and from improper assembly. The electricity connection must be made by a qualified specialist. Installation must comply with the valid standards, regulations and laws. All safety and warning information and the operating and installation instructions must be complied with.
TABLE OF CONTENTS
- Important safety information .... 2
- Installation 10
Installation and connection.... 11
Prior to start up of the appliance.... 13
- Your new oven 13
- Control panel 17
Digital timer control.... 19
-
Operation instructions.... 22
-
Before using the oven for the first time 31
- How to operate the oven 32
- Troubleshooting 33
- Maintenance and cleaning 39
1. Important safety information
This User Instruction Manual contains important information, including safety & installation points, which will enable you to get the most out of your appliance.
Please keep it in a safe place so that it is easily available for future reference; for you or any person not familiar with the operation of the appliance.
Warning:
● The appliance and its accessible parts become hot during use. Care should be taken to avoid touching heating elements.
● Children less than 8 years of age shall be kept away unless continuously supervised.
●This appliance can be used by children aged from 8 years and above and persons with reduced physical, sensory or mental capabilities or lack of experience and knowledge or they have been given supervision or instruction concerning
use of the appliance in a safe way and understand the hazards involved.
Children shall not play with the appliance.
Cleaning and user maintenance shall not be made by children without supervision.
●A steam cleaner is not to be used.
- Accessible parts may become hot during use. Young children should be kept well away when in use.
● Do not use harsh abrasive cleaners or metal scrapers to clean the oven door glass as this can scratch the surface, which may result
in the oven glass shattering.
● Do not use abrasive products to clean the glass door panel to avoid scratching it. Otherwise, severe failure might happen to the appliance.
●The appliance must not be installed behind a decorative door in order to avoid overheating.
●The air must not be discharged into a flue that is used for exhausting fumes from appliances burning gas or other fuels.
Operation:

Warning! Danger of
fire!
- Do not allow paper or cloth to come in contact with any heating element.
● Never store or use corrosive chemicals, vapors, flammables or nonfood products in or
near oven. It is specifically designed for use when heating or cooking food. The use of corrosive chemicals in heating or cleaning will damage the appliance and could result in injury
● If food inside an oven should ignite, keep door closed. Switch off the oven and disconnect from supply power.
● Exercise caution when opening the door. Standing to the side, open the door slowly and slightly to let hot air and/or steam escape. Keep your face clear of the opening and make sure there are no children or pets near the oven. After the release of hot air and/or steam, proceed with your cooking. Keep doors closed at all time
unless necessary for cooking or cleaning purposes.
- Only use utensils that are suitable for use with ovens.

Warning!
Danger of explosion!
● Liquids and other foods must not be heated in sealed containers since they are liable to explode.
● If smoke is observed, switch off the oven and keep the door closed in order to stifle any flames.
● Do not allow any accessories or electric cables to contact the hot parts of the appliance.

Warning!
Hot surfaces! Risk of burns!
● During use the appliance becomes hot. Care should be taken to avoid
touching heating elements inside the oven.
● Warning! Accessible parts may become hot during use. Young children should be kept away.
● Never move racks or pans when they are hot. Wait until they cool.
Safety advices:

IMPORTANT!
Always switch off the electricity supply at
the mains during installation and maintenance.
General Information
● This appliance is designed for domestic household use and can be built into a standard kitchen cabinet or housing unit.
● Certain types of vinyl or laminate kitchen furniture are particularly prone to heat damage or discolouration at temperatures below the guidelines given above.
●The appliance surfaces will become hot during use and retain heat after operation.
● Any damage caused by the non-compliance of temperature tolerance of oven during installation or by the too close distance between the furniture and the oven will be borne by the owner.
●This appliance is not intended for use by persons (including children) with reduced physical sensory, or mental capabilities, or by those who lack experience and knowledge, unless they have been given supervision and instruction concerning the use of the appliance by a person responsible for their safety.
Installation
●The oven must be installed in accordance with the installation instructions and all
measurements must be followed.
● All installation work must be carried out by a competent person or qualified electrician.
Children
● Please dispose of the packaging material carefully. Packaging material can be dangerous to children.
● Make sure to keep children away from the appliance, children should be supervised to ensure that they do not play with the appliance. It might be dangerous to allow the children to touch the appliance.
General Safety
● Do not place heavy objects on the oven door or lean them on the oven door when it is open, as it may cause damages to the oven door hinges.
● Do not place those baked hot oil or fat unattended
on unattended areas, as it will be a fire risk.
● Do not place pans or baking trays directly on the base of the oven cavity, even if aluminum foil is placed below them.
● Do not allow cable or plug to come into contact with the heating areas of appliance.
● Do not install the appliance next to curtains or soft furnishings.
● Do not attempt to lift or move cooking appliances by using the oven door or handle, as this may cause damage to the appliance or result in injury to the person lifting the appliance.
Electrical safety
● If the supply cord is damaged, it must be replaced by the manufacturer, its service agent or similarly qualified persons in order to avoid a hazard.
●The appliance must be placed in such a way, that the power supply is accessible at all times.
● Before connecting the appliance to the power supply, check that the power supply voltage and current rating corresponds with the power supply details shown on the appliance rating label.
● Never use a damaged appliance! Disconnect the appliance from the power source and contact your supplier if it is damaged.
● Danger of electric shock! Do not attempt to repair the appliance yourself. In case of malfunction, repairs are to be conducted by qualified personnel only.
●To avoid damaging the cord, do not squeeze, bend or chafe it on sharp edges. Keep it away from hot surfaces and open flames as well.
● Lay out the cord in such a way that no unintentional pulling or tripping over it is possible.
● Do not open the appliance casing under any circumstances. Do not insert any foreign objects into the inside of the casing.
● Never use accessories which are not recommended by the manufacturer. They could pose a safety risk to the user and might damage the appliance. Only use original parts and accessories.
- Keep the appliance away from any hot surfaces and open flames. Always operate the appliance on a level, stable, clean and dry surface. Protect the appliance against heat, dust, direct sunlight, moisture, dripping and splashing water.
● Do not place objects with open flames, e.g. candles,
on top of or beside the appliance.
●WARNING: Ensure that the appliance is switched off before replacing the lamp to avoid the possibility of electric shock.
●The fixed wiring for applicant shall have an all-pole disconnection device.

Safety:
●Attention, the glass is extremely fragile. Always wear gloves when handling.
● For your safety, this product is made of tempered glass. This type of glass is highly resistant but has the feature to retain the "memory" of shocks.
●Therefore, it should handle the product with the greatest care to avoid shocks and twists,
especially during installation.
●Avoid installing this type of product in areas where it would be highly exposed to shocks.
● Do not let children play with the product.
● Do not stick adhesive film on the glass surface. In case of breakage, it would generate large pieces that could be dangerous
Electrical connection

Danger of electric shock!
● Any electrical installation must be carried out by an authorised professional.
● All fittings must be installed by a competent person in accordance with local regulations. If in doubt, consult a qualified electrician.
● Important! Always switch off the electricity supply at the mains during installation and
maintenance. We recommend that the fuse is withdrawn or circuit breaker switched off at the distribution board whilst work is in progress.
●This product must be earthed – if no earth feed wire is available, consult an electrician.
● Means for disconnection must be incorporated in the fixed wiring in accordance with the wiring rules. To achieve this install appropriate switched fused connection unit.
● Note! A switched fused connection unit having a contact separation of at least 3mm in all poles should be connected in fixed wiring.
● Connect the incoming positive, neutral and earth cables to the terminals of the switched fused connection unit. Ensure connections are tight.
●The spur outlet must still be accessible even when
your oven is located in its housing to enable the appliance to be disconnected from the mains supply.
Cleaning
●Always disconnect the power supply prior to cleaning the appliance. If the switched fused connection unit is difficult to reach, shut off the power supply by using the corresponding circuit breaker at the distribution board.
● Clean the appliance thoroughly before first use. The oven should be cleaned regularly and any food deposits removed.
● Never clean the oven surfaces by steam cleaning.
●The oven cavity should only be cleaned with warm soapy water, using either a sponge or soft
cloth. No abrasive cleaners should be used.
● Any stains that may appear on the bottom of the oven will have originated from food splashes or spilt food, these splashes occur during the cooking process. These could possibly be a result of the food being cooked at an excessively high temperature or being placed in cookware that is too small.
● You should select a cooking temperature and function that is appropriate for the food that you are cooking. You should also ensure that the food is placed in an adequately sized dish and that you use the drip tray where appropriate.
2. Installation
Before installation
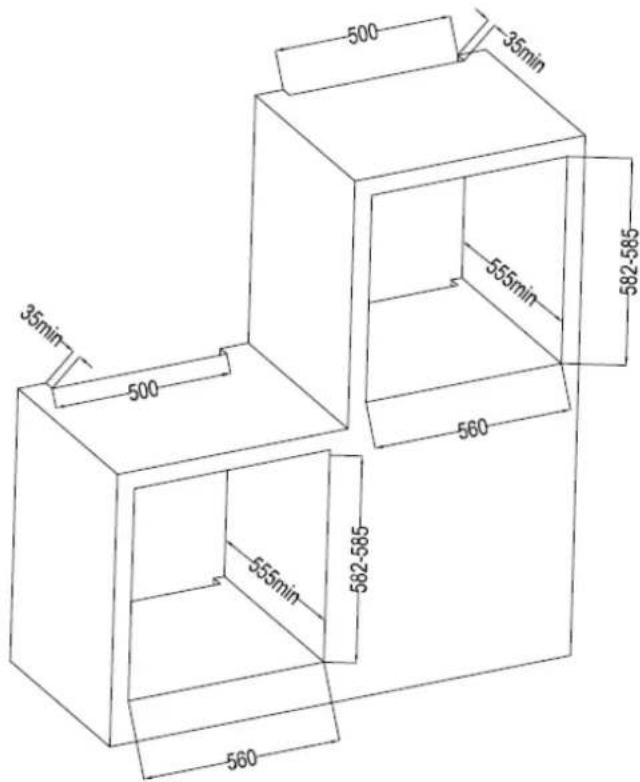
The appliance should be installed built in the cabinet . It should be keep safety distance with appliance and the kitchen walls.
Detail pls check below picture . (values in mm).
✿ Surfaces, synthetic laminates and adhesives used must be heat resistant(100°C minimum), and neighboring unit fronts up to 70°C.
Kitchen cabinets must be set level and fixed. A gap of 5 mm is required between the appliance and surrounding unit fronts.
If there is a drawer beneath the oven, a shelf must be installed between oven and drawer.
Installation and connection
▲ Material damage!
The door and/or handle must not be used for lifting or moving the appliance.
For installation the appliance must be connected in accordance with all local gas and/or electrical regulations.
✨ Carry the appliance with at least two persons.
Use the slots or wire handles located at both sides to move the appliance.

Connection to the mains supply This appliance must be earthed.
Our company shall not be held responsible for any damage caused by using the appliance without an earthed socket. Risk of electric shock, short circuit or fire by unprofessional installation! The appliance may be connected to the mains supply only by an authorized qualified person and the appliance is only guaranteed after correct installation.
Risk of electric shock, short circuit or fire by damage of the mains lead! The mains lead must not be clamped, bent or trapped or come into contact with hot parts of the appliance. If the mains lead is damaged, it must be replaced by a qualified electrician.
The mains supply must correspond to be data specified on the rating plate of the appliance. The appliance mains cable must correspond to the specifications and the power consumption.

Risk of electric shock!
Before starting any work on the electrical installation, please disconnect the appliance from the mains supply.
Installation
1、Slide the oven through the cabinet aperture, align and secure.
2、Fix your oven with the 2 screws and washers as indicated in the figure.
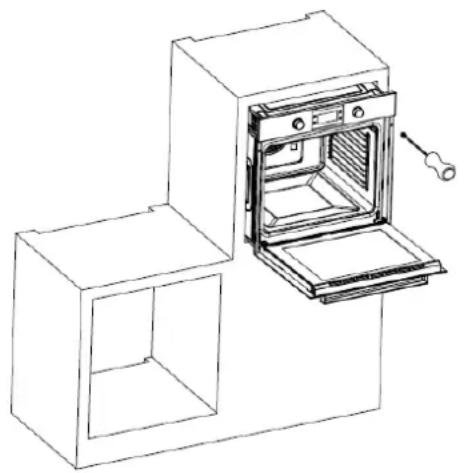
natural_image
Line drawing of an oven with a mounted door and chimney, shown in 3D perspective (no text or symbols)Final check
- Connect the appliance to the mains supply and switch on the mains supply.
- Check function.
Prior to start up of the appliance
Once this simple operation has been carried out the oven is ready to use for cooking.
This appliance is exclusively for domestic use.
▶ Use the oven to cook food only.
Before cooking, make sure all oven accessories that are not required are removed from the oven.
➢ Pre-heat the oven to the cooking temperature before using it.
Place the cooking trays in the center of oven and leave space in between when using more than one, so that the air can circulate.
Do not put oven trays on the base of the oven or cover it with aluminium foil. This will cause thermal accumulation. The cooking and roasting times will not coincide and the enamel may be damaged.
➢ Try to open the oven door as little as possible to see the food (the oven light remains on during cooking).
Take care when opening the door to avoid contact with hot parts and steam.
3. Your new oven
Oven overview
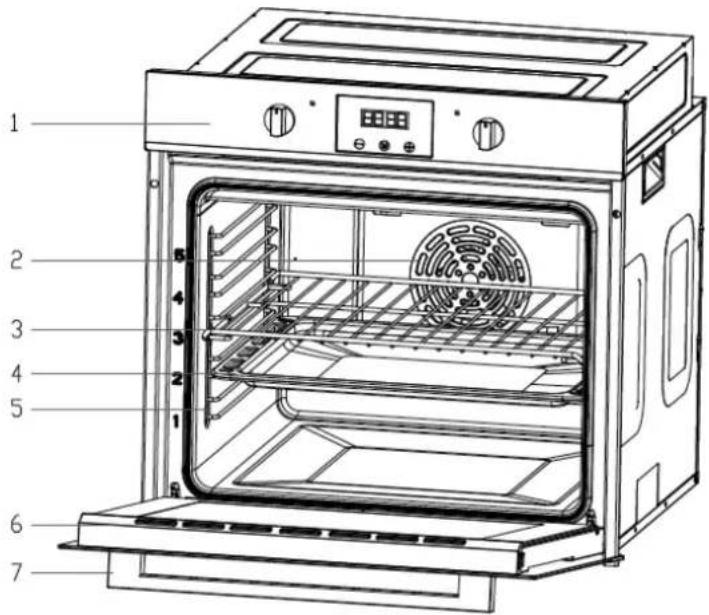
text_image
Technical diagram of an oven with numbered parts for identification-
Control panel
-
Fan motor( inner the cover)
-
Wire rack
-
Tray
-
Side shelf
-
Door
-
Handle
Technical specifications
| Voltage/frequency | 220-240V ~ 50Hz |
| Total power consumption | 2800W |
| Cable type/section | H05VV-F 3*1.5mm ^2 |
| Cable length | 1.2m |
| External dimensions(height/width/depth) | 595/595/575 (mm) |
| Installation dimensions(height/width/depth) | 600/600/ min 575 (mm) |
| Main oven | Multi-function oven |
| Energy efficiency class | A |
| Oven lamp | 25W/300°C halogen I G9 |
| Grill power consumption | 2800W |
Your accessories
- The accessories supplied with your appliance are suitable for making many meals. Ensure that you always insert the accessories into the cooking compartment the right way round.
- There is also a selection of optional accessories, with which you can improve on some of your favorite dishes, or simply to make working with your oven more convenient.
Inserting accessories
You can insert the accessories into the cooking compartment at 5 different levels. Always insert them as far as they will go so that the accessories do not touch the door panel.
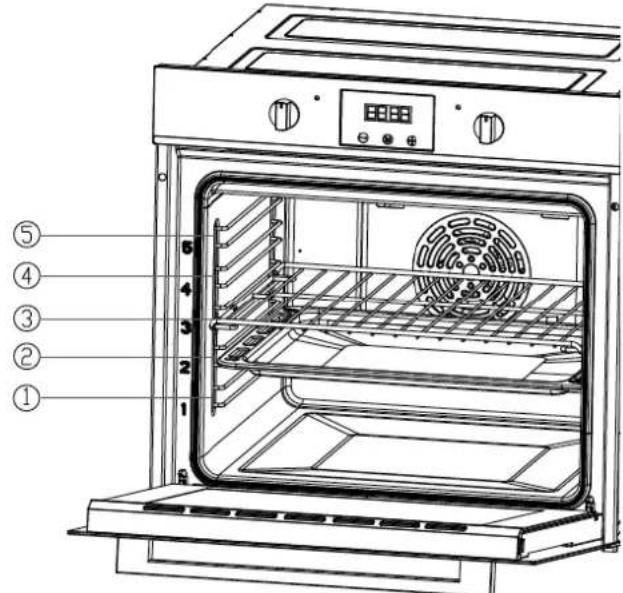
text_image
Technical diagram of an oven with numbered parts labeled for identificationThe accessories can be pulled out approximately halfway until they lock in place. This allows dishes to be removed easily. Note: The accessories may deform when they become hot. Once they cool down again, they regain their original shape. This does not affect their operation.
Oven pan
For moist cakes, pastries, frozen meals and large roasts. It can also be used to catch dripping fat when you are grilling directly on the wire rack.
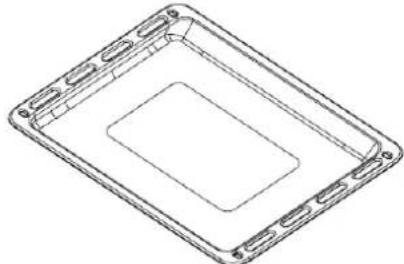
natural_image
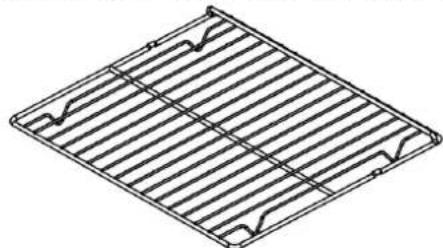
Isometric line drawing of a rectangular frame with internal cavity and mounting holes (no text or symbols)Wire rack
Used for roasting and for placing the food to be baked, roasted or cooked in casserole dishes to the desired rack.
natural_image
Isometric line drawing of a metal grate with slats and central grating (no text or symbols)Side shelf
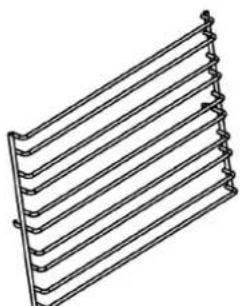
①②③④⑤ on behalf of five different height positions for your choosing. For removable side shelf, you can adjust four different height positions to bake food.
For cooking larger ,these side shelf can be removed , wire rack can be put on the oven floor , using functions as grill , full grill,full grill with fan .
NOTE: When placing dishes on the oven floor, please DO NOT use functions with bottom heater to prevent heat gathering at bottom.(Only for specific models)
natural_image
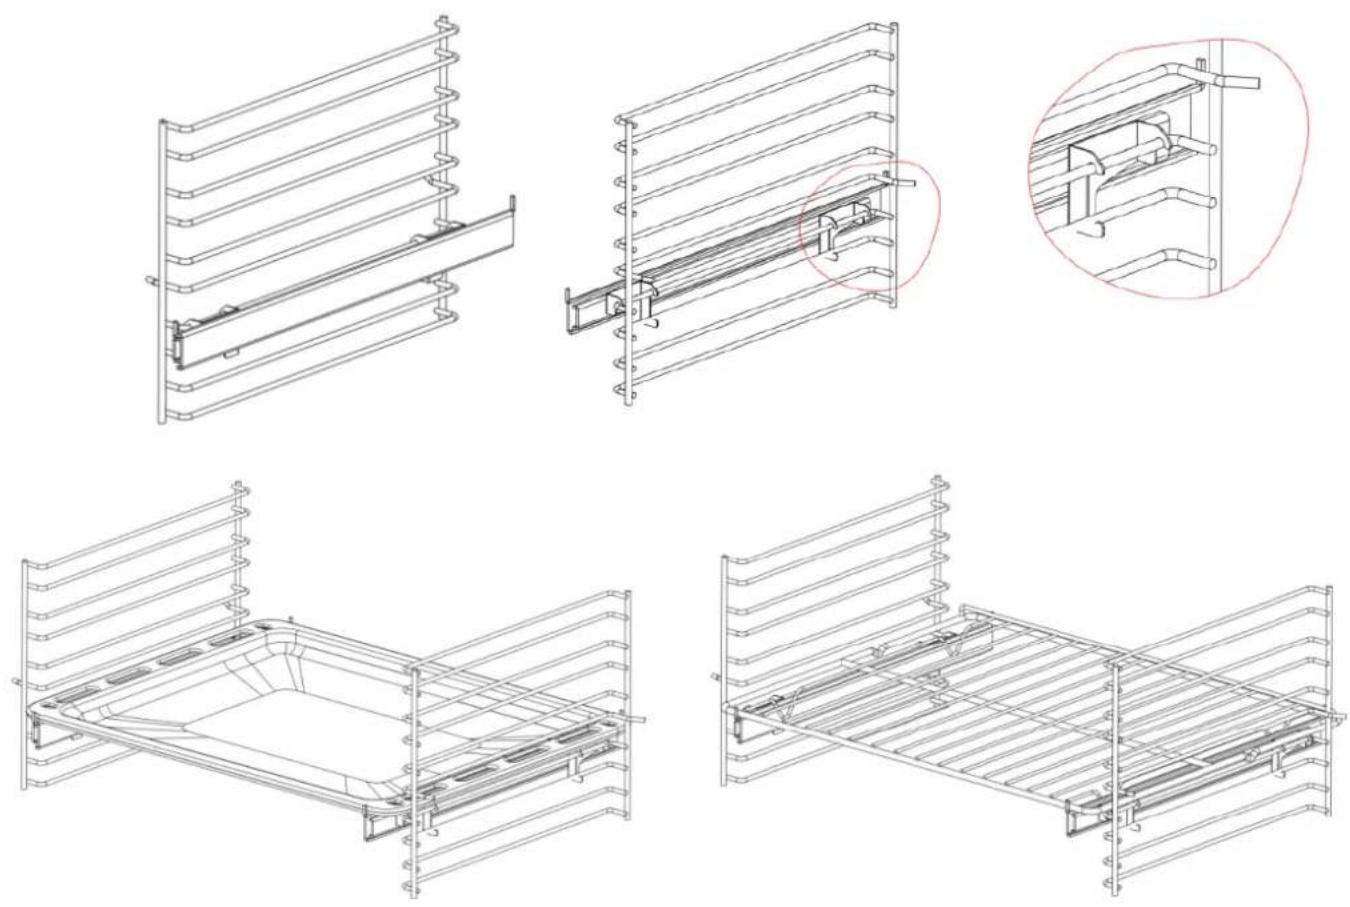
Line drawing of a coiled spring or heat exchanger with multiple parallel strips (no text or symbols)Telescopic Rail Runner
Generally installed on the second or fourth layer of the side shelf, it can support the oven tray or wire rack to be pulled out and pushed smoothly, which is convenient for placing and taking out food.
4. Control panel
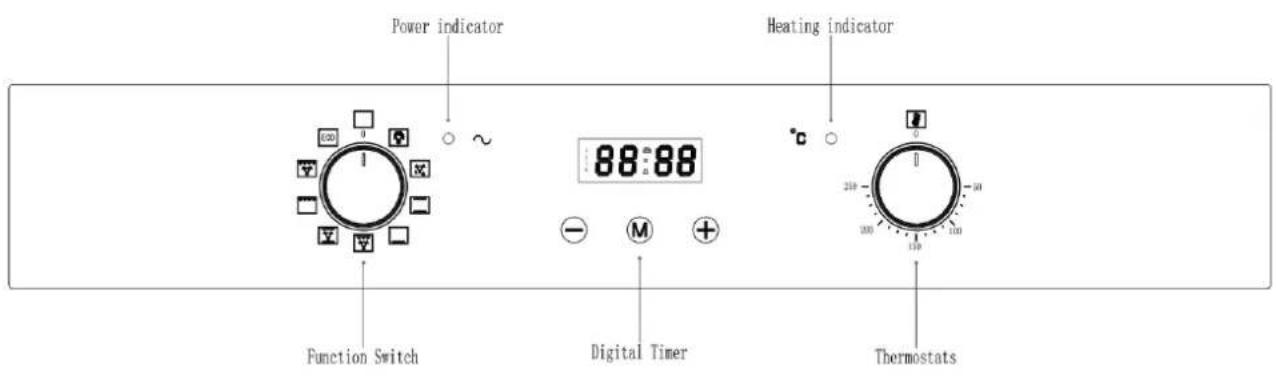
Here, you will see an overview of the control panel.
Depending on the appliance model, individual details may differ.
text_image
Power indicator ~ Function Switch Digital Timer Heating indicator °C 210 300 110 110 ThermostatsFunction selector
Use the function selector to set the type of heating.
This appliance have 9 functions available.

OVEN LIGHT: This mode switches on the oven light and other electric devices do not work.
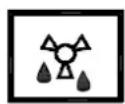
DEFROST: The fan runs without heat to reduce the defrosting time of frozen foods. The time required to st the food will depend on the room temperature, the city and type of food.
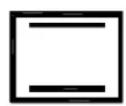
CONVENTIONAL OVEN (top and lower element): This method of cooking provides traditional cooking, with meat from the top and lower elements. This function is suitable for roasting and baking on one shelf only.
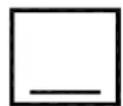
BOTTOM ELEMENT: This method of cooking utilises the bottom element in conjunction. This function is suitable erilizing and preserving jars.

FAN AND HALF GRILL: This method of cooking utilises the inner part of the top element with the fan, which directs heat downwards onto the food. This function is suitable for grilling small portions of bacon, toast and meat etc.
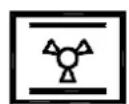
INTENSIVE BAKE: This method of cooking is a conventional cooking method, the oven heat from top vent to lower element, and the fan helps to circulate the to achieve an even baking result.
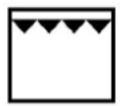
FULL GRILL: This method of cooking utilises the inner and outer parts of the top element, which directs heat downwards onto the food. This function is suitable for grilling medium or large portions of sausages, bacon, steaks, fish etc.
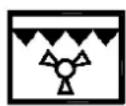
FAN AND GRILL: This method of cooking utilises the top element in conjunction with the fan, which helps to provide a quick circulation of heat. This function is suitable where quick browning is required and “sealing” the juices in, such as steaks, hamburgers, some vegetables etc.
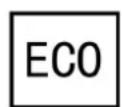
Energy saving GRILLING mode: This method of cooking uses the top outer ring and the bottom heating element to control the temperature, making the grilling more energy saving, mainly suitable for large food, oven temperature rises slowly, the heat fully penetrates and the excess heat consumption is reduced.
Digital timer control
Control panel
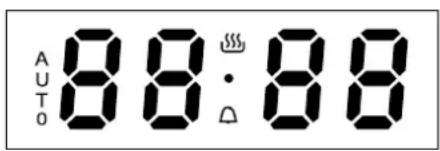
text_image
AUTO 88:88


Control panel diagram
1.1 Function icon instruction
| Icons | Function |
| ⊖ | Minus button |
| ⊕ | Plus button/ audible signal selecting key |
| ◎ | Program button |
1.2 Display screen icon instruction
| Icons | Function | Icons | Function |
| 1 | "Auto" function symbol | 4 | Clock symbol |
| 2 | Oven in use symbol | 5 | Display the time, can display system time, clock and cooking time |
| 3 | Decimal point symbol |
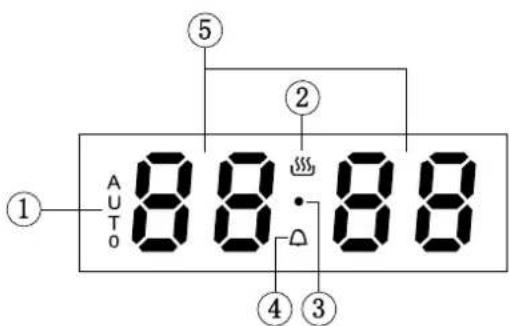
text_image
① AUTO ② ③ ④ ⑤Display section diagram
Timer working status
Switching the timer status
The timer has 3 status, they are standby, function to be selected and working status.
Stand-by status: After connected to the power supply, the display screen displays the system time, the decimal point symbol flashes, it is the status before entering cooking function; If exceeds 10 seconds without any operation under standby mode, the display brightness automatically reduces, press any key to recover to the original brightness.
Function to be selected status: Long press program button under standby status, the display screen will show system time, it is the status when oven in use symbol and decimal point symbol keep bright.
Working status: After completed setting any one of the system time, clock, cooking time or cooking end time, the display screen will show system time, and it is the status when corresponding working icon keep bright.
Status switching diagram refer to below:
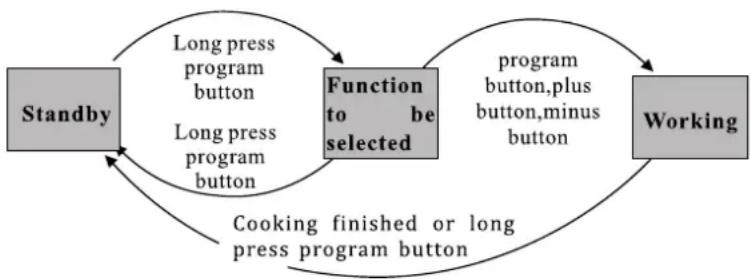
flowchart
graph TD
    A["Standby"] -->|Long press program button\nLong press program button| B["Function to be selected"]
    B -->|program button, plus button, minus button| C["Working"]
    C -->|Cooking finished or long press program button| A
Status switching diagram
1. Timer function mode switching
Long press program button "M" for 3s enter to system time setting status, without any operation after 5S,system time, oven in use symbol "and decimal point symbol " " keep bright display; you can circularly switch the oven timer function mode by program button "M".
The operation flow and corresponding functional sequence are as followings:
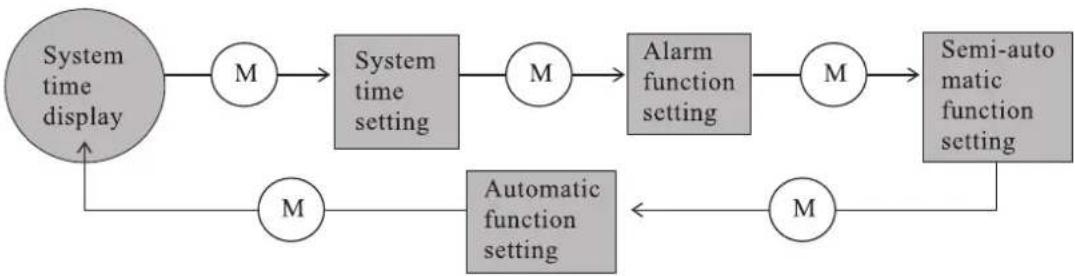
flowchart
graph LR
    A["System time display"] --> B["M"]
    B --> C["System time setting"]
    C --> D["M"]
    D --> E["Alarm function setting"]
    E --> F["M"]
    F --> G["Semi-automatic function setting"]
    G --> H["M"]
    H --> I["Automatic function setting"]
    I --> J["M"]
    J --> A
Timer function mode switching diagram
4. Operation instructions
4.1 Power on
For the first time, the buzzer "beep" for one time to show that the timer enters into the standby state. The clock shows the time of the system and starts the timing. Power-on displays as "0·00", the display screen displays the system time, the decimal point symbol "●" is flashing, 1 second 1 time, like Pic 5. You can push "⊕" to choose 3 kinds of ring tone, The default is the second ring tone. Whenever user wants to adjust the ring tone again, press "⊕".
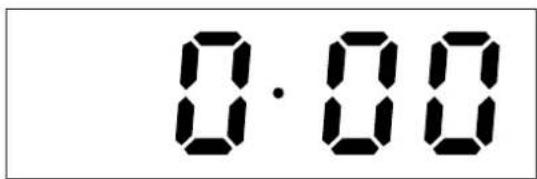
text_image
0.00Pic 5 Power-on default clock diagram (standby state)
4.2 Start up and time setting
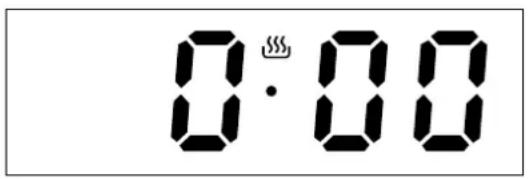
When the display is flashing, press “ ^M ”for 3 seconds to start up the oven. Then oven in use symbol “ ^SSS ”lights up and decimal point symbol “●” twinkles. When decimal point
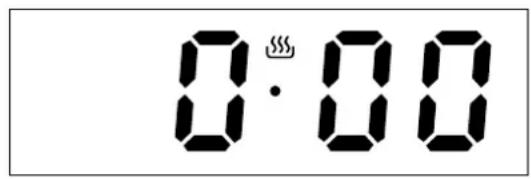
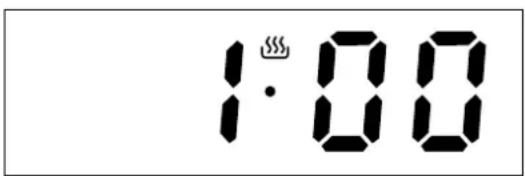
symbol “●” twinkles, press “⊕” or “⊖” to set the system time. After choosing the time, lift the finger off the buttons and wait for 5 seconds, then decimal point symbol “●” stop twinkling. It means time is well set. Like pic 8. Whenever user wants to set the time again, In the status of pic 7, push “◎” one time, when user sees decimal point symbol “●” twinkles, then can set the time again.
text_image
0.00Pic 6 Clock setting state diagram (second icon flickering)
text_image
0.00Pic 7 Feature to be selected state diagram (second icon always bright)
Press button“M” again for 3 seconds, oven is turned off and returns to standby status. The display of pic 6 is flashing.
text_image
1:00Pic 8 System time well set diagram
Note 1: System time setting range is 0: 00-23: 59.
Note 2: When setting the time for each function of the timer, you can set the time by short press or long press “⊕” and “#”,short press will add 1 minute or reduce 1 minute each press of the button, while long press will quickly increase or decrease the time by 1 minute, so it can set the time fast.
4.3 Alarm clock setting function
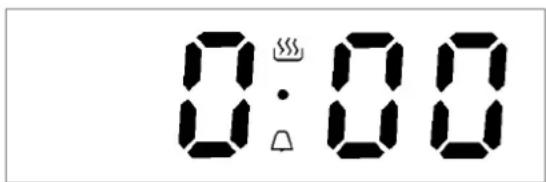
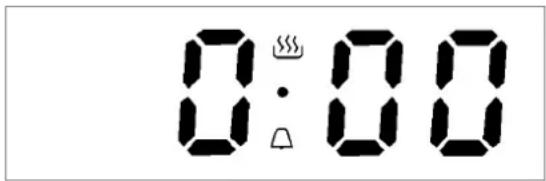
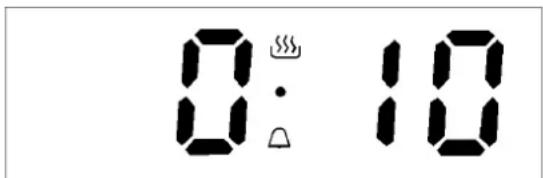
In the state of function to be selected, when the display shows the system time, oven in use symbol“” and decimal point symbol “●” keep bright, press “M” two times, then the clock icon“△”twinkles, and the screen display changes to the alarm clock time(First set default display “0·00”), alarm clock time and decimal point symbol “●” always display , like pic 9.When the alarm clock icon“△” twinkles, Press“⊕”or“⊖” to set the clock. Alarm clock well set diagram like pic 10 (Set 10 minutes).
text_image
0:00Pic 9 Alarm clock setting initial state (alarm clock icon flickering)

text_image
0:10Pic 10 Alarm clock well set (alarm clock icon flickering)
After choosing the time, lift the finger off the buttons and wait for 5 seconds, then the alarm clock icon "△" stops twinkling and changes to always bright, display screen shows system time, oven in use symbol", decimal point symbol " "●and system time keep bright. It means time is well set. See Pic 11.
Whenever user wants to adjust the clock, in the working status, push “ Ⓜtwo times, when user sees the alarm clock icon” ” △ twinkles, it will shows the set clock or the time left, and user can adjust the clock again. After setting is done, the display will change back to system time.
text_image
0:00Pic 11 Alarm clock working status diagram clock icon always bright)
text_image
0:10Pic 12 Alarm clock time over diagram (alarm (alarm clock icon flickering)
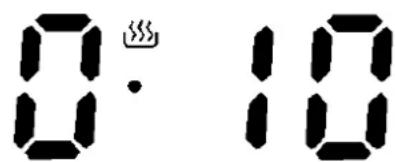
For example, set the clock 10 minutes. After 10 minutes, display screen shows system time, oven in use symbol “###”, decimal point symbol “●” and system time keep bright, the alarm clock icon “△” twinkles, buzzer will prompt the user for 5 minutes, reminding the user that the alarm clock time is over .Like Pic 12. Pressing any key can stop the buzzer and extinguish alarm icon “△”. Like Pic 13.
text_image
0:10Pic 13 Cancel alarm clock icon display diagram(After alarm clock over)
Note : Alarm clock time setting range is 0: 00-23: 59.
4.4 Cooking time setting function
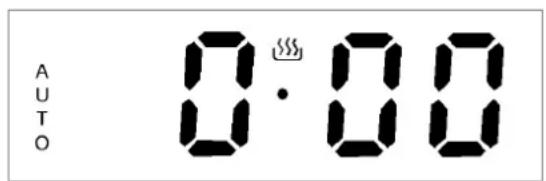
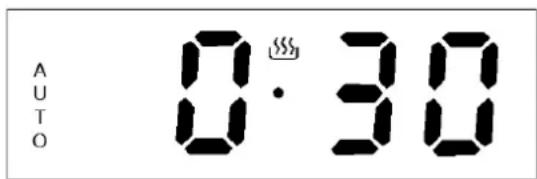
In the state of function to be selected, press button" 3 times, then the icon "AUTO" and oven in use symbol icon "###" twinkle. The screen shows the cooking time (First set default display "0·00"), cooking time and decimal point symbol "●" keep bright display, see Pic 14. When the icon "AUTO" and oven in use symbol "###" twinkle, user can set the cooking time by pressing "⊕" or "Well set diagram see Pic 15(Set 30 minutes).
text_image
AUTO 0.00Pic 14 Cooking time setting initial state
text_image
AUTO 0·30Pic 15 Cooking time well set state
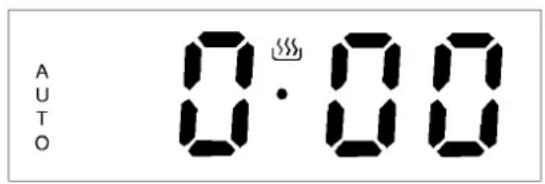
After choosing the time, lift the finger off the buttons and wait for 5 seconds, then the icon "AUTO" and oven in use symbol "###" stop twinkling and change to always bright display. It means time is well set. Whenever user wants to adjust the timer, in the working status, push "M" three times, when user sees the icon "AUTO" and oven in use symbol "###" twinkles, it will shows the set timer or the time left, and user can adjust the timer again. After setting is done, the display will change back to system time, decimal point symbol "●" and system time keep bright. See Pic 16.
text_image
AUTO 0·00Pic 16 Cooking time working status (All the icons always bright)
text_image
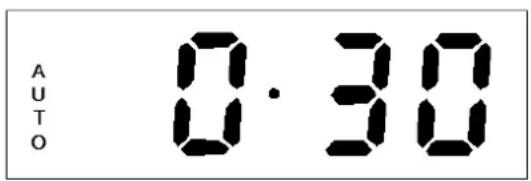
AUTO 0·30Pic 17 Cooking time over diagram (All the icons flickering)
text_image
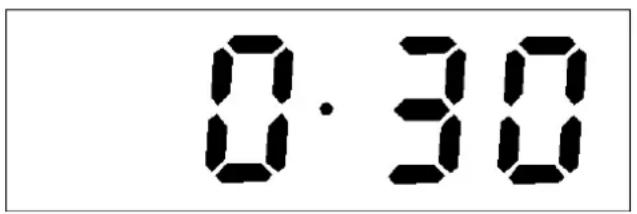
8.30Pic 18 Cancel "Auto" function symbol display diagram(After cooking time over)
For example, set the timer 30 minutes. After 30 minutes, display screen shows system time, oven in use symbol "###" extinguishes, system time keeps bright, decimal point symbol "●" and "Auto" function symbol twinkle, buzzer will prompt the user for 5 minutes, reminding the user that the cooking time is over .Like Pic 17.Pressing any key can stop the buzzer and extinguish"Auto" function symbol.Like Pic 18.
Note 1: Cooking time setting range is 0: 00-10: 00.
Note 2: Not setting cooking time after power on, the appliance will automatically shut down after working 10 hours, without buzzer reminding function.
4.5 Cooking end time setting function
In the state of function to be selected, press button “ ^M ” 4 times, then icon “AUTO” and oven in use symbol “ ^### ”twinkle, display screen shows cooking end time (The first setting shows the current system time by default), cooking end time and decimal point symbol “●” keep bright. Display effect see Pic 19(Suppose current system time is 0:00). When the icon “AUTO” and oven in use symbol “ ^### ”twinkle, you can set cooking end time by pressing“+”or“ ^## ”, well set diagram see Pic 20(Suppose cooking end time is 0:30).
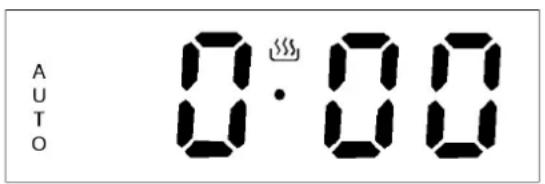
text_image
AUTO 0·00Pic 19 Cooking end time setting initial state
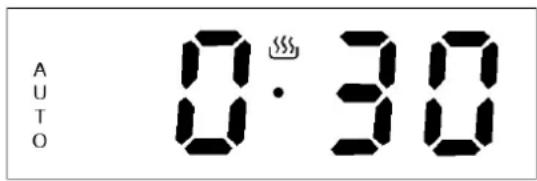
text_image
AUTO 0·30Pic 20 Cooking end time well set state
After choosing the time, lift the finger off the buttons and wait for 5 seconds, then the icon "AU TO" and oven in use symbol "###" stop twinkling and change to always bright. Display screen will show system time, decimal point symbol "●" and system time keep bright. It means time is well set. See Pic 21.
Whenever user wants to adjust the timer, in the working status, push “M” four times, when user sees the icon “AUTO” twinkles, it will show the set cooking end time, and user can
adjust the time again. After setting is done, The display will change back to system time.
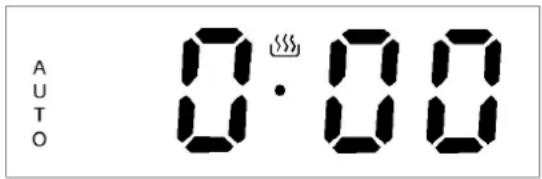
text_image
AUTO 0.00Pic 21 Cooking end time working status (All the icons always bright)
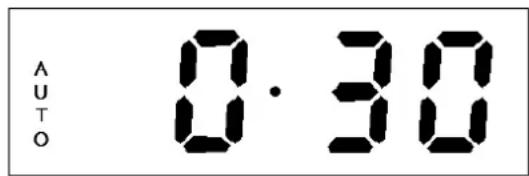
text_image
AUTO 0.30Pic 22 Cooking finished diagram (All the icons flickering)
text_image
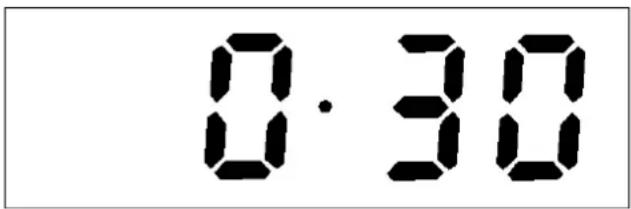
0.30Pic 23 Cancel "Auto" function symbol display diagram(After cooking finished)
For example, the system time is 0:00 like pic 19. Set cooking end time 0:30, like pic 20. When the time reaches 0:30, display screen shows system time, oven in use symbol " 🔊" extinguishes, system time keeps bright, decimal point symbol " ●" and "Auto" function symbol twinkle, buzzer will prompt the user for 5 minutes, reminding the user that the cooking is finished .Like Pic 22.Pressing any key can stop the buzzer and extinguish "Auto" function symbol.Like Pic 23.
Note: Cooking end time is beyond current system time plus cooking time, and within 23:59.
4.6 Cooking reservation function
In the state of function to be selected, user can reserve the cooking time, by setting how much time to cook and when to have the dish ready.
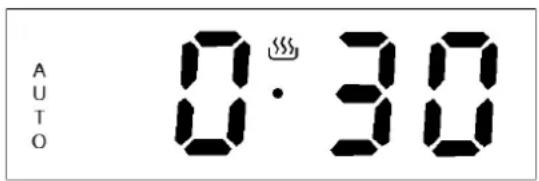
First, press button “M” 3 times, then the icon “AUTO” and oven in use symbol icon“twinkle. The screen shows the
cooking time (First set default display "0·00").When the icon "AUTO" and oven in use symbol "###"twinkle, user can set the cooking time by pressing "+"or".
text_image
AUTO 0·30Pic 24 Cooking time well set diagram
text_image
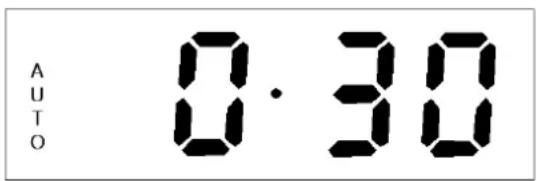
AUTO 0·30Pic 25 Reservation function setting initial state
Second, press “M” one time again, when icon “AUTO” twinkles, user can set the time that expect the cooking finishes at, by pressing“+”or“u”. After choosing the time, lift the finger off the buttons and wait for 5 seconds, then the icon “AUTO” stops twinkling. It means time is well set. Whenever user wants to adjust the timer, in the working status, press “M” three times to adjust the cooking period, or press “M” four times to adjust the ending time. After setting is done, The display will change back to system time.
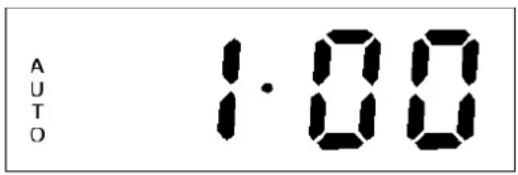
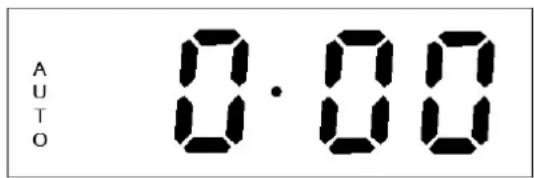
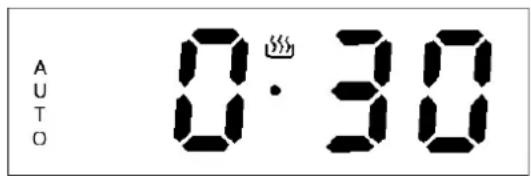
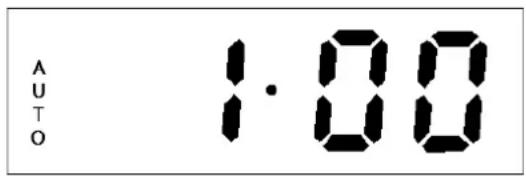
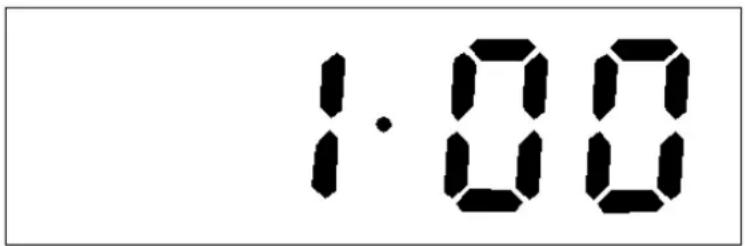
For example, the system time is 0:00. First, set cooking time 30 mins like pic 25. Second, set cooking end time 1:00, like pic 26. Then the oven is back to waiting mode. When the time reaches 0:30, the oven automatically starts to cook. It cooks for 30 mins and stop at the set time 1:00, display screen shows system time, oven in use symbol “ ” extinguishes, system time keeps bright, decimal point symbol “ ●” and “Auto” function symbol twinkle, buzzer will prompt the user for 5 minutes, reminding the user that the cooking is finished . See Pic 29. Pressing any key can stop the buzzer and extinguish“Auto” function symbol.Like Pic 30.
text_image
AUTO 1:00Pic 26 Reservation function well set state
text_image
AUTO 0.00Pic 27 Reservation function start state
text_image
AUTO 0·30Pic 28 Cooking function start diagram
text_image
AUTO 1:00Pic 29 Cooking function end diagram
text_image
1.00Pic 30 Cancel "Auto" function symbol display diagram(After cooking finished)
Note : Cooking time setting range is within 10 hours.
When the oven uses the reservation function, during working process: If the oven door closes, the oven will remain working properly; if the oven door open, the display displays the system time with digital tube flashing, and the auto icon "AUTO", system time second icon "●", "icon will always bright to remind the users since the oven door is open state, the oven stops cooking (pause heating, oven lights out), but still start the buzzer reminder at the end of the reservation.
4.7 Selecting the audible signal
The audible signal has 3 tones. To adjust the signal you should proceed as follows:
✿ Under standby mode, that is when display screen shows system time, decimal point symbol “●” twinkling, audible
signal can be adjusted by pressing the plus button to choose the 3 tones, press one time choose one kind. It is the second kind of tone by default when power on.
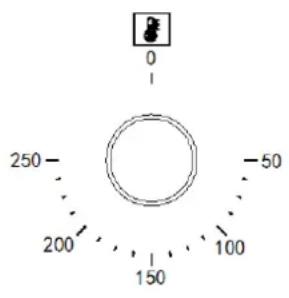
Thermostat control knob
text_image
0 - 250 - 50 200 - 150 100The oven thermostat control knob sets the required temperature of the oven. It is possible to regulate the temperature within a range of 50 - 250°C.
Turn the control knob clockwise.
5. Before using the oven for the first time
Heating up the oven
To remove the new cooker smell, heat up the oven when it is empty and closed. An hour of Top/bottom heating at 250^ C is ideal for this purpose. Ensure that no packaging remnants have been left in the cooking compartment.
1、Use the function selector to set Top/bottom heating.
2、Set the temperature selector to 250^ C. After an hour, switch off the oven. To do so, turn the function selector to the off position.
Cleaning the accessories
Before you use the accessories for the first time, clean them thoroughly with hot soapy water and a soft dish cloth.
Tips for saving energy
The following information will help you to use your appliance in an ecological way, and to save energy:
1、Use dark coloured or enamel coated cookware in the oven since the heat transmission will be better.
2、While cooking your dishes, perform a preheating operation if it is advised in the user manual or cooking instructions.
3、Do not open the door of the oven frequently during cooking.
4、Try to cook more than one dish in the oven at the same time, whenever possible. You can cook by placing two cooking vessels onto the wire grill.
5、Cook more than one dish one after another. The oven will already be hot.
6、You can save energy by switching off your oven a few minutes before the cooking time. Do not open the oven door.
7、Defrost frozen dishes before cooking them.
6. How to operate the oven
General information on baking, roasting and grilling Risk of scalding by hot steam! Take care when opening the oven door as steam may escape.
Tips for baking
1、Use non-stick coated appropriate metal plates or aluminum containers or heat-resistant silicone moulds.
2、Make best use of the space on the rack.
3、It is recommended to place the baking mould in the middle of the rack.
4、Keep the oven door closed.
Tips for roasting
1、Seasoning with lemon juice and black pepper will improve the cooking performance when cooking a whole chicken, turkey or a large piece of meat.
2、Meat with bones takes about 15 to 30 minutes longer before it is cooked than a roast of the same size without bones.
3、You should calculate about 4 to 5 minutes cooking time per centimeter height of the meat.
4、Let meat rest in the oven for about 10 minutes after the cooking time. The juice is better distributed all over the roast and does not run out when the meat is cut.
5、Fish in a fire-resistant dish should be placed on the rack at the medium or lower level.
Tips for grilling
Grilling is ideal for cooking meat, fish and poultry and will achieve a nice brown surface without it drying out too much. Flat pieces, meat skewers and sausages are particularly suited for grilling as are vegetables with a high water content such as tomatoes and onions.
7. Troubleshooting
The oven may have some abnormal breakdown during working, you can check the fault list before calling to the after-sell service, maybe some breakdown you can repair by yourself.
Normal operation:
When first using the oven, it may have some situation of peculiar smell and smoking for some hours; Open the heating pattern to let the oven burn without anything for 1 hour when use the oven for the first time, then close the heating function, waiting for some time until the oven is cold, open the door and clean the oven.
When oven working, it may have sounds of crisp because of well of metal.
If the heating foods have some moisture, the heating emission hole may blow steam during the working operation.
The fan will start to work after 15 minutes after oven begin to work. Even if the oven is closed, fan will continue to work for 35 minutes.
Please preheat before put food in oven when for baking.
For a long cooking, you can turn off the oven before stop the oven and using the balance heat to finish the cooking.
If the problem has not been solved: 1. Separate unit from the
Malfunction table
| Problem | Reason | Suggestion |
| Oven isn't working | Interrupt electrical current | Check your kitchen light or other appliance if working on |
| Breaker malfunction | Check if your breaker are working on | |
| Forgot to push the timer function | Reset the timer function | |
| Lamp isn't coming on | Lamp have defectiveness | Change for a new lamp |
| No electrical current | Check if the oven have electrical current | |
| Oven stop | Power interrupt | Check your kitchen light |
| working in a sudden during working | or other appliance whether still working on | |
| Normal close thermostat protective | Check if the cool fan are working, if yes, need change for a new normal close thermostat | |
| Oven not heating | Not adjust the temperature controller | Set up the temperature |
| If this model have timer, you may not set up the time | Set up the timer | |
| No power | Check the power box | |
| Heating element was damaged | Change for a new heating element | |
| Water come out from the glass door when working | Door seal is blow-by | Change for a new door seal |
| Hinge is not strong enough | Change for a new hinge | |
| Oven stop working but the motor cool still working | Oven working for a long time, so cooling oven need for a long time | Put your hand to the outlet and feel if it is come out for hot air, if yes, it is normal |
| Normal open thermostat have a problem | If the air temperature from the outlet is room temperature, need change for a new normal open thermostat |
mains supply(deactivate or unscrew fuse). 2. Call the after-sales service of your store reseller; Do not attempt to repair the appliance yourself. There are no customer service items inside the appliance.
Baking and grilling tips
Baking tips
1、How to establish whether sponge cake is baked through. Approximately 10 minutes before the end of the baking time specified in the recipe, stick a cocktail stick into the cake at the highest point. If the cocktail stick comes out clean, the cake is ready.
2、The cake collapses. Use less fluid next time or set the oven temperature 10 degrees lower. Observe the specified mixing times in the recipe.
3、The cake has risen tin the middle but is lower around the edge. Do not grease the sides of the spring form cake tin. After baking, loosen the cake carefully with a knife.
4、The cake goes too dark on top. Place it lower in the oven, select a lower temperature and bake the cake for a little longer.
5、The cake is too dry. When it is done, make small holes in the cake using a cocktail stick. Then drizzle fruit juice or an alcoholic beverage over it. Next time, select a temperature 10 degree higher and reduce the baking time.
6、The bread or cake(e.g. cheesecake) looks good, but is soggy on the inside (sticky, streaked with water). Use slightly less fluid next time and bake for slightly longer at a lower temperature. For cakes with a moist topping, bake the base first. Sprinkle it with almonds or bread crumbs and then place the topping on top. Please follow the recipe and baking times.
7、The cake is unevenly browned. Select a slightly lower
temperature to ensure that the cake is baked more evenly. Bake delicate pastries on one level using Top/bottom heating. Protruding grease proof paper can affect the air circulation. For this reason, always cut grease proof paper to fit the baking tray.
8、The bottom of a fruit cake is too light. Place the cake one level lower the next time.
9、The fruit juice overflows. Next time, use the deeper universal pan, if you have one.
10、Small baked items made out of yeast dough stick to one another when baking. There should be a gap of approx. 2 cm around each item. This gives enough space for the baked items to expand well and turn brown on all sides.
11、You were baking on several levels. The items on the top baking tray are darker than that on the bottom baking tray. Always use 3D hot air to bake on more than one level. Baking trays that are placed in the oven at the same time will not necessarily be ready at the same time.
12、Condensation forms when you bake moist cakes. Baking may result in the formation of water vapour, which escapes above the door. The steam may settle and form water droplets on the control panel or on the fronts of adjacent units. This is natural process.
Grilling tips
When grilling, preheat the oven for approx. 4 minutes, before placing the food into the cooking compartment. Always grill with the oven door closed.
As far as possible, the pieces of food you are grilling should be of equal thickness. This will allow them to brown evenly and remain succulent and juicy.
Turn the food you are grilling after 2/3 of the time.
Do not add salt to steaks until they have been grilled.
Add in a little liquid if the meat is lean. Cover the base of the ovenware with approx. 1/2 cm of liquid.
▲ Add liquid generously for pot roasts. Cover the base of the ovenware with approx. 1-2 cm of liquid.
Place the food to be grilled directly on the wire rack. If you are grilling a single piece, the best results are achieved by placing it in the centre of the wire rack. The universal pan should also be inserted at level 1. The meat juices are collected in the pan and the oven is kept cleaner.
When grilling, do not insert the baking tray or universal pan at level 4 or 5. The high heat distorts it and the cooking compartment can be damaged when removing it.
The grill element switches on and off continually. This is normal. The grill setting determines how frequently this will happen.
When the roast is ready, turn off the oven and allow it to rest for an additional 10 minutes. This allows better distribution of the meat juices.
For roast pork with a rind, score the rind in a crossways pattern, then lay the roast in the dish with the rind at the bottom.
Place whole poultry on the lower wire rack breast-side down. Turn after 2/3 of the specified time.
For duck or goose, pierce the skin on the underside of the wings. This allows the fat to run out.
Turn the pieces of fish after 2/3 of the time, whole fish does not have to be turned. Place the whole fish in the oven in its swimming position with its dorsal fin facing upwards. Placing half a potato or a small ovenproof container in the stomach cavity of the fish will make it more stable.
How to tell when the roast is ready. Use a meat thermometer (available from specialist shops) or carry out a
"spoon test". Press down on the roast with a spoon. If it feels firm, it is ready. If the spoon can be pressed in, it needs to be cooked for a little longer.
The roast is too dark and the crackling is partly burnt. Check the shelf height and temperature.
The roast looks good but the juices are burnt. Next time, use a smaller roasting dish or add more liquid.
The roast looks good but the juices are too clear and watery. Next time, use a larger roasting dish and use less liquid.
▲ Steam rises from the roast when basted. This is normal and due to the laws of physics. The majority of the steam escapes through the steam outlet. It may settle and form condensation on the cooler switch panel or on the fronts of adjacent units.
8. Maintenance and cleaning
- The oven should be cleaned after every use. When cleaning the oven the lighting should be switched on to enable you to see the surfaces better.
- The oven chamber should only be washed with warm water and a small amount of washing-up liquid.
• After cleaning the oven chamber wipe it dry. - Never clean the oven surfaces by steam cleaning.
- The oven cavity should only be cleaned with warm soapy water, using either a sponge or soft cloth. No abrasive cleaners should be used.
- Any stains that may appear on the bottom of the oven will have originated from food splashes or spilt food, these splashes occur during the cooking process. These could possibly be a result of the food being cooked at an excessively high temperature or being placed in cookware
that is too small.
- You should select a cooking temperature and function that is appropriate for the food that you are cooking. You should also ensure that the food is placed in an adequately sized dish and that you use the drip tray where appropriate.
- Outer parts of the oven should only be cleaned with warm soapy water, using either a sponge or soft cloth. No abrasive cleaners should be used.
- If you use any form of oven cleaner on your appliance, then you must check with the manufacturer of the cleaner that it is suitable for use on your appliance.
- Any damage that is caused to the appliance by a cleaning product will not be fixed free of charge, even if the appliance is within the guarantee period.
- Do not use cleaning products containing abrasive materials for the cleaning and maintenance of the glass front panel.
Cleaning the oven
No oven cleaner or any other special cleaning agent is required for cleaning the oven. It is recommended to wipe the oven with a damp cloth while it is still warm.
To clean the side walls and oven door
-
Take down left and right side-shelves, method is pushing the bottom of shelves and pull to sides at the same time, push up side shelves and rotate up to level, and pull out the rack.
-
Cleaning left and right sides, order of install is opposite to the order of take down.
Detaching and attaching the oven door
For cleaning purposes and to remove the door panels, you can detach the oven door. Every door hinge has a locking rod, when it is close, door was fixed in place, then the door was not disassembly. If in order to remove down door to open the locking rod, hinge will be locked and would not bite.

When the hinge not locked, it will have a big strength to close in sudden. Make sure locking rod closed all the time, and insure it was open when remove the door.
Remove the door
▶ Full open the door.
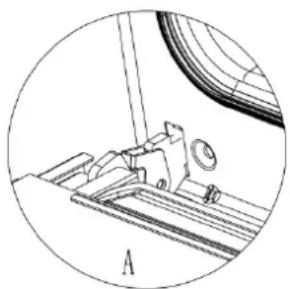
➢ Fold up the right and left side of locking rod. (picture A)
Close the door until reach to stop step, hold on both left and right sides of the door, then reclose the door, upward and downward and pull out the door.
natural_image
Technical line drawing of a mechanical assembly with no visible text or symbolsInstall the oven door
Accord to the opposite order of door disassembly
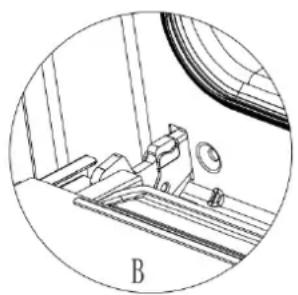
When install oven door, make sure both hinge plug into opening mouth directly.
Both sides of hinge rabbet must bite up each other.
When open the door, spread down locking rod(picture B)
natural_image
Technical line drawing of a mechanical assembly with no visible text or symbols
If the door drop accidentally or hinges shut up suddenly, do not push you hand in hinges. Please call your after-sell department.
Remove and install door panel
Remove
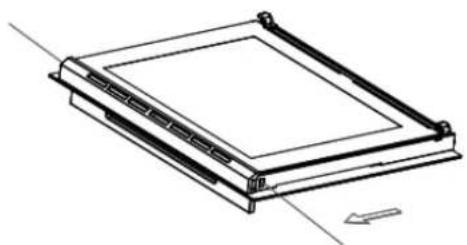
Remove oven door, put it on a piece of cloth.
Using two hand to push the button of the door inner glass bracket, The bracket will eject automatic
Take away the inner glass and middle glass.
Notice! Dangerous!
If the glass has some scratches, it may lead to crack.
Don't use the glass spatula, acute and corrosive cleaning product or detergent to clean the glass.
natural_image
Technical line drawing of a rectangular electronic component with mounting holes and a diagonal arrow indicating direction (no text or symbols)Install
Plug the inner glass into glass pressure groove.
Both right and left sides need put down alignment to card slot and push the glass to its place.
Put on the oven door.
Remove and install side shelves
In order to clean sides of oven, you should remove the side shelves to clean the oven
One hand push the side of the cavity, another hand catch the front side of the shelf, pull at the shelf out.
Replacing the oven lamp

If the bulb in the oven Light fails, it must be replaced.
Risk of electric
Shock!
Switch off the circuit breaker in the fuse box.
Place a tea towel in the oven when it is cold to prevent damage.
➢ Unscrew the glass cover by turning it anti-clockwise.
Replace the bulb with one of the same type.
Screw the glass cover back in.
Remove the tea towel and switch on the circuit breaker.
Regular inspections
Besides keeping the cooker clean, you should:
- Carry out periodic inspections of the control elements and cooking units of the cooker. After the guarantee has expired you should have a technical inspection of the cooker carried out at a service centre at least once every two years.
- Fix any operational faults
Carry out periodical maintenance of the cooking units of the cooker.

Caution!
All repairs and regulatory activities should be carried out by the appropriate service centre or by an appropriately authorized fitter.
Environmental note
Note: Before discarding an old appliance, switch off and disconnect it from the power supply. Cut off and render any plug useless. Cut the cable off directly behind the appliance to prevent misuse. This should be undertaken by a competent person.
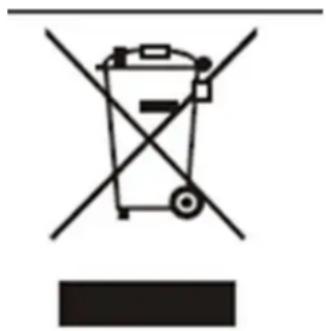
This appliance is marked according to the European directive 2002/96/EC on Waste electrical and Electronic Equipment (WEEE). By ensuring this product is disposed of correctly, you will help prevent potential negative consequences for the environment and human health, which could otherwise be caused by inappropriate waste handling of this product.
The symbol on the product or on the documents
accompanying the product
indicates that this appliance may not be treated as household waste. Instead it shall be handed over to the applicable collection point for the recycling of electrical and electronic equipment.
Disposal must be carried out in accordance with local environmental regulations for waste disposal. For more detailed information about treatment, recovery and recycling of this product, please contact your local city office or local waste management office.
The packaging materials that we use are environmentally friendly and can be recycled. Please discard all packaging material with due regard for the environment.
natural_image
Symbol of a trash bin crossed with a diagonal line, no text or numbers presentLIKE TO KNOW MORE?
For further information on all Linärie appliances, or to obtain detailed dimension and installation information, phone or email our Customer Care team or visit our website:
Australia
hello@linarie.com.au
www.linarie.com.au
Follow Us
@Linarie.Appliances

© Linärie
Operating and installation instructions: Original √ Translation
Mart Online Services Pty Ltd. ACN 657 824 050
Linärie Contact hello@linarie.com.au www.linarie.com.au
The distribution and duplication of this document, as well as the use and disclosure of its contents are prohibited unless expressly authorised.
These operating and installation instructions have been drawn up with the greatest of care. But it cannot be ruled out that subsequent technical modifications have not yet been incorporated or the relevant content has not yet been adapted. Please accept our apologies in this eventuality. An updated version can be requested from our team. Subject to printing errors and mistakes.
© Linärie
All rights reserved.