XF-12M27-US - Sprayer Vevor - Free user manual and instructions
Find the device manual for free XF-12M27-US Vevor in PDF.

User questions about XF-12M27-US Vevor
0 question about this device. Answer the ones you know or ask your own.
Ask a new question about this device
Download the instructions for your Sprayer in PDF format for free! Find your manual XF-12M27-US - Vevor and take your electronic device back in hand. On this page are published all the documents necessary for the use of your device. XF-12M27-US by Vevor.
USER MANUAL XF-12M27-US Vevor
Affordable. Reliable. Home Improvement.
BACKPACK SPRAYER
MODEL:XF-12M27-US & XF-12M27
VEVOR
Affordable. Reliable. Home Improvement.
BACKPACK SPRAYER
MODEL:XF-12M27-US & XF-12M27

natural_image
White VEVOR agricultural sprayer with orange filter and spray gun (no visible text or symbols)This is the original instruction, please read all manual instructions care before operating. VEVOR reserves a clear interpretation of our user manual. The appearance of the product shall be subject to the product received. Please forgive us that we won't inform you again if there are technology or software updates on our product.
SAFETY INSTRUCTIONS


EYE PROTECTIONH AND PROTECTION FOOT PROTECTION DUST MASK PROTECTION WEAR WASH YOUR HAND
! For your safety and the safety of others, the following precautions must be observed when operating the sprayer:
- During spraying operation, the personnel shall wear clothes in strict accord with the regulations, wear masks, glasses, hats, gloves, or protective clothing against pesticide penetration, and shall not work naked.
- It is strictly prohibited to spray toxic solutions such as pesticides on peop animals during use.
- Patients with mental illness or serious diseases, drunken people, and people without operation knowledge are prohibited from using this machine. People will have just taken strenuous exercise, have not had a good rest, or have an insufficient sleep, as well as women in the period of lactation, should not be engaged in this work.
- The operator must wash all parts of the body and clean all kinds of clot use.
- When handling pesticides, the safety instructions provided by the pesticide manufacturer should be followed.
- Do not use the special liquid.
WARNING:
-
Do not leave machines and tools or store them in unattended places. Tur the power when not in use.
-
Do not disassemble or change this machine.
-
Operators must spray pesticides in front of the wind direction and shall no under high temperatures for a long time.
-
Before each use of the battery (including the new machine), please charge battery for 4-8 hours. When the battery is not charged, cover the charging but tightly to prevent water from getting wet.
-
Try to avoid working without water to avoid damaging the diaphragm of th
water pump.
- Before use, try spraying with clean water to check whether there is water leakage at the base and whether the atomization effect is good. Only when everything is normal can you prepare liquid medicine for the operation.
- When adding liquid medicine, it must pass through the filter screen. If the impurities, the normal use of the machine will be affected.
- If the liquid medicine overflows, please dry it immediately. Battery connected electrical components, and wire connectors shall not be exposed to liquid medicine to avoid corrosion.
- Please do not use non-water bath powder because it cannot be dissolved in the liquid. And the suspended solids in the medicine tank will precipitate at the bottom, causing clogging of the filter screen and pipeline, thus affecting the p service life. The use of chemical liquids and special working fluids is prohibited.
- When the liquor spraying is completed, turn off the power switch or regu switch first, and then release the injection switch after the pump stops working.
- Never point the spray wand at another person or animal, whether the sp on or not.
- The maximum temperature of the liquid to be sprayed must not exceed Do not use the sprayer if the temperature of the work environment is up to lower than -10^ .
MODEL AND PARAMETERS
| Model | XF-12M27-US & XF-12M27 |
| Capacity | 3.2 Gallons(12L) |
| Pump | Diaphragm pump |
| Working Pressure | 0-90psi |
| Max. Performance | (3.3±0.3)L/min |
| Charger | Input: 100-240V 50/60Hz 0.6AOutput: DC21V 1.0A |
| Battery | Lithium battery (DC18V, 2AH) |

text_image
1 2 3 VEVOR 4 5 6 7 8
text_image
9 10
text_image
11 12 13| No. | Name | No. | Name |
| 1 | Tank Cap | 8 | Hose |
| 2 | Barrel body | 9 | Switch |
| 3 | Voltmeter | 10 | Pressure regulating knob |
| 4 | Spraying nozzle | 11 | Battery cover |
| 5 | Spray bar clamp | 12 | Backrest |
| 6 | Spray Lance | 13 | Strap |
| 7 | Spray handle |
COMPONENTS
| No. | Picture | Name and Qty | No. | Picture | Name and Qty |
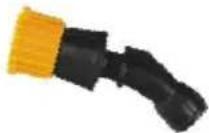
| 1 |  | Barrel body(x1) | 12 | 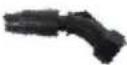 | Adjustable single-hole nozzle(x1) |
| 2 | 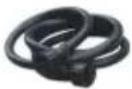 | HoseΦ7mmX1.2m(x1) | 13 |  | Windproof nozzle(x1) |
| 3 | 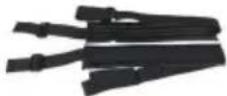 | Straps(x1) | 14 |  | 3 head nozzle(x1) |
| 4 |  | Telescopic lance(x1) | 15 | 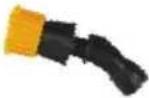 | 4 holes nozzle(x1) |
| 5 |  | Plastic spray rod(x1) | 16 | 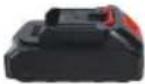 | Battery(x1) |
| 6 | 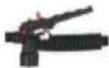 | Spray rod handle(x1) | 17 |  | Tank cap(x1) |
| 7 |  | Spray bar clamp(x1) | 18 |  | Tank filter(x1) |
| 8 |  | Split cotter(x1) | 19 |  | Pressure regulating knob cap(x1) |
| 9 | 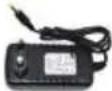 | Charger(x1)/XF-12M27 | 20 |  | Green seal ring14*18(x2) |
| 10 |  | Charger(x1)/XF-12M27-US | 21 |  | Black seal ring13*17(x2) |
| 11 | 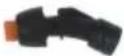 | Fan-shaped nozzle(x1) | 22 |  | User manual(x1) |
Note:
This sprayer is available with two types of spray lances to meet different application needs: Telescopic stainless steel lance; Plastic spray rod.
Each lance is designed for specific working conditions and user preferences.
Telescopic stainless steel lance recommended for:
Suitable for spraying clean water or mild solutions
Ideal for public sanitation, cleaning, and landscaping work
Strong and durable for general outdoor use
More cost-effective for short-term or low-frequency spraying tasks
Recommended in low-corrosion environments
Plastic spray rod recommended for:
Spraying with acidic or alkaline chemicals
Long-time handheld spraying (lightweight)
Areas near electricity (non-conductive)
Please select the lance type based on your specific usage requirements. If you assistance in choosing the best option, feel free to contact us.
ASSEMBLY
STEP 01: ASSEMBLE THE LANCE SET
Telescopic stainless steel lance:
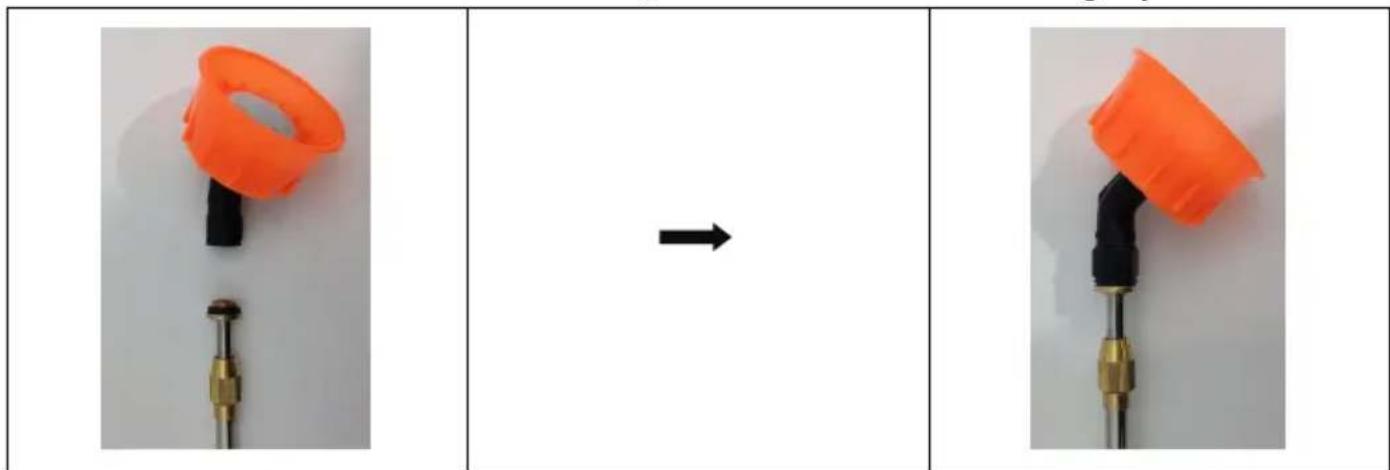
- Connect the hose to the spray handle, make sure the connection is properly aligned, Tighten the nut firmly to ensure there is no leakage.

text_image
Diagram showing a mechanical device before and after assembly, with red arrows indicating the process.- Insert the lance into the switch handle, then screw the nut tightly.

natural_image
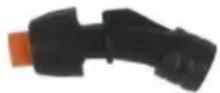
Mechanical assembly diagram showing a valve mechanism before and after modification, with no visible text or symbols.- Connect the nozzle with lance, then screw the nut tightly.
natural_image
Three-panel image showing a device being processed, with an arrow indicating transformation (no text or symbols present)Plastic spray rod:
- Connect the hose to the spray handle, make sure the connection is properly aligned, Tighten the nut firmly to ensure there is no leakage.

text_image
Diagram showing a firearm being adjusted to form a post mounted weapon, with red arrows indicating the motion direction.- Insert the lance into the switch handle, then screw the nut tightly.

natural_image
Three-panel image showing a mechanical assembly process: before, after, and post-up, with red arrows indicating direction of movement (no text or symbols)- Connect the nozzle with lance, then screw the nut tightly.

natural_image
Two sequential images showing a black stick with an orange object, one transforming to the other (no text or symbols)STEP 02: ASSEMBLE THE BATTERY
- Open the battery packaging and insert it into the battery holder.

natural_image
Close-up of a black and red electronic device with orange top panel and control buttons (no visible text or symbols)

natural_image
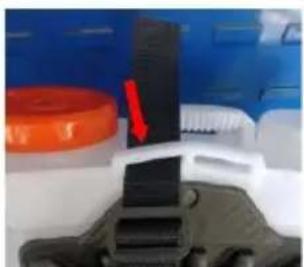
Close-up of a small electronic device with red and black buttons, placed inside a white plastic case with orange lid (no visible text or symbols)STEP 03: ASSEMBLE THE STRAP
- Insert the belt into the hole of sprayer, insert the belt into the inside of tighten the belt.
natural_image
Close-up of a mechanical component with black and white parts, no visible text or symbols

natural_image
Close-up of a mechanical device with a red arrow pointing to a blue plastic container (no visible text or symbols)

natural_image
Close-up of a hand adjusting a black textured object with orange and white components (no visible text or symbols)- Insert the hook to the holder of the sprayer's bottom.

natural_image
Close-up of hands adjusting a red plastic component with black clasp and orange base (no text or symbols visible)

natural_image
Close-up of a black cable clip interacting with an orange and white object, with a red tassel (no visible text or symbols)

natural_image
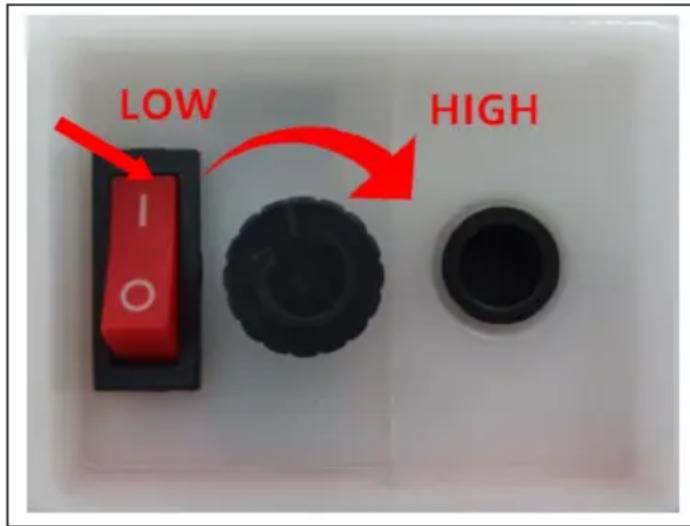
Black and white photo of a portable backpack with orange straps (no text or symbols visible)01. START TO WORK AND STOP TO WORK
- Turn on the electric switch to "I", then rotate the knob to "HIGH", start to
- Rotate the knob to "LOW", stop to work, then turn off the electric switch to "0".
text_image
LOW HIGH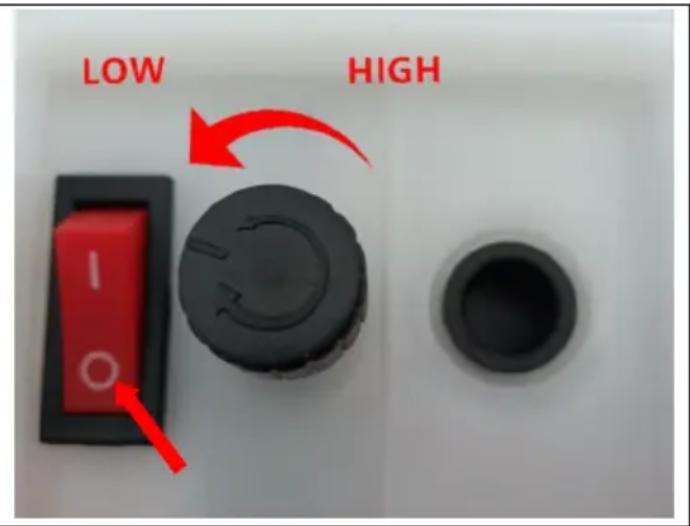
text_image
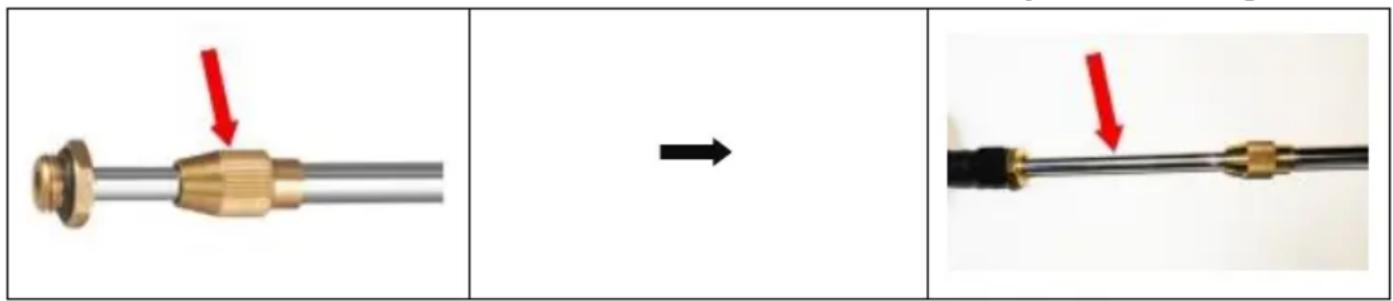
LOW HIGHLoose the brass nut of the middle of lance, then adjust the length of the la
text_image
Diagram showing a pipe fitting process with red arrows indicating direction of movement, before and after modification.
natural_image
Two-step assembly of a black mechanical component, showing a change from left to right with red arrows indicating direction (no text or symbols)03. THE USAGE OF HANDLE SWITCH
| 1. Press and hold the handle to s working, or release it to stop work |  |
| 2. When spraying for a long time, handle can be fixed by the ring. |  |
04. CHARGING
Open the battery cover and remove the battery.
Insert the charger plug into the battery charging socket, then check the charge indicator light.

natural_image
Orange plastic container held by a hand, no visible text or symbols on the device itself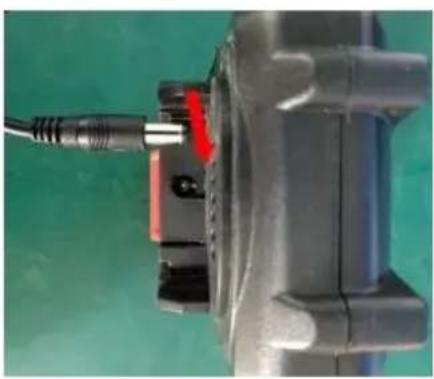
natural_image
Close-up of a mechanical component with a red pin inserted, against a green background (no visible text or symbols)
natural_image
Close-up of a mechanical device with visible internal components and wiring, no text or symbols present.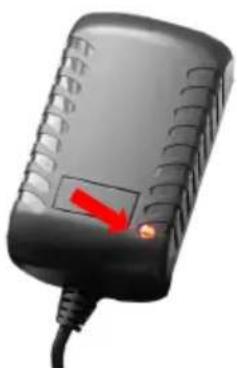
natural_image
Close-up of a black handheld device with a red arrow pointing to its side panel (no visible text or symbols)A red light indicates that the battery is char while a green light means the battery is full charged.
05.BATTERY LEVEL INDICATOR
 | No lights: battery is empty and must be rech immediately. |
 | Only one light on: battery is low and needs recharging. |
 | All green lights on: battery is fully charged. |
06. CHECK THE BATTERY
Press the button of battery cover of the back of the sprayer, then open it a check the situation of the battery.
 |  |  |
07. CLEANING
Please clean the sprayer with water, and finally turn off the regulator and the electric switch after use.
SEAL POSITION

text_image
Black seal ring13*17 Sealing gasket Green seal ring14x18 Black seal ring13*17 Green seal ring14x18INTRODUCTION AND APPLICATION OF NOZZLE
 | Fan-shaped nozzle | Provide fan-shaped spray, which is mostly used in scenes requiring control range, such as |
 | Adjustable single-hole nozzle | Rotational control spray.Provide a small amount of spray. or linear spray (15-20ft). |
 | Windproof nozzle | 1.Equipped with a protective cover reduce the impact of wind on spray.2.Turn the top adjustment spray to |
 | 3 head nozzle | Provide medium spray effect. Allows you to cover large areas w medium fine fog. |
 | 4 holes nozzle | Turn the top adjustment spray to different uses. |
MAINTAIN AND STORAGE
Cleaning and care:
After operating the sprayer, remove the working solution from the tank completely and the tank, hose, pump, and spray tube with clean water. Finally, spray with clean water minutes to eliminate the possibility of a chemical reaction when other chemicals are used in the next spraying. Residues of chemicals can lead to corrosion and other damage to the sprayer especially spraying nozzles, filters, and seals.
Storage rules:
- Keep the sprayer in a dry, cool, and out-of-way place for children.
- It is forbidden to store the sprayer near an open fire.
- To prevent damage to the pump and other parts, it must be washed and dried before storing the sprayer in winter. Clean the surface of machines and tools, filter screen, air nozzle, and dry them in the air. Do not put them directly in the sun.
- Before storage, the battery must be fully charged. During the storage period, you need charge your battery regularly with an adapter (at least once every 2 months).
- Keep the adapter in a dry place.
TROUBLESHOOTING INSTRUCTION
| Problem | Reason | Solution |
| The motor doesn’t run automatically stop after working. | 1. The power connection wire fall off.2. The battery is flat.3. Motor overheating.4. Power switch is broken. | 1. Check the wire connections.2. Charge the battery.3. Start work after the motor is 4. Change a switch. |
| The nozzle does not spray water.The pressure is not steady. | 1. The nozzle is blocked.2. Air in the hose.3. Pump is blocked.4. Hose is leaking. | 1. Clear the nozzle.2. Check the hose to see if it is leaking or not.3. Open the pump, and get the debris out.4. Change a hose. |
| Flow rate and pressu | 1. Suction plug.2. Power is not enough. | 1. Cleaning the filter2. Change the battery |
| Leaking | 1. Connecting place is not tight.2. The O-ring is broken.3. The hose is broken. | 1. Tight the connecting.2 Change the o-ring.3. Change the hose. |
| Poor spraying. | 1. The nozzle has debris.2. The nozzle nut is broken.3. The nozzle flat is installed on wrong face.4. The strainer is blocked.5. Connecting parts are leaking.6. The power is not enough. | 1. Clearing the debris.2. Change the nozzle nut.3. Correct the face for flat.4. Cleaning the strainer.5. Tight the connecting part.6. Charge the battery. |
| Turn the spraying nozzle off, the motor sometimes on, sometimes off. | 1. The spraying nozzle has debris.2. Seals not on the position.3. The cover of the pump is less | 1. Clear the debris.2. Tight and put the seals in po 3. Tight the cover. |
| Stronger noise for | 1. Fitting screw for the pump is | 1. Tight the screw. |
| Charging fail. | 1. The socket is damp, the surf is oxidation, and the wire is bro | 1. Change the socket.2. Connect wires again. |
Manufacturer: Shanghaimuxinmuyeyouxiangongsi
Address: Shuangchenglu 803nong11hao1602A-1609shi, baoshanqu, shanghai 200000 CN.
Imported to AUS: SIHAO PTY LTD. 1 ROKEVA STREETEASTWOOD NSW 2122 Australia
Imported to USA: Sanven Technology Ltd. Suite 250, 9166 Anaheim Place, Rancho Cucamonga, CA 91730
| UK | REP |
YH CONSULTING LIMITED. C/O YH Consultin Limited Office 147, Centurion House, London Road, Staines-upon-Thames, Surrey, TW18 4A>
| EC | REP |
Affordable. Reliable. Home Improvement.
RÜCKENSPRITZE
MODELL: XF-12M27-US & XF-12M27
MODELL: XF-12M27-US & XF-12M27

natural_image
White VEVOR spray sprayer with orange filter and metal handle (no text or symbols visible)natural_image
Six black circular icons representing different workplace safety symbols (no text or labels)text_image
Diagram showing a firearm being adjusted to form a post with red arrows indicating motion or change.natural_image
Three-panel diagram showing a mechanical device before and after assembly, with no visible text or symbols.natural_image
Two sequential images showing a device being processed, one with orange ring and black connector, the other with black and gold connectors (no text or symbols)text_image
Diagram showing a firearm being adjusted to form a post mounted weapon, with red arrows indicating the motion direction.natural_image
Two-panel sequence showing a mounted firearm component before and after assembly, with red arrows indicating the process (no text or symbols present)natural_image
Two-panel image showing a black stick holding an orange object, with an arrow pointing to the right panel (no text or symbols)SCHRITT 0 2 : BATTERIE MONTIEREN
natural_image
Two views of a robotic device showing a red grip, with an arrow indicating transformation from left to right (no text or symbols present)SCHRITT 0 3 : DEN GURT MONTIEREN
natural_image
Four-panel sequence showing a device being adjusted, with red arrows indicating the process (no text or symbols present)flowchart
graph LR
    A["Step 1: Carriage with red arrow"] --> B["Step 2: Lock with orange part"]
    B --> C["Step 3: Battery pack with black strap"]
USAGE
text_image
Diagram showing a mechanical component before and after assembly, with red arrows indicating direction of movement.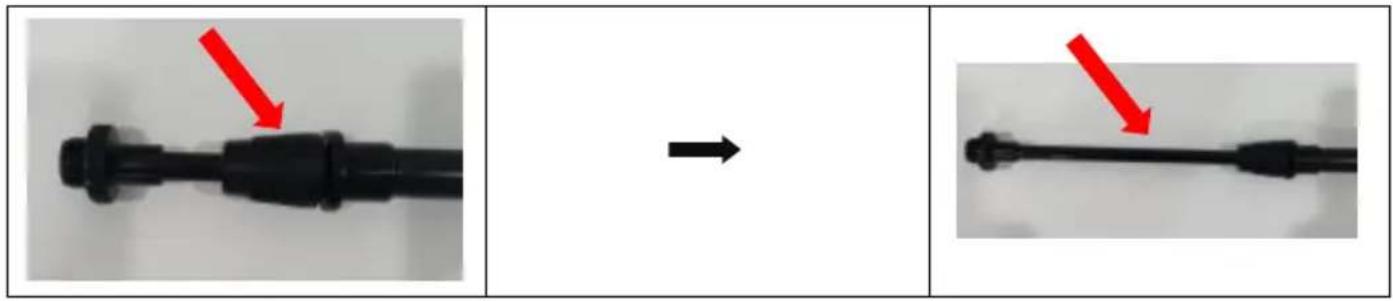
natural_image
Two black mechanical components with red arrows pointing to a detail, shown from before and after states (no text or symbols)natural_image
Orange plastic container held in hand, no visible text or symbols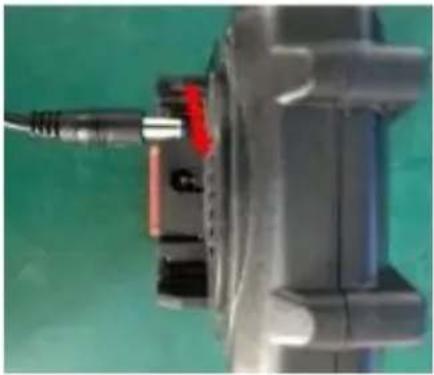
natural_image
Close-up of a mechanical component with a red pin inserted, against a green background (no visible text or symbols)
natural_image
Top-down view of a gray electric motor with red buttons and visible wiring (no text or symbols)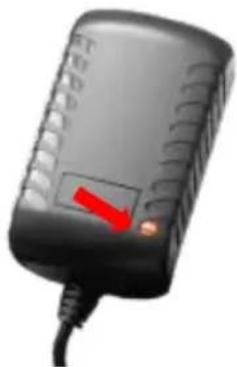
natural_image
Close-up of a black electronic device with a red warning symbol on its side (no text or symbols present)A red light indicates that the battery is char while a green light means the battery is full charged.
0 5. BATTERIESTANDSANZEIGE
text_image
Black seal ring13*17 Green seal ring14x18 Sealing gasket
natural_image
Black cylindrical mechanical component with two red arrows pointing to its ends (no text or symbols)INTRODUCTION AND APPLICATION OF NOZZLE
Place, Rancho Cucamonga, CA 91730
| UK | REP |
YH CONSULTING LIMITED. C/O YH Consultin Limited Office 147, Centurion House, London Road, Staines-upon-Thames, Surrey, TW18 4A>
| EC | REP |
Affordable. Reliable. Home Improvement.
PULVÉRISATEUR À DOS
MODÈLE : XF-12M27-US ET XF-12M27
MODÈLE : XF-12M27-US ET XF-12M27

natural_image
White VEVOR spray sprayer with orange filter and metal handle (no text or symbols visible)natural_image
Six black circular icons representing different workplace safety symbols (no text or labels)PROTECTION DES YEUX ET PROTECTION PROTECTION DES PIEDS MASQUE ANTI-POUSSIÈRE VÊTEMENTS DE PROTECTION LAVEZ-VOUS LES MAINS
text_image
Diagram showing a firearm being adjusted to form a post with red arrows indicating motion or change.natural_image
Three-panel diagram showing a mechanical assembly process: top view, right view, and bottom view (no text or symbols)natural_image
Two sequential images showing a device being held, one with orange cap and black connector, the other with black and gold connectors (no text or symbols)text_image
Diagram showing a firearm being adjusted to form a post with red arrows indicating motion or change.natural_image
Two-panel image showing a mechanical assembly process: one before and after, with red arrows indicating direction of movement (no text or symbols present)natural_image
Two-panel image showing a red-orange object being lifted by black rods, with an arrow indicating transformation (no text or symbols)ÉTAPE 0 2 : ASSEMBLER LA BATTERIE
natural_image
Two-panel image showing a device with red control panel and orange lid, before and after transformation (no text or symbols)ÉTAPE 0 3 : ASSEMBLER LA SANGLE
natural_image
Four-panel sequence showing a device being adjusted, with red arrows indicating the process (no text or symbols present)flowchart
graph LR
    A["Step 1: Initial device with orange and black components"] --> B["Step 2: Setup with red arrows"]
    B --> C["Step 3: Setup with black and white components"]
USAGE
01. COMMENCEZ À TRAVAILLER ET ARRÊTEZ DE TRAVAILLI
text_image
Diagram showing a pipe fitting process with red arrows indicating direction of movement, likely illustrating a mechanical or electrical component assembly.
natural_image
Two-panel image showing a black mechanical component before and after modification, with red arrows indicating the process (no text or symbols present)natural_image
Hand holding an orange plastic container with a red arrow pointing to the side (no visible text or symbols)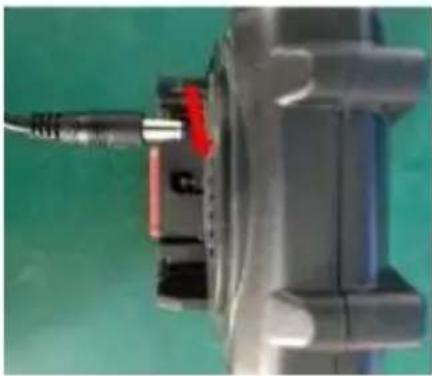
natural_image
Close-up of a mechanical component with a red arrow pointing to a section, against a green background (no visible text or symbols)
natural_image
Top-down view of a gray electric motor with red buttons and cable, no visible text or symbols
natural_image
Close-up of a black electronic device with a red arrow pointing to its side panel (no visible text or symbols)A red light indicates that the battery is char while a green light means the battery is full charged.
0 5. INDICATEUR DE NIVEAU DE BATTERIE
text_image
Black seal ring13*17 Green seal ring14x18 Sealing gasket
natural_image
Black cylindrical mechanical component with two red arrows pointing to its ends (no text or symbols)INTRODUCTION AND APPLICATION OF NOZZLE
Lieu, Rancho Cucamonga, CA 91730
| UK | REP |
YH CONSULTING LIMITED. C/O YH Consultin Limited Office 147, Centurion House, London Road, Staines-upon-Thames, Surrey, TW18 4A>
| EC | REP |
Affordable. Reliable. Home Improvement.
RUGSPUIT
MODEL: XF-12M27-US & XF-12M27
MODEL: XF-12M27-US & XF-12M27

natural_image
White VEVOR spray sprayer with orange filter and metal handle (no text or symbols visible)natural_image
Six black circular icons representing different workplace safety symbols (no text or labels)OOGBESCHERMING EN BESCHERMING VOETBESCHERMING STOFMASKER BESCHERMENDE KLEDING WAS JE HANDEN
text_image
Diagram showing a firearm being adjusted to form a post with red arrows indicating motion or change.natural_image
Three-panel diagram showing a mechanical assembly before and after modification, with no visible text or symbols.natural_image
Two sequential images showing a device being held, one with an orange ring and black connector, the other with a black handle and brass fittings (no text or symbols)text_image
Diagram showing a firearm being adjusted to form a post with a red arrow indicating the change direction.natural_image
Two-panel image showing a mechanical assembly process: one before and after, with red arrows indicating the change direction (no text or symbols present)natural_image
Two-panel image showing a red-orange object being lifted by black rods, with an arrow indicating transformation (no text or symbols)STAP 0 2 : DE BATTERIJ IN ELKAAR ZETTEN
natural_image
Two views of a robotic device showing a red grip and orange cover, with an arrow indicating transformation (no text or symbols visible)STAP 0 3 : DE BAND IN ELKAAR ZETTEN
natural_image
Four-panel sequence showing a device being adjusted, with red arrows indicating the process (no text or symbols present)flowchart
graph LR
    A["Step 1: Initial device with orange and black components"] --> B["Step 2: Setup with red arrows"]
    B --> C["Step 3: Setup with black and white components"]
USAGE
01. BEGIN MET WERKEN EN STOP MET WERKEN
text_image
Diagram showing a pipe fitting process with red arrows indicating direction of movement, likely illustrating a mechanical or electrical component assembly.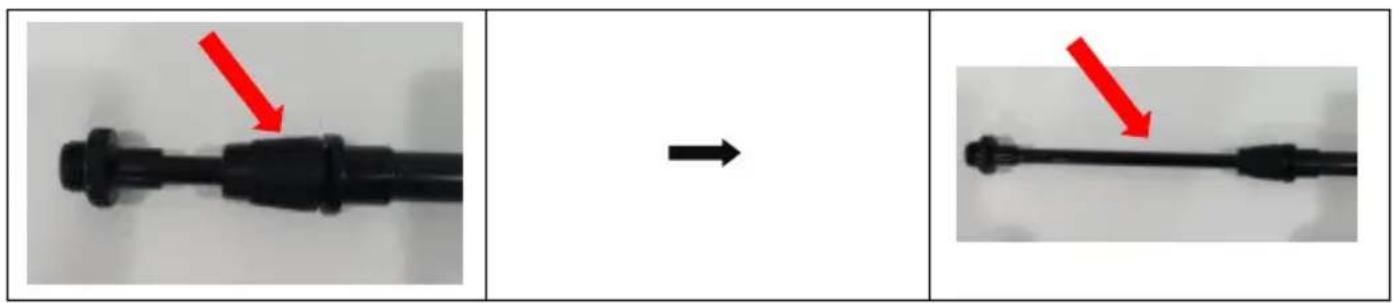
natural_image
Two-panel image showing a black mechanical component before and after modification, with red arrows indicating the process (no text or symbols present)03. HET GEBRUIK VAN DE HANDVATSCHAKELAAR
natural_image
Hand holding an orange plastic container with a red arrow pointing to the side (no visible text or symbols)
natural_image
Close-up of a mechanical component with a red arrow pointing to a section, against a green background (no visible text or symbols)
natural_image
Top-down view of a gray electric motor with red buttons and cable, no visible text or symbols
natural_image
Close-up of a black electronic device with a red arrow pointing to its side panel (no visible text or symbols)A red light indicates that the battery is char while a green light means the battery is full charged.
0 5. BATTERIJNIVEAU-INDICATOR
natural_image
Solid orange rectangular object with a red vertical line and arrow, no visible text or symbols

natural_image
Close-up of an open industrial machine with orange lid and red control panel (no visible text or symbols)0 7 . SCHOONMAKEN
text_image
Black seal ring13*17 Green seal ring14x18 Sealing gasket
natural_image
Black cylindrical mechanical component with two red arrows pointing to its ends (no text or symbols)INTRODUCTION AND APPLICATION OF NOZZLE
YH CONSULTING LIMITED. C/O YH Consultin Limited Office 147, Centurion House, London Road, Staines-upon-Thames, Surrey, TW18 4A>
| EC | REP |
Affordable. Reliable. Home Improvement.
RYGGSPRUTA
MODELL: XF-12M27-US OCH XF-12M27
MODELL: XF-12M27-US OCH XF-12M27

natural_image
White VEVOR spray sprayer with orange filter and metal handle (no text or symbols visible)natural_image
Six black circular icons representing different workplace safety symbols (no text or labels)ÖGONSKYDD OCH SKYDD FOTSKYDD DAMMMASK SKYDDSKLÄDER TVÄTTA HANDEN
text_image
Diagram showing a firearm being adjusted to form a post mounted weapon, with red arrows indicating the motion direction.natural_image
Three-panel diagram showing a mechanical assembly process: top view, right view, and bottom view (no text or symbols)natural_image
Two sequential images showing a device being held, one with an orange ring and black connector, the other with a black handle and brass fittings (no text or symbols)Plastsprutstång :
text_image
Diagram showing a firearm being adjusted to form a post with a red arrow indicating the change direction.natural_image
Two-panel sequence showing a mechanical assembly before and after modification, with red arrows indicating the process (no text or symbols present)natural_image
Two-panel image showing a red-orange object being lifted by black rods, with an arrow indicating transformation (no text or symbols)STEG 0 2 : MONTERA BATTERIET
natural_image
Two-panel image showing a device with red control panel and orange lid, before and after transformation (no text or symbols)STEG 0 3 : MONTERA REMMEN
natural_image
Four-panel sequence showing a device being adjusted, with red arrows indicating the process (no text or symbols present)flowchart
graph LR
    A["Step 1: Initial device with orange and black components"] --> B["Step 2: Assembly of orange and black components"]
    B --> C["Step 3: Final device with black-and-red connectors"]
USAGE
01. BÖRJA ARBETA OCH SLUTA ARBETA
natural_image
Diagram showing a pipe fitting with two connectors and red arrows indicating direction (no text or symbols)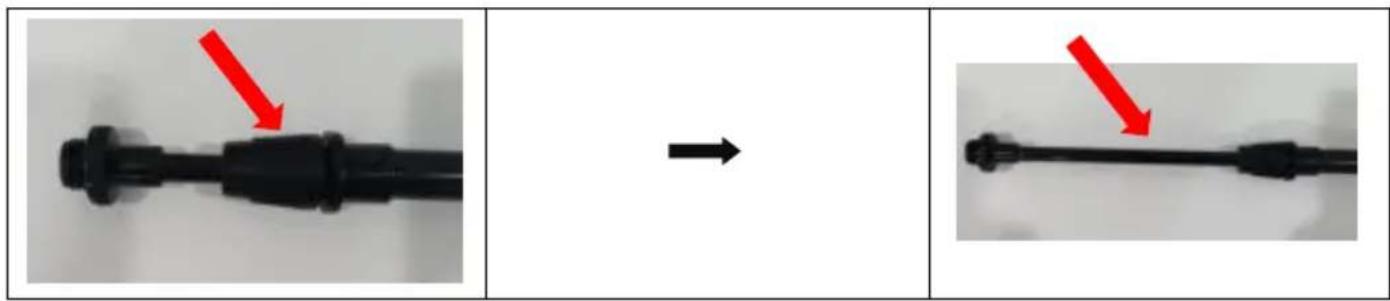
natural_image
Two-panel image showing a black mechanical component before and after modification, with red arrows indicating the process (no text or symbols present)03. ANVÄNDNING AV HANDTAGSBRYTAREN
natural_image
Orange plastic tray with a small rectangular cutout, held by a hand (no visible text or symbols)
natural_image
Close-up of a mechanical component with a red arrow pointing to a small component (no visible text or symbols)
natural_image
Top-down view of a mechanical device with visible internal components and wiring (no text or symbols)
natural_image
Close-up of a black electronic device with a red arrow pointing to its side panel (no visible text or symbols)A red light indicates that the battery is char while a green light means the battery is full charged.
0 5. BATTERINIVÅINDIKATOR
text_image
Black seal ring13*17 Green seal ring14x18 Sealing gasket
natural_image
Black cylindrical mechanical component with two red arrows pointing to its ends (no text or symbols)INTRODUCTION AND APPLICATION OF NOZZLE
YH CONSULTING LIMITED. C/O YH Consultin Limited Office 147, Centurion House, London Road, Staines-upon-Thames, Surrey, TW18 4A>
| EC | REP |