
FY-EP-2 - Pizza oven Vevor - Free user manual and instructions
Find the device manual for free FY-EP-2 Vevor in PDF.
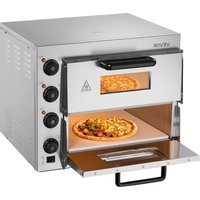


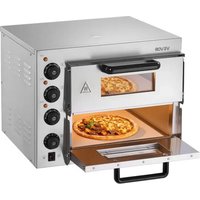
| Product type | Electric pizza oven |
| Brand | Vevor |
| Model | FY-EP-2 |
| Dimensions (L×P×H) | 559 × 475 × 433 mm |
| Net weight | 30.4 kg (120 V) / variable depending on voltage |
| Rated power | 2700 W (120 V) / 3000 W (220-240 V) |
| Supply voltage | 120 V ~ / 220-240 V ~ |
| Maximum temperature | 350 °C |
| Recommended preheating | 200 °C for 19-24 min (depending on voltage) |
| Pizza cooking time | Approximately 7 min at 350 °C after preheating |
| Heating elements | Upper, center and lower (independent thermostats) |
| Interior lighting | Yes, with dedicated switch |
| Timer | Yes, with automatic heating shutoff |
| Thermostat | Adjustable and maintains constant temperature |
| Material | Stainless steel |
| Installation type | On horizontal work surface, grounded outlet required |
| Maintenance and cleaning | Clean with a damp cloth and mild detergent; do not immerse |
| Safety | Grounding required; do not use outdoors; hot surface |
| Spare parts | Available from manufacturer (thermostat, heating element, fuse, indicator) |
| Repairability | Component replacement possible by a professional |
| Warranty | Electronic warranty certificate at www.vevor.com/support |
Frequently Asked Questions - FY-EP-2 Vevor
User questions about FY-EP-2 Vevor
0 question about this device. Answer the ones you know or ask your own.
Ask a new question about this device
Download the instructions for your Pizza oven in PDF format for free! Find your manual FY-EP-2 - Vevor and take your electronic device back in hand. On this page are published all the documents necessary for the use of your device. FY-EP-2 by Vevor.
USER MANUAL FY-EP-2 Vevor
Technical Support and E-Warranty Certificate www.vevor.com/support
Electric Pizza Oven
MODEL: FY-1EP-2, FY-1EP-1, FY-EP-1, FY-EP-2
We continue to be committed to providing you with tools at competitive prices. "Save Half", "Half Price", or any other similar expressions used by us only represent savings you might benefit from buying certain tools with us compared to top brands, and does not necessarily mean to cover all categories of tools offered. We kindly remind you to verify carefully when placing an order with us to ensure you are actually saving half in comparison with the top major brands.
MODEL: FY-1EP-2, FY-1EP-1, FY-EP-1, FY-EP-2
NEED HELP? CONTACT US!
Have product questions? Need technical support? Please feel free to contact us:
Technical Support and E-Warranty Certificate www.vevor.com/support
This is the original instruction. Please read all manual instructions carefully before operating. VEVOR reserves a clear interpretation of the user manual. The appearance of the product shall be subject to the product you received. Please forgive us that we won't inform you of any technology or software updates on our product.
 | Warning-To reduce the risk of injury, user must re instructions manual carefully. |
 | This product is subject to the provision of European D 2012/19/EC. The symbol showing a wheelie bin cros through indicates that the product requires separate re collection in the European Union. This applies to the and all accessories marked with this symbol. Products as such may not be discarded with normal domestic v must be taken to a collection point for recycling electr electronic devices |
A. Important Safety Instructions
Before using this product, please read the safety instructions carefully and operate in accordance with the regulations:
- Please read carefully before use
- This equipment must use a socket with a safety ground!
- For commercial use only!
- Do not touch the heating surface!
- To prevent electric shock, please ensure that the power cord, plug, and other electrical components do not come into contact with water or other liquids!
- Please disconnect the plug before cleaning!
- Before loading or unloading parts, please let the appliance cool down to prevent burns!
- Do not use electrical appliances if the power cord is damaged!
- Do not use the machine if it is damaged or malfunctions!
- Not suitable for outdoor use!
- Do not place it near electrical appliances or gas heat sources!
- Turn off the thermostat and timer first, and then unplug it!
- Do not use electrical appliances for purposes other than those for
which they were designed!
- Do not put metal objects or oversized food in the pizza oven, as this can cause fire alarms and electrical short circuits!
- Do not place task items on the top of the pizza oven during use
- Do not let the pizza oven come into contact with any flammable materials during use, such as curtains, rags, wooden boards, etc.!
- Do not use gold-based rags to clean the pizza oven, as they may damage electrical components and cause an electric shock!
- Never put paper, cardboard or plastic in the pizza oven!
- Do not wrap the inner pot with tin foil, as it may cause overheating.
- Resetting the timer to zero can cut off the power of the pizza oven.
- Note: Parts not recommended by the manufacturer may cause damage to the pizza oven!
- Children over eight years old or people with disabilities can use the pizza oven under correct guidance and supervision and fully understand the dangers of use. Do not let children use the pizza oven as a toy. Children cannot use it without supervision. Clean or maintain this pizza oven.
- If the power cord is damaged, you must contact the manufacturer or after-sales agency for replacement to avoid possible dangers. The break may be burnt or even catch fire, so do not let the pizza oven near flammable objects such as curtains!
- When using the pizza oven in public places such as shops, fast food restaurants, hotels, etc., check the voltage and socket to ensure that it matches the electrical specifications of the pizza oven!
- Place the pizza oven on a horizontal surface to allow for air flow. Please pay attention during use. Do not leave the pizza oven unsupervised while it is working!
- Please unplug the plug before cleaning, and wipe the plug dry before plugging it back in to prevent ignition and short circuit.
- It is normal for the door and shell of the pizza oven to heat up during use. Please pay attention to safety and avoid burns.
Instructions before use:
B. Before using your pizza oven for the first time, please follow the instructions
- Use a small amount of detergent to clean the handle and grilling (note: do not use salt water or corrosive detergents).
- Gently wipe the inner pot with a damp cloth. When cleaning the oven, be careful not to touch the electrical components, and do not immerse the pizza oven in water.
- After cleaning, dry all the above parts, put them back in the pizza oven, close it, and preheat at the highest temperature for 5 minutes.
- Turn off the electric heating tube and open the pizza oven to expel remaining smoke. The heating tube is lubricated and rust-proofed. The residual grease can be burned off after first use. Slight smoke is normal.
- Technical Parameters
| Model | Measurement(mm) | Power(W) | Voltage(V) | Weight(kg) |
| FY-1EP-2 | 520*430*430mm | 1800W | 120V | 24.5kg |
| 2700W | 220V~240V | |||
| FY-1EP-1 | 517*470*266mm | 1300W | 120V | 15.9kg |
| 1800W | 220V~240V | |||
| FY-EP-1 | 515*560*267mm | 1700W | 120V | 19kg |
| 2000W | 220V~240V | |||
| FY-EP-2 | 559*475*433mm | 2700W | 120V | 30.40kg |
| 3000W | 220V~240V |
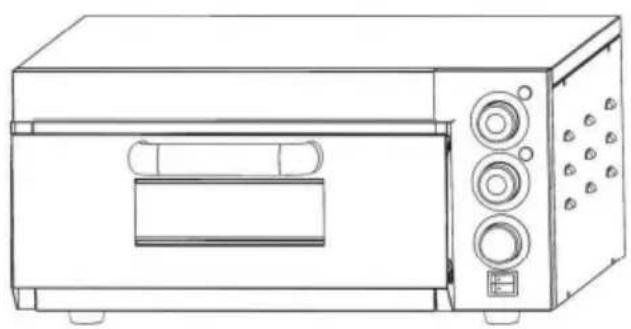
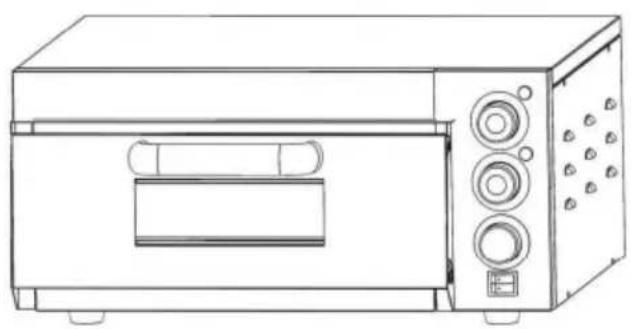
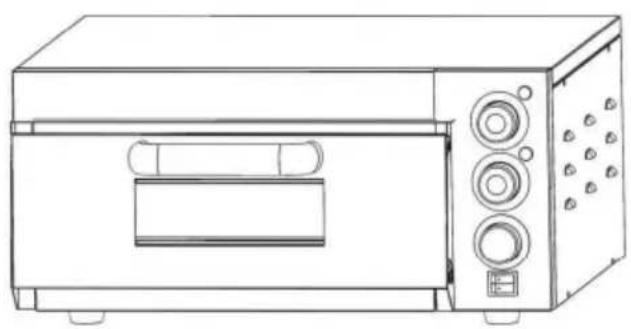
2. Control Panel
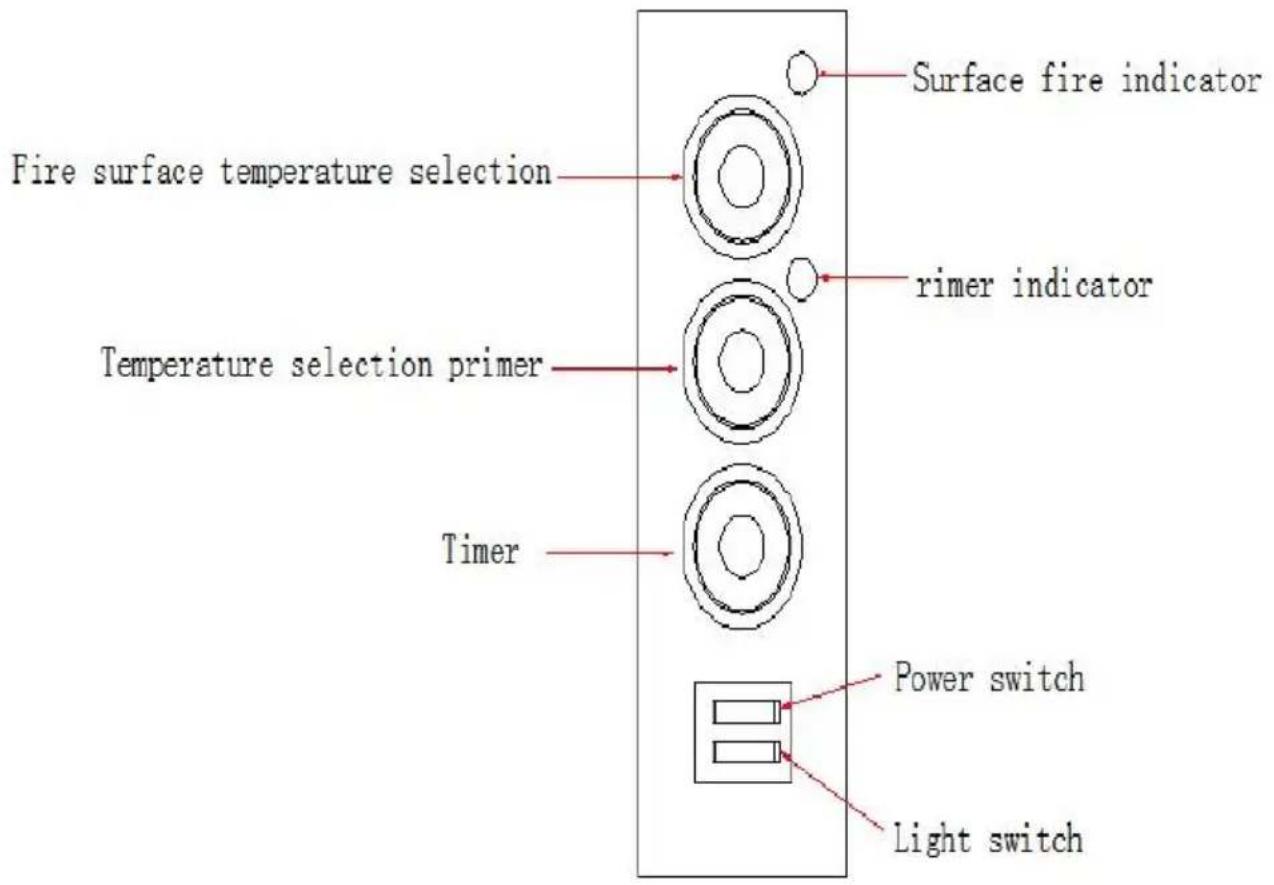
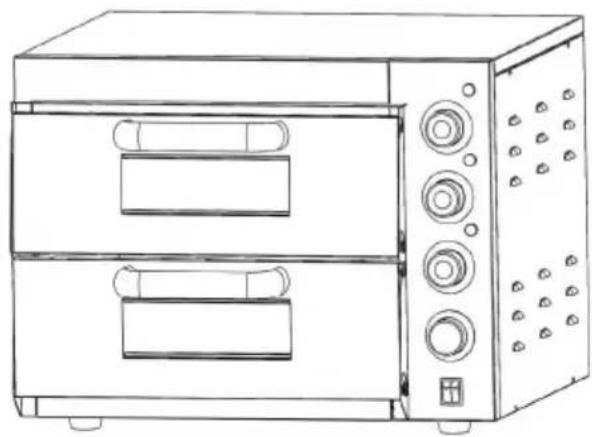
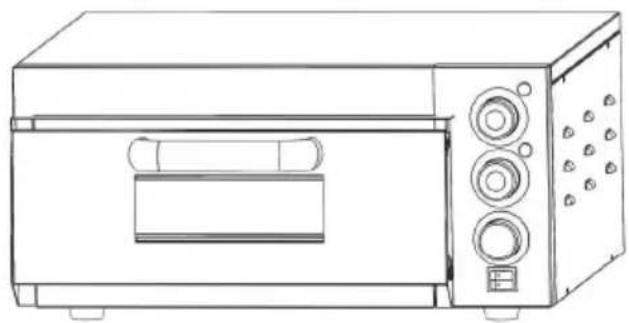
FY-1EP-1, FY-EP-1
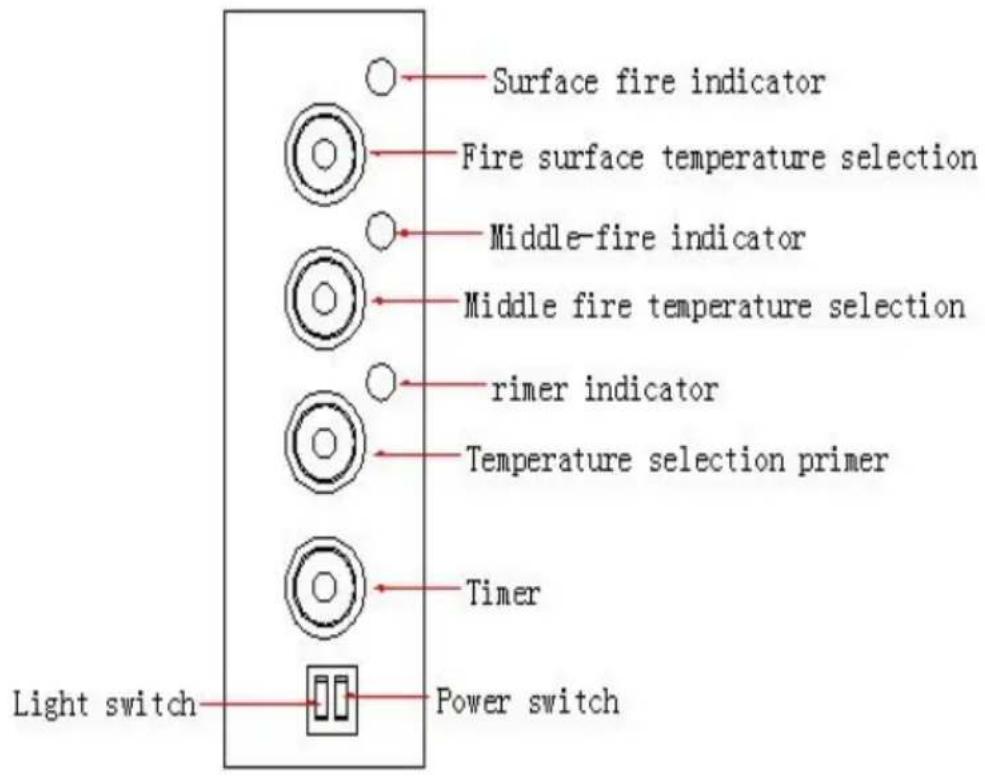
FY-1EP-2, FY-EP-2
3. Instructions
A. The illuminating light switch controls the illuminating light in the oven. B. Turn on the power switch. Regulate the bottom heater thermostat to the needed temperature to heat. (The timer is just a reminder, it does not interrupt.) The thermostat will keep a constant temperature when the temperature reaches the set temperature. C. Turn off the power switch. Regulate the bottom heater thermostat to the needed temperature. Then regulate the timer to the needed time. It will start heating when time is up. (Suggestion: if using the timer, please increase the temperature to the set temperature.) D. The bottom heater thermostat controls the bottom element and the bottom indicator. The middle heater thermostat controls the middle element and the middle indicator. The top heater thermostat controls the top element and the top indicator. E. The maximum temperature can reach 350°C and the temperature increases very fast. F. You must preheat the temperature to 200-300°C before putting the food in this oven.
4. Fault Treatment:
| Fault | Cause | Overcome |
| Power switch turned on, indicator light, but temperature not increased in the oven | 1. thermostat damaged2. element damaged | 1.change thermostat2. change element |
| Power switched, turn the thermostat, temperature can not be controlled. | Thermostat damaged | Change thermostat |
| Power wired, press the switch, indicator not light | Indicator damaged | Change indicator |
| Power wired, indicator not light, temperature not increased | Power not wired, fuse damaged | Inspect power and wire, change fuse |
5. Installation Instructions:
A. The used voltage must be the same as the rated voltage. B. You must have enough power supply beside the equipment. C. There is a grounding bolt at the back of the equipment. You must connect a copper core wire (>2.5mm2) with a safe earth wire. D. You must inspect the wire, the voltage, and the loading wire to ensure they are all safe and well done.
6. Bake Pizza Temperature Reference
| Model | Preheating temperature | Preheating time | Adjust the temperature after the pizza is in | Pizza time | Voltage |
| FY-1E P-1 | 200°C | 16 minutes | 350°C | 7 minutes | 220-240 V |
| 200°C | 20 minutes | 350°C | 7 minutes | 120V | |
| FY-1E P-2 | 200°C | 20minutes | 350°C | 7 minutes | 220-240 V |
| 200°C | 24 minutes | 350°C | 7 minutes | 120V | |
| FY-EP-1 | 200°C | 15minutes | 350°C | 7 minutes | 220-240 V |
| 200°C | 18minutes | 350°C | 7 minutes | 120V | |
| FY-EP-2 | 200°C | 19minutes | 350°C | 7 minutes | 220-240 V |
| 200°C | 24minutes | 350°C | 7 minutes | 120V |
VEVOR®
TOUGH TOOLS, HALF PRICE
Technical Support and E-Warranty Certificate
www.vevor.com/support
VEVOR®
TOUGH TOOLS, HALF PRICE
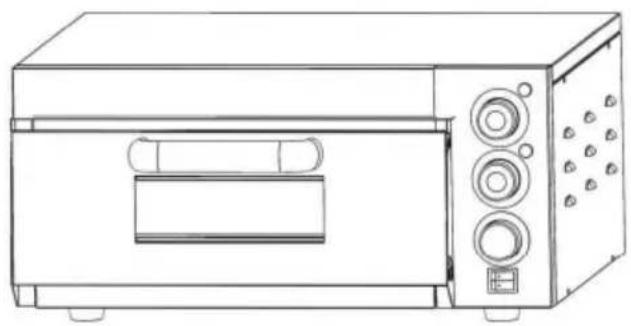
NEED HELP? CONTACT US!
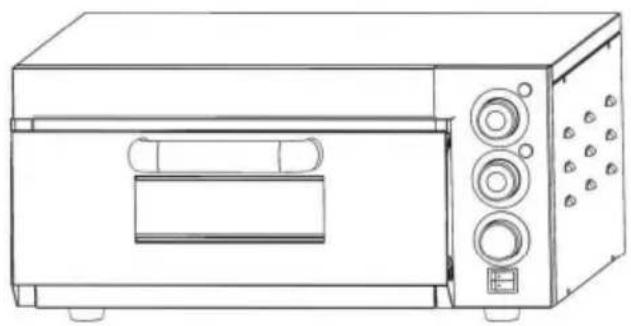
FY-1EP-2, FY-EP-2
3. Instructions
www.vevor.com/support
VEVOR®
TOUGH TOOLS, HALF PRICE

FY-1EP-2, FY-EP-2
3. Instructions
electronics www.vevor.com/support
VEVOR®
TOUGH TOOLS, HALF PRICE
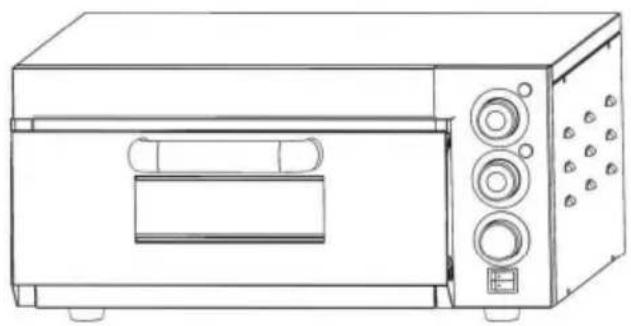
NEED HELP? CONTACT US!
NEED HELP? CONTACT US!
warranty certificate www.vevor.com/support
VEVOR®
TOUGH TOOLS, HALF PRICE
NEED HELP? CONTACT US!
FY-1EP-2, FY-EP-2
3. Instructions
www.vevor.com/support
- ELECTRIC PIZZA OVEN
- MODEL: FY-1EP-2, FY-1EP-1, FY-EP-1, FY-EP
- NEED HELP? CONTACT US
- IMPORTANT SAFETY INSTRUCTIONS
- BEFORE USING YOUR PIZZA OVEN FOR THE FIRST TIME, PLEASE FOLLOW THE INSTRUCTIONS
- CONTROL PANEL
- INSTRUCTIONS
- FAULT TREATMENT
- INSTALLATION INSTRUCTIONS
- BAKE PIZZA TEMPERATURE REFERENCE
- VEVOR®
- TOUGH TOOLS, HALF PRICE
Brand : Vevor
Model : FY-EP-2
Category : Pizza oven