LQX-110056 - Bed accessory Vevor - Free user manual and instructions
Find the device manual for free LQX-110056 Vevor in PDF.

| Brand | Vevor |
| Model | LQX-110056 |
| Product Type | Bed safety rail |
| Maximum load capacity | 136 kg (300 lb) |
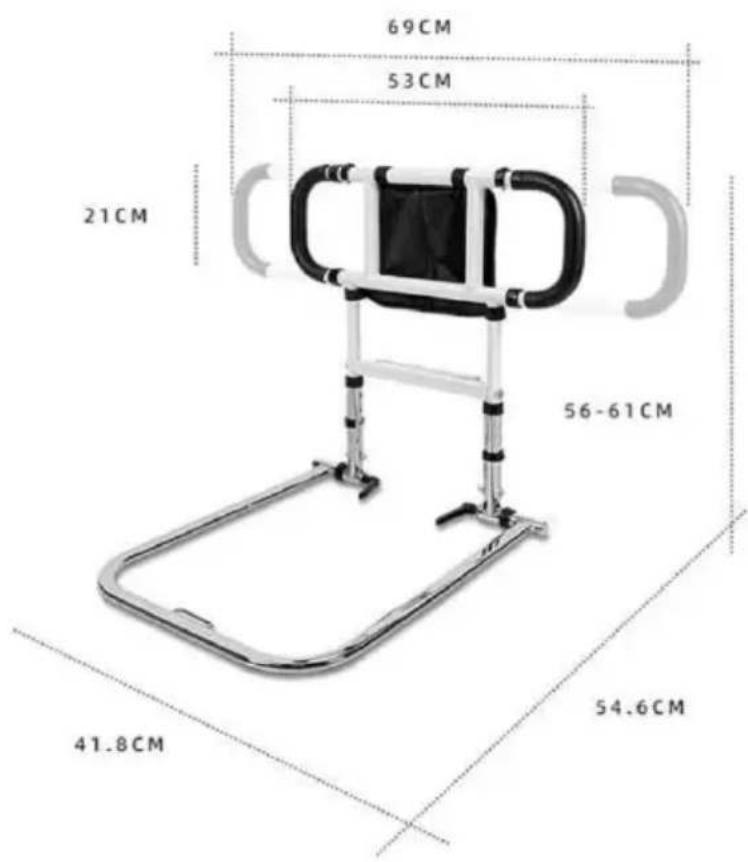
| Height | 53 cm |
| Width | 69 cm |
| Depth | 21 cm |
| Adjustable width | 56–61 cm |
| Compatible mattress height | 17.8 to 33 cm (7 to 13 inches) |
| Compatible bed types | Metal bed, platform bed, upholstered bed |
| Non-compatible bed types | Toddler beds, bunk beds, water beds, air beds, adjustable beds |
| Material | Steel and foam |
| Main functions | Helps to get in and out of bed, fall prevention, adjustable height and width |
| Care and cleaning | Regular cleaning with soapy water or warm water, dry completely before use |
| Safety instructions | Do not sit or stand on it, do not use with children, check that there is no gap between the rail and the mattress |
| Assembly required | Yes, screwing onto the bed frame possible as an option |
| Spare parts | Contact customer service for missing or damaged parts |
| Warranty | Standard manufacturer warranty, contact after-sales service |
| After-sales service | Support by email or phone, address: Sanven Technology Ltd., USA |
Frequently Asked Questions - LQX-110056 Vevor
User questions about LQX-110056 Vevor
0 question about this device. Answer the ones you know or ask your own.
Ask a new question about this device
Download the instructions for your Bed accessory in PDF format for free! Find your manual LQX-110056 - Vevor and take your electronic device back in hand. On this page are published all the documents necessary for the use of your device. LQX-110056 by Vevor.
USER MANUAL LQX-110056 Vevor
Affordable. Reliable. Home Improvement.
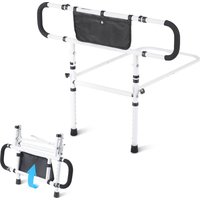
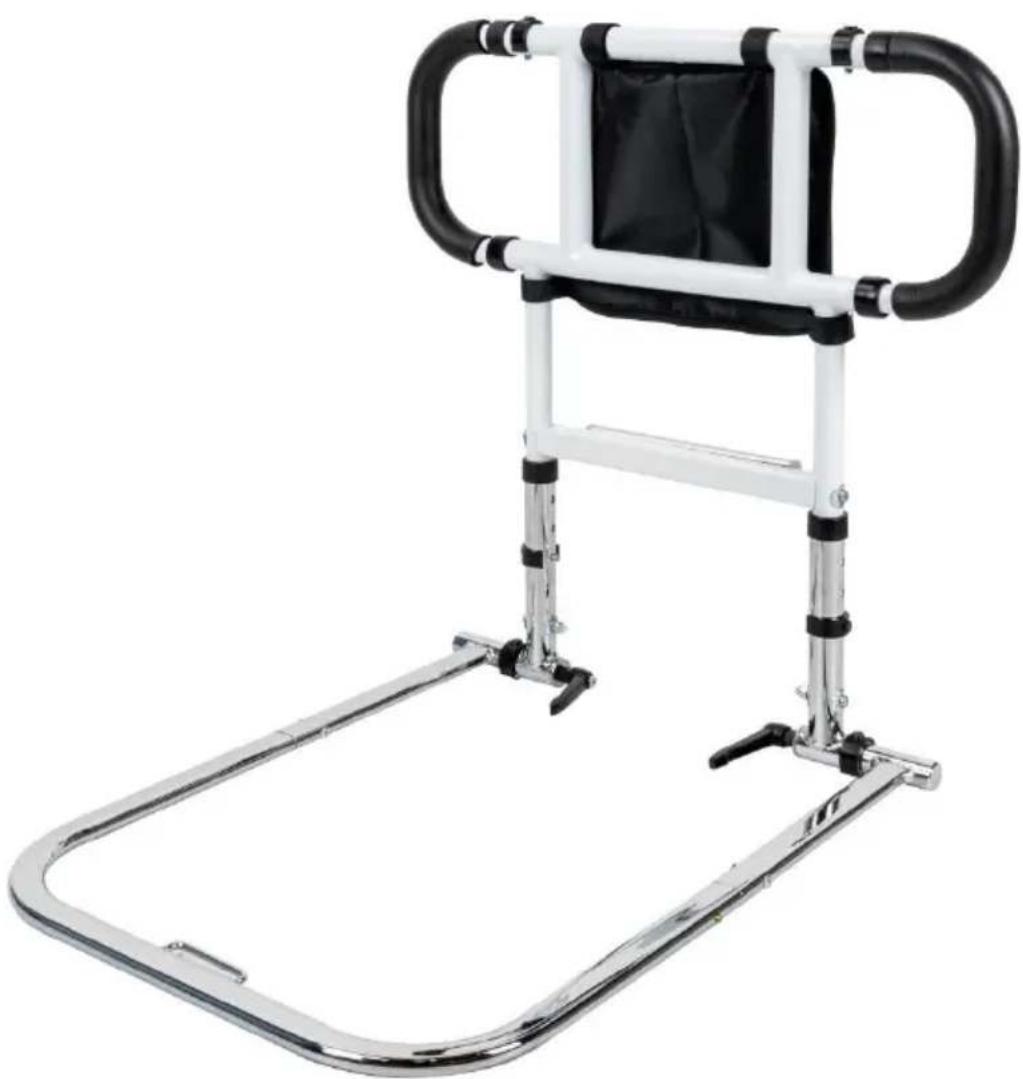
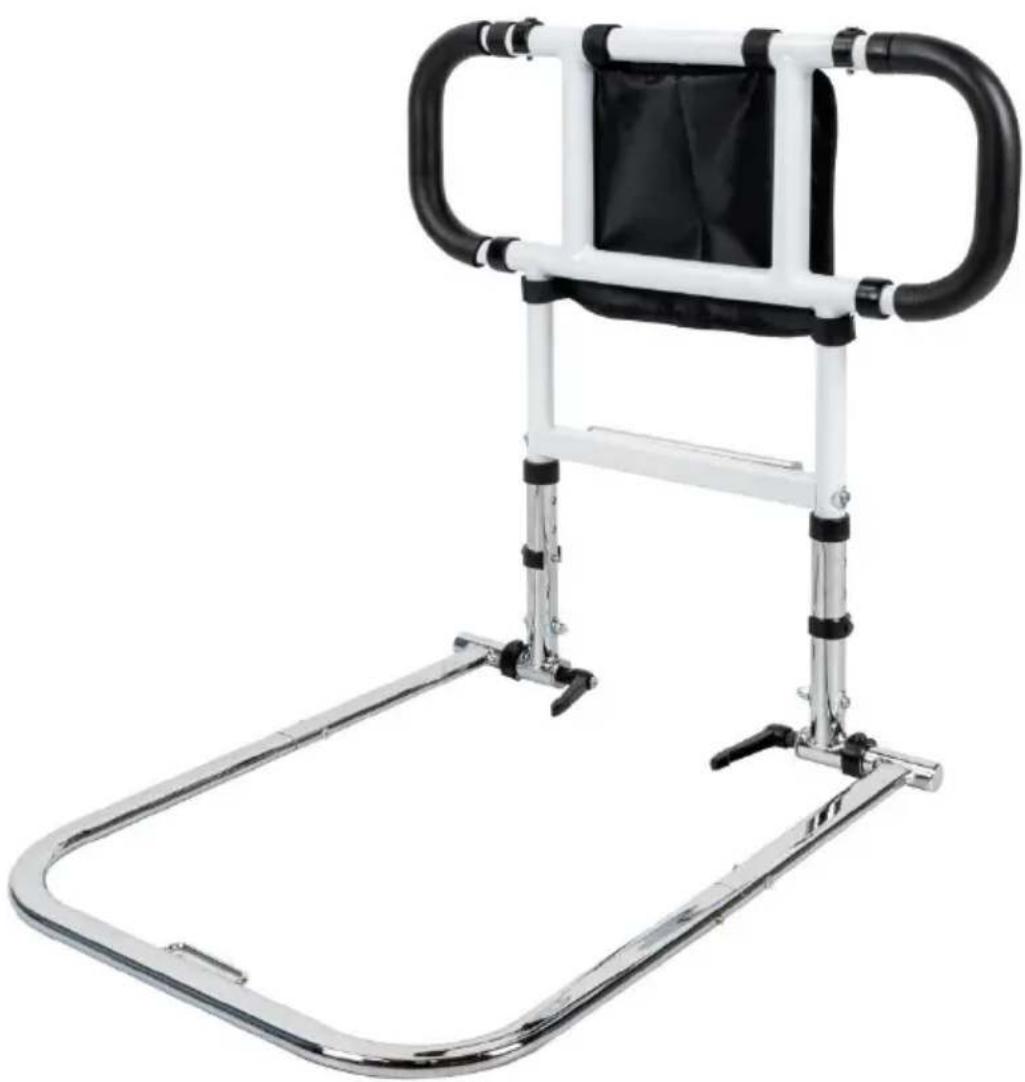
BED HANDLE
MODEL:LQX-110056
VEVOR Support Center

VEVOR
Affordable. Reliable. Home Improvement.
BED HANDLE
natural_image
Modern mobility device with black and white frame, metal frame, and curved base (no text or symbols visible)This is the original instruction, please read all manual instructions care before operating. VEVOR reserves a clear interpretation of our user manual. The appearance of the product shall be subject to the product received. Please forgive us that we won't inform you again if there are technology or software updates on our product.
SAFETY INSTRUCTIONS
WARNING:
Read this material before using this product. Failure to do so can result in injury.
Use precautions
TO PREVENT SERIOUS INJURY AND DEATH FROM TIPPING:
- DO NOT SIT OR STAND ON THIS ITEM.
- This product is not a toy. Do not allow children to play with or near this. Please keep small spare parts out of children's reach.
- Use as intended only.
- Inspect before every use; do not use if parts are loose or damaged.
- Keep away from sharp points, blades and other items, so as not to scratch product.
Technical Parameters
| Model | maximum load capacity |
| LQX-110056 | 300lb |
| FDA Registration No.: 3016734231 | |
Instructions for Use
APPLICATION OF BED SAFETY RAIL
This Bed Safety Rail is an assistive balance device. It is designed to assist people who are mobile, but require some assistance to get and get out of bed, or reposition in bed safely. The bed rail is intended for people with very poor mobility, or who are permanently bedridden. It is NOT designed to prevent people from falling out of bed.

CAUTIONS and WARNINGS
- Please make sure that you read and follow these instructions careful. Failure to comply may result in injury.
- Ensure all parts are assembled securely and all spring buttons are properly engaged in position prior to use.
- The area between an assistive bed rail and mattress creates a po for serious, life-threatening entrapment. It is possible fora person's head neck, arm (s), leg (s) or body to become wedged between the side mattress and any of the bed rail.
- The mattress must be tight against the assistive handrail, with no at all times. This should be checked frequently-at least daily.
- The mattress must be tight against the assistive handrail, with no at all times. This should be checked frequently-at least daily.
- NEVER use unless the product is tight against the mattress without gaps, and at least 12.5 in. from headboard and foot board.
- NEVER use with children.
- NEVER use on toddler, bunk, water, or inflatable beds, beds with compressible pads, articulated beds, or on beds with a mattress height taller than 13in (33cm)or shorter than 7 in (17.8cm).ONLY use with two queen and king size beds.
- Theproduct is an auxiliary product. Patients without autonomous ability must be under supervision.
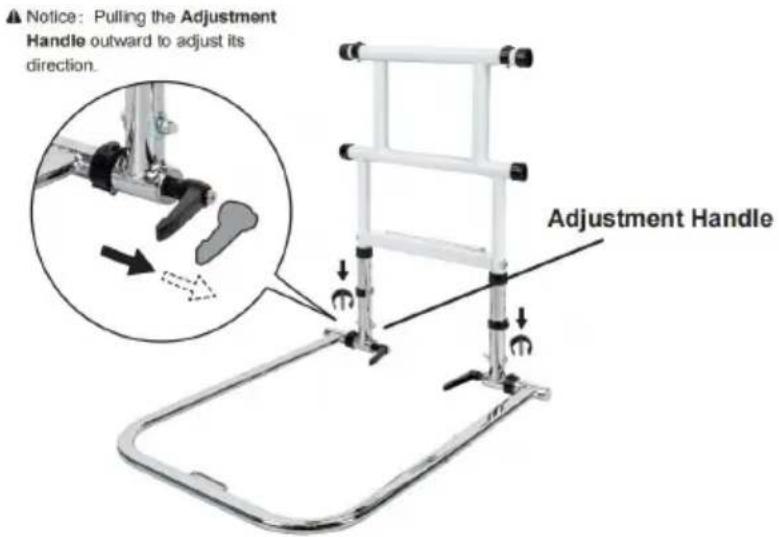
Height and Width Adjustable
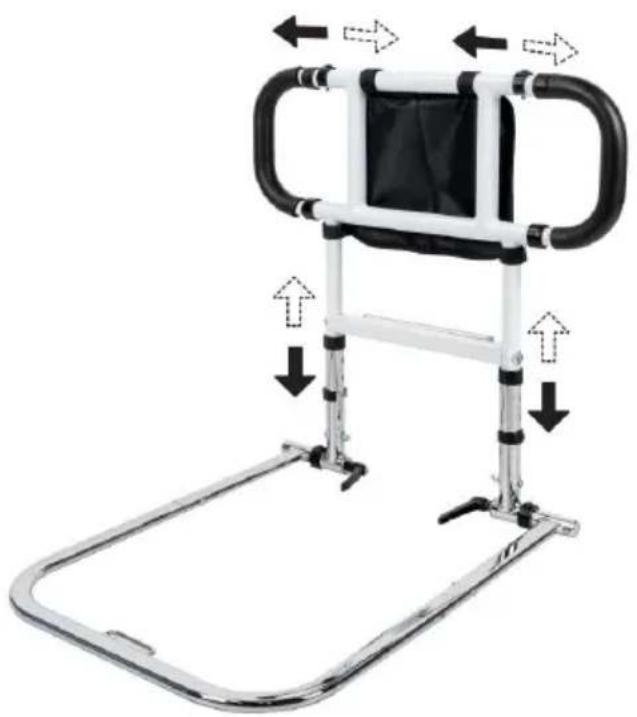
natural_image
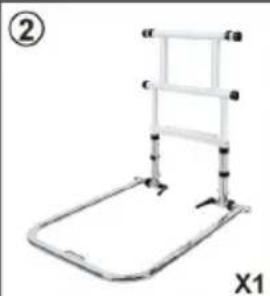
Diagram of a mobility device with adjustable arms and legs, showing directional arrows indicating movement (no text or symbols)What You Get
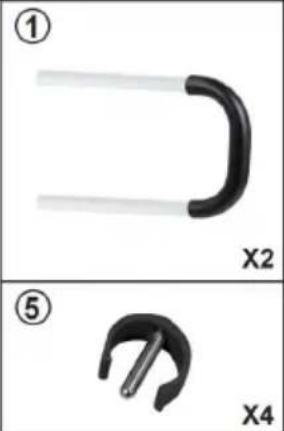
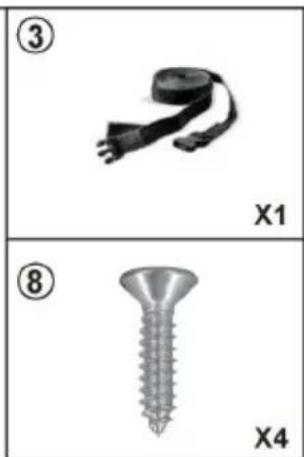
1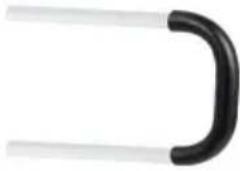 Armrest tube x2 Armrest tube x2 | 2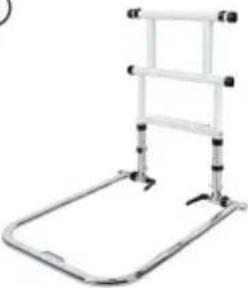 Main frame x1 Main frame x1 | 3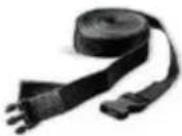 Safety belt x1 Safety belt x1 | 4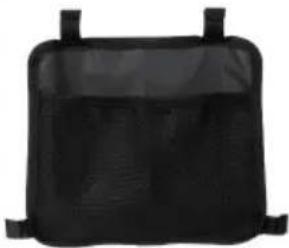 Storage bag x1 Storage bag x1 |
5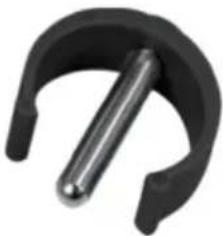 Buckle x6 Buckle x6 | 6 Motion sensor light x1 Motion sensor light x1 | 7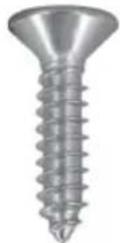 Screw x4 Screw x4 |
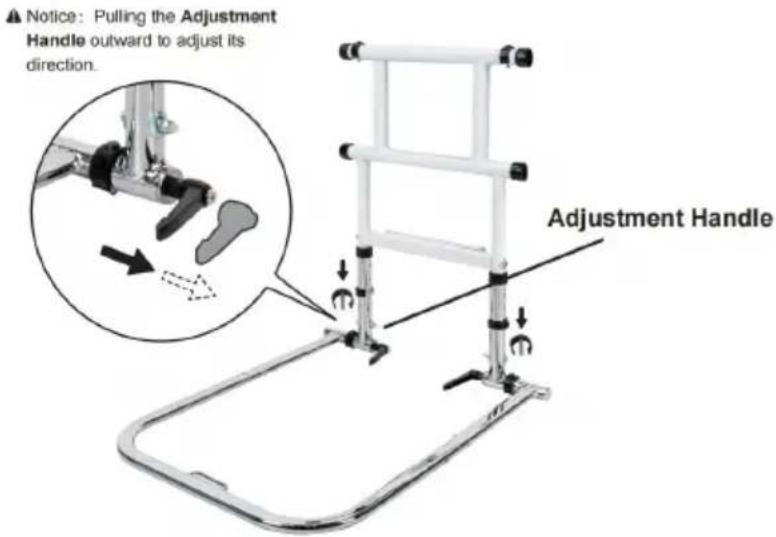
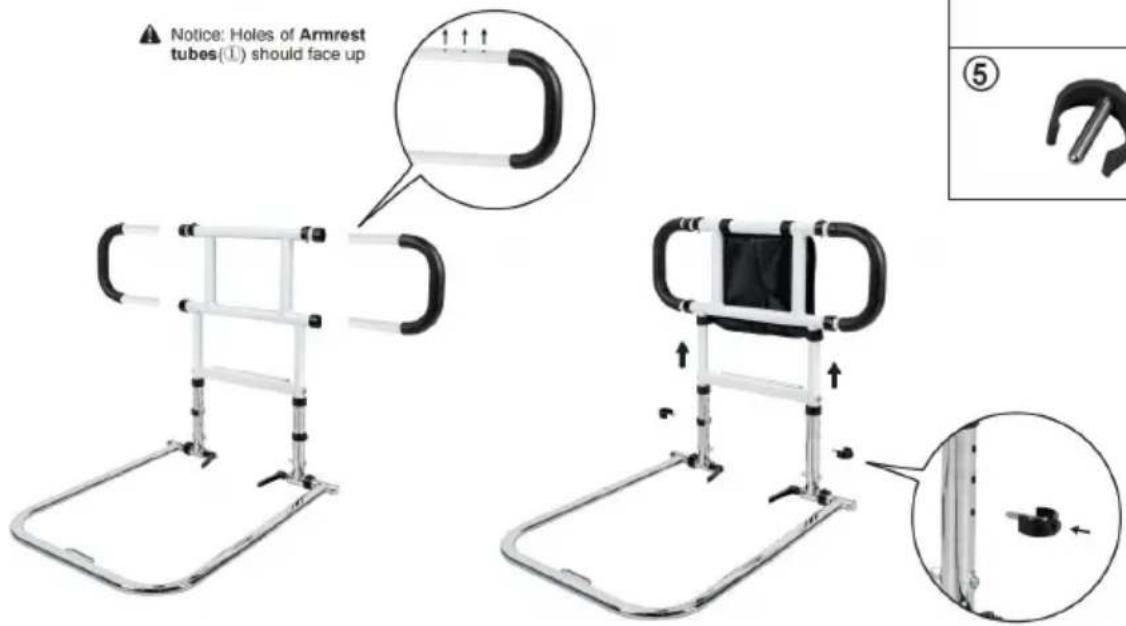
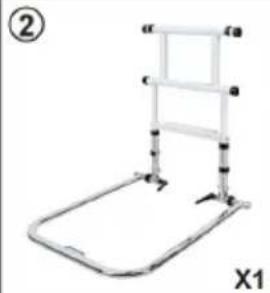
Step 1:
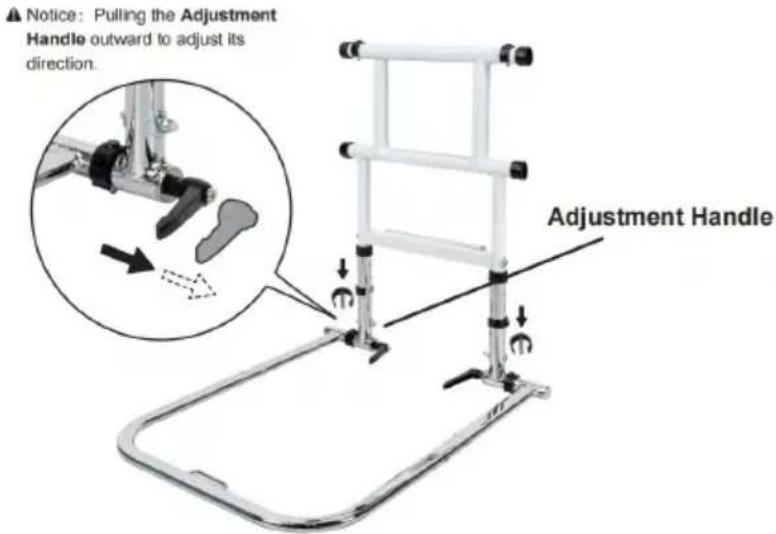
Loose the Adjustment Handle (▲important).
Unfold Main Frame(②) to 90°, secure with the buckle (⑤).
Tighten the Adjustment Handle(▲important).
Adjust the position of the Adjustment Handle as shown.
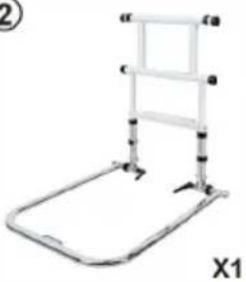
natural_image
Metallic horizontal ladder device with a flat base and side supports, labeled X1 (no text or symbols on the device itself)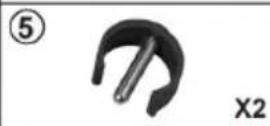
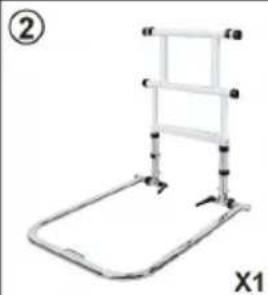
Step 2:
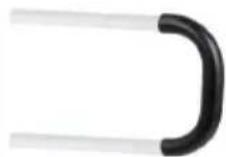
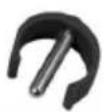
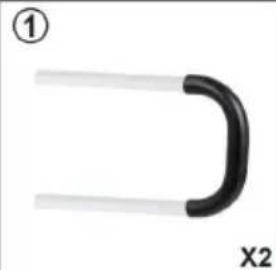
Insert the Armrest tubes(①) on both sides of the frame, secure with the buckle (⑤). Adjust the frame to the desired height, secure with the buckle (⑤).
natural_image
Two mechanical component diagrams labeled X2 and X4, showing curved and straight ends (no text or symbols beyond labels)
Step 3:
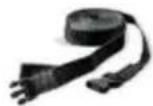
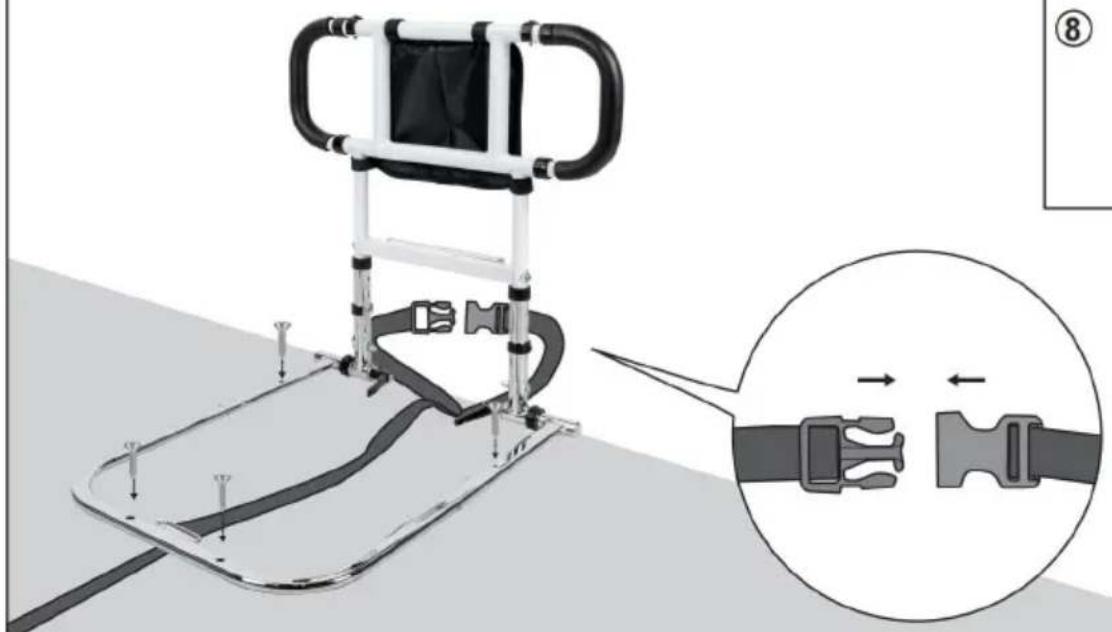
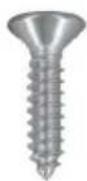
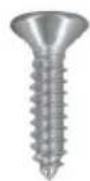
Pass the Safety belt (③) through the hole, loop it around the bed frame. After tightening the Safety belt (③), buckle both ends of the Safety belt (③). Secure the bed rail to the bed frame using screw(⑧). (for wooden bed frames only)
natural_image
Two technical drawings of screw components labeled X1 and X4, showing different types of assembly (no text or symbols beyond labels)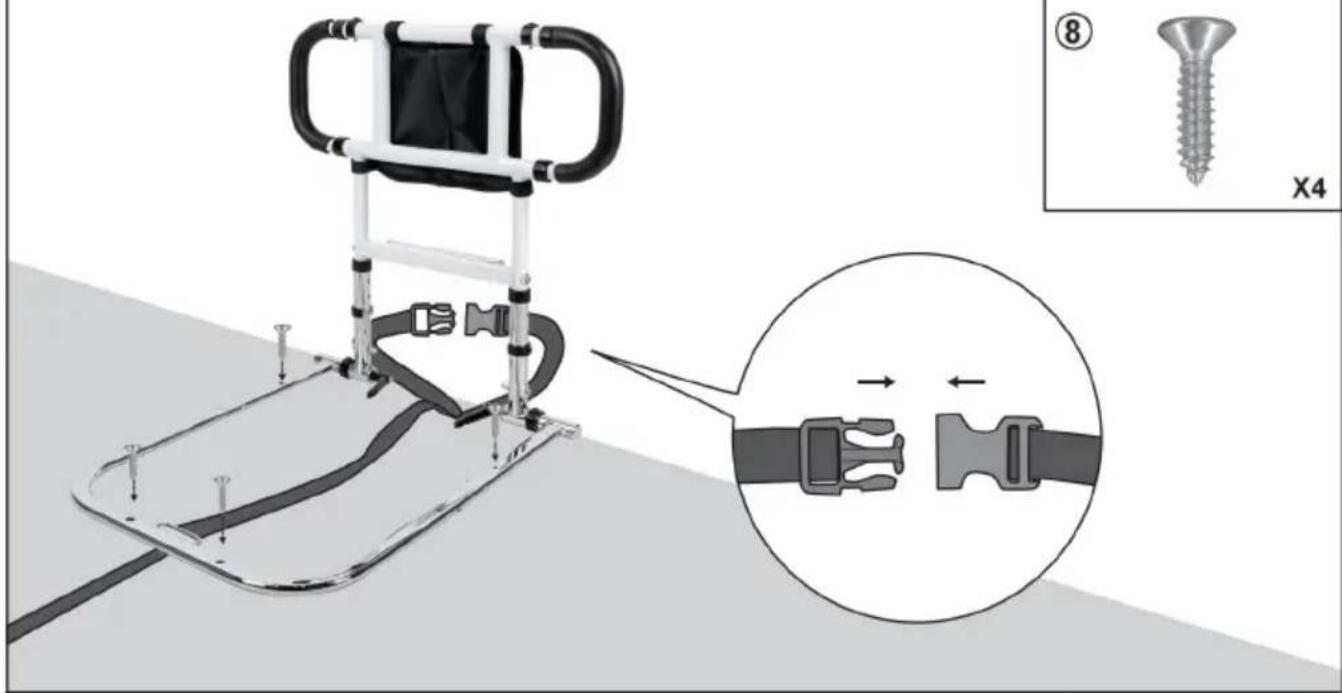
Step 4:
Attach the Motion sensor light(⑥) to the bed rail as shown, turn on the light on its side.
Tips: When first turned on, the light stays on for 15 seconds. It automatically turns off if there is enough light, and turns on when it senses movement in the dark.
⑥

X1

Step 5:
Great job on completing the installation process! The bed ran now installed and ready to enhance your comfort and convenience.
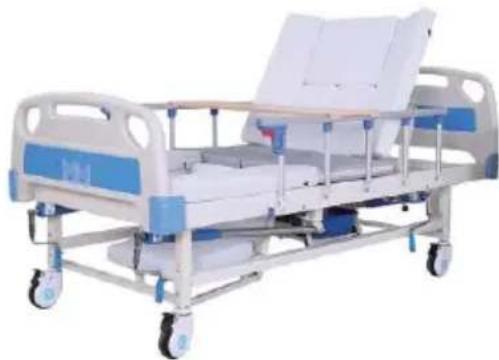
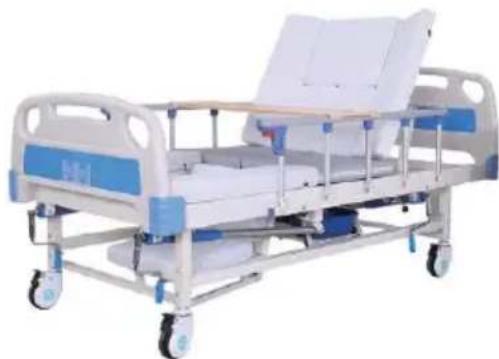
Compatible BedTypes:
·Metal bed
- Platform bed
·Upholstered bed
Non-Compatible BedTypes:

natural_image
Modern minimalist bed with a wide neck and two pillows, no text or symbols visibleStorage bed
natural_image
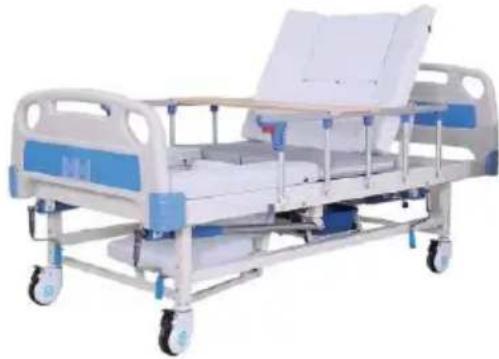
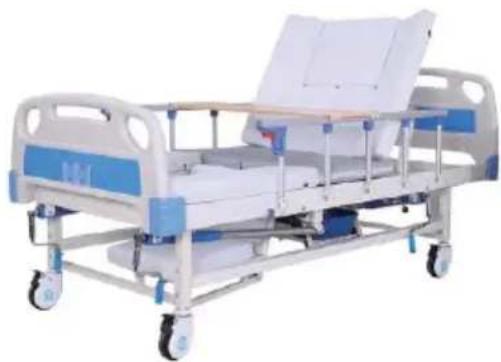
Medical hospital bed with blue and white sections, no visible text or symbolsAdjustable bed
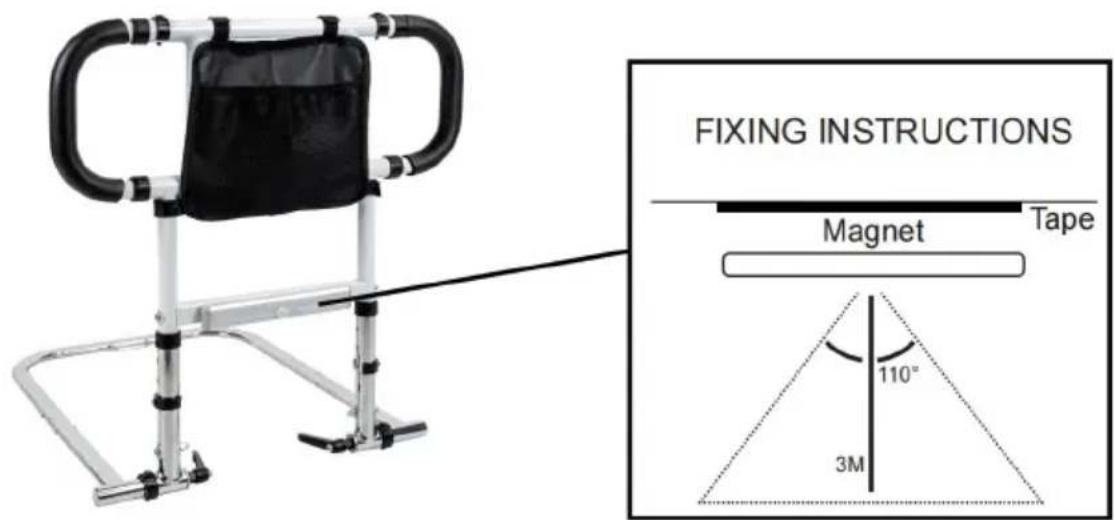
Option -Fix the Bed Rail on Bed Frame (it's non-mandatory)
The Bed Safety Rail could be fixed on base of the bed with screws provided and provide increased stability for users, but it is not necessary to do.
CLEANING THE BED SAFETY RAIL
Note: Please check the suitability of the cleaning products before use. Do not use abrasive cleaners or cloths as these could permanently damage the surface and invalidate any warranty.
- Clean regularly using soapy water or warm water. Then wipe it with dry towel.
- Allow product to fully dry prior to use/storage.
Our After-Sales Service:
- If you discover any product damage or missing parts, please contact customer service team for assistance.
- Our dedicated customer service team is available to address any questions or concerns you may have regarding the product.
-
We strive to provide prompt and efficient support to ensure the satisfaction of our customers.
-
For any inquiries, warranty claims or assistance, please contact our customer service.
Usage Guidelines for Bed Rail:
- Ensure that the bed rail is properly installed and securely attached bed frame before use.
- When adjusting the height or position of the bed rail, make sure securely locked in place before use.
- Do not allow children to play or hang on the bed rail. It is inten adult use only.
- Use caution when getting in or out of bed, ensuring that the bed properly positioned to provide support.
Manufacturer: MOBILITY SOURCE MEDICAL TECHNOLOGY CO., LTD.
Address: 160 HEHENG ROAD, YANGHE TOWN, GAOMING DISTRICT, Fosha Guangdong, 528513, CHINA.
Imported to AUS: SIHAO PTY LTD. 1 ROKEVA STREETEASTWOOD NSW : Australia
Imported to USA: Sanven Technology Ltd. Suite 250, 9166 Anaheim Place, Rancho Cucamonga, CA 91730
| UK | REP |
YH CONSULTING LIMITED. C/O YH Consultin Limited Office 147, Centurion House, London Road, Staines-upon-Thames, Surrey, TW18 4A>
| EC | REP |
Affordable. Reliable. Home Improvement.
UCHWYT ŁÓŻKA
MODEL: LQX-110056

natural_image
Modern mobility device with black and white frame, featuring a curved metal frame and a rectangular seat (no text or symbols visible)natural_image
Diagram of a mobility device with directional arrows indicating movement or force (no text or symbols present)Co otrzymasz
1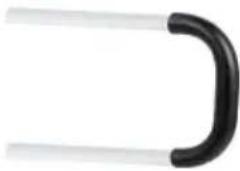 Armrest tube x2 Armrest tube x2 | 2 Main frame x1 Main frame x1 | 3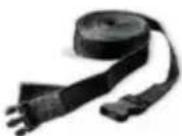 Safety belt x1 Safety belt x1 | 4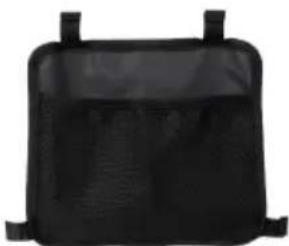 Storage bag x1 Storage bag x1 |
5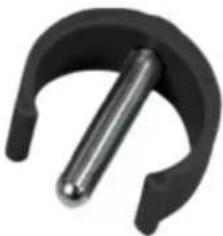 Buckle x6 Buckle x6 | 6 Motion sensor light x1 Motion sensor light x1 | 7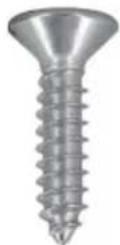 Screw x4 Screw x4 |
Step 1:
Loose the Adjustment Handle (▲important).
Unfold Main Frame(②) to 90°, secure with the buckle (⑤).
Tighten the Adjustment Handle(▲important).
Adjust the position of the Adjustment Handle as shown.
natural_image
Metallic horizontal ladder device with a flat base and support legs, labeled X1 (no text or symbols on the device itself)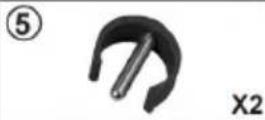
Step 2:
Insert the Armrest tubes(①) on both sides of the frame, secure with the buckle (⑤). Adjust the frame to the desired height, secure with the buckle (⑤).

natural_image
Two mechanical component diagrams labeled X2 and X4, showing curved and straight ends (no text or symbols beyond labels)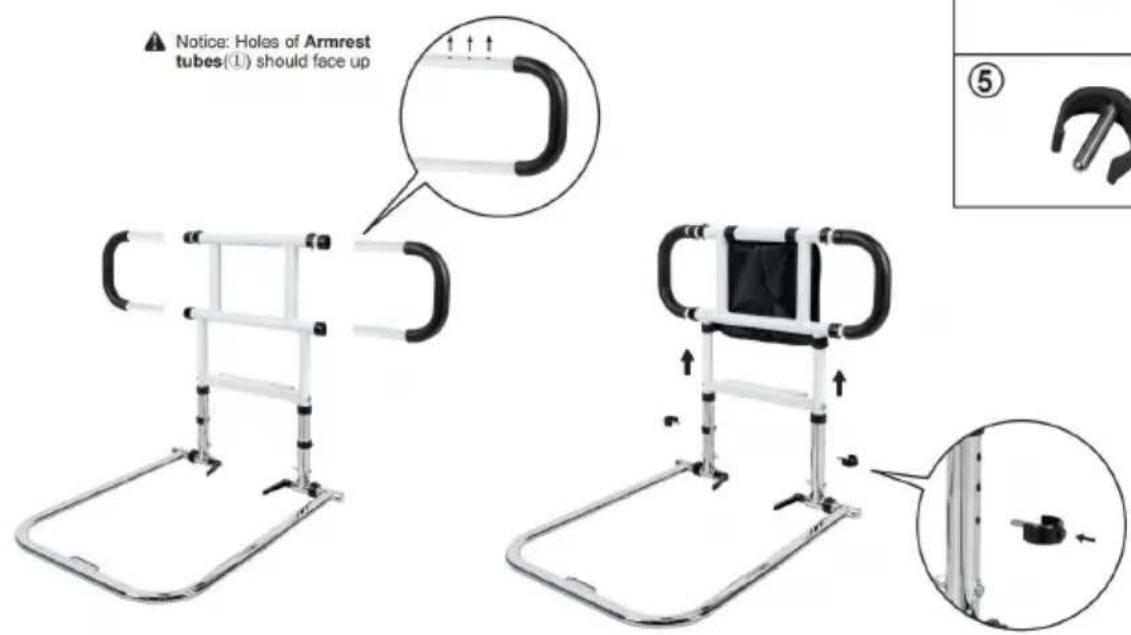
Step 3:
Pass the Safety belt (③) through the hole, loop it around the bed frame. After tightening the Safety belt (③), buckle both ends of the Safety belt (③). Secure the bed rail to the bed frame using screw(⑧). (for wooden bed frames only)

natural_image
Two technical drawings of screw components labeled X1 and X4, showing different types of assembly (no text or symbols beyond labels)
Step 4:
Attach the Motion sensor light(⑥) to the bed rail as shown, turn on the light on its side.
Tips: When first turned on, the light stays on for 15 seconds. It automatically turns off if there is enough light, and turns on when it senses movement in the dark.
⑥

X1

Krok 5:
natural_image
Modern minimalist bed with a wide neck and two pillows, no text or symbols visibleStorage bed

natural_image
Medical hospital bed with blue and white sections, no visible text or symbolsAdjustable bed
Producent: MOBILITY SOURCE MEDICAL TECHNOLOGY CO., LTD. Adres: 160 HEHENG ROAD, YANGHE TOWN, GAOMING DISTRICT, Foshan, Guangdong, 528513, CHINY.
Importowane do Australii: SIHAO PTY LTD. 1 ROKEVA STREETEASTWOOD NSW 2122 Australia
Importowane do USA: Sanven Technology Ltd. Suite 250, 9166 Anaheim Pla Rancho Cucamonga, CA 91730
| UK | REP |
YH CONSULTING LIMITED. C/O YH Consultin Limited Office 147, Centurion House, London Road, Staines-upon-Thames, Surrey, TW18 4A>
| EC | REP |
Affordable. Reliable. Home Improvement.
BETTGRIFF
MODELL: LQX-110056
VEVOR-Supportcenter


natural_image
Modern mobility device with black and white frame, featuring a curved metal frame and a rectangular seat (no text or symbols visible)natural_image
Mechanical device with adjustable arms and a screen, shown in 3D perspective view (no text or symbols)Was Sie bekommen
1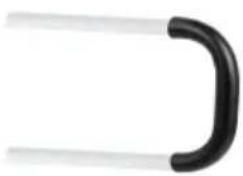 Armrest tube x2 Armrest tube x2 | 2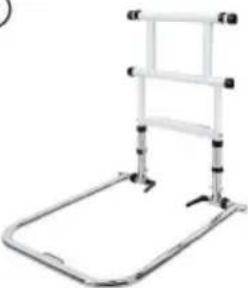 Main frame x1 Main frame x1 | 3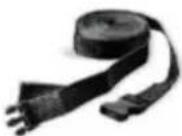 Safety belt x1 Safety belt x1 | 4 Storage bag x1 Storage bag x1 |
5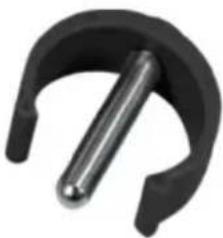 Buckle x6 Buckle x6 | 6 Motion sensor light x1 Motion sensor light x1 | 7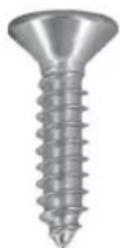 Screw x4 Screw x4 |
Step 1:
Loose the Adjustment Handle (▲important).
Unfold Main Frame(②) to 90°, secure with the buckle (⑤).
Tighten the Adjustment Handle(▲important).
Adjust the position of the Adjustment Handle as shown.

②

natural_image
Metallic horizontal ladder device with a flat base and side supports, labeled X1 (no text or symbols on the device itself)⑤

Step 2:
Insert the Armrest tubes(①) on both sides of the frame, secure with the buckle (⑤).
Adjust the frame to the desired height, secure with the buckle (5).

①
X2

X4
Step 3:
Pass the Safety belt (③) through the hole, loop it around the bed frame. After tightening the Safety belt (③), buckle both ends of the Safety belt (③). Secure the bed rail to the bed frame using screw(⑧). (for wooden bed frames only)
③

X1

X4

natural_image
Diagram of a mobility device with a close-up inset showing the same cable being adjusted (no text or symbols present)Step 4:
Attach the Motion sensor light(⑥) to the bed rail as shown, turn on the light on its side.
Tips: When first turned on, the light stays on for 15 seconds. It automatically turns off if there is enough light, and turns on when it senses movement in the dark.
⑥

X1

Schritt 5:
natural_image
Modern minimalist bed with a curved headboard and two pillows, no text or symbols visibleStorage bed

natural_image
Modern hospital bed with blue and white sections, no visible text or symbolsAdjustable bed
YH CONSULTING LIMITED. C/O YH Consultin Limited Office 147, Centurion House, London Road, Staines-upon-Thames, Surrey, TW18 4A>
| EC | REP |
Affordable. Reliable. Home Improvement.
POIGNÉE DE LIT
MODÈLE : LQX-110056
natural_image
Modern mobility device with black and white frame, featuring a curved metal frame and a rectangular seat (no text or symbols visible)natural_image
Diagram of a mobility device with adjustable arms and legs, showing directional arrows indicating movement or force (no text or symbols present)Ce que vous obtenez
1 Armrest tube x2 Armrest tube x2 | 2Main frame x1 | 3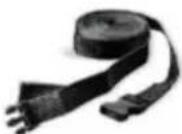 Safety belt x1 Safety belt x1 | 4Storage bag x1 |
| 5Buckle x6 | 6Motion sensor light x1 | 7Screw x4 |
Step 1:
Loose the Adjustment Handle (▲important).
Unfold Main Frame(②) to 90°, secure with the buckle (⑤).
Tighten the Adjustment Handle(▲important).
Adjust the position of the Adjustment Handle as shown.

②

natural_image
Metallic horizontal ladder device with a flat base and side supports, labeled X1 (no text or symbols on the device itself)⑤

Step 2:
Insert the Armrest tubes(①) on both sides of the frame, secure with the buckle (⑤).
Adjust the frame to the desired height, secure with the buckle (5).
①

X2
X4
Step 3:
Pass the Safety belt (③) through the hole, loop it around the bed frame. After tightening the Safety belt (③), buckle both ends of the Safety belt (③). Secure the bed rail to the bed frame using screw(⑧). (for wooden bed frames only)
③

X1

X4

natural_image
Diagram of a mobility device with a close-up inset showing the same cable being adjusted (no text or symbols present)Step 4:
Attach the Motion sensor light(⑥) to the bed rail as shown, turn on the light on its side.
Tips: When first turned on, the light stays on for 15 seconds. It automatically turns off if there is enough light, and turns on when it senses movement in the dark.
⑥

X1

Étape 5 :
natural_image
Modern minimalist bed with a curved headboard and two pillows, no text or symbols visibleStorage bed

natural_image
Modern hospital bed with blue and white sections, no visible text or symbolsAdjustable bed
Fabricant : MOBILITY SOURCE MEDICAL TECHNOLOGY CO., LTD. Adresse 160 HEHENG ROAD, YANGHE TOWN, GAOMING DISTRICT, Foshan, Guangdong, 528513, CHINE.
Importé en Australie : SIHAO PTY LTD. 1 ROKEVA STREET, ASTWOOD M 2122, Australie
YH CONSULTING LIMITED. C/O YH Consultin Limited Office 147, Centurion House, London Road, Staines-upon-Thames, Surrey, TW18 4A>
| EC | REP |
Affordable. Reliable. Home Improvement.
BEDHANDGREEP
MODEL: LQX-110056
VEVOR

natural_image
Modern mobility device with black and white frame, featuring a curved metal frame and a rectangular seat (no text or symbols visible)natural_image
Diagram of a mobility device with adjustable arms and legs, showing directional arrows indicating movement or force (no text or symbols present)Wat je krijgt
| 1Armrest tube x2 | 2Main frame x1 | 3Safety belt x1 | 4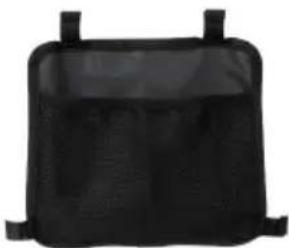 Storage bag x1 Storage bag x1 |
| 5Buckle x6 | 6Motion sensor light x1 | 7Screw x4 |
Step 1:
Loose the Adjustment Handle (▲important).
Unfold Main Frame(②) to 90°, secure with the buckle (⑤).
Tighten the Adjustment Handle(▲important).
Adjust the position of the Adjustment Handle as shown.

natural_image
Diagram of a metal frame structure with labeled components (X1), no readable text or symbols present.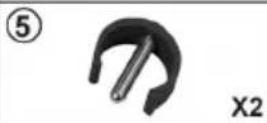
Step 2:
Insert the Armrest tubes(①) on both sides of the frame, secure with the buckle (⑤).
Adjust the frame to the desired height, secure with the buckle (5).


natural_image
Simple diagram of a U-shaped pipe or tube with two parallel tubes, labeled X2 (no text or symbols on the tube itself)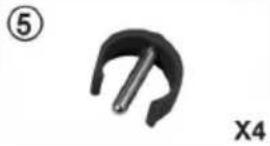
natural_image
Close-up of a black curved object with a metallic rod, labeled with number ⑤ and X4 (no text or symbols on the object itself)Step 3:
Pass the Safety belt (③) through the hole, loop it around the bed frame. After tightening the Safety belt (③), buckle both ends of the Safety belt (③). Secure the bed rail to the bed frame using screw(⑧). (for wooden bed frames only)
③
X1

X4

natural_image
Diagram of a mobility device with a close-up inset showing the same cable being adjusted (no text or symbols present)Step 4:
Attach the Motion sensor light(⑥) to the bed rail as shown, turn on the light on its side.
Tips: When first turned on, the light stays on for 15 seconds. It automatically turns off if there is enough light, and turns on when it senses movement in the dark.
⑥

X1

Stap 5:
natural_image
Modern minimalist bed with two pillows and a frontrest, shown in grayscale (no text or symbols visible)Storage bed

natural_image
Modern hospital bed with blue and white sections, no visible text or symbolsAdjustable bed
YH CONSULTING LIMITED. C/O YH Consultin Limited Office 147, Centurion House, London Road, Staines-upon-Thames, Surrey, TW18 4A>
| EC | REP |
Affordable. Reliable. Home Improvement.
SÄNGHANDTAG
MODELL: LQX-110056
VEVOR Supportcenter

VEVOR
Affordable. Reliable. Home Improvement.
BED HANDLE

natural_image
Modern mobility device with black and white frame, featuring a curved metal frame and handle (no text or symbols visible)natural_image
Mechanical device with adjustable arms and a screen, shown in 3D perspective view (no text or symbols)Vad du får
| 1Armrest tube x2 | 2Main frame x1 | 3Safety belt x1 | 4Storage bag x1 |
| 5Buckle x6 | 6Motion sensor light x1 | 7Screw x4 |
Step 1:
Loose the Adjustment Handle (▲important).
Unfold Main Frame(②) to 90°, secure with the buckle (⑤).
Tighten the Adjustment Handle(▲important).
Adjust the position of the Adjustment Handle as shown.

②

natural_image
Metallic horizontal ladder device with a flat base and labeled 'X1' (no text or symbols on the device itself)⑤

Step 2:
Insert the Armrest tubes(①) on both sides of the frame, secure with the buckle (⑤).
Adjust the frame to the desired height, secure with the buckle (5).

①

X2

X4
Step 3:
Pass the Safety belt (③) through the hole, loop it around the bed frame. After tightening the Safety belt (③), buckle both ends of the Safety belt (③). Secure the bed rail to the bed frame using screw(⑧). (for wooden bed frames only)
③

X1

X4
natural_image
Diagram of a mobility device with a close-up inset showing the same cable being adjusted (no text or symbols present)Step 4:
Attach the Motion sensor light(⑥) to the bed rail as shown, turn on the light on its side.
Tips: When first turned on, the light stays on for 15 seconds. It automatically turns off if there is enough light, and turns on when it senses movement in the dark.
⑥

X1
Steg 5:
natural_image
Modern minimalist bed with two pillows and a frontrest, shown in grayscale (no text or symbols visible)Storage bed
natural_image
Medical hospital bed with blue and white sections, no visible text or symbolsAdjustable bed
YH CONSULTING LIMITED. C/O YH Consultin Limited Office 147, Centurion House, London Road, Staines-upon-Thames, Surrey, TW18 4A>
| EC | REP |
Affordable. Reliable. Home Improvement.
ASA DE CAMA
MODELO: LQX-110056

natural_image
Modern mobility device with black and white frame, featuring a curved metal frame and a rectangular seat (no text or symbols visible)natural_image
Diagram of a mobility device with directional arrows indicating movement or force (no text or symbols present)Lo que obtienes
1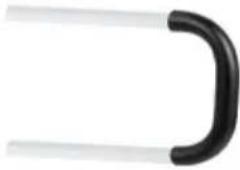 Armrest tube x2 Armrest tube x2 | 2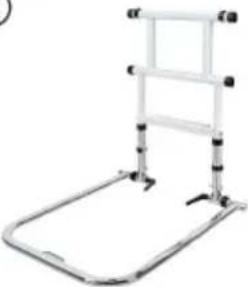 Main frame x1 Main frame x1 | 3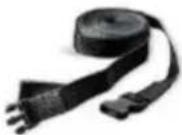 Safety belt x1 Safety belt x1 | 4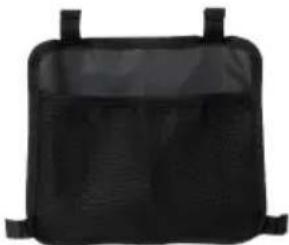 Storage bag x1 Storage bag x1 |
5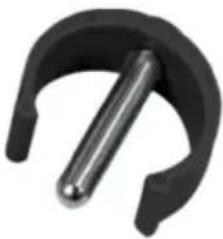 Buckle x6 Buckle x6 | 6 Motion sensor light x1 Motion sensor light x1 | 7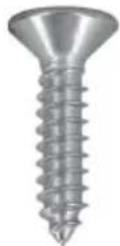 Screw x4 Screw x4 |
Step 1:
Loose the Adjustment Handle (▲important).
Unfold Main Frame(②) to 90°, secure with the buckle (⑤).
Tighten the Adjustment Handle(▲important).
Adjust the position of the Adjustment Handle as shown.


natural_image
Diagram of a metal frame structure with labeled components (X1), no readable text or symbols present.
Step 2:
Insert the Armrest tubes(①) on both sides of the frame, secure with the buckle (⑤).
Adjust the frame to the desired height, secure with the buckle (5).

natural_image
Simple diagram of a U-shaped pipe or tube with two parallel tubes, labeled X2 (no text or symbols on the tube itself)
natural_image
Close-up of a black curved object with a metallic rod, labeled with number ⑤ and X4 (no text or symbols on the object itself)Step 3:
Pass the Safety belt (③) through the hole, loop it around the bed frame. After tightening the Safety belt (③), buckle both ends of the Safety belt (③). Secure the bed rail to the bed frame using screw(⑧). (for wooden bed frames only)
③

X1
X4

natural_image
Diagram of a mobility device with a close-up inset showing the same cable being adjusted (no text or symbols present)Step 4:
Attach the Motion sensor light(⑥) to the bed rail as shown, turn on the light on its side.
Tips: When first turned on, the light stays on for 15 seconds. It automatically turns off if there is enough light, and turns on when it senses movement in the dark.
⑥

X1

Paso 5:
natural_image
Modern bedroom with a bed and two pillows (no text or symbols visible)Storage bed
natural_image
Medical hospital bed with blue and white sections, no visible text or symbolsAdjustable bed
Guangdong, 528513, CHINA.
Importado a AUS: SIHAO PTY LTD. 1 ROKEVA STREET, EASTWOOD, NSW 2122, Australia
Importado a EE. UU.: Sanven Technology Ltd. Suite 250, 9166 Anaheim Pla
| UK | REP |
YH CONSULTING LIMITED. C/O YH Consultin Limited Office 147, Centurion House, London Road, Staines-upon-Thames, Surrey, TW18 4A>
| EC | REP |
Affordable. Reliable. Home Improvement.
MANIGLIA DEL LETTO
MODELLO: LQX-110056

natural_image
Modern mobility device with black and white frame, featuring a curved metal frame and a rectangular seat (no text or symbols visible)natural_image
Mechanical device with adjustable arms and a screen, shown in 3D perspective view (no text or symbols)Cosa ottieni
| 1Armrest tube x2 | 2Main frame x1 | 3Safety belt x1 | 4Storage bag x1 |
| 5Buckle x6 | 6Motion sensor light x1 | 7Screw x4 |
Step 1:
Loose the Adjustment Handle (▲important).
Unfold Main Frame(②) to 90°, secure with the buckle (⑤).
Tighten the Adjustment Handle(▲important).
Adjust the position of the Adjustment Handle as shown.
②
natural_image
Metallic horizontal ladder device with a flat base and side supports, labeled X1 (no text or symbols on the device itself)⑤

Step 2:
Insert the Armrest tubes(①) on both sides of the frame, secure with the buckle (⑤).
Adjust the frame to the desired height, secure with the buckle (5).

①

X2

X4
Step 3:
Pass the Safety belt (③) through the hole, loop it around the bed frame. After tightening the Safety belt (③), buckle both ends of the Safety belt (③). Secure the bed rail to the bed frame using screw(⑧). (for wooden bed frames only)
③

X1
X4

natural_image
Diagram of a mobility device with a close-up inset showing the same cable being adjusted (no text or symbols present)Step 4:
Attach the Motion sensor light(⑥) to the bed rail as shown, turn on the light on its side.
Tips: When first turned on, the light stays on for 15 seconds. It automatically turns off if there is enough light, and turns on when it senses movement in the dark.
⑥

X1

Fase 5:
natural_image
Modern minimalist bed with a curved headboard and two pillows (no text or symbols visible)Storage bed
natural_image
Modern hospital bed with blue and white sections, no visible text or symbolsAdjustable bed
Importato in AUS: SIHAO PTY LTD. 1 ROKEVA STREETEASTWOOD NSW 2122 Australia
Importato negli USA: Sanven Technology Ltd. Suite 250, 9166 Anaheim Plac Rancho Cucamonga, CA 91730
| UK | REP |
YH CONSULTING LIMITED. C/O YH Consultin Limited Office 147, Centurion House, London Road, Staines-upon-Thames, Surrey, TW18 4A>
| EC | REP |