HAF2700DCD - Deep fryer HISENSE - Free user manual and instructions
Find the device manual for free HAF2700DCD HISENSE in PDF.

User questions about HAF2700DCD HISENSE
0 question about this device. Answer the ones you know or ask your own.
Ask a new question about this device
Download the instructions for your Deep fryer in PDF format for free! Find your manual HAF2700DCD - HISENSE and take your electronic device back in hand. On this page are published all the documents necessary for the use of your device. HAF2700DCD by HISENSE.
USER MANUAL HAF2700DCD HISENSE
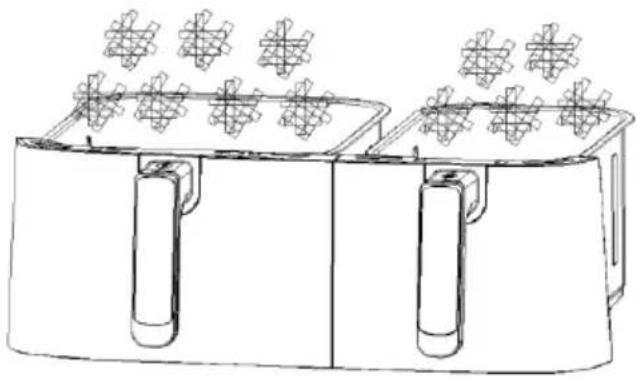
natural_image
Line drawing of a two-wet frying pan with lid covers (no text or symbols)
natural_image
Line drawing of a rectangular device with a lid and internal compartments (no text or symbols)2

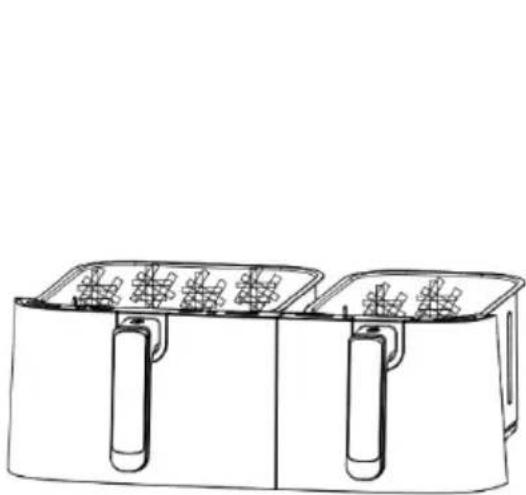
natural_image
Line drawing of a two-wet container with handles and multiple tray containers (no text or symbols)3
natural_image
Line drawing of a two-wető grating machine with handles and grating (no text or symbols)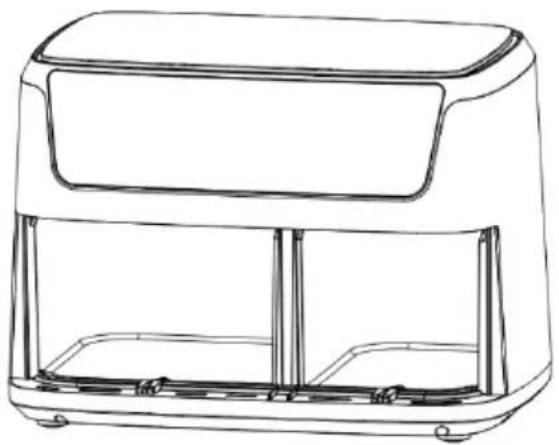
natural_image
Line drawing of a microwave oven with lid and side panel (no text or symbols)4
Prije prve uporabe
- Uklonite svu ambalažu.
- Uklonite sve naljepnice ili oznake s uređaja.
- Temeljito očistite nosač i lonac toplom vodom, malo tekućine za pranje i neabrazivnom spužvom.
- Obrišite unutrašnjost i vanjsku stranu uređaja vlažnom krpom.
Ovo je friteza bez ulja koja radi na vrućem zraku. Nemojte puniti lonac uljem ili masnoćom za prženje.
3

2
natural_image
Line drawing of two rectangular containers with circular patterns on top, each containing a cylindrical object (no text or symbols)3

natural_image
Line drawings of a two-wet air fryer and a rectangular oven (no text or symbols)4
Pre prve upotrebe
- Uklonite sav ambalažni materijal.
- Uklonite sve nalepnice ili etikete sa uređaja.
- Temeljito očistite rešetku i posudu toplom vodom sa malo deterdženta i neabrazivnim suđerom.
- Obrišite unutrašnjost i spoljašnjost uređaja vlažnom krpom.
Ovo je friteza za prženje bez ulja koja radi pomoću vrućeg vazduha. Nemojte sipati ulje ili mast direktno u posudu.
2
natural_image
Line drawing of two rectangular containers with handles and patterned top surfaces, no text or symbols present3

natural_image
Line drawing of a two-wet air fryer with handles and grilles (no text or symbols)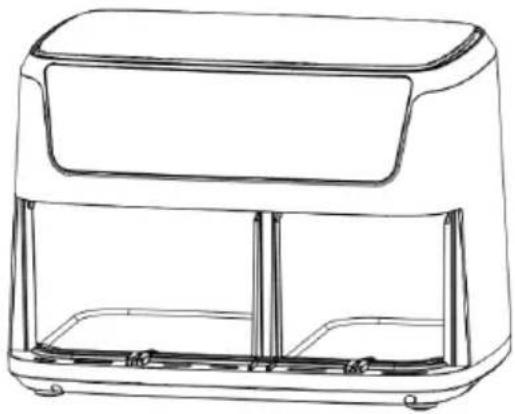
natural_image
Line drawing of a portable food appliance with front panel and side legs (no text or symbols)4
Note1: Add 3 minutes to the preparation time when you start frying with the air fryer still cold. The appliance may emit some smoke and odour during first use, which is a normal occurrence.
| Мени | Референтна тежина (g) | Стандардна температура (°C) | Време на садот (min) | Температурен опсег (°C) | Временска рамка (min) | Протресува ње |
| Помфрит | 600/400 | 200 | 25 | 80-200 | 1-60 | 1–2 |
| Бифтек | 500/350 | 180 | 16 | 80-200 | 1-60 | Flip |
| Пилешко | 1200/800 | 200 | 45 | 80-200 | 1-60 | Flip |
| Скара | 600/400 | 200 | 25 | 80-200 | 1-60 | Flip |
| Риба | 650/450 | 180 | 18 | 80-200 | 1-60 | Flip |
| Шкампи | 650/500 | 180 | 12 | 80-200 | 1-60 | 1-2 |
| Пица | 500/300 | 180 | 15 | 80-200 | 1-60 | / |
| Дехидрација | 650/450 | 40 | 6h | 80-200 | 1-60 | 1-2 |
Чистенье
Important safety instructions
Carefully read the instructions for use before using the appliance.
- Save the instructions, certificate of warranty, proof of payment, and preferably the appliance packaging.
- Do not immerse the housing with electric components and heating elements in liquid and do not rinse it under running water.
- Prevent any ingress of water or other liquid into the appliance as this may cause electric shock.
- Always place the food to be fried in the basket in order to avoid contact with the heating elements.
- Do not cover the air inlets and outlets during appliance operation.
- Do not fill the pan with oil as this may result in a risk of fire.
- Do not touch any part of the appliance interior during operation.
- Before connecting the appliance to the power mains, make sure the voltage indicated on the appliance matches the power mains voltage in your home.
- Do not use the appliance if the plug, power cord, or any other component is damaged.
- If the power cord is damaged, it may only be replaced by Hisense, Hisense authorized service and repair centre, or an adequately trained professional.
- This appliance may be used by children aged 8 years and above and by persons with reduced physical, sensory or mental capabilities or lack of experience and knowledge, if they are supervised during the use of the appliance or if they have been provided relevant instructions regarding the use of the appliance in a safe way and if they understand the hazards involved. Keep children under supervision while they use the appliance and make sure they do not play with it. Children should not perform any cleaning or maintenance tasks on the appliance, unless they are older than 8 years and do so under supervision.
- Keep the power cord away from hot surfaces.
- Do not plug the power cord to the power outlet, and do not use the appliance control panel if your hands are wet.
- Only connect the appliance to a grounded power outlet. Make sure the power plug is inserted correctly into the power outlet.
- This appliance cannot be controlled using an external timer or a separate remote control system.
-
Do not place the appliance on or close to a flammable material such as a tablecloth or curtains.
-
Do not place the appliance next to a wall or on top of other appliances. Make sure there is at least 10 cm of clearance behind, next to, and above the appliance. Do not place any objects on the appliance.
- Only use the appliance for the purposes described in this manual.
- Do not leave the appliance to operate unattended.
- During hot air frying, hot steam is released through the air outlet vents. Take care not to come too close to the air outlet vents with your hands and face. Also be careful not to be scalded by steam when removing the pan from the appliance.
- During operation, accessible surfaces of the appliance may become hot.
- If there is dark smoke coming out of the appliance, immediately switch it off. Before removing the tray from the appliance, wait for the smoke to subside.
- Place the appliance on a level flat and stable surface.
- The appliance is intended solely for normal household use. It is not intended for use in environments such as kitchenettes at stores, offices, farms, or other working environments. It is also not intended to be used by guests in hotel rooms, motels, bed and breakfast establishments, and other establishments offering accommodation.
- If the appliance is not used correctly or if it is used for professional or semi-professional purposes or in a way not in compliance with these instructions, the warranty shall be void and Hisense shall not be responsible for any resulting damage.
- For inspection or repair of the appliance, contact an authorized Hisense service centre.
- Do not attempt to repair the appliance yourself as this will void the warranty.
- Always disconnect the appliance from the power mains after use.
- Before holding or cleaning the appliance, wait for it to cool down for approximately 30 minutes.
- Make sure the food cooked in the appliance is a golden colour, rather than dark or brown. Remove any residue of burnt food. Do not fry raw potatoes at a temperature above 180 °C (to reduce the formation of acrylamides).
This equipment is labelled in compliance with the European Directive 2012/19/EC on waste electric and electronic equipment – WEEE. The Directive specifies the requirements for collection and management of waste electric and electronic equipment effective in the entire European Union.
Automatic switch off
This appliance is fitted with a timer. When the time runs out, the appliance will beep and automatically switch off.
Electrical connection:
The appliance may only be connected to a correctly fitted 220-240 V \~ 50-60 Hz power outlet.
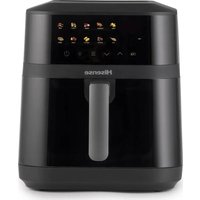
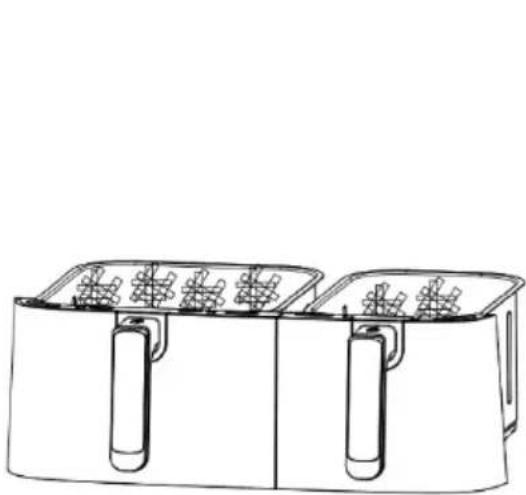
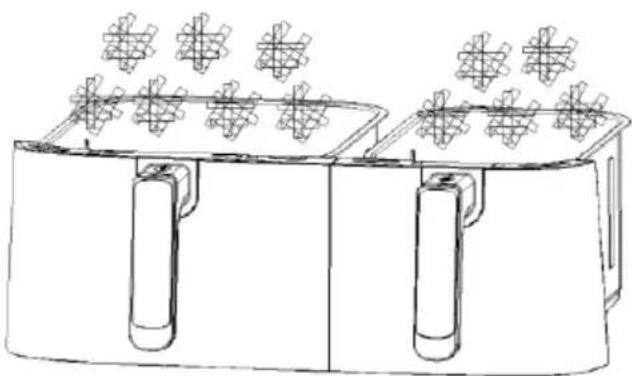
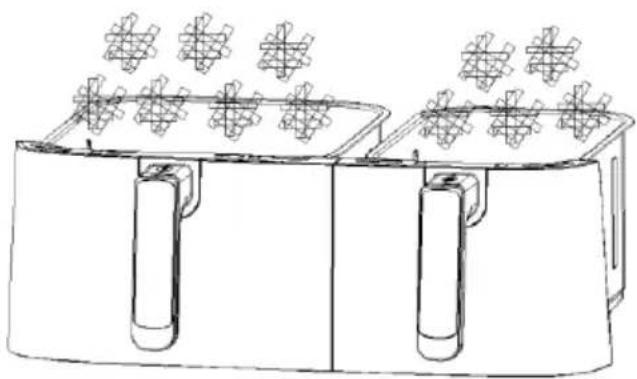
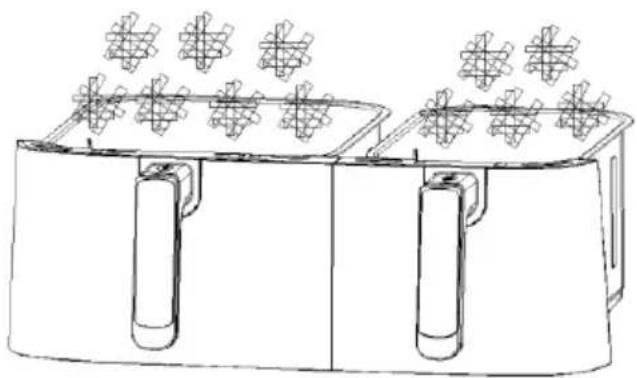
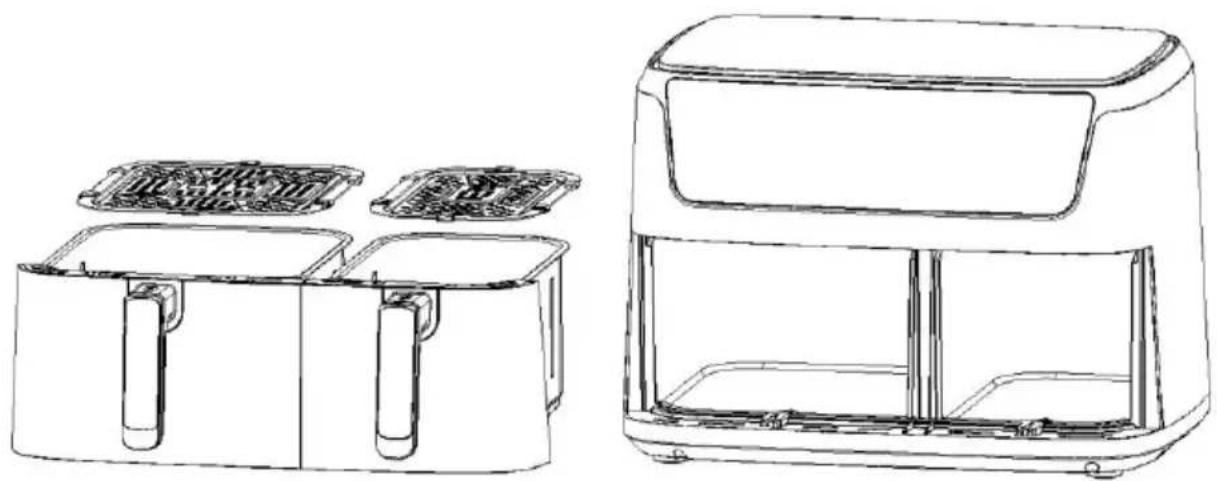
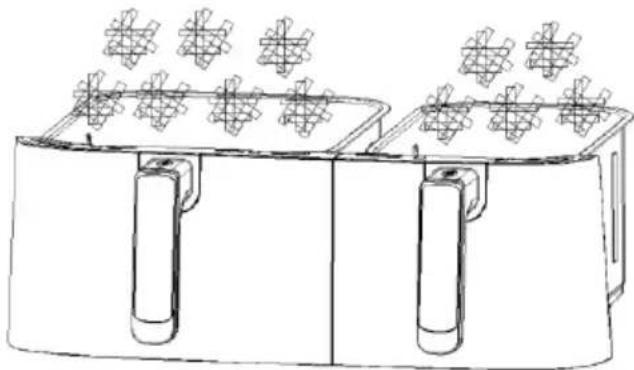
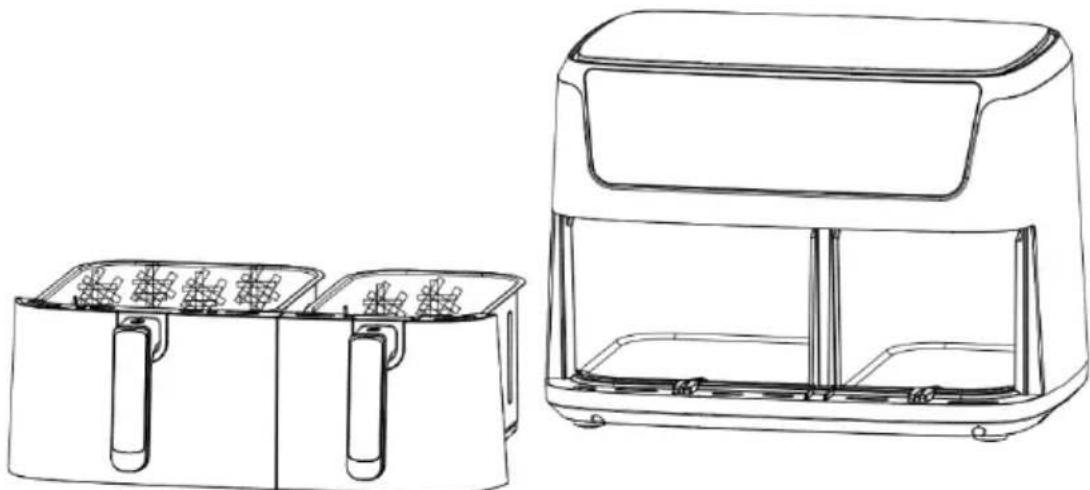
General description (Picture1)
- Frying pot
- Frying Rack
- Appliance


natural_image
Line drawings of two household appliances: a microwave oven and a digital air fryer (no text or symbols)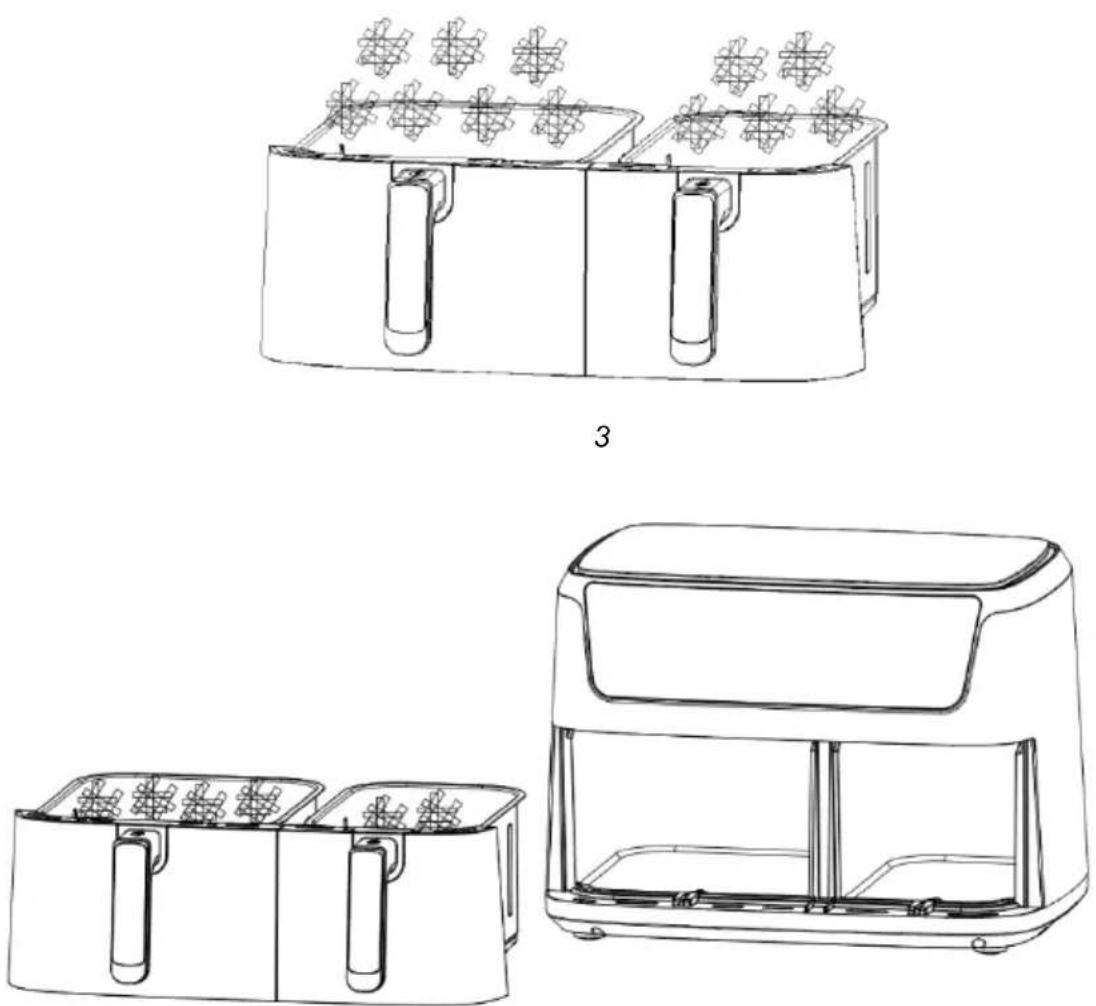
4
Before first use
- Remove all packaging materials.
- Remove any stickers or labels from the appliance.
- Thoroughly clean the shelf and pot with hot water, some washing-up liquid, and a non-abrasive sponge.
- Wipe the inside and outside of the appliance with a moist cloth.
This is an oil-free fryer that works on hot air. Do not fill the pot with oil or frying fat directly.
Notice: When your air fryer is heated for the first time, it may emit slight smoke or odour. This is normal with many heating appliances. This does not affect the safety of your appliance.
Preparing the appliance for use
- Place the appliance on a stable, horizontal and even surface.
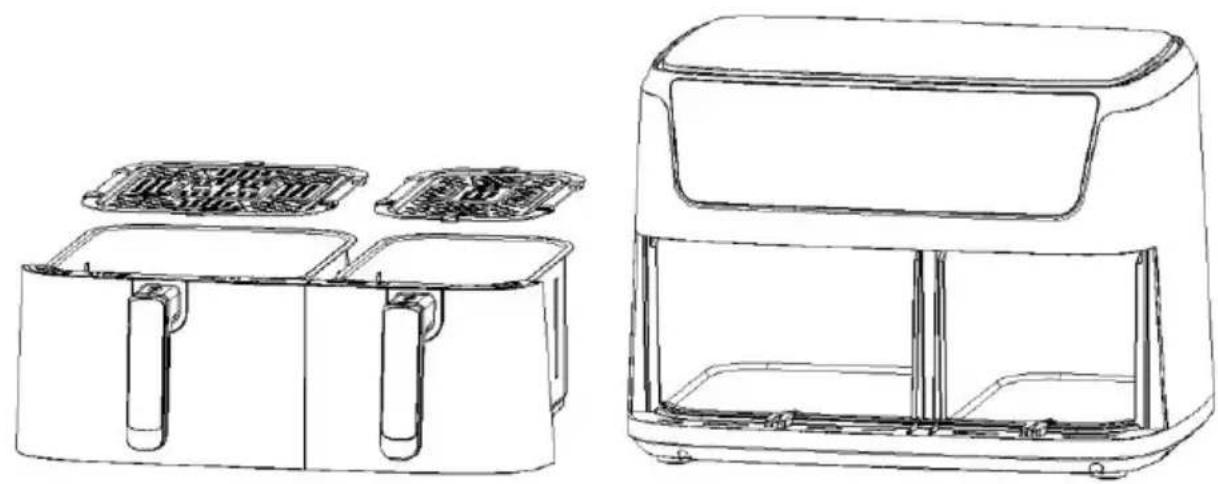
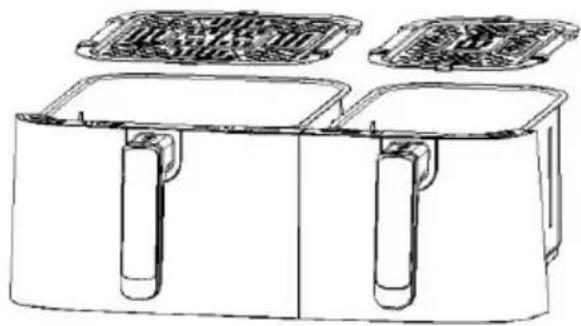
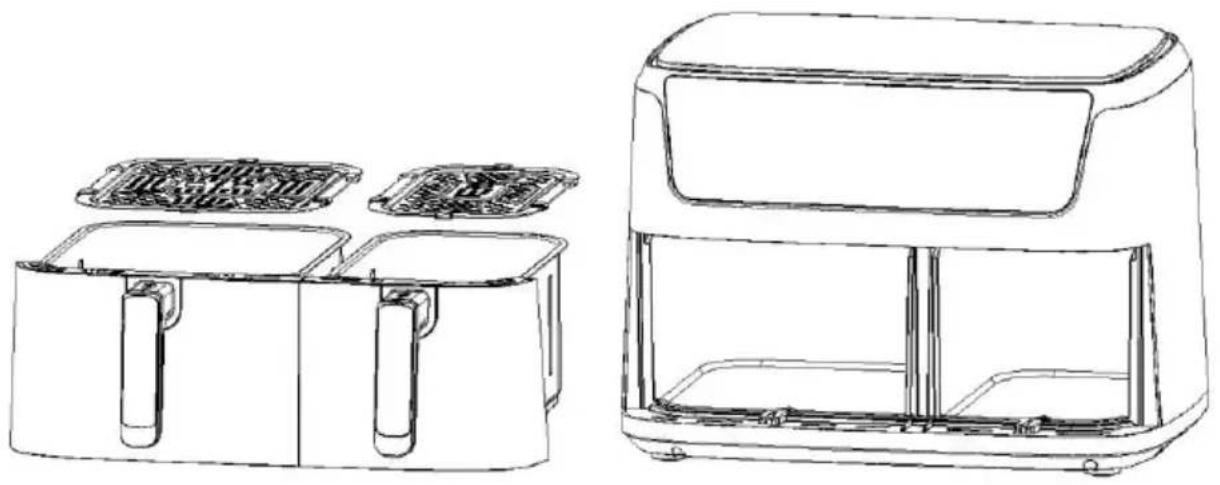
Do not place the appliance on non-heat-resistant surface. - Place the frying rack in the pot
Do not fill the pot with oil or any other liquid.
Do not put anything on top of the appliance as this could obstruct the airflow and affect the hot air frying result.
Using the appliance
- Connect the mains plug into an earthed wall socket.
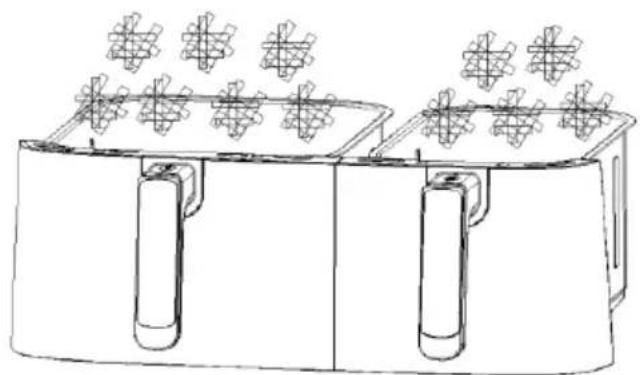
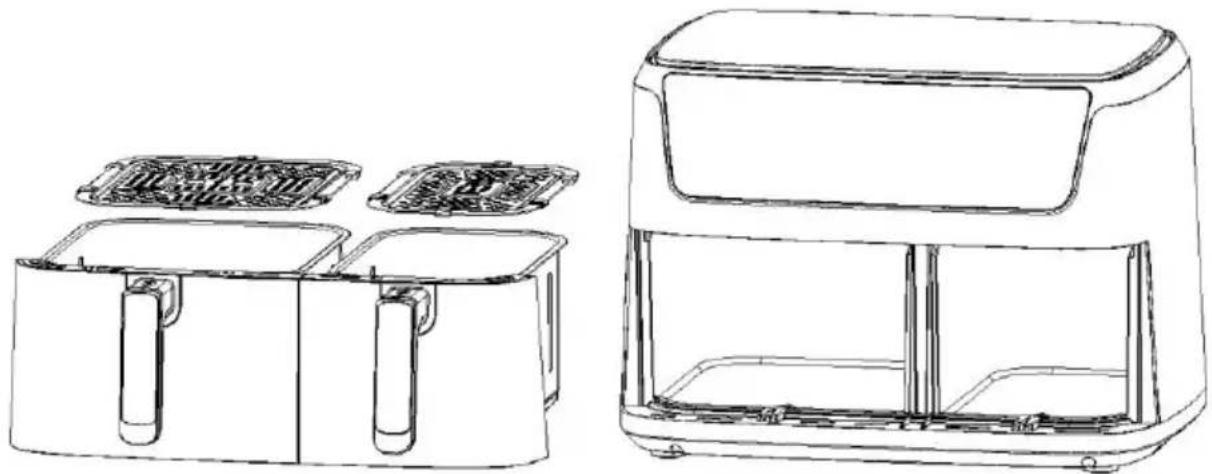
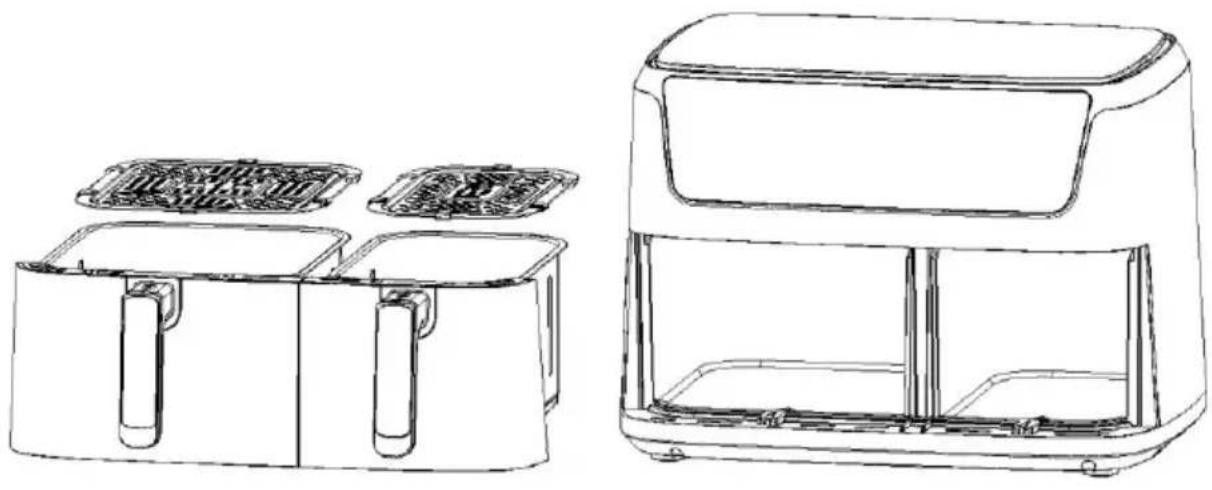
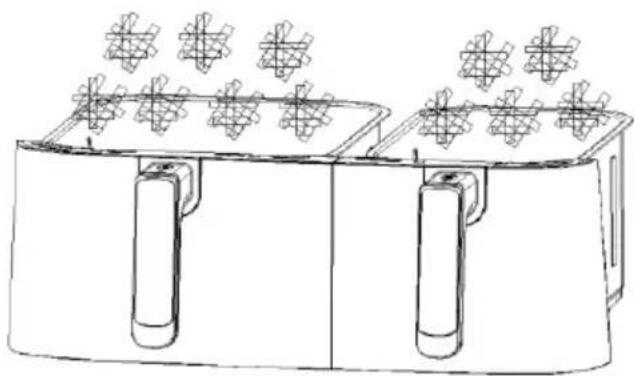
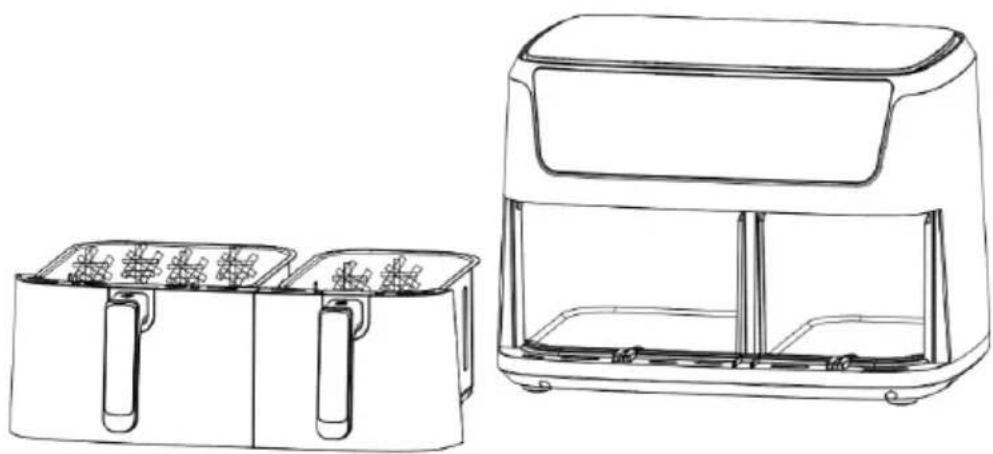
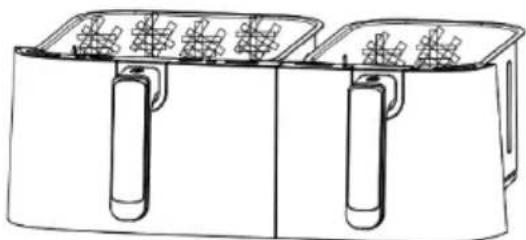
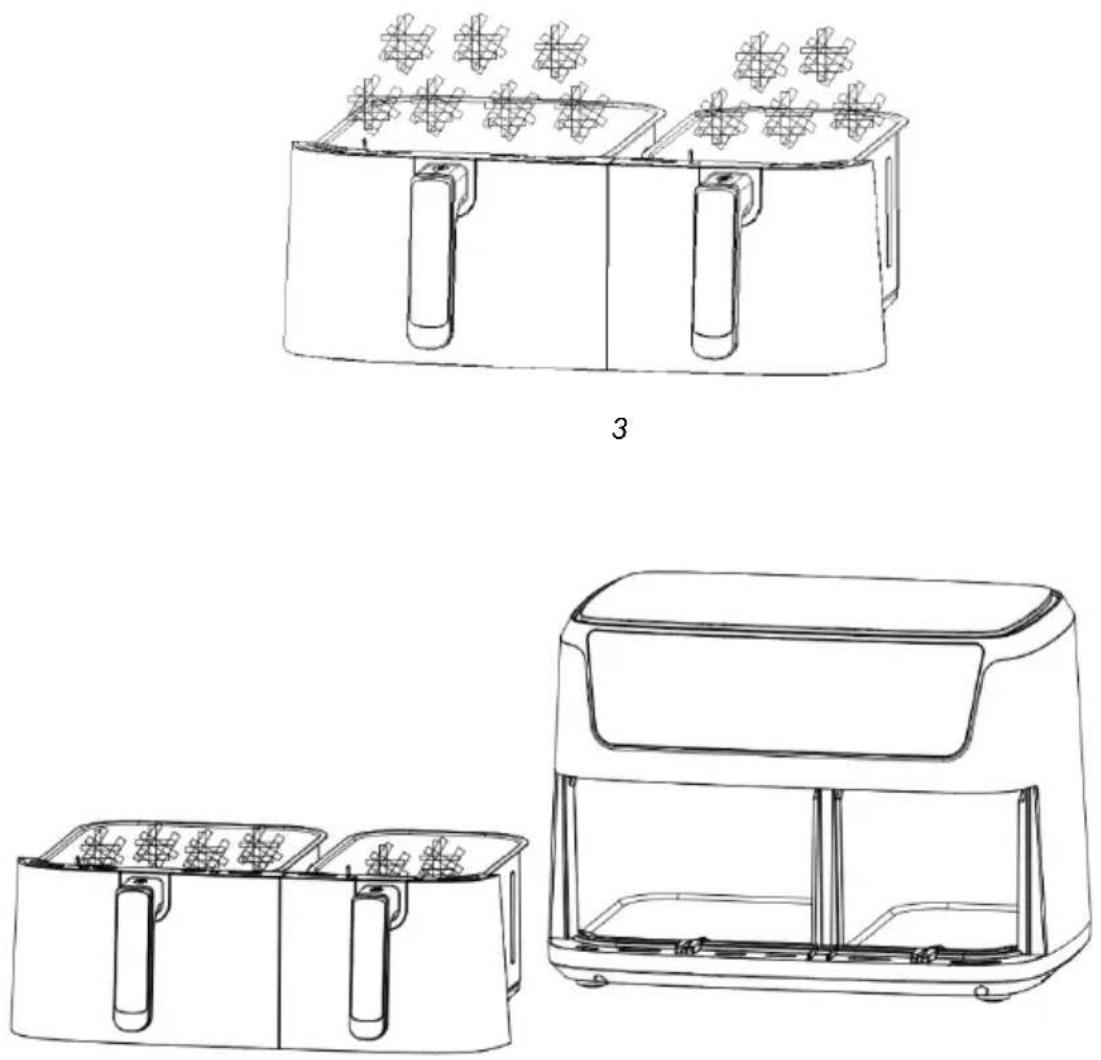
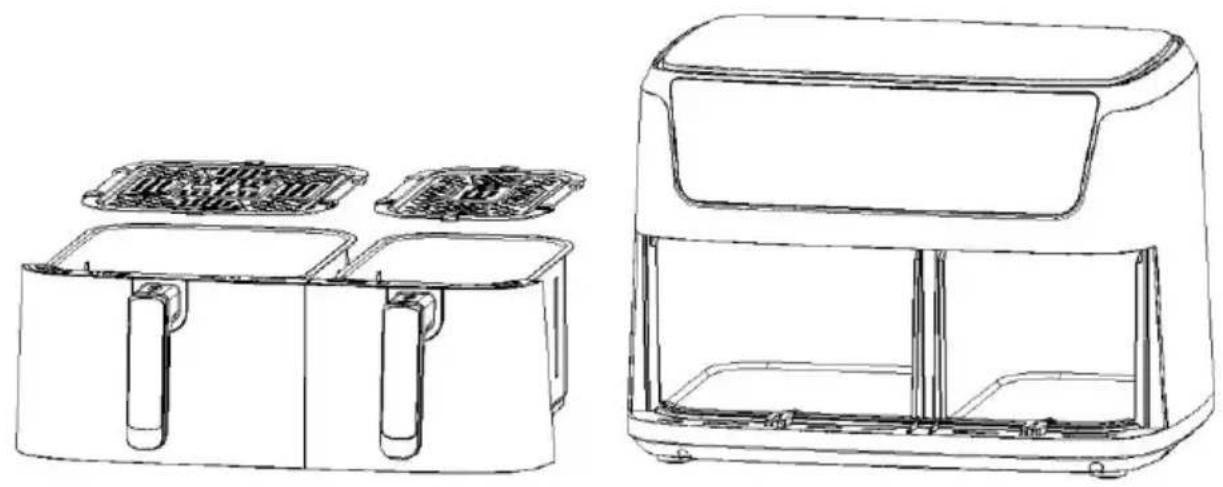
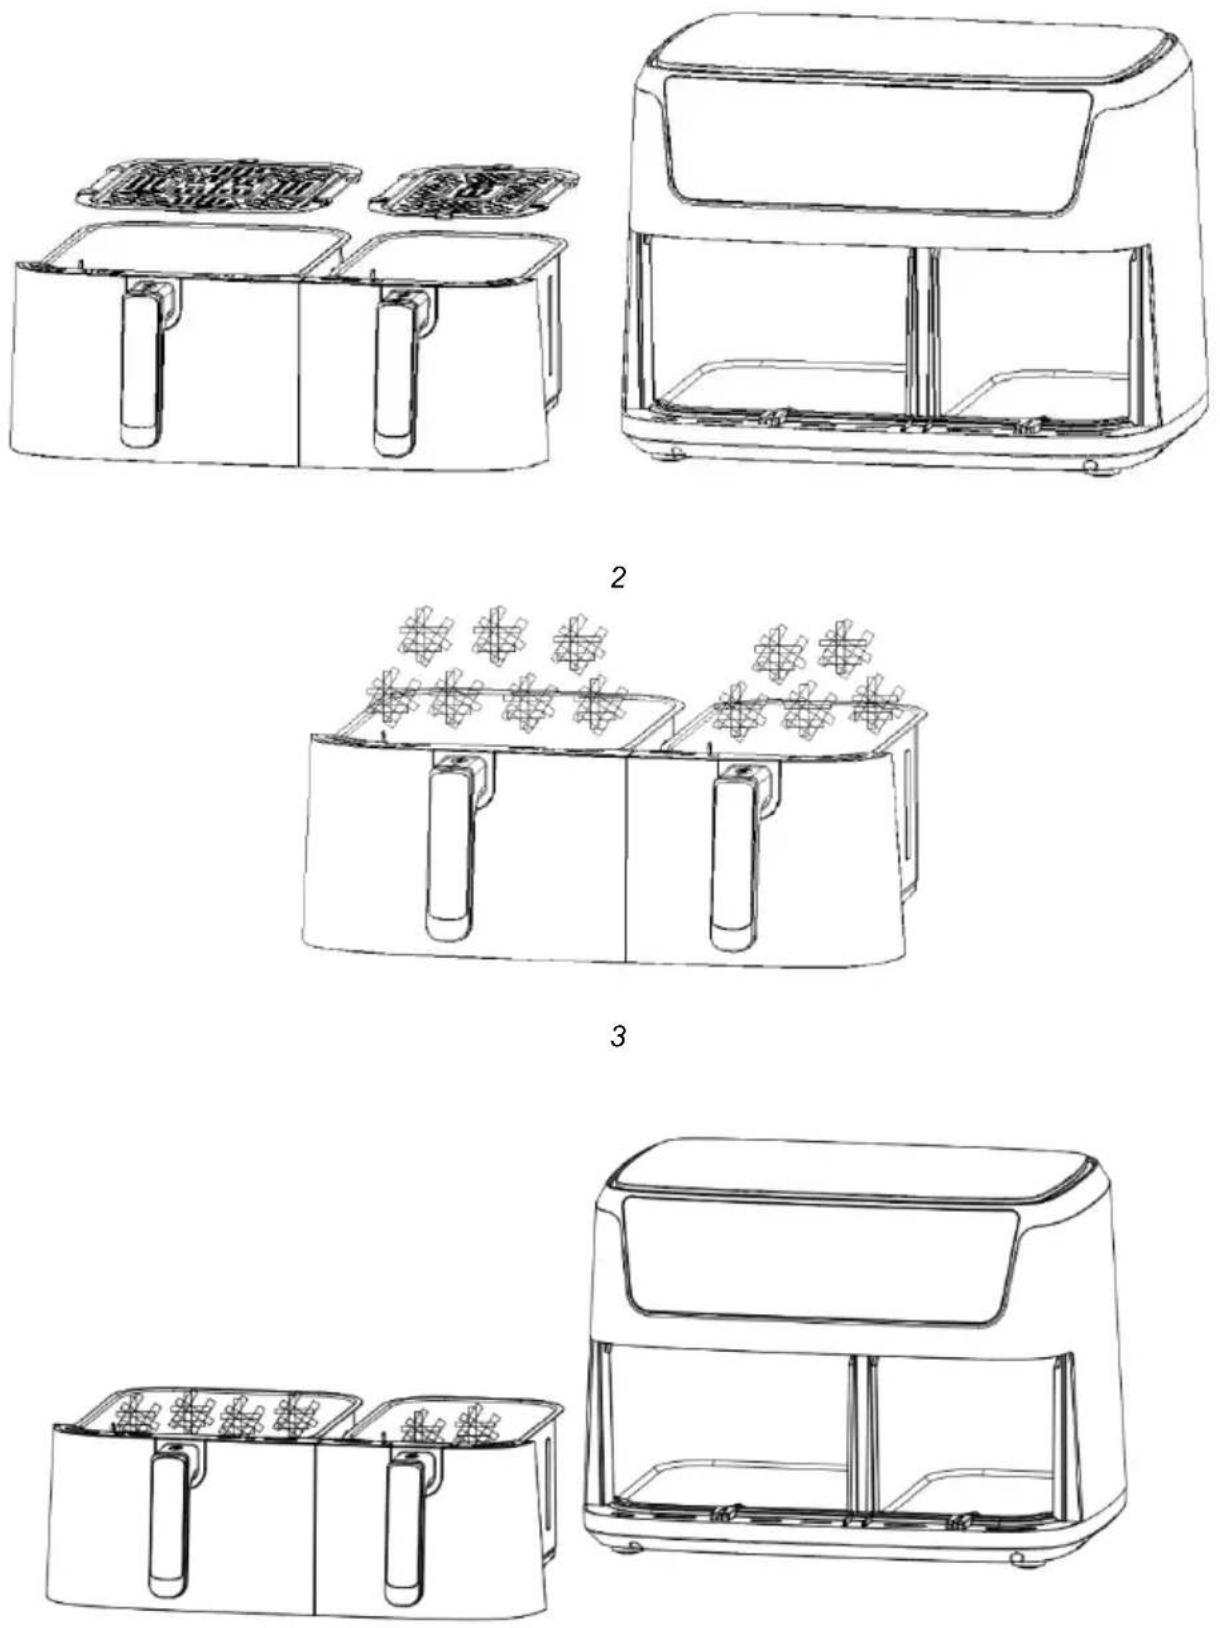
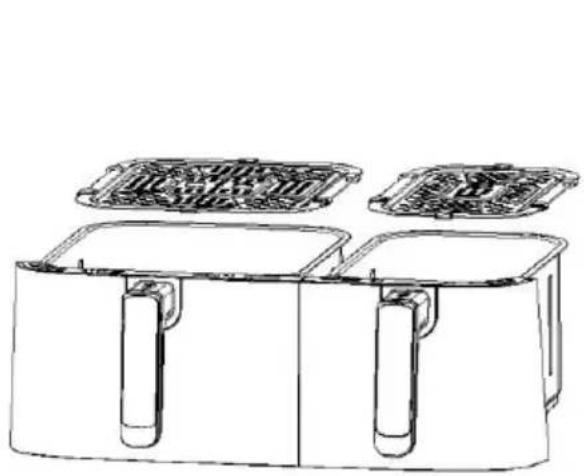
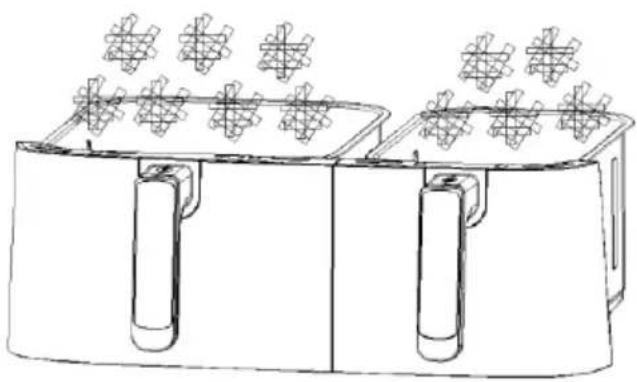
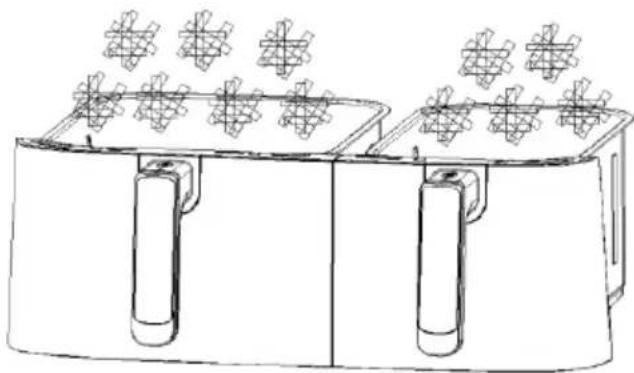
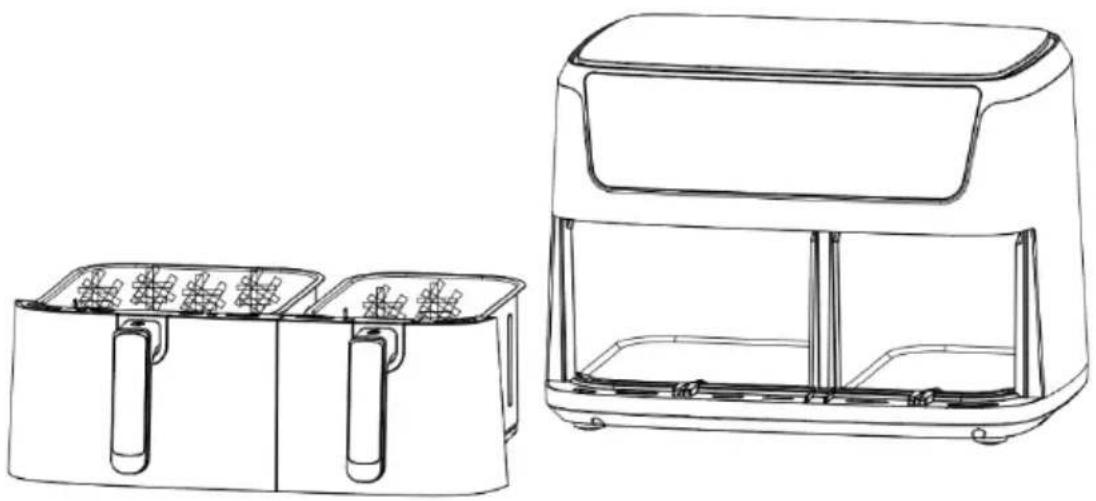
- Carefully pull the pot out of the air fryer (Figure 2).
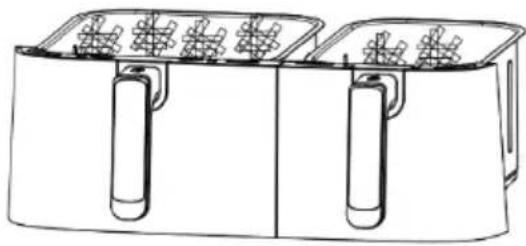
- Put the ingredients in the pot. (Figure 3).
- Slide the pot back into the air fryer (Figure 4).
Never use the pot without the frying rack in it.
Caution: Do not touch the pot during and for some time after use as it gets very hot. Only hold the pot by the handle.
- Determine the required preparation time for the ingredient (see section "Settings" in this chapter).
-
Some ingredients require shaking halfway through the preparation time (see section "Settings" in this chapter). To shake the ingredients, pull the pot out of the appliance by the handle and shake it. Then slide the pot back into the air fryer.
-
When you hear the buzzer, the set preparation time has elapsed. Pull the pot out of the appliance Note: Long press the power button for 2 seconds. Then, you can switch off the appliance manually.
Tip: You can adjust temperature or time according to your preference during use.
- Check if the ingredients are ready.
If the ingredients are not ready yet, simply slide the pot back into the appliance and set the timer to a few extra minutes.
- To remove ingredients (e.g., fries), pull the pot out of the air fryer and place it on a trivet.
Do not turn the pot upside down as any excess oil that has collected on the bottom of the pot will leak onto the ingredients.
The pot and the ingredients are hot. Depending on the type of the ingredients in the air fryer, steam may escape from the pot.
- Use appropriate utensils for transferring food to a plate.
- When a batch of ingredients is ready, the air fryer is instantly ready for preparing another batch.
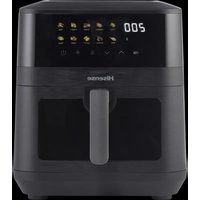
Control panel instruction

Key 1 Power key
Once the basket and the pot are properly placed in the main housing, the Power light will illuminate. Press the Power key to put the appliance into standby mode after you have selected the pot that you want to use. Pressing the Power key a second time will start the cooking process. Pressing the power key for 2 seconds will close the entire device during cooking and stop the motor at the same time.
Key 2 ▷ Start/pause key
To start or pause the device.
Key 3 Flip reminder key
When the food needs to be turned over, if you have selected this function, the device will issue a reminder at the set time.
Key 4 - Temperature decrease key
Key 5 - Temperature increase key
Key 6 - Time decrease key
Key 7 - Time increase key
Key 8 - Reservation key
Use this key to reserve the cooking time as desired, with the reservation time range from 0.5 hours to 12 hours.
Key 9 - Simultaneous end key
By pressing this key, two recipes with different time settings can be ended at the same time.
Key 10 - Light key
Key 11 Pot 1 selection key
Indicator light "12" – Display for the left pot
Indicator light "13" – Display for the right pot
Key 14 2 Pot 2 selection key
Touch the Time selection key. You can adjust the time indicated on the display unit as needed.
Indicator light "15" - Time light
Indicator light "16" - Temperature light
Keys 17-24 - Recipe keys
Detailed Operation Instructions
1. Boot mode
Firstly, to ensure that the frying pan is correctly installed into the appliance, insert the plug into the socket. The appliance will turn on, beep once, all the lights will go on for one second and then go out again. The power icon will light up.
2. Standby mode
Touch the power icon. The Pot selection key and Pot selection key indicators will light up and stay on, the appliance is now in standby mode. When the unit is in standby mode and has not been operated within 5 mins, it will return to boot mode.
3. Single pot working mode
3.1. Touch the icon 1 or 2. The function indicator and the menu will turn on and stay on. The Fries indicator will flash, as this is the default menu, and the other indicators will also stay on. At the same time, the temperature and time indicator will flash. If you press and hold the icon for 2 sec, you can cancel the selection for the left pot. You do the same for the right pot by pressing and holding the icon. If you cancel the selection of both pots by pressing the icons, the appliance enters standby mode.
3.2. Touch the Menu key icon to select the menu you want to use according to what you are cooking or to adjust the temperature and time if needed. When adjusting temperature, every time you press the key, the temperature will change by 5 °C, and if you long press the " ^" or " √" key, the temperature will increase or decrease continuously. For each menu, the adjustable temperature range is 80 °C-200 °C. Time adjustment: every time you press the key, the time changes by 1 min. The adjustable time range is 1 min-60 min.
3.3. After you have selected the correct recipe, temperature and time, touch the Power key icon. The pot 1 / 2 starts working, and the display shows the current cooking time, counting it down before it stops flashing. The selected recipe indicator will be lit continuously, other recipe indicators will be off.
3.4. If you need to adjust the temperature or time during the cooking process, press the 1 or 2 key, then press the Temperature or Time key icon once, then press the “^” or “^” key icon to adjust the temperature or time. During the adjustment process, the appliance will keep working.
3.5. If you need to reset the recipe during cooking, lightly press the 1 or 2 key, then press ▷□ once to pause cooking. The heater and the motor will stop working, and the recipe indicator and the display screen will flash. Adjust the recipe as required. At this time, you can also adjust the temperature and time.
3.6. Press the Power key during cooking and the appliance will stop. If there is no operation, the appliance will automatically return to standby mode after 5 minutes.
3.7. If you need to turn off the appliance during cooking, press the Power key for 2 seconds and the appliance will be turned off. The heating tube and the motor will stop working. The display screen will display the word "OFF" and the buzzer will beep.
3.8. After cooking, the screen will display the word "OFF" and the buzzer will promptly beep 5 times. The display screen turns off and the appliance returns to standby mode.
3.9. If, during cooking, you take out the frying basket, the display screen will show the word "OPEN" and the appliance will stop working. After you have re-inserted the frying basket, the appliance will resume its previous operation.
4. Double pot working mode
4.1. Starting the 2 pots
4.1.1. Firstly, select one side and set the recipe, temperature and time according to your needs. Secondly, select the other side and set the desired recipe, temperature and time in the same way.
4.1.2. When you press the key, the left and right pot will start working at the same time. The key and the indicator light of the left pot recipe will flash once every 6 seconds simultaneously, also the key and the indicator light of the right pot recipe will flash once every 6 seconds simultaneously. The left and right pot displays will light up alternately in an about 3-second interval.
4.1.3. You can also start the left pot first by pressing the key after setting the parameter Pot and then pressing to set the parameter of the right pot. When the right pot is ready, press the key to start the operation of the right pot.
4.1.4. When both pots are working, time and temperature are not adjustable.
4.2. Changing a setting while working with both pots
4.2.1. When the left and right pot are working at the same time and you need to set the temperature or time for the left pot, press 1 and then set the temperature and time as needed. The recipe can not be changed in this state. If there is no operation within 10 seconds after the setting, the display screen automatically returns to normal.
4.2.2. If you need to set the temperature or time of the right pot, refer to 4.2.1.
4.2.3. During the cooking process, the recipe and temperature/time can be adjusted by pressing 1 / 2 and the ▷□ key. The left or right pot will enter pause mode. Press the ▷□ key to resume cooking after changing your settings.
4.2.4. After the appliance has entered pause mode, if there is no operation in 5 minutes, the pot will enter standby mode.
4.3. Turning off left or right pot
4.3.1. Press the or key first, and then long press the Power key for 2 seconds. The selected pot will stop working and return to standby mode.
4.4. Pulling out the basket
4.4.1. If the basket was pulled out during cooking, the display will show the symbol "OPEN". The side in question will stop working (both heating and the motor will be stopped), and it will resume working with the previous setting when the basket is re-inserted.
4.4.2. When the frying basket is pulled out in standby state, the display will show the symbol "OPEN". At this time, both pots cannot be operated at the same time.
4.5. Pausing the left and right pot
4.5.1. When cooking with both pots, press the key once, and the left and right pot will enter pause mode at the same time. Both screens and recipes will now be flashing. Press the key again, and the left and right pot will resume operation.
4.5.2. When both the left and right pot are paused at the same time and there is no operation within 5 minutes, both pots will stop working and return to standby mode.
4.5.3. When cooking with both pots, gently press the key once. The left and right pot will enter pause mode at the same time. If you need to adjust anything, first press or and then adjust the recipe, temperature and time according to your needs.
Now press the key once to resume the simultaneous operation of the left and right pot.
4.5.4. When cooking with both pots, gently press the key once. The left and right pot will enter pause mode at the same time. Long press the key again for 2 seconds, and the left and right pot will stop working at the same time. The left and right screens will display "OFF", and the product will return to standby mode after a prompt beep.
4.6. Stopping the left and right pot
4.6.1. When cooking with both pots, long press the Power key for 2 seconds. The left and right pot will stop working at the same time, and the left and right screens will display "OFF". After a prompt beep, the appliance will enter standby mode.
4.6.2. There will be no operation of the left or right pot after the time on the display has elapsed, both heating and the motor will be stopped, and the display screen will show "OFF". After the buzzer gives out 5 prompt beeps, the display screen will turn off and the appliance will return to standby mode.
4.6.3. If you want to turn off one pot, press 1 or 2 first and then long press the Power key for 2 seconds. The selected pot will stop working, and the corresponding display screen will show "OFF". After a prompt beep, it will return to standby mode. At this point, the appliance state changes to single pot working mode.
4.7. Simultaneous end function
4.7.1. This function is active only when two recipes with a different time setting are selected in the left and right pot mode. The indicator light will light up at the same time. When the function is active, the display is flashing.
4.7.2. After selecting the menu, press the Simultaneous end key first, then press the ▷□ key. The appliance will begin to work. At this point, the pot with the longer cooking time will be working, while the pot with the shorter cooking time will be showing the symbol "HOLD". When the extra time has passed, the second pot begins to work. The Simultaneous end key normally stays on during this process.
4.7.3. During cooking, if the time displayed on the "HOLD" side is longer than the time on the other side, exit the Simultaneous end mode. The Simultaneous end key indicator will stop flashing.
4.7.4. If you pull out the pot during operation, the timer will pause and the screen will show the symbol "HOLD". Insert the pot back into the appliance to resume operation.
4.7.5. While working with both pots, if the operation of one pot is stopped and the other pot continues to work, exit the Simultaneous end function and the Simultaneous end key indicator will stop flashing.
Notes:
- Boot mode: when in this mode, only the Power Key Icon is illuminated.
- Standby mode: the Power Key Icon, the Left Pot Key and the Right Pot Key are all illuminated.
- Setting the unit when it is not working: the corresponding function key is always on, the selected recipe indicator is flashing, the other menu indicators are always on, the corresponding display is flashing alternately to show the temperature/time of the selected recipe. When adjusting the menu, the selected recipe is flashing, when setting the temperature, press the temperature key, the display is flashing to show the current temperature, press the time key to adjust the time, the display switches the current time and flashes. When the left and right pot is the selected state at the same time, the
menu of the side that is not selected does not flash, the corresponding display alternately shows the temperature and time without flashing. During this process the heaters and motors are not working.
- Making adjustments during cooking: the recipe does not flash. The screen flashes to display the temperature and time. You can adjust the temperature and time, but the recipe cannot be adjusted.
- Single pot pause mode: the corresponding function key is steadily lit, and the menu indicator blinks when selected. The other menu indicators are steadily lit, and the corresponding display screen blinks,
indicating temperature/time. The corresponding 1 or 2 key blinks, and the menu, temperature and time can be adjusted at this time.
- Left pot and right pot pause mode: the corresponding function key is steadily lit, the selected menu indicator blinks, the other menu indicator is steadily on, the display screen blinks, showing the
temperature/time, the corresponding 1 and 2 keys blink.
- Working mode: the corresponding function key is steadily lit, the selected menu indicator is steadily lit, other menu indicators are off, and the corresponding screen displays the menu time.
- When the left and right pot are working at the same time, the key indicator and the corresponding
menu indicator of the 1 pot blink at the same time /3 seconds, and the extinguishing time < 0.5
seconds. After 3 seconds, the key indicator and the corresponding menu indicator of the 2 pot blink at the same time /6 seconds, with the extinguishing time < 0.5 seconds, the left and right indicators blink alternately, and the left and right interval time is 3 seconds.
- Memory function: this appliance has a memory function. When the cooking is finished, the appliance does not power off. At next use, if you select the same pot as the last time, the appliance will directly display the menu that was used the last time. The memory function will disappear when the appliance is powered off for 1 hour. After at least 1 hour has passed, the initial state will be displayed when the appliance is powered on again. Power off memory: if the appliance is in use, and the power is cut off accidentally, the machine will return to the working state before power off as long as it is re-energized within 30 minutes.
Settings
The table below will help you select the basic settings for the ingredients.
Note: Keep in mind that these settings are indicative only. As ingredients differ in origin, size, shape, and brand, we cannot guarantee the best settings for your ingredients.
Because the rapid air technology instantly reheats the air inside the appliance, briefly pulling the pot out of the appliance during hot air frying will barely disturb the process.
Tips:
- Smaller ingredients usually require a slightly shorter preparation time than larger ingredients.
- A larger amount of ingredients only requires a slightly longer preparation time, a smaller amount of ingredients only requires a slightly shorter preparation time.
- Shaking smaller ingredients halfway through the preparation time optimizes the final result and can help prevent unevenly fried ingredients.
- Add some oil to fresh potatoes for a crispy result. Fry your ingredients in the air fryer within a few minutes after you have added the oil.
- Do not prepare extremely greasy ingredients such as sausages in the air fryer.
- Snacks that can be prepared in an oven can also be prepared in the air fryer.
- The optimal amount for preparing crispy fries is 500 grams.
- Use pre-made dough to prepare filled snacks quickly and easily. Pre-made dough also requires a shorter preparation time than home-made dough.
- Place a baking tin or oven dish in the air fryer pot if you want to bake a cake or quiche or if you want to fry delicate ingredients or dishes with filling or stuffing.
| Menu | Reference weight (g) | Default temperature (°C) | Pot time (min) | Temperature range (°C) | Time frame (min) | Shake |
| Fries | 600/400 | 200 | 25 | 80-200 | 1-60 | 1-2 |
| Steak | 500/350 | 180 | 16 | 80-200 | 1-60 | Flip |
| Chicken | 1200/800 | 200 | 45 | 80-200 | 1-60 | Flip |
| Grill | 600/400 | 200 | 25 | 80-200 | 1-60 | Flip |
| Fish | 650/450 | 180 | 18 | 80-200 | 1-60 | Flip |
| Shrimps | 650/500 | 180 | 12 | 80-200 | 1-60 | 1-2 |
| Pizza | 500/300 | 180 | 15 | 80-200 | 1-60 | / |
| Dehydrate | 650/450 | 40 | 6h | 80-200 | 1-60 | 1-2 |
Note1: Add 3 minutes to the preparation time when you start frying with the air fryer still cold. The appliance may emit some smoke and odour during first use, which is a normal occurrence.
Cleaning
Clean the appliance after every use.
Do not use metal kitchen utensils or abrasive cleaning materials to clean the pot and the frying rack as this may damage the non-stick coating.
- Remove the mains plug from the wall socket and let the appliance cool down.
Note: Remove the pot to let the air fryer cool down more quickly. - Wipe the outside of the appliance with a moist cloth.
- Clean the pots with hot water, some washing-up liquid, and a non-abrasive sponge.
You can use degreasing liquid to remove any remaining dirt.
Tip: If dirt is stuck to the shelf (rack) or the bottom of the pot, fill the pot with hot water and some washing-up liquid. Put the frying rack in the pot and let the pot and the frying rack soak for approximately 10 minutes.
- Clean the inside of the appliance with hot water and a non-abrasive sponge.
- Clean the heating element with a cleaning brush to remove any food residues.
Troubleshooting
| Problem | Possible cause | Solution |
| The appliance does not operate. | The appliance is not connected to the power mains. | Connect the power cord plug to a grounded power outlet. |
| The ingredients fried | Excessive amount of | Fill the pot with suggested amount of |
| with the air fryer are not done. | ingredients or ingredients are too large. | ingredients (of recommended size). |
| The temperature is too low. | Adjust the temperature accordingly. | |
| The appliance was not pre-heated. | Set the time to required preparation time. | |
| The ingredients are fried unevenly. | Certain types of ingredients need to be shaken halfway when cooking. | Ingredients that lie on top of or across each other (e.g., fries) need to be shaken halfway through the preparation time. |
| Fried snacks are not crispy when they come out of the air fryer. | Used the type of snacks intended for preparation in a traditional deep fryer. | Use oven snacks or lightly brush some oil onto the snacks for a crispier result. |
| Cannot slide the pan into the appliance properly. | Too much ingredients in the pot. | Do not fill the pan beyond the MAX indication. |
| The pot is not placed in the pot correctly. | Push the pot down into the appliance until you hear a click. | |
| White smoke comes out of the appliance. | Cooking greasy ingredients. | When cooking greasy ingredients, a large amount of oil will leak into the pot. The oil produces white smoke, and the pot may heat up more than usual. This does not affect the appliance or the final result. |
| The pot was not cleaned after the last cooking. | White smoke is caused by grease heating up in the pan. Make sure you clean the pan properly after each use. | |
| Fresh fries are fried unevenly. | Did not use the right potato type. | Use fresh potatoes and make sure they stay firm during cooking. |
| Did not rinse the potato sticks properly before cooking. | Rinse the potato sticks properly to remove starch from the outside of the sticks. | |
| Fresh fries are not crispy. | The crispiness of the fries depends on the amount of oil and water in the fries. | Make sure you dry the potato sticks properly. |
| Cut the potato sticks smaller for a crispier result. | ||
| Brush some oil for a crispier result. |
ENVIRONMENT
At the end of the appliance's useful life, do not discard it with common household waste. Take is to an authorized recycling centre. This will help preserve the environment.
WARRANTY AND REPAIR
For more information or in case of problems, please contact Hisense Call Centre in your country (phone number listed in the International Warranty Sheet). If there is no such centre in your country, please contact the local Hisense dealer or Hisense small domestic appliance department.
For personal use only!
Hisense
WISHES YOU A LOT OF PLEASURE IN USING YOUR APPLIANCE.
We reserve the right to modifications.
natural_image
Line drawing of a two-part kitchen appliance with handles and a top panel (no text or symbols)
natural_image
Line drawing of a rectangular device with a lid and internal compartments (no text or symbols)2
natural_image
Line drawing of a two-wető appliance with handles and grid-patterned top panel (no text or symbols)3

natural_image
Line drawing of a two-wető grater with handles and grating (no text or symbols)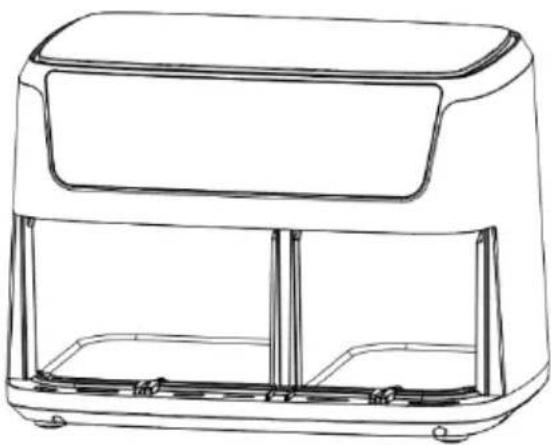
natural_image
Line drawing of a rectangular food appliance with a lid and side panel (no text or symbols)4
Detailed Operation Instructions
7
2
natural_image
Line drawing of a two-wet container with two handles and three rows of star-shaped objects on top (no text or symbols)3
natural_image
Line drawing of a pair of air fryer units, one with two handles and one with three outlets (no text or symbols)4
Detailed Operation Instructions
Detailed Operation Instructions
9

2
natural_image
Line drawing of two rectangular containers with handles and patterned top surfaces, no text or symbols present3
natural_image
Line drawing of a two-wető griddle with handles and filter units (no text or symbols)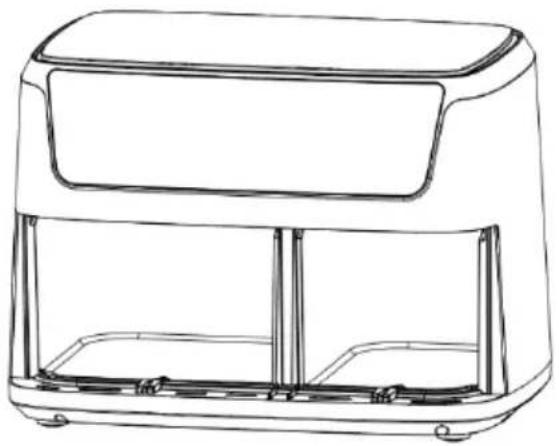
natural_image
Line drawing of a microwave oven with lid and front panel (no text or symbols)4
natural_image
Line drawings of a two-wire air fryer and a rectangular oven (no text or symbols)2
natural_image
Line drawing of two rectangular containers with handles and patterned top surfaces, no text or symbols present3

natural_image
Line drawing of two rectangular containers with handles and grid-like cutouts on top (no text or symbols)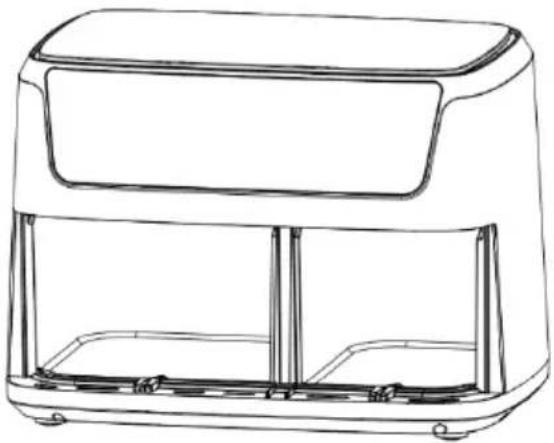
natural_image
Line drawing of a portable food appliance with front panel and side legs (no text or symbols)4
Pred prvým použitím
Detailed Operation Instructions
1. Režim bootovania
natural_image
Line drawing of a two-wet kitchen appliance with handles and a lid (no text or symbols)
natural_image
Line drawing of a rectangular device with a lid and internal compartments (no text or symbols)2

natural_image
Line drawing of two rectangular containers with handles and a grid-patterned top surface, no text or symbols present3
natural_image
Line drawing of a two-wető electrical enclosure with two handles and three grilles (no text or symbols)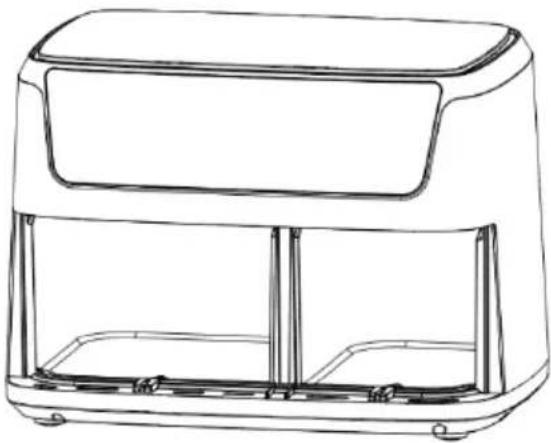
natural_image
Line drawing of a rectangular food appliance with lid and side panel (no text or symbols)4
Detailed Operation Instructions
1. Režim spouštění
12
natural_image
Line drawings of a two-tier air fryer with cutouts and a closed lid (no text or symbols)2
4
Detailed Operation Instructions
1. Tryb rozruchu
natural_image
Line drawing of two rectangular containers with handles and patterned top surfaces, no text or symbols present3

natural_image
Line drawing of a pair of air fryer units, one with two handles and one with three outlets (no text or symbols)4
14
natural_image
Line drawings of a pair of electric cookers with cutouts and heat sinks (no text or symbols)2

natural_image
Line drawing of two rectangular containers with handles and patterned top surfaces, no text or symbols present3
natural_image
Line drawing of a two-part container with handles and filter units (no text or symbols)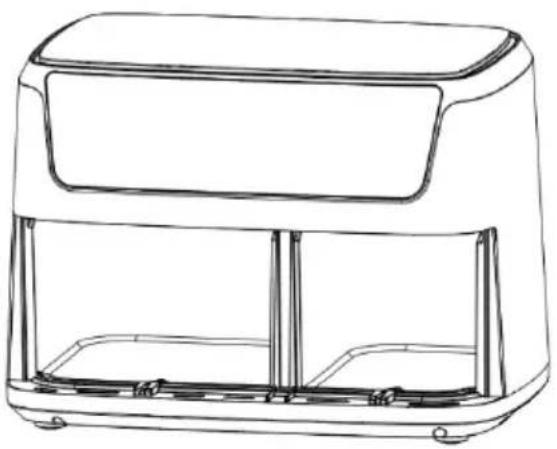
natural_image
Line drawing of a portable food appliance with front panel and side legs (no text or symbols)4
4

natural_image
Line drawings of a two-wire air fryer with cutouts and side panels (no text or symbols)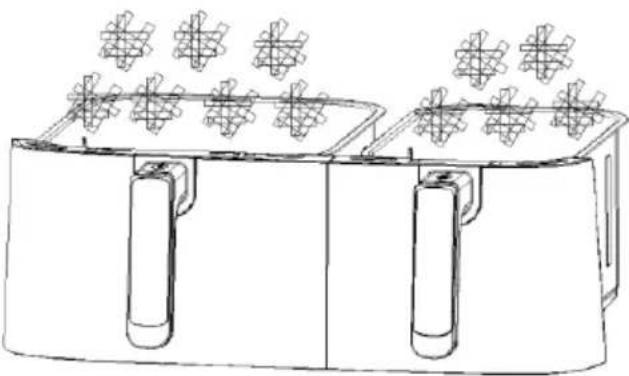
natural_image
Line drawing of two identical rectangular containers with side handles and a grid of star-shaped objects on top (no text or symbols)3

natural_image
Line drawing of a pair of air fryers with different designs (no text or symbols)4
natural_image
Line drawing of a two-wet frying pan with lid covers (no text or symbols)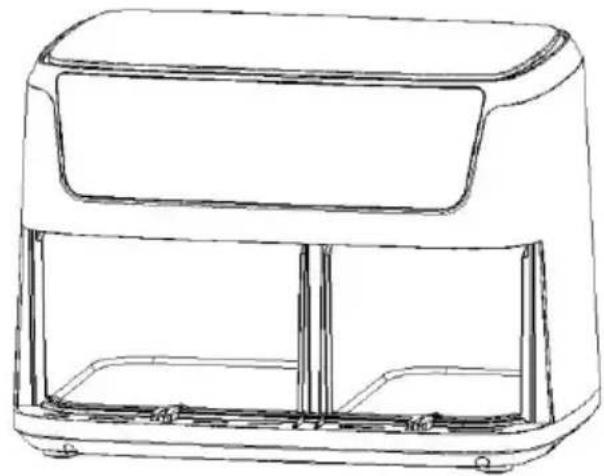
natural_image
Line drawing of a rectangular device with a lid and internal compartments (no text or symbols)2
natural_image
Line drawing of two rectangular containers with handles and a grid of star-shaped objects on top (no text or symbols)3

natural_image
Line drawing of a two-wető grater with two handles and three grilles (no text or symbols)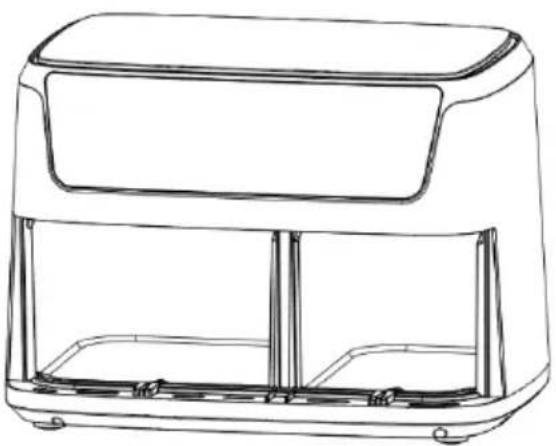
natural_image
Line drawing of a rectangular food appliance with lid and front panel (no text or symbols)4
4.1. Iniciar as 2 panelas
1
18
natural_image
Line drawing of a two-wető appliance with handles and a lid, no text or symbols present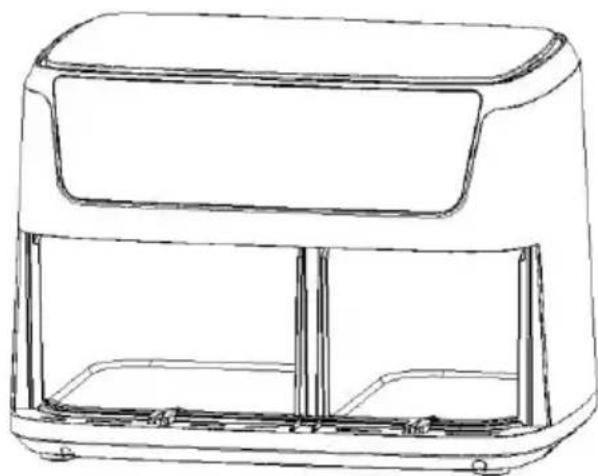
natural_image
Line drawing of a rectangular device with a recessed top and two internal compartments (no text or symbols)2
natural_image
Line drawing of two identical rectangular containers with handles and grid-like patterns on top (no text or symbols)3
natural_image
Line drawing of a pair of air fryer units, one with two handles and one with three outlets (no text or symbols)4
2

natural_image
Line drawing of a two-stage food processor with side handles and top tray, no text or symbols present3

natural_image
Line drawings of a two-f<|im_start|> Guyan air fryer and a rectangular oven (no text or symbols)4
natural_image
Line drawings of a two-wire air fryer with two labeled compartments (no text or symbols)Lughson 2
natural_image
Line drawing of two identical rectangular containers with side handles and a grid of star-shaped objects on top (no text or symbols)Lugmoo 3
natural_image
Line drawings of a two-tier air fryer and a rectangular oven (no text or symbols)4
- ἀγγδόσον ἀγγδόσον δηφωνού ραδούδεμεν κατάγδόσον.
- grades of the quality of the quality of the quality of the quality of the quality of the quality of the quality of the quality of the quality of the quality of the quality of the quality of the quality of the quality of the quality of the quality of the quality of the quality of the quality of the quality of the quality of the quality of the quality of the quality of the quality of the quality of the quality of the quality of the quality of the quality of the quality of the quality of the quality of the quality
- blood glucose levels of blood glucose levels of blood glucose levels of blood glucose levels of blood glucose levels of blood glucose levels of blood glucose levels of blood glucose levels of blood glucose levels of blood glucose levels of blood glucose levels of blood glucose levels of blood glucose levels of blood glucose levels of blood glucose levels of blood glucose levels of blood glucose levels of blood glucose levels of blood glucose levels of blood glucose levels of blood glucose levels of blood glucose levels of blood glucose levels of blood glucose levels of blood glucose levels of blood glucose levels, (Lungsten 3)
- olg3 hsqgo jdsdo sygmznoomdo (luymsno 4)
śśśśśśśśśśśśśśśśśśśśśśśśśśśśśśśśśśśśśśśśśśśśśśśśśśśśśśśśśśśśśśśśśśśśśśśśśśśśśśśśśśśśśśśśśśśśśśśśś ŚŚŚŚŚŚŚŚŚŚŚŚŚŚŚŚŚŚŚŚŚŚŚŚŚŚŚŚŚŚŚŚŚŚŚŚŚŚŚŚŚŚŚŚŚŚŚŚŚŚŚŚŚŚŚŚŚ Ś Ś Ś Ś Ś Ś Ś Ś Ś Ś Ś Ś Ś Ś Ś Ś Ś Ś Ś Ś Ś Ś Ś Ś Ś Ś Ś Ś Ś Ś Ś Ś Ś Ś Ś Ś Ś Ś Ś Ś Ś Ś Ś Ś Ś Ś Ś Ś Ś Ś Ś Ś Ś Ś Ś Ś Ś Ś Ś Ś Ś Ś Ś Ś Ś Ś Ś Ś Ś Ś Ś Ś Ś Ś Ś Ś Ś Ś Ś Ś Ś Ś Ś Ś Ś Ś Ś Ś Ś Ś Ś Ś Ś Ś Ś Ś Ś Ś Ś Ś ś ś ś ś ś ś ś ś ś ś ś ś ś ś ś ś ś ś ś ś ś ś ś ś ś ś ś ś ś ś ś ś ś ś ś ś ś ś ś ś ś ś ś ś ś ś ś ś ś ś ś ś ś ś ś ś ś ś ś ś ś ś ś ś ś ś ś ś ś ś ś ś ś ś ś ś ś ś ś ś ś ś ś ś ś ś ś ś ś ś ś ś ś ś ś ś ś ś ś ś ̄
zsghmbngjds: sm ddgbmm fjsdu zsdmygbdou q6mlu qs ddqggz gmqs bbou zsbdsgm ol dsmosb gbgmcqjds. dbmcmqo lsbgmmyfmoq wsofomjo fjsdo.
3.7. Money is the money of money for cash, money from money to account for cash, money from money to account for cash.
3.9. Money is the money of money from the government, which is the government of the United States, and the government of the United Kingdom. The government has a general structure of the government's own structure, and the government's own structure is to be organized by the Government.
4.2. 356s408m0s 493m0s m603g 438m5b 47d5m8o5b