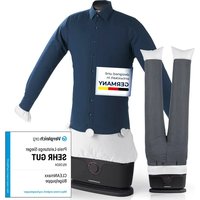
14907 - Iron Cleanmaxx - Free user manual and instructions
Find the device manual for free 14907 Cleanmaxx in PDF.


| Product type | Air pressurized garment steamer |
| Brand | Cleanmaxx |
| Model | 14907 |
| Color | Black |
| Adjustable height | Approx. 100-170 cm (telescopic) |
| Weight | Approx. 2.5 kg (estimated) |
| Power supply | 230 V ~ 50 Hz |
| Rated power | Not specified (estimated 1200 W) |
| Protection class | II |
| Timer | 5-30 minutes (adjustable in 5-minute increments) |
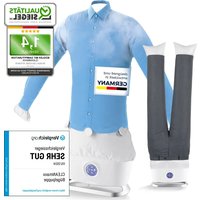
| Main functions | Drying and ironing with pressurized air, balloon inflation to smooth clothes |
| Included accessories | 1 telescopic pole, 1 hanger, 1 balloon (shirts), 1 balloon (pants), 5 weighted clips, 2 rods, 1 Y-piece, 1 anti-drip protection |
| Maintenance and cleaning | Wipe with a damp cloth and mild detergent; dry completely before storing |
| Safety | Anti-drip protection, automatic shut-off at end of cycle, safety switch in case of fall, hot surfaces (CAUTION) |
| Spare parts and repairability | Repair by manufacturer or after-sales service only; use original accessories |
| General information | Household use only; do not use near water; suitable for textiles that can withstand tumble drying and ironing |
Frequently Asked Questions - 14907 Cleanmaxx
User questions about 14907 Cleanmaxx
0 question about this device. Answer the ones you know or ask your own.
Ask a new question about this device
Download the instructions for your Iron in PDF format for free! Find your manual 14907 - Cleanmaxx and take your electronic device back in hand. On this page are published all the documents necessary for the use of your device. 14907 by Cleanmaxx.
USER MANUAL 14907 Cleanmaxx
Operating instructions
starting on page 13
FR
Mode d'emploi
Safety Instructions 14
Items Supplied 16
Device Overview 17
Assembly 17
Use 18
Cleaning and Storage 21
Troubleshooting 21
Technical Data 22
Disposal 22
SYMBOLS
Danger symbols: These symbols indicate possible dangers. Read the associated safety notices carefully and follow them.

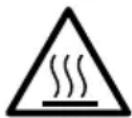
Caution: hot surfaces!

WARNING: Do not use this device near a bathtub, shower or any vessel containing water.

Protection class II

Read instruction manual before use!

Supplementary information
SIGNAL WORDS
Signal words indicate hazards if the associated notices are not followed.
DANGER - high risk, results in serious injury or death
WARNING - medium risk, may result in serious injury or death
CAUTION - low risk, may result in minor or moderate injury
NOTE - may result in risk of damage to material
Dear Customer,
We are delighted that you have chosen this 2in1 clothes dry & press machine.
Before using the device for the first time, please read the operating instructions carefully and keep it for future reference. If the device is given to someone else, these operating instruction should also be handed over with it. It forms an integral part of the device.
The manufacturer and importer do not accept any liability if the information in these operating instruction is not complied with.
If you have any questions about the device and about spare parts/accessories, contact the customer service department via our website: www.ds-group.de/kundenservice
INTENDED USE
- This device is intended to be used to dry and press textiles which are suitable for tumble drying and ironing. It is not suitable for delicate textiles (e.g. wool or similar) which shrink or could be damaged by heat.
- The device is for personal use only and is not intended for commercial applications.
- The device should only be used as described in these instructions. Any other use is deemed to be improper.
- The following are excluded from the warranty: all defects caused by improper handling, damage or unauthorised attempts at repair. This also applies to normal wear and tear.
SAFETY INSTRUCTIONS
WARNING: Note all safety notices, instructions, illustrations and technical data provided with this device. Failure to follow the safety notices and instructions may result in electric shock, fire and/or injuries.
This device can be used by children aged from 8 years and above and persons with reduced physical, sensory or mental abilities or lack of experience and / or knowledge if they have been given supervision or instruction concerning use of the device in a safe way and understand the hazards involved.
Children must not play with the device.
- Cleaning and user maintenance may not be carried out by children without supervision.
Children younger than 8 years of age and animals must be kept away from the device and the connecting cable.
WARNING: Only ever use the device to dry textiles which have been washed in water.
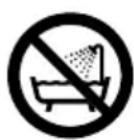
WARNING: Do not use this device near a bathtub, shower or any vessel containing water.
CAUTION: hot surfaces! The device and accessories (incl. the clamps) will get hot during use. You should therefore not touch them during or shortly after use.
The device must always be switched off and disconnected from the mains power when it is not being used or before cleaning it.
The device must not be left unattended while it is connected to the mains power supply.
- Do not make any modifications to the device. If the device is damaged, it must be replaced by the manufacturer, customer service department or a similarly qualified person (e.g. specialist workshop) in order to avoid any hazards.
If the mains connecting cable of this device is damaged, it must be replaced with a special connecting cable which is available from the manufacturer or its customer service department.
- Allow the device to cool down completely before it is cleaned or stored away.

DANGER - Danger of Electric Shock
Use and store the device only in closed rooms.
- Do not operate or store the device in rooms with high humidity.
- Never immerse the device and the connecting cable in water or other liquids and ensure that they cannot fall into water or become wet.
If the device falls into water while it is connected to the mains power, pull the mains plug out of the plug socket immediately. Only after this should you retrieve the device from the water. Have it checked in a specialist workshop before using it again. - Never touch the device and the connecting cable with wet hands when the device is connected to the mains power.
It is only allowed to use the device when the drip protection is attached!

WARNING - Danger of Injury
- Keep the packaging material away from children and animals. There is a danger of suffocation.
Make sure that the connecting cable is always kept out of the reach of young children and animals. There is a danger of strangulation.
Lay the connecting cable in such a way that it does not present a trip hazard.
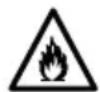
WARNING - Danger of Fire
Do not operate the device in the vicinity of combustible material.
- Never cover up the ventilation openings of the main unit and do not insert any objects into them.
NOTICE - Risk of Damage to Material and Property
Steam may rise during operation. For this reason, do not place the device under equipment containing electrical components.
Make sure that the connecting cable is not squashed, bent or laid over sharp edges and does not come into contact with hot surfaces.
- Disconnect the device from the mains power if a fault occurs or in a thunderstorm.
- When you disconnect the device from the mains power, always pull on the mains plug and never the mains cable.
-
Never pull or carry the device by the connecting cable.
-
Use only original accessories from the manufacturer in order to guarantee that there is no interference that may prevent the device from working and to avoid possible damage.
- Never place heavy objects on the device or the connecting cable.
Use and store the device at room temperature, do not expose it to extreme temperatures or temperature fluctuations. - Protect the device from other heat sources, naked flames, persistent moisture and impacts.
ITEMS SUPPLIED
- 1x motor unit
- 1 x telescopic rod with drip protection (long)
1 x rod with drip protection (short) - 2 x rods
- 1 x hanger
- 1 x Y tube
1 x balloon (for shirts, blouses)
1 x balloon (for trousers) - 5 × clamps with integrated weight
1xmanual
Check the items supplied for completeness and the components for transport damage. If you find any damage, do not use the device but contact our customer service department. Remove any possible films, stickers or transport protection from the device. Never remove the rating plate and any possible warnings!
DEVICE OVERVIEW
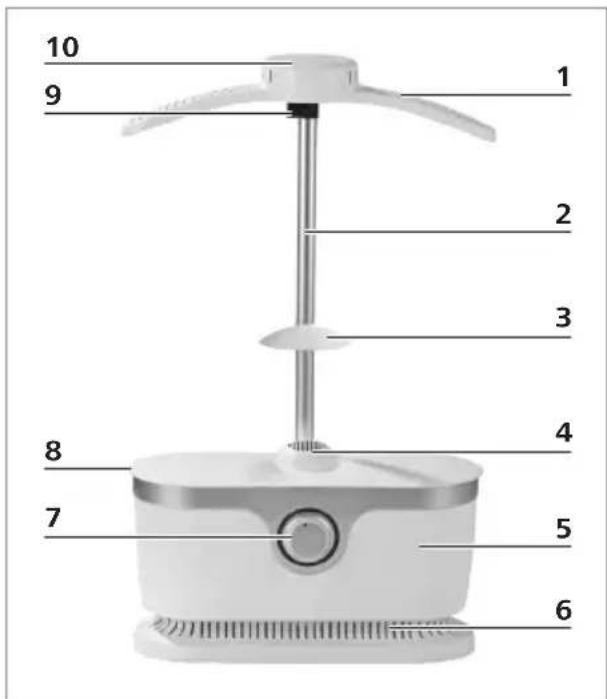
1 Hanger
2 Telescopic rod
3 Drip protection (premounted on the telescopic rod)
4 Fan
5 Motor unit
6 Ventilation slots
7 Timer (5-30 minutes)
8 Mounting flange
9 Clip (for adjusting the height)
10 Collar section
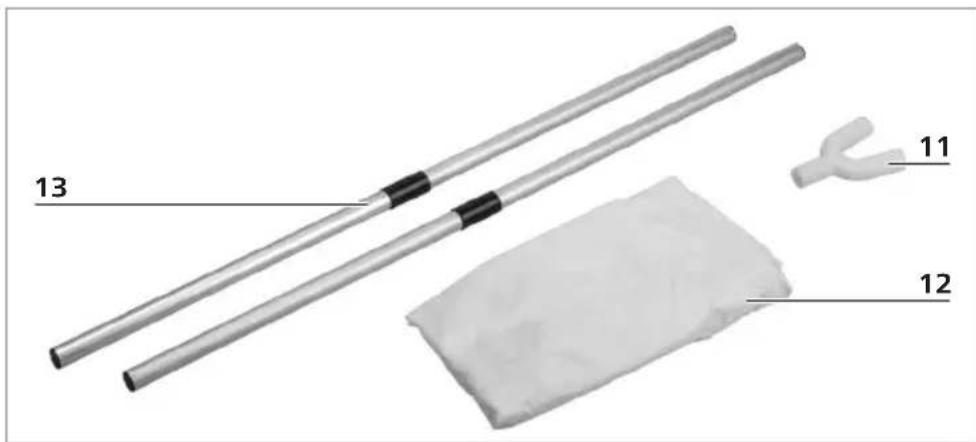
11 Y tube
12 Balloon
13 Rods
ASSEMBLY
Presser for blouses and shirts
- Plug the telescopic rod (2) into the recess on the top of the motor unit (5).
- Place the hanger (1) onto the telescopic rod (2). When you do this, make sure that the slight bend in the hanger (1) points forwards.
- Check that the drip protection (3) is fitted securely on the telescopic rod. The drip protection must be fitted approx. 15cm above the fan outlet. It prevents any water that may drip down from being able to get into the fan (4). Make sure that the drip protection is not fitted any lower to prevent a build-up of heat in the fan.
-
Attach the balloon:
-
Pull it over the hanger. When you do this, make sure that the side with the hole line points forwards.
o Pull the small elastic cord at the top over the collar section (10) on the hanger. - Pull the large elastic cord at the bottom over the mounting flange (8).
The device is disassembled in the reverse order.
Presser for trousers
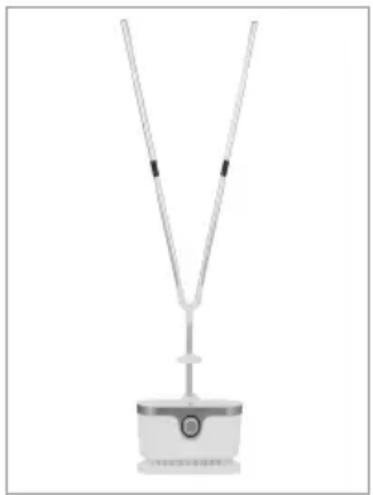
- Insert the rod with the drip protection into the recess which is provided for it on the main device.
- Fit the Y tube (11) on the rod with the drip protection.
- Insert the two rods (13) into the Y tube.
- Attach the balloon (12):
draw it over the two rods.
- draw the elastic over the mounting flange on the main device.
The device is disassembled in the reverse order.
USE
Please note!
- Only connect the device to a plug socket that is properly installed. The plug socket must also be readily accessible after connection so that the connection to the mains can quickly be isolated. The mains voltage must match the rating plate of the device.
- Do not connect the device along with other consumers (with a high wattage) to a multiple socket in order to prevent overloading and a possible short circuit (fire).
- Do not use any extension cables more than 3m long or cable extension reels.
Always switch off the device first before the plug is pulled out of the plug socket. One exception is when the device has fallen into water or in the event of a fault.
Always place the device with clear space above it and on all sides on a dry, flat, solid and heat-resistant surface.
It is essential that you follow the care labels for the textiles to be dried!
Presser for blouses and shirts
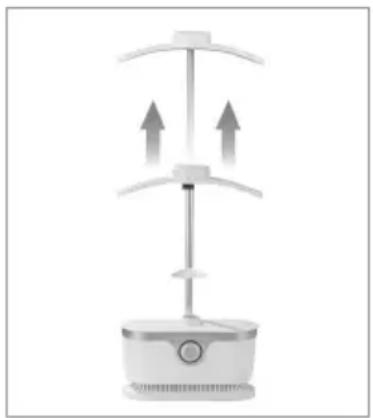
- Set the height you want. To do this, open the clip (9), pull out the telescopic rod (2) and then close the clip again.
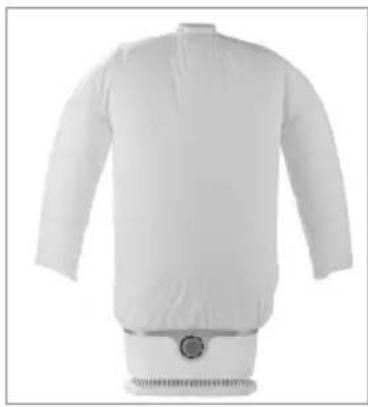
- If you have not already done so, pull on the balloon (see the "Before Initial Use" chapter, "Assembly" section).

The balloon should sit immediately below the mounting flange (8) so that it can fully inflate.
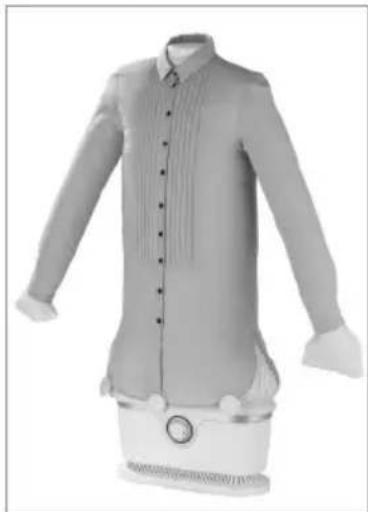
- Pull the garment which is to be pressed over the balloon and the hanger (1) and do up the buttons if necessary. Make sure that
the collar is fitted over the collar section (10) on the hanger,
any button strip is over the hole line on the balloon,
the arms of the balloon fit properly in the sleeves of the garment and are not twisted or scrunched up,
-
all buttons on the garment (including on the sleeves) are done up.
-
Spread the clamps along the bottom of the garment (at the front and back in each case on the outsides and in the middle on the button strip at the front) so that it is weighed down and will not go out of shape when the balloon is inflated.
-
Insert the mains plug into an easily accessible socket.
- Turn the timer (7) clockwise and set it to the length of time you want. Each LED light represents 5 minutes.
- Once the balloon has inflated, straighten out the garment and smooth it down again.
- When the set time elapses, the device switches off automatically. The drying / pressing process can be interrupted at any time by turning the timer to the starting position.
- Remove the garment from the balloon and hanger (1).
- Pull the mains plug out of the plug socket and allow the device to cool down completely.
Presser for trousers
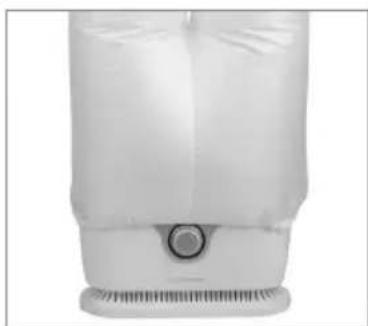
- If you have not yet done so, attach the balloon (2) (see the "Assembly" chapter).

The balloon should sit immediately below the mounting flange so that it can fully inflate.
EN
- Pull the garment which is to be pressed over the balloon and do up the zip or buttons if necessary. Make sure that
the legs of the balloon fit properly into the legs of the trousers and are not twisted or scrunched up,
all buttons on the garment (including the legs) are done up. - Spread the clamps along the bottom of the garment (at the front and back in each case on the outsides) so that it is weighed down and will not go out of shape when the balloon is inflated.
- Insert the mains plug into an easily accessible socket.
- Turn the timer (7) clockwise and set it to the length of time you want. Each LED light represents 5 minutes.
- Once the balloon has inflated, straighten out the garment and smooth it down again.
- Remove the garment from the balloon after the completion of the drying/pressing process.
- Pull the mains plug out of the plug socket and allow the device to cool down completely.
Tips
- The device is intended primarily for machine-spun laundry! If hand-washed or non-machine-spun laundry is to be pressed, first allow it to dry out a little first.
- The drying / pressing process takes around 10 minutes for a spun-dried shirt or trousers. However, the length of time can vary depending on the material and thickness of the material. We recommend that you start with a shorter time and extend it if necessary.
- The balloon can be enlarged or reduced in size with the aid of the zip fasteners. For smaller sizes, the zip fasteners should be closed. For larger sizes, the zip fasteners should be opened on both sides.
- Wide-apart buttons may result in the button strip crimping slightly during pressing. Here it is advisable to smooth down the button strip again by hand immediately after the pressing process.
-
In the case of trousers with a very small waist it may not be possible to pull them over the attachment when it has already been fitted. In this case you proceed as follows:
-
push the balloon (12) upwards slightly, to enable access to the rods (13),
remove one of the two rods from the Y tube once more (11),
draw the trousers over the two rods,
O now replace the rods in the Y tube and
draw the balloon over the mounting flange on the main device again.
After the drying / pressing process any creases need to be ironed out using a normal iron.
CLEANING AND STORAGE
Please note!
- Do not use any corrosive or abrasive cleaning agents or cleaning pads to clean the device. These can damage the surface.

The metal at the outlet may lose some of its colour over time. This is normal and does not have any adverse effect on function.
- Clean the device and the balloon if necessary with a slightly damp cloth and a little mild detergent if required. Then wipe down fully with a dry cloth.
- Allow all parts to dry completely before you put them away.
- Store the device in a clean, dry place that is protected from sunlight and is not accessible to children and animals.
TROUBLESHOOTING
If the device does not work properly, check whether you are able to rectify the problem yourself. If the problem cannot be solved with the steps below, contact the customer service department.

Do not attempt to repair an electrical device yourself!
| Problem Possible cause / solution | |
| The device does not work. The LEDs do not light up. | ·Is the mains plug inserted in the plug socket correctly? Correct the fit of the mains plug. ·Is the plug socket defective? Try another plug socket. ·Check the fuse of the mains connection. ·Is the device switched on? Set the timer (7) to a time. |
| Unusual noises | ·Are the ventilation slots (6) covered up or blocked? Free up the ventilation slots. |
| The device switches off suddenly. | ·Are the ventilation slots (6) covered up or blocked? Free up the ventilation slots. ·The device has an automatic safety switch-off function. It switches off automatically if it overheats. Allow the device to cool down and switch it on again. ·Has the device fallen over? The device has a protective switch that is activated if the device falls over. Set the device up again and switch it back on. ·Has the set time elapsed? Set the timer (7) to the time you want again. |
| Odour produced | ·You might notice a slight odour caused by production residues the first time you use the device. However, this is harmless and will cease as you use the device. |
TECHNICAL DATA
Article numbers: 07252 (light blue)
12315 (white)
14907 (black)
Model number: LGY-01YK
Voltage supply: 220 - 240V 50Hz
Power: 1800W
Protection class: II
Manual ID: Z 07252_12315_14907 MDS V7.2 0125 as


DISPOSAL

Dispose of the packaging material in an environmentally friendly manner so that it can be recycled.
The adjacent symbol (crossed-out bin underlined) means that used devices should not be disposed of in the domestic waste, but should instead be taken to special collection and return systems.
Owners of used devices from private households can take them free of charge to the collection points of the public waste disposal authorities or the disposal points which are set up by manufacturers and distributors under the Electrical Equipment Act so that they can be disposed of in an environmentally friendly way and valuable raw materials can be recovered. If they are not disposed of properly, toxic ingredients may escape into the environment and cause harm to the health of humans, animals and plants. Businesses which market electrical and electronic devices are also obliged to take back used devices.
Waste prevention makes an even more valuable contribution to protecting the environment. This means if possible, as well as continuing to use or repair, passing it on to another user also represents an ecologically beneficial alternative to disposal.
CONTENU
Symboles 23
Chere cliente, cher client,
WAARSCHUWING - Brandgevaar
Calls to German landlines are subject to your provider's charges.


- SYMBOLS
- SIGNAL WORDS
- INTENDED USE
- SAFETY INSTRUCTIONS
- DANGER - Danger of Electric Shock
- WARNING - Danger of Injury
- WARNING - Danger of Fire
- NOTICE - Risk of Damage to Material and Property
- ITEMS SUPPLIED
- DEVICE OVERVIEW
- ASSEMBLY
- Presser for blouses and shirts
- Presser for trousers
- USE
- Please note!
- EN
- Tips
- CLEANING AND STORAGE
- TROUBLESHOOTING
- TECHNICAL DATA
- DISPOSAL
- CONTENU
- WAARSCHUWING - Brandgevaar
Brand : Cleanmaxx
Model : 14907
Category : Iron