
MFT302R0BPK - Fan MIDEA - Free user manual and instructions
Find the device manual for free MFT302R0BPK MIDEA in PDF.

| Product type | Ventilateur de circulation d'air |
| Brand | Midea |
| Model | MFT302R0BPK |
| Voltage | 220-240 V ~ |
| Frequency | 50 Hz |
| Power | 30 W |
| Maximum airflow | 10,8 m³/min |
| Fan power consumption | 31,6 W |
| Service value | 0,5 (m³/min)/W |
| Standby power consumption | 0,35 W |
| Off mode power consumption | 0,0 W |
| Noise level | 56,1 dB(A) |
| Maximum air velocity | 1,94 m/s |
| Seasonal electricity consumption | 10,5 kWh/an |
| Number of speeds | 5 |
| Oscillation | Horizontal and vertical |
| Timer | 1 to 15 hours |
| Remote control | Yes, with CR2032 battery |
| Automatic shut-off | After 24 hours without operation |
| Memory function | Remembers last speed and last mode |
| Blade protection | Front and rear grilles |
| Usage | Indoor, domestic use |
| Cleaning | Slightly damp soft cloth, neutral detergent |
| Remote control battery | CR2032, 3,0 V |
Frequently Asked Questions - MFT302R0BPK MIDEA
User questions about MFT302R0BPK MIDEA
0 question about this device. Answer the ones you know or ask your own.
Ask a new question about this device
Download the instructions for your Fan in PDF format for free! Find your manual MFT302R0BPK - MIDEA and take your electronic device back in hand. On this page are published all the documents necessary for the use of your device. MFT302R0BPK by MIDEA.
USER MANUAL MFT302R0BPK MIDEA
natural_image
Line drawing of a small electric fan with a circular blade and internal blades (no text or symbols)Tischventilator
BEDIENUNGSANLEITUNG
MFT302R0BPK
natural_image
Four grayscale illustrations of a spherical object with internal structure, shown in different angles and motion directions (no text or symbols)DE
(Beispiel) 1 Stunde
natural_image
Simple line drawing of a staircase with an arrow pointing upward toward a spherical object (no text or symbols)flowchart
graph TD
    A["Document Icon"] --> B["Robot"]
    B --> C["Curved Arrow 1"]
    B --> D["Curved Arrow 2"]
    B --> E["Curved Arrow 3"]
    B --> F["Curved Arrow 4"]
    B --> G["Curved Arrow 5"]
    B --> H["Curved Arrow 6"]
    B --> I["Curved Arrow 7"]
    B --> J["Curved Arrow 8"]
    B --> K["Curved Arrow 9"]
    B --> L["Curved Arrow 10"]
natural_image
Line drawing of a hand cleaning a fan-shaped device (no text or symbols)natural_image
Symbol of a trash bin crossed with no visible text or labelsDE
natural_image
Recycling symbol with three chasing arrows forming a triangle (no text or labels)DATENSCHUTZHINWEISE
Thank you for choosing Midea! Before using your new Midea product, please read this manual thoroughly to ensure that you know how to operate the features and functions that your new appliance offers in a safe way.
CONTENTS
THANK YOU LETTER 01
SAFETY INSTRUCTIONS 02
SPECIFICATIONS 05
PRODUCT OVERVIEW 06
QUICK START GUIDE 07
PRODUCT INSTALLATION 09
OPERATION INSTRUCTIONS 11
CLEANING AND MAINTENANCE 17
TROUBLESHOOTING 18
TRADEMARKS, COPYRIGHTS AND LEGAL STATEMENT 19
DISPOSAL AND RECYCLING 20
DATA PROTECTION NOTICE 21
SAFETY INSTRUCTIONS
Intended Use
The following safety guidelines are intended to prevent unforeseen risks or damage from unsafe or incorrect operation of the appliance. Please check the packaging and appliance on arrival to make sure everything is intact to ensure safe operation. If you find any damage, please contact the retailer or dealer. Please note modifications or alterations to the appliance are not allowed for your safety concern. Unintended use may cause hazards and loss of warranty claims.
Explanation of Symbols
| EN | [DZ4WA] | DangerThis symbol indicates that there are dangers to the life and health of persons due to extremely flammable gas. |
 | Warning of electrical voltageThis symbol indicates that there is a danger to life and health of persons due to voltage. | |
 | WarningThe signal word indicates a hazard with a medium level of risk which, if not avoided, may result in death or serious injury. | |
 | CautionThe signal word indicates a hazard with a low degree of risk which, if not avoided, may result in minor or moderate injury. | |
 | AttentionThe signal word indicates important information (e.g., damage to property), but not danger. | |
 | Observe instructionsThis symbol indicates that a service technician should only operate and maintain this appliance in accordance with the operating instructions. |
Read these operating instructions carefully and attentively before using/commissioning the unit and keep them in the immediate vicinity of the installation site or unit for later use!
SAVE THESE INSTRUCTIONS
CAUTION
- Read Rules for Safe Operation and Instructions Carefully.
-
This appliance can be used by children aged from 8 years and above and persons with reduced physical, sensory or mental capabilities or lack of experience and knowledge if they have been given supervision or instruction concerning use of the appliance in a safe way and understand the hazards involved. Children shall not play with the appliance. Cleaning and user maintenance shall not be made by children without supervision.
-
Keep electrical appliances out of reach from children or infirm persons. Do not let them use the appliances without supervision.
- Never insert fingers, pencils, or any other object through the grille when fan is running.
- Disconnect fan when moving from one location to another.
- Be sure fan is on a stable surface when operating to avoid overturning.
- DO NOT use fan in window, rain may create electrical hazard.
- Indoor use only.
WARNING
- If the supply cord is damaged, it must be replaced by manufacturer or its service agent or a similarly qualified person in order to avoid a hazard.
• To protect against the risk of electrical shock, do not immerse the unit, cord or plug in water or other liquid. - When the appliance is not in use and before cleaning, unplug the appliance from the outlet.
- Indoor and household use only.
- When the fan was assembled, the rotor blade guard shall not be taken off anymore.
- Prior cleaning unplugs the fan.
- The rotor guard shall not be dissembled/opened to clean the rotor blades.
- Wipe the fan enclosure and rotor blade guard with a slightly damp cloth.
- WARNING: Only use the supply unit provided with this appliance.
SPECIFICATIONS
| MFT302ROBPKProduct Model | |
| Voltage 220-240V~ | |
| Frequency | 50Hz |
| Power | 30W |
| DescriptionSymbolValueUnit | |||
| Maximum fan flow rate F m | 10.8 | ^3 /min | |
| Fan power input | P | 31.6 | W |
| Service value | Sv(m) | 0.5 | ^3 /min)W |
| Standby power consumption | PSB W | 0.35 | |
| Off power consumption | POFF | 0.0 | W |
| Fan sound power level | LWA dB(A) | 56.1 | |
| Maximum air velocity | C meters/sec | 1.94 | |
| Seasonal electricity consumption | Q kWh/a | 10.5 | |
| Measurement standard for service value | IEC 60879: 1986+Corr.1992;IEC 60879: 2019 | ||
| Contact details for obtaining more information | GD Midea Environment Appliances MFG. Co., LtdNo.28, Dong Fu Road, HeSui East Industrial Area,Dong Feng Town, ZhongShan, GuangDong, China. | ||
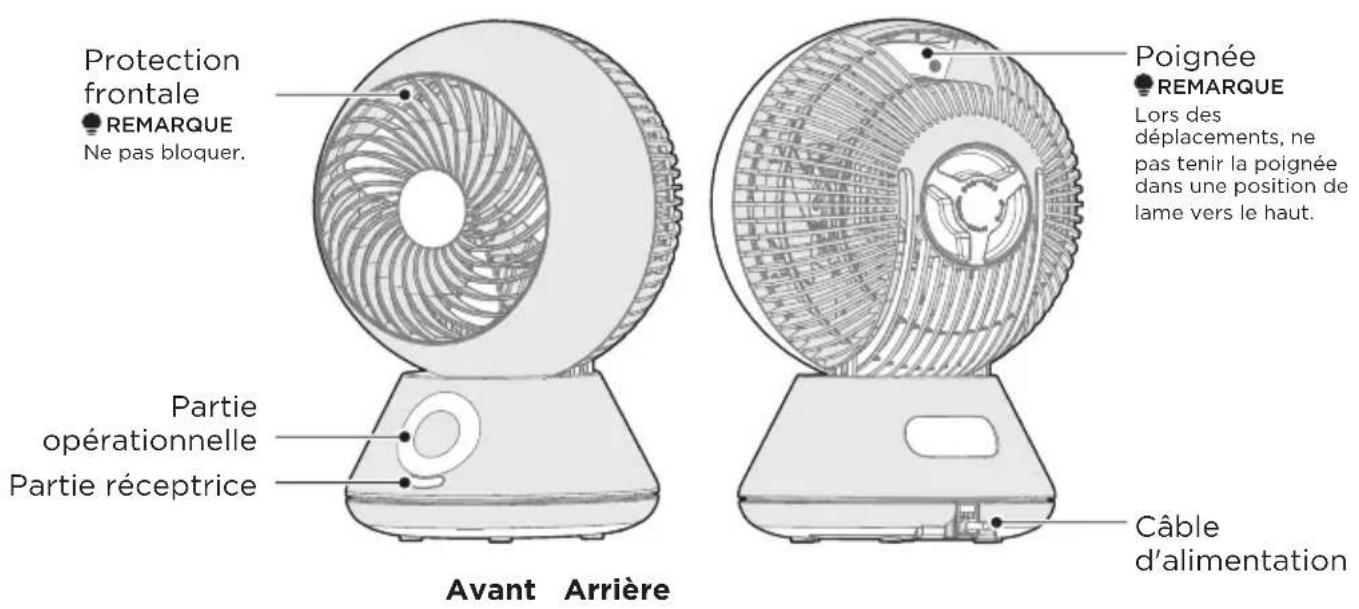
PRODUCT OVERVIEW
Name of Part

Part List
Remote Control

NOTE
The air circulation fan adopts a structure that enhances the straightness of the wind so that the air can be circulated and stirred. Therefore, compared with ordinary electric fans, the sound of blowing air will be slightly louder.
QUICK START GUIDE
Preparation of Remote Control
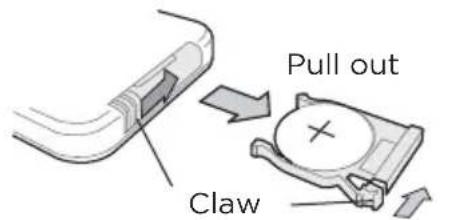
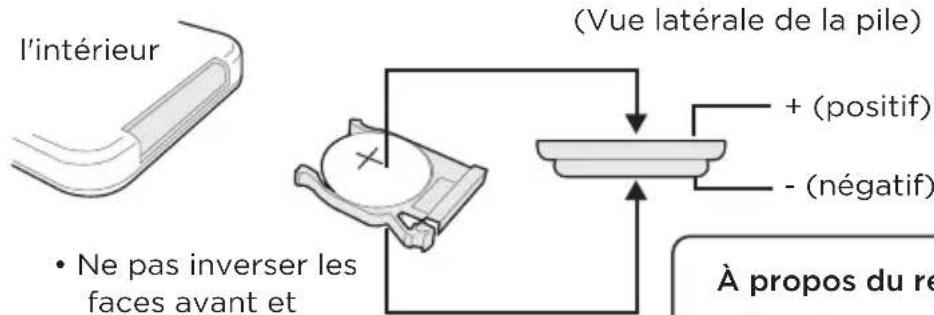
Insert the supplied battery (CR2032 button battery) into the battery holder of the remote control.

How to Install the Battery (How to Replace)
- Press the claw in the direction of the arrow to pull out the battery holder.
- Install the new battery on the battery holder with the correct orientation, and insert it into the remote control.
• The state of the remote control facing inward.
Press

About replacement batteries The battery is a consumable. Please purchase a commercially available button battery CR2032.
The remote control may not be able to be operated in the following cases.
- When there is an obstacle between the receiver of the main unit and the remote control.
- When using inverter lighting equipment or electronic instant lighting equipment.
- When the receiving part of the main unit is exposed to strong light such as sunlight.

TIPS
- Once the battery is depleted, the operable range of the remote control will be reduced.
In this case, please replace the battery. - Do not damage the transmitting part of the remote control.
- When the remote control is not used for a long time, the battery should be removed from the remote control to avoid battery leakage.
- Keep the battery out of reach of infants and young children. There is a possibility of swallowing the battery.
WARNING
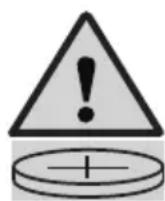
- INGESTION HAZARD: This product contains a button cell or coin battery.
- DEATH or serious injury can occur if ingested.
- A swallowed button cell or coin battery can cause Internal Chemical Burns in as little as 2 hours.
- KEEP new and used batteries OUT OF REACH of CHILDREN.
- Seek immediate medical attention if a battery is suspected to be swallowed or inserted inside any part of the body.
a) Remove and immediately recycle or dispose of used batteries according to local regulations and keep away from children. Do NOT dispose of batteries in household trash or incinerate.
b) Even used batteries may cause severe injury or death.
c) Call a local poison control center for treatment information.
d) Compatible battery type: CR2032
e) Nominal battery voltage: 3.0V
f) Non-rechargeable batteries are not to be recharged.
g) Do not force discharge, recharge, disassemble, heat above 60^ C or incinerate. Doing so may result in injury due to venting, leakage or explosion resulting in chemical burns.
h) Ensure the batteries are installed correctly according to polarity(+ and -).
i) Do not mix old and new batteries, different brands or types of batteries, such as alkaline, carbon-zinc, or rechargeable batteries.
j) Remove and immediately recycle or dispose of batteries from equipment not used for an extended period of time according to local regulations.
k) Always completely secure the battery compartment. If the battery compartment does not close securely, stop using the product, remove the batteries, and keep them away from children.
PRODUCT INSTALLATION
Installation Method
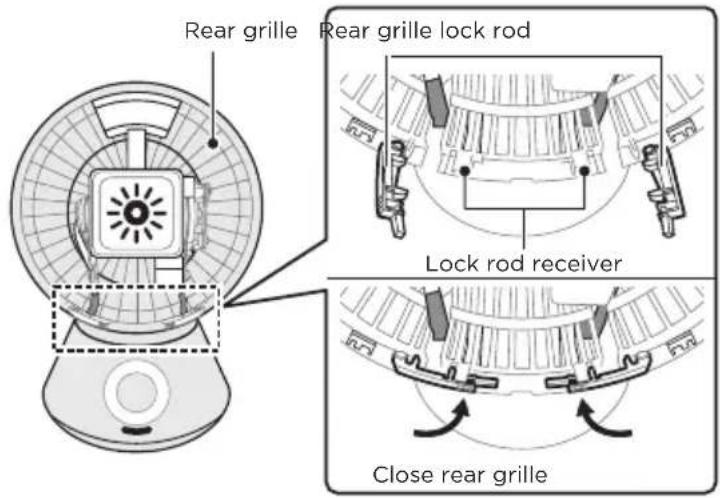
1 Place the back of the body facing the front. Open the rear grille to the state where the rear grille lock rod is open. Hold the rear grille with both hands, and be careful not to touch the main body. When inserting the main body, align the hole of the rear grille with the grille nut interface of the main body and install it. Turn the grille nut clockwise to the "Lock" position to ensure that the rear grille is firmly fixed.
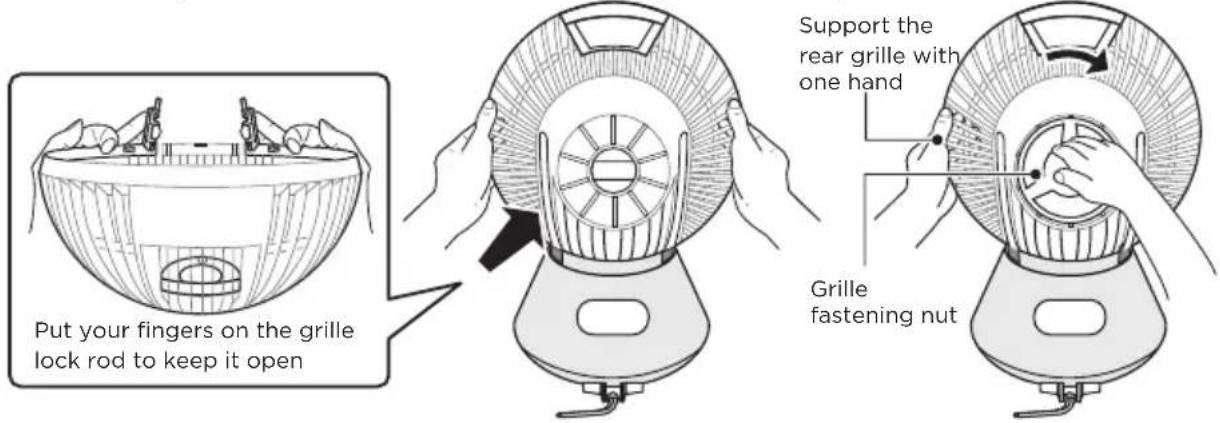
EN
2 Place the front of the body facing up. Close the rear grille lock rod to ensure that the rear grille is locked.
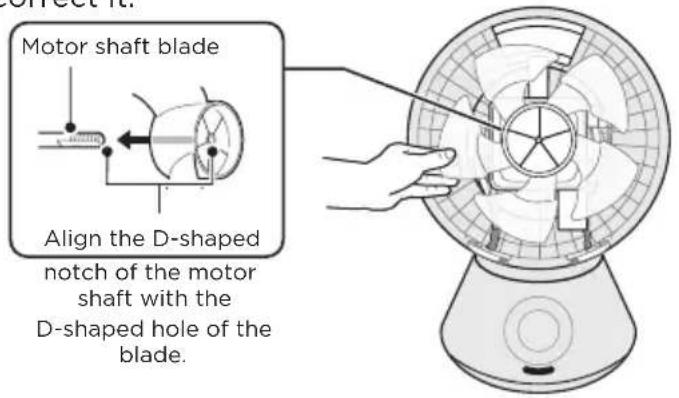
3 Align the notch of the motor shaft with the D-shaped hole shape in the center of the blade and insert the blade to the bottom. The feather below refers to the blade. Remember to correct it.
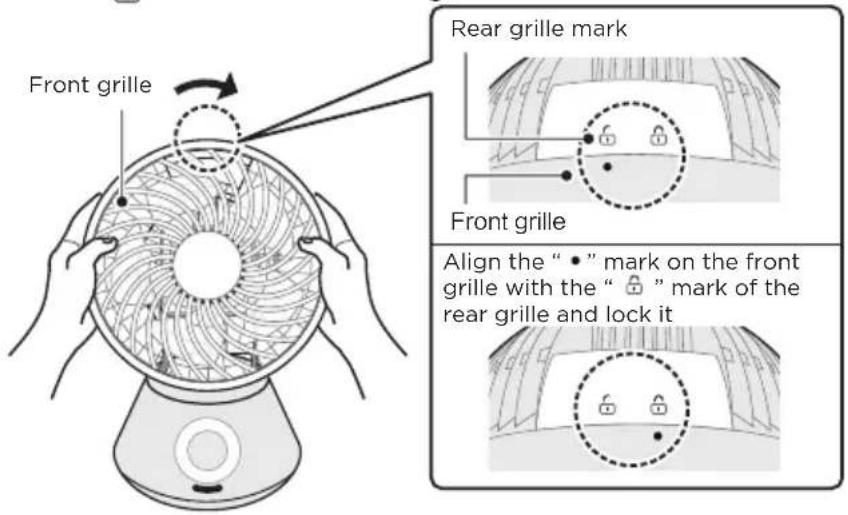
4 With the “●” mark on the front grille facing up, hold it with both hands, and align the “●” mark with the “☐” mark of the rear grille. Turn the “●” mark on the front grille clockwise to align with the “☐” mark of the rear grille.

NOTE
- Make sure that the “●” mark of the front grille and the “☐” mark of the rear grille are correctly aligned.
• The grille may fall off during operation.
• After cleaning, wait for the body to dry before using it.
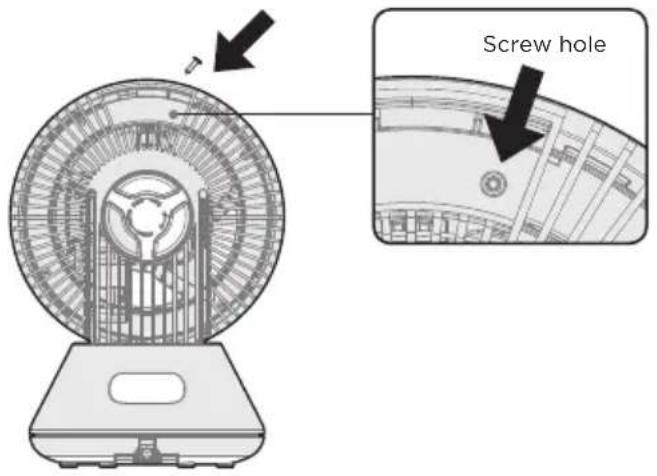
5 Finally, use screws to secure the front and rear mesh covers at the handle of the fuselage.
OPERATION INSTRUCTIONS
How to Use
Operations on the main body operating part are explained.
You can also perform the same operation with the remote control.
1. Insert the power plug into the socket
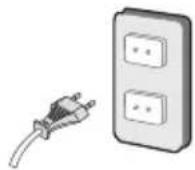
Please insert it all the way in.
- The buzzer sounds, and all the indicators light up for about 1 second.
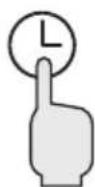
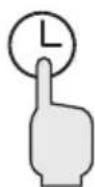
2. Press the power button to start running
EN
natural_image
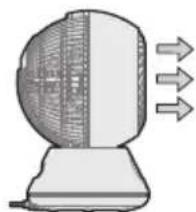
Simple line drawings of a hand pressing a button and a clock icon with power symbols (no text or labels)(Example) Air volume 1
The air volume indicator lights up and the air blows. Press the power button again to stop.
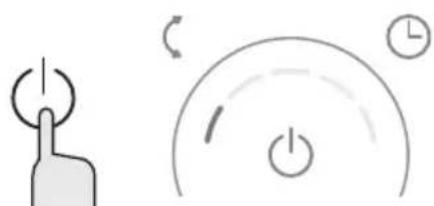
3. Adjust the air volume
natural_image
Simple diagram with a curved line, circular arrows, and a power button symbol (no text or labels)(Example) Air volume 1
Each time you press the air volume button, you can switch the blowing intensity in 5 levels, and the air volume indicator light corresponding to the air volume will light up.
4. Up/down left/right oscillator
(Example)
up/down
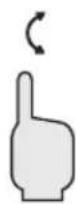
Each time you press the oscillator button, you can switch the oscillator direction, and the indicator light corresponding to the direction lights up.
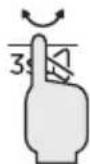
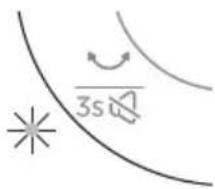
- Press the ∪ (button on the remote control.
- Press and hold 13s button for 3 seconds to mute the device.
(Example) left/right
When the oscillator is running, there will be click sound. This is the unique sound of the oscillator motor, and it does not mean that the product is abnormal.
natural_image
Illustration of a computer mouse with a fan blade and directional arrows indicating motion (no text or symbols)
natural_image
Illustration of a computer monitor with upward arrows indicating motion (no text or symbols)EN
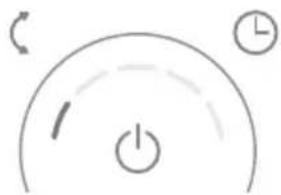
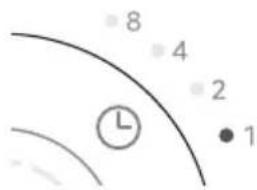
5. Schedule off operation setting time: 1·2·4·8 hours
(Example) 1 hour
Press the schedule off button during operation to set the schedule off (the time can be set to 1-15h hours). The indicator light corresponding to the set time lights up.
- If you want to cancel the schedule off setting, please press the schedule off button to turn off the schedule off indicator.
Or press the power button to stop, turn on and restart. -
When schedule off isn't turned on, functions cannot be set in power-off state.
-
After use, use the power button to stop the operation, and pull out the power plug from the socket.
Forced Stop
- If the fan runs continuously for 24 hours without any operation, it will automatically enter off.
Setting Place
Please install it on a level floor or table without obstacles.
flowchart
graph TD
    A["Document Icon"] --> B["Robot"]
    B --> C["Arrow Up"]
    C --> D["Arrow Down"]
    D --> E["Arrow Left"]
    E --> F["Arrow Up"]
    F --> G["Arrow Down"]
    G --> H["Arrow Left"]
    H --> I["Arrow Up"]
    I --> J["Arrow Down"]
    J --> K["Arrow Left"]
    K --> L["Arrow Up"]
    L --> M["Arrow Down"]
    M --> N["Arrow Left"]
    N --> O["Arrow Up"]
    O --> P["Arrow Down"]
    P --> Q["Arrow Left"]
    Q --> R["Arrow Up"]
    R --> S["Arrow Down"]
    S --> T["Arrow Left"]
    T --> U["Arrow Up"]
    U --> V["Arrow Down"]
    V --> W["Arrow Left"]
    W --> X["Arrow Up"]
    X --> Y["Arrow Down"]
    Y --> Z["Arrow Left"]
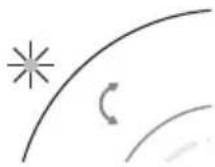
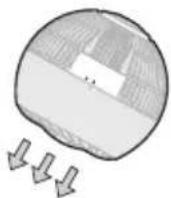
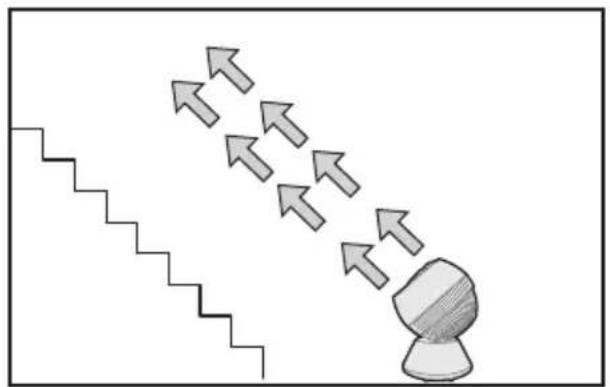
During cooling During heating
natural_image
Simple line drawing of a staircase with an arrow pointing upward and a shaded object below (no text or symbols)Sends air to the roof and recirculates the upper heating in the room.
Diffuses the cold air accumulated on the floor and circulates repeatedly in the room.
flowchart
graph TD
    A["Door"] --> B{Flow Direction}
    B -->|Upward Arrow| C["Downward Arrow"]
    B -->|Downward Arrow| D["Upward Arrow"]
    C --> E["Downward Arrow"]
    D --> F["Downward Arrow"]
    E --> G["Downward Arrow"]
    F --> H["Downward Arrow"]

flowchart
graph TD
    A["Input Image"] --> B{Decision Point}
    B -->|Yes| C["Process Step 1"]
    B -->|No| D["Process Step 2"]
    C --> E["Output"]
    D --> E
    E --> F["End"]
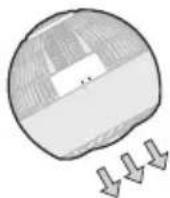
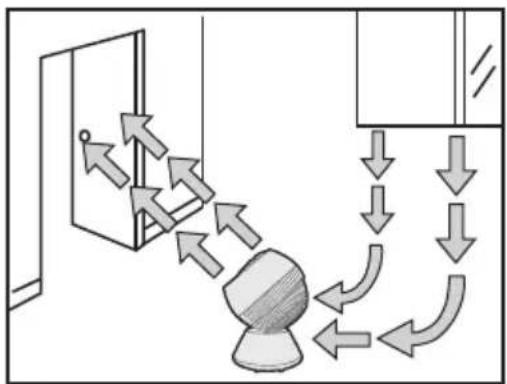
For ventilation (stationary operation) Dual room circulation (stationary operation)
- If a wide range of air supply is required, it will be more effective to use the oscillator operation.
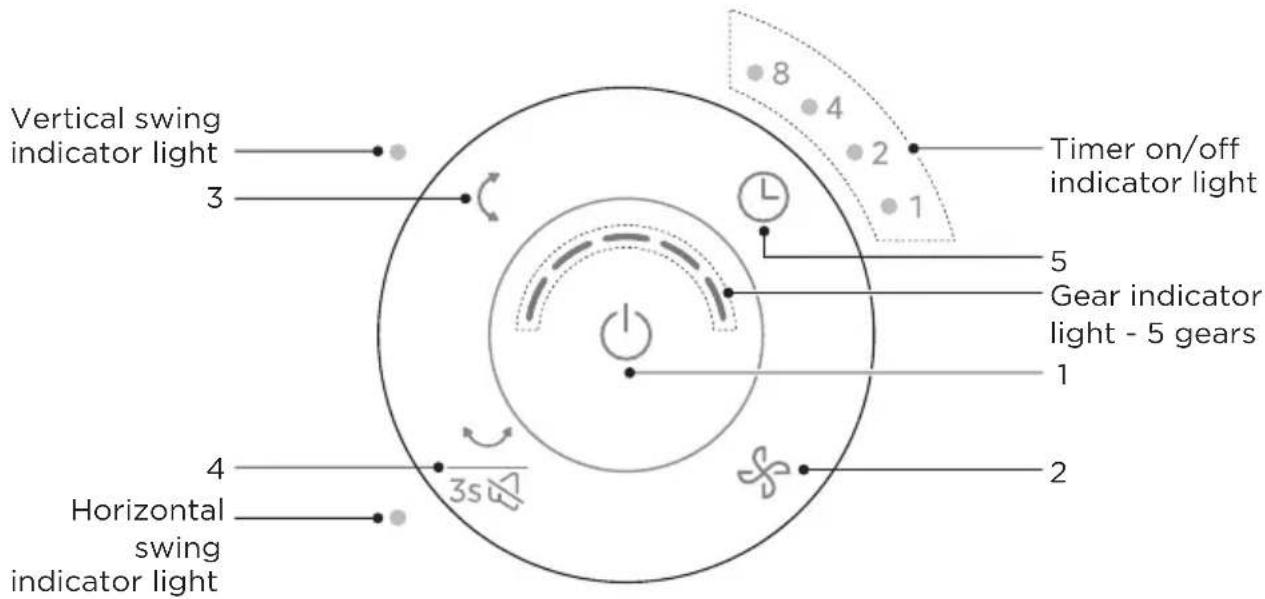
Operating Part
EN
| Function DescriptionButtonNo | ||
| 1 |  ON/OFF ON/OFF | Tap to turn the fan on/off. |
| 2 |  Wind speed Wind speed | Tap to change the wind speed from 1 (low) to 5 (high). |
| 3 |  Vertical swing button Vertical swing button | Press the button to turn on/off vertical swing |
| 4 | 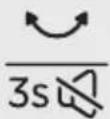 Horizontal swing/mute button Horizontal swing/mute button | Turn on/off horizontal swingPress and hold the button for 3s until there is a long beep to turn on/off the mute function. |
| 5 |  Schedule on/off button Schedule on/off button | Press to set 1-15 hours schedule on/off.Schedule time indicator light effect,○indicates on:1h ●8 ●4 ●2 ○1 2h ●8 ●4 ○2 ●1 3h ●8 ●4 ○2 ○14h ●8 ○4 ●2 ●1 5h ●8 ○4 ●2 ○1 6h ●8 ○4 ○2 ●17h ●8 ○4 ○2 ○1 8h ○8 ●4 ●2 ●1 9h ○8 ●4 ●2 ○110h ○8 ●4 ○2 ●1 11h ○8 ●4 ○2 ○1 12h ○8 ○4 ●2 ●113h ○8 ○4 ●2 ○1 14h ○8 ○4 ○2 ●1 15h ○8 ○4 ○2 ○1 |
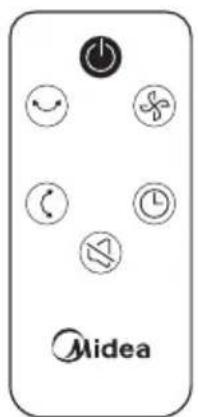
Remote Control
- Use of the remote control. Please refer to the panel operation and display section for the key functions of the remote control.
- The remote control can be used in front of the product within 3 m.

| Function DescriptionButtonNo | ||
| 1 |  | • Tap to turn the fan on/off. |
| 2 |  | • Tap to change the wind speed from 1 (low) to 5 (high). |
| 3 |  | • Set timer to turn the fan on/off. |
| 4 |  | • Turn on/off horizontal swing |
| 5 |  | • Press the button to turn on/off vertical swing. |
| 6 |  | • Press the button to turn on/off the mute function. |
About Oscillator Function
- The oscillator mechanism is composed of a special motor and other connecting parts. When the oscillator is running, there will be a motor operation sound (squeak or click sound), but this is not a problem of the product.
- If there is an abnormal sound, please contact the place of purchase or the customer service center.
- During the oscillator operation, please do not move the main unit. A load may be applied to the connection part or the motor, resulting in failure.
About Memory Function
• Power-off memory function
When the power of the fan is turned off, it will automatically remember the speed and mode settings used last time. The fan will automatically restore to the previous setting state the next time it is turned on.
When the fan unexpectedly shuts down due to sudden power failure or other reasons, this product can automatically record the fan speed and mode settings from the last use. When the fan is turned on again, it will automatically restore to the previous setting state, without the need to reset.
Precautions For Long-term Use
Fans that have been used for many years may cause deterioration of internal parts due to the influence of heat, moisture, dust, etc., which may cause smoke and fire. If the following situations occur during use, please immediately turn off the operation switch, pull out the power plug from the socket, and contact the store where you purchased the product or the Customer Service registered in the terms of after-sales service.
- The impeller does not rotate when the switch is turned on.
- Impeller rotates but very slowly and irregularly.
- Abnormal vibrations or noises are generated when rotating (there are friction noises, contact noises, knocking noises, impeller deflection vibrations, etc.)
- The motor part is abnormally hot and produces a burnt smell.
- The power cord is bent and damaged.
- When touching the power cord, the impeller may rotate or not rotate in an unstable state.
If any abnormality occurs, please stop using it immediately!
Immediately pull out the power plug from the socket, and contact the store where you purchased the product or the Customer Service registered in the terms of after-sales service.
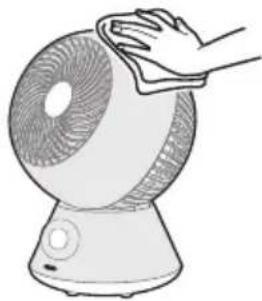
CLEANING AND MAINTENANCE
Maintenance
During maintenance, the power plug must be pulled out from the socket.
Main Unit
Wipe clean with a soft cotton cloth.
If the stain is difficult to remove, please soak the cotton cloth with neutral detergent, then wring it out to wipe off the stain, and finally dry the unit gently.

CAUTION
- Do not use thinner, alcohol, or detergents containing benzene. It may cause deterioration, discoloration, etc.
- When using chemical wipes, follow precautions.
- Do not use sprays (insecticides, fragrances, etc.). It may cause deterioration, discoloration, etc.
natural_image
Line drawing of a hand cleaning a fan-shaped device (no text or symbols)EN
Guard Cleaning
- Regularly use the vacuum cleaner to vacuum up the dust and so on. Once dust accumulates, it may cause the motor to overheat or produce abnormal noise.
Storage
After cleaning, pay attention to the following points and store it properly.
- Please put it in a box or pack it in a plastic bag when purchasing and keep it properly.
- Please store it in a place without direct sunlight and with low humidity.
TROUBLESHOOTING
Operation of your appliance can lead to errors and malfunctions. The following tables contain possible causes and notes for resolving an error message or malfunction. It is recommended to read the tables carefully below in order to save your time and money that may cost for calling to the service center.
| MeasuresFault | |
| Operation failure | Is the power plug inserted into the outlet?- Insert the plug fully into the socket. |
| Cannot operate with the remote control | Has the batteries run out of power?- Reload the battery.Is the transmitting part facing the main unit? Or are there any obstacles?- The operation can only be carried out within the angle range of about 90° left and right at a distance of about 3m without obstacles.Has the protective film on the battery been removed?- When the product leaves the factory, a protective film is inserted to prevent the battery of the remote control from being consumed. Please remove it before use. |
| Loud blowing noise | Is there any dust or stains on the guard?- Clean up the dirt with a vacuum cleaner, etc. |
If the following problems 2 and 3 occur on the power cord and power plug, or if the stains cannot be cleaned in the case of 1, it may cause electric shock or fire. Please contact the store where you purchased the product.
- Is there any dirt, rust or dust attached to the power plug?
- Clean up stains, rust, dust, etc.
- Is the power cord damaged?
- During the operation, is there any power failure when moving the power cord?
TRADEMARKS, COPYRIGHTS AND LEGAL STATEMENT
Midea logo, word marks, trade name, trade dress and all versions thereof are valuable assets of Midea Group and/or its affiliates (“Midea”), to which Midea owns trademarks, copyrights and other intellectual property rights, and all goodwill derived from using any part of an Midea trademark. Use of Midea trademark for commercial purposes without the prior written consent of Midea may constitute trademark infringement or unfair competition in violation of relevant laws.
This manual is created by Midea and Midea reserves all copyrights thereof. No entity or individual may use, duplicate, modify, distribute in whole or in part this manual, or bundle or sell with other products without the prior written consent of Midea.
All the described functions and instructions were up to date at the time of printing this manual. However, the actual product may vary due to improved functions and designs.
EN
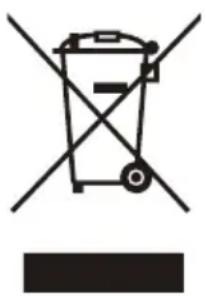
DISPOSAL AND RECYCLING
Important instructions for environment
Compliance with the WEEE Directive and Disposing of the Waster Product: This product complies with EU WEEE Directive (2012/19/EU). This product bears a classification symbol for waster electrical and electronic equipment (WEEE).
This symbol indicates that this product shall not be disposed with other household wastes at the end of its service life. Used device must be returned to official collection point for recycling of electrical electronic devices. To find these collection systems please contact to your local authorities or retailer where the product was purchased. Each household performs important role in recovering and recycling of old appliance. Appropriate disposal of used appliance helps prevent potential negative consequences for the environment and human health.
natural_image
Symbol of a trash bin crossed with a diagonal line and a horizontal bar below (no text or labels)Compliance with RoHS Directive
The product you have purchased complies with EU RoHS Directive (2011/65/EU). It does not contain harmful and prohibited materials specified in the Directive.
Package information
Packaging materials of the product are manufactured from recyclable materials in accordance with our National Environment Regulations. Do not dispose of the packaging materials together with the domestic or other wastes. Take them to the packaging material collection points designated by the local authorities.

natural_image
Recycling symbol icon with three chasing arrows forming a triangle (no text or labels)DATA PROTECTION NOTICE
For the provision of the services agreed with the customer,
we agree to comply without restriction with all stipulations of applicable data protection law, in line with agreed countries within which services to the customer will be delivered, as well as, where applicable, the EU General Data Protection Regulation (GDPR).
Generally, our data processing is to fulfil our obligation under contract with you and for product safety reasons, to safeguard your rights in connection with warranty and product registration questions. In some cases, but only if appropriate data protection is ensured, personal data might be transferred to recipients located outside of the European Economic Area.
Further information is provided on request. You can contact our Data Protection Officer via MideaDPO@midea.com. To exercise your rights such as right to object your personal date being processed for direct marketing purposes, please contact us via MideaDPO@midea.com. To find further information, please follow the QR Code.
DĚKOVNÝ DOPIS
INSTALACE PRODUKTU 09
NÁVOD K OBSLUZE 11
ČIŠTĚNÍ A ÚDRŽBA 17
ŘEŠENÍ PROBLÉMŮ 18
OCHRANNÉ ZNÁMKY, AUTORSKÁ PRÁVA A PRÁVNÍ PROHLÁŠENÍ 19
LIKVIDACE A RECYKLACE 20
OZNÁMENÍ O OCHRANĚ OSOBNÍCH ÚDAJŮ 21
BEZPEČNOSTNÍ POKYNY
Určené použití
USCHOVEJTE SI TYTO POKYNY
⚠️ Výstraha
natural_image
Illustration of a computer monitor with a side panel and three arrows indicating flow or direction (no text or symbols)
natural_image
Illustration of a computer monitor with upward arrows indicating motion (no text or symbols)(Příklad) 1 hodina
flowchart
graph TD
    A["Document Icon"] --> B["Robot"]
    B --> C["Arrow Up"]
    C --> D["Arrow Down"]
    D --> E["Arrow Left"]
    E --> F["Arrow Right"]
    F --> G["Arrow Left"]
    G --> H["Arrow Up"]
    H --> I["Arrow Down"]
    I --> J["Arrow Left"]
    J --> K["Arrow Up"]
    K --> L["Arrow Left"]
    L --> M["Arrow Up"]
    M --> N["Arrow Left"]
    N --> O["Arrow Up"]
    O --> P["Arrow Left"]
    P --> Q["Arrow Up"]
    Q --> R["Arrow Left"]
    R --> S["Arrow Up"]
    S --> T["Arrow Left"]
    T --> U["Arrow Up"]
    U --> V["Arrow Left"]
    V --> W["Arrow Up"]
    W --> X["Arrow Left"]
    X --> Y["Arrow Up"]
    Y --> Z["Arrow Left"]
natural_image
Simple line drawing of a staircase with an arrow pointing upward toward a spherical object (no text or symbols)flowchart
graph TD
    A["Door"] -->|Flow| B((Circular Object))
    B -->|Flow| C["Downward Arrow"]
    C --> D["Downward Arrow"]
    D --> E["Downward Arrow"]
    E --> F["Downward Arrow"]
    F --> G["Downward Arrow"]
    G --> H["Downward Arrow"]
    H --> I["Downward Arrow"]
    I --> J["Downward Arrow"]
    J --> K["Downward Arrow"]
    K --> L["Downward Arrow"]
    L --> M["Downward Arrow"]
    M --> N["Downward Arrow"]
    N --> O["Downward Arrow"]
    O --> P["Downward Arrow"]
    P --> Q["Downward Arrow"]
    Q --> R["Downward Arrow"]
    R --> S["Downward Arrow"]
    S --> T["Downward Arrow"]
    T --> U["Downward Arrow"]
    U --> V["Downward Arrow"]
    V --> W["Downward Arrow"]
    W --> X["Downward Arrow"]
    X --> Y["Downward Arrow"]
flowchart
graph TD
    A["Document Icon"] --> B["Robot"]
    B --> C["Curved Arrow 1"]
    B --> D["Curved Arrow 2"]
    B --> E["Curved Arrow 3"]
    B --> F["Curved Arrow 4"]
    B --> G["Curved Arrow 5"]
    B --> H["Curved Arrow 6"]
    B --> I["Curved Arrow 7"]
    B --> J["Curved Arrow 8"]
    B --> K["Curved Arrow 9"]
    B --> L["Curved Arrow 10"]
natural_image
Line drawing of a hand cleaning a small fan with a cloth (no text or symbols)LIKVIDACE A RECYKLACE
natural_image
Symbol of a trash bin crossed with no text or labels, accompanied by a black rectangle below (no readable text or symbols)natural_image
Recycling symbol icon with three chasing arrows forming a triangle (no text or labels)OZNÁMENÍ O OCHRANĚ OSOBNÍCH ÚDAJŮ
bar
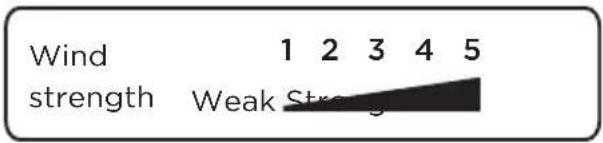
| Category | Value | |---|---| | Tuule tugevus | 12345 | | Nörk | (not labeled) | | Tugev | (not labeled) |natural_image
Illustration of a computer monitor with a fan blade and three arrows indicating flow or direction (no text or symbols)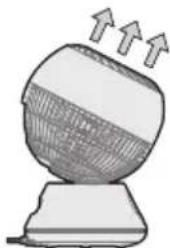
natural_image
Illustration of a computer monitor with upward arrows indicating motion (no text or symbols)5. Taimeri seadistamine: 1·2·4·8 tundi
EST

(Näide) 1 tund
flowchart
graph TD
    A["Document Icon"] --> B["Robot"]
    B --> C["Arrow Up"]
    C --> D["Arrow Down"]
    D --> E["Arrow Left"]
    E --> F["Arrow Up"]
    F --> G["Arrow Down"]
    G --> H["Arrow Left"]
    H --> I["Arrow Up"]
    I --> J["Arrow Down"]
    J --> K["Arrow Left"]
    K --> L["Arrow Up"]
    L --> M["Arrow Down"]
    M --> N["Arrow Left"]
    N --> O["Arrow Up"]
    O --> P["Arrow Down"]
    P --> Q["Arrow Left"]
    Q --> R["Arrow Up"]
    R --> S["Arrow Down"]
    S --> T["Arrow Left"]
    T --> U["Arrow Up"]
    U --> V["Arrow Down"]
    V --> W["Arrow Left"]
    W --> X["Arrow Up"]
    X --> Y["Arrow Down"]
    Y --> Z["Arrow Left"]
natural_image
Simple line drawing of a staircase with an arrow pointing upward toward a spherical object (no text or symbols)flowchart
graph TD
    A["Left Panel"] --> B["Central Object"]
    B --> C{Flow Direction}
    C -->|Upward Flow| D["Right Panel"]
    C -->|Downward Flow| E["Bottom Left Panel"]
    E --> F["Right Panel"]
    F --> G{Flow Direction}
    G -->|Upward Flow| H["Left Panel"]
    G -->|Downward Flow| I["Right Panel"]
natural_image
Line drawing of a hand cleaning a fan with a cloth (no text or symbols)natural_image
Symbol of a trash bin crossed with no text or labels, accompanied by a blank rectangular block below (no text or symbols present)EST
Vastavus RoHS direktiivile
natural_image
Recycling symbol icon with three chasing arrows forming a triangle (no text or labels)ANDMEKAITSE TEATIS
VUE D'ENSEMBLE DU PRODUIT 06
GUIDE DE DÉMARRAGE RAPIDE 07
INSTALLATION DU PRODUIT 09
INSTRUCTIONS D'UTILISATION 11
NETTOYAGE ET ENTRETIEN 17
DÉPANNAGE 18
MARQUES, DROITS D'AUTEUR ET MENTIONS LEGALES 19
MISE AU REBUT ET RECYCLAGE 20
AVIS SUR LA PROTECTION DES DONNEES 21
CONSIGNES DE SÉCURITÉ
Usage prévu
VUE D'ENSEMBLE DU PRODUIT
Noms des Pièces
INSTALLATION DU PRODUIT
natural_image
Four grayscale illustrations showing a spherical object with internal structure and directional arrows, no text or symbols present.(Exemple) 1 heure
flowchart
graph TD
    A["Document Icon"] --> B["Robot"]
    B --> C["Arrow Right"]
    C --> D["Arrow Up"]
    D --> E["Arrow Left"]
    E --> F["Arrow Down"]
    F --> G["Arrow Up"]
    G --> H["Arrow Left"]
    H --> I["Arrow Up"]
    I --> J["Arrow Down"]
    J --> K["Arrow Up"]
    K --> L["Arrow Left"]
    L --> M["Arrow Up"]
    M --> N["Arrow Down"]
    N --> O["Arrow Up"]
    O --> P["Arrow Left"]
    P --> Q["Arrow Up"]
    Q --> R["Arrow Down"]
    R --> S["Arrow Up"]
    S --> T["Arrow Left"]
    T --> U["Arrow Up"]
    U --> V["Arrow Down"]
    V --> W["Arrow Up"]
    W --> X["Arrow Left"]
    X --> Y["Arrow Up"]
    Y --> Z["Arrow Down"]

natural_image
Simple line drawing of a staircase with an arrow pointing upward toward a spherical object (no text or symbols)flowchart
graph TD
    A["Door"] -->|Flow| B((Circular Object))
    B -->|Flow| C["Downward Arrow"]
    C --> D["Downward Arrow"]
    D --> E["Downward Arrow"]
    E --> F["Downward Arrow"]
    F --> G["Downward Arrow"]
    G --> H["Downward Arrow"]
    H --> I["Downward Arrow"]
    I --> J["Downward Arrow"]
    J --> K["Downward Arrow"]
    K --> L["Downward Arrow"]
    L --> M["Downward Arrow"]
    M --> N["Downward Arrow"]
    N --> O["Downward Arrow"]
    O --> P["Downward Arrow"]
    P --> Q["Downward Arrow"]
    Q --> R["Downward Arrow"]
    R --> S["Downward Arrow"]
    S --> T["Downward Arrow"]
    T --> U["Downward Arrow"]
    U --> V["Downward Arrow"]
    V --> W["Downward Arrow"]
    W --> X["Downward Arrow"]
    X --> Y["Downward Arrow"]
natural_image
Line drawing of a hand cleaning a fan-shaped device (no text or symbols)natural_image
Symbol of a trash bin crossed with no visible text or labelsnatural_image
Recycling symbol with three chasing arrows forming a triangle (no text or labels)AVIS SUR LA PROTECTION DES DONNEES
make yourself at home

www.midea.com
© Midea 2022 all rights reserved
| MIDEA | Midea Europe GmbH Ludwig-Erhard-Str.14, 65760 Eschborn, Germany | kundenservice@midea.com |
| MIDEA ITALIA S.R.L. Via Luigi Bodio 29/37 -Milano (MI) 20158 Italy | assistenza@midea.com | |
| Midea Electrics France 253 RUE SAINT-HONORE 75001 PARIS | service_france@midea.com | |
| MIDEA HOME APPLIANCES UK LTD 5 New Street Square. London, United Kingdom, EC4A 3TW | service_uk@midea.com |


- BEDIENUNGSANLEITUNG
- DATENSCHUTZHINWEISE
- CONTENTS
- SAFETY INSTRUCTIONS
- Intended Use
- Explanation of Symbols
- SAVE THESE INSTRUCTIONS
- CAUTION
- WARNING
- SPECIFICATIONS
- PRODUCT OVERVIEW
- Name of Part
- Part List
- NOTE
- QUICK START GUIDE
- Preparation of Remote Control
- How to Install the Battery (How to Replace)
- TIPS
- PRODUCT INSTALLATION
- Installation Method
- OPERATION INSTRUCTIONS
- How to Use
- Insert the power plug into the socket
- Press the power button to start running
- Adjust the air volume
- Up/down left/right oscillator
- EN
- Schedule off operation setting time: 1·2·4·8 hours
- Forced Stop
- Setting Place
- Operating Part
- Remote Control
- About Oscillator Function
- About Memory Function
- • Power-off memory function
- Precautions For Long-term Use
- CLEANING AND MAINTENANCE
- Maintenance
- Main Unit
- Guard Cleaning
- Storage
- TROUBLESHOOTING
- TRADEMARKS, COPYRIGHTS AND LEGAL STATEMENT
- DISPOSAL AND RECYCLING
- Important instructions for environment
- Compliance with RoHS Directive
- Package information
- DATA PROTECTION NOTICE
- DĚKOVNÝ DOPIS
- BEZPEČNOSTNÍ POKYNY
- Určené použití
- USCHOVEJTE SI TYTO POKYNY
- ⚠️ Výstraha
- LIKVIDACE A RECYKLACE
- OZNÁMENÍ O OCHRANĚ OSOBNÍCH ÚDAJŮ
- Taimeri seadistamine: 1·2·4·8 tundi
- EST
- Vastavus RoHS direktiivile
- ANDMEKAITSE TEATIS
- CONSIGNES DE SÉCURITÉ
- Usage prévu
- VUE D'ENSEMBLE DU PRODUIT
- Noms des Pièces
- INSTALLATION DU PRODUIT
- AVIS SUR LA PROTECTION DES DONNEES
Brand : MIDEA
Model : MFT302R0BPK
Category : Fan