USER MANUAL RIE4122181/23EHO FAR
natural_image
Blank white image with no visible content, text, or symbols
RI4E122181/23 E-HO
MANUEL D'INSTRUCTIONS
SAV - GARANTIE FR-29
CARACTERISTIQUES TECHNIQUE…… FR-30
MISE AU REBUT....FR-31
ENLÈVEMENT DES APPAREILS
MÉNAGERS USAGÉS...... FR-31
INSTRUCTIONS DE SÉCURITÉ
natural_image
Simple line drawing of a table with a pointer and curved arrow indicating rotation (no text or symbols)
natural_image
Pure technical line drawing of a mechanical assembly without any text, numbers, or symbols
natural_image
Technical line drawing showing a pipe connection before and after modification (no text or symbols)
natural_image
Line drawing of a door panel with buttons and an arrow pointing to the door (no text or symbols)
natural_image
Pure technical line drawing of a mechanical assembly without any text, numbers, or symbols
natural_image
Technical line drawing of a mechanical bracket with an inset showing a close-up of a mechanical assembly (no text or symbols)
natural_image
Diagram showing four sequential steps of a mechanical bracket assembly, with no text or symbols present.
natural_image
Simple line drawing of a mechanical setup with a rotating component and a base (no text or symbols)
natural_image
Diagram of a document with arrows indicating rotational movement (no text or symbols)
INSTALLATION
Kits d'installation
Guide x 2
natural_image
Isometric diagram of a rectangular box with two arrows indicating directional flow or movement (no text or symbols)
natural_image
Technical line drawing of a mechanical assembly with no visible text or symbols
natural_image
Simple line drawing of a mechanical frame with a hanging hook and rotational arrow (no text or symbols)
natural_image
Diagram showing a curved pipe or duct with an inset magnified view of the main structure (no text or symbols)
Emplacement
natural_image
Illustration of a hand cleaning or adjusting a shelf with a tool (no text or symbols visible)
POSITIONNEMENT DES BALCONNETS DE PORTE
natural_image
Simple diagram of a container with two upward arrows inside, no text or symbols present
CONSEILS D'ÉCONOMIE D'ÉNERGIE
natural_image
Diagram showing a bird cutting a leaf with leaves, enclosed in a heart-shaped container (no text or symbols)
REPLACEMENT DE LA LUMIÈRE LED
flowchart
graph LR
    A["LED"] --> B["LED"]
    style A fill:#f9f,stroke:#333
    style B fill:#bbf,stroke:#333
natural_image
Pure warning symbol with exclamation mark inside a downward arrow (no text or numbers)
Thank you for choosing FAR quality. This product has been developed by our team of professional and according to European regulations in force. In order to get the most out of your new appliance, we recommend that you read this instruction manual carefully and keep it for future reference.
TABLE OF CONTENTS
SAFETY INSTRUCTIONS GB-2
DESCRIPTION OF THE DEVICE...... GB-8
REVERSE DOOR GB-9
INSTALLATION GB-12
DAILY USE GB-16
TROUBLESHOOTING GB-27
CUSTOMER SERVICE GB-28
TECHNICAL INFORMATION...... GB-29
DISPOSAL GB-30
DISPOSAL OF OLD ELECTRICAL
APPLIANCES GB-30
SAFETY INSTRUCTIONS
- IMPORTANT SAFETY INSTRUCTIONS: READ CAREFULLY AND KEEP FOR FUTURE REFERENCE
- This appliance is intended to be used in household and similar applications such as:
- staff kitchen areas in shops, offices and other working environments;
- farm houses and by clients in hotels, motels and other residential type environments;
- bed and breakfast type environments;
- catering and similar non-retail applications.
- WARNING: Keep ventilation openings, in the appliance enclosure or in the built-in structure, clear of obstruction.
- WARNING: Do not use mechanical devices or other means to accelerate the defrosting process, other than those recommended by the manufacturer.
- WARNING: Do not damage the refrigerant circuit.
- If the refrigerant circuit is damaged:
- Avoid naked flames and sources of ignition.
-
Thoroughly ventilate the room in which the appliance is situated.
-
WARNING: Do not use electrical appliances inside the food storage compartments of the appliance, unless they are of the type recommended by the manufacturer.
- This appliance can be used by children aged from 8 years and above and persons with reduced physical, sensory or mental capabilities or lack of experience and knowledge if they have been given supervision or instruction concerning use of the appliance in a safe way and understand the hazards involved.
- Children shall not play with the appliance.
- Cleaning and user maintenance shall not be made by children without supervision.
- WARNING: When positioning the appliance, ensure the supply cord is not trapped or damaged.
- If the supply cord is damaged, it must be replaced by the manufacturer, its service agent or similarly qualified persons in order to avoid a hazard.
- WARNING: Do not locate multiple portable socket-outlets or portable power supplies at the rear of the appliance.
- WARNING: To avoid a hazard due to instability of the appliance, it must be fixed in accordance with the instructions.
-
Do not store explosive substances such as aerosol cans with a flammable propellant in this appliance.
-
For information on the installation, handling, maintenance and disposal of the device, and the method of replacing the lamp, please refer to the following paragraphs of this manual.
-
Gas warning: risk of fire / flammable materials

Please keep the product far away fire source during using, service and disposal. There are flammable materials at the back of the appliance. Please according to local regulations regarding disposal of the appliance for its flammable blowing gas, Before you scrap the appliance, please
take off the doors to prevent children trapped.
- To avoid contamination of food, please respect the following instructions:
- Opening the door for long periods can cause a significant increase of the temperature in the compartments of the appliance.
- Clean regularly surfaces that can come in contact with food and accessible drainage systems.
- Store raw meat and fish in suitable containers in the refrigerator, so that it is not in contact with or drip onto other food.
- Two-star frozen-food compartments are suitable for storing pre-frozen food, storing or making ice-cream and making ice cubes.
- One-, two- and three-star compartments are not suitable for the freezing of fresh food.
- If the refrigerating appliance is left empty for long periods, switch off, defrost, clean, dry, and leave the door open to prevent mould developing within the appliance.
WARNINGS
- If you are discarding an old freezer or refrigerator with a lock/ catch fitted to the door, ensure that it is left in a disabled condition to prevent the entrapment of young children when playing.
- Unplug the appliance from the mains socket when not in operation and before cleaning. Remove food before cleaning the appliance.
- Do not insert oversized food as this could cause incorrect operation.
- Extreme caution must be used when moving an appliance.
- Do not give children ice-cream and water ices direct from the freezer as the low temperature may cause ‘freezer burns’ on the lips.
- The appliance must be installed on the ground, on a flat, horizontal surface, making sure that the ventilation openings are completely clear.
-
Never try to replace or repair any part or component of the appliance yourself; seek the assistance of professional, qualified personnel, if need be.
-
In order to improve efficiency of the cooling system and save energy, it is necessary to maintain good ventilation around the appliance for the dissipation of heat. For this reason, sufficient clear space should be available around the refrigerator.
- To save energy, please avoid keeping the door open for a longtime when using the appliance.
- Replacing certain parts of your household electrical appliance may lead to a danger. Please ensure that you have the necessary skills and own all tools required to carry out the self-repair operations safely. Otherwise, please contact a qualified professional.
- Regarding the information pertaining to the installation, handling, servicing and disposal of the appliance, thanks to refer to the below paragraph of the manual.
- As old refrigeration equipment may contain CFC's which will damage the ozone layer, when disposing of any refrigeration equipment please contact your local waste disposal department for advice on the correct method of disposal.
-
Replacing certain parts of your household electrical appliance may lead to a danger. Please ensure that you have the necessary skills and own all tools required to carry out the self-repair operations safely. Otherwise, please contact a qualified professional.
-
Please according to local regulations regarding disposal of the appliance for its flammable blowing gas.
Before you scrap the appliance, please take off the doors to prevent children trapped.
- Children aged from 3 to 8 years are allowed to load and unload refrigerating appliances.
- This product contains a light source of energy efficiency class .
DESCRIPTION OF THE DEVICE
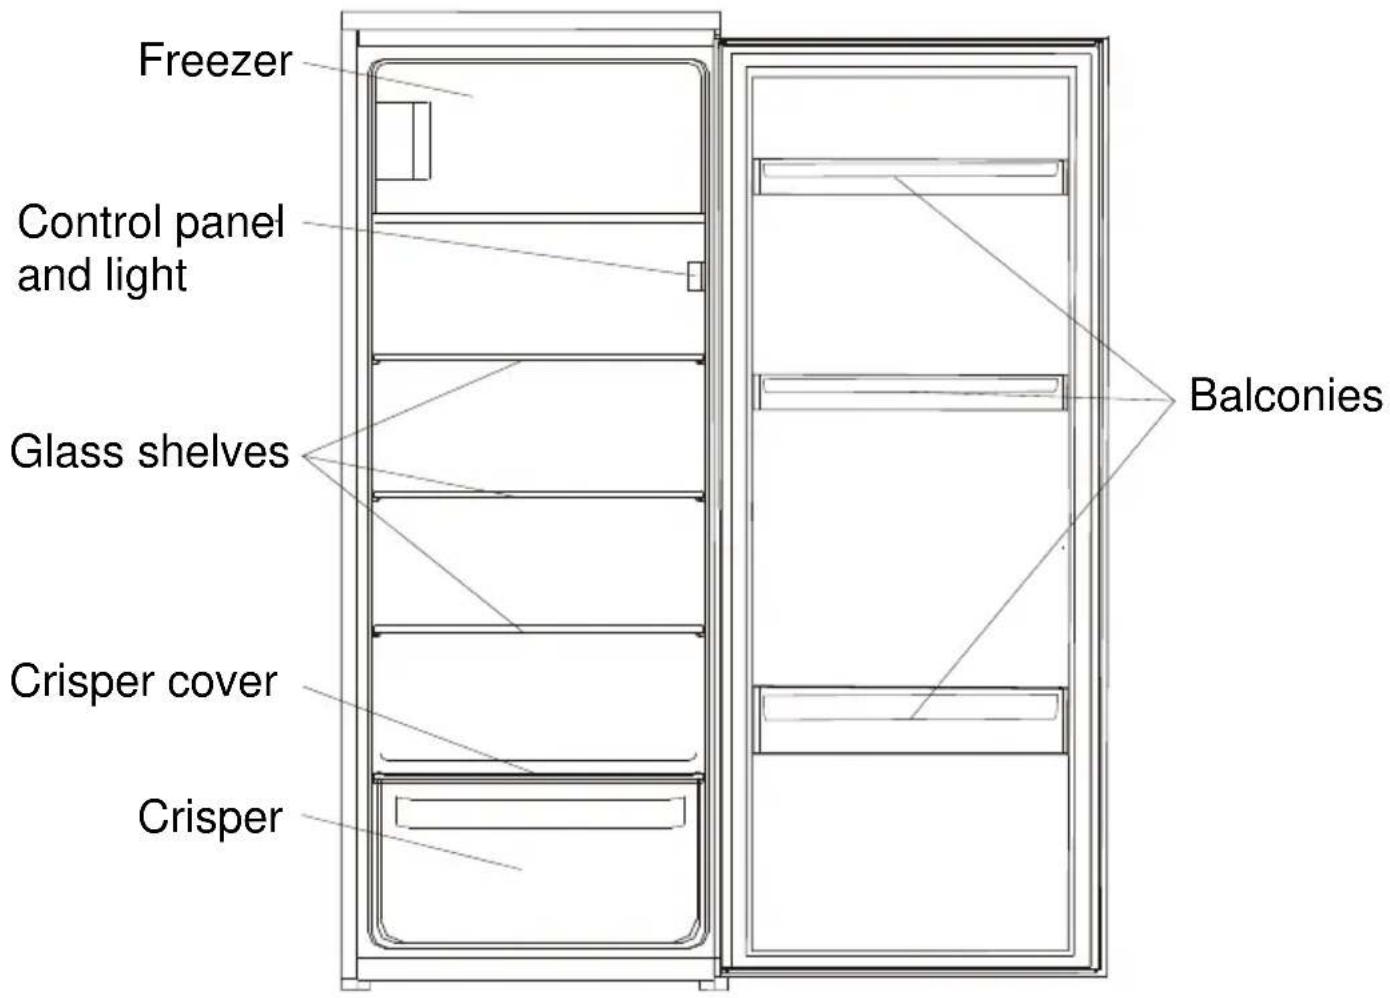
NOTE: The appliance design is subject to change without prior notice.
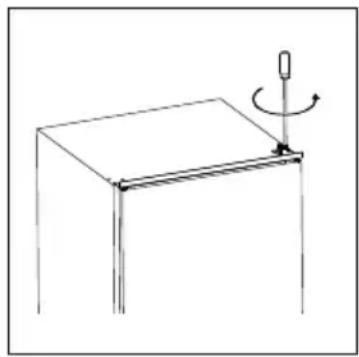
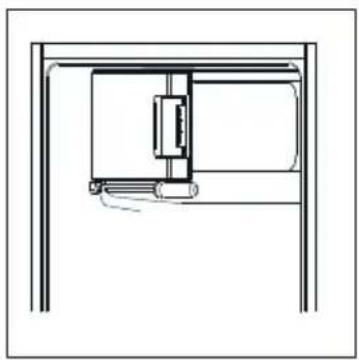
REVERSE DOOR
TOOL REQUIRED: PHILIPS SCREWDRIVER, FLAT BLADED SCREWDRIVER, HEXAGONAL SPANNER.
natural_image
Simple line drawing of a table with a pointer and rotational arrow, no text or symbols present
natural_image
Simple line drawing of a mechanical assembly with a bracket and a rectangular component (no text or symbols)
natural_image
Technical line drawing showing a mechanical assembly before and after modification (no text or symbols)
- Move hinge hole cover from left side to right side.
natural_image
Pure technical line drawing of a door panel with no text or symbols
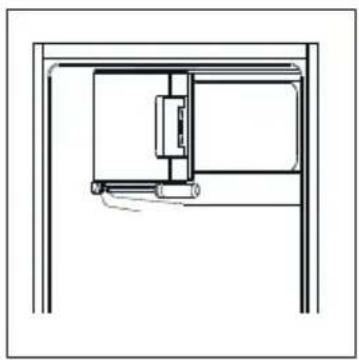
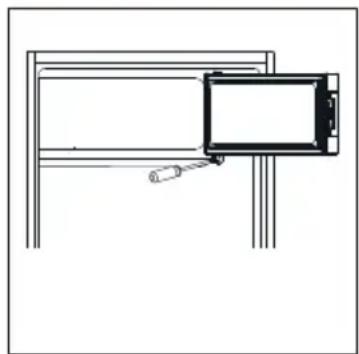
- Rotate freezer door and place hinge side at left side. And then fix the door by holder.
natural_image
Pure technical line drawing of a mechanical assembly without any text, numbers, or symbols
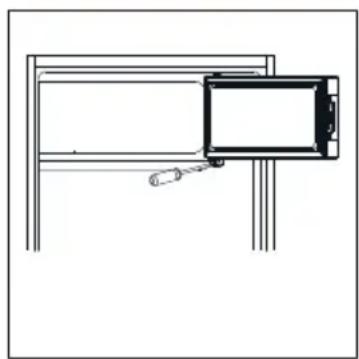
- Remove bottom hinge pin from right to left.
natural_image
Technical line drawing of a mechanical bracket with a close-up inset showing a cylindrical component (no text or symbols)
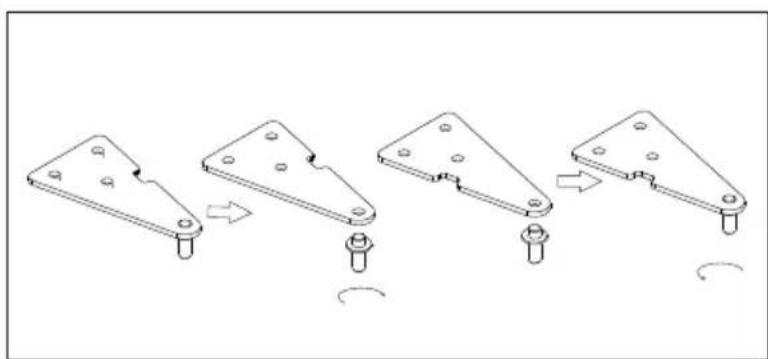
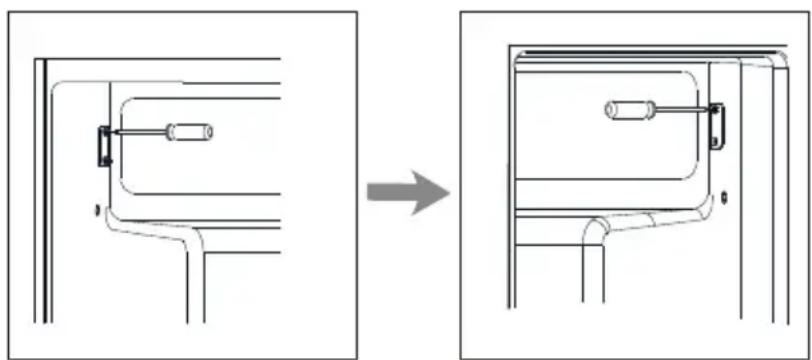
- Unscrew top hinge pin from the hinge. Then turn the hinge over and screw hinge pin.

natural_image
Diagram showing four sequential steps of a mechanical bracket assembly, with no text or symbols present.
-
Re-fit the door and then upper hinge on left side. Ensure the door is aligned horizontally and vertically, so that the seals are closed on all sides before finally tightening the upper hinge. If necessary, a spanner to tighten the hinge.
-
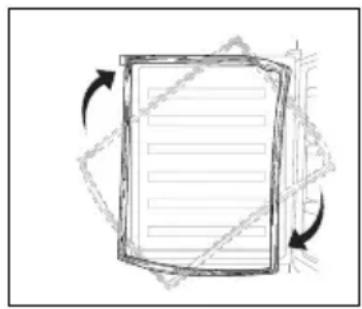
Detach the Fridge and the Freezer door gaskets and then attach them after rotating.
natural_image
Simple line drawing of a mechanical setup with a rotating component and support structure (no text or symbols)

natural_image
Simple line drawing of a rectangular frame with curved arrows indicating rotation or movement (no text or symbols)
INSTALLATION
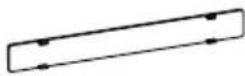
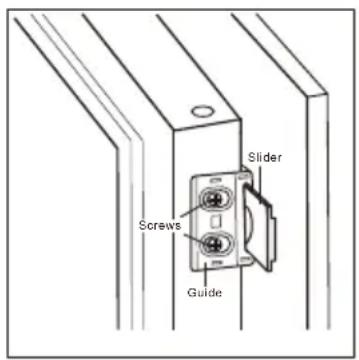
Kits for installation
Guide x 2

Guide Cover x2
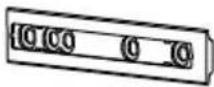
Slider x2
Slider Cover x 2

Short Screw x 15
Long Screw x 2
Rubber Seal x 1
Install the appliance
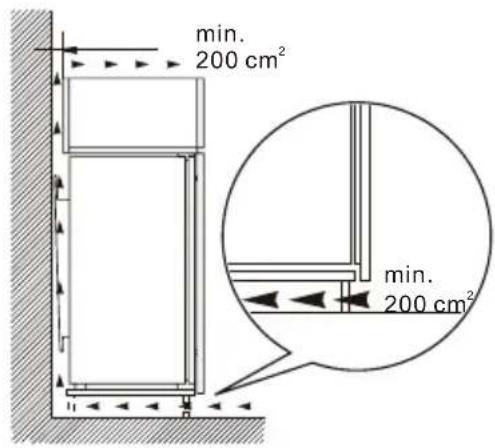
- Ensure the size of cabinet and ventilation is enough.
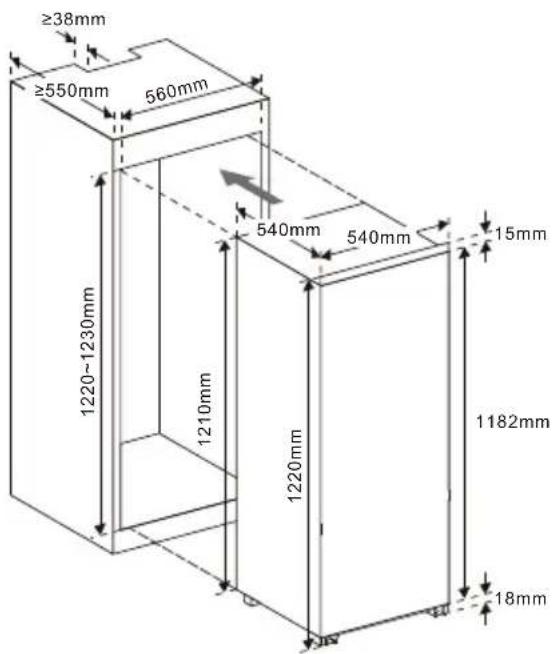
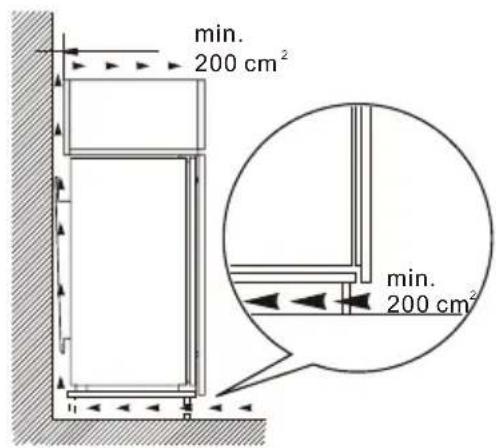
Note: Keep 200 square centimeter space for airflow. For example, keep a 4cm x 50cm passage for airflow.
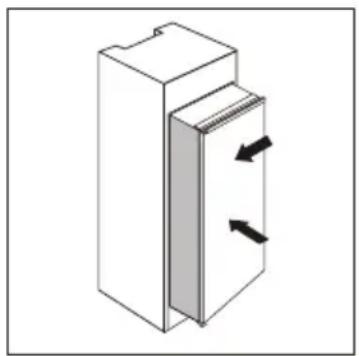
- Slowly and carefully push the appliance into the cabinet. Ensure the opening side is as close to the cabinet wall as possible.
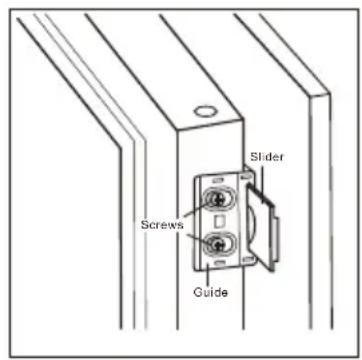
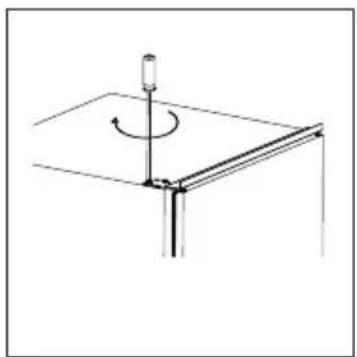
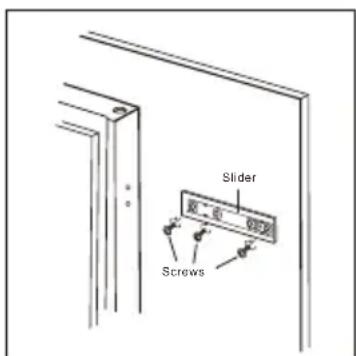
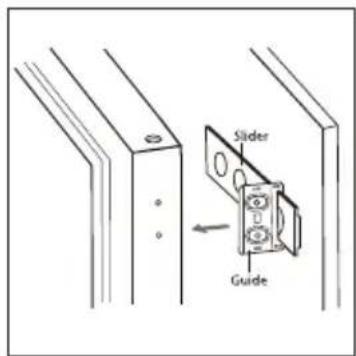
- Screw a guide to holes in the side of appliance door by short screw. Insert the slider into the guide, then fully open and close appliance door and wooden door to check whether wooden door can close totally and smoothly.
- Open the appliance's door and the wooden door together, mark the position of the slider when the slider can function well at all angle during the door close and open. Take the slider out of the guide and fix it with wooden door by two short screws. Then fix the slider cover onto the slider.
- Unscrew the guide from appliance door.
- Repeat step 2 to 5 to fix other three sliders and covers.
natural_image
Diagram of a door with arrows indicating force or movement, no text or symbols present
-
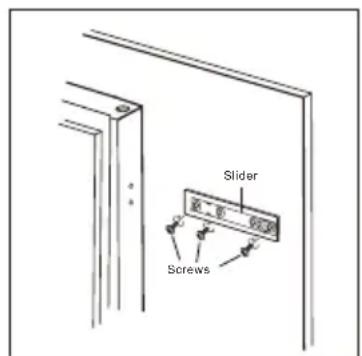
Fit four guides with sliders and fix them with short screws, then fix guide covers with guides.
-
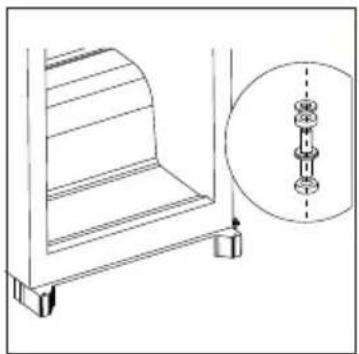
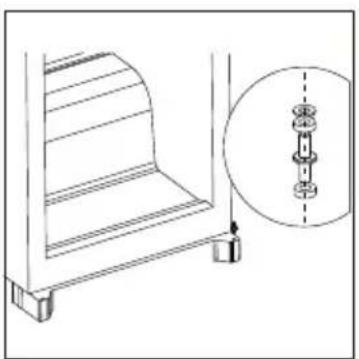
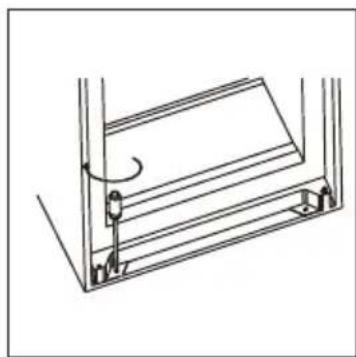
Double check the door can close and open smoothly, and appliance is sealed well. If not, slightly adjusts the unit. Then fix bottom bracket with wooden cabinet by 2 long screws.
-
Fix to bracket with wooden cabinet by short screws.
-
Attached rubber seal to the gap between unit and wooden cabinet at door open side.
natural_image
Technical line drawing of a mechanical assembly with no visible text or symbols
natural_image
Simple line drawing of a mechanical frame with a hanging hook and rotational arrow (no text or symbols)
natural_image
Diagram showing a curved pipe or duct with an arrow indicating direction, alongside a magnified inset (no text or symbols)
Location
The appliance should be installed well away from sources of heat such as radiators, boilers, direct sunlight etc.

Warning! It must be possible to disconnect the appliance from the mains power supply; the plug must therefore be easily accessible after installation.
Electrical connection
Before plugging in, ensure that the voltage and frequency shown on the rating plate correspond to your domestic power supply. The appliance must be earthed. The power supply cable plug is provided with a contact for this purpose. If the domestic power supply socket is not earthed, connect the appliance to a separate earth in compliance with current regulations, consulting a qualified electrician.
The manufacturer declines all responsibility if the above safety precautions are not observed.
DAILY USE CONTROL PANEL
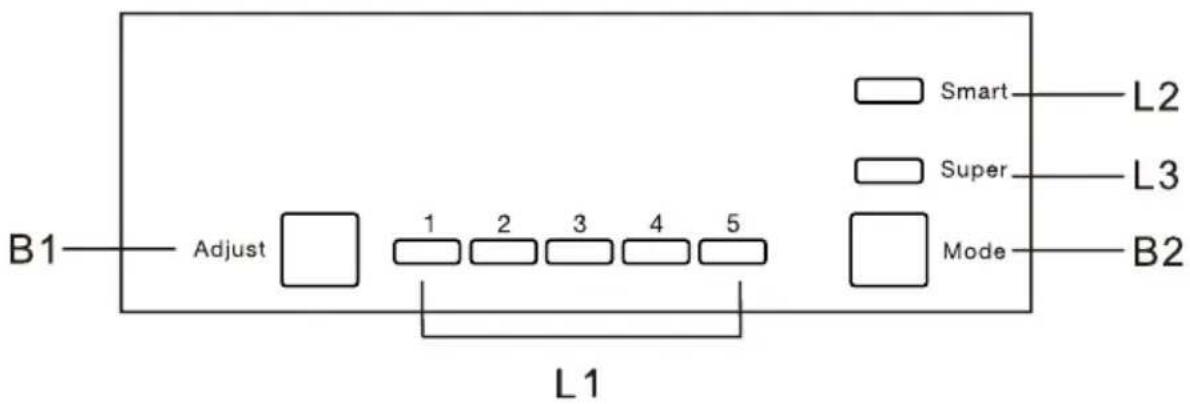
B1 – Press to adjust temperature of fridge compartment in cycle of 1,2,3,4 to 5.
B2 – Press to select mode from Smart, Super and user's setting.
Lights
L1 – show the setting temperature of fridge compartment.
L2 – light on once Smart mode is selected.
L3 – light on once Super mode is selected.
Operation
Temperature Setting
- Press Mode button to select user's setting.
- Press Adjust buttom to adjust the setting temperature of fridge.
The temperature of freezer is automatically controlled at around -18°C.
Smart Mode
Press Mode button to select Smart mode. The appliance will run automatically according to ambient temperature around the appliance.
Super Mode
Press Mode button to select Super mode. The appliance will run to make the freezer compartment coldest. After 54 hours, the original temperature set will be automatically restored.
Turn off the appliance
Press and hold Adjust button for 5 seconds, the appliance will turn off. Press again to turn on the appliance.
Door open alarm
The alarm will sound when door is left open for 90 seconds and it will not stop until the door is closed.
Temperature setting recommendation
| Environment Temperature | Temperature Setting |
| Summer |  | Set on 1~3 |
| Normal |  | Set on 3~4 |
| Winter | 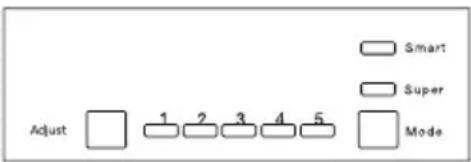 | Set on 4~5 |
The temperature will impact the storage time of food. Too Warm or too cold will both speed up the spoilage of food.
FIRST USE
Cleaning the interior
Before using the appliance for the first time, wash the interior and all internal accessories with lukewarm water and some neutral soap so as to remove the typical smell of a brand new product, then dry thoroughly.
IMPORTANT! Do not use detergents or abrasive powders, as these will damage the finish.
FRIDGE FOOD
Storage time of different food in different compartments according to be below table.
| Refridgeratorcomportments | Type of food | Storage time |
| Door or balconies offridge compartment | ·Food with natural preservatives, such jams,juices, drinks, condiments.·Do not store perishable foods. | 3 days |
| Crisper drawer(salad drawer) | ·Fruits, herbs and vegetables should be placed separately in the crisper bin.·Do not store bananas, onions, potatoes, garlic in the refrigerator. | 1 week |
| Fridge shelf - middle | ·Dairy products, eggs | 1 week |
| Fridge shelf - top | ·Foods that do not need cooking, such as ready-to-eat food, deli meats, leftovers | 1 week |
Take care not to store the following at temperatures of less than 7^ C for long periods: Citrus fruit, melons, aborigines, pineapple, papaya, curettes, passion fruit, cucumber, peppers, tomatoes.
Undesirable changes will occur at low temperatures such assoftening of the flesh, browning and/or accelerated decaying.
Do not refrigerate avocados (until they are ripe), bananas and mangoes.
FREEZING FRESH FOOD
- The freezer compartment is suitable for freezing fresh food and storing frozen and deep-frozen food for a long time.
- Place the fresh food to be frozen in the bottom compartment.
- The maximum amount of food that can be frozen in 24 hours is specified on the rating plate.
- The freezing process lasts 24 hours: during this period do not add other food to be frozen.
- The combination of the drawers, baskets and shelves shown in the device description is optimal for efficient energy savings. Changing the combination proposition could alter the efficiency.
STORING FROZEN FOOD
When first starting-up or after a period out of use.
Before putting the product in the compartment, let the appliance run at least 2 hours on the lowest temperature.
IMPORTANT! In the event of accidental defrosting, for example the power has been off for longer than the value shown in the technical characteristics chart under "rising time", the defrosted food must be consumed quickly or cooked immediately and then re-frozen (after cooked).
| Food | Storage time |
| Bacon, casseroles, milk | 1 month |
| Bread, ice cream, sausages, pies, prepared shell fish, oily fish | 2 months |
| Non-oily fish, shellfish, pizza, scones and muffins | 3 months |
| Ham, cakes, biscuits, beef and lamb chops, poultry pieces | 4 months |
| Butter, vegetables (blanched), eggs whale and yolks, cooked crayfish, mincedmeat (raw),pork (raw) | 6 months |
| n,Fruit (dry, ar in syrup), egg lamb (raw), fruit cakes | 12 months |
Never forget: When you freeze fresh foods with a 'use by / best before / best by" date, you must freeze them before this date expires.
Check that the food was not already frozen. Indeed, frozen food that has thawed completely must not be refrozen.
Once defrosted, food should be consumed quickly. In order to avoid to waste food, please make the temperature of cooling 4-6°C.
THAWING
Deep-frozen or frozen food, prior to be used, can be thawed in the freezer compartment or at room temperature, depending on the time available for this operation.
MOVABLE SHELVES
The walls of the refrigerator are equipped with a series of runners so that the shelves can be positioned as desired.
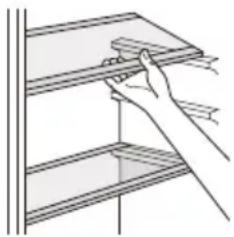
natural_image
Line drawing of a hand holding a shelf with a tab, no text or symbols present
POSITIONING THE DOOR BALCONIES
To permit storage of food packages of various sizes, the door balconies can be placed at different heights. To make these adjustments proceed as follows: gradually pull the balcony in the direction of the arrows until it comes free, then reposition as required.
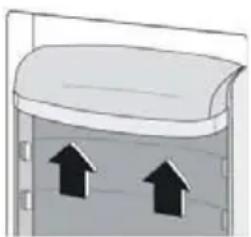
natural_image
Simple line drawing of a container with two upward arrows inside, no text or symbols present.
ENERGY SAVING TIPS
To help you make the most of the freezing process, here are some important hints:
- the maximum quantity of food which can be frozen in 24 hrs. is shown on the rating plate,
- the freezing process takes 24 hours. No further food to be frozen should be added during this period;
- only freeze top quality, fresh and thoroughly cleaned, foodstuffs;
- prepare food in small portions to enable it to be rapidly and completely frozen and to make it possible subsequently to thaw only the quantity required;
- wrap up the food in aluminium foil or polythene and make sure that the packages are airtight;
- do not allow fresh, unfrozen food to touch food which 1s already frozen, thus avoiding a rise in temperature of the latter;
- lean foods store better and longer than fatty ones; salt reduces the storage life of food,
- water ices, if consumed immediately after removal from the freezer compartment, can possibly cause the skin to be freeze burnt;
- it is advisable to show the freezing in date on each individual pack to enable you removal from the freezer compartment, can possibly cause the skin to be freeze burnt;
- it is advisable to show the freezing in date on each individual pack to enable you to keep tab of the storage time.
• do not open the door frequently or leave it open longer than absolutely necessary.
• do not store warm food or evaporating liquids in the refrigerator.
CLEANING
For hygienic reasons the appliance interior, including interior accessories, should be cleaned regularly.

Caution! The appliance may not be connected to the mains during cleaning. Danger of electrical shock! Before cleaning switch the appliance off and remove the plug from the mains, or switch off or turn out the circuit breaker or fuse. Never clean the appliance with a steam cleaner. Moisture could accumulate in electrical components, danger of electrical shock! Hot vapors can lead to the damage of plastic parts The appliance must be dry before it is placed back into service.
FRIDGE DEFROSTING
The fridge defrosting process is carried out automatically every time the compressor stops.
The defrost water is automatically routed to the drain port and into a tray placed on the top of the compressor to the rear of the appliance from which it evaporates.
Make sure the drain port on the fridge at the rear of the appliance is kept clear.
FREEZER DEFROSTING
- Frost will accumulate inside the freezer depending upon the length of time during which the door is left open or the amount of moisture introduced.
-
It is essential to ensure that no frost or ice is allowed to form at places where it will affect the close fitting of the door seal.
-
This might allow air to penetrate the cabinet, thus encouraging continuous running of the compressor.
- Thin frost formation is quite soft and can be removed with a brush or plastic scraper. Do not use metal or sharp scrapers, mechanical devices or other means to accelerate the defrosting process. Remove all dislodged frost from the cabinet floor.
- For the removal of thin frost it is not necessary to switch off he appliance.
- For the removal of heavy ice deposits disconnect the appliance from the mains supply and empty the contents into cardboard boxes and wrap in thick blankets or layers of paper to keep them cold. Defrosting will be most effective if carried out when the freezer is empty, and it should be carried out as quickly as possible.
- An increase in temperature of frozen food packages during defrosting will shorten the storage life. Provided that the contents are well wrapped and placed in a cool area, they should keep for several hours.
- Examine the contents when replacing them in the freezer and if some of the packages have thawed out.
• After defrosting is finished clean the inside with a solution of warm water with a little bicarbonate of soda and then dry thoroughly. Wash all removable parts in the same way and reassemble.
- Reconnect the appliance to the mains supply and leave for2 to 3 hours on setting number 7 before introducing the food back into the freezer and setting the thermostat to your normal setting.
LED LIGHT REPLACEMENT

flowchart
graph LR
    A["LED"] <--> B["LED"]
LED lighting source
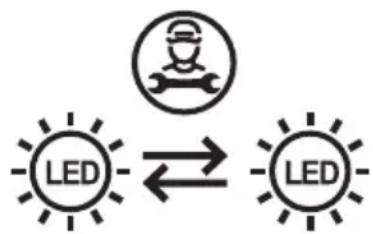
Replaceable by professional
WARNING: the LED light must not be replaced by the user! If the LED light is damaged, contact an authorized service representative for repairing.
The product contains a light source of energy efficiency class G.
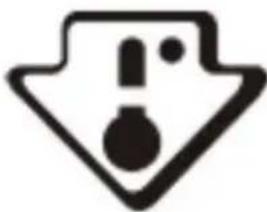
COLDEST ZONE IN THE REFRIGERATOR
This symbol indicates the location of the coldest zone of the refrigerator,
natural_image
Warning symbol with exclamation mark and circular dot (no text or numbers)
To ensure the temperatures in this area, do not change the positioning of the shelf.
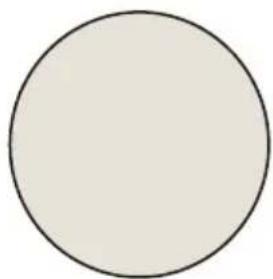
TEMPERATURE INDICATOR SETTING
To help you set your refrigerator well, it is equipped with temperature indicator that will monitor the average temperature in the coldest zone. WARNING: This indicator is intended to work only with your refrigerator, do not use it in another refrigerator (in fact, the coldest zone is not the same), or for any other use.
CHECKING THE TEMPERATURE IN THE COLDEST ZONE
With the temperature indicator, you can check regularly that the temperature of the coldest zone is correct. Indeed, the internal temperature of the refrigerator depends on several factors such as the ambient temperature of the room, the amount of food stored and the frequency of door opening.
Take these factors into consideration when setting the device.
ENGLISH
When the indicator shows « OK », this means that your thermostat is well adjusted and the internal temperature
correct.

natural_image
Simple black circular outline on white background (no text or symbols)
If the indicator of temperature turns WHITE, this means that the temperature is too high; in this case, increase the refrigerator temperature control setting and wait for 12 hours before performing a new visual inspection of the indicator.
TROUBLESHOOTING
Caution! Before troubleshooting, disconnect the power supply. Only a qualified electrician of competent person must do the troubleshooting that is not in this manual.
Important! There are some sounds during normal use (compressor, refrigerant circulation)
| Problem | Possible cause | Solution |
| Appliance does not work | Appliance is turned off. | Press “Adjust” button for 5 seconds to turn on the appliance. |
| Mains plug is not plugged in or is loose. | Insert mains plug. |
| Fuse has blown or is defective. | Check fuse, replace if necessary. |
| Socket is defective. | Mains malfunctions are to be corrected by an electrician. |
| Appliance freezes or cools too much | Temperature is set too cold. | Turn the temperature regulator to a warmer setting temporarily. |
| The food is not frozen enough. | Temperature is not properly adjusted. | Please look in the initial Temperature Setting section. |
| Door was open for an extended period. | Open the door only as long as necessary. |
| A large quantity of warmfood was placed in the appliance within the last 24 hours. | Turn the temperature regulation to a colder setting temporarily. |
| The appliance is near a heat source. | Please look in the installation location section. |
| Unusual noises | Appliance is not level. | Adjust the wood cabinet if it's not level. |
| The appliance is touching the wall or other objects. | Move the appliance slightly. |
| A component, e.g. a pipe, on the rear of the appliance is touching another part of the appliance or the wall. | If necessary, carefully bend the component out of the way. |
| Water on the floor | Water drain hole is blocked. | See the Cleaning section. |
If the malfunction shows again, contact the Service Center.
CUSTOMER SERVICE
We decline liability for any damage or accident derived from any use of this appliance which is not in conformity with the instructions contained in this manual.
Duration of availability of spare parts: 10 years.
In accordance with Article L. 217 of the Consumer Code, your product benefits from a legal guarantee of conformity of 2 years.
This instruction book is also available on our website: www.conforama.fr
If you have a problem with your product, before going to your Conforama store, please get in touch with our aftersales services for electrical household appliances: http://sav-client.conforama.fr/

09 69 32 05 05
From Monday to Saturday, 08:30 to
19:00 Price of a local call
Flash the QR code on the energy label or below to access its main information.
| Model | Website | QR Code |
| RI4E122181/23 E-HO | https://eprel.ec.europa.eu/qr/1483504 |  |
| Reference: | RI4E122181/23 E-HO |
| 220-240V~Rated voltage: |
| Ampere: | 0.75A |
| 50HzRated frequency |
| Climate class: | N,ST |
| Refrigerant: | R600a(29g) |
| IProtection against electrical shock: |
| CYCLOPENTANEInsulation foam: |
Climate class:
-- Temperate (N): 'this refrigerating appliance is intended to be used at ambient temperatures ranging from 16 °C to 32 °C'.
-- Subtropical (ST): ‘this refrigerating appliance is intended to be used at ambient temperatures ranging from 16 °C to 38 °C’.
DISPOSAL
The refrigerating gas contained in the circuit of this appliance is isobutane (R600a); it causes a low level of pollution but is inflammable. Please contact your local disposal department for advice on the correct method of disposal.
DISPOSAL OF OLD ELECTRICAL APPLIANCES
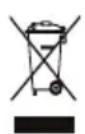
European directive 2012/19/EU on Waste from Electrical and Electronic Equipment (WEEE), requires that used household appliances are not thrown into the normal municipal waste stream.
Used appliances must be collected separately in order to optimize the rate of recovery and recycling of materials that compose them, and to reduce the impact on human health and on the environment. The crossed bin symbol is affixed to all the products to remind you of the obligations of separated collection.
CE
CONFORAMA FRANCE