RS60R - Lamp GODOX - Free user manual and instructions
Find the device manual for free RS60R GODOX in PDF.

User questions about RS60R GODOX
0 question about this device. Answer the ones you know or ask your own.
Ask a new question about this device
Download the instructions for your Lamp in PDF format for free! Find your manual RS60R - GODOX and take your electronic device back in hand. On this page are published all the documents necessary for the use of your device. RS60R by GODOX.
USER MANUAL RS60R GODOX
Godox Full-color LED Light
使用手册
Instruction Manual
重要的安全说明及注意事项
"Godox Light"app固件升级
Safety Instructions and Attentions
First of all, as the most basic principle: This product is a professional lighting set equipment and should be used by professional lighting engineers or under the guidance of professionals. Basic safety attentions must always be followed during use, as follows:
- Before use, please read and understand these instructions and attentions.
- Professional lighting is prohibited for children. When children are near, parents or accompanying persons must supervise closely to prevent children from personal injury due to collision with lamps or private use of lamps.
- This lighting product is not ordinary lighting product and cannot be used for general lighting. Anyone who has suffered eye damage or has sensitive eyes should avoid using this product.
- When the lamp is on, it must be used with care. Do not touch high-temperature parts, such as LED lamp beads, to avoid burns.
- When the lamp is on, it is forbidden to look directly at the lamp beads under any circumstances. Strong light should be used under the guidance of professional lighting engineers. Avoid prolonged exposure to strong light under any circumstances. If eye discomfort, please turn off the lamp in time, suspend use, and see a doctor immediately.
- If the lamp bead is damaged or deformed by heat, stop using this equipment, and contact the manufacturer, service agent or qualified maintenance personnel to replace the lamp bead in time to avoid accidents.
- This product is only suitable for use in -10^ to 40^ operating environment and normal humidity environment.
- Do not use damaged equipment or accessories, and wait for professional maintenance personnel to check and repair to confirm being normal before use.
- During using, if the casing of this product is broken due to being dropped, squeezed or subjected to strong impact, please do not use it, so as to avoid electric shock injury due to contact with internal electronic components.
- If an extension cord is required, please use an extension cord with a current rating greater than or equal to that of the equipment. If an extension cord is rated less than the equipment, overheating may result.
- Some products have long power cords, please place the power cords properly and keep them in a safe place. Avoid contacting the power cord with overheating surfaces, avoid improper placement that could cause pulling damage, or trip on-site personnel. Please use the certified power cord from the original manufacturer. If the product is damaged by using a non-certified power cord, it will not be repaired by our factory.
- Be sure to unplug equipment from the power outlet before cleaning and repairing. When
not in use, do not pull the power cord to unplug the equipment. For normal power-off, please hold both ends of the plug of the equipment with your hands and pull the plug out of power outlet. This equipment needs to be connected to a grounded outlet.
- This equipment is not waterproof, please keep it dry and do not immerse it in water or other liquids. The equipment should be installed in a dry and ventilated place, and avoid using it in rainy, humid, dusty or overheated environments. Do not place any objects on the lamp or let liquid flow into the lamp to avoid accidents.
- Do not disassemble the product without permission. If the product fails, it must be checked and repaired by authorized maintenance personnel.
- Before storing, make sure that the equipment has cooled down completely. For storage, unplug the power cord from the equipment. The equipment should be placed in the carrying case or in a ventilated dry place.
- Do not place equipment near flammable and volatile solvents such as alcohol and gasoline.
- Do not use accessories that are not recommended by our factory to avoid fire, electric shock or personal injury.
- When cleaning, do not wipe it with a damp cloth, please use a dry cloth or a soft cloth to wipe the dirt of the equipment.
- This product complies with ROHS CE and FCC certification, please refer to the relevant national standards for use and operation.
- The safety instructions are formulated according to the strict testing of the factory, and the design and specifications of the equipment are subject to change without prior notice. For latest product information, please check the GODOX website and view latest electronic instruction.
- Some products have built-in lithium batteries. Please use specified chargers, and use them within a proper range of the specified voltage and temperature according to the correct operating instructions.
-
Some products are battery powered. Do not use any batteries, power sources or accessories not specified in the instructions for such products. Keep batteries and other accessories out of the reach of children and infants. In the instance that a child or infant swallows a battery or accessory, immediate emergency medical attention is required. If the battery leaks, becomes discolored, deformed, emits smoke, or emits an abnormal odor, remove it immediately. Be careful during removal to avoid burns. Continued use could result in fire, electric shock, or burns. Do not use any deformed or modified batteries. Do not disassemble or modify this product or battery. Do not heat or solder the battery. Keep the battery away from fire or water. Do not incorrectly insert the positive and negative ends of batteries, or mix old and new batteries or batteries of different types together.
-
One-year warranty period, accessories such as consumable batteries, adapters, power cords, etc. are not covered by this warranty.
- If it is found that the equipment is repaired without authorization, the one-year warranty period will be cancelled and relevant fees will be charged for maintenance.
- Machine failures caused by non-standard operation are not covered by the warranty.
Keep these instructions!
Do not stare at the operating light source
AC power module USB Type-C port is only used for powering the lighting fixtures, not for powering other products.
Thank you for purchasing !
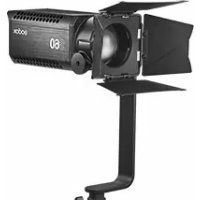
Godox is proud to introduce the new full-color LED light RS60R, which is featured with multiple color modes (CCT/HSI/RGBW/FX mode), 1800K-10000K wide CCT range, thousand-bit adjustable brightness, support wired DMX connection and Bluetooth control, high CRI light beads and etc., suitable for lighting interviews, live broadcasts, short videos, and still life shooting.
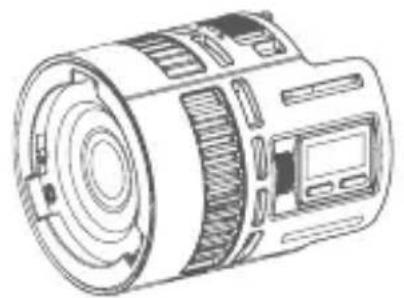
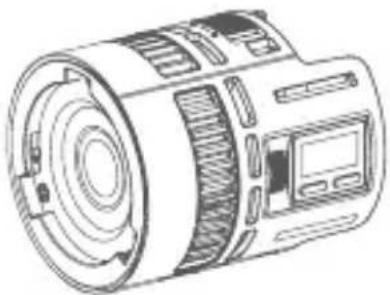
Names of Parts
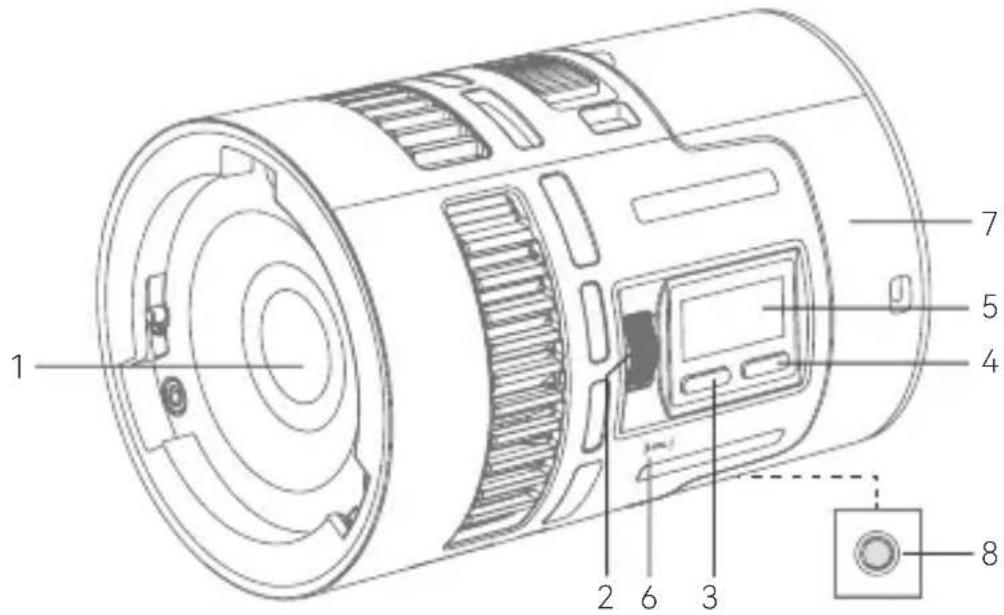
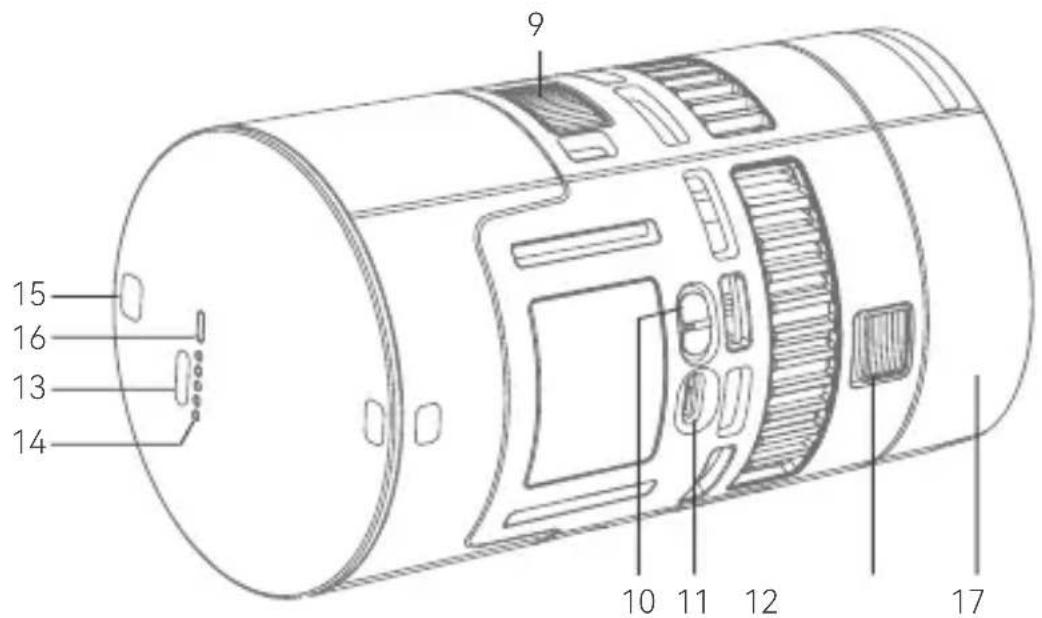
- Light Beads
- Select Dial (Rotate/Press)
- MODE Button
- MENU Button
- Display
- NFC Sensing Area
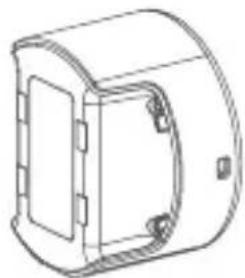
- Battery
8.1/4"Port -
Battery Disassemble Pusher
-
Power Switch Button
- Light Body USB-C Port
- Mount Locking Pusher
- Battery USB-C Port
- Battery Level Indicator
- Hanging Hole 2
- Battery Level Indicator Button
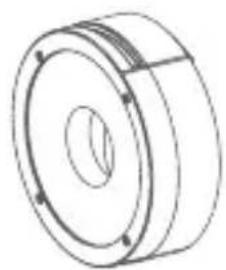
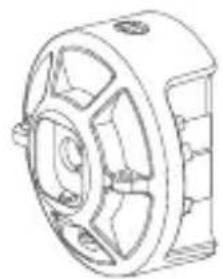
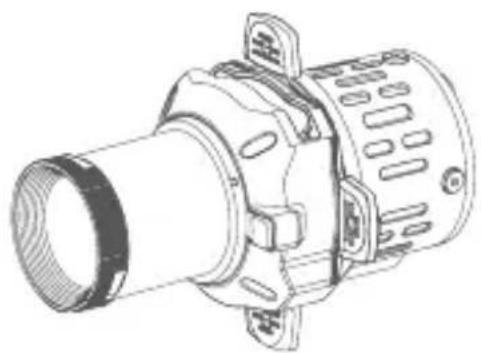
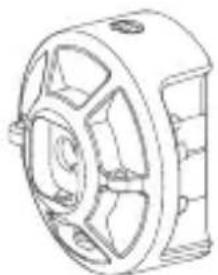
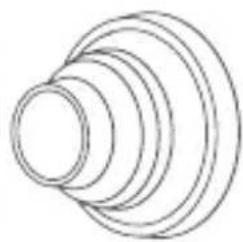
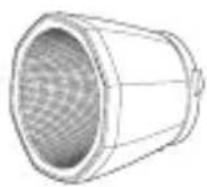
- Lens Reflector
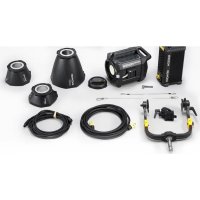
What's Inside RS60R
Light Body × 1 Lens Reflector × 1
Battery × 1 (MS60BAT01)
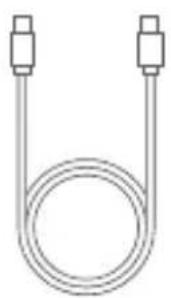
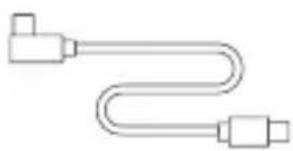
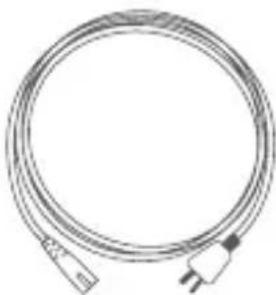
USB-C Charging Cord × 1 (80cm)
What's Inside RS60R 1K
Light Body × 1 Lens Reflector × 1
Mount × 1 (AD-E2)
Power Adapter × 1 (MS60PA01)
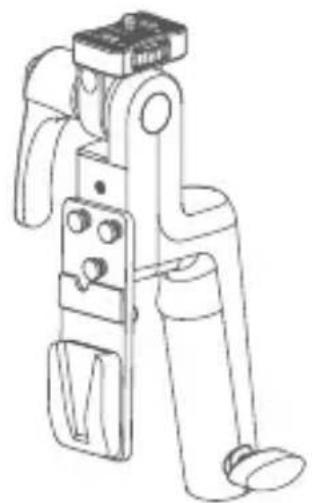
V-mount Battery Grip × 1
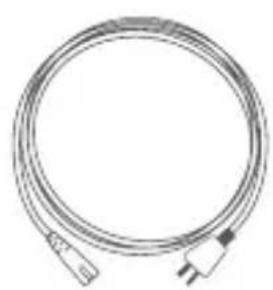
Power Cord × 1

D-TAP Cord×1
NP-F Battery Adapter Plate × 1 (MS60NPA)
Projection × 1 (SP36K)


Instruction Manual × 1 Storage Bag × 1
What's Inside RS60R 2K
Light Body × 2 Lens Reflector × 2

Battery × 2 (MS60BAT01)
(80cm)
Power Adapter × 2 (MS60PA01)
Power Cord × 2USB-C CI

Mount × 2 (AD-E2)

Zoom Lens × 1 (SZL2)
Magnet Kit × 1 (MK)
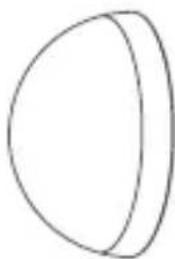
Collapsible Diffusion Dome × 1 (SD15)
Parabolic Softbox 1^× 1 (SP1)

Carry Bag × 1

Instruction Manual × 1
Note: Due to continuous updates and upgrades of the products, there may be differences between the actual products and the pictures. Therefore, the pictures are for reference only, products to prevail in kind.
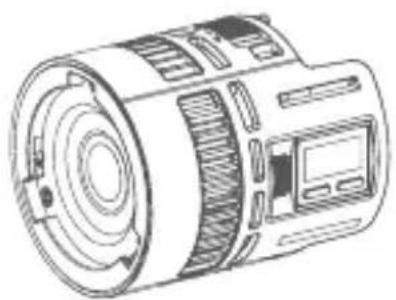
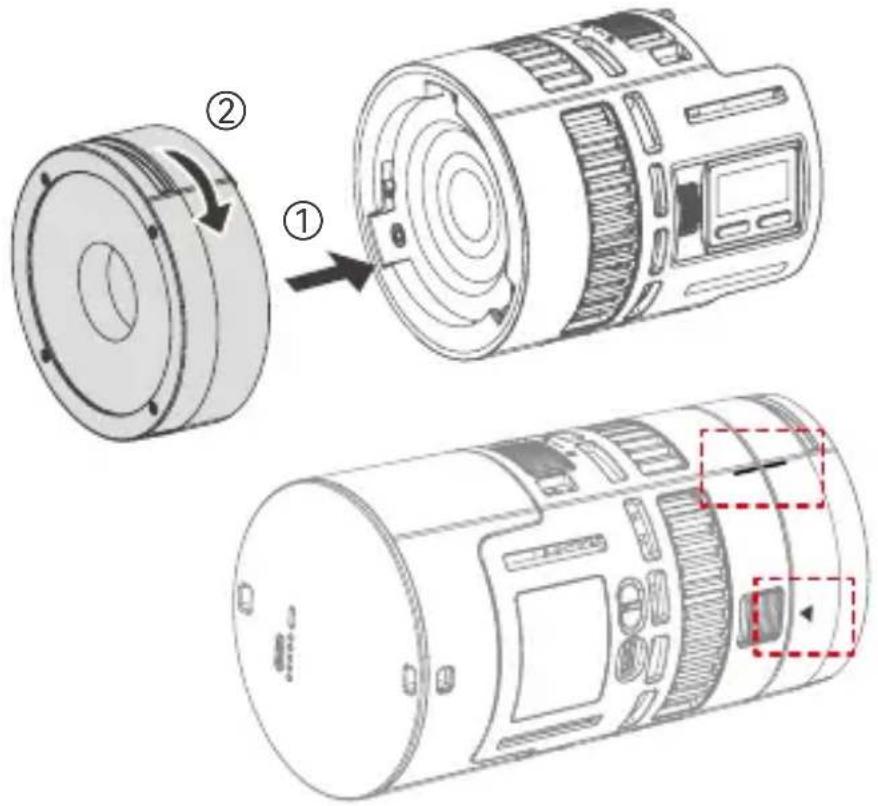
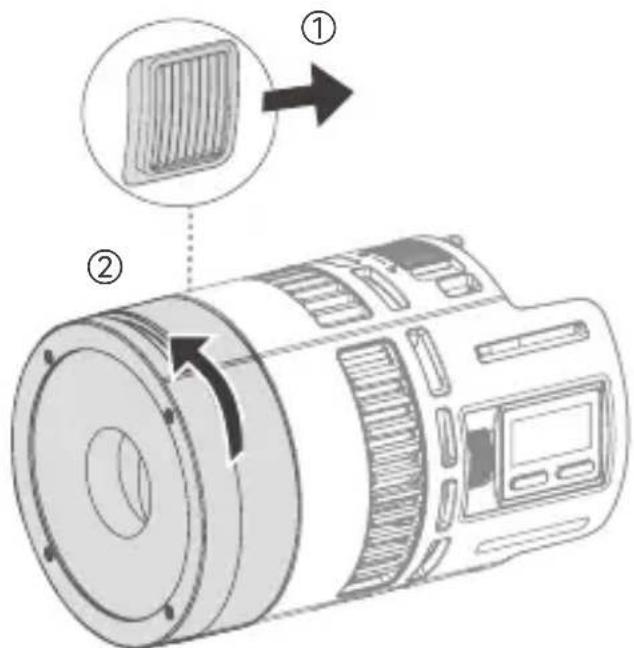
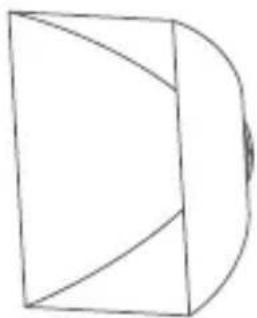
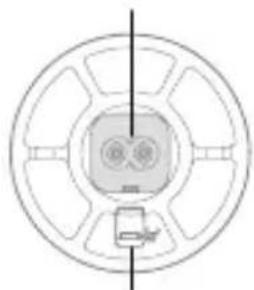
Install/Disassemble the Lens Reflector
Insert the lens reflector into the light head mount and rotate the lens reflector clockwise to install it.
Aim the icon on the lens reflector at the mount locking pusher to make the lens reflector aligns with the line on the side of light body, then it can be correctly installed.
Press and hold the mount locking pusher, rotate the lens reflector anticlockwise to disassemble it.
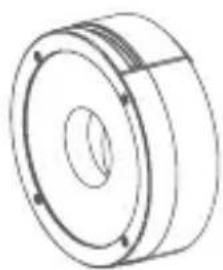
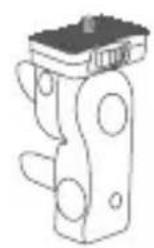
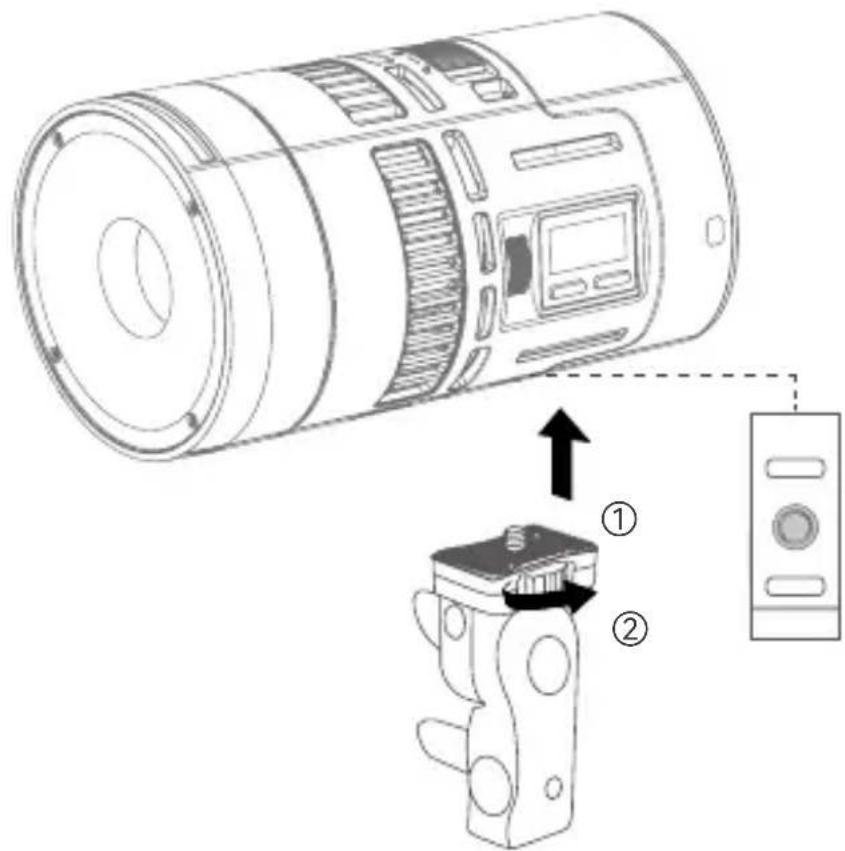
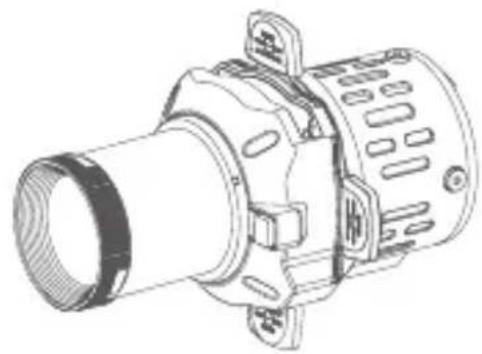
Install/Disassemble the Mount AD-E2
Align the 1/4'' port on the light body with the screw, rotate clockwise the locking device to install it, then mount on an optional tripod.
To disassemble, rotate anticlockwise the locking device to remove the light body.
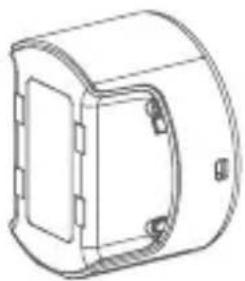
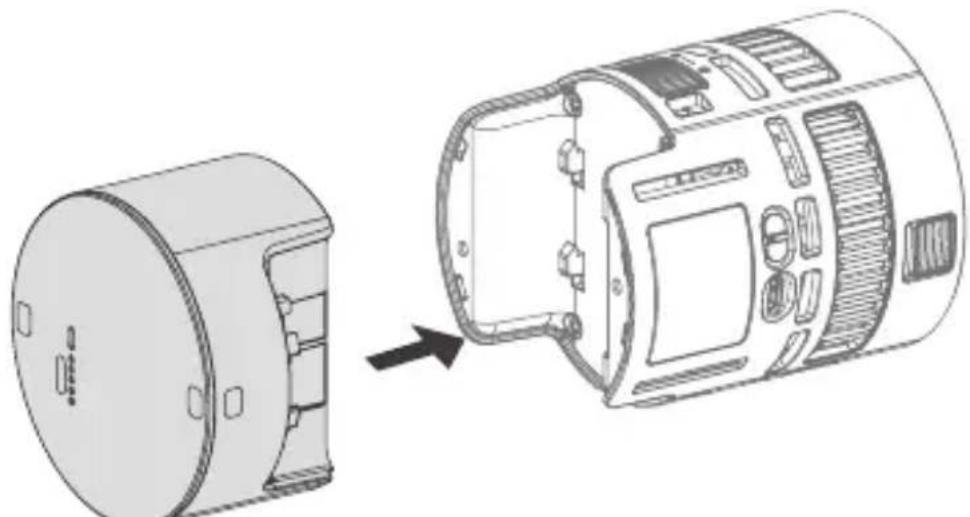
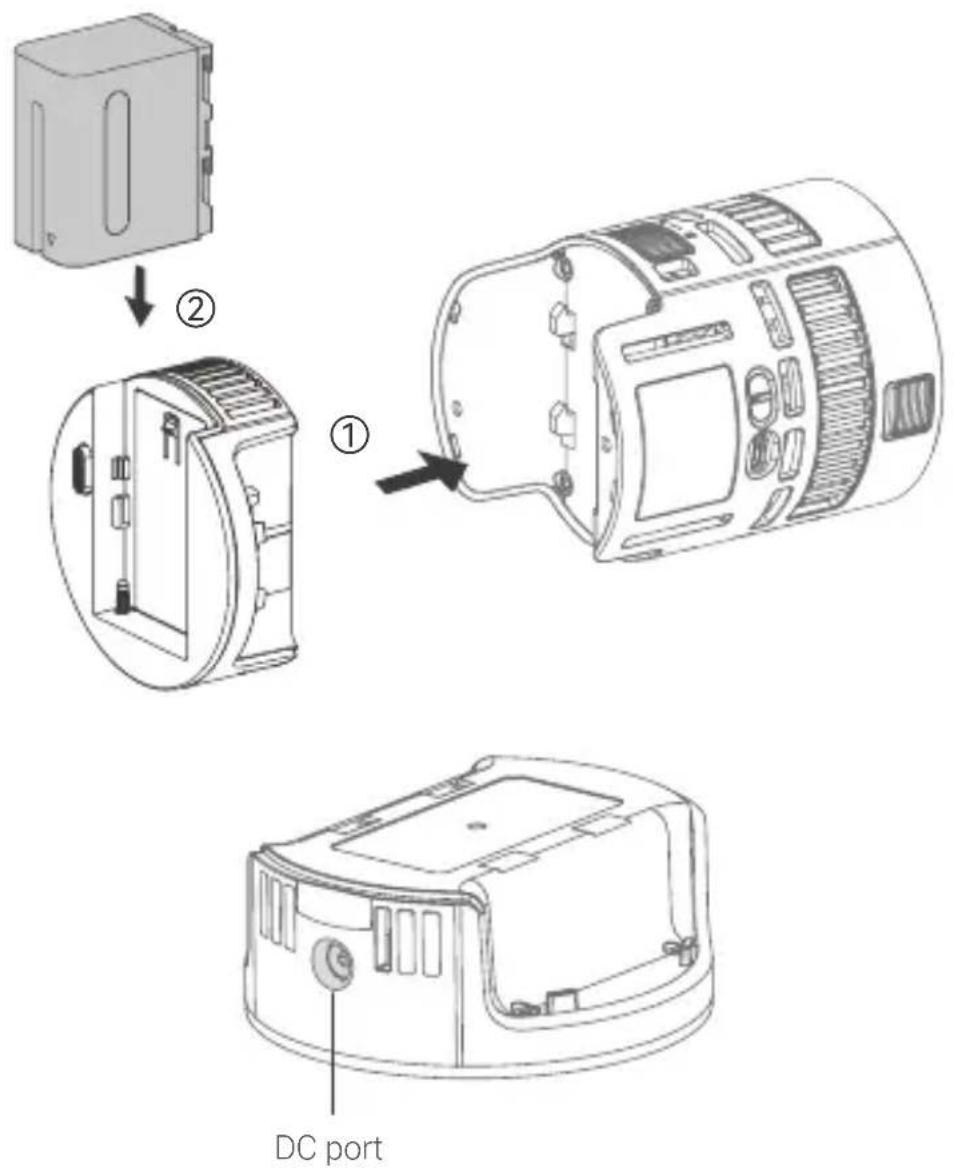
Battery Instructions
Installation: Align the light body with the metal contacts at both ends of the battery, insert the battery into the slot and press it down, the battery disassemble pusher will automatically lock with a "click", and the battery is installed.
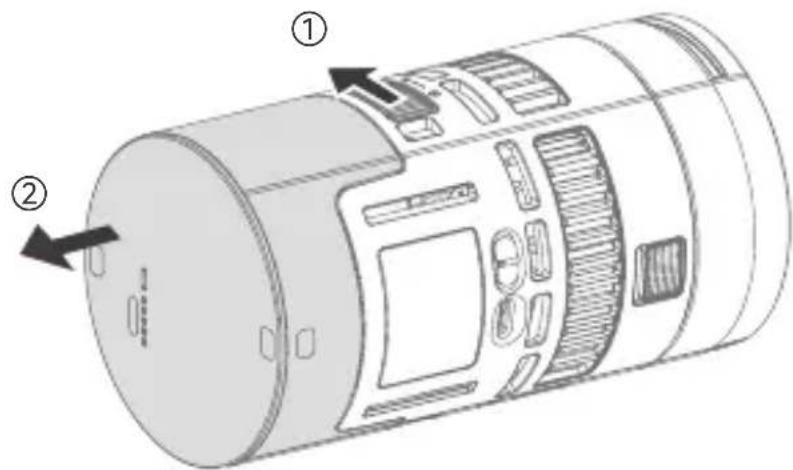
Disassembly: Press and hold the battery disassemble pusher, then pull the battery out to disassemble it.
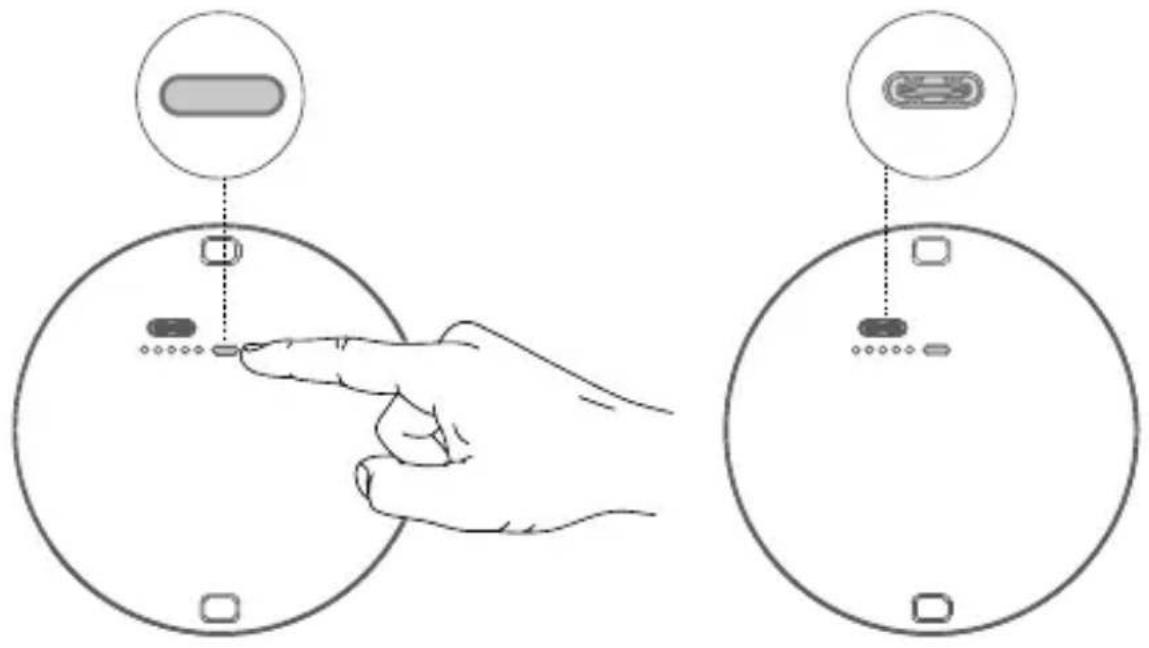
Battery Level Indicator: Just press down the battery level indicator button to check the battery level.
Charging the Battery: When the device is powered off, insert the attached USB-C charging cord into the USB-C charging port of the battery, then connect to power source to charge the battery. Please do not charge the battery in power on status.
USB-C Power Supply For the Light Body
Insert the attached USB-C charging cord into the USB-C port of the light body, then connect to power source to power the light body. Please note that the USB-C port of the light body can not charge the battery.
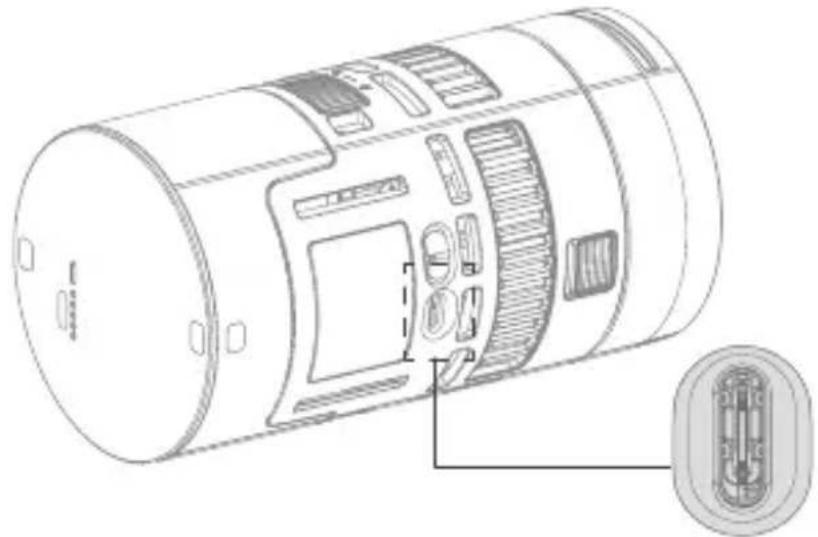
Note: An over 60W power supply device is needed.
Wired DMX Connection
The fixture will be equipped with DMX output and input port after connecting to the DMX adapter cable DMX-C2 through USB-C port on the light body, then wired DMX connection can be achieved by connecting the controller to the fixture with DMX connecting cable.
Note: The above mentioned DMX adapter cable DMX-C2, DMX controller and DMX connecting cable are all sold separately.
Accessories Instructions
The following accessories are either sold separately or included in different kits, so the inclusion of which depends on the actual item list of the purchased kit.
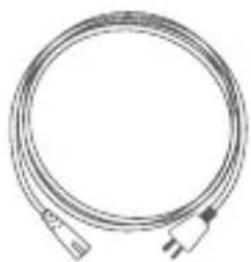
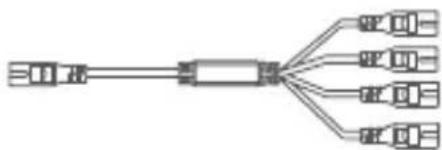
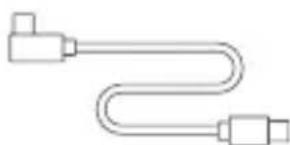
Power Cord 1 to 4 Power Cord USB-C Charging Cord
(20cm)
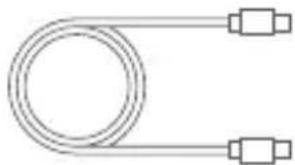
USB-C Charging Cord (80cm) Reflector SR15 Hyper Reflector
BeamLight S20

DMX Adapter Cable DMX-C2
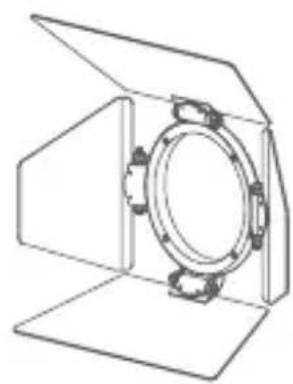
Projection SP36K

Lantern SL1 Projection SReclangular Softbox SS11
Parallel Beam Booster DL5 Lite
NP-F Battery Adapter Plate MS60NPA
Soot AK-SN
Grid SS11G
Grid SP1G
Skirt SL1S
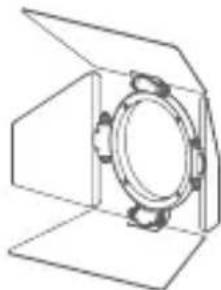
Barndoor AK-B4
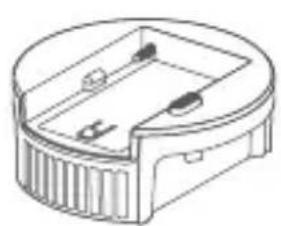
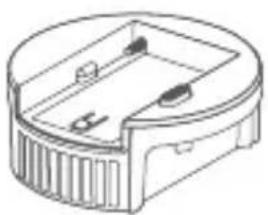
Power Adapter MS60PA01
- Align the light body with the metal contacts at both ends of the power adapter, insert the power adapter into the slot and press it down, the battery disassemble pusher will automatically lock with a "click", and the power adapter is installed.
- Press and hold the battery disassemble pusher, then pull the power adapter out to disassemble it.
- Connect the power adapter to power source via the built-in 8-shaped power socket to power the light body.
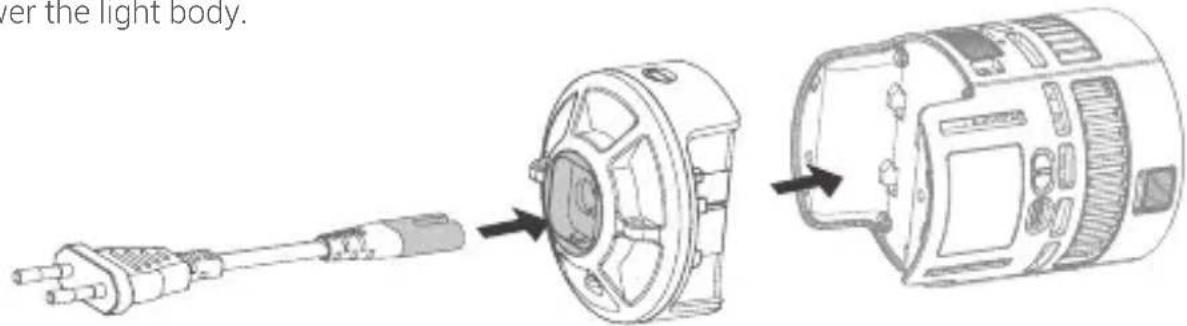
8-shaped power socket
Pusher

Hanging Hole
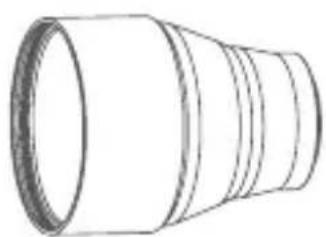
Zoom Lens SZL2
- Light beam with a zoom range adjustable from 15^ to 30^ .
- Align SZL2 with the light head mount and insert it, rotate clockwise to install it.
- To disassemble, press and hold the mounting locking pusher, then rotate SZL2 anticlockwise.
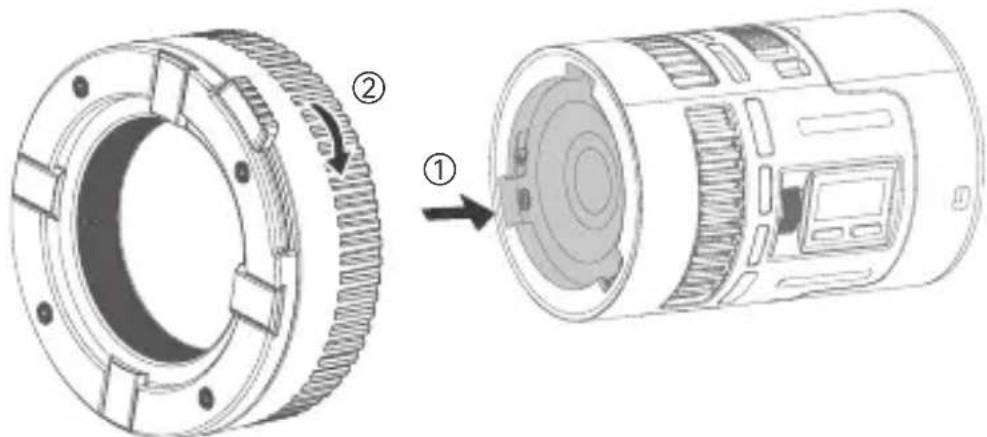
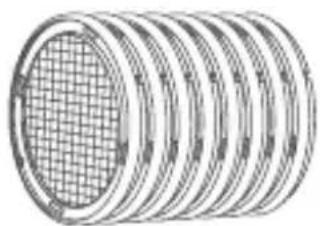
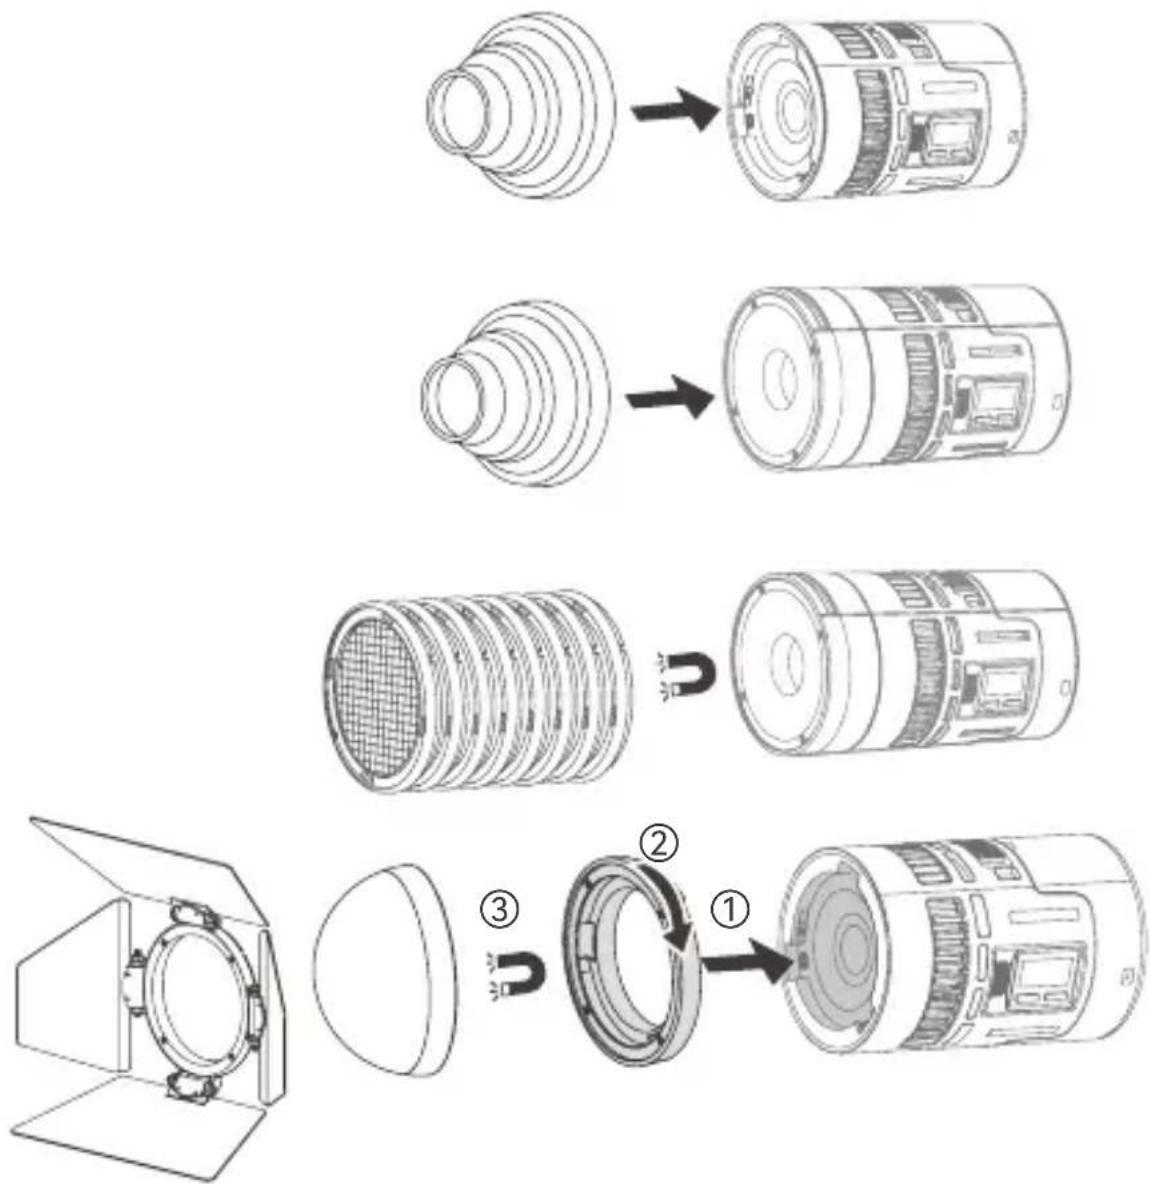
Magnet Kit MK
- The snot and slides need to be collocated with the lens reflector. The snot can also be inserted onto the locking pusher of bare light.
- The four-way barndoor and hemispherical diffuser need to be collocated with the magnetic adapter ring.
- Align the magnetic adapter ring with the mount on the light head, insert and rotate clockwise until the locking pusher is automatically locked, then the magnetic adapter ring is properly installed.
NP-F Battery Adapter Plate MS60NPA
- Important Note: Please make sure the load capacity of the separately purchased battery is no less than 70W, so that the fixture operates normally in high brightness mode. Or you can reduce the brightness output of the fixture to reduce the battery load and avoid triggering the automatic shutdown due to overloading.
- Align the light body with the metal contacts at both ends of the plate, insert the plate into the slot and press it down, the battery disassemble pusher will automatically lock with a "click", and the plate is installed.
- Press and hold the battery disassemble pusher, then pull the plate out to disassemble it.
- The DC port on the adapter plate can be connected to 14.8V V-mount battery through optional adapter cable, which enables v-mount battery power supply.
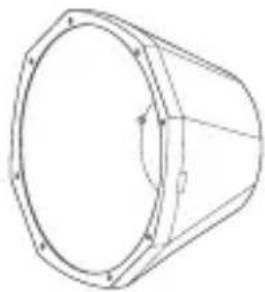
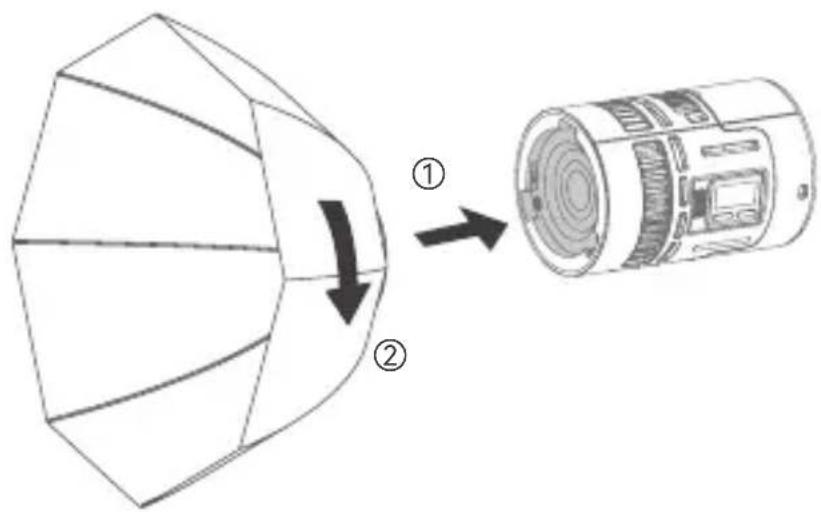
Parabolic Softbox SP1
- Install the parabolic softmax SP1 on the mount adapter first, the inner sides have velcros to paste on the outer white cloth and grid.
- Align the assembled SP1 with the light head mount and insert it, rotate clockwise to complete the installation.
- To disassemble, press and hold the mount locking pusher, and rotate SP1 anticlockwise.
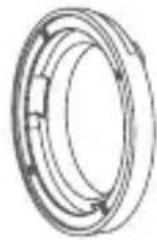
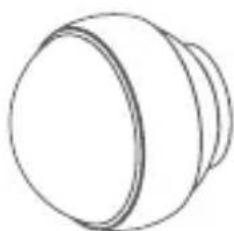
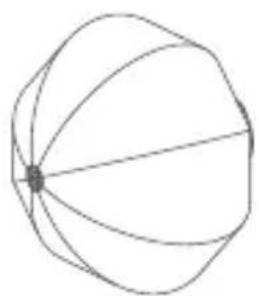
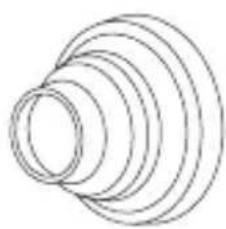
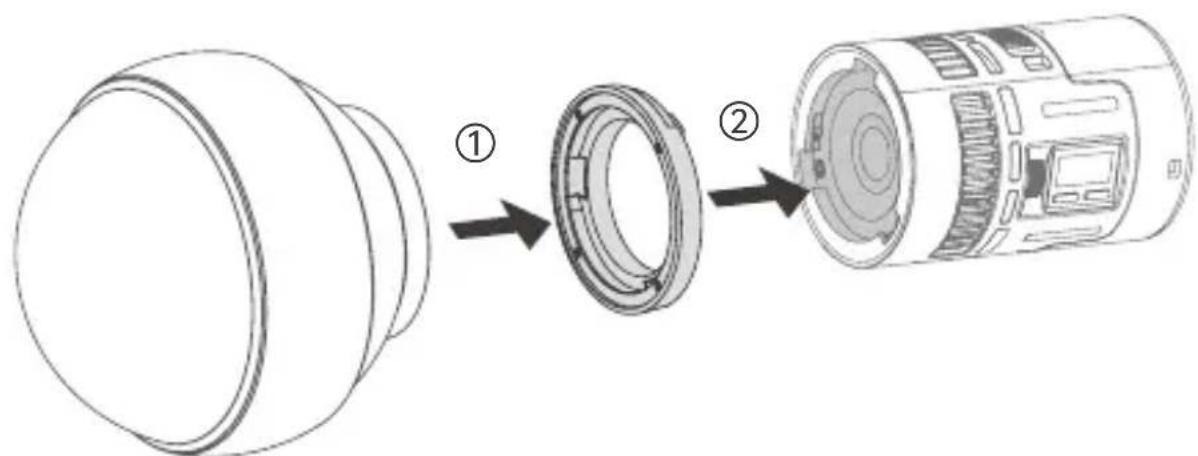
Diffusion Dome SD15
- Insert the flat surface of the adapter ring into the diffusion dome, then the other outside groove surface into the mount of the light head, then rotate clockwise until the locking pusher is automatically locked.
- To disassemble, press and hold the mount locking pusher, and rotate diffusion dome anticlockwise.
Note: Due to continuous updates and upgrades of the products, there may be differences between the actual products and the pictures. Therefore, the pictures are for reference only, products to prevail in kind.
Power Switch
Toggle the power switch button to ON after connected to the power source can turn it on, toggle the button to OFF can turn it off. The anti-false touch function is available for setting in the menu.
Mode Selection
Short press the MODE button to enter mode selection interface, rotate and press the select dial to choose among the following modes and adjust the corresponding parameters. Rotate the select dial upward to increase the values, while rotate downward to decrease the values.
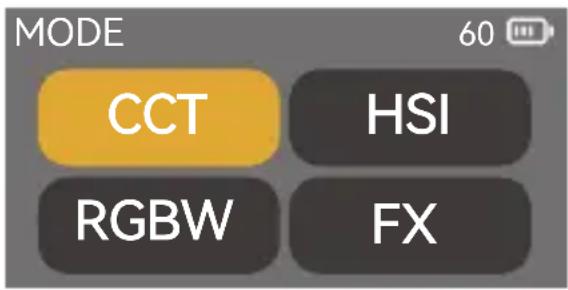
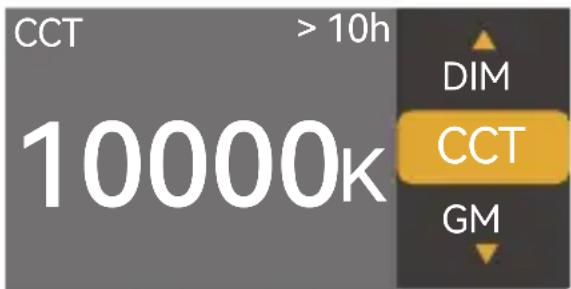
CCT Mode
Short press the MODE button to enter CCT mode, in which you can adjust the DIM, CCT and GM.
DIM Range: 0% 100%
CCT Range: 1800K ~ 10000K
GM Range: -100% ~ +100%
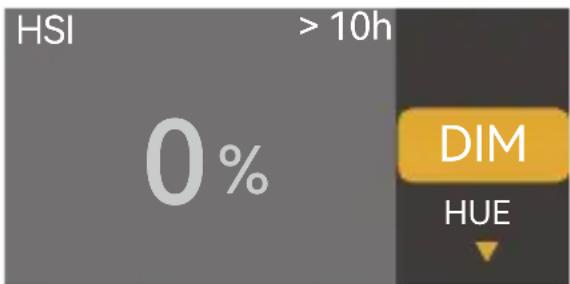
HSI Mode
Short press the MODE button to enter HSI mode, in which you can adjust the DIM, HUE and SAT.
DIM Range: 0% 100%
HUE Range: 0^ 360^
SAT Range: 0% 100%
RGBW Mode
Short press the MODE button to enter RGBW mode, in which you can adjust the DIM, R (red light), G (green light), B (blue light) and W (white light).
DIM Range: 0% 100%
R Range: 0% 100%
G Range: 0% 100%
Short press the MODE button to enter FX mode, in which you can choose among the following 11 effects and adjust their respective parameters. Rotate the select dial upward to increase the parameters, while rotate downward to decrease the parameters.
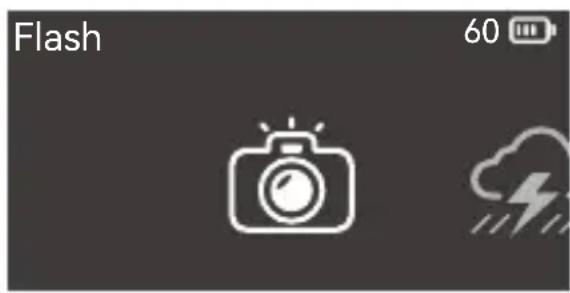
1. Flash

This light effect simulates the flash of a camera flash or a traditional flash bulb, often used to create a lively and dynamic atmosphere.
SW (switch): Turn on/off the effect
DIM: 0% -100% (in 0.1% increment)
Color: CCT/HSI
CCT/HUE: 1800K-10000K/0-360°
SPD (speed): 1-100
MOD (mode): Camera Flash/Flash Bulb
TRIG (trigger): Auto/Manual
2. Lightning

This effect simulates the natural thunder and lightning and is often used to create a tense, terrifying or mysterious atmosphere.
SW (switch): Turn on/off the effect
DIM: 0% -100% (in 0.1% increment)
CCT: 1800K-10000K
Times: Random/1-10
FREQ (frequency): Random /2-20
TRIG (trigger): Auto/Manual
3. Cloudy

This effect simulates the effect of cloud occlusion and is often used to create a gloomy, oppressive or sad atmosphere.
SW (switch): Turn on/off the effect
DIM: 0% -100% (in 0.1% increment)
This effect simulates the effect of a broken bulb and is often used to create a dim atmosphere.
SW (switch): Turn on/off the effect
DIM: 0% - 100% (in 0.1% increment)
Color: CCT/HSI
CCT/HUE: 1800K-10000K/0-360°
SPD (speed): 1-100
5.TV
This effect simulates the effect of light from a television or screen and is often used to create a cold, mechanical or digital atmosphere.
SW (switch): Turn on/off the effect
DIM: 0% -100% (in 0.1% increment)
Color: CCT/HSI
SPD (speed): 1-100
6. Candle

This effect simulates the effect of light from a candle and is often used to create a soft, warm, shimmering atmosphere.
SW (switch): Turn on/off the effect
DIM: 0% -100% (in 0.1% increment)
SPD (speed): 1-100
7. Fire

This effect simulates the effect of light from flame and is often used to create a bright, warm, shimmering atmosphere.
SW (switch): Turn on/off the effect
DIM: 0% - 100% (in 0.1% increment)
SPD (speed): 1-100
8. Firework

This effect simulates the effect of light from fireworks and is often used to create a gorgeous, colorful, romantic atmosphere.
SW (switch): Turn on/off the effect
DIM: 0% - 100% (in 0.1% increment)
Ember: 1-100
SPD (speed): 1-100
9. Explosion

This effect simulates the effect of light from explosion and is often used to create a bright, fierce, shimmering atmosphere.
SW (switch): Turn on/off the effect
DIM: 0% - 100% (in 0.1% increment)
Color: CCT/HSI
CCT/HUE: 1800K-10000K/0-360°
Ember: 1-100
SPD (speed): 1-100
TRIG (trigger): Auto/Manual
10. Welding

This effect simulates the effect of light from welding and is often used to create a hot, mechanical atmosphere.
SW (switch): Turn on/off the effect
DIM: 0% - 100% (in 0.1% increment)
Color:CCT/HSI
CCT/HUE: 1800K-10000K/0-360°
SPD (speed): 1-100
11. Cop Car

This effect simulates the effect of light from cop car and is often used to create a tension, chasing atmosphere.
SW (switch): Turn on/off the effect
DIM: 0% -100% (in 0.1% increment)
Color: Red+Blue/Red/Blue/Blue+White/Blue+Yellow/Yellow/Red+White+Blue/Red +Yellow +Blue
MOD (mode): 1-5
12.SOS SOS
This effect simulates the flashing effect of an SOS signal and is often used to create a dangerous, distress or emergency atmosphere.
SW (switch): Turn on/off the effect
DIM: 0% - 100% (in 0.1% increment)
Color: CCT/HSI
CCT/HUE: 1800K-10000K/0-360°
13. RGB Cycle

This effect simulates the effect cycle and change of colorful lights and is often used to create a fantasy, sci-fi atmosphere.
SW (switch): Turn on/off the effect
DIM: 0% - 100% (in 0.1% increment)
SAT: 0% - 100%
SPD (speed): 1-100
14. Party

This effect simulates the effect of colorful lights, flashes and laser, and is often used to create a carnival, fun, high energetic atmosphere.
SW (switch): Turn on/off the effect
DIM: 0% -100% (in 0.1% increment)
SAT: 0% - 100%
SPD (speed): 1-100
Note: Please rotate the select dial to adjust the parameters, then press and rotate it to the next parameter. Select manual, the effect can be triggered once by pressing the select dial once. After a certain effect is set, press MODE button can return to the 14 effects interface.
MENU Settings
Press the MENU button to enter menu interface, rotate and press the select dial to enter the following setting options.
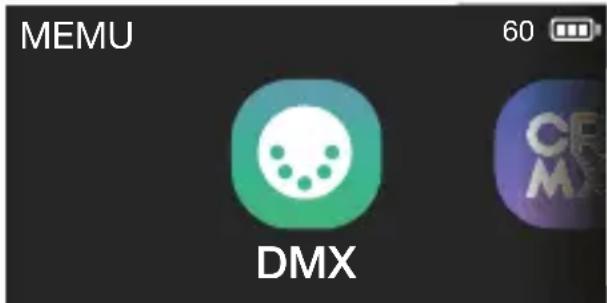
Short press the select dial to enter DMX interface, rotate and press the select dial to adjust the following settings.
| DMX | 60 |
| DMX Add | 1 |
| DMX Mode | 01 |
| RDM State | On |
| DMX Lost | |
| Termination | |
| Extend DMX Channels |
| Level 1 Option | Level 2 Option | Description |
| Address | 001-512 | Initial address |
| DMX Mode | 01: CCT 8Bit | CCT mode in 8bit |
| 02: HSI 8Bit | HSI mode in 8bit | |
| 03: RGB 8Bit | RGB mode in 8bit | |
| 04: RGBW 8Bit | RGBW mode in 8bit | |
| 05: CCT+HSI 8Bit | CCT+HSI mode in 8bit | |
| 06: CCT+RGBW 8Bit | CCT+RGBW mode in 8bit | |
| 07: FX 8Bit | FX mode in 8bit | |
| 08: CCT 16Bit | CCT mode in 16bit | |
| 09: HSI 16Bit | HSI mode in 16bit | |
| 10: RGB 16Bit | RGB mode in 16bit | |
| 11: RGBW 16Bit | RGBW mode in 16bit | |
| 12: FX 16Bit | FX mode in 16bit | |
| 13: ULTIMATE 8Bit | ULTIMATE DMX mode in 8bit | |
| 14: ULTIMATE 16Bit | ULTIMATE DMX mode in 16bit | |
| RDM State | On | Turn on RDM, the controller can setthe fixture address and DMX mode |
| Off | Turn off RDM | |
| DMX Lost | Hold Last Command | After the DMX control signal is lost, continue to use the last received DMX control signal until power down or a valid DMX control signal is received again. |
| Black Out | The light is off immediately. | |
| Black Out After 2 min | After the DMX control signal is lost, continue to use the last received DMX control signal for 2 minutes then black out. | |
| Note: If a valid DMX control signal is received within 2 minutes, then use the new DMX control signal. | ||
| Termination | On | Turn on DMX terminal |
| Off | Turn off DMX terminal | |
| Extend DMX Channels | On | Turn on extend DMX channels |
| Off | Turn off extend DMX channels |
Note: Please refer to the DMX mode specification to control the device by DMX/RDM. The electronic version can be downloaded from the official website https://www.godox.com.
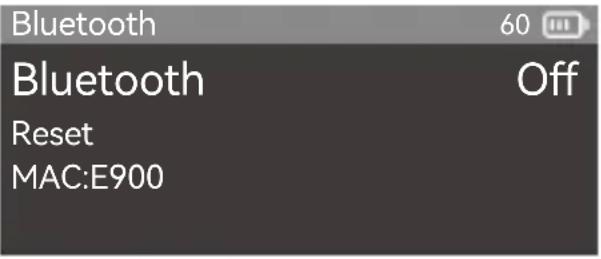
2. Bluetooth

Short press the select dial to enter Bluetooth interface, rotate and press the select dial to Bluetooth to turn it on or off. If you need to reset the Bluetooth, rotate the select dial to reset and press it to choose between yes and no. The MAC code is on the left corner for quick check.
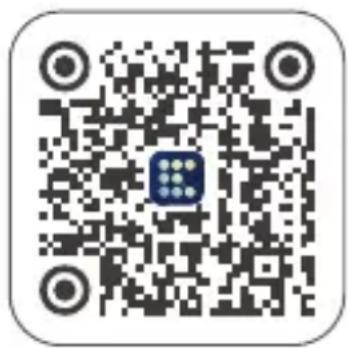
"GODOX Light" app Downloading
Scan the QR code to download the "Godox Light" smartphone app (can be used in Android and iOS).
Note:
- The app can be used directly on the firstly installed device (smartphone or tablet). When change to other mobile device (smartphone or tablet), the light shall be reset before the normal connection of the app.
- The app should be version 3.0 or above.
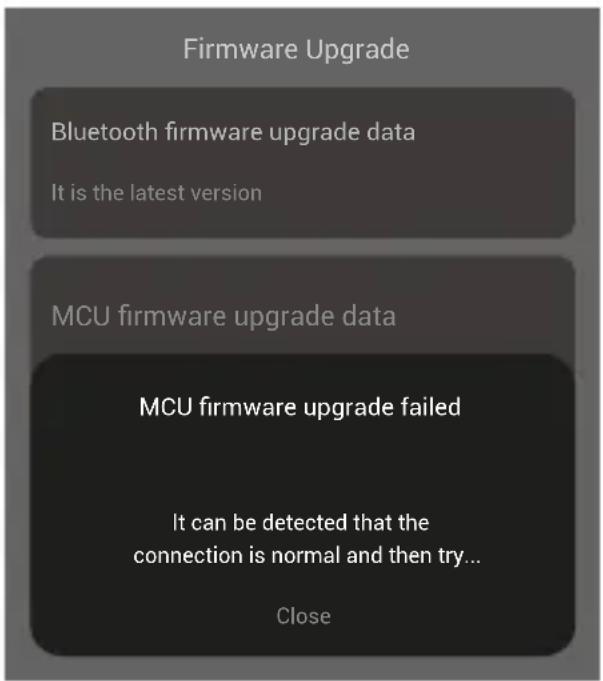
"GODOX Light" app Firmware Upgrade
Open Godox Light, enter a certain scene and click "+" to add a fixture, then click to display more settings, choose firmware upgrade.
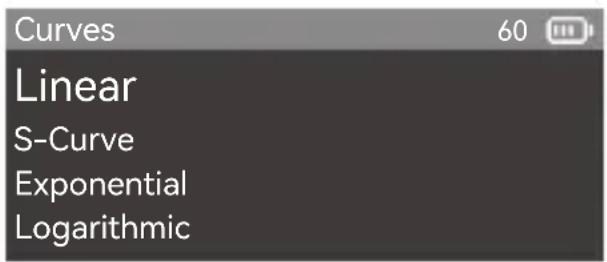
3. Curves

Short press the select dial to enter dimming curves interface, rotate and press the select dial to select among linear, S-curve, exponential and logarithmic.
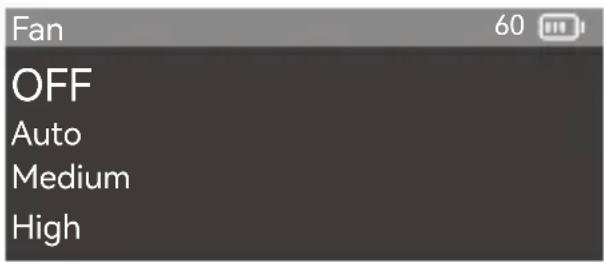
4. Fan

Short press the select dial to enter fan interface, rotate and press the select dial choose among off, auto, medium and high.
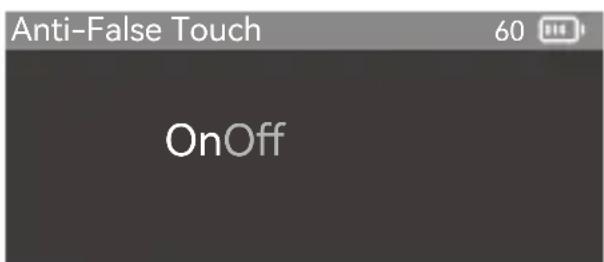
5. Anti-False Touch

Short press the select dial to enter anti-false touch interface, rotate and press the select dial choose on or off. After turning on the anti-false touch, it will not enter the main interface immediately after booting, the unlocking method will appear on the screen, rotate down the select dial to unlock and enter the main interface as shown below.

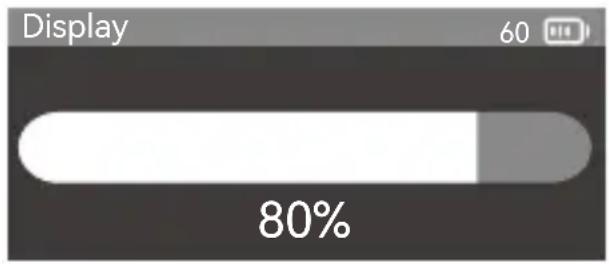
6. Display

Short press the select dial to enter display interface, rotate and press the select dial to adjust the display brightness from 10% to 100% .
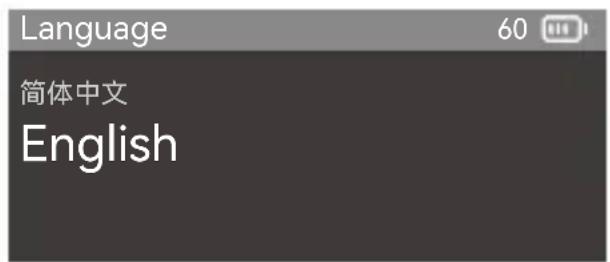
7. Language

Short press the select dial to enter language interface, rotate and press the select dial to choose between simplified Chinese and English.
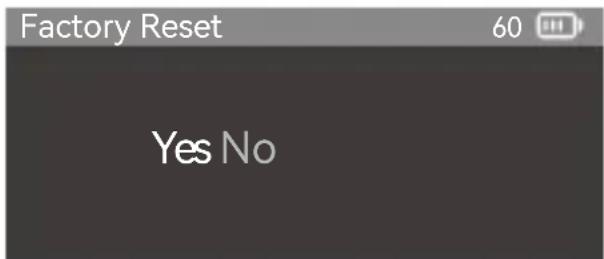
8. Factory Reset

Short press the select dial to enter factory reset interface to choose yes or no. If you choose yes, the device will automatically reset and reboot, then simplified Chinese and English options show on the display for your choice, after which the brightness will turn to 100% and go to CCT mode automatically.
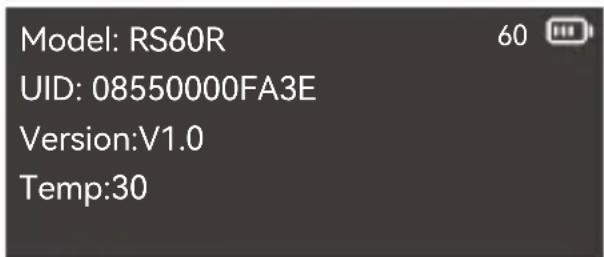
9. Fixture Info

Short press the select dial to enter fixture info interface to check the model, UID, firmware version, and temperature.
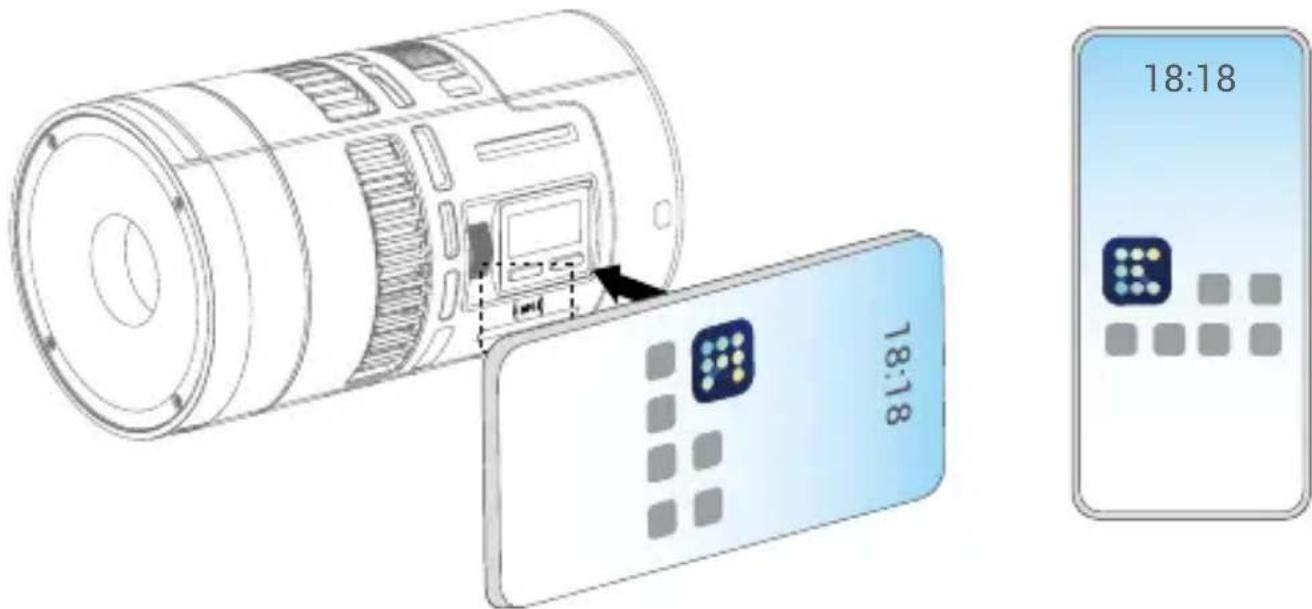
NFC Addition
Use the NFC function of smartphone and NFC chip of the light fixture to connect them, then add the light fixture to 【Godox Light】app.
- Preconditions: light fixture supports NFC addition, 【Godox Light】 app is V3.2.4 or above, Bluetooth and NFC functions of smartphone are turned on.
- Operation Instructions: subject to the fulfillment of preconditions, turn on the【Godox Light】app and enter the corresponding scene, click [+] to select【NFC Addition】function, bring the NFC sensing area of smartphone near the sensing area of light fixture to scan to add in【NFC Addition】interface, bulk addition is also supported.
Note: Android systems can complete the addition by directly closing the sensing area, while iOS system need to click the
Illuminance Data
| CCT | Condition | Unit | 1m | 2m | 3m |
| 1800K | Bare Light | lux | ≈926 | ≈229 | ≈103 |
| fc | ≈86 | ≈21 | ≈10 | ||
| 2800K | lux | ≈1420 | ≈358 | ≈161 | |
| fc | ≈132 | ≈33 | ≈15 | ||
| 3200K | lux | ≈1420 | ≈358 | ≈161 | |
| fc | ≈132 | ≈33 | ≈15 | ||
| 4300K | lux | ≈1390 | ≈352 | ≈158 | |
| fc | ≈129 | ≈33 | ≈15 | ||
| 5600K | lux | ≈1350 | ≈340 | ≈153 | |
| fc | ≈125 | ≈32 | ≈14 | ||
| 6500K | lux | ≈1320 | ≈343 | ≈149 | |
| fc | ≈122 | ≈32 | ≈14 | ||
| 8500K | lux | ≈1240 | ≈312 | ≈141 | |
| fc | ≈115 | ≈29 | ≈13 | ||
| 10000K | lux | ≈1210 | ≈304 | ≈137 | |
| fc | ≈112 | ≈28 | ≈13 | ||
| R (Red) | lux | ≈504 | ≈125 | ≈55 | |
| fc | ≈47 | ≈12 | ≈5 | ||
| G (Green) | lux | ≈773 | ≈196 | ≈88 | |
| fc | ≈72 | ≈18 | ≈8 | ||
| B (Blue) | lux | ≈247 | ≈63 | ≈29 | |
| fc | ≈23 | ≈6 | ≈3 | ||
| 1800K | With Lens Reflector | lux | ≈7540 | ≈1700 | ≈733 |
| fc | ≈700 | ≈158 | ≈68 | ||
| 2800K | lux | ≈11400 | ≈2740 | ≈1210 | |
| fc | ≈1060 | ≈254 | ≈112 | ||
| 3200K | lux | ≈11400 | ≈2740 | ≈1220 | |
| fc | ≈1060 | ≈255 | ≈113 | ||
| 4300K | lux | ≈11300 | ≈2720 | ≈1200 | |
| fc | ≈1050 | ≈252 | ≈112 | ||
| 5600K | lux | ≈11000 | ≈2650 | ≈1180 | |
| fc | ≈1020 | ≈246 | ≈109 | ||
| 6500K | lux | ≈10800 | ≈2600 | ≈1160 | |
| fc | ≈1010 | ≈242 | ≈108 | ||
| 8500K | lux | ≈10200 | ≈2460 | ≈1090 | |
| fc | ≈948 | ≈229 | ≈102 | ||
| 10000K | lux | ≈10000 | ≈2410 | ≈1070 | |
| fc | ≈929 | ≈224 | ≈100 | ||
| R (Red) | lux | ≈4200 | ≈964 | ≈408 | |
| fc | ≈390 | ≈90 | ≈38 | ||
| G (Green) | lux | ≈6480 | ≈1570 | ≈695 | |
| fc | ≈602 | ≈146 | ≈65 | ||
| B (Blue) | lux | ≈2570 | ≈601 | ≈267 | |
| fc | ≈239 | ≈56 | ≈25 |
Note: All the data are average values instead of absolute values. All the above tests are based on the condition of 100% brightness.
Technical Data
| Model | RS60R |
| Lithium Battery Parameters | Nominal voltage 14.4V |
| USB-C Input: 5V=3A, 9V=3A, 12V=2.5A, 20V=1.5A | |
| Battery Life ≈ 45min(100% brightness) | |
| Charging Time ≈ 2h 15min | |
| Light Body USB-C Port Input | 20V=3A Max.60W |
| CCT | 1800K-10000K |
| Brightness Range | 0%-100% |
| Dimming Curves | linear, S-curve, exponential, logarithmic |
| FX Mode | 14 |
| CRI | Average≥95 |
| TLCI | Average≥95 |
| Controlling Methods | Wired DMX connection, support RDM protocol/Bluetooth app control |
| Bluetooth Controlling Distance | 60m |
| Working Environment Temperature | -20°C ~ 40°C |
| Dimension(without lens reflector and battery) | ≈3.03" ×3.03" ×3.58" |
| Netweight(without lens reflector and battery) | ≈311g |
Specifications and data may subject to changes without notice.
FCC Statement
This device complies with part 15 of the FCC Rules. Operation is subject to the following two conditions:
(1) This device may not cause harmful interference, and
(2) this device must accept any interference received, including interference that may cause undesired operation.
Any Changes or modifications not expressly approved by the party responsible for compliance could void the user's authority to operate the equipment.
Note: This equipment has been tested and found to comply with the limits for a Class B digital device, pursuant to part 15 of the FCC Rules. These limits are designed to provide reasonable protection against harmful interference in a residential installation. This equipment generates uses and can radiate radio frequency energy and, if not installed and used in accordance with the instructions, may cause harmful interference to radio communications. However, there is no guarantee that interference will not occur in a particular installation. If this equipment does cause harmful interference to radio or television reception, which can be determined by turning the equipment off and on, the user is encouraged to try to correct the interference by one or more of the following measures:
-Reorient or relocate the receiving antenna.
-Increase the separation between the equipment and receiver.
-Connect the equipment into an outlet on a circuit different from that to which the receiver is connected.
-Consult the dealer or an experienced radio/TV technician for help.
The device has been evaluated to meet general RF exposure requirement.
The device can be used in portable exposure condition without restriction.
IC Warning
Declaration of Conformity
GODOX Photo Equipment Co., Ltd. hereby declares that this equipment are in compliance with the essential requirements and other relevant provisions of Directive 2014/53/EU. In accordance with Article 10(2) and Article 10(10), this product is allowed to be used in all EU member states. For more information of DoC, Please click this web link:
https://www.godox.com/eu-declaration-of-conformity/
The device complies with RF specifications when the device used at 0mm from your body.
产品保修
Dear customers, as this warranty card is an important certificate to apply for our maintenance service, please fill in the following form in coordination with the seller and safe-keep it. Thank you!
| Product Information | Model | Product Code Number |
| Customer Information | Name | Contact Number |
| Address | ||
| Seller Information | Name | |
| Contact Number | ||
| Address | ||
| Date of Sale | ||
| Note | ||
Note: This form shall be sealed by the seller.
Applicable Products
Applicable Products The document applies to the products listed on the Product Maintenance Information (see below for further information). Other products or accessories (e.g. promotional items, giveaways and additional accessories attached,etc.) are not included in this warranty scope.
Warranty Period
The warranty period of products and accessories isimplemented according to the relevant Product Maintenance Information. The warranty period is calculated from the day(purchase date) when the product is bought for the first time, And the purchase date is considered as the date registered onthe warranty card when buying the product.
How to Get the Maintenance Service
If maintenance service is needed, you can directly contact the product distributor or authorized service institutions. You can also contact the Godox after-sale service call and we will offer you service. When applying for maintenance service, you should provide valid warranty card. If you cannot provide valid warranty card, we may offer you maintenance service once confirmed that the product or accessory is involved in the maintenance scope, but that shall not be considered as our obligation.
The guarantee and service offered by this document are not applicable in the following cases: ① The product or accessory has expired its warranty period; ② Breakage or damage caused by inappropriate usage, maintenance or preservation, such as improper packing, improper usage, improper plugging in/out external equipment, falling off or squeezing by external force, contacting or exposing to the improper temperature, solvent, acid, base, flooding and damp environments, etc; ③ Breakage or damage caused by non-authorized institution or staff in the process of installation, maintenance, alternation, addition and detachment; ④ The original identifying information of product or accessory is modified, alternated, or removed; ⑤ No valid warranty card; ⑥ Breakage or damage caused by using illegally authorized, nonstandard or non-public released software; ⑦ Breakage or damage caused by force majeure or accident; ⑧ Breakage or damage that could not be attributed to the product itself. Once met these situations above, you should seek solutions from the related responsible parties and Godox assumes no responsibility. The damage caused by parts, accessories and software that beyond the warranty period or scope is not included in our maintenance scope. The normal discoloration, abrasion and consumption are not the breakage within the maintenance scope.
Maintenance and Service Support Information
The warranty period and service types of products are implemented according to the following Product Maintenance Information:
| Product Type | Name | Maintenance Period(month) | Warranty Service Type |
| Parts | Circuit board | 12 | Customer sends the product to designated site |
| Battery | 3 | Customer sends the product to designated site | |
| Electrical parts e.gbattery charger, etc. | 12 | Customer sends the product to designated site | |
| Other Items | Lamp body, lamp cover, locking device, package, etc. | No | Without warranty |

Wechat Official Account 神牛微信公众号
深圳市神牛摄影器材有限公司
GODOX Photo Equipment Co., Ltd.
Add.: Building 2, Yaochuan Industrial Zone, Tangwei Community, Fuhai Street, Bao'an District, Shenzhen 518103, China Tel: +86-755-29609320(8062) Fax: +86-755-25723423 E-mail: godox@godox.com