
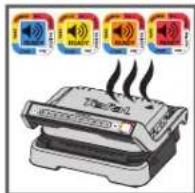
Optigrill+ GC774D - Waffle Maker TEFAL - Free user manual and instructions
Find the device manual for free Optigrill+ GC774D TEFAL in PDF.

User questions about Optigrill+ GC774D TEFAL
0 question about this device. Answer the ones you know or ask your own.
Ask a new question about this device
Download the instructions for your Waffle Maker in PDF format for free! Find your manual Optigrill+ GC774D - TEFAL and take your electronic device back in hand. On this page are published all the documents necessary for the use of your device. Optigrill+ GC774D by TEFAL.
USER MANUAL Optigrill+ GC774D TEFAL
Please read the "Use & Safety instructions" booklet carefully before first use.
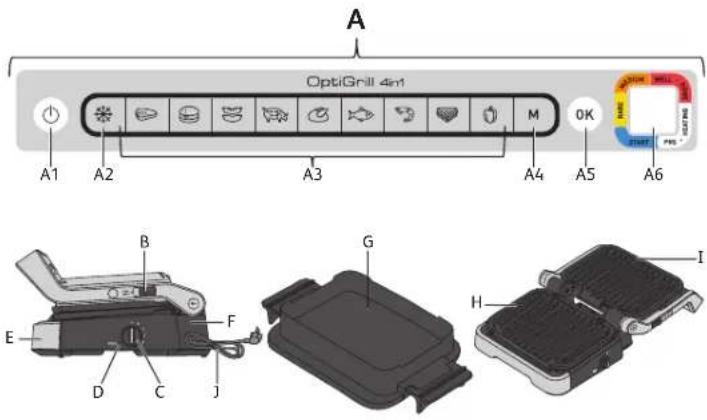
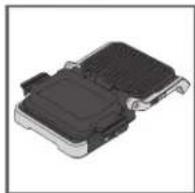
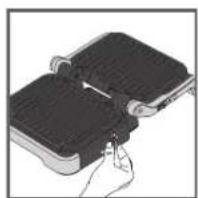
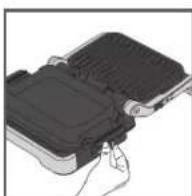
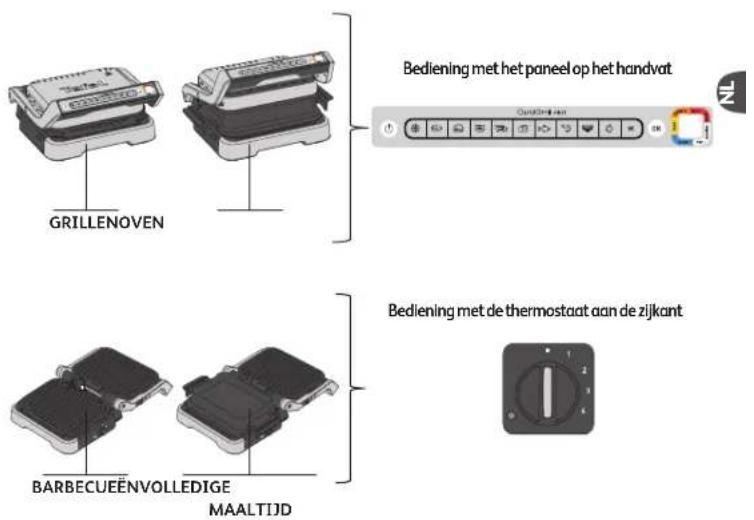
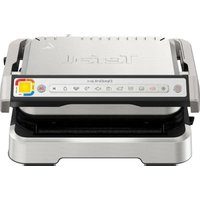
PRODUCT DESCRIPTION POSITIONS AND INTERFACE
A. Control panel
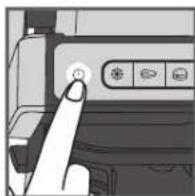
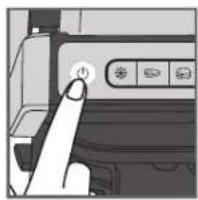
A1. On/Off button
A2. Frozen food function
A3. 9 automatic cooking programs
A4. Manual mode with 4 temperatures
A5. Confirm selection and start preheating
A6. Cooking level indicator
B. Release latch for barbecue and complete meal positions
C. Side thermostat for barbecue and complete meal positions
D. Indicator light for barbecue and complete meal positions
E. Front drip tray
F. Back drip tray
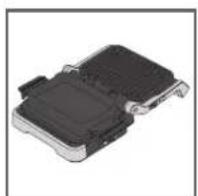
G. Baking tray
H. Bottom plate
I. Top plate
1. Power cord
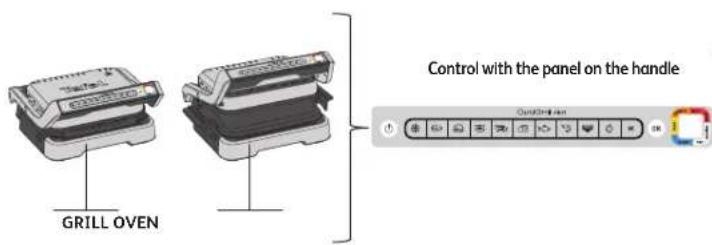
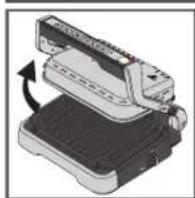
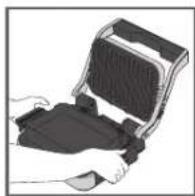
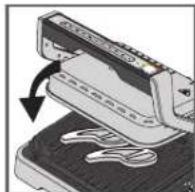
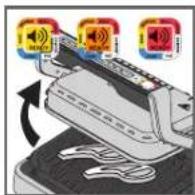
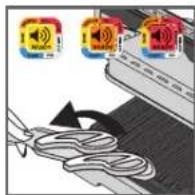
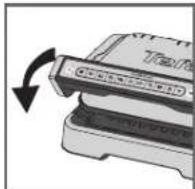
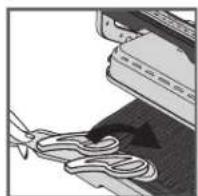
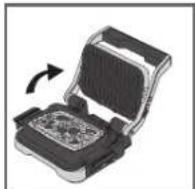
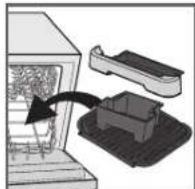
CHANGE POSITION
natural_image
Illustration of a mechanical device with a rotating arrow indicating rotation (no text or symbols)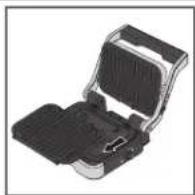
Change to oven position:
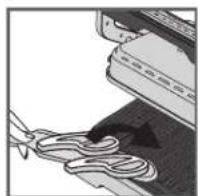
Open the grill, remove the lower grill plate and replace with the baking tray.
Caution: The baking tray is placed on the grill without being locked into place.
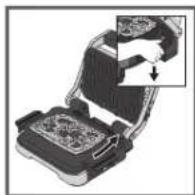
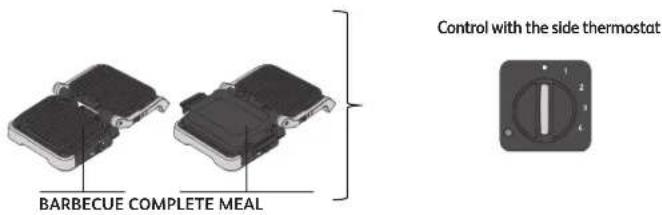
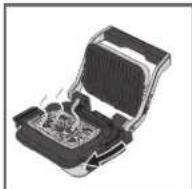
Change to barbecue position:
When opening the grill, hold the latch up and bring the handle to the 180° open barbecue position.
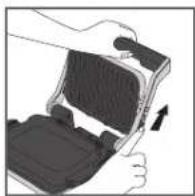
Change to complete meal position:
Plug the baking tray in place of the lower plate, then open the grill to the 180° position following the steps above.
Caution: Check that the thermostat on the side is on • before opening the grill in barbecue or complete meal position. If the thermostat is not on •, the grill will start heating up and will notify you of this with a beep.
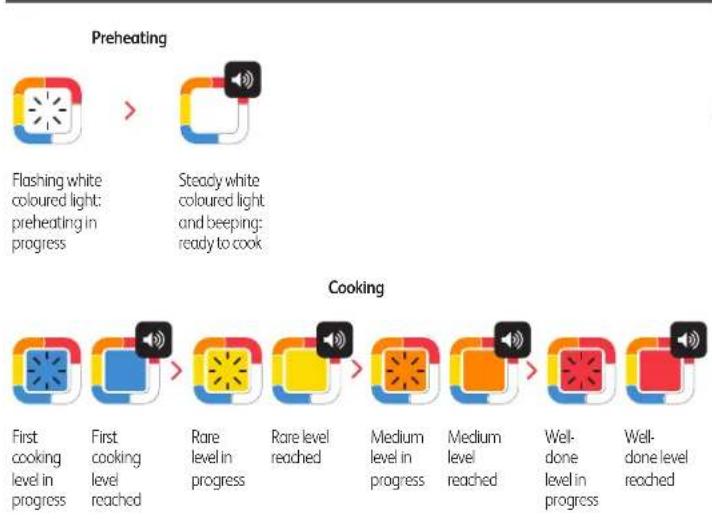
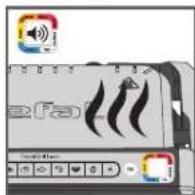
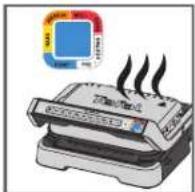
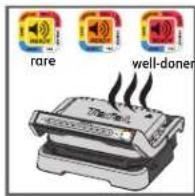
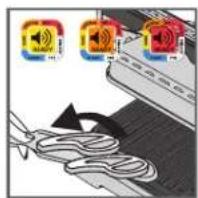
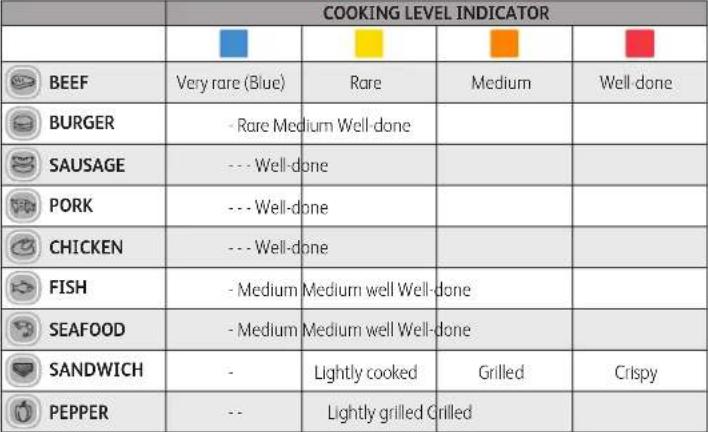
COOKING LEVEL INDICATOR
flowchart
graph LR
    A["Flashing white coloured light: preheating in progress"] --> B["Steady white coloured light and beeping: ready to cook"]
    C["First cooking level in progress"] --> D["First cooking level reached"]
    E["Rare level in progress"] --> F["Rare level reached"]
    G["Medium level in progress"] --> H["Medium level reached"]
    I["Well-done level in progress"] --> J["Well-done level reached"]
For each automatic program, Optigrill lets you know when your food has reached the desired cooking level. When a cooking level is reached, the grill beeps to notify you.
BEFORE FIRST USE
1
2

3
4
5
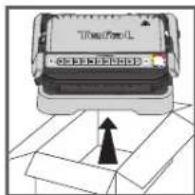
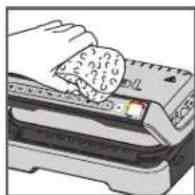
- Remove all packaging materials, stickers and accessories from the inside and the outside of the appliance. Additional colour ring stickers are provided. You can stick your preferred language on the original colour ring.
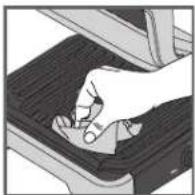
- Before using for the first time, thoroughly clean the plates with warm water and a little dishwashing liquid, rinse and dry thoroughly.
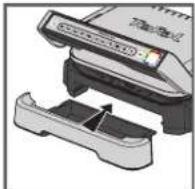
- Position the removable drip trays at the front and at the back of the appliance.
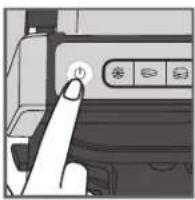
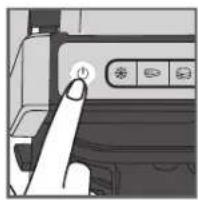
- Make sure that the upper and lower plates are correctly positioned in the product. Do not activate preheating without the plates. Connect the appliance to the mains supply (the cable must be completely unwound).
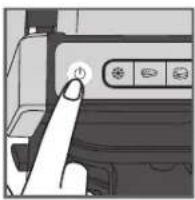
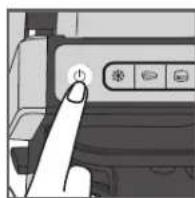
- Press the on/off button.
Caution: Make sure there is no food between the plates
1. GRILL POSITION
A) USING AN AUTOMATIC PROGRAM
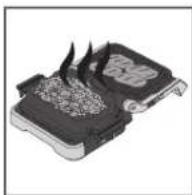
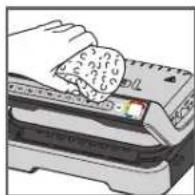
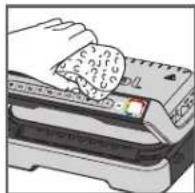
9 automatic programs: red meat, burger, sausage, pork, chicken, fish, seafood, sandwich, pepper


1

2

3
4
5
- If the food you wish to cook is frozen, press the corresponding button. This function is only available when cooking with the automatic programs, not in manual mode.
- Select the appropriate cooking program according to the type of food you wish to cook.
Tip, especially for meat: The cooking results on the automatic programs may vary depending on origin, cut and quality of the food being cooked, the programs have been set and tested for good quality food.
Similarly, the thickness of the meat must be taken into account during cooking; you should not cook foods with a thickness greater than 4 cm.
If you are uncertain about which cooking program to use, please refer to the cooking guide page 13.
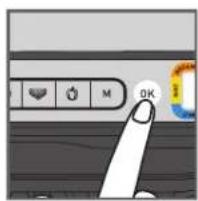
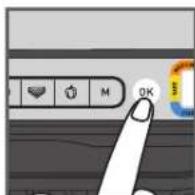
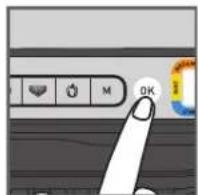
- Press the "OK" button: the appliance starts preheating and the cooking level indicator flashes white.
NB: If you have selected the wrong program, turn off the appliance and repeat the steps. - Wait for preheating to be complete.
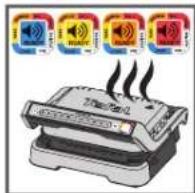
- When the level indicator stops flashing white and the grill beeps, the preheating is complete, the grill is ready to cook.
Comments: At the end of preheating, if the appliance remains closed, the safety system will turn off the appliance after a while.
1. GRILL POSITION

6
7
8
- Open the grill and place the food on the cooking plate.
Comments: If the appliance remains open for too long, the safety system will turn off the appliance automatically after a while.
- Close the appliance to start the cooking cycle. The cooking level indicator turns blue to indicate the cooking is in progress (for the best results, do not open or move your food during the cooking process). The appliance automatically adjusts the cooking cycle (time and temperature) according to the food thickness and quantity.
Note for very thin pieces of food: Close the appliance, the button OK will flash and the indicator will stay steady white until you press OK. Press OK to ensure the appliance recognizes the food and that the cooking cycle starts.
- According to the level of cooking, the indicator light changes color. While cooking is in progress, a beep alerts you each time a cooking level is reached. When the indicator light is yellow with a beep, food is rare, orange with a beep, food is medium and red with a beep, food is well done.
N.B.: If you like your meat very rare, remove the meat when the cooking level indicator reaches steady blue.
Please note, especially on meat, it is normal that cooking results vary depending on type, quality and origin of food.
1. GRILL POSITION
9
10
- When the color corresponding to your desired cooking level becomes steady and the beep sounds, open the appliance and remove your food.
Note: If you want to cook food to different personal tastes, open the grill and remove the food when it has reached the desired level and then close the grill and continue cooking the other food. The program will continue its cooking cycle until it reaches the final level.
- When finished cooking, remove food and close the appliance. The control panel will light up and set itself to 'choice of program' mode.
Comment: The security system will turn off automatically after a while if no program selection is made
Keep warm function
Once the red level is reached, the cooking is finished, the appliance automatically activates the keep warm function, the indicator light is red, and the device begins to beep every 20 seconds. If food is left on the grill, it will continue to cook while the cooking plates cool. You may deactivate the beep by pressing the button "OK".
Note : The security system will power off the appliance automatically after a while.
Cooking a second batch straight away:
Once your first batch of food has finished cooking;
a) Make sure that the appliance is closed, and that no food is remaining inside.
b) Select the cooking program (this step is necessary even if the program is the same as for the foods you have just finished cooking).
c) Press the button "OK" to begin preheating. While preheating, the color level indicator will flash white.
d) Once preheating is complete, the appliance will beep, and the indicator light will be steady white.
e) The appliance is ready to be used once preheating is complete. Open the grill and place the food inside the appliance.
Important:
- Please note that preheating is required for each new batch. Before preheating, make sure that the appliance is closed, and that no food is remaining inside. Wait for preheating to finish before opening the grill and placing food inside.
- If the new preheating cycle is activated immediately after the end of the previous cycle, the preheating time will be reduced.
1. GRILL POSITION
B) USING THE MANUAL MODE
1
2
3
4

5
6
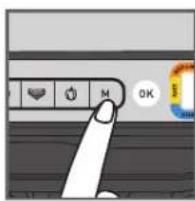
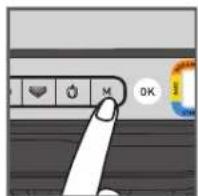
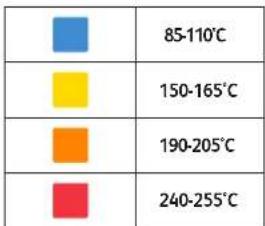
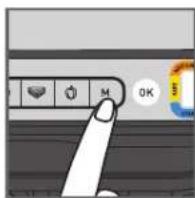
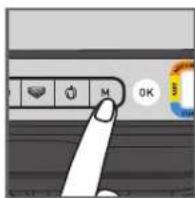
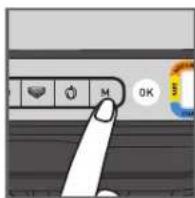
- Select the manual mode and the cooking temperature by clicking on M several times until the colour matches your desired temperature:
| 110-125°C | |
| 180-195°C | |
| 220-235°C | |
| 255-275°C |
- Press OK to start preheating. The cooking level indicator flashes with the selected colour: preheating in progress. Wait until preheating is finished.
- When the desired temperature is reached, the light stops flashing and the grill beeps: the grill is ready to cook.
- Add the food on the grill, the cooking process begins.
- You can adjust the temperature during cooking.
- Watch the food cook and remove it when you consider it cooked as desired.
1. GRILL POSITION
C) COOKING GUIDE
9 AUTOMATIC COOKING PROGRAMS
 |
MANUAL MODE IN GRILL POSITION
| from 180°C to 195°C | from 220°C to 235°C | from 255°C to 275°C | |
| POTATOES | |||
| ZUCCHINI / SQUASH | |||
| EGGPLANT | |||
| TOMATOES | |||
| ASPARAGUS | |||
| MUSHROOMS | |||
| ONIONS | |||
| BROCOLI | |||
| BABY CARROTS | |||
| FENNEL | |||
| SWEET POTATOES | |||
| APPLE SLICES | |||
| PINEAPPLE | |||
| PEACH |
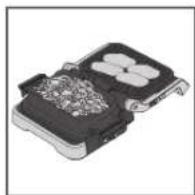
2. OVEN POSITION
1
2

3

4
5
6
7
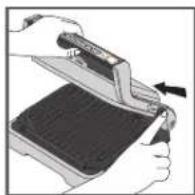
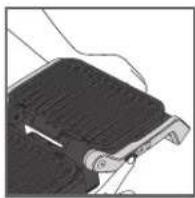
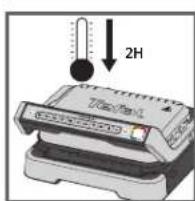
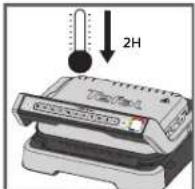
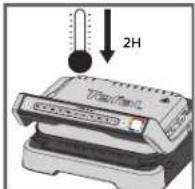
- If your OptiGrill is already on and you want to use the baking tray, unplug the grill and let it cool down for at least 2 hours.
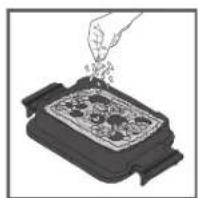
- Put the ingredients in the baking tray.
- Open the grill, remove the lower grill plate and replace with your baking tray.
CAUTION: Be careful that upper grill plate is correctly installed in the appliance.
- Close the grill and press the On/Off button.
- Select the manual mode and the cooking temperature by clicking on M several times until the colour matches your desired temperature:
- Begin preheating by pressing the OK button.
- When the desired temperature is reached, the grill will beep, and the cooking process will begin.
2. OVEN POSITION

8
9
10
- You can adjust the temperature during the cooking progress.
- Watch the food cook. When you consider it cooked as desired, end the cooking by pressing the ON/OFF button. All buttons switch off, the grill stops heating/cooking.
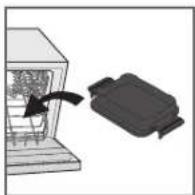
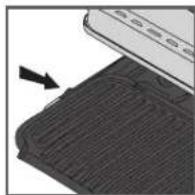
- Open the grill and remove the baking tray from the grill using its handles.
CAUTION: Hot surfaces, the use of gloves is recommended. The baking tray is hot, make sure to place it on an adopted surface. - The baking tray can go in the dishwasher.
11
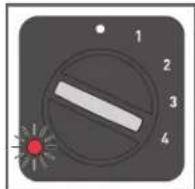
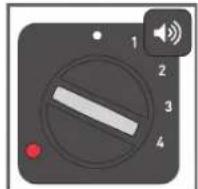
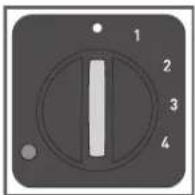
3. BARBECUE POSITION
1
2
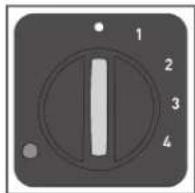
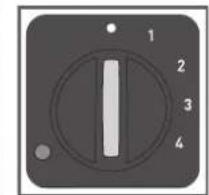
- Open the grill in barbecue position. The cooking is managed with the side thermostat.
- Select the desired temperature setting. The thermostat sets the same cooking temperature for both plates:
| • thermostat off |
| 1: 80-100°C |
| 2: 130-160°C |
| 3: 160-190°C |
| 4: 180-220°C |
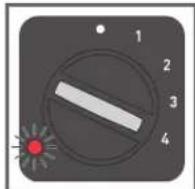
3
4
- The side light indicator flashes red during preheating.
- When the light indicator becomes steady red and the grill beeps, the grill is ready to use.
- Add food on the grill.
- Watch the food cook and remove it once it is done.
- Turn off the appliance by setting the thermostat to •.
Comments:
- You can change the temperature during cooking. If it is changed during cooking, the grill will adjust the temperature to the new setting.
- If you cook food on one plate only, use the top one.
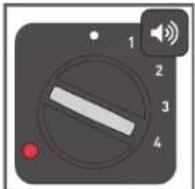
4. COMPLETE MEAL POSITION
1
2
3
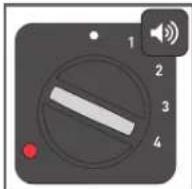
4
5
6
7
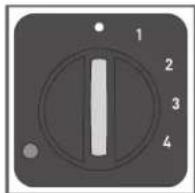
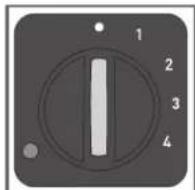
- Put the grill in complete meal position. The cooking is managed with the side thermostat.
- Select the desired temperature setting. The thermostat controls the cooking temperature for both plates.
| • thermostat off |
| 1: 80-100°C |
| 2: 130-160°C |
| 3: 160-190°C |
| 4: 180-220°C |
- The side light indicator flashes red during preheating.
- When the light indicator becomes steady red and the grill beeps, the grill is ready to use.
- Add food on the grill and in the baking tray.
- Watch the food cook and remove it once it is done.
- Turn off the appliance by setting the thermostat to •.
Comment:
- You can change the temperature during cooking. If it is changed during cooking, the grill will adjust the temperature to the new setting.
Tips:
If your side dish takes longer to cook than what you're grilling, you can also start cooking in oven position. If you are doing this, please refer to page 14 and follow steps 1 to 7. When the food is cooked as desired, open your grill in barbecue position. The grill automatically switches to the thermostat on the side. Choose the desired temperature setting using the thermostat. When the grill plate has preheated, put the food on it.
7
END OF USE
natural_image
Close-up of a circular industrial control knob with numbered dial (no text or symbols visible)112
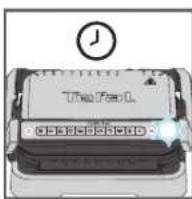
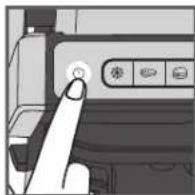
- Turn off the appliance:
- Press the on/off button on the handle in grill/oven positions.
- Set the side thermostat to • in barbecue/complete meal positions.
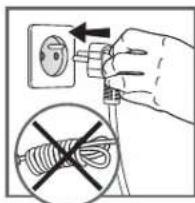
- Unplug the appliance from outlet.
- Allow to cool for at least 2 hours. To avoid accidental burns, allow grill to cool thoroughly before cleaning.

2
3
CLEANING
3
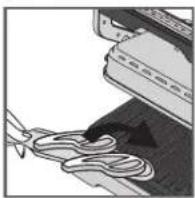
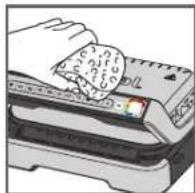
- Before cleaning, unlock and remove the plates, drip trays, and baking tray to prevent damage to the cooking surface. Drain the juice drip trays and wash them in mild soapy water, then dry thoroughly with a paper towel.
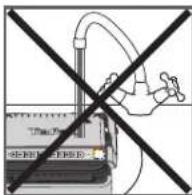
- Do not immerse the body of grill in water or any other liquid.
- The appliance and its cord cannot be placed in the dishwasher. The heating elements, visible and accessible parts, should not be cleaned after removing the plates. If they are very dirty, wait until the appliance has completely cooled down and clean them with a dry cloth.
- If you do not wish to wash the cooking plates, drip trays, and baking tray in the dishwasher, use hot water and a little washing up liquid to clean, then rinse thoroughly to remove any residue. Wipe them carefully with a paper towel.
Do not use metal scouring pads, steel wool or abrasive cleaners to clean any part of the grill, use only nylon or non-metallic cleaning pads.
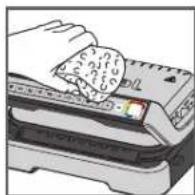
- To clean the grill cover, wipe with a warm, wet sponge and dry with a soft, dry cloth.
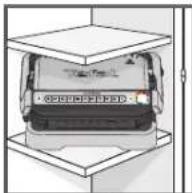
- Always make sure the grill is clean and dry before storing.
Any repairs must be carried out by an approved service representative.
natural_image
Illustration of a printer with a magnified inset showing internal structure (no text or symbols)4
5

6
Troubleshooting guide
| Problem | Cause Solution | |
| Button blinking+ Indicator light solid blue+ Button OK blinking | Switching on the appliance or starting an automatic cooking cycle with food and without plates preheating (manual mode is automatically activated). | 2 possible options:Choose the temperature setting by pressing the button and then press OK. Allow to cook, but you must monitor the cooking (manual mode).stop the appliance, remove the food, close the appliance properly, re-program the appliance and wait until end of preheating. |
| The appliance stops during the cycle of pre-heating or cooking. | The appliance has been kept open for too long while cooking.The appliance has been idle too long after the end of warm up or keep warm. | Disconnect the appliance from the outlet and leave for 2-3 mins., restart the process. The next time you use the appliance, make sure you open and close it quick for best cooking results. If the problem occurs again contact your local Tefal customer service. |
| The indicator light will blink purple+ Button 📄 / 🐃/ blinking+ Intermittent beeping | Appliance failure.Appliance stored or used in a room that is too cold. | Disconnect and reconnect your appliance and immediately restart a preheat cycle. If the problem persists, contact your Customer Service. |
| The device does not beep. | ||
| The indicator light will blink purple+ Button 🐄/ blinking+ Continuous beeping | Appliance failure. Unplug the appliance and contact customer service. | |
| After preheating, I placed the food inside and closed the appliance,but the indicator light stays white and cooking does not begin. | The quantity of food inside the appliance is greater than 4 cm. | The quantity of food should not exceed 4 cm. |
| The grill was not opened completely when placing the food inside. | Open the grill completely and close it again. | |
| The appliance does not detect food inside The quantity of food is insufficient, "OK" is blinking. | Confirm cooking activation by pressing the button OK. | |
| The appliance will activate in manual mode+ The indicator light will blink red buttons1M temp control and OK light fixed | Preheating time was cut short. | Monitor the cooking periodically (for use in manual mode).OrStop the grill, remove food, close the grill, select the new cooking program you wish to use and wait for the preheating cycle to finish. |
INHALTSVERZEICHNIS
natural_image
Illustration of a mechanical device with a rotating arrow indicating rotation (no text or symbols)
4
5
1
2

3
4
5

6
natural_image
Illustration of a printer with a magnified inset showing internal components (no text or symbols visible)4
5

6
STANDEN EN INTERFACES
natural_image
Illustration of a mechanical device with a rotating arrow indicating rotation (no text or symbols)
flowchart
graph LR
    A["Orange Square icon"] --> B["Blue Square icon"]
    B --> C["Yellow Starburst icon"]
    C --> D["Orange Square icon"]
    D --> E["Red Square icon"]
    E --> F["Green Audio Signal"]
Eerste
goringsniveau
in uitvoering
Eerste
garingsniveau
bereikt
Niveau
"Rare" in
uitvoering
Niveau
"Rare"
bereikt
Niveau
"Medium
rare" in
uitvoering
Niveau
"Medium
rare
bereikt
Niveau
"Wel
done" in
uitvoering
Niveau
Well
done"
bereikt
4
natural_image
Close-up of a finger pressing a button on a printer (no visible text or symbols)5
1

2

3

4
5

6
natural_image
Close-up of a black plastic electronic component with multiple circular slots and metallic contacts (no visible text or symbols)
7
6
7
natural_image
Close-up of a hand pressing a button on a device (no visible text or symbols)1

2

3
natural_image
Diagram of a printer with a magnified inset showing internal components (no text or symbols)4
5

6
natural_image
Illustration of a mechanical device with a rotating arrow indicating rotation (no text or symbols)4
natural_image
Close-up of a finger pressing a button on a printer (no visible text or symbols)5
1

2
3

4
5

6
natural_image
Close-up of a finger pressing a button on a device (no visible text or symbols)1


2
3
natural_image
Diagram of a printer with a magnified inset showing internal components (no text or symbols)4
5

6
natural_image
Illustration of a mechanical device with a rotating arrow indicating rotation (no text or symbols)flowchart
graph LR
    A["Orange Square"] --> B["Blue Square"]
    B --> C["Yellow Star"]
    C --> D["Blue Square"]
    D --> E["Orange Square"]
    E --> F["Red Square"]
    F --> G["Blue Square"]
    G --> H["Orange Square"]
    H --> I["Blue Square"]
Primo
4

natural_image
Close-up of a finger pressing a button on a printer (no visible text or symbols)5
natural_image
Illustration of a printer with a magnified inset showing internal structure (no text or symbols)4
5
6

- PRODUCT DESCRIPTION POSITIONS AND INTERFACE
- BEFORE FIRST USE
- GRILL POSITION
- A) USING AN AUTOMATIC PROGRAM
- Keep warm function
- Cooking a second batch straight away:
- Important:
- OVEN POSITION
- BARBECUE POSITION
- Comments:
- COMPLETE MEAL POSITION
- Comment:
- Tips:
- END OF USE
- CLEANING
- INHALTSVERZEICHNIS
- STANDEN EN INTERFACES
Brand : TEFAL
Model : Optigrill+ GC774D
Category : Waffle Maker