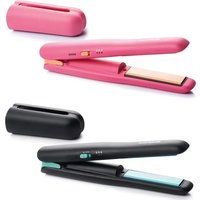
SGEA 3.6 A1 - Hair straightener SILVERCREST - Free user manual and instructions
Find the device manual for free SGEA 3.6 A1 SILVERCREST in PDF.


| Product Type | Cordless Hair Straightener |
| Brand | SilverCrest |
| Model | SGEA 3.6 A1 |
| Article Number (IAN) | 472280_2407 |
| Power Supply | Integrated rechargeable lithium-ion battery, charging via USB-C (5 V, 2 A max) |
| Battery Capacity | 4000 mAh / 3.6 V (14.4 Wh) |
| Adjustable Temperatures | 3 levels: 160 °C (fine hair), 180 °C (normal hair), 200 °C (pronounced effects) |
| Plate Material | Ceramic |
| Auto Shut-off Function | Yes, after approx. 3 minutes if the device is locked and switched on |
| Safety Lock | Yes, to close the plates together and prevent burns |
| Included Accessories | Protective cover, USB charging cable (USB-A to USB-C), instruction manual |
| Care and Cleaning | Clean cooled plates with a slightly damp cloth; protective cover washable in lukewarm water |
| Safety | Low-voltage protection, do not use near water, auto shut-off |
| Replaceable Battery | No, integrated battery not user-replaceable |
| Warranty | 3 years |
| After-Sales Service France | Tel. 0800 919270, Email: kompernass@lidl.fr |
| After-Sales Service Belgium | Tel. 0800 12089, Email: kompernass@lidl.be |
| Intended Use | Only for straightening human hair, private use |
Frequently Asked Questions - SGEA 3.6 A1 SILVERCREST
User questions about SGEA 3.6 A1 SILVERCREST
0 question about this device. Answer the ones you know or ask your own.
Ask a new question about this device
Download the instructions for your Hair straightener in PDF format for free! Find your manual SGEA 3.6 A1 - SILVERCREST and take your electronic device back in hand. On this page are published all the documents necessary for the use of your device. SGEA 3.6 A1 by SILVERCREST.
USER MANUAL SGEA 3.6 A1 SILVERCREST
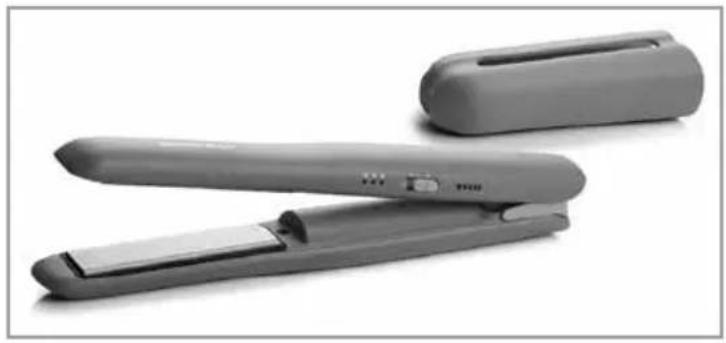
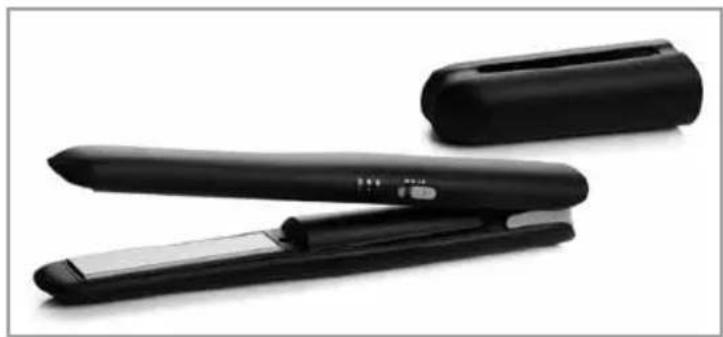
CORDLESS HAIR STRAIGHTENER / AKKU-HAARGLÄTTER / LISSEUR SANS FIL SGEA 3.6 A1
GB IE
Operating instructions
FR BE
LISSEUR SANS FIL
Mode d'emploi
CZ
AKU ŽEHLIČKA NA VLASY
Návod k obsluze
SK
AKU ŽEHLIČKA NA VLASY
Návod na obsluhu
DK
GLATTEJERN MED GENOPLADELIGT BATTERI
Before reading, unfold the page containing the illustrations and familiarise yourself with all functions of the device.
DE AT CH
GB/IE Operating instructions Page 1
Contents
Introduction 2
Intended use 2
Warnings and symbols used 2
Notes on trademarks 3
Package contents....3
Appliance description 3
Technical data 3
Safety information 3
Before first use ....6
Charging the integrated battery 6
Use....7
Before straightening 7
Switching on/off and selecting a heat level 7
Straightening hair 8
Cleaning 9
Storage 9
Troubleshooting 9
Disposal....10
Disposal of the appliance 10
Disposal of the packaging 10
KompernassHandelsGmbHwarranty....11
Service 12
Importer 12
Introduction
Congratulations on the purchase of your new appliance. You have selected a high-quality product.

The operating instructions are part of this product. They contain important
information about safety, usage and disposal.
Before using the product, please familiarise yourself with all instructions regarding safety and use. Use the product only as described and for the specified range of applications. Please also pass on all documents to any future owner.
Intended use
The appliance is intended for straightening human hair. Never use it for wigs and hairpieces made of synthetic material or on animals. This appliance is intended exclusively for private use. This appliance is not suitable for commercial applications.
Warnings and symbols used
The following warnings and symbols are used in these operating instructions, on the packaging and on the appliance (where applicable):
| DANGER! A warning with this symbol and the signal word „DANGER” indicates an imminently hazardous situation that will result in death or serious injury if not avoided. | |
| WARNING! A warning with this symbol and the signal word „WARNING” indicates a potentially hazardous situation that could result in death or serious injury if not avoided. |
| CAUTION! A warning with this symbol and the signal word „CAUTION“ indicates a potentially hazardous situation that could result in a minor or moderate injury if not avoided. | |
| ATTENTION! A warning with this symbol and the signal word „ATTENTION“ indicates a potential situation that could result in property damage if not avoided. | |
| A note identifies additional information that facilitates the use of the appliance. | |
| DC current/voltage | |
| Use the device indoors only. | |
| Protection through extra-low voltage. | |
| Do not use the appliance near water. | |
| Removable power supply | |
| Read the instructions. |
Notes on trademarks
USB ® is a registered trademark of USB Implementers Forum, Inc.
The SilverCrest trademark and the retail name are the property of their respective owner. All other names and products may be trademarks or registered trademarks of their respective owner.
Package contents
The appliance is supplied with the following components as standard:
• Cordless hair straightener
- Protective cap
- Charging cable
- Instructions for use
■ Unpack all parts of the appliance from the packaging and remove all packaging material. Check the package for completeness and signs of visible damage.
If the delivery is incomplete or damage has occurred as a result of defective packaging or during transport, contact the customer service hotline (see Service section).
Safety information
DANGER!
■ For charging, connect the USB power adapter only to a properly installed and earthed power outlet. Ensure that the power supply corresponds with the specifications on the type plate of the USB power adapter.
In the event of a malfunction and before cleaning the appliance, disconnect the USB power adapter from the power outlet and the charging cable from the appliance.
■ During charging, make sure that the charging cable does not become wet or damp. Route the cable in such a way that it cannot get caught or damaged.
Appliance description
① Heating plates
② Indicator lights with operational readiness indicator
③ ON/OFF switch with temperature level setting
4 Charge level indicator
⑤ USB-C port
6 Lock
⑦ USB charging cable (USB-A to USB-C)
8 Protective cap
Technical data
| Input voltage 5,0 V | == |
| Input current Max. 2,0 A | |
| Integrated battery (Li-ion) | 4000 mAh / 3.6 V =/14.4 Wh |
| Protection class | III / III |
■ To prevent risks, stop using the appliance or accessory immediately if it is damaged.
■ Never touch the appliance or the charging cable with wet hands.
■ Never immerse the appliance in water or other liquids!
■ After every charging, unplug the USB power adapter from the power outlet and the charging cable from the appliance.
■ Switch off the appliance after each use, before cleaning it and before charging.
■ Do not operate the appliance if it has been dropped or is damaged in any way. Have the appliance checked and/or repaired by a qualified technician, if necessary.
■ Do not open the housing or attempt to repair the appliance yourself. This can lead to hazards and also invalidates the warranty. Defective appliances should be repaired by authorized specialists only.
■ Never use the appliance near water, especially in vicinity of sinks, baths or other similar containers. The proximity of water is hazardous, even if the appliance is switched off. Always disconnect the plug from the power outlet after use. For additional protection, we recommend that you install a residual current circuit breaker with an activation power rating of no more than 30 mA for the power circuit in the bathroom. Ask your electrician for advice.
WARNING!
■ Never leave children unattended with the packaging material. Keep children away from the packaging. Risk of suffocation!
■ Do not allow children to play with the appliance.
■ This appliance may be used by children aged 8 and above and persons with limited physical, sensory or mental capabilities or lack of experience and knowledge, provided that they are under supervision or have been told how to use the appliance safely and are aware of the potential risks.
■ Cleaning and user maintenance tasks may not be carried out by children unless they are supervised.
■ Use only the original accessories for this appliance. Accessory parts from other manufacturers may not be suitable, and this may lead to risks!
■ The appliance heats up during use.
Always hold the appliance by its handle and not by the heating plates when it is hot!
■ Never leave a switched-on appliance unsupervised.
! ATTENTION!
■ Use the appliance only indoors.
■ Use only the supplied charging cable to charge the appliance.
- Charge the appliance with a USB power adapter with protection class II that is approved for use with household appliances and has an output voltage of 5 V==and a maximum output current of 2 A.
■ When using a USB power adapter, the power outlet used must always be easily accessible so that the USB power adapter can be quickly removed from the outlet in a dangerous situation. You should also observe the operating instructions for the USB power adapter.
■ Do not wrap the charging cable around the appliance, and protect it from being damaged.
■ Do not use any aggressive cleaning liquids or solvents to clean the appliance. They could damage the surface.
■ Only ever place the appliance on a non-flammable surface during operation and for cooling down. This must also be observed for the heating process!
⚠ WARNING! SAFETY GUIDELINES FOR RECHARGEABLE BATTERIES
■ The product is equipped or supplied with a lithium-ion battery.
■ This appliance contains a battery that cannot be replaced by the user.
■ The appliance has an integrated lithium-ion battery. Incorrect handling can lead to fire, explosions, leakage of dangerous substances or other hazards!
■ Do not throw the appliance into an open fire.
■ Do not open or short-circuit the battery. This could cause the battery to overheat and explode. There is a risk of fire!
■ Never store the device when it is discharged. Prolonged storage in a discharged state can cause permanent damage to the battery. If the device is stored for a longer period of time, the charge level of the battery must be checked regularly. The optimum charge level is between 50% and 80%.
Before first use
1) Charge the battery as described in the section Charging the integrated battery.
2) We recommend cleaning the appliance and all parts as described in the section Cleaning before using them for the first time. This will remove any residues left from the production process.
The appliance is now ready for use.
Charging the integrated battery
DANGER!
Risk of fatal electric shock!
▶ Charge the appliance indoors in dry locations away from water. Do not charge the appliance next to or above a sink filled with water.
(i) Note
▶ Before using the appliance for the first time, the integrated battery must be completely charged.
The USB charging cable ⑦ and USB-C port ⑤ are used only to charge the integrated battery. They are not suitable for data transmission.
Charge the appliance with a USB power adapter with protection class II that is approved for use with household appliances and has an output voltage of 5 V== and a maximum output current of 2 A.
Use only the supplied USB charging cable ⑦ to charge the integrated battery. Disconnect the USB charging cable ⑦ from the appliance when charging is complete.
The appliance may not be operated during charging.
| Charge level indicator 4 | Charge level / measures |
| The last bar flashes. USB charging cable 7 is not connected. | Battery charge low. Recharge immediately. |
| One bar flashes, others may light up continuously. USB charging cable 7 is connected. | Battery is charging, charging progress is displayed. |
| All bars light up constantly. | Battery is fully charged. Remove the USB charging cable 7. |
The charge level of the battery is indicated by constant illumination of the bars. This means:
1 bar: 20%, 2 bars: 40%, 3 bars: 60%, 4 bars: 80%, 5 bars: 100%.
1) Make sure that the mark on the ON/OFF switch ③ points to "O", meaning that the appliance is switched off.
2) Connect the USB-A plug of the USB charging cable ⑦ to a suitable USB power adapter.
3) Connect the USB-C plug of the USB charging cable ⑦ to the USB-C port ⑤ on the appliance.
4) Plug the USB power adapter into a power outlet. The charge level indicator ④ flashes to show the charging progress.
5) The battery is charged as soon as all bars of the charge level indicator ④ light up constantly.
6) Pull the USB power adapter out of the power outlet and disconnect the USB charging cable ⑦ from the appliance.
Use
Before straightening
The hair should be clean, dry and free of styling products. This does not apply to special products that contain heat protection or assist the straightening of hair when exposed to heat.
■ Comb the hair thoroughly before straightening so that there are no knots in it.
Switching on/off and selecting a heat level
ATTENTION!
▶ Only ever place the appliance on a non-flammable surface during operation and for cooling down. This must also be observed for the heating process!
1) If necessary, remove the protective cap ⑧.
2) The appliance is secured by the lock Ⓐ. Press the heating plates ① together and slide the lock ⑥ from the 🔔 symbol to the 🔔 symbol to unlock. This allows the appliance to be opened further.
3) To switch on the appliance, slide the ON/OFF switch ③ from "O" to the desired heating level. Choose between the following settings:
| Level | Temperature | Recommended application |
| "I" 160°C For fine or barely wavy hair. | ||
| "II" 180°C For normal hair. | ||
| "III" 200°C For stronger styling effects. | ||
The indicator lights ② show you the selected temperature level and operational readiness. The heating plates ① start to heat up.
i Note
▶ If you have dyed or damaged hair, select a low temperature setting. Please note that too frequent or too intensive straightening with heat can damage your hair!
4) Allow the appliance to heat up. The indicator light ② flashes during the heating process. Start smoothing as soon as the indicator light ② lights up constantly.
5) To switch off the appliance, slide the ON/OFF switch ③ back to "O". The indicator light ② goes out.
6) Allow the appliance to cool down before storage or cleaning! Then press the heating plates ① together and slide the lock ⑥ from the 🔔 symbol to the 🔔 symbol to lock the appliance.
Put the protective cap ⑧ on the appliance so that the open sides are in contact with the heating plates ① (Fig. 1)
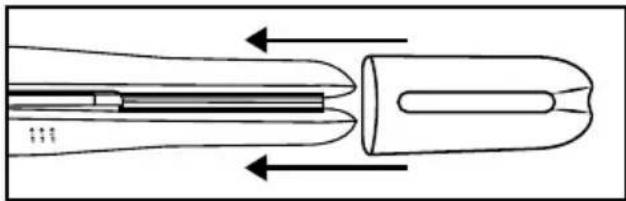
Fig. 1
i Note
▶ The appliance comes with an automatic switch-off function:
If the appliance is secured by the lock 6, but still switched on, the automatic switch-off function is triggered after approximately 3 minutes. The appliance then switches itself off automatically.
The automatic switch-off is a safety function only. It is not intended as a replacement for switching the appliance off properly by using the ON/OFF switch ③! If you'd like to continue straightening, the appliance has to be turned back on.
Straightening hair
(i) Note
The heating plates ① must be free of dirt. If necessary, clean them before use as described in the section Cleaning.
1) Prepare the hair as described in Before straightening.
2) Start with the lower sections of hair at the back of your head if you want to straighten all the hair. If necessary, divide the hair into several sections and secure them with clips or similar. Then work your way forwards over the sides.
Separate a section of hair approx. 2 cm wide, hold the ends of the hair with one hand and pull the entire section taut.
!
CAUTION!
▶ Make sure that you do not touch your scalp or face with the heating plates ①. Never touch the heating plates ① or the upper part of the hair straightener during operation! Risk of burns!
3) Clamp the strand of hair near the scalp between the heating plates ① and press them together.
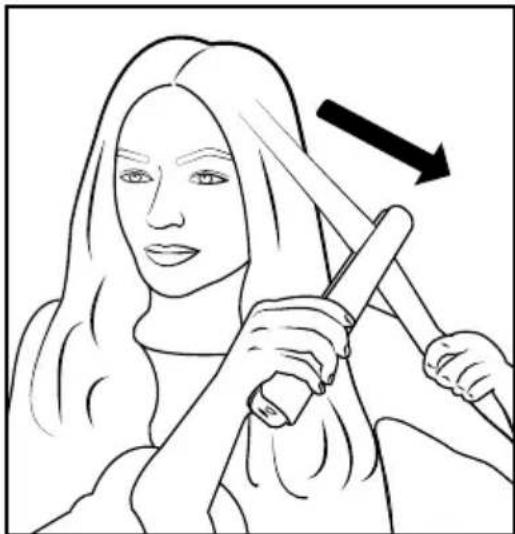
Fig. 2
Straighten the entire section of hair by pulling the appliance downwards from the roots to the ends (see Fig. 2). Do not stay in one place for longer than 2 seconds so as not to subject your
hair to excess stress. You can shape the ends of your hair slightly by turning the appliance inwards or outwards. Release the ends of your hair as you approach them with the appliance to avoid burning your fingers. Proceed in the same way with each individual strand you want to straighten.
4) When you have achieved the desired result, switch off the appliance.
5) Allow the appliance to cool down completely before cleaning or storage.
Cleaning
DANGER!
Risk of fatal injury from electrocution!
▶ Always unplug the USB power adapter from the power outlet and the charging cable from the appliance before cleaning!
▶ Never immerse the appliance and USB charging cable ⑦ in water or other liquids! Make sure that no water or moisture penetrates inside the appliance!
CAUTION!
▶ Allow the appliance to cool down before cleaning it. Risk of burns!
! ATTENTION!
▶ Do not use abrasive or caustic cleaning agents. They can corrode the surface and irreparably damage the appliance.
1) Wipe the appliance and the cooled heating plates ① with a slightly damp cloth.
2) For stubborn dirt use a mild detergent on the cloth. Remove cleaning agent residues with a slightly moistened cloth.
3) Wipe with a dry cloth and allow the appliance to dry thoroughly before reuse or storage.
4) Wash the protective cap ⑧ in lukewarm water with some washing-up liquid. The protective cap ⑧ must be completely dry before you use it again.
Storage
■ Store the appliance and its accessories in a dry and dust-free location. Lock the cooled appliance with the lock ⑥ and put on the protective cap ⑧.
- Charge the battery at regular intervals to ensure a long battery life.
■ Never store the device when it is discharged. Prolonged storage in a discharged state can cause permanent damage to the battery. If the device is stored for a longer period of time, the charge level of the battery must be checked regularly. The optimum charge level is between 50% and 80%.
Troubleshooting
| Problem Cause Solution | ||
| The appliance is not working. | The battery is empty. | Charge the battery. |
| The appliance is secured by the lock 6. | Unlock the lock 6. | |
| The automatic switch-off has been activated. | Switch the appliance off and on again. | |
| The appliance is defective. | Contact Customer Service. | |
| The hair does not straighten. | The appliance is not yet heated up. | Wait until the appliance has heated up. |
| The hair is singed. | The hair was between the heating plates 1 for too long. | Always pull the hair straightener steadily through the hair. Never stay in one place for more than 2 seconds! |
If you are unable to resolve the problem by following the above-mentioned suggestions, please contact Customer Service (see Service section).
Disposal
Applies only to France:

The product, its packaging and the operating instructions are recyclable. They are subject to an extended manufacturer responsibility and will be collected separately.
Disposal of the appliance
The adjacent symbol of a crossed-out dustbin means that this appliance is subject to Directive 2012/19/EU. This directive states that this appliance may not be disposed of in the normal household waste at the end of its useful life, but must be taken to specially set-up collection locations, recycling depots or disposal companies.
The disposal is free of charge for the user. Protect the environment and dispose of this appliance properly.
If your old appliance has stored any personal data, you are responsible for deleting it yourself before returning it.
If it is possible to do so without destroying the old appliance, remove the old batteries or rechargeable batteries before returning the appliance for disposal and take them to a separate collection point. In the case of permanently installed rechargeable batteries, you must indicate during disposal that the appliance contains a battery.
The integrated rechargeable battery in this appliance cannot be removed for disposal.

Your local community or municipal authorities can provide information on how to dispose of the worn-out product.
Disposal of the packaging

The packaging materials have been selected for their environmental friendliness and ease of disposal and are therefore recyclable.
Dispose of packaging materials that are no longer needed in accordance with applicable local regulations.
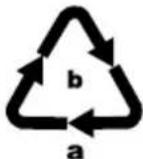
Dispose of the packaging in an environmentally friendly manner. Note the labelling on the packaging and separate the packaging
material components for disposal, if necessary. The packaging material is labelled with abbreviations (a) and numbers (b) with the following meanings: 1–7: plastics, 20–22: paper and cardboard, 80–98: composites.
Applies only to Spain:
The packaging contains paper and/or cardboard components.
The packaging contains plastic and/or metal components.
KompernassHandels GmbHwarranty
Dear Customer,
This appliance has a 3-year warranty valid from the date of purchase. If this product has any faults, you, the buyer, have certain statutory rights. Your statutory rights are not restricted in any way by the warranty described below.
Warranty conditions
The warranty period starts on the date of purchase. Please keep your receipt in a safe place. This will be required as proof of purchase.
If any material or manufacturing fault occurs within three years of the date of purchase of the product, we will either repair or replace the product for you or refund the purchase price (at our discretion). This warranty service requires that you present the defective appliance and the proof of purchase (receipt) within the three-year warranty period, along with a brief written description of the fault and of when it occurred.
If the defect is covered by the warranty, your product will either be repaired or replaced by us. The repair or replacement of a product does not signify the beginning of a new warranty period.
Warranty period and statutory claims for defects
The warranty period is not prolonged by repairs effected under the warranty. This also applies to replaced and repaired components. Any damage and defects present at the time of purchase must be reported immediately after unpacking. Repairs carried out after expiry of the warranty period shall be subject to a fee.
Scope of the warranty
This appliance has been manufactured in accordance with strict quality guidelines and inspected meticulously prior to delivery.
The warranty covers material faults or production faults. The warranty does not extend to product parts subject to normal wear and tear or to fragile parts which could be considered as consumable parts such as switches or parts made of glass.
The warranty does not apply if the product has been damaged, improperly used or improperly maintained. The directions in the operating instructions for the product regarding proper use of the product are to be strictly followed. Uses and actions that are discouraged in the operating instructions or which are warned against must be avoided.
This product is intended solely for private use and not for commercial purposes. The warranty shall be deemed void in cases of misuse or improper handling, use of force and modifications / repairs which have not been carried out by one of our authorised Service centres.
Warranty claim procedure
To ensure quick processing of your case, please observe the following instructions:
■ Please have the till receipt and the item number (IAN) 472280_2407 available as proof of purchase.
■ You will find the item number on the type plate on the product, an engraving on the product, on the front page of the operating instructions (below left) or on the sticker on the rear or bottom of the product.
If functional or other defects occur, please contact the service department listed either by telephone or by e-mail.
■ You can return a defective product to us free of charge to the service address that will be provided to you. Ensure that you enclose the proof of purchase (till receipt) and information about what the defect is and when it occurred.
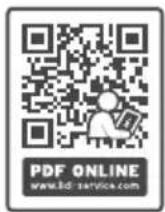
You can download these instructions along with many other manuals, product videos and installation software at www.lidl-service.com.
This QR code will take you directly to the Lidl service page (www.lidl-service.com) where you can open your operating instructions by entering the item number (IAN) 472280_2407.
Service
GB Service Great Britain
Tel.: 0800 404 7657
E-Mail: kompernass@lidl.co.uk
IE ServiceIreland
Tel.: 1800 101010
E-Mail: kompernass@lidl.ie
IAN 472280_2407
Importer
Please note that the following address is not the service address. Please use the service address provided in the operating instructions.
KOMPERNASS HANDELS GMBH
BURGSTRASSE 21
44867 BOCHUM
GERMANY
www.kompernass.com
Inhaltsverzeichnis
Einleitung 14
Abb. 1
i Hinweis
Abb. 2
KOMPERNASS HANDELS GMBH
BURGSTRASSE 21
44867 BOCHUM
DEUTSCHLAND
www.kompernass.com
Table des matières
Introduction 28
Fig. 1
i REMARQUE
Fig. 2
KOMPERNASS HANDELS GMBH
BURGSTRASSE 21
44867 BOCHUM
ALLEMAGNE
www.kompernass.com
Inhoud
Inleiding 44
⚠ WAARSCHUWING! VEILIGHEIDSVOORSCHRIFTEN VOOR ACCU'S
Afb. 1
i OPMERKING
Afb. 2
Obr. 1
i Upozornění
Obr. 2
KOMPERNASS HANDELS GMBH
BURGSTRASSE 21
44867 BOCHUM
NĚMECKO
www.kompernass.com
Spis treści
W step 70
Rys. 1
i Wskazówka
Rys. 2
KOMPERNASS HANDELS GMBH
BURGSTRASSE 21
44867 BOCHUM
NIEMCY
www.kompernass.com
Obsah
Ú v o d....84
Obr. 1
i Upozornenie
Obr. 2
KOMPERNASS HANDELS GMBH
BURGSTRASSE 21
44867 BOCHUM
NEMECKO
www.kompernass.com
Índice
Introducción....96
Uso previsto 96
Fig. 1
i Indicación
Fig. 2
KOMPERNASS HANDELS GMBH
BURGSTRASSE 21
44867 BOCHUM
ALEMANIA
www.kompernass.com
Indholdsfortegnelse
Indledning 110
Anvendelsesområde 110
Fig. 1
i Bemærk
Fig. 2
KOMPERNASS HANDELS GMBH
BURGSTRASSE 21
44867 BOCHUM
TYSKLAND
www.kompernass.com
Indice
Introduzione....122
Uso conforme 122
1 barra 20%, 2 barre: 40%, 3 barre: 60%, 4 barre: 80%, 5 barre: 100%
Fig. 1
i Nota
Fig. 2
KOMPERNASS HANDELS GMBH
BURGSTRASSE 21
44867 BOCHUM
GERMANIA
www.kompernass.com
Tartalomjegyzék
Bevezető 136
- ábra
i Tudnivaló
- ábra
KOMPERNASS HANDELS GMBH
BURGSTRASSE 21
44867 BOCHUM
NÉMETORSZÁG
www.kompernass.com

KOMPERNASS HANDELS GMBH
BURGSTRASSE 21
44867 BOCHUM
GERMANY
www.kompernass.com
Last Information Update · Stand der Informationen · Version des informations
Stand van de informatie · Stav informací · Stan informacji · Stav informácií
Estado de las informaciones · Tilstand af information · Versione delle informazioni
- CORDLESS HAIR STRAIGHTENER / AKKU-HAARGLÄTTER / LISSEUR SANS FIL SGEA 3.6 A1
- LISSEUR SANS FIL
- AKU ŽEHLIČKA NA VLASY
- GLATTEJERN MED GENOPLADELIGT BATTERI
- CONTENTS
- INTRODUCTION 2
- PACKAGE CONTENTS....3
- APPLIANCE DESCRIPTION 3
- BEFORE FIRST USE ....6
- CHARGING THE INTEGRATED BATTERY 6
- USE....7
- CLEANING 9
- STORAGE 9
- TROUBLESHOOTING 9
- DISPOSAL....10
- KOMPERNASSHANDELSGMBHWARRANTY....11
- INTRODUCTION
- INTENDED USE
- WARNINGS AND SYMBOLS USED
- NOTES ON TRADEMARKS
- PACKAGE CONTENTS
- SAFETY INFORMATION
- DANGER
- APPLIANCE DESCRIPTION
- TECHNICAL DATA
- WARNING
- ATTENTION
- ⚠ WARNING! SAFETY GUIDELINES FOR RECHARGEABLE BATTERIES
- BEFORE FIRST USE
- CHARGING THE INTEGRATED BATTERY
- NOTE
- USE
- BEFORE STRAIGHTENING
- SWITCHING ON/OFF AND SELECTING A HEAT LEVEL
- I NOTE
- STRAIGHTENING HAIR
- CAUTION
- CLEANING
- STORAGE
- DISPOSAL
- DISPOSAL OF THE APPLIANCE
- THE DISPOSAL IS FREE OF CHARGE FOR THE USER. PROTECT THE ENVIRONMENT AND DISPOSE OF THIS APPLIANCE PROPERLY
- DISPOSAL OF THE PACKAGING
- APPLIES ONLY TO SPAIN
- KOMPERNASSHANDELS GMBHWARRANTY
- WARRANTY CONDITIONS
- WARRANTY PERIOD AND STATUTORY CLAIMS FOR DEFECTS
- SCOPE OF THE WARRANTY
- WARRANTY CLAIM PROCEDURE
- SERVICE
- IMPORTER
- INHALTSVERZEICHNIS
- EINLEITUNG 14
- I HINWEIS
- TABLE DES MATIÈRES
- INTRODUCTION 28
- I REMARQUE
- INHOUD
- INLEIDING 44
- ⚠ WAARSCHUWING! VEILIGHEIDSVOORSCHRIFTEN VOOR ACCU'S
- I OPMERKING
- I UPOZORNĚNÍ
- SPIS TREŚCI
- W STEP 70
- I WSKAZÓWKA
- OBSAH
- Ú V O D....84
- I UPOZORNENIE
- ÍNDICE
- INTRODUCCIÓN....96
- I INDICACIÓN
- INDHOLDSFORTEGNELSE
- INDLEDNING 110
- I BEMÆRK
- INDICE
- INTRODUZIONE....122
- I NOTA
- TARTALOMJEGYZÉK
- BEVEZETŐ 136
- I TUDNIVALÓ
- KOMPERNASS HANDELS GMBH
Brand : SILVERCREST
Model : SGEA 3.6 A1
Category : Hair straightener