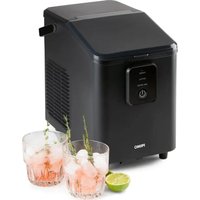
PR409IB - Ice machine PRIMO - Free user manual and instructions
Find the device manual for free PR409IB PRIMO in PDF.


User questions about PR409IB PRIMO
0 question about this device. Answer the ones you know or ask your own.
Ask a new question about this device
Download the instructions for your Ice machine in PDF format for free! Find your manual PR409IB - PRIMO and take your electronic device back in hand. On this page are published all the documents necessary for the use of your device. PR409IB by PRIMO.
USER MANUAL PR409IB PRIMO
natural_image
Black PRIMO appliance with control panel and power button (no visible text or symbols on body)natural_image
Two simple line icons: a triangular warning triangle with an exclamation mark and an open book with a blank pages (no text or symbols)Read all instructions carefully - save this instruction manual for future reference.
| NL Nederlands 4 | |
| FR Français 16 | |
| DE Deutsch 28 | |
| EN English 41 |
GARANTIE (NL)
Geachte klant,
⚠PRODUCTSPECIFIEKE WAARSCHUWINGEN
natural_image
Black industrial air purifier with open lid and ventilation slots, shown with an upward arrow (no text or symbols visible)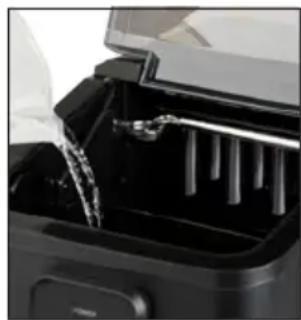
natural_image
Close-up of a black appliance with water flowing through its opening (no visible text or symbols)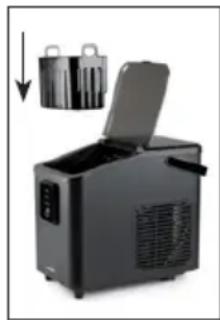
natural_image
Black industrial air purifier with open lid and ventilation slots, no visible text or symbols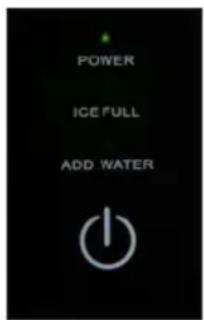
text_image
POWER ICE FULL ADD WATER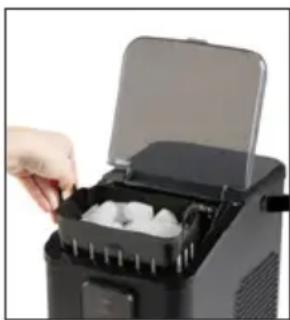
natural_image
Close-up of a hand placing ice cubes into an open ice cream grater (no text or symbols visible)natural_image
Close-up of a mechanical device with multiple ports and connectors (no visible text or symbols)natural_image
Technical line drawing of a mechanical device with internal components and a separate housing (no text or symbols)natural_image
Symbol of a trash bin with crossed lines indicating no waste, and a solid black rectangle below (no text or labels)⚠AVERTISSEMENTS SPÉCIFIQUES AU PRODUIT
natural_image
Black industrial air purifier with open lid and ventilation slots, no visible text or symbols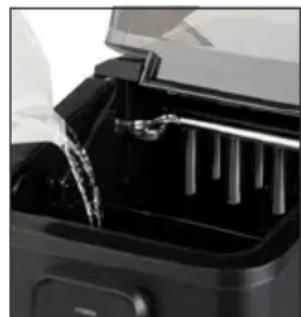
natural_image
Close-up of a black appliance with water flowing through its glass lid (no visible text or symbols)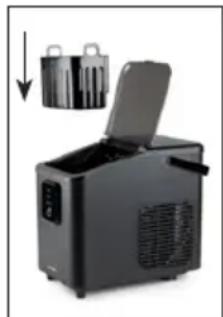
natural_image
Black industrial air purifier with open lid and ventilation slots, no visible text or symbols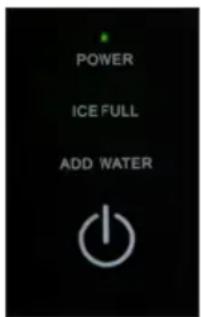
text_image
POWER ICE FULL ADD WATER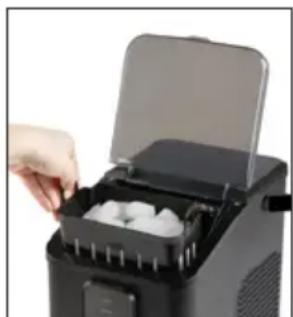
natural_image
Close-up of a hand placing ice cubes into an open ice cream maker (no text or symbols visible)natural_image
Technical line drawing of a mechanical device with internal components and a separate housing (no text or symbols)text_image
Warning symbol for a trash bin with crossed and unshaded lanes, indicating no waste or discharge.natural_image
Black industrial air purifier with open lid and ventilation slots, shown with upward arrow indicator (no text or symbols)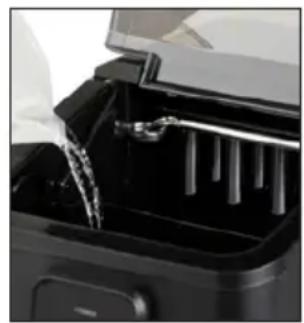
natural_image
Close-up of a black appliance with water flowing through its glass (no visible text or symbols)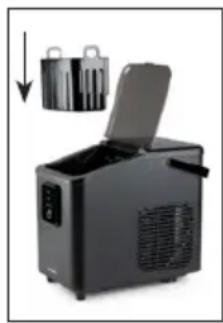
natural_image
Black portable air purifier with open lid and ventilation slots, shown with a downward arrow indicating compression (no text or symbols visible)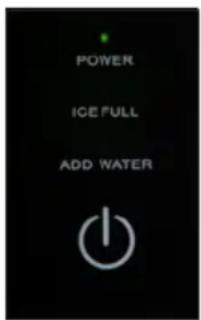
text_image
POWER ICE FULL ADD WATER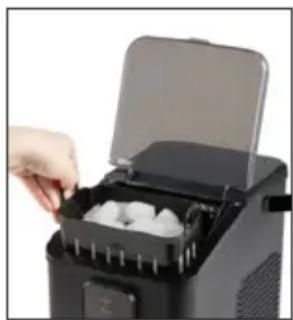
natural_image
Close-up of a hand placing ice into a black appliance with a lid open (no visible text or symbols)natural_image
Close-up of a mechanical device's internal components, possibly a camera or scanner, with no visible text or symbols.natural_image
Technical line drawing of an electrical connector housing and its internal components (no text or symbols)text_image
Prohibition sign for a trash bin with crossed and unbroken lines, indicating no waste or discharge.natural_image
Recycling symbol with three chasing arrows forming a triangle (no text or labels)All of our products are always submitted to a strict quality control before they are sold to you. Should you nevertheless experience problems with your device, we sincerely regret this.
In that case, we kindly request you to contact our customer service. Our staff will gladly assist you.

www.primo-elektro.be
Monday – Thursday: 8.30 – 12.00 and 13.00 – 17.00
Friday: 8.30 – 12.00 and 13.00 – 16.30
This appliance has a two year warranty period. During this period the manufacturer is responsible for any failures that are the direct result of construction failure.
When these failures occur the appliance will be repaired or replaced if necessary.
The warranty will not be valid when the damage to the appliance is caused by wrong use, not following the instructions or repairs executed by a third party. The guarantee is issued with the original till receipt. All parts, which are subject to wear, are excluded from the warranty.
If your device breaks down within the 2-year warranty period, you can return the device together with your receipt to the shop where you purchased it.
The guarantee on accessories and components that are liable to wear-and-tear is only 6 months.
The guarantee and responsibility of the supplier and manufacturer lapse automatically in the following cases:
- If the instructions in this manual have not been followed.
- In case of incorrect connection, e.g. electrical voltage that is too high.
- In case of incorrect, rough or abnormal use.
- In case of insufficient or incorrect maintenance.
- In case of repairs or alterations to the device by the consumer or non-authorised third parties.
- If the customer used parts or accessories that are not recommended or provided by the supplier / manufacturer.
SAFETY INSTRUCTIONS
When using electrical appliances, basic safety precautions should always be taken, including the following:
- Read all instructions carefully. Keep this manual for future reference.
- Make sure all packaging materials and promotional stickers have been removed before using the appliance for the first time. Make sure children cannot play with the packaging materials.
- This appliance is intended to be used in household and similar applications such as:
- staff kitchen areas in shops, offices and other working environments;
- farm houses;
- by clients in hotels, motels and other residential type environments;
- bed and breakfast type environments.
- Children should be supervised to ensure that they do not play with the appliance.
- This appliance can be used by children aged from 16 years and above and persons with reduced physical, sensory or mental capabilities or lack of experience and knowledge if they have been given supervision or instruction concerning use of the appliance in a safe way and understand the hazards involved.
• Children shall not play with the appliance.
- Cleaning and user maintenance shall not be made by children unless they are older than 16 or supervised.
- Keep the appliance and its cord out of reach of children younger than 16 years.
- All repairs should be carried out by the manufacturer or its aftersales service.
- Any injury or damage caused by failure to comply with these rules are at your own risk. Neither the manufacturer, importer, or the supplier may be held liable.
⚠️ELECTRICAL WARNINGS
- In order to avoid a hazard this appliance must not be supplied through an external switching device, such as a timer or a separate remote control, or connected to a circuit that is regularly switched on and off by the utility.
- The appliance must be disconnected from its power source when not in use, during service and when replacing parts. Allow to cool before putting on or taking off parts, and before cleaning the appliance. To disconnect, turn controls to “OFF” or “0” position, then remove the plug from the wall. Never pull the cord or appliance to remove the plug from the socket.
- Before use, check carefully that the electric tension and frequency of the power net at your home match the indications on the rating label of the appliance.
- The appliance must be plugged into an appropriate outlet that is installed and grounded in accordance with local installation regulations.
- Do not let the power supply cord hang over the edge of a counter, or touch hot surfaces.
- Keep the power cord away from hot parts and don't cover the appliance.
- Unwrap the cord completely to prevent overheating of the cord. Do not allow the power cord supply to run underneath or around the unit.
- Do not operate this appliance with a damaged cord or plug or in the event the appliance malfunctions or has been damaged in any manner. Return the appliance to the PRIMO Service Department or its service agent for examination, repair, or electrical or mechanical adjustment. Do not try to repair the appliance yourself.
⚠️INSTALLATION
- Do not place near flammable materials, gases or explosives.
- Do not use or store this appliance outdoors.
• Always use the appliance on a steady, dry and level surface. - Never place this appliance near a gas stove or electrical stove or in a place where it may come into contact with a warm appliance.
⚠ USE
- Do not use this appliance for other than intended use.
- Only use the appliance for domestic use. The manufacturer cannot be held responsible for accidents that result from improper use of the appliance or not following the instructions described in this manual.
- Never leave the appliance unattended while it is functioning.
- Do not operate the appliance with wet hands.
- The use of accessories that are not recommended or sold by the manufacturer can cause fire, electrical shock or injuries. Only use the utensils delivered with the appliance.
⚠ CLEANING AND MAINTENANCE
- To protect against electrical shock or burns, do not immerse unit, cord, or plug in water or other liquid.
- Failure to maintain this appliance in a clean condition could adversely affect the life of the appliance and possibly result in a hazardous situation.
⚠️PRODUCT-SPECIFIC WARNINGS
- Do not use water of unknown quality or water that contains unsafe microbes.
- Do not clean the ice maker with flammable liquids. The vapours can cause fire or explosion.
-
Do not tilt the appliance more than 45°. If the appliance is laid flat, return the appliance to a completely upright position and wait 2 hours before turning it back on.
-
If the ice maker is brought in from a cold environment during the winter, do not use for a few hours. Allow it to warm to room temperature before use.
- Do not use the appliance in temperatures below 10^ and above 32^ .
- Never put flammable, explosive and/or corrosive items in the ice maker.
- Never use the ice maker if flammable gas is leaking.
- Unplug the ice maker from the power socket before moving it to avoid causing damage to the cooling system.
- The ice maker makes use of flammable gas and refrigerant and must therefore be disposed of according to local regulations.
- Do not damage the cooling circuit.
- Keep the ventilation openings clear and make sure they are not blocked or obstructed.
- Do not use mechanical appliances or other aids to speed up the defrosting process.
- Do not place portable power strips or portable power supplies at the back of the appliance.
- Do not place other electrical appliances inside this one, unless recommended by the manufacturer.
- Other appliances must not be connected to the same power socket. Make sure the plug is fully inserted into the power socket.
- Arrange the power cable to prevent children from pulling on it or people tripping over it.
- Do not attempt to disassemble, repair, modify, or replace any part of the item.
- When putting the appliance in its position, make sure the power cable does not become pinched or damaged.
-
Place the appliance at least 15 cm away from other objects to ensure a proper ventilation around the appliance.
-
Do not switch the appliance on and off too frequently.
Always wait for at least 5 minutes to prevent damage to the compressor.
• To avoid frost injuries, do not touch the evaporator and/or the cooling fins while the appliance is in operation.

CAUTION: risk of fire / flammable materials This appliance uses a flammable refrigerant. If the refrigerant is leaked and exposed to an external ignition source, there is a risk of fire.
SAVE THESE INSTRUCTIONS FOR FUTURE REFERENCE
All images and descriptions in this manual are purely indicative and may differ slightly from the actual device.
PARTS
- Water tray
- Freeze fingers
- Ice shovel
- Full basket sensor
- Transparent lid
- Ice basket
- Water tank
- Drain hole with plug
- Air outlet
- Control panel
- Scoop
- Handle
CONTROL PANEL
- Indicator light "in operation"
- Indicator light 'ice basket full'
- Indicator light 'water reservoir empty'
- On/off button
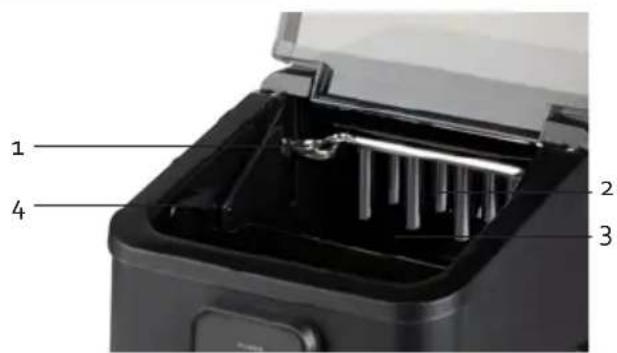
text_image
1 2 3 4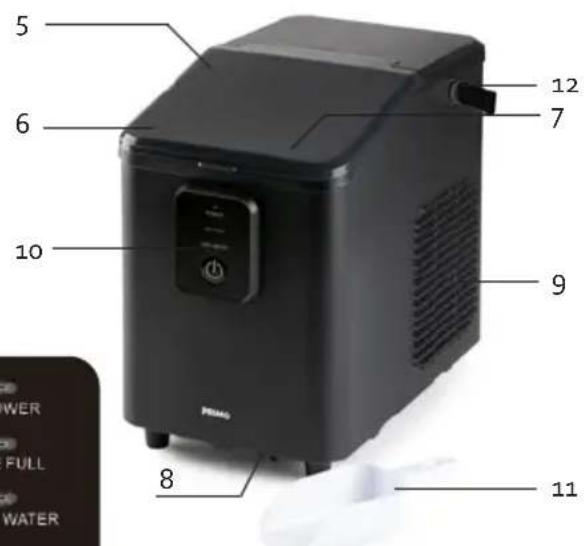
text_image
5 6 10 9 8 11 7 12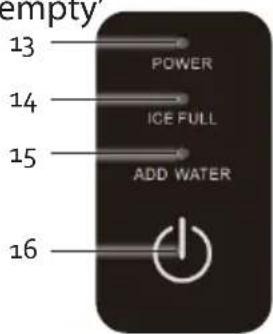
text_image
empty 13 POWER 14 ICE FULL 15 ADD WATER 16BEFORE THE FIRST USE
- Remove all packaging materials and any promotional stickers.
- Place the ice cube maker on a flat and stable surface and make sure that the ventilation openings are not blocked.
- Before using the ice cube maker for the first time: wait 2 hours after putting the appliance in place and leave the lid open for at least 2 hours. This way the refrigerant can settle.
- Attach the handle to the ice cube maker.
- Clean the appliance before using it for the first time. See: "cleaning and maintenance".
USE
- Place the ice cube maker on a flat and stable surface and make sure that the ventilation openings are not blocked. Make sure the drainage hole on the bottom of the unit is closed.
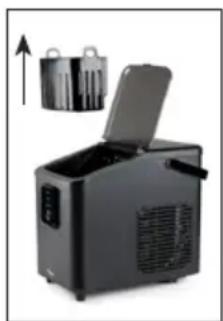
- Open the lid and take out the ice basket so you can pour water into the water tank. It is recommended to use spring water or mineral water. Do not use hot water, the recommended water temperature is between 8 and 25°C.
Caution: Make sure that the water level is lower than the maximum indication. If the water tank is filled above the MAX indication, drain the excess water through the drain hole at the bottom of the ice cube maker. Open the drainage hole on the underside of the appliance above a collecting container or a sink. - Place the basket back into the appliance and close the transparent lid.
- Insert the mains plug into the power socket. The 'in operation' indicator light flashes and the appliance prepares to start.
- Press the on/off button on the appliance to turn it on. The "in operation" indicator lamp will illuminate steadily. It starts making the ice cubes and the first ice cubes will fall into the ice basket after ± 9 minutes.
- To stop the appliance, press the on/off button. The appliance ends the current cycle. Unplug the power cord after use.
- Clean the appliance after each use. Empty the water reservoir before storing the appliance. Open the drainage hole on the underside of the appliance above a collecting container or a sink.
natural_image
Black industrial air purifier with open lid and ventilation slots, shown with upward arrow (no text or symbols)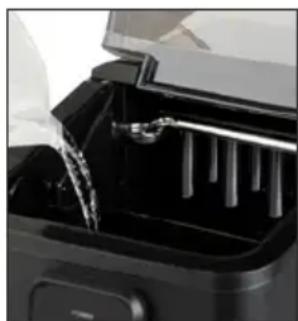
natural_image
Close-up of a black appliance with water flowing through its opening (no visible text or symbols)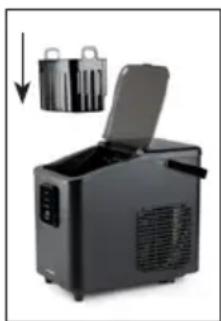
natural_image
Black industrial air purifier with lid open, showing internal ventilation and cooling unit (no text or symbols visible)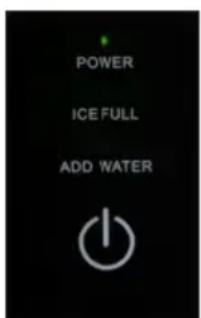
text_image
POWER ICE FULL ADD WATER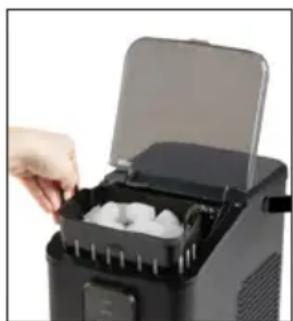
natural_image
Close-up of a hand placing an open lid into a black appliance with ice cubes (no visible text or symbols)During the first 3 cycles, the ice cubes may be smaller and more irregular in size.
When the ice basket is full, immediately remove the ice from the ice basket.
- If the 'water reservoir empty' indicator lamp lights up, there is not enough water left in the water reservoir. Fill the water reservoir with water and press the on/off button to restart the machine.
- If the 'ice basket full' indicator light flashes, the machine will stop working. Empty the ice basket. If there is no more ice near the sensor, the appliance will restart automatically.
CLEANING AND MAINTENANCE
⚠️Do not immerse unit, cord, or plug in water or other liquid.
⚠️Never use aggressive or abrasive cleaning agents.
- Switch off the appliance and unplug before cleaning. Also remove all ice cubes.
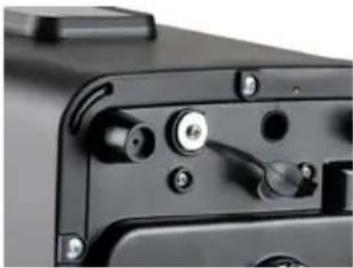
- Drain all water from the water tank through the drain hole at the bottom of the ice cube maker. Open the drainage hole on the underside of the appliance above a collecting container or a sink. To do this, you can slide
natural_image
Close-up of a black electronic device with multiple ports and connectors (no visible text or symbols)the appliance forward, so the front protrudes 55-60 mm over the front of the worktop.
- Regularly clean the ice basket, the water tank, the water tray, the freeze fingers and the ice shovel. Use a soft cloth with warm water and maybe cleaning vinegar to clean the inside of the appliance. Rinse thoroughly before using the appliance again.
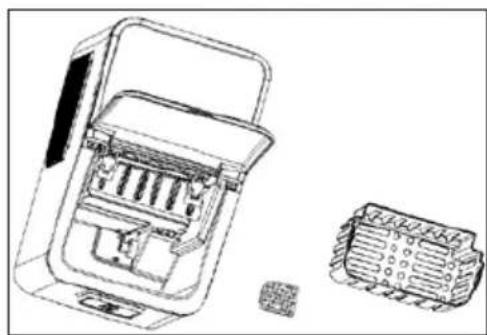
- There is a water supply filter at the bottom of the water tank. Remove it for cleaning. Clean with warm water and a mild detergent. Afterwards, replace correctly before using the appliance again.
natural_image
Technical line drawing of a mechanical component with internal channels and a separate view showing internal structure (no text or symbols)- Clean the outside with a damp cloth and mild detergent if necessary.
- Do not use any chemical products or products containing acids, gasoline or oil. Do not use boiling water.
- Replace the water in the water tank at least once a day to guarantee clean ice cubes. When not using the appliance, always drain the water from the water tank. Always use clean water when using the ice cube maker.
RINSE THE LINES
It is recommended that the appliance lines be rinsed once a week or if the appliance has been idle for a long time.
- Make sure the drainage hole on the bottom of the appliance is closed; then fill the water tank with clean water.
- Plug the power cord into a socket. The 'in operation' indicator light flashes and the appliance prepares to start. The appliance is now in standby mode.
- Press and hold the power button for several seconds until all indicator lights flash in turn.
- The cleaning cycle starts. The lines will be rinsed for a few minutes.
- When the cleaning cycle is finished, the appliance will stop automatically.
DESCALING
Descale the appliance regularly to avoid calcification and to maintain a well operating appliance. Use a descaling product for example coffee makers, or use a solution of 1/2 vinegar and 1/2 water.
- Fill the water tank with the descaling solution; do not exceed the maximum level.
- Plug in and wait until the appliance is in standby mode; the 'in operation' indicator light will flash slowly.
- Switch on the cleaning cycle by pressing and holding the power button for a few seconds. All indicator lights flash alternately.
- The cleaning cycle starts. The pipes will be rinsed for several minutes.
- When cleaning cycle is finished, the appliance will automatically stop and switch back to standby mode.
- Unplug and drain the descaling solution in the water tank over a sink. Rinse with clean water and clean the reservoir.
- After this, refill the appliance with clean water and repeat the cleaning cycle again to rinse the residue of the descaling solution from the pipes.
- Empty the water tank once more over a sink. The appliance is ready to use again.
PROBLEMS AND SOLUTIONS
| PROBLEMS SOLUTIONS | |
| “Ice basket full” indicator lamp is on. | The ice basket is full. Empty it.The sensors are dirty. Clean both sensors.The sensors are broken. Contact the after-sales department. |
| All indicator lights flash simultaneously. | The ice scoop is blocked. Clear the blockage.The motor is broken. Contact the after-sales department. |
| The appliance stops working. • The ice scoop is not in the correct position. Remove the ice from the scoop and press the power button. If the appliance does not work after restarting, please contact the after-sales department. | |
| Indicator lamp “water reservoir empty” lights up. | Is the water reservoir empty. Fill the water reservoir with water.There’s air in the pump. Restart the appliance with the on/off button.The water supply is blocked. Clean the filter on the bottom of the water tank. |
| There are no indicator lights on. • There is no power applied to the appliance. Check the plug is placed in the socket.Check that no fuse has tripped in your fuse box. | |
| The ice is too big and there are bits of broken ice sticking to it. | It is possible that ice from a previous cycle has ended up in the water tray. Turn off the appliance and remove the ice from the water tray.The water in the reservoir is too cold. The recommended temperature is between 8 and 25°C. |
| The appliance goes through the cycle, but no ice comes out. | The ambient temperature or the water temperature is too high.Do not use the appliance at a temperature higher than 32°C and fill the tank with cold water.The compressor or the ventilation motor is broken. Contact the after-sales service.There is insufficient coolant in the appliance. Contact the after-sales service. |
| PROBLEMS SOLUTIONS | |
| The appliance works, but the water gets warm. | • Contact the after-sales service. |
| The ice basket is full, but the indicator light is not lit. | • The operation of the sensors is blocked by sunlight. Move the appliance.• The sensors are broken. Contact the after-sales department. |
| The appliance and the air around the appliance become warm. | • This is normal. The temperature of the compressor can be up to 90°C. |
| The compressor makes a lot of noise. | • Check that the voltage indicated on the appliance corresponds to the voltage of the electricity grid in your home. |
SPECIFICATIONS
| Model DO9292IB | |
| Voltage 220-240V~ 50Hz | |
| Power 120W | |
| Energy consumption standby-mode after 1 minute 0.14W |
natural_image
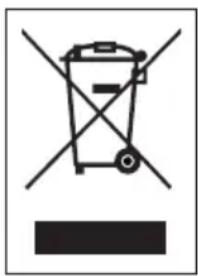
Symbol of a trash bin crossed with two crossed arms, no text or numbers presentThis symbol on the product or on its packaging indicates that this product may not be treated as household waste. Instead it must be brought to the applicable collection point for recycling of electrical and electronic equipment. By ensuring this product is disposed of correctly, you will help prevent potential negative consequences for the environment and human health, which could otherwise be caused by inappropriate waste handling of this product. For more detailed information about recycling of this product, please contact your local city office, your household waste disposal service or the shop where you purchased the product.

natural_image
Recycling symbol with three chasing arrows forming a triangle (no text or labels)The packaging is recyclable. Please treat the packaging ecologically.

This appliance conforms to all European requirements in the areas of safety, health, and environmental protection.
The EU declaration concerning this appliance can be requested at any time from info@primo-elektro.be
WEBSHOP

Following accessories have 6 months warranty, and can be easily ordered using the link below.
WWW.PRIMO-ELEKTRO.BE
WWW.PRIMO-ELEKTRO.BE