SFMT 2.4 A1 - Computer Mouse SILVERCREST - Free user manual and instructions
Find the device manual for free SFMT 2.4 A1 SILVERCREST in PDF.

User questions about SFMT 2.4 A1 SILVERCREST
0 question about this device. Answer the ones you know or ask your own.
Ask a new question about this device
Download the instructions for your Computer Mouse in PDF format for free! Find your manual SFMT 2.4 A1 - SILVERCREST and take your electronic device back in hand. On this page are published all the documents necessary for the use of your device. SFMT 2.4 A1 by SILVERCREST.
USER MANUAL SFMT 2.4 A1 SILVERCREST
Wireless Mouse SFMT 2.4 A1
TARGA GMBH
Coesterweg 45 DE 501016
GERMANY
Last Information Update - Seneste informationsopdatering
- Intended use 3
- Package contents.. 4
- Controls and displays. 5
- Technical specifications 6
4.1 System requirements 7
- Safety instructions 7
6.Before you start 11
6.1 Inserting the batteries 11
6.2 Connecting the USB nano receiver 12
6.3 Installing the software 13
6.4 Icon in the system tray 14
- Getting started 15
7.1 Switching the operating mode 15
7.2 Configuring the wireless mouse using the mouse software 16
-
After use 20
8.1 Storage when not in use 20 -
Troubleshooting 20
-
Environmental regulations and disposal information .... 21
-
Conformity notes 22
- Warranty and service information 22
Service 23
Manufacturer 23
Congratulations!
By purchasing the SilverCrest SFMT 2.4 A1 wireless mouse, hereinafter referred to as the wireless mouse, you have opted for a quality product.
Before first using it, familiarise yourself with the way the wireless mouse works and read these operating instructions through carefully. Be careful to follow the safety instructions and only use the wireless mouse as described in the operating instructions and for the applications given.
Keep these operating instructions in a safe place. If you pass the wireless mouse on to someone else, make sure to give them all the relevant documents with it.
Trademarks
Microsoft Windows is a registered trademark of Microsoft Corporation, USA.
Intel and Pentium are registered trademarks of Intel Corporation, USA.
AMD® and AMD Athlon are registered trademarks of Advanced Micro Devices, Inc.
USB is a registered trademark.
Other names and products may be the trademarks or registered trademarks of their respective owners.
1. Intended use
This wireless mouse, consisting of a wireless mouse and wireless receiver, is an IT device. It has been designed for data input and for controlling a computer. The product should only be used in dry areas. This product has not been designed for corporate or commercial applications. Use the product in domestic environments for private applications only. Any use other than that mentioned above does not correspond to the intended use.
This wireless mouse can only be used with the right hand.
This wireless mouse fulfils all that relates to CE Conformity, relevant norms and standards. Any modifications to the device other than recommended changes by the manufacturer may result in these standards no longer being met. The manufacturer shall not be liable for any damage or malfunctions resulting from such modifications. Only use accessories recommended by the manufacturer.
You must observe the regulations and laws in the country of use.
2. Package contents
Remove the wireless mouse and all accessories from the packaging. Remove the packaging material and check that all components are complete and undamaged. Keep the packaging material away from children and dispose of appropriately. If you find anything missing or damaged, please contact the manufacturer.
A

B
C

D

E
F
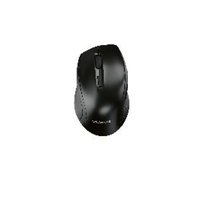
A SilverCrest SFMT 2.4 A1 wireless mouse
B USB nano receiver
(inserted into the wireless mouse)
C 2 AAA-type batteries, 1.5V (Micro) for the wireless mouse
D User manual (lineart illustration)
E CD-ROM with software (linear illustration)
F Quick Start Guide
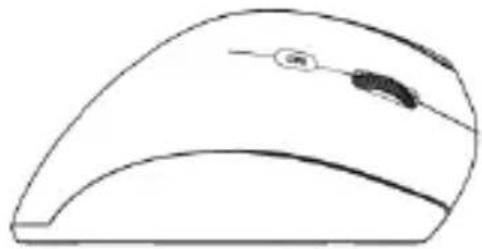
3. Controls and displays
These operating instructions have a fold-out cover. On the inside of the cover, the wireless mouse is shown with figures indicated. The meanings of the numbers are as follows:
1 Left mouse button
2 Right mouse button
3 Indicator light
flashing continuously = batteries empty
one long flash = default operating mode
several short flashes = media mode
one short flash = resolution CPI1
two short flashes = resolution CPI2 three short flashes = resolution CPI3
4 Scroll wheel and middle mouse button Volume adjustment and mute (media mode)
5 Switch resolution CPI1/CPI2/CPI3 (short press) Default/Media mode toggle switch (keep pressed for approx. 5 seconds)
6 Back (default mode)
Previous title (media mode)
Launch Media Player (media mode)
Playback / Pause (media mode)
7 Next (default mode)
Next title (media mode)
8 On/off button of the wireless mouse
9 Optical sensor
10 Battery compartment
You can use the mouse software provided to program the functions of the mouse buttons (1, 2, 4, 5, 6 and 7) and amend the default assignment described above. See also "Configuring the wireless mouse using the mouse software" on page 16.
4. Technical specifications
General technical data
Wireless transmission frequency: 2.4 GHz
Transmission power: max. 10 mW
Synchronisation: SmartLink technology (no longer any need to establish connections between the receiver and mouse manually)
Range: up to 5 m
Operating temperature, humidity: 5 to 40^ , max. 90% relative humidity
Storage temperature, humidity: 5 to 40^, max. 90% relative humidity
Wireless Mouse
Tracking: optical sensor with 800 cpi, 1600 cpi and 2400 cpi, LED Class 1
Mouse buttons: 6 buttons, all buttons programmable
Scroll wheel
Dimensions: 12.3 × 6.2 × 6.9 cm (L X W × H)
Weight: 90g (without batteries)
Power supply: 2 batteries type AAA, 1.5V (Micro)
USB nano receiver
Standard:USB2.0
Dimensions: 1.8 × 1.5 × 0.7 cm ( L × W × H )
Weight: 2 g
Power supply: via USB connection
The technical data and design may be changed without prior notice.
4.1 System requirements
Intel® Pentium® III / AMD Athlon™ or higher
1 free USB port
Microsoft® Windows® 7/8/10
CD-ROM or DVD-ROM drive for installing the software
5. Safety instructions
Before you use the wireless mouse for the first time, please read the following notes and heed all warnings, even if you are familiar with handling electronic devices. Keep this manual safe for fut you sell the device or pass it on, it is essential that you also hand over this manual, as it is part of the product.
Explanation of symbols used

DANGER! This symbol and the word "Danger" alert you to a potentially dangerous situation. Ignoring it can lead to severe injury or even death.

WARNING! This symbol and the word "Warning" denote important information required for the safe operation of the product and for the safety of its users.
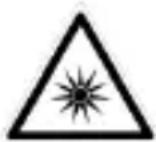
This symbol alerts about a strong light source.

This symbol denotes further information on the topic.

Avoid damage to your eyes! Never look into the light beam, not even by using optical devices and tools.

DANGER! Children and persons with disabilities
Electrical devices are not suitable for children. Also persons with reduced physical, sensory or mental capabilities should only use electrical devices in appropriate circumstances. Never allow children or persons with disabilities to use electrical devices unsupervised, unless they are instructed accordingly and supervised by a competent person responsible for their safety. Children should always be supervised to ensure that they do not product. Small parts can be fatal if swallowed. The packaging material is no toy! Keep the packaging away from and persons with disabilities.

DANGER! There is a risk of suffocation.

DANGER! Batteries
Insert the batteries with the correct polarity. Never try to recharge the batteries and under no circumstances throw them into fire. Do not mix battery types (old and new or carbon and alkaline, etc.). Batteries are not toys! If a battery is swallowed, seek medical help immediately. Batteries must never be opened or deformed. Otherwise there is a risk of leaking chemicals. If the chemicals come into contact with your skin or eyes, rinse with plenty of fresh water immediately and seek medical aid. Remove the batteries when the device is not to be used for an extended period. Improper use could cause explosions or leaks.

DANGER! Radio interface
Turn the device off when on board an aircraft, in a hospital, in an operating theatre or in the vicinity of electronic medical equipment. The RF signals may interfere with the functionality of sensitive devices. Keep the device at least 20~cm (8 inches) away from pacemakers, as the RF signals could interfere with the functionality of the pacemaker. The RF signals transmitted can interfere with hearing aids. If wireless mode is switched on, do not place the device near flammable gases or in a potentially explosive area (e.g. a paint shop), as the RF signals transmitted could cause explosions or fire. The range of the radio frequency signals depends on environmental conditions. If data is transmitted via a wireless connection, it can also be received by unauthorised parties. Targa GmbH is not liable for any interference caused to RF or TV signals through unauthorized modification to this device. Furthermore, Targa accepts no liability for replacing any devices that have not been specifically approved by Targa GmbH. The user is solely responsible and liable for remedying any interference caused by such unauthorised modification of this device and for replacing devices.

WARNING! Maintenance/cleaning
Repairs are required when this device has been damaged in any way, for example when liquid has entered the product, when the product has been exposed to rain or moisture, when the product does not work normally or if the product has been dropped. If smoke, unusual noises or smells are noticed, power off the device immediately and remove the batteries. If this occurs, do not continue to use the device and have it checked out by an expert. All repair work must be carried out by qualified personnel. Never open the housing of the device, or the accessories. Only use a clean, dry cloth for cleaning. Never use aggressive liquids.

WARNING! Make sure that:
-
the device is not exposed to direct heat sources (e.g. radiators)
-
no direct sunlight or bright artificial light reaches the device
-
contact with water sprays or drops and corrosive liquids is avoided and the device is never operated near water; in particular the device may never be immersed in liquids (do not place any objects containing liquids, such as vases or drinks, on or near the device)
-
the device is never placed near magnetic fields (e.g. speakers)
-
no naked flames (e.g. burning candles) are placed on or near the device
-
no foreign bodies can penetrate into the device
-
the device is not exposed to any extreme temperature fluctuations as this can cause moisture through condensation and cause short-circuits. If the device has been exposed to strong temperature variations, wait for it to reach the ambient temperature before switching it on (about 2 hours).
-
the device should not be subjected to excessive shocks and vibrations
Operating environment
Position the device on a stable, flat surface and do not place any objects on the device. The device is not designed for use in environments with high
10 - English
temperatures or humidity (e.g. bathrooms) or those with above-average levels of dust. Operating temperature and operating humidity: 5^ to 40^ , max. 90% relative humidity.
Copyright
All the contents of these operating instructions are protected by copyright and provided to the reader for information only. Copying data and information without the prior explicit written consent of the author is strictly forbidden. This also applies to any commercial use of the contents and information. All texts and diagrams are up-to-date as of the date of printing. Subject to change without notice.
6. Before you start
Unpack all the devices and use the package contents checklist on page 4 to verify that you have received all items listed. Next remove all package material. If you find anything missing or damaged, contact Customer Service.
6.1 Inserting the batteries
- Open the battery compartment cover.
- Insert the batteries into the wireless mouse, as shown in the figure below. Take care to observe the correct polarity (note + and -).
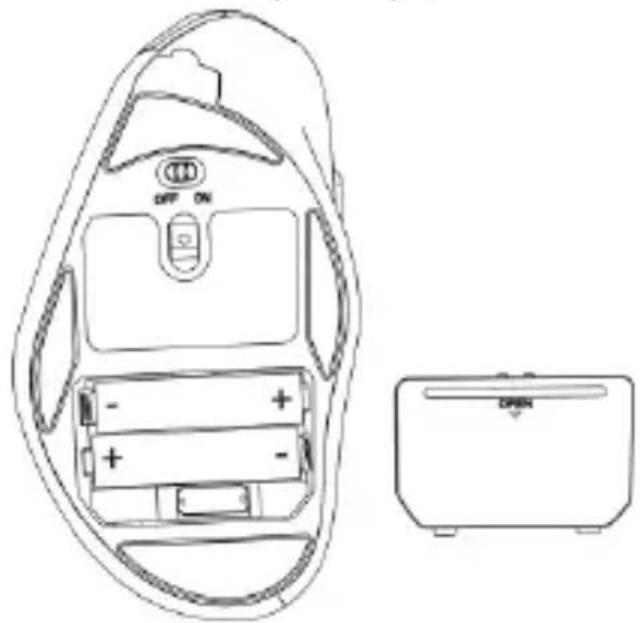
- Close the battery compartment cover properly.
- Use the On/Off button (8) to power the wireless mouse on. The status indicator (3) then lights up.
If the status indicator (3) flashes, the batteries are empty. When this happens, replace the batteries with new batteries of the same type.

The wireless mouse has an automatic standby function. When not using the wireless mouse for about 8 minutes, it will power off. Move the wireless mouse or press any mouse button to power it back on (the driver software must be installed).
If you do not plan on using the wireless mouse for an extended period, we recommend switching it off by sliding the On/Off switch (8) to the "Off" position.
6.2 Connecting the USB nano receiver
- If you still have your old mouse connected to the computer, shut down your computer, disconnect the device from your PC and restart the computer.
- Switch the wireless mouse on by sliding the On/Off switch (8) to the "On" position.
- Plug the USB nano receiver into a free USB port on your powered-on computer. This is stored in the wireless mouse battery compartment (10).
The operating system detects the new hardware and automatically installs the corresponding drivers. Depending on the operating system, one of the following messages appears:
Under Windows® 8 and Windows® 10
When connecting the receiver for the first time, the installation process runs in background and no message is displayed.
For Windows® 7
When connecting the receiver for the first time, the operating system displays "Installing device driver software". Wait until the message "Your
12 - English
devices are ready to use" appears. Your mouse has been successfully installed and can now be used.

If the connection to the nano receiver is interrupted or if it is not possible to establish a connection, remove the batteries from the wireless mouse and re-insert them.
6.3 Installing the software
In order to be able to use the full functionality of your mouse, you must install the software supplied. To do this, insert the CD-ROM supplied into the DVD drive of your computer. The setup process should start automatically, otherwise double-click on the EXE file on the CD-ROM to start manually.
The setup process is temporarily blocked and a message "Do you want to allow the following program from an unknown publisher to make changes to this computer?" appears. To continue setup, click "Yes".
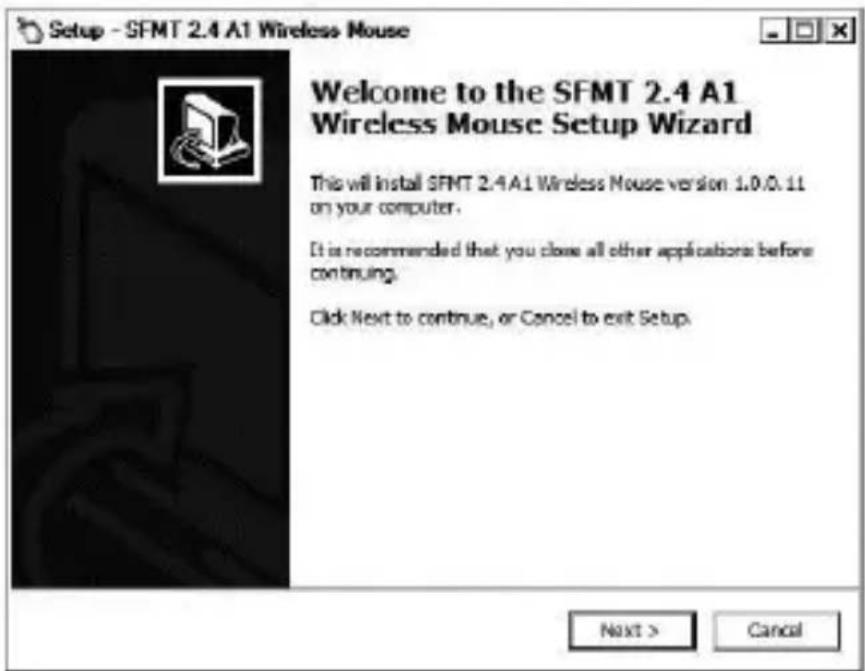
The following setup screens correspond to the Windows® 8 operating system. For Windows® 10 and Windows® 7, these screens vary slightly but their contents are the same.
-
Select the desired installation language and click "OK".
-
Click "Next" to continue.
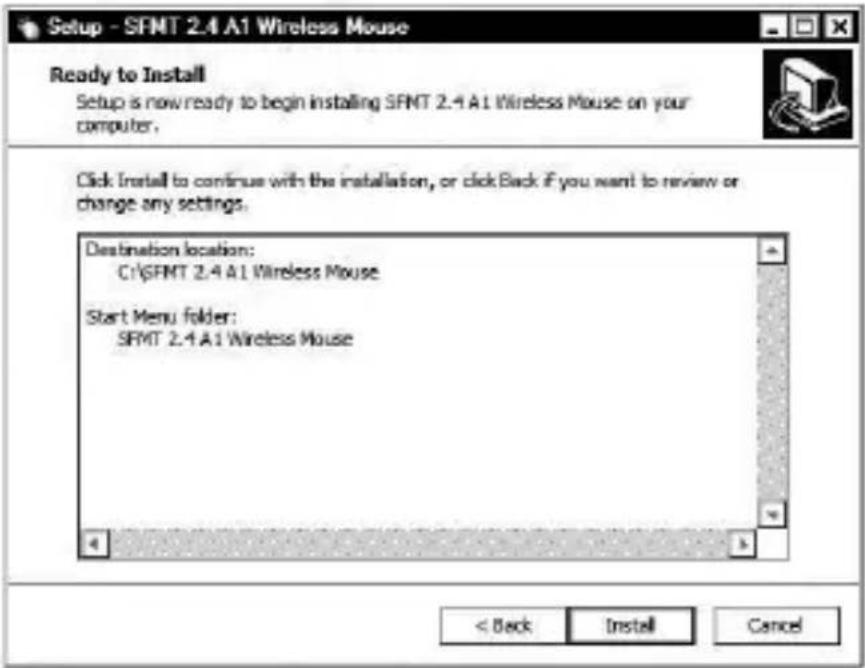
- Click "Install" to start the installation.
- To complete setup, click on "Finish".
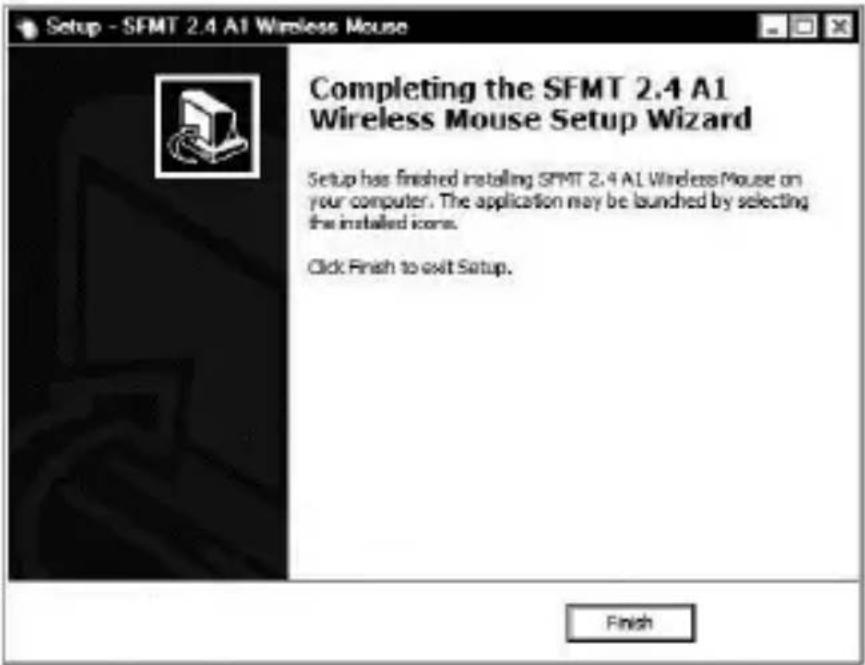

If you are prompted to restart your computer, restart it before using the software.
6.4 Icon in the system tray
After installation, there is a mouse icon on the task bar which you can use to open the mouse software and configure the wireless mouse. Double-clicking on this icon opens the configuration menu for the wireless mouse (see page 16, "Configuring the wireless mouse using the mouse software").
You can also right-click on the icon and then select "Control Panel" to access the configuration menu.

The operating system's default settings hide disabled icons in the task bar. It is recommended that the "Hide inactive icons" option in task bar properties is disabled.
7. Getting started
Once you have connected the mouse and installed the mouse software as described in the chapter above, you can use it as follows. Please note that the description below is of the buttons in their default assignment. You can program the function of all buttons individually. So, for example, you can assign the fire function for a computer game to the CPI button (5). This would then no longer be available for switching the resolution.
7.1 Switching the operating mode
7.1.1 Default mode
In default mode, the wireless mouse is essentially not different from other mice. The conventional functions for clicking and scrolling are available.
7.1.2 Media mode
In media mode, you can control the playback of multimedia files (audio and video). This includes functions such as playback/pause, next or previous track, adjust volume, etc.
To toggle between default and media operating mode of your wireless mouse, press and hold the CPI button (5) for at least 5 seconds until the indicator (3) flashes up several times briefly. The available functions for media mode can be found on page 5 in the section on "Controls and displays". In media mode, you can adjust the volume using the scroll wheel (4) or press it downwards to mute or resume the sound output.
To toggle back from media to default operating mode of your wireless mouse, press and hold the CPI button (5) for at least 5 seconds until the
indicator (3) flashes up once for a longer time. While in default mode, the Windows audio volume can still be adjusted by turning the scroll wheel (4), as long as the volume control window has been enabled from the system tray.
7.1.3 Setting the resolution
Press the CPI button (5) briefly to quickly toggle between 800 cpi, 1600 cpi and 2400 cpi resolution for optical tracking. At 2400 cpi, tracking is more accurate and the movement of the mouse cursor on the screen is faster. After you press the CPI button (5), the indicator light (3) shows the currently selected resolution.
| Indicator light (3) Resolution | |
| Flashing once 800 cpi | |
| Flashing twice 1600 cpi | |
| Flashing three times 2400 cpi |
7.2 Configuring the wireless mouse using the mouse software
Double-click on the icon in the task bar (bottom right cor
screen, near the system clock) or on the desktop. Or right-click on the icon and select "Control panel" from the dialog box that opens. The configuration menu for the wireless mouse appears. You can set the language you want in the top right-hand corner of the menu.
The configuration menu has three tabs: "Button assign", "Sensitivity" and "Support". The options available on the tabs are explained below.
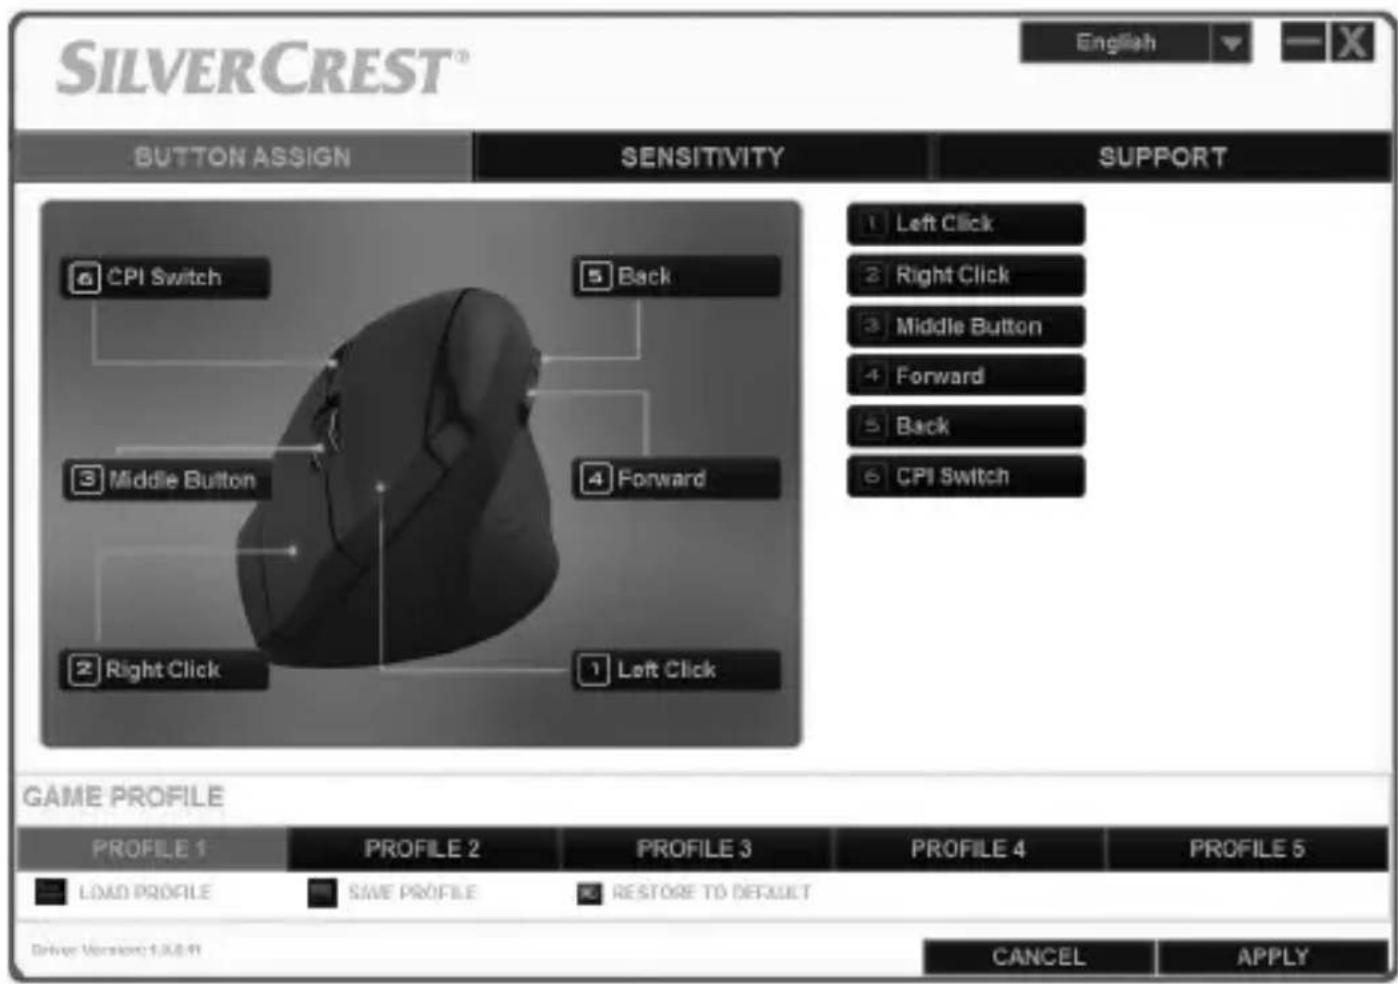
7.2.1 "Button assign" tab
Click on one of the button names shown (e.g. "Back") to assign a different function to the button in question. You can also click on 1 to 6 in the list to the right to assign a different function to the button in question.
Once you have left-clicked to select the button you want, a selection menu of the available functions appears. Click on the function you want and the then on "Apply" in the bottom right-hand corner to assign the new function to the button for the current mouse profile.
By using the "Restore to default" button you can return the current profile settings to their factory default values.

All selected options apply to the default mode. The button assignments for media mode cannot be modified.

You can only change the assignment of the left mouse button if you have already assigned the "Left click" function to a different button.
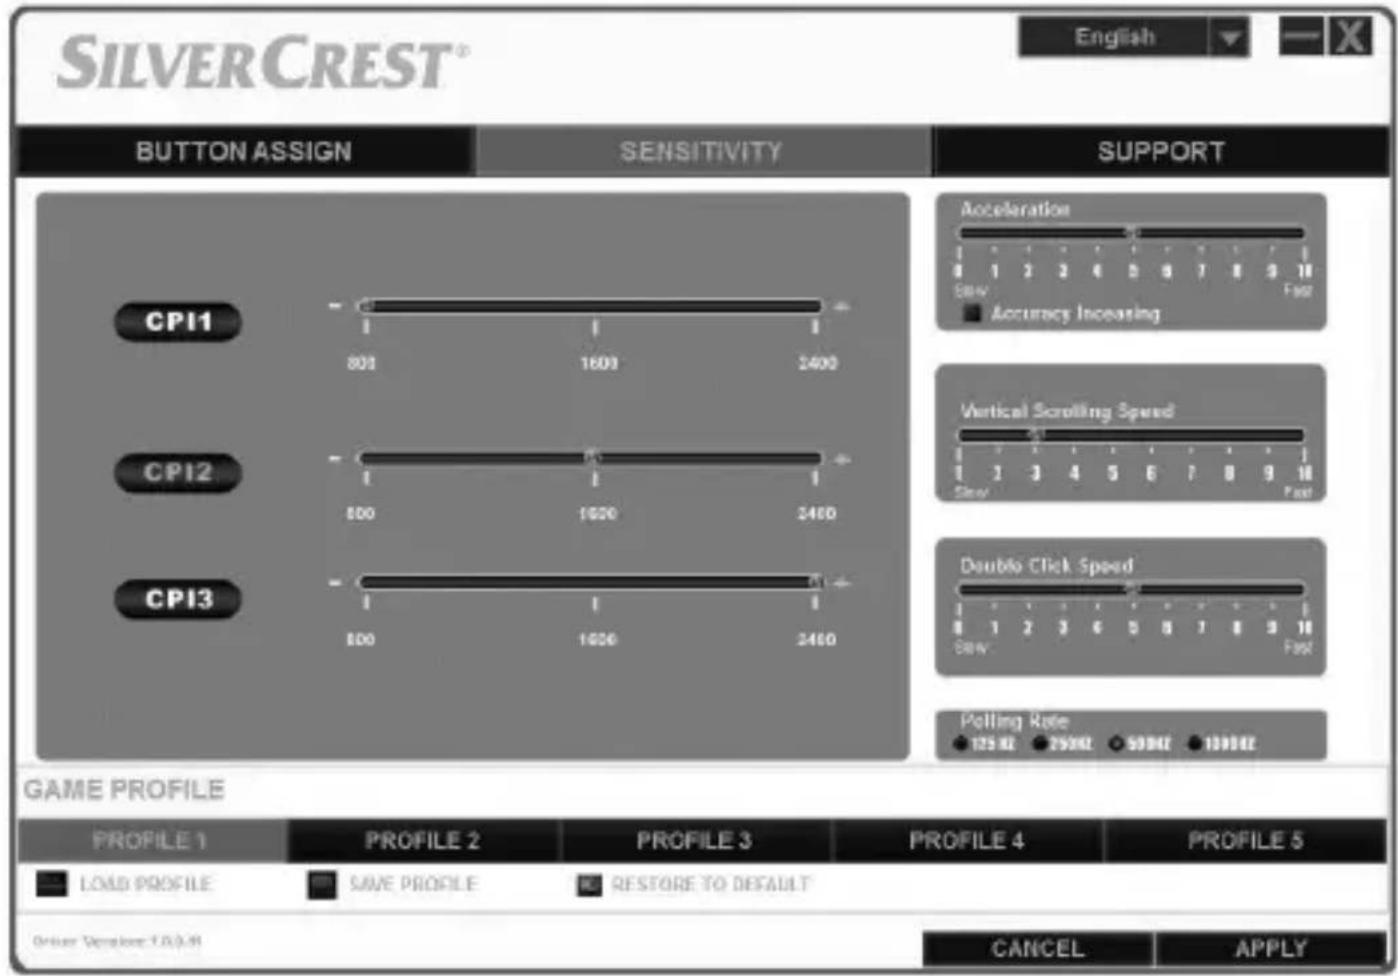
7.2.2 "Sensitivity" tab
| Option | Description |
| CPI1, CPI2 and CPI3 These are | the settings for the optical resolution of the wireless mouse which you can switch using the CPI button (5). |
| Acceleration Use this option to | set the speed of the mouse cursor on the screen. To achieve more accuracy (e.g. for image editing applications), check the "Accuracy Increasing" box. |
| Vertical Scrolling Speed Use this option is option to set the scroll speed when you turn the scroll wheel (4). | |
| Double Click Speed This option is sets how quickly you need to press the left mouse button twice in succession for it to be recognised as a double click. | |
| Polling Rate This option defines the number of times the optical sensor scans per second. If you need a higher tracking accuracy (e.g. for action games), select a higher value. | |
7.2.3 "Support" tab
You may need the data shown in this tab if you need to contact Customer Service in the event of a problem.
7.2.4 "Game Profile" section
You can save the settings for the wireless mouse in different profiles. This gives you the option of saving up to 5 different button assignments and accessing them as you need them. This means, for example, 5 different users with individual preferences can use the wireless mouse, or you can set different functions to different buttons for various computer games and access them quickly when you start up the game.
- To save the configuration for the current wireless mouse profile, click on "Save profile". Select the folder to which you wish to save the profile, give the profile a name and then click on "Save".
- To load a previously saved configuration into a profile, select the desired profile (1 to 5) and click "Load profile". Select the folder to which you saved the profile, select the profile you want and then click on "Open".

When you load a previously saved profile, the configuration of the current profile is overwritten. No safety prompt is shown in this case..
- Click "Restore to default" to restore the current profile settings to their factory default values. After confirming the safety prompt, the assignment for all buttons is restored to the default values.
8. After use
If you do not plan on using the wireless mouse for an extended period, we recommend switching it off by sliding the On/Off switch (8) to the "Off" position.
8.1 Storage when not in use
When left unused for a long period of time, remove the batteries wireless mouse. Remove the USB nano receiver from your computer's USB port and insert it into the storage slot within the battery compartment (10) of the wireless mouse. Make sure that the storage temperature is maintained between 5^ and 40^ . Humidity must not exceed 90% rel. humidity.
9. Troubleshooting
If, after setup, the wireless mouse does not respond, please test the following:
- Please check the polarity of the batteries (see the chapter "Inserting the batteries").
- Check the charge level of the batteries (if necessary, insert new batteries).
- Please check that the receiver unit is connected properly to your computer (see page 12, "Connecting the USB nano receiver").
- Please try a different USB port.
- If the scrolling function doesn't work, you have probably enabled the media operating mode. Press and hold the CPI button (5) for about 5
seconds to switch to standard mode (the indicator light (3) flashes up once for a longer time).
- Please note that, when using multiple wireless mice, the different components such as the wireless mouse and USB nano receiver are not interchangeable.
- Please note that you should use a pad (e.g. mouse pad) when using the mouse on a glass or glossy surface.
10. Environmental regulations and disposal information

Devices marked with this symbol are subject to the European Directive 2012/19/EU. All electrical and electronic devices must be disposed of separately from household waste at official disposal centres. The USB nano receive electronic device and needs to be disposed of properly. Avoid hazards to the environment and dangers to your personal health by disposing of the device properly. For further information about proper disposal, contact your local council, disposal bodies or the shop where you bought the device.
Respect the environment. Old batteries must not be disposed of with domestic waste. They must collection point for waste batteries. Please note that batteries must be disposed of fully discharged at appropriate collection points for old batteries. If disposing of batteries which are not fully discharged, take precautions to prevent short circuits. To prevent any short circuits cover the battery poles with insulating tape.

Dispose of all packaging in an environmentally friendly manner. Cardboard packaging can be taken to paper recycling centres or public collection points for recycling. Any film or plastic contained in the packaging should be taken to your public collection points for disposal.
11. Conformity notes

This wireless mouse complies with the basic and other relevant requirements of RE Directive 2014/53/EU and the RoHS Directive 2011/65/EU.
The complete EU Declaration of Conformity is available
for download from this link:
www.targa.de/downloads/conformity/307348.pdf
12. Warranty and service information
This device is sold with three years warranty from the date of p. Please keep the original receipt in a safe place as proof of purchase. Before using your product for the first time, please read the enclosed documentation. Should any problems arise which cannot be solved in this way, please call our hotline. Please have the article number and, if available, the serial number to hand for all enquiries. If it is not possible to solve the problem on the phone, our hotline support staff will initiate further servicing procedures depending on the fault. Within the warranty period the product will be repaired or replaced free of charge as we deem appropriate. No new warranty period commences if the product is repaired or replaced. Consumables such as batteries, rechargeable batteries and lamps are not covered by the warranty.
Your statutory rights towards the seller are not affected or restricted by this warranty.

Service

Phone: 0800 404 7657
E-Mail: targa@lidl.co.uk

Phone: 1890 930 034
E-Mail: targa@lidl.ie

Phone: 800 62230
E-Mail: targa@lidl.com.mt

Phone: 8009 4409
E-Mail: targa@lidl.com.cy
IAN:307348

Manufacturer
TARGA GmbH
Coesterweg 45
DE-59494 Soest
GERMANY