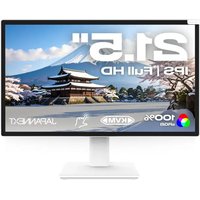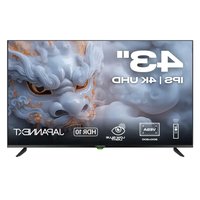
JN-i432TUR - Monitor Japannext - Free user manual and instructions
Find the device manual for free JN-i432TUR Japannext in PDF.


| Product Type | 43-inch LED/LCD Monitor |
| Brand and Model | Japannext JN-i432TUR |
| Screen Size | 43 inches (109.2 cm) |
| Panel Type | IPS |
| Native Resolution | 3840 x 2160 (UHD 4K) |
| Brightness | 250 cd/m² |
| Contrast Ratio | 1200:1 |
| Refresh Rate | 60 Hz |
| Response Time | 8 ms (Gray to Gray) |
| Viewing Angle | 178° horizontal / 178° vertical |
| Displayable Colors | 1.07 billion colors (sRGB 96%) |
| HDR Technology | HDR10 (HDMI) |
| Built-in Speakers | 2 x 10 W |
| Video Connectivity | 3 x HDMI 2.0 (3840x2160 @ 60 Hz) |
| Audio Connectivity | Line Out audio output, optical output |
| Other Connectors | USB (multimedia playback), YPbPr component input, composite video |
| Dimensions (without stand) | 958 x 563 x 90 mm |
| Net Weight | 6.5 kg |
| VESA Mount Standard | 200 x 200 mm |
| Power Consumption (typical) | 44 W |
| Standby Power Consumption | ≤ 0.5 W |
| Power Supply | AC 100-240 V, 50/60 Hz |
| Cleaning and Maintenance | Soft LCD-specific cloth; do not use alcohol, acetone, or direct spray cleaner; turn off before cleaning. |
| Safety | Do not open the casing; avoid moisture and water; do not block ventilation openings; use on a flat, stable surface. |
| Repairability | Contact JAPANNEXT customer service (09 70 70 80 90) or the retailer; do not repair yourself. |
| Included Accessories | HDMI cable, remote control, manual |
Frequently Asked Questions - JN-i432TUR Japannext
User questions about JN-i432TUR Japannext
0 question about this device. Answer the ones you know or ask your own.
Ask a new question about this device
Download the instructions for your Monitor in PDF format for free! Find your manual JN-i432TUR - Japannext and take your electronic device back in hand. On this page are published all the documents necessary for the use of your device. JN-i432TUR by Japannext.
USER MANUAL JN-i432TUR Japannext
text_image
ENERG 54 kWh/1000h HOR 54 kWh/1000hImportant :
Cleaning and maintaining the monitor 21
How to maintain the monitor 21
The symptoms listed 21
Welcome 2 2
Quick Start Guide 23
Assembling the Monitor Base 23
Connection with a computer 24
Accessories 24
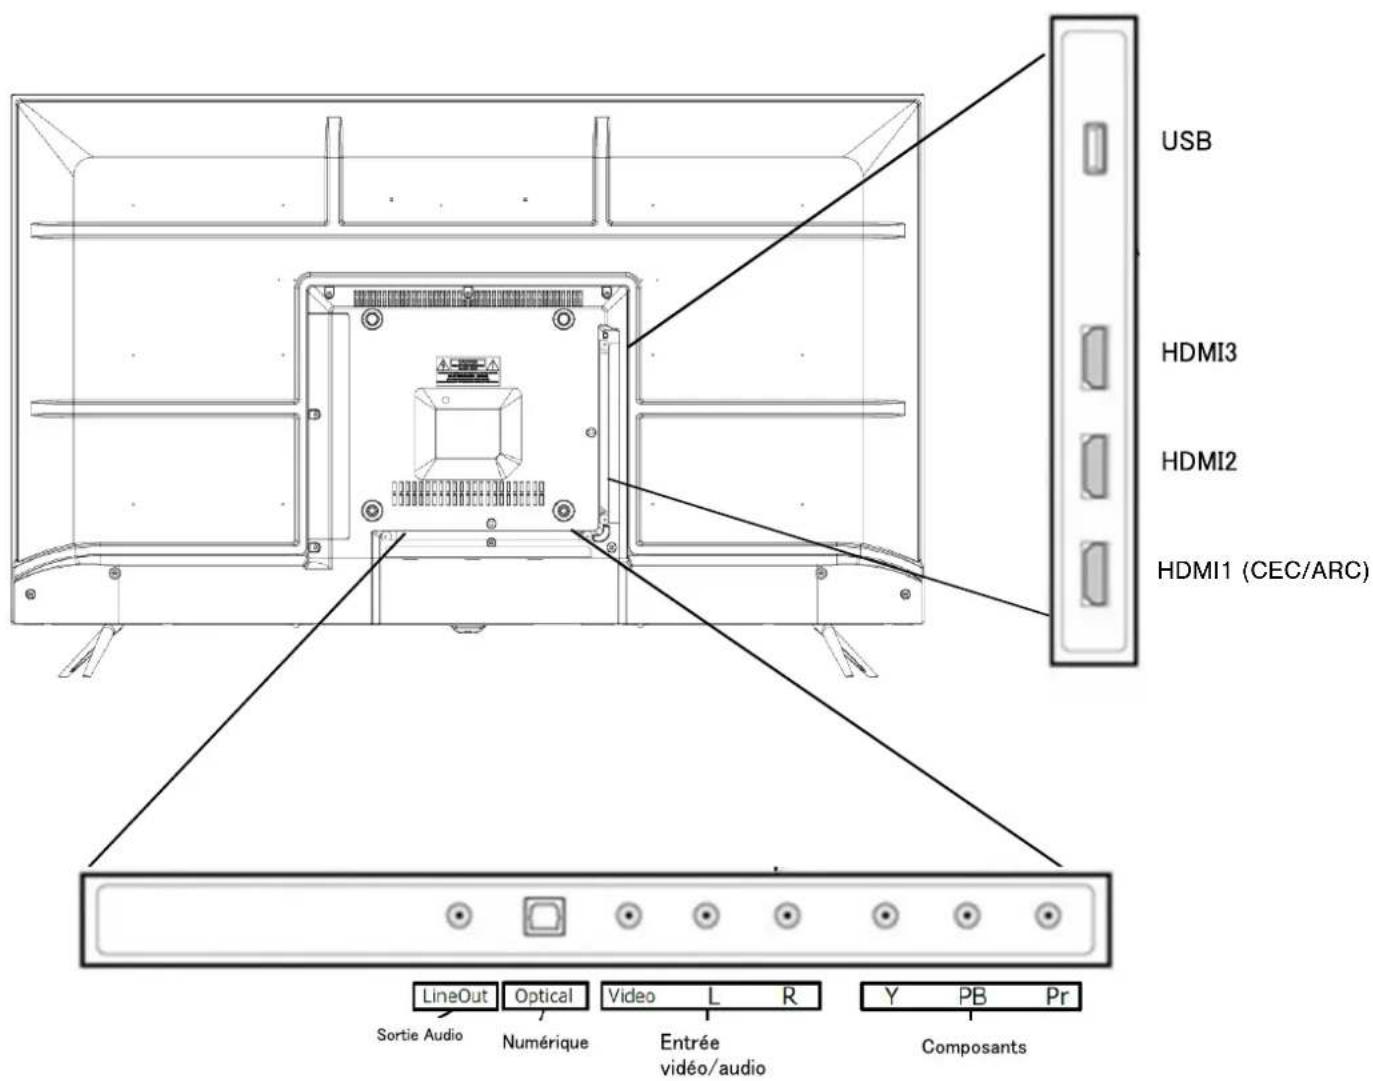
Interface / Connectivity 25
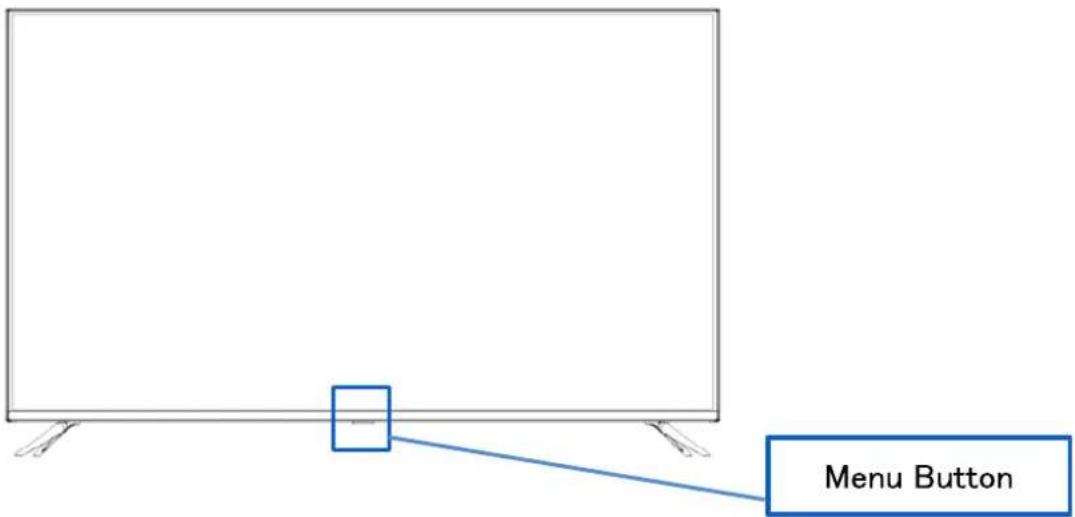
Description of the display button 26
On-Screen Menu (OSD) 27
USB device screen and operations 28
Media selection 29
Example of control panel (when viewing a movie) 29
About HDR 30
Dysfunction 31
Main specifications 32
Other notes 3 3
Customer Support 34
natural_image
Technical line drawing of a flat-screen monitor with side-mounted sensors and rear panel (no text or symbols)text_image
QR code image containing encoded data, no visible human-readable textJAPANNEXT Co., Ltd. Département CS
Chiba-Ken Isumi-Shi Namegawa 506-5
4K UHD Monitor - 43 inches LED Monitor/LCD Screen
Manual
text_image
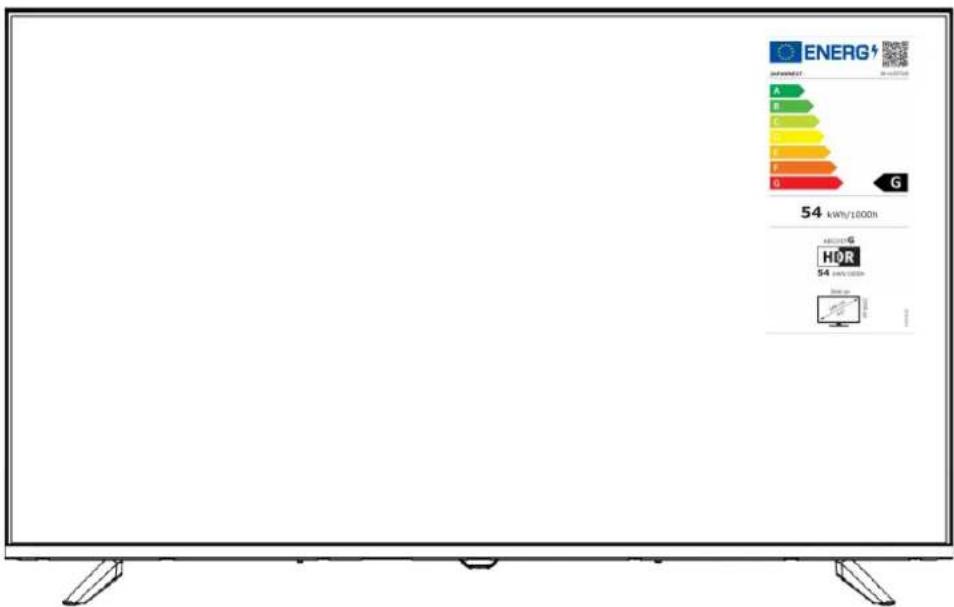
ENERG 54 kWh/1000h HOR 54 kWh/1000hImportant :
Please be sure to read this instruction manual before use.
Please use it correctly for your safety.
Once you have read it, be sure to keep it.
Please read all included instruction manuals carefully before use.
- Place the monitor on a flat, stable surface. To avoid the risk of fire or electric shock, avoid high temperatures, low temperatures, high humidity and accumulation of dust.
Do not use the monitor where it may become wet or exposed to water. - Do not open and never cover the monitor case because it contains high voltage parts inside which could cause serious injury or fire if you come into contact with them.
- If the power supply is damaged, please contact our customer service or your dealer. Never attempt to inspect or repair the product yourself.
- Before use, please ensure that all cables are properly connected and the power cord is not damaged. If you discover any damage or blurred areas, please contact your dealer immediately.
- The slots and openings on the top or back of the monitor are required ventilation holes for this product. Do not cover these holes. Do not place this product near or above a heat source such as a radiator without adequate ventilation.
- Do not insert foreign objects or spill liquids into any openings in the monitor case. This could cause damage or malfunction.
• Always operate the monitor using the type of power source indicated on the product label.
If you are unsure of the type of power supply you have, please contact your local power company. - Do not apply excessive current to sockets or extension cords. Use caution as excessive current can cause electric shock and is very dangerous.
- To protect your monitor from damage caused by power surges, turn off power to the device during long periods of inactivity or during lightning storms.
- To ensure satisfactory operation of the monitor, the computer must be equipped with a properly configured outlet marked in the AC100-240V range.
-
If you experience technical problems or concerns with your monitor, please contact our customer service or authorized reseller.
-
To work safely, make sure to establish the ground connection before connecting the power plug to the power source. Also, when disconnecting the ground connection, make sure to unplug the power plug first.
- This product is not intended for continuous use for 24 hours. Please unplug the power plug when you do not use the product for a long time.
- The included AC adapter and cord are intended for this product only. Do not use it for other equipment.
- Do not use cleaners or detergents containing alcohol or acetone to clean your monitor. Make sure to use a cleaner specifically designed for LCD monitors. Do not spray liquid cleaner directly on the screen. Please note that if the cleaning fluid drips and gets inside the monitor, it is very dangerous as it may cause electric shock or fire. LCD panels are easily damaged, so do not rub it with hard objects.
- Before lifting or moving the monitor, turn off the power switch and unplug all cables and power cords. When installing the monitor, lift it using the appropriate method. When lifting or carrying the monitor, make sure to grip it by the edges. Never lift the monitor by its stand or cord.
Precaution
- Using the monitor in a dark room, or using it continuously for long periods of time, may cause eye fatigue.
• Take a break of 5 to 10 minutes every hour and use the monitor in a reasonably bright room.
Before cleaning the monitor, turn off the power and unplug all cables and cords.
How to maintain the monitor:
- LCD panel area: Do not use tissue paper, etc., instead use a clean, soft cloth specially designed for LCD panels. Please wipe the monitor gently. For difficult-to-remove stains, use a neutral cleaner specifically designed for LCD panels.
- Monitor frame: Wipe with a soft cloth dampened with a mild cleaner.
The symptoms listed below are normal conditions for the monitor
- When first used, the screen may flicker due to the nature of the backlight. If this symptom appears, please turn off the monitor and then turn it on again.
- Depending on your desktop setup, displayed colors, and brightness, brightness may appear uneven.
- Several pixels may or may not always be lit.
- If you display the same image for a long time, an afterimage from the previous image may persist even after switching to a different image.
In this case, the screen will recover slowly. Otherwise, turn off the power for a few hours and the problem will be fixed.
Instead of trying to repair the monitor yourself, contact customer service or the dealer.
Thank you for purchasing the 43 inch LCD monitor JAPANNEXT.
The installed panel supports UHD resolution (3840X2160). We recommend using it in UHD (4K)
resolution for maximum performance. Original performance cannot be achieved at resolutions lower than UHD (4K).
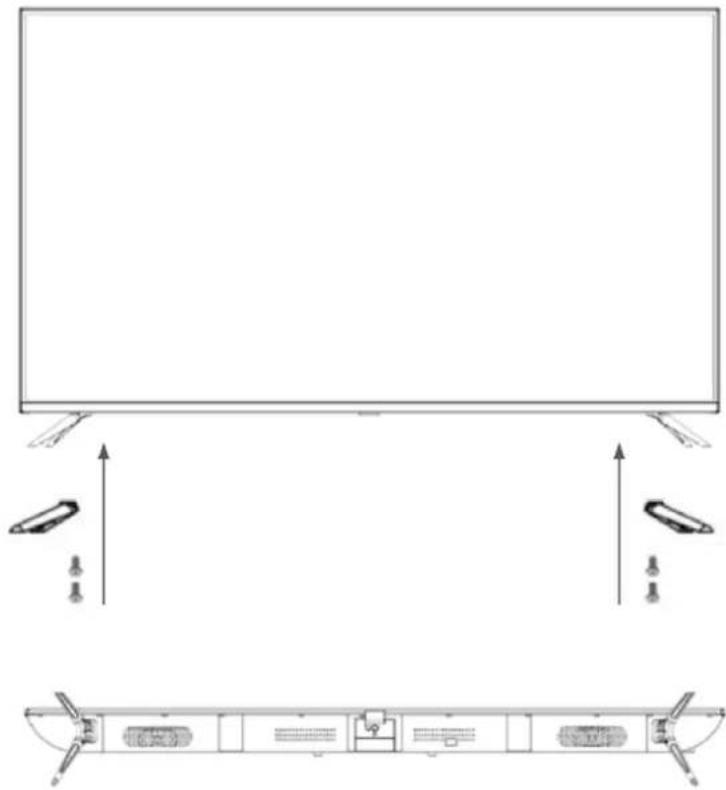
Assembling the Monitor Base
- Spread a soft cloth on a flat, stable surface and place the device screen side down on it.
- Align the screw holes on the monitor body and stand using the image below as a reference.
- Secure the bracket body and bracket using the screws provided.
natural_image
Technical line drawing of a flat-screen monitor with side and top views, showing internal components and directional arrows (no text or symbols)Connection with a computer
- Make sure the monitor and computer are turned off before connecting the cable.
- Connect the power cable and compatible cable (HDMI) to the monitor.
Also connect the (HDMI) cable to the computer. - Turn on the monitor and computer.
Notice : Since problems may occur, do not connect HDMI, Type-C and DP cables at the same time.
Please connect only one to a computer.
Accessories

Manual

HDMI cable
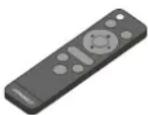
Remote
text_image
USB HDMI3 HDMI2 HDMI1 (CEC/ARC) LineOut Optical Video L R Y PB Pr Sortie Audio Numérique Entrée vidéo/audio ComposantsDescription of the display button
text_image
Menu Button- When the On-Screen Menu (OSD) is not open
| 1 time | Open the control menu |
| Long hold | Turn on/off |
- When the on-screen menu (OSD) is displayed
| 1 time | Move menu item to the right |
| Long hold | Menu item selection / Execute button v+ - |
• Operation using the control menu
| Turn off | |
| Open OSD menu | |
| Open input switching window | |
| ^ | Long press to move item up |
| ∨ | Long press to move item down |
| + | Long press to increase the value or move right |
| - | Long press to decrease the value or move to the left |
On-Screen Menu (OSD)
| Settings | Menu | Setting value | Comment |
| Video Settings | Image mode | standard | Select picture mode |
| user | |||
| distinct | |||
| Bright HDR | Various settings > Other settings > Set HDMI 4 Enhanced and select when HDR is enabled | ||
| Shadow HDR | |||
| User HDR | |||
| BLACK LEVEL | 0-100 | Used during user settings | |
| Contrast | 0-100 | ||
| Color intensity | 0-100 | ||
| Tint | 0-100 | Available only when using components. It can be used if the video format is not available. | |
| Sharpness | 0-100 | ||
| Brightness | 0-100 | Adjust backlight from 0 to 100 | |
| Color temperature | standard | When HDR is enabled (Standard/Hot/Cold) | |
| blue light reduction | |||
| cool | |||
| Other video settings | aspect ratio | Video formats that are not available cannot selected. | |
| noise reduction | Off / Low / Medium / High Available only when using components. | ||
| dynamic contrast | on/off | ||
| Mode HDMI | Video/Computer/Auto | ||
| HDR | low/medium/high | Select when HDR is enabled | |
| Audio settings | Audio Mode | standard | Select audio mode |
| music | |||
| film | |||
| sport | |||
| Low | 0-100 | Set when using custom audio mode | |
| Triple | 0-100 | ||
| Balance | -50 ~ 50 | The balance can be adjusted from -50 to 50 | |
| Digital output | disabled | Used when outputting digital audio | |
| binary stream | |||
| P C M | |||
| Surround | on/off | Surround on/off | |
| AVL | on/off | Available only when using components | |
| Speaker | on/off | Select speaker on/off *Does not work with mute remote |
On-Screen Menu (OSD)
| Settings | Menu | Setting value | Comment |
| Time | shutdown timer | disabled/5/10/15/30/60/90/120/180/240 | |
| Other settings | menu language | French / English | |
| OSD Timeout | 15/05/30/45/60 | ||
| Other settings | audio only | off or on | |
| HDMI 4K Standard/Improvement | Select when HDMI is connected*1 | ||
| Reset | no/yes | ||
| HDMI-CEC | Equipment link control enabled/disabled | Not available.(Some devices can be used.CEC functionality is not guaranteed.) | |
| Powering off the on/off system | |||
| TV link when setting On/Off | |||
| ARC on/off | |||
| List of connected devices | |||
| Selection of connected devices | |||
| List of operations |
*Please note that product design, specifications and appearance are subject to change without notice due to product improvement.
*If the information listed differs from the actual item, priority will be given to the actual item.
*To use HDR, set Miscellaneous Settings > Other Settings > HDMI 4K to "Enhanced".
(To enable HDR, settings are also required on the connected device such as a PC. Please contact the manufacturer of each device for details on the connected device settings.)
*Even if you connect headphones to the LINE OUT (audio output) terminal, sound will continue to output from the speakers and the audio settings will not be reflected in the headphones. If you want to listen to audio only with headphones, please set the speaker volume to 0 or mute it.
The LINE OUT jack is not dedicated to headphone output, so you cannot adjust the audio from the monitor's OSD menu.
*1 When using 3840 x 2160@60Hz, please change the OSD menu > Miscellaneous Settings > HDMI 4K to Enhanced.
USB device screen and operations
When you select “Media” for source selection, it is the output of the USB device connected to the USB terminal on the back of the product.
You can select or view data files.
• Media selection
| Medias | Content | Comment |
| photo | You can watch image data | .jpg/.jpeg/.png etc. |
| music | You can listen to music data | .mp3 etc. |
| film | You can watch video data | .mpeg/.avi etc. |
*The above information is for reference only, and even if mentioned, it may not be usable depending on the file format. Additionally, playback may not be possible depending on the data resolution.
Examples :
MP4 Video: Only supports up to FHD (1920 x 1080)
JPEG: Supports resolution up to 4K
JPG: only supports up to 1024 × 768
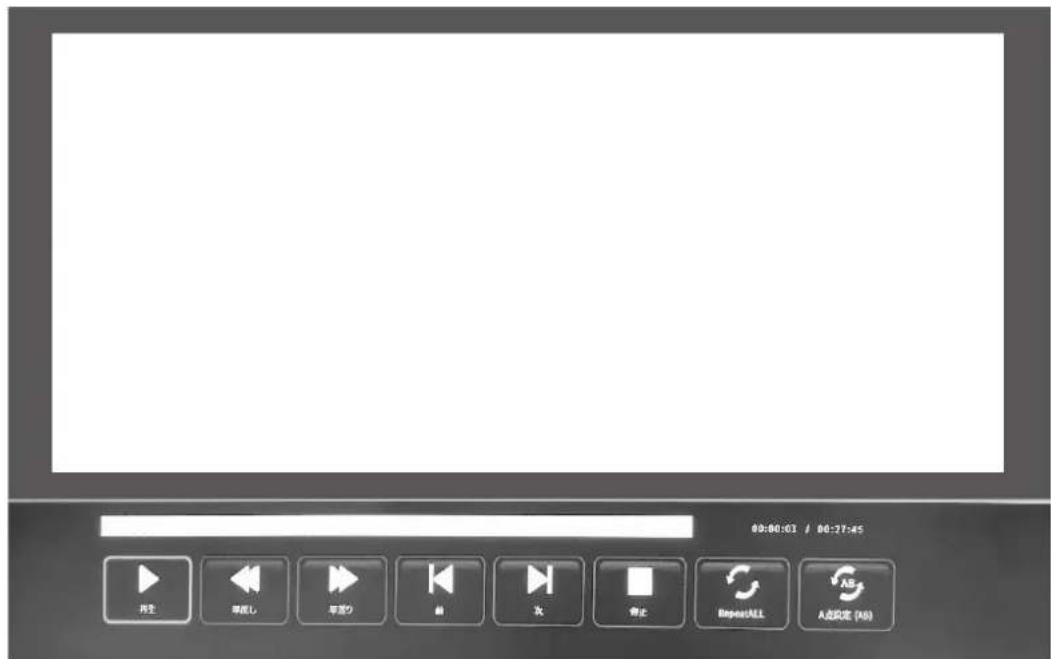
• Example of control panel (when viewing a movie)
If you press the selection button on the remote control while each data is displayed, the control panel will be displayed. Use ◀▶ buttons to move and press OK button to confirm.
HDR stands for High Dynamic Range. This is a display technology that can express a wider range of brightness than the conventional SDR standard dynamic range.
Set HDR in the screen menu (OSD) to automatic.
The monitor can then automatically enable HDR functionality if the player and content are compatible.
Depending on Windows 10 settings, HDR may not display correctly.
Check if HDR settings in Windows 10 are enabled or disabled.
How to open the settings screen:
Settings > System > Display
Depending on your graphics card specifications, photos and text may not display correctly when the monitor's HDR function is enabled.
Note : If you enable HDR, some OSD menu functions will not be available.
Note : To enable HDR, the connected device and content must support HDR.
Description: Windows 10 Fall Creators Update (version 1709), if the graphics card does not support HDR, Windows HDR settings will not be displayed.
The HDR function is enabled only for HDR content.
If you enable HDR settings in Windows 10, your desktop screen may appear darker than if you set it to Standard Dynamic Range (SDR) mode. This is not a malfunction, but rather the result of the monitor interpreting HDR and SDR signals differently.
| Symptoms | Checkpoint |
| Power LED does not light up | • Is the device turned on by pressing the power button?• Make sure the power cord is securely connected to the monitor and the outlet. |
| No image appears even though the power indicator is on | • Is the blank screensaver running? Please move your mouse or keyboard• Make sure the brightness and contrast are not set to minimum.• Please make sure the signal cable is properly connected to your monitor and computer.• Check if the signal cable pins are bent or the cable is damaged.• Is your computer turned on? If you have another monitor, try connecting it to see if the works properly.• Does the computer signal timing match the monitor specifications? |
| The image is distorted or ripp appear in the image. | • Please make sure the signal cable is well connected to your monitor and computer.• Keep electrical devices that may cause electrical interference away from the monitor.• Does the computer signal timing match the monitor specifications? |
| The image position is off-center. Image size is incorrect | • Is your computer resolution correct?• Does the computer signal timing match the monitor specifications? |
| The screen is too bright/too dark | • Screen (OSD): Adjust brightness and contrast settings from the menu. |
| The image is blurry or unclear | • Set the display resolution on your PC to the same as the recommended native screen re of the monitor.• Does the computer signal timing match the monitor specifications?• Check if the signal cable pins are bent or the cable is damaged. |
| The color of the image is incorrect | • Check if the signal cable pins are bent or the cable is damaged.• Screen (OSD): Please adjust the red/blue/green color settings in the menu (color temperature).• Screen (OSD): Please reset the settings from the menu.• Does the computer signal timing match the monitor specifications? |
| Unable to display UHD | • HDMI supports resolutions up to 3840X2160 (UHD). However, some graphics cards do not support 3840X2160. Hardware limitations of your computerPlease check with your local distributor or manufacturer for details. |
| Abnormal image noise | • Are the cables correctly connected? |
| LCD | Panel type | IPS |
| Panel size | 43" | |
| Backlight | D-LED | |
| Luminosity | 250 cd/m2 | |
| Contrast | 1200:1 | |
| Refreshment rate | 60Hz | |
| Contrast (DCR) | YES | |
| Pixel size | About 0,245 mm | |
| Resolution | 3840x2160 | |
| Screen size | 16:9 | |
| Response time | 8 ms (G to G) | |
| Vision angle | H:178°V:178° | |
| Type of surface | semi-glossy | |
| Screen color | 1.07 billion sRGB 96% colors | |
| Features | HDCP | YES 2.2 |
| HDR10 | YES (HDMI) | |
| Signal input | HDMI1 | 2.0 3840 x 2160 at 60Hz *1 |
| HDMI2 | 2.0 3840 x 2160 at 60Hz *1 | |
| HDMI3 | 2.0 3840 x 2160 at 60Hz *1 | |
| USB | Can play videos, still images, audio files, etc. | |
| Audio | Audio output | YES |
| Speaker | 10Wx2 | |
| Power | Consumption | Max ≤75W Typical ≤44W Standby ≤0.5W |
| Environmental conditions | Operating temperature conditions | -20 °C ~ 40 °C |
| Humidity conditions of use | 30% ~ 80% | |
| Appearance/weight /function | External dimensions (without support) | Height 563 mm x Width 958 mm x Depth 90 mm |
| External dimensions (with support) | Height 600 mm x Width 958 mm x Depth 209 mm | |
| Packaging dimensions | Height 632 mm x Width 1028 mm x Depth 120 mm | |
| Product weight | About 6.5Kg | |
| Total packaging weight | About 8,1 kg | |
| Support VESA | 200x200mm | |
| AC power range | AC 100 V 50/60 Hz |
*Please note that product design, specifications and appearance are subject to change without notice due to improvements.
*If the information listed differs from the actual item, priority will be given to the actual item.
*Power consumption is a value measured by our company.
*1 When using 3840 x 2160@60Hz, please change the OSD menu > Other Settings > HDMI 4K to Enhanced.
- The screen is not displayed even if the cable is connected
The connection terminal and input source may not match.
Solution: Display the input switching screen (input switching button on the remote control) and select the name of the connected terminal.
Finally, press the "OK" button on the remote control.
• The screen is bright or dark
There are two types of screen brightness adjustment: backlight adjustment and software adjustment.
The adjustment methods for each are as follows.
Backlight adjustment: OSD menu > Picture settings > Brightness
Software adjustment: OSD menu > Video settings > BLACK LEVEL
*We recommend adjusting the brightness for effective brightness adjustment.
*Please note that product design, specifications and appearance are subject to change without notice due to product improvement.
*If the information listed differs from the actual item, priority will be given to the actual item.

Precautions when removing the monitor body
The LCD panel breaks easily, so two or more people need to unpack it.
When removing the item, hold the frame without touching the panel.
Customer Support

JAPANNEXT
TEL: 09 70 70 80 90
Hours 9:00 a.m. to 5:00 p.m. (Closed Saturdays, Sundays and public holidays)
Contact form
You can easily access the application form by scanning the QR code.
text_image
QR code image containing encoded data, no visible human-readable textJAPANNEXT Co., Ltd. CS Department
Chiba-Ken Isumi-Shi Namegawa 506-5