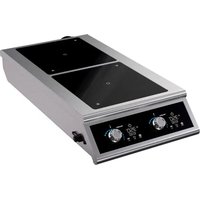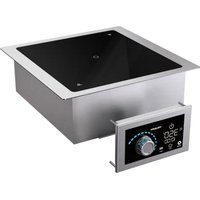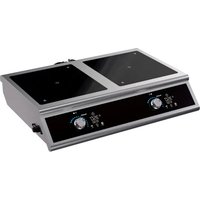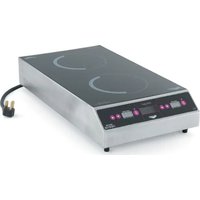
HPI4-300003 - Cooker Vollrath - Free user manual and instructions
Find the device manual for free HPI4-300003 Vollrath in PDF.


User questions about HPI4-300003 Vollrath
0 question about this device. Answer the ones you know or ask your own.
Ask a new question about this device
Download the instructions for your Cooker in PDF format for free! Find your manual HPI4-300003 - Vollrath and take your electronic device back in hand. On this page are published all the documents necessary for the use of your device. HPI4-300003 by Vollrath.
USER MANUAL HPI4-300003 Vollrath
High Power Countertop Induction Ranges with Temperature Control Probe
SAFETY PRECAUTIONS
To ensure safe operation, read the following statements and understand their meaning. This manual contains safety precautions which are explained below. Please read carefully.

WARNING
Warning is used to indicate the presence of a hazard that will or can cause severe personal injury or death.

CAUTION
Caution is used to indicate the presence of a hazard that will or can cause minor or major personal injury if the caution is ignored.
NOTICE: Notice is used to note information that is important but not hazard-related.
To reduce risk of injury or damage to the equipment:
- Unplug this equipment from the wall outlet when not in use.
- Use this equipment only in a flat, level position.
- To protect against electrical shock do not immerse the cord or plug in water. Keep the cord away from heated surface. Do not let the cord hang over the edge of table or counter.
- As a precaution, persons using a pacemaker should stand back 12" (30 cm) from an operating unit. Studies have shown that the induction element will not disrupt a pacemaker.
- Keep all credit cards, driver licenses and other items with a magnetic strip away from an operating unit. The unit's magnetic field will damage the information on these strips.
- The heating surface is made of a strong, non-porous material. However, should it crack or break, stop using and immediately unplug the unit. Cleaning solutions and spills could penetrate the broken cooktop and create a risk of electrical shock.
- Do not operate this equipment with a damaged cord or plug or if it is not functioning properly.
- Do not operate unattended. Closely supervise units operating in public areas and/or around children.
- Do not place any objects inside the air intake or exhaust panels.
- Do not modify the equipment or a attach any accessory other than the included temperature control probe and USB flash drive.
natural_image
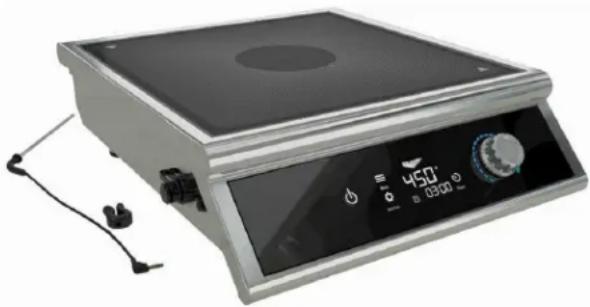
Exterior view of a digital kitchen appliance with a rotary dial and control panel (no visible text or symbols)| Item No. | Watts Plug | Item No. | Watts Plug | ||
| HPI4-2600 2600 | NEMA 8-20P | HPI4-300002 | 3000 | Schuko | |
| HPI4-3000 3000 | HPI4-300002 | ||||
| HPI4-3800 3800 | HPI4-300004 | China | |||
| HPI4-260002 | 2600 | Schuko | HPI4-380002 | UK800 | Schuko |
| HPI4-260003 | UK | HPI4-380003 | |||
| HPI4-260004 | China | HPI4-380004 | China | ||
TABLE OF CONTENTS
| Function and Purpose | page 1 |
| Cookware Requirements | page 2 |
| Environment Requirements | page 2 |
| Clearance Requirements | page 2 |
| Features and Controls | page 3 |
| Operation | page 4 |
| Edit the Default Programs | page 7 |
| Cleaning | page 8 |
| TroubleShooting | page 9 |
| Replace the Fuse | page 11 |
FUNCTION AND PURPOSE
This equipment is intended to heat food in commercial food service operations only. It is not intended for household, industrial or laboratory use.
It is intended to be used with induction-ready cookware. Performance is optimized with Vollrath induction-ready cookware. Other cookware may have different properties which may alter performance.
The Temperature Control Probe is intended to provide advanced temperature control. It is not intended to be used as a thermometer for measuring the temperature of food. The temperature control probe port is intended for use only with the Vollrath supplied probe. It is not a headphone jack. The USB port is intended for use only with the supplied USB flash drive.
COOKWARE REQUIREMENTS
Compatible
text_image
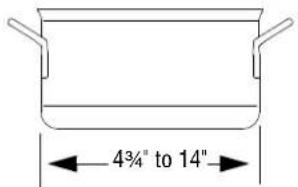
4¾" to 14"- Flat base 4 34'' to 14" (12.1 to 35.6 cm) in diameter
• Ferrous stainless steel, iron, cast iron
Incompatible
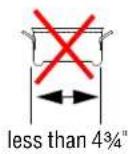
- Base is not flat
- Base is less than 4^3/4 (12.1 cm) in diameter
• Pottery, glass, aluminum, bronze or copper cookware
Note: Cookware with inferior construction or material may not perform well. Cookware with a larger base diameter can be used, however only the area of the cookware above the induction coil will heat. The more cookware extends past the coil, the more the overall performance will be reduced.
ENVIRONMENT REQUIREMENTS
NOTICE: Indoor use only.
NOTICE: Do not place the equipment on or near heat-producing equipment.
NOTICE: This equipment requires a dedicated circuit.

Maximum Ambient Temperature as measured at the air intake. See below): 104°F (40°C)
CLEARANCE REQUIREMENTS
NOTICE: This equipment is not designed to be enclosed or built into any area. Sufficient airflow must be allowed around the equipment. Blocking the airflow could reduce performance.
2" (5.1 cm) minimum clearance Air intake Air exhaust

Single Range Two Ranges
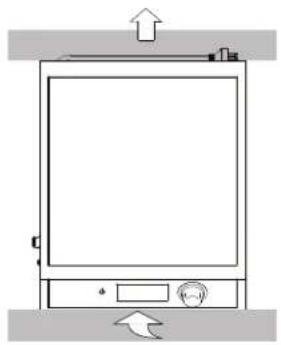
natural_image
Simple line drawing of a refrigerator with an upward arrow and control knob (no text or symbols)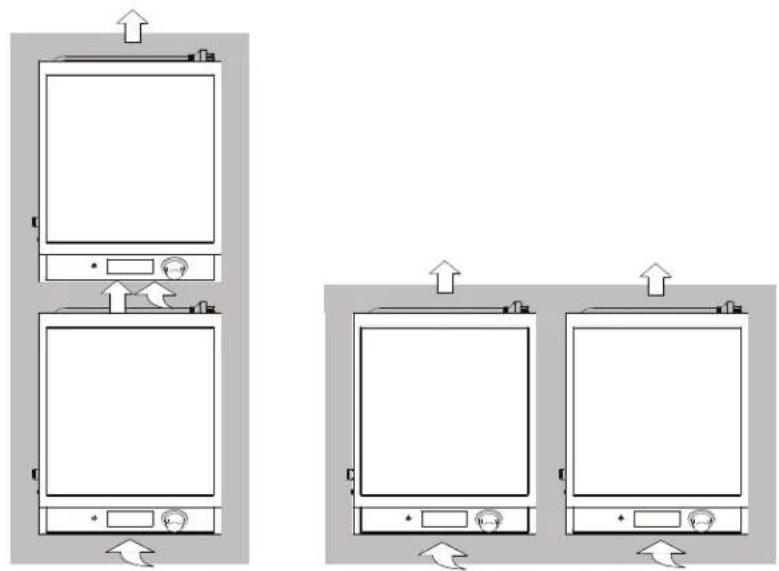
natural_image
Diagram showing three identical 3D kitchen appliances with directional arrows indicating movement or positioning (no text or symbols present)NOTICE: Operating more than two ranges side by side is not recommended.
FEATURES AND CONTROLS
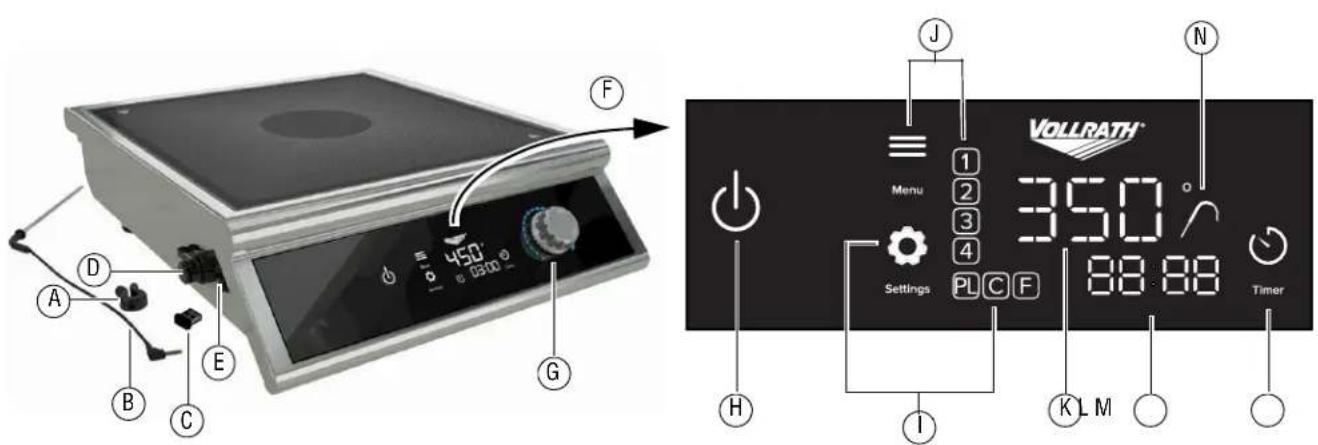
text_image
A B C D E F 450° 300° G J Menu 35.0 ° Settings PL CF 88:88 Timer H I K L M NA Temperature Probe Clip
B Temperature Control Probe
C USB Flash Drive
DUSBPort
E Temperature Control Probe Port
F Control Panel
G Control Knob. Sets power level, temperature or time.
• Monitors food and cooks at set temperature
- Use for most precise temperature control
- Use for sauces, stocks, deep frying
• Not for use as a thermometer
H Power On/Off
I Settings

1-100% of power
• Responsive, gas flame-like control
- Use for fast, powerful heating
- Use for boiling, sautéing and searing

Temperature in °C
• Single degree increments in °F or °C
• Steady, controlled heating
- Use for more precise pan control

Temperature in °F
• Use for sauces, stocks, poaching
J Programs. Four customizable programs. See "Edit the Default Programs" on page 7.
K Power Level and Temperature Display
L Timer Display
M Timer On/Off
N Temperature Control Probe Indicator


WARNING
Electrical Shock Hazard
Keep water and other liquids from entering the inside of the equipment. Liquid inside the equipment could cause an electrical shock.


CAUTION
Burn Hazard
Do not touch hot food, liquid or heating surfaces while equipment is heating or operating.
NOTICE: This equipment requires a dedicated circuit.
NOTICE: Using a voltage other than the nameplate rated voltage, modifying the power cord or electrical components may damage unit and will void the warranty.
NOTICE: Do not use extension cords, power strips or surge protectors with this equipment.
NOTICE: Do not preheat empty cookware nor leave an empty cookware on an operating range. Because of the speed and efficiency of the induction range, cookware can very quickly overheat and be damaged.
NOTICE: Do not drop cooking utensils or other objects onto the cooking surface or control panel. The surfaces could break. The warranty does not cover broken cooktop or control panel glass.
NOTICE: Do not heat sealed cans or containers. They may explode.
NOTICE: When the temperature control probe or the USB flash drive are not in use, the covers must be installed over the ports. Operating this equipment without the covers could allow food debris or moisture to enter the ports which could damage the equipment. This type of damage is not covered by the warranty.
Turn on the Induction Range
- Place the induction range on a flat stable surface.
- Plug the range into an electrical outlet that matches the voltage shown on the rating plate.
- Place a pan containing food or liquid onto the cooking surface.
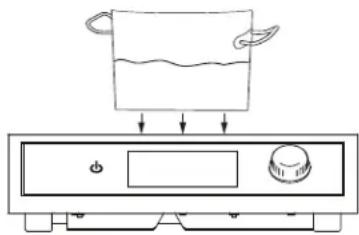
text_image
Diagram showing a cooking pan with liquid and directional arrows, likely illustrating a cooking or heating process.4.
OPERATION (CONTINUED)
Select a Cooking Method
Choose between power level, pan temperature or select one of the cooking programs.
| Power LevelResponsive, gas flame-like controlUse for fast, powerful heatingUse for boiling, sautéing and searing | TemperatureSingle degree increments in °F or °CSteady, controlled heatingUse for more precise pan temperatureUse for sauces, stocks, poaching | ProgramsSelect a default program or see “Edit the Default Programs” on page 7 for how to create a custom program. |
1. Touch  until PL is selected. until PL is selected. 2. Rotate 2. Rotate  act a power level. act a power level. | 1. Touch  until C or F is selected. until C or F is selected. 2. Rotate 2. Rotate  act a temperature.Tip: When heating delicate foods, start with a lower temperature and gradually increase temperature. act a temperature.Tip: When heating delicate foods, start with a lower temperature and gradually increase temperature.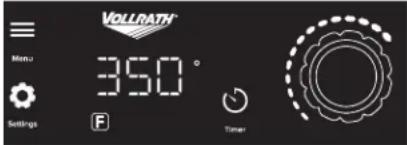 | 1.  .2. The program numbers will flash.3. Touch repeatedly until the desired program is selected (not flashing). .2. The program numbers will flash.3. Touch repeatedly until the desired program is selected (not flashing).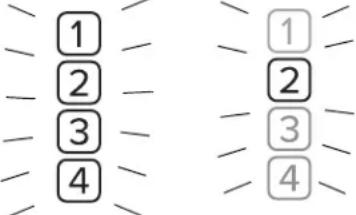 1 Chocolate. Use probe. Heat to 110° F. Hold at 90° F. No timer.2 Fajita Heater. Power level 100 for 1 minute.3 Simmer. Use probe. Heat to 190° F. No timer.4 Rethermize Chilled Food. Use probe. Heat to 165° F. Hold 2 minutes. Hold at 155° F. No timer.4. After three seconds the program will start.The will flash to indicate the program is running.To Cancel the ProgramTouch repeatedly until all program numbers are unselected. 1 Chocolate. Use probe. Heat to 110° F. Hold at 90° F. No timer.2 Fajita Heater. Power level 100 for 1 minute.3 Simmer. Use probe. Heat to 190° F. No timer.4 Rethermize Chilled Food. Use probe. Heat to 165° F. Hold 2 minutes. Hold at 155° F. No timer.4. After three seconds the program will start.The will flash to indicate the program is running.To Cancel the ProgramTouch repeatedly until all program numbers are unselected. |
OPERATION (CONTINUED)
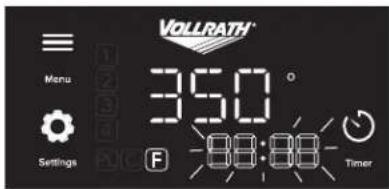
Set the Timer (Optional)
1.

- The time will flash.
text_image
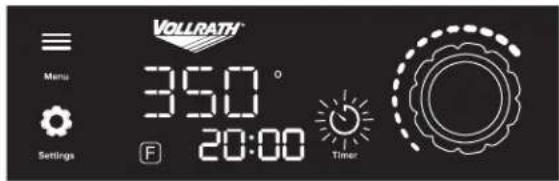
VOLLRATH Menu Settings 35.0 ° 88:88- Timer- Rotate to select a time in 30 second increments.
After three seconds, timer will begin to count down and flash to indicate the timer is in use.
text_image
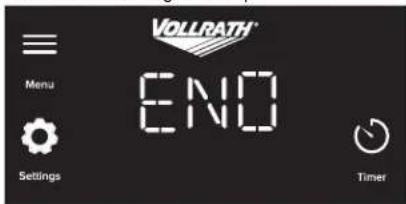
VOLLRATH Menu 350° Settings F 20:00 Timer- When the timer reaches zero, a buzzer will sound and the display will show END. Heating will stop.
text_image
VOLLRATH® Menu Settings ENO TimerChange the Duration of Time
1.

- Then rotate to change the duration of time.

Cancel the timer
Touch

Use the Temperature Control Probe (Optional)
The temperature control probe provides advanced temperature control. The probe monitors the temperature of the food and then automatically adjusts the output of the range as needed to heat the food to the selected temperature. For best performance and food quality, stir the food often when using the temperature control probe.
NOTE: The Temperature Control Probe is intended to provide a more consistent and accurate cooking temperature. It is not intended to be used as a thermometer for measuring the temperature of food.
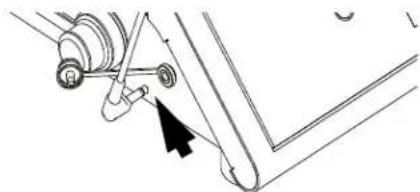
Attach Probe and Insert into the Food
- Use a soft clean cloth to wipe the tip of the probe. This is important to keep the port clean and working properly.
- Remove the cover from the temperature control probe port. Plug the probe into port.
natural_image
Mechanical assembly diagram showing a lever mechanism with a black arrow pointing to a pivot point (no text or labels)- Place the probe into the center of the food. Use the included probe clip to secure the probe to the pan and suspend it in the center of the food. Do not allow the probe to rest on the bottom of the cookware. For the most accurate temperature control, the probe must be positioned into the center of the food, and not touch the bottom of the pan.
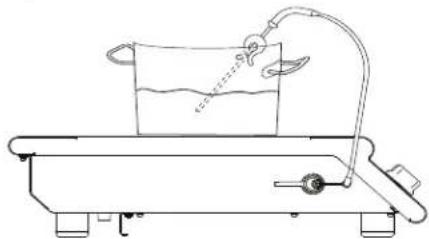
natural_image
Simple line drawing of a laboratory apparatus with a beaker, tubing, and a scale (no text or symbols)Set the Temperature
- Touch

or is selected


- Rotate

a temperature.
Heat the Food
- The probe icon will flash as the food heats to the set temperature. The display shows the set temperature.
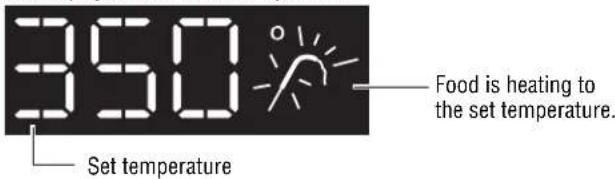
text_image
350 Set temperature Food is heating to the set temperature.- When the probe detects the food the reached the set temperature, the probe icon will change to a steady state
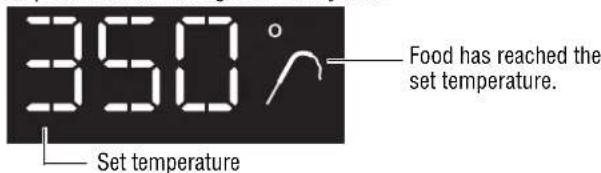
text_image
350° Food has reached the set temperature. Set temperatureEDIT THE DEFAULT PROGRAMS
The factory-set programs can be edited. Use a computer to access the program editor on the USB flash drive. Then load the new programs into the induction range. One USB flash drive can be used to program multiple induction ranges.
Load the Program Editor
- Remove the USB flash drive from the induction range. Insert it into the USB port on your computer.
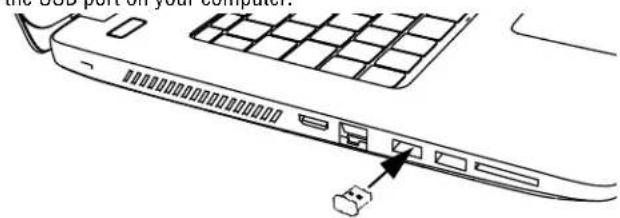
text_image
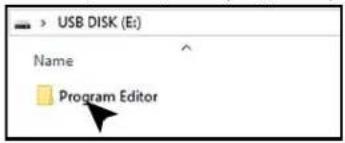
the USB port on your computer- Open the Programs folder.
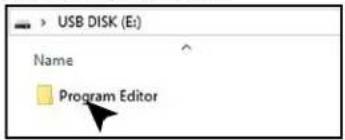
text_image
USB DISK (E:) Name Program Editor- Double click the Programs Editor file.
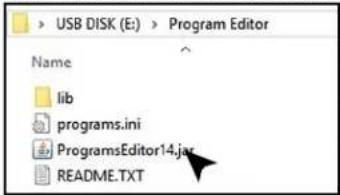
text_image
USB DISK (E:) > Program Editor Name lib programs.ini ProgramsEditor14.jar README.TXTIf the Program Editor does not open or if you are asked to choose a program, you may need to install or update the Java program on your computer. Java is free and can be downloaded from www.java.com.
Edit Programs
- Enter data for up to four programs. Each program can have up to three stages.

text_image
VOLLRATH Invalid data Valid data Editing is not allowed PL = Power Level C = Celsius F = Fahrenheit Program1 Program2 Program3 Program4 PL C F 50 Continuous Run Timer Enabled 55.1 Minutes Next step PL C F 50 Continuous Run Timer Enabled 5 Minutes Next step PL C F 50 Continuous Run Timer Enabled 5 Minutes B Generate file to USB flash driveA Programs B Stages
- For each stage in the program:
| Step 1 Step 2 Optional | ||||
| Select One | Enter | Select One | Enter Time | Add Stages. Select |
| PL | Power level or temp (°C or °F) | Timer Enabled | Minutes* | Next step |
| C | 5.5 | |||
| F | 50 | Continuous Run | Skip | |
*Time can be entered in full and half minutes. To enter a half minute, type .5. For example for five and one half minutes, type 5.5.
- To edit another program, click the program tab.

text_image
Program1 Program2 Program3 Program4-
Enter data for each program you wish to create.
-
To save the programs, click the Generate File button.
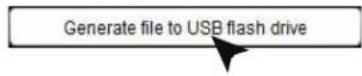
- When you see the message at the bottom of the program editor window, remove and then re-insert the flash drive.
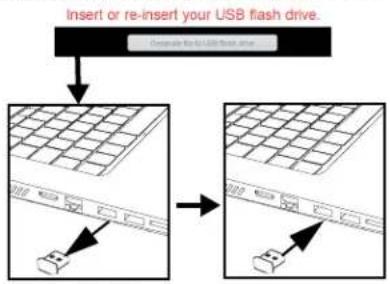
flowchart
graph TD
    A["Insert or re-insert your USB flash drive"] --> B["Device placement"]
    B --> C["Device placement"]
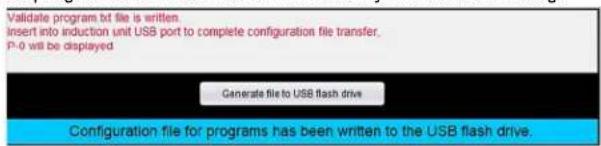
- The programs are saved to the USB when you see this message
text_image
Validate program bt file is written. Insert into induction unit USB port to complete configuration file transfer. P-0 will be displayed Generate file to USB flash drive Configuration file for programs has been written to the USB flash drive.and the programs.txt appears on the file list.
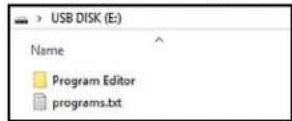
- The edited programs are now ready to be transferred to the induction range.
EDIT THE DEFAULT PROGRAMS (CONTINUED)
Transfer Programs to the Induction Range
- Plug in the induction range. Do NOT turn on the range.

- Only the Vollrath logo on the control panel should be illuminated.
text_image
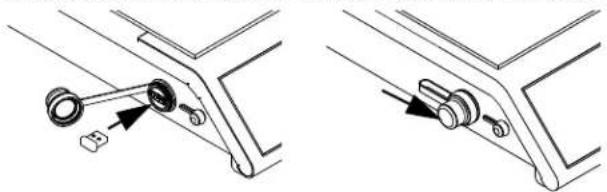
VOLLRATH™- Insert the USB flash drive into the induction range. The USB flash drive can be left in the range for storage. Close the USB port cover.
natural_image
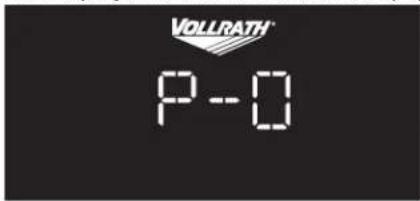
Technical line drawing showing two mechanical assembly steps with no visible text or symbols- When the programs have transferred, the display will show
text_image
VOLLRATH P-05.

- The new programs are now available for use.
CLEANING
To maintain the appearance and increase the service life, clean your induction range daily.


WARNING
Electrical Shock Hazard
Do not spray water or cleaning products. Liquid could contact the electrical components and cause a short circuit or an electrical shock.


CAUTION
Burn Hazard
Heating surface remains hot after equipment is turned off. Hot surfaces and food can burn skin. Allow the hot surfaces to cool before handling.
NOTICE: Do not use abrasive materials, scratching cleansers or scouring pads to clean the equipment. These can damage the finish.
- Touch to turn off the range.
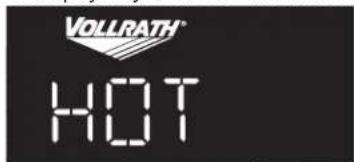
The display may show HOT until the cooking surface cools.
text_image
VOLLRATH® HOT-
Unplug the cord from the wall outlet.
-
Allow the equipment to cool.
-
Wipe the exterior with a clean damp cloth.
-
Thoroughly wipe off any soap residue.
NOTICE: Residue could corrode the surface of the unit.
Clean the USB and Temperature Control Probe Ports (As needed)
The USB and temperature control probe port covers should always be in place when not in use to prevent food debris from entering the ports. However, if food debris does enter the ports, they can be cleaned.
- Turn off and unplug the induction range
- Use a cotton swab dipped into isopropyl alcohol to gently remove the debris.
- Allow the port(s) to air dry before placing the cap over the port(s).
TROUBLESHOOTING
| Problem Might be Caused By Course of Action | ||
| The display is flashing. | There is not a pan on the range or the pan is not induction-ready. | Place a pan onto the range. Verify the cookware is compatible. See the Cookware Requirements section in this manual. |
| Message on the Display | ||
| F-01 | The range may have overheated because it is too close to heat producing equipment. | Relocate the equipment away from heat producing equipment. Contact Vollrath Technical Services if the problem persists. |
| F-02 | The cookware may have been too hot when it was placed onto the range. | Remove the cookware. Allow it cool slightly before placing it on the cooking surface. Contact Vollrath Technical Services if the problem persists. |
| F-05, F-06, F-07, F10, F11, F24, F25 | There may be a problem with an internal component. | Try to clear the error by turning the range off, and then on. Contact Vollrath Technical Services if the problem persists. |
| F-08 | The range may have overheated due to insufficient airflow. | Make sure the equipment has adequate airflow. See the Clearance Requirements section in this manual. Verify the air intake under the equipment is not blocked. Contact Vollrath Technical Services if the problem persists. |
| F16 | The sensor may have detected an empty pan was on the range for too long. | Remove the pan. Clear the error by turning the range off, and then on. Place only pans with food in them onto the range. |
| F17, F18 | There may be an issue with the incoming power supply or there may have been a power surge. | Try plugging the range into an a electrical outlet that is on a different circuit. Contact Vollrath Technical Services if the problem persists. |
| F19, F20 | There may be an issue with the incoming power supply quality. | Try plugging the range into an a electrical outlet that is on a different circuit. Contact an electrician to troubleshoot the electrical supply. |
| F22 | The range is plugged into an outlet with the wrong voltage. | Make sure the power at the electrical outlet matches the rating tag on the underside of the range. |
| A prolonged power surge. | Try to clear the error by unplugging, and then plugging in the range. Resume operation. Contact Vollrath Technical Services if the problem persists. | |
| F23 | The range is plugged into an outlet with the wrong voltage. | Make sure the power at the electrical outlet matches the rating tag on the underside of the range. |
| A prolonged dip in the power supply | Try to clear the error by unplugging, and then plugging in the range. Resume operation. Contact Vollrath Technical Services if the problem persists. | |
| HOT | The user turned off the range. The cooking surface is still hot. | This is normal operation. |
| Cookware is not Heating | ||
| The range turned off after 10 minutes. | There is not a pot or pan on the induction range or it is not induction-ready cookware, so the induction range turned off. This is normal. | Verify the cookware is compatible. See the Cookware Requirements section of this manual. |
| The pan suddenly stopped heating. No power level or temperature is displayed. | The timer was in use and time expired. The range stopped heating the pan. | This is normal. A program that includes a timer stage may have been in use or the timer may have been inadvertently activated. |
| Vollrath logo is not illuminated even though the range is plugged in. | There may be problem with the electrical supply. | Try plugging another piece of equipment into the outlet to verify the outlet is working. |
| Verify the voltage at the outlet matches the voltage rating on the nameplate located on the underside of the range. | ||
| The fuse may need to be replaced. | See the Fuse Replacement instructions in this manual. | |
| Temperature Control Probe Issues | ||
| The temperature on the display does not increase as the food heats. | This normal. | The display shows the selected temperature. It does not display the temperature of the food. |
| The temperature on the display does not match the temperature of food when checked with a food thermometer. | Temperature control probe may be placed incorrectly in the food. | Make sure the probe is in the center of the food and is not touching the bottom of the pan. |
| Food thermometer and temperature probe may have been inserted into different areas of the food. | For even heating and food quality, stir the food often. | |
| The temperature probe icon is blinking. | This is normal. The food is heating to the set temperature. | |
TROUBLESHOOTING (CONTINUED)
| Problem Might be Caused By Course of Action | ||
| Food Not Heating as Expected | ||
| Food is not heating evenly or seems to be taking too long to heat. | There could be an issue with the cookware. | Verify the cookware is compatible. See the Cookware Requirements section in this manual. |
| The food may need more time to heat to the desired temperature. | For faster heating times, try using power level mode instead of temperature mode. | |
| The cookware may be too large. | With induction cooking, only the area of a cookware that makes contact with the induction coil will heat. | |
| Trying to heat too much food at once. | In general, larger amounts of food take longer to heat. For faster heating times, try heating less food at a time. For best performance, stir food often. | |
| Insufficient airflow around the range. | Refer to the Clearance Requirements of this manual. | |
| Ambient temperature may be too high. | ||
| The cooking application may not match the intended use of the range. | Vollrath offers induction ranges with different wattages and features designed to fit a variety of applications. Visit Vollrath.com for more information. | |
| Noise | ||
| Grinding, ticking noise, rattle sound coming from the vents. | There may be a problem with the fans. | Contact Vollrath Technical Services. |
| The fan is running slow or not at all. | This is normal. Normal operation. The fan | will run as needed. |
| Range Does Not Turn On | ||
| Range is plugged into a working electrical outlet with correct voltage, but the Vollrath logo is not illuminated. | The fuse may need to be replaced. | See “Replace the Fuse” on page 11. |
| Programs Editor | ||
| Programs editor does not open. | Java may not be installed on the computer or may need to be updated. | Download a free version of Java. |
REPLACE THE FUSE
The Troubleshooting section of this manual describes situations in which the fuse may need to be replaced.
Tools You Will Need
- Small screw driver
- Towel or soft cloth
• 314 20A fuse (Available on Vollrath.com and found at most hardware stores)
-
Turn off and unplug the induction range.
-
Place a towel or soft cloth on a flat, stable surface.
-
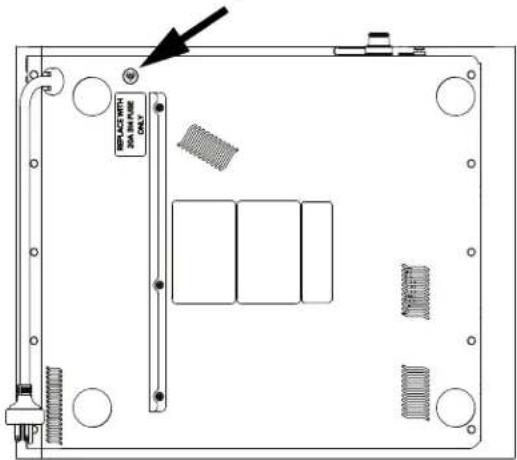
Gently and carefully, lay the induction range, glass-side down, onto the towel. Locate the fuse cap.
text_image
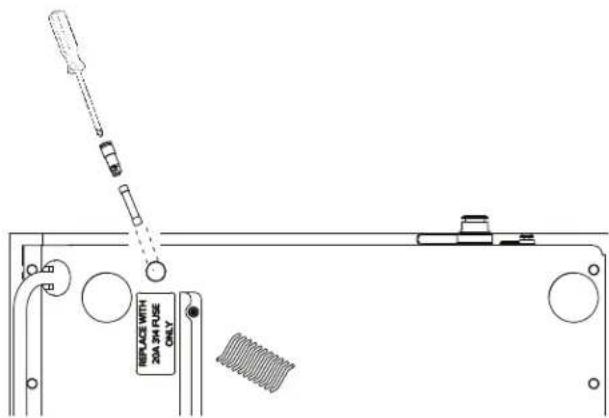
BIP-ACS WITH 300 MIN ONLY- Using screwdriver; press down and turn the fuse holder cap to release it from the range.
text_image
REPLACE WITH 20A 3H FUSE ONLY- Remove the fuse from the holder.
- Insert a replacement fuse into the holder.
- Re-insert the holder and use the screwdriver to secure the cap into the range.
- Ensure the cap holder is locked into place.
FCC STATEMENT
This equipment has been tested and found to comply with Part 18 of FCC Rules. These limits are designed to provide reasonable protection against harmful interference in a residential installation. This equipment generates, uses and can radiate radio frequency energy and, if not installed and used in accordance with the instructions, may cause harmful interference to radio communications. However, there is no guarantee that interference will not occur in a particular installation. If this equipment does cause harmful interference to radio or television reception, which can be determined by turning the equipment off and on, the user is encouraged to try to correct the interference by one or more of the following measures:
- Reorient or relocate the receiving antenna
- Increase the separation between the equipment and receiver
- Connect the equipment into an outlet on a circuit different from that to which the receiver is connected
- Consult the dealer or an experienced radio/TV technician for help
- To assure continued compliance, any changes or modifications not expressly approved by the party Responsible for compliance could void the user's authority to operate this equipment.
SERVICE AND REPAIR
Serviceable parts are available on Vollrath.com.
To avoid serious injury or damage, never attempt to repair the unit or replace a damaged power cord yourself. Do not send units directly to The Vollrath Company LLC. Please contact Vollrath Technical Services for instructions.
When contacting Vollrath Technical Services, please be ready with the item number, model number (if applicable), serial number, and proof of purchase showing the date the unit was purchased.
WARRANTY STATEMENT FOR THE VOLLRATH CO.
The warranty period is 2 years. See Vollrath.com for full warranty details.
This warranty does not apply to products purchased for personal, family or household use, and The Vollrath Company LLC does not offer a written warranty to purchasers for such uses.
The Vollrath Company LLC warrants the products it manufactures or distributes against defects in materials and workmanship as specifically described in our full warranty statement. In all cases, the warranty runs from the date of the end user's original purchase date found on the receipt. Any damages from improper use, abuse, modification or damage resulting from improper packaging during return shipment for warranty repair will not be covered under warranty.
For complete warranty information, product registration and new product announcement, visit www.vollrath.com.
| The Vollrath Company, L.L.C. Headquarters1236 North 18th StreetSheboygan, Wisconsin53081-3201 USAMain Tel: 800-624-2051 or 920-457-4851Main Fax: 800-752-5620 or 920-459-6573Canada Customer Service: 800-695-8560Tech Services: techservicereps@vollrathco.www.vollrath.com |
| Pujadas |
| Ctra. de Castanyet,132 P.O. Box 121 |
| 17430 Santa Coloma de Farners(Girona) – Spain |
| Tel. +34 972 84 32 01info@pujadas.es |
| Vollrath of China |
| Vollrath Shanghai Trading Limited |
| Room 201, Building A |
| Xin Yi Plaza |
| 1618 Yi Shan Road |
| Shanghai, 201103 |
| China, P.R.C. |
| Tel: +86-21-5058-9580 |
| Vollrath de Mexico S. de R.L. de C.V.Periferico Sur No. 7980 Edificio 4-ECol. Santa Maria Tequepexpan45600 Tlaquepaque, Jalisco | MexicoTel: (52) 333-133-6767Tel: (52) 333-133-6769Fax: (52) 333-133-6768 |
natural_image
Exterior view of a dual-chamber electric heating appliance with a digital display and control knob (no readable text or symbols)| Num. d'article | W Prise | Num. d'article | W Prise | ||
| HPI4-2600 2600 | NEMA | HPI4-300002 | 3000 | Schuko | |
| HPI4-3000 3000 | HPI4-3000058-6-20P | U | |||
| HPI4-3800 3800 | HPI4-300004 Chine | ||||
| HPI4-260002 | 2600 | Schuko | HPI4-380002 | 3800 | Schuko |
| HPI4-260003 | R.-U | HPI4-380003 R. | |||
| HPI4-260004 | China | HPI4-380004 Chine | |||
TABLE DES MATIÈRES
natural_image
Simple line drawing of a refrigerator with an upward arrow and control knob (no text or symbols)natural_image
Line drawing of a cooking pot with liquid and arrows indicating flow (no text or symbols)4.
text_image
sains for pricenatural_image
Line drawing of a laboratory apparatus with a beaker, tubing, and a stand (no text or symbols)natural_image
Line drawing of a computer monitor rear panel with a close-up of the internal ports (no text or symbols)text_image
USB DISK (E:) Name Program Editortext_image
VOLLRATH Invalid data Valid data Editing is not allowed PL = Power Level C = Celsius F = Fahrenheit Program1 Program2 Program3 Program4 PL C F 50 Continuous Run Timer Enabled 55.5 Minutes Next step PL C F 60 Continuous Run Timer Enabled 6 Minutes Next Step PL C F 60 Continuous Run Timer Enabled 6 Minutes B Generate file to USB flash driveA Programmes B Phases
text_image
Program1 Program2 Program3 Program4flowchart
graph TD
    A["Insert or re-insert your USB flash drive."] --> B["Component for USB flash drive"]
    B --> C["Device 1"]
    B --> D["Device 2"]
text_image
Validate program to file is written. Insert into induction unit USB port to complete configuration file transfer. P-0 will be displayed. Generate file to USB flash drive Configuration file for programs has been written to the USB flash drive.natural_image
Technical line drawing showing two mechanical assembly steps with no visible text or symbolsnatural_image
Exterior view of a digital kitchen appliance with a rotary dial and control buttons (no readable text or symbols)| Núm. de art. | Vatios | Enchufe | Núm. de art. | Vatios | Enchufe |
| HPI4-2600 2600 | NEMA 8-20P 300004 | HPI4-300002 | 3000 | Schuko | |
| HPI4-3000 3000 | R-U | ||||
| HPI4-3800 3800 | China | ||||
| HPI4-260002 | 2600 | Schuko | HPI4-380002 | 3800 | Schuko |
| HPI4-260003 | R.-U | HPI4-380003 | R-U | ||
| HPI4-260004 | China | HPI4-380004 | China | ||
CONTENIDO
natural_image
Simple line drawing of a refrigerator with an upward arrow and control knob (no text or symbols)natural_image
Line drawing of a cooking pot with liquid and control panel (no text or symbols)4.

natural_image
Pure mechanical diagram showing a lever and pivot point without any text, numbers, or symbolsnatural_image
Simple line drawing of a laboratory apparatus with a beaker, tubing, and a control panel (no text or symbols)Fijar la temperatura
1.

repetidamente
0 F
natural_image
Line drawing of a computer monitor rear panel with a button inserted (no text or symbols)- Abra la carpeta Programs (Programas).
text_image
USB DISK (E:) Name Program Editortext_image
VOLLRATH Invited data Valid data Editing is not allowed PL = Power Level C = Census F = Pathlength Program1 Program2 Program3 Program4 PL C F 50 Continuous Rate Timer Enabled 55.5 Minutes Next step PL C F 50 Continuous Rate Timer Enabled 5 Minutes Next step PL C F 50 Continuous Rate Timer Enabled 5 Minutes B Generate file to USB Flash BlueA Programas B Etapas