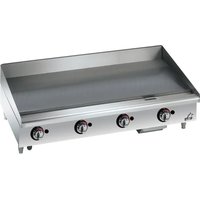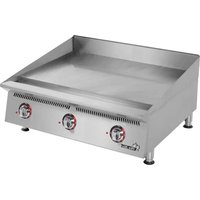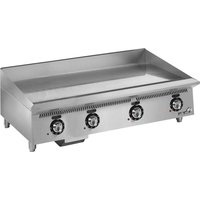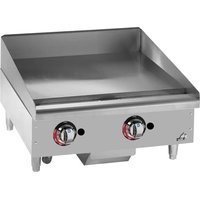
6136RCBF - Grill plate STAR - Free user manual and instructions
Find the device manual for free 6136RCBF STAR in PDF.


User questions about 6136RCBF STAR
0 question about this device. Answer the ones you know or ask your own.
Ask a new question about this device
Download the instructions for your Grill plate in PDF format for free! Find your manual 6136RCBF - STAR and take your electronic device back in hand. On this page are published all the documents necessary for the use of your device. 6136RCBF by STAR.
USER MANUAL 6136RCBF STAR
2M-Z16002 Rev. A 4/01/13
natural_image
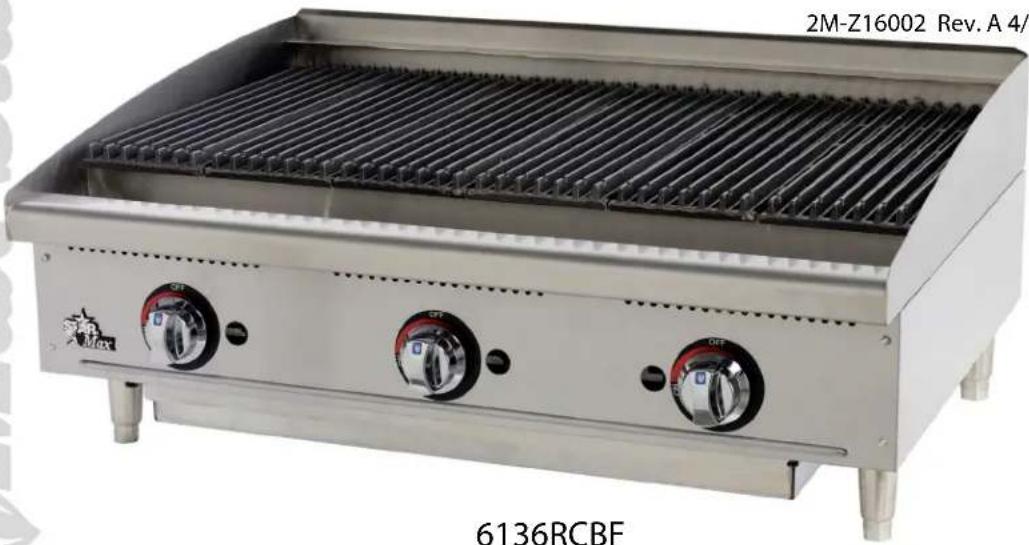
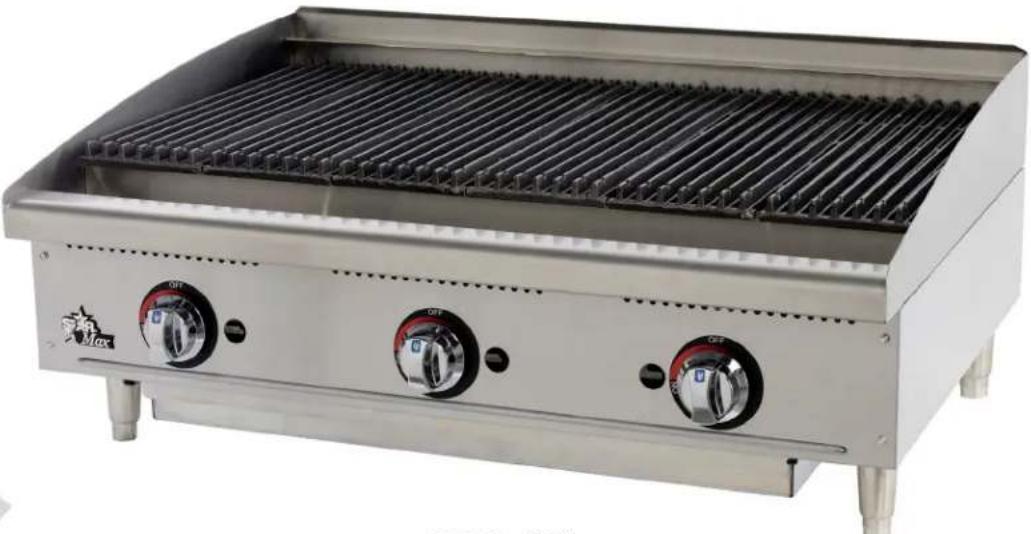
Exterior view of a stainless steel portable grating appliance (no visible text or symbols on the body)6136RCBF

text_image
STAR®Max® StarMax® StarMax® StarMax


These symbols are intended to alert the user to the presence of important operating and maintenance instructions in the manual accompanying the appliance.
RETAIN THIS MANUAL FOR FUTURE REFERENCE NOTICE
Using any part other than genuine Star factory supplied parts relieves the manufacturer of all liability.
Star reserves the right to change specifications and product design without notice. Such revisions do not entitle the buyer to corresponding changes, improvements, additions or replacements for previously purchased equipment.
Due to periodic changes in designs, methods, procedures, policies and regulations, the specifications contained in this sheet are subject to change without notice. While Star International Holdings Inc., Company exercises good faith efforts to provide information that is accurate, we are not responsible for errors or omissions in information provided or conclusions reached as a result of using the specifications. By using the information provided, the user assumes all risks in connection with such use.
MAINTENANCE AND REPAIRS
Contact your local authorized service agent for service or required maintenance.
Please record the model number, serial number, voltage and purchase date in the area below and have it ready when you call to ensure a faster service.
Model No.
Serial No.
Voltage
Purchase Date
Authorized Service Agent Listing
Reference the listing provided with the unit
or
for an updated listing go to:
Website: www.star-mfg.com
E-mail customerservice@star-mfg.com
Service Help Desk
Business 8:00 am to 4:30 p.m. Central Standard Time Hours:
Telephone: (314) 678-6303
Fax: (314) 781-2714
E-mail customerservice@star-mfg.com
Website: www.star-mfg.com
Mailing Address: Star International Holdings Inc., Company
10 Sunnen Drive
St. Louis, MO 63143
U.S.A
| Specifications | |||||||||
| Model Controls Cooking Surface | BTU/HR Weight Dimensions | ||||||||
| NAT LP | Installed S | Shipping Width Depth | Height | ||||||
| Manual Control, Lava Rock | |||||||||
| 6015CBF | 1 | 300 sq in (1935 sq cm) | 40,000 | 35,000 | 87 lbs (39.5kg) | 95 lbs (43.2 kg) | 15" (38.1 cm) | 29." (65.4 cm) | 15.5" (48 cm) |
| 6024CBF | 2 | 480 sq in (3097 sq cm) | 80,000 | 70,000 | 149 lbs (67.7 kg) | 164 lbs (74.5 kg) | 24" (61 cm) | ||
| 6036CBF | 3 | 720 sq in (4645 sq cm) | 120,000 | 105,000 | 236 lbs (107.3 kg) | 256 lbs (116.4 kg) | 36" (91.4 cm) | ||
| 6048CBF | 4 | 960 sq in (6194 sq cm) | 160,000 | 140,000 | 323 lbs (146.8 kg) | 348 lbs (158.2 kg) | 48" (122 cm) | ||
| Manual Control, Radiant | |||||||||
| 6115RCBF | 1 | 300 sq in (1935 sq cm) | 40,000 | 35,000 | 80 lbs (36.4 kg) | 88 lbs (40 kg) | 15" (38.1 cm) | 29." (65.4 cm) | 15.5" (48 cm) |
| 6124RCBF | 2 | 480 sq in (3097 sq cm) | 80,000 | 70,000 | 140 lbs (63.5 kg) | 155 lbs (70.3 kg) | 24" (61 cm) | ||
| 6136RCBF | 3 | 720 sq in (4645 sq cm) | 120,000 | 105,000 | 220 lbs (100 kg) | 240 lbs (109 kg) | 36" (91.4 cm) | ||
| 6148RCBF | 4 | 960 sq in (6194 sq cm) | 160,000 | 140,000 | 300 lbs (136 kg) | 325 lbs (147.7 kg) | 48" (122 cm) | ||

GENERAL INSTALLATION DATA
This equipment is designed and sold for commercial use only by personnel trained and experienced in its operation and is not sold for consumer use in and around the home nor for use directly by the general public in food service locations.
The Star-Max™ series gas charbroiler is equipped for the type of gas indicated on the nameplate mounted on the front panel. All units are shipped from the factory for use with natural gas. The unit can easily be converted for use with propane gas: see propane gas.
-IMPORTANT-
INSTALL IN NON-COMBUSTIBLE LOCATIONS ONLY! Clearance from non-combustible construction must be 6" from back and sides.
The installation of the Appliance must conform to the NATIONAL FUEL GAS CODE "ANSI Z223.1 - LATEST EDITION" AND ALL LOCAL GAS COMPANY RULES AND REGULATIONS.
IN CANADA INSTALLATION SHALL BE IN ACCORDANCE WITH THE CURRENT CAN/CGA-B149.1 NATURAL GAS INSTALLATION CODE OR CAN/CGA-B149.2 PROPANE INSTALLATION CODE AND LOCAL CODES WHERE APPLICABLE.
WARNING: Improper installation, adjustment, alteration, service or maintenance can cause property damage, injury or death. Read the installation, operating and maintenance instructions thoroughly before installing or servicing the equipment.
FOR YOUR SAFETY
Do not store or use gasoline or other flammable vapors and liquids in the vicinity of this or any other appliance. Keep the appliance area clear and free from combustibles.
For your protection, we recommend a qualified installing agency install this appliance. They should be familiar with gas installations and your local gas requirements. In any case, your gas company should be called to approve the final installation. In addition, there should be posted, in a prominent location, detailed instructions to be followed in the event the operator smells gas. Obtain the instructions from the local gas supplier.
This appliance, its pressure regulator and its individual shutoff valve must be disconnected from the gas supply piping system during any pressure testing of that system at test pressures in excess of 1/2 PSIG. This appliance and its pressure regulator must be isolated from the gas supply piping system by closing its individual manual shutoff valve during any pressure testing of the gas supply piping system at test pressures equal to or less than 1/2 PSIG.
EXHAUST CANOPY
Open hearth broilers inherently create a good deal of heat and smoke and should be installed under an efficient exhaust hood with flame proof filters. A vertical distance of not less than 48" shall be provided between the top of the appliance and filters or any other combustible material. Exhaust installation must conform to local codes.
AIR SUPPLY
Provisions for adequate air supply must be provided.
LEVELING UNIT
This charbroiler is supplied with 4 feet which must be screwed into the body. Level unit by adjusting the (4) feet which have an adjustment of 1-3/4" for accurate and perfect line-up with other units.
DO NOT INSTALL WITHOUT ATTACHING FEET - DO NOT REMOVE FEET.
GAS PIPING
Gas piping shall be of such size and so installed as to provide a supply of gas sufficient to meet the full gas input of the appliance. If the appliance is to be connected to existing piping, it shall be checked to determine if it has adequate capacity. Joint compound shall be used sparingly and only on the male threads of the pipe joints. Such compounds shall be resistant to the action of L.P. gases.
WARNING: Any loose foreign material, debris, or metal particles allowed to enter the gas lines on this appliance will damage the valve and affect its operation. When installing this appliance, all pipe and fittings must be free from all internal loose dirt.
A convertible pressure regulator is provided with each charbroiler. It should be connected to the inlet pipe at the rear of the unit. The gas supply is then connected to it. It is shipped set for 6" water column manifold pressure for use with natural gas, andd 10" water column manifold pressure for use with propane gas. Allow 6" clearance from back of unit to wall for servicing and installation.
MANUAL SHUT OFF VALVE
A manual shut off valve should be installed upstream from the manifold and within six feet of the charbroiler.
CONNECTING GAS SUPPLY LINE
The gas inlet of the charbroiler is sealed at the factory to prevent entry of dirt. Do not remove this seal until the actual connection is made to the gas supply line.
If your charbroiler is equipped with fixed orifice hoods and is shipped from the factory for use with natural gas, and you wish to convert to propane gas. Follow these steps, install the burner orifice hoods, included with the unit, as follows:
- Remove grill, radiants and burners.
- Remove the burner orifice hoods and install the orifice hoods supplied.
-
Replace the burners, radiants, and grill.
-
Set manifold pressure to (10) inch water column. A 1/8" pipe plug on the burner manifold can be removed for attaching a pressure gauge. Remove the slotted, or hex-threaded plug from the pressure regulator. Invert the plug and re-install. The letters "LP" should now be visible on the plug. The regulator is now set for 10" (25.4 cm) water column. Attach the conversion label, supplied with the unit, close to the nameplate.
CONVERT TO NATURAL GAS
If your charbroiler is equipped with fixed orifice hoods and is shipped from the factory for use with propane gas, and you wish to convert to natural gas. Follow these steps, install the burner orifice hoods, located in the grease drawer, as follows:
- Remove grill, radiants and burners.
- Remove the burner orifice hoods and install the orifice hoods (not supplied).
-
Replace the burners, radiants, and grill.
-
Set manifold pressure to (6) inch water column. A 1/8" pipe plug on the burner manifold can be removed for attaching a pressure gauge. Remove the slotted, or hex-threaded plug from the pressure regulator. Invert the plug and re-install. The letters "NAT" should now be visible on the plug. The regulator is now set for 6" (15.24 cm) water column.

CHECKING FOR GAS LEAKS
Check entire piping system for leaks. Soap and water solution or other material acceptable for the purpose shall be used in locating gas leakage.
Matches, candle flame or other sources of ignition shall not be used for this purpose.
PILOT LIGHTING INSTRUCTIONS
The unit is equipped with standing pilots, and should be lit immediately after the gas is turned on.
- Turn off main valve to unit.
- Turn off all knobs and pilot valves and wait 5 minutes to clear gas.
- Turn on main valve and light all pilots. The best access to the pilot is obtained from the bottom with the grease drawer removed.
- Adjust pilot light flames as small as possible, but high enough to light burner immediately when burner valve is turned on high.
- Turn burner knobs to desired setting.
- To turn burners off, turn knobs off.

SHUTTING DOWN INSTRUCTIONS
Turn the burner valve knobs to the off position to turn burners off.
BURNER IGNITION AND ADJUSTMENT
- To ignite burners turn burner valve knob to "HI" position.
- Slowly decrease openings of air shutters on burners to give a soft blue flame having luminous tips, then slowly increase openings to a point where the yellow tips disappear and a hard blue flame is obtained.
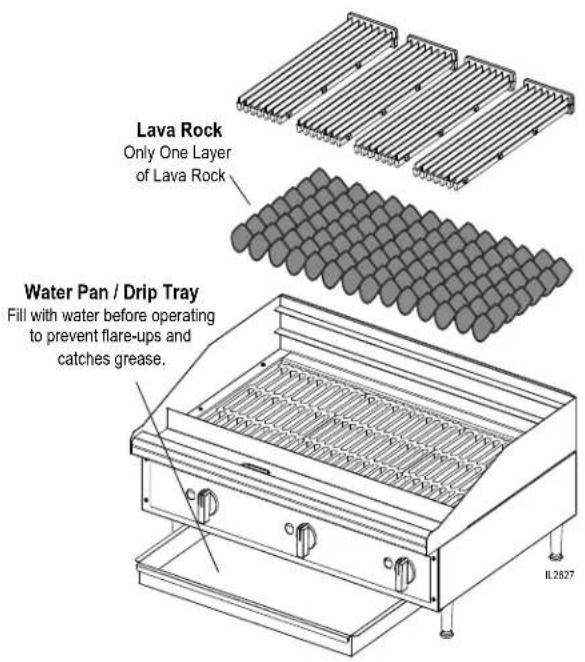
PLACING LAVA ROCK ON GRATES (FOR 60--CBD SERIES)
Open the lava rock bags and place rock evenly on grates. Do not cover the grates with more than two layers of lava rock. DO NOT PUT MORE THAN 5 LBS. OF ROCK PER BURNER!
PLACING RADIANTS (FOR 61--RCBD SERIES)
After the unit is unpacked and installed, place 2 radiants above each burner. Install each radiant engaging the notches on the top assembly. Refer to the exploded view in this manual for orientation of the radiants.
BURNER OPERATION
Each burner is controlled by an individual high-low, on-off valve. An infinite number of broiling temperatures may be obtained by turning the burner valve knob to any position between high and low. It is possible through this arrangement to have a high heat or searing section, while having a low heat finishing or holding section. For the searing operation, set the valves for the section at a position of "HI" or close to it. For holding or finishing, set the valves closer to the "LOW" position on the dial. You select the heat pattern you like, and set the valves accordingly.
GENERAL OPERATING INSTRUCTIONS
WATER PAN / DRIP TRAY
The water pan is located at the bottom of the unit, and is easily removed from the front of the unit. Water should be added to the water pan and replaced as necessary. The water pan helps prevent flare ups and catches grease.
LIGHTING
When broiler is first lit, it will smoke for approximately 20-30 minutes until the preservation oils and impurities are burned off.
SEASONING THE COOKING GRATES
Set the heat control switch to the low position and preheat for about 15 to 20 minutes. Using a cloth, spread a thin film of cooking oil over the top of the grate surface. Allow the film to remain on the grate for about 5 minutes. Wipe the surface clean and apply another film of cooking oil. Wipe the surface clean again. The broiler is now ready for use. The oil may tend to smoke - this is normal.
BROILING
Turn valves on and pre-heat unit on "HI" before attempting to broil. You will have to experiment with
the grill settings and the valve settings for your particular food products. We recommend that you set the grate at the full tilt position to start. This position allows the grease to run down the grate into the grease tray, reducing flare ups. Check water pans frequently and add a sufficient amount of water when necessary. Hot water vapors rising from the water pans and through the combustion chamber helps reduce flare ups. Exercise care when using your broiler.
TILTING THE GRATE
Raise or lower the grate to the next step by lifting the grate at the back of the charbroiler where the grate rests. Use potholders or gloves to reposition.
text_image
Lava Rock Only One Layer of Lava Rock Water Pan / Drip Tray Fill with water before operating to prevent flare-ups and catches grease. IL2827CHARBROILERS ARE HOT! NEVER ATTEMPT TO CHANGE THE GRATE POSITION WHILE FOOD PRODUCTS ARE COOKING. FLARE UPS CAN OCCUR UNEXPECTEDLY. TURN OFF THE CHARBROILER AND ALLOW IT TO COOL.
CLEANING
Clean regularly. Remove grate section to sink for washing. Brush out carboned particles. Remove and wash water pan. Wipe exterior surfaces with detergent and a cloth. A non-abrasive cleaner can be used on caked areas.
AIR INTAKES IN BOTTOM
Air for combustion enters from the bottom of the unit.
Do not obstruct this area.
Deteriorated lava rocks, food and debris build-up, and excessive lava rock will cause heat build-up in the char-broiler, which will damage the burners and grates.
Follow these cleaning and care instructions:
- Place no more than 5 pounds (1 bag) of lava rock per 1' foot section.
- Remove the cooking grate daily and clean off any build up debris from the top of the lava rock.
- Lava rock breaks down over time and will need to be replaced. It is recommended to replace the lava rock every three to six months.
- Keep the water pan filled with water during use to avoid flare-up and easier cleaning.


THOROUGHLY INSPECT YOUR UNIT ON ARRIVAL
This unit has been tested for proper operation before leaving our plant to insure delivery of your unit in perfect condition. However, there are instances in which the unit may be damaged in transit. In the event you discover any type of damage to your product upon receipt, you must immediately contact the transportation company who delivered the item to you and initiate your claim with same. If this procedure is not followed, it may affect the warranty status of the unit.
LIMITED EQUIPMENT WARRANTY
All workmanship and material in Star products have a one (1) year limited warranty on parts & labor in the United States and Canada. Such warranty is limited to the original purchaser only and shall be effective from the date the equipment is placed in service. Star's obligation under this warranty is limited to the repair of defects without charge, by the factory authorized service agency or one of its sub-agencies. Models that are considered portable (see below) should be taken to the closest Star service agency, transportation prepaid.
Star will not assume any responsibility for loss of revenue.
On all shipments outside the United States and Canada, see International Warranty.
* The warranty period for the Ultra-Max, Hot Plates, Griddles, Charbroilers is (3) years parts & labor.
* The warranty period for the Star-Max, Charbroilers, Griddles, Hot Plates, Fryers & Finishing Oven is (2) years parts & labor.
* The warranty period for the JetStar six (6) ounce & Super JetStar eight (8) ounce series popcorn machines is two (2) years.
* The warranty period for the Chrome-Max Griddles is five (5) years on the griddle surface. See detailed warranty provided with unit.
* The warranty period for Dura-Tec coatings is one year under normal use and reasonable care. This warranty does not apply if damage occurs to Dura-Tec coatings from improper cleaning, maintenance, use of metallic utensils, or abrasive cleaners, abrasive pads, product identifiers and point-of-sale attachments, or any other non-food object that comes in continuous contact with the roller coating. This warranty does not apply to the “non-stick” properties of such materials.
This warranty does not apply to "Special Products" but to regular catalog items only. Star's warranty on "Special Products" is six (6) months on parts and ninety (90) days on labor.
This warranty does not apply to any item that is disassembled or tampered with for any purpose other than repair by a Star Authorized Service Center or the Service Center's sub-agency.
This warranty does not apply if damage occurs from improper installation, misuse, wrong voltage, wrong gas or operated contrary to the Installation and Operating instructions.
This warranty is not valid on Conveyor Ovens unless a "start-up/check-out" has been performed by a Factory Authorized Technician.
PARTS WARRANTY
Parts that are sold to repair out of warranty equipment are warranted for ninety (90) days. The part only is warranted, the labor to replace the part is NOT warranted.
SERVICES NOT COVERED BY WARRANTY
- Travel time and mileage rendered beyond the 50 mile radius limit
- Mileage and travel time on portable equipment (see below)
- Labor to replace such items that can be replaced easily during a daily cleaning routine, ie; removable kettles on fryers, knobs, grease drawers on griddles, etc.
- Installation of equipment
- Damages due to improper installation
- Damages from abuse or misuse
- Operated contrary to the Operating and Installation Instructions
- Cleaning of equipment
-
Seasoning of griddle plates
-
Voltage conversions
II. Gas conversions - Pilot light adjustment
- Miscellaneous adjustments
- Thermostat calibration and by-pass adjustment
- Resetting of circuit breakers or safety controls or reset buttons
- Replacement of bulbs
- Replacement of fuses
- Repair of damage created during transit, delivery, & installation OR created by acts of God
PORTABLE EQUIPMENT
Star will not honor service bills that include travel time and mileage charges for servicing any products considered "Portable" including items listed below. These products should be taken to the Service Agency for repair:
* The Model 510FD, 510FF Fryer.
* The Model 526TOA Toaster Oven.
* The Model J4R, 4 oz. Popcorn Machine.
* The Model 518CMA & 526CMA Cheese Melter.
* The Model 12MC & 15MC & 18MCP Hot Food Merchandisers.
* The Model 12NCPW & 15NCPW Nacho Chip/Popcorn Warmer.
* All Hot Dog Equipment except Roller Grills & Drawer Bun Warmers.
* All Nacho Cheese Warmers except Model 11WLA Series Nacho Cheese Warmer.
* All Condiment Dispensers except the Model HPD & SPD Series Dispenser.
* All Specialty Food Warmers except Model 130R, 11RW Series, and 11WSA Series.
* All QCS/RCS Series Toasters except Model QCS3 & RCS3 Series.
* All Fast Steamer Models except Direct Connect Series.
ALL:
* Pop-Up Toasters
* Butter Dispensers
* Pretzel Merchandisers (Model 16PD-A Only)
* Pastry Display Cabinets
* Nacho Chip Merchandisers
* Accessories of any kind
* Snecze Guards
* Pizza Ovens
(Model PO12 Only)
* Heat Lamps
* Pumps-Manual
The foregoing warranty is in lieu of any and all other warranties expressed or implied and constitutes the entire warranty.
FOR ASSISTANCE
Should you need any assistance regarding the Operation or Maintenance of any Star equipment; write, phone, fax or email our Service Department. In all correspondence mention the Model number and the Serial number of your unit, and the voltage or type of gas you are using.
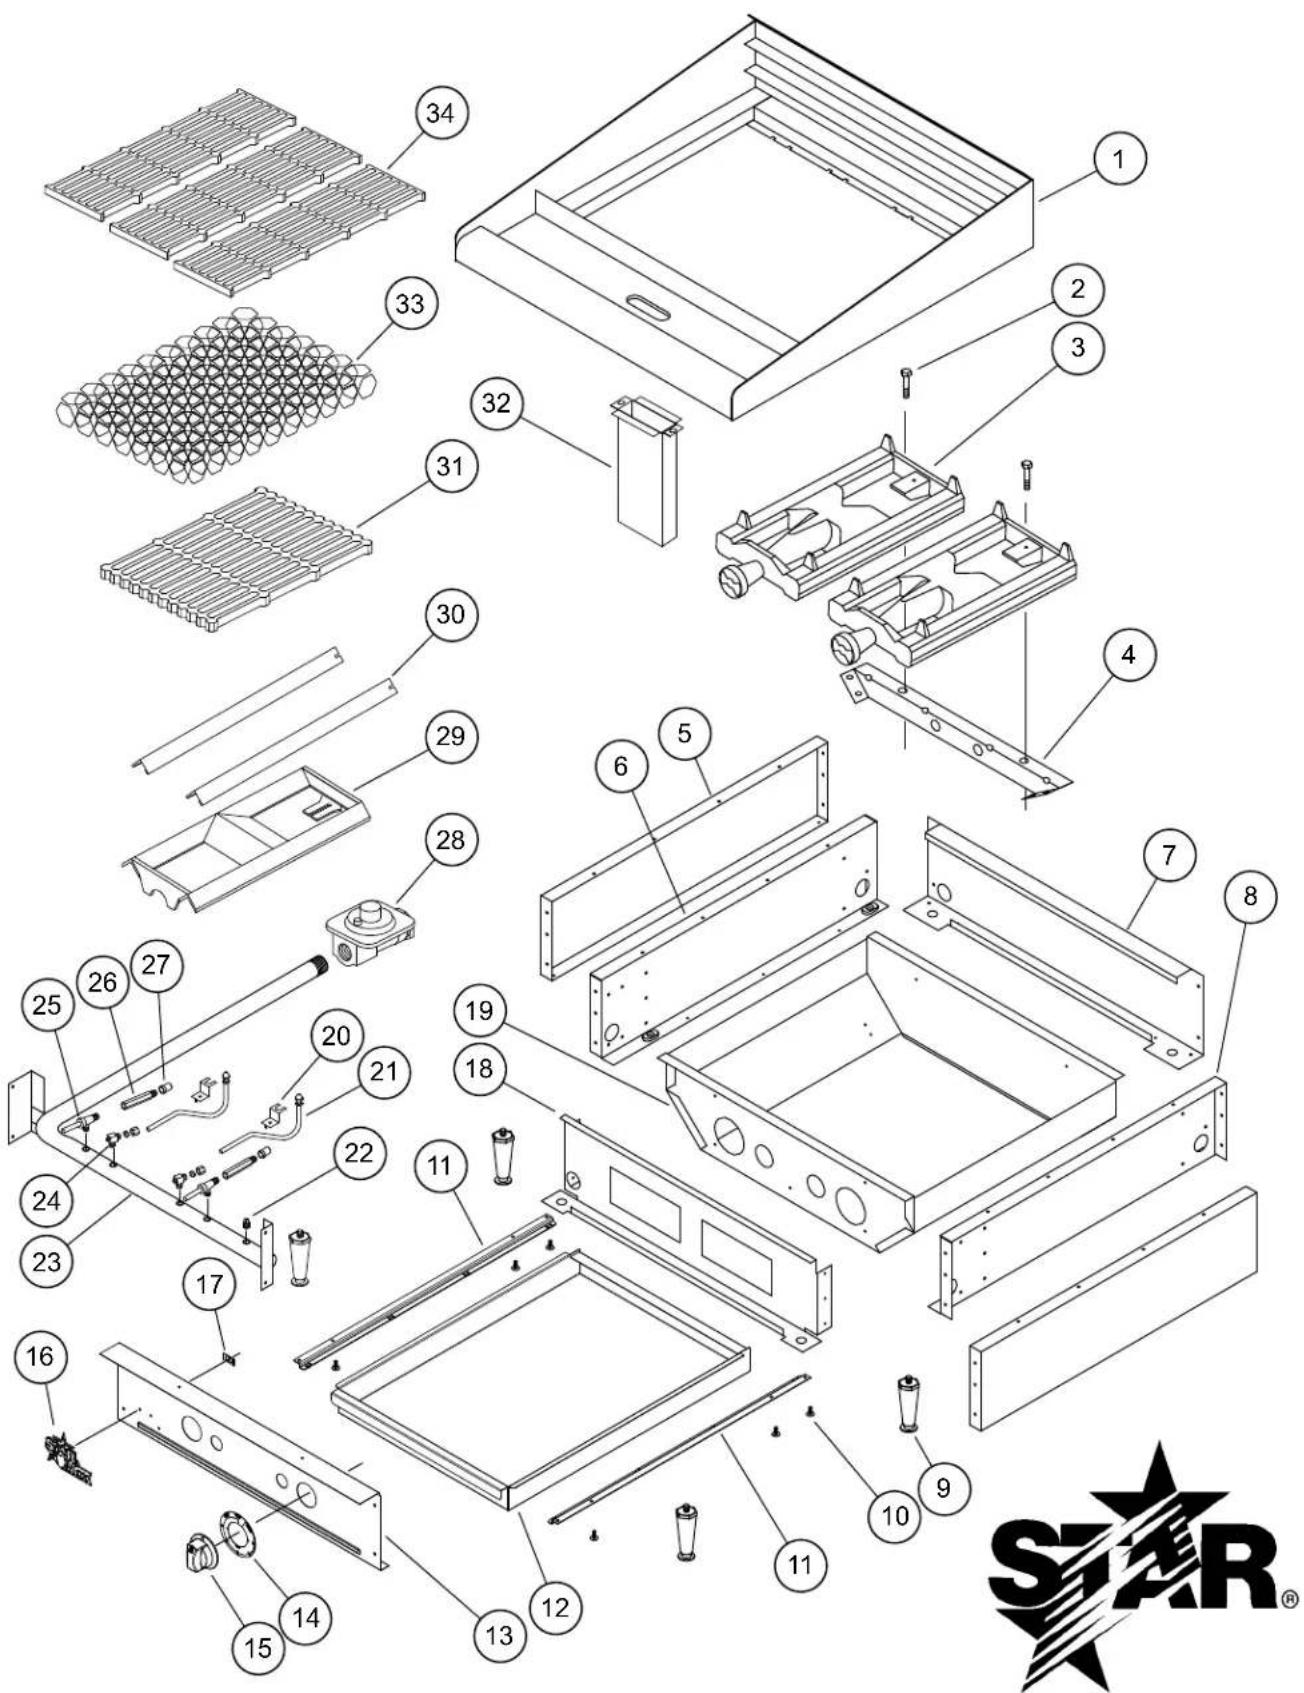
text_image
Exploded view diagram of a mechanical assembly with numbered components and a STAR logo at the bottom right.| Model: Gas Charbroiler Radiant (RCBF) & Lava Rock (CBF), 15", 24", 36", 48" | ||||
| Fig No P | Part No. Qty Description | Application | ||
| 1 | H3-611505 | 60241 TOP ASSEMBLY | ASSEMBLY | 6115, 6015 |
| H3-612405 6124, | ||||
| H3-613605 6136, | ||||
| H3-614805 6148, | ||||
| 2 2C- | Z3154 1/2/3/4 BOLT | 1/4 - 20 x 1-3/4 ALL 15-INCH / ALL 15-INCH / 24-INCH / 36-INCH / 48-INCH | ||
| 3 | 2F-Z3035 | 1/2/3/4 | BURNER | ALL 15-INCH / 24-INCH / 36-INCH / 48-INCH |
| 4 | H3-Z6067 | 2 BURNER BRACKET | 6115, 6015 | |
| H3-Z6068 | 6124, 6024 | |||
| H3-Z6069 | 6136, 6036 | |||
| H3-Z6070 | 6148, 6048 | |||
| 5 G3- | Z5945 | 2 SIDE PANEL ALL | ||
| 6 G3- | 624302 | 1 SIDE LINER ASSEMBLY LEFT ALL | ||
| 7 | H3-Z6053 | 1 REAR PANEL | 6115, 6015 | |
| H3-Z6055 | 6124, 6024 | |||
| H3-Z6057 | 6136, 6036 | |||
| H3-Z6058 | 6148, 6048 | |||
| 8 G3- | 624303 | 1 SIDE LINER ASSEMBLY RIGHT ALL | ||
| 9 2A- | Z5942 | 4 FOOT | ALL | |
| 10 | 2C-8823 | Various | SCREW #8 x 3/8 HEX | ALL |
| 11 | G3-Z6036 | 2 | DRAWER SLIDE | 6015, 6115, 6024, 6124, 6036, 6136 |
| G3-Z6036 | 4 | 6148, 6048 | ||
| 12 | H3-Z6481 | 1 | WATER PAN / GREASE DRAWER | 6115, 6015 |
| H3-Z6482 | 1/1/2/2 | 6124 / 6024 / 6148 / 6048 | ||
| H3-Z6483 | 1 | 6136, 6036 | ||
| 13 | H3-Z15710 | 1 FRONT PANEL | 6115, 6015 | |
| H3-Z15711 | 6124, 6024 | |||
| H3-Z15712 | 6136, 6036 | |||
| H3-Z15741 | 6148, 6048 | |||
| 14 | 2M-Z15449 | 1/2/3/4 | KNOB LABEL MAN LG | ALL 15-INCH / 24-INCH / 36-INCH / 48-INCH |
| 15 | I4-Z15484 | 1/2/3/4 | KNOB ASSY LG GAS KEYB | ALL 15-INCH / 24-INCH / 36-INCH / 48-INCH |
| 16 | 2M-Z15804 | 1 STAR-MAX LOGO ALL | ||
| 17 | 2C-8477 | 3 CLIP .125 PO STL PHOS ALL | ||
| Fig No Part No. Qty Description Application | ||||
| 18 | H3-Z6043 | 1 CENTER WALL | 6115, 6015 | |
| H3-Z6045 6124, 6024 | ||||
| H3-Z6047 6136, 6036 | ||||
| H3-Z6048 6148, 6048 | ||||
| 19 | H3-611500 | 1 LINER ASSEMBLY | 6115, 6015 | |
| H3-612400 6124, | ||||
| H3-613600 6136, | ||||
| H3-614800 6148, | ||||
| 20 I5-Z5463 1/2/3/4 PILOT BRACKET ALL 15-INCH / 24-INCH / 36-INCH / 48-INCH | ||||
| 21 | 2K-Z6192 | 1/2/3/4 | PILOT BURNER | ALL 15-INCH / 24-INCH / 36-INCH / 48-INCH |
| 22 2P-1453 | 1 PIPE PLUG ALL | |||
| 23 | 2K-Z6049 | 1 MANIFOLD | 6115, 6015 | |
| 2K-Z6050 | 6124, 6024 | |||
| 2K-Z6051 | 6136, 6036 | |||
| 2K-Z6052 | 6148, 6048 | |||
| 24 | 2V-6671 | 1/2/3/4 | PILOT VALVE | ALL 15-INCH / 24-INCH / 36-INCH / 48-INCH |
| 25 | 2V-Y8832 | 1/2/3/4 | MANUAL VALVE | ALL 15-INCH / 24-INCH / 36-INCH / 48-INCH |
| 26 | 2A-Z3010 | 1/2/3/4 | ORIFICE EXTENDER | ALL 15-INCH / 24-INCH / 36-INCH / 48-INCH |
| 27 | 2J-Z3032 | 1/2/3/4 | ORIFICE NATURAL #36 | ALL 15-INCH / 24-INCH / 36-INCH / 48-INCH |
| 2J-Z3033 | ORIFICE PROPANE #50 | ALL 15-INCH / 24-INCH / 36-INCH / 48-INCH | ||
| 28 2J-Z0792 | 1 PRESSURE REGULATOR ALL | |||
| 29 2F-Z3036 | 1/2/3/4 BURNER COVER 6015 / 6024 / 6036 / 6048 | |||
| 30 H3-Z15960 | 2/4/6/8 RADIANT 6115 / 6124 / 6136 / 6148 | |||
| 31 | 2F-Z3077 | 2/2/2 | GRATE LAVA ROCK 10 1/2" X 17 1/16" | 6024 / 6036 / 6048 |
| 2F-Z3078 | 1/1/2 | LAVAROCK GRATE 12" X 17 1/16" | 6015 / 6036 / 6048 | |
| 32 | G3-615304 | 1 | CHUTE ASSEMBLY | 6115, 6015 |
| G3-624304 | 1 | CHUTE ASSEMBLY | 6024, 6124, 6036, 6136, 6048, 6148 | |
| 33 2F-Y7193 | 1/2/3/4 LAVA | ROCK 2" 6015 / 6024 / 6036 / 6048 | ||
| 34 | 2F-Y8830 | 2/4/6/8 | GRATE CHARBROILER 6" | ALL 15-INCH / 24-INCH / 36-INCH / 48-INCH |
| H3-Y8831 | 1 GRATE CHARBROILER 3" 6015, 6115 | |||
| NA | H3-Z6071 | 1 LINER DIVIDER 6148, 6048 | ||
INSTRUCTIONS DE FONCTIONNEMENT
BAC À EAU
2M-Z16002 Rev.-6/05/12
natural_image
Exterior view of a stainless steel grater with three side control knobs (no visible text or symbols)6136RCBF