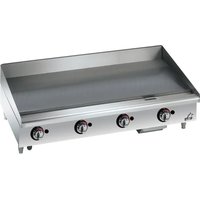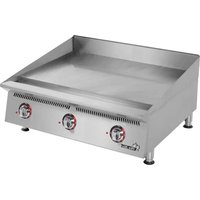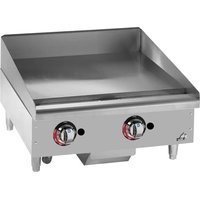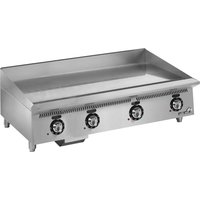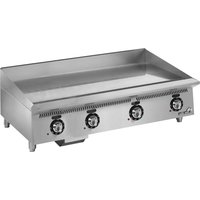
Ultra-Max 848TA - Grill plate STAR - Free user manual and instructions
Find the device manual for free Ultra-Max 848TA STAR in PDF.


User questions about Ultra-Max 848TA STAR
0 question about this device. Answer the ones you know or ask your own.
Ask a new question about this device
Download the instructions for your Grill plate in PDF format for free! Find your manual Ultra-Max 848TA - STAR and take your electronic device back in hand. On this page are published all the documents necessary for the use of your device. Ultra-Max 848TA by STAR.
USER MANUAL Ultra-Max 848TA STAR
WARNING: Improper installation, adjustment, alteration, service or maintenance can cause property damage, injury or death. Read the installation, operating and maintenance instructions thoroughly before installing or servicing this equipment.
FOR YOUR SAFETY: Do not store or use gasoline or other flammable vapors or liquids in the vicinity of this or any other appliance.
WARNING: This appliance shall be installed in accordance with current regulations and used only in well-ventilated space. Refer to instructions before installing and using this appliance.
In addition, there should be posted, in a prominent location, detailed instructions to be followed in the event the operator smells gas. Obtain the instructions from the local gas supplier.
RETAIN THIS MANUAL FOR FUTURE REFERENCE
NOTICE
Using any part other than genuine Star factory supplied parts relieves the manufacturer of all liability.
Star reserves the right to change specifications and product design without notice. Such revisions do not entitle the buyer to corresponding changes, improvements, additions or replacements for previously purchased equipment.
Due to periodic changes in designs, methods, procedures, policies and regulations, the specifications contained in this sheet are subject to change without notice. While Star International Holdings Inc., Company exercises good faith efforts to provide information that is accurate, we are not responsible for errors or omissions in information provided or conclusions reached as a result of using the specifications. By using the information provided, the user assumes all risks in connection with such use.
MAINTENANCE AND REPAIRS
Contact your local authorized service agent for service or required maintenance.
Please record the model number, serial number, voltage and purchase date in the area below and have it ready when you call to ensure a faster service.
Model No.
Serial No.
Voltage
Purchase Date
Authorized Service Agent Listing
Reference the listing provided with the unit
or
for an updated listing go to:
Website: www star-mfg.com
E-mail customerservice@star-mfg.com
Service Help Desk
Business 8:00 am to 4:30 p.m. Central Standard Time Hours:
Telephone: (800) 264-7827
Fax: (314) 781-2714
E-mail customerservice@star-mfg.com
Website: www.star-mfg.com
Mailing Address: Star Manufacturing International Inc.
265 Hobson Street
Smithville, TN 37166
U.S.A
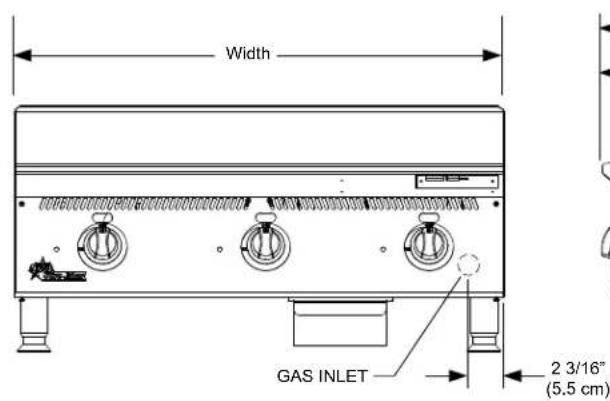
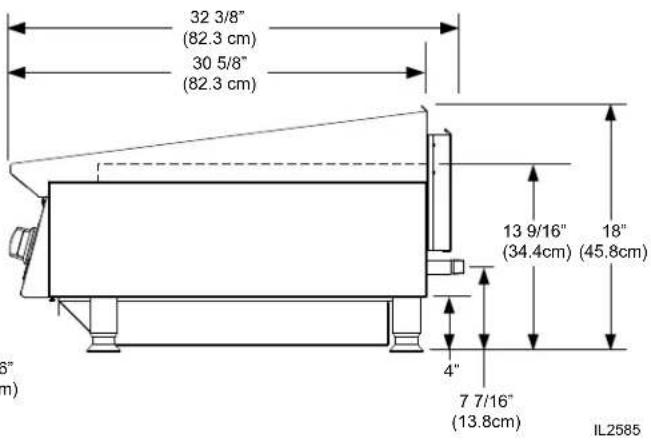
SPECIFICATIONS
| Model Type | Type Controls | BTUH Griddle Area | Dimensions Approx Weight | ||||||
| Width Depth | Height Installed | Led Shipping | |||||||
| 824MA | Manual Valve (pilot) | 260,000 | 573 sq in | (3697 sq. cm) 24" (61cm) | 32 3/8" (82.2cm) | 18" (45.7cm) | 214lbs (97kg) | 244lbs (110.6kg) | |
| 836MA | 3 | 90,000 | 860 sq. in. (5545 sq. cm) | 36" (91.4cm) | 321lbs (145.4kg) | 366lbs (165.8kg) | |||
| 848MA | 4 | 120,000 | 1146 sq. in (7397 sq. cm) | 48" (122cm) | 428lbs (193.3kg) | 488lbs (221.1kg) | |||
| 860MA | 5 | 150,000 | 1433 sq in (9242 sq cm) | 60" (152.4cm) | 535lbs (242.4kg) | 610lbs (276.4kg) | |||
| 872MA | 6 | 180,000 | 1719 sq in (11091 sq cm) | 72" (182.9cm) | 642lbs (290.9kg) | 732lbs (331.7kg) | |||
| 824TA | T-Stat (pilot) | 2 60,000 573 sq in | (3697sq. cm) 24" (61cm) | 32 3/8"(82.2cm) | 18"(45.7cm) | 214lbs (97kg) 24 | 4lbs (110.6kg) | |
| 836TA | 3 90,000 | 860 sq. in. (5545 sq. cm) | 36" (91.4cm) | 321lbs (145.4kg) | 366lbs (165.8kg) | |||
| 848TA | 4 120,000 | 1146 sq. in (7397 sq. cm) | 48" (122cm) | 428lbs (193.3kg) | 488lbs (221.1kg) | |||
| 860TA | 5 150,000 | 1433 sq in (9242 sq cm) | 60" (152.4cm) | 535lbs (242.4kg) | 610lbs (276.4kg) | |||
| 872TA | 6 180,000 | 1719 sq in (11091 sq cm) | 72" (182.9cm) | 642lbs (290.9kg) | 732lbs (331.7kg) |
| 824TSA, TSCHSA | Thermal Spark (no pilot) | 2 80,000 573 sq in | (3697sq. cm) 24" (61cm) | 32 3/8" (82.2cm) | 18" (45.7cm) | 214lbs (97kg) 24 | 4lbs (110.6kg) | |
| 836TSA, TSCHSA | 3 | 120,000 | 860 sq. in. (5545 sq. cm) | 36" (91.4cm) | 321lbs (145.4kg) | 366lbs (165.8kg) | ||
| 848TSA, TSCHSA | 4 | 160,000 | 1146 sq. in (7397 sq. cm) | 48" (122cm) | 428lbs (193.3kg) | 488lbs (221.1kg) | ||
| 860TSA, TSCHSA | 5 | 200,000 | 1433 sq in (9242 sq cm) | 60" (152.4cm) | 535lbs (242.4kg) | 610lbs (276.4kg) | ||
| 872TSA, TSCHSA | 6 | 240,000 | 1719 sq in (11091 sq cm) | 72" (182.9cm) | 642lbs (290.9kg) | 732lbs (331.7kg) |

GENERAL INSTALLATION DATA
This equipment is designed and sold for commercial use only by personnel trained and experienced in its operation and is not sold for consumer use in and around the home nor for use directly by the general public in food service locations.
Before using your new equipment, read and understand all the instructions & labels associated with the unit prior to putting it into operation. Make sure all people associated with its use understand the units operation & safety before they use the unit.
Ultra-Max series griddles are equipped for use on either natural or propane gas. All units are shipped for natural gas and can easily be converted to propane. See Propane Gas - Conversion.
-IMPORTANT
Be sure to remove all paper protection and packing material from unit prior to lighting. Remove the protective plastic from the griddle plate and thoroughly clean the unit's exterior surfaces.
KEEP THE APPLIANCE AREA FREE AND CLEAR FROM COMBUSTIBLES! For use on non-combustible countertops only. Combustible and non-combustible material must be at least 48'' (120cm) from the top of the appliance and at least 6'' (16cm) from the sides and back. Adequate clearance should also be provided for proper operation and servicing.
The installation of the Appliance must conform to the NATIONAL FUEL GAS CODE "ANSI Z223.1 - LATEST EDITION" AND ALL LOCAL GAS COMPANY RULES AND REGULATIONS.
IN CANADA INSTALLATION SHALL BE IN ACCORDANCE WITH THE CURRENT CAN/CGA-B149.1 NATURAL GAS INSTALLATION CODE OR CAN/CGA-B149.2 PROPANE INSTALLATION CODE AND LOCAL CODES WHERE APPLICABLE.
NOTICE
When this appliance is installed with casters, it must be installed with the casters supplied, a connector complying with either ANSI Z21.69 or CAN/CGA-6.16 and a quick-disconnect device complying with either ANSI Z21.41 or CAN1-6.9. It must also be installed with restraining means to guard against transmission of strain to the connector.
For your protection, we recommend a qualified installing agency install this appliance. They should be familiar with gas installations and your local gas requirements. In any case, your gas company should be called to approve the final installation.
This appliance, its pressure regulator and its individual shutoff valve must be disconnected from the gas supply piping system during any pressure testing of that system at test pressures in excess of 1/2 PSIG. This appliance and its pressure regulator must be isolated from the gas supply piping system by closing its individual manual shutoff valve during any pressure testing of the gas supply piping system at test pressures equal to or less than 1/2 PSIG.
EXHAUST CANOPY
Griddles inherently create a good deal of heat and smoke and should be installed under an efficient exhaust hood with flame proof filters. A vertical distance of not less than 48" shall be provided between the top of the appliance and filters or any other combustible material. Exhaust installation must conform to local codes.
AIR SUPPLY: Provisions for adequate air supply must be provided.

CAUTION
AIR INTAKES IN BOTTOM
Air for combustion enters from the bottom of the unit. Do not obstruct this area.
LEVELING UNIT
This griddle is supplied with 4 feet or floor stand legs which must be screwed into the body. After the griddle is in its final position, adjust the legs to create 1/8 inch slant from back to front. This will allow the grease to run into the grease gutter and provide the proper combustion air for the burners. Adjusting the (4) feet which have an adjustment of 1 - 3 / 4 for accurate and perfect line-up with other units.

CAUTION
DO NOT INSTALL WITHOUT ATTACHING FEET OR SUPPLIED STAND LEGS AND SHELF - DO NOT REMOVE FEET.
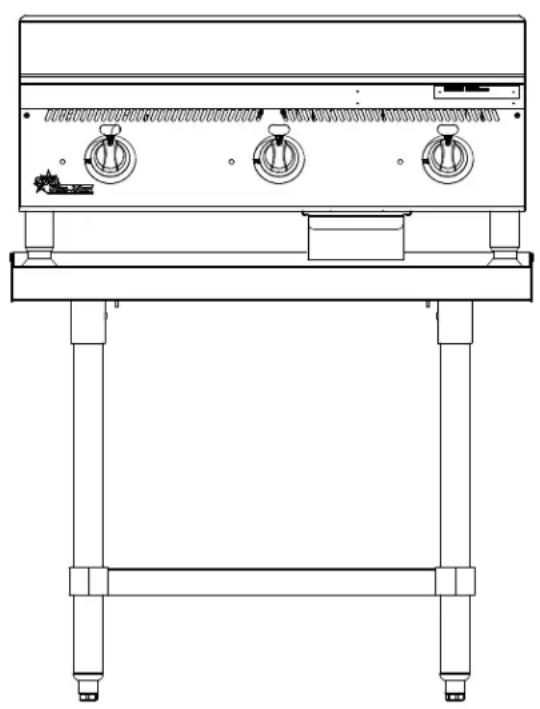
ON OPTIONAL EQUIPMENT STAND
FLOOR STAND MODELCOUNTER TO
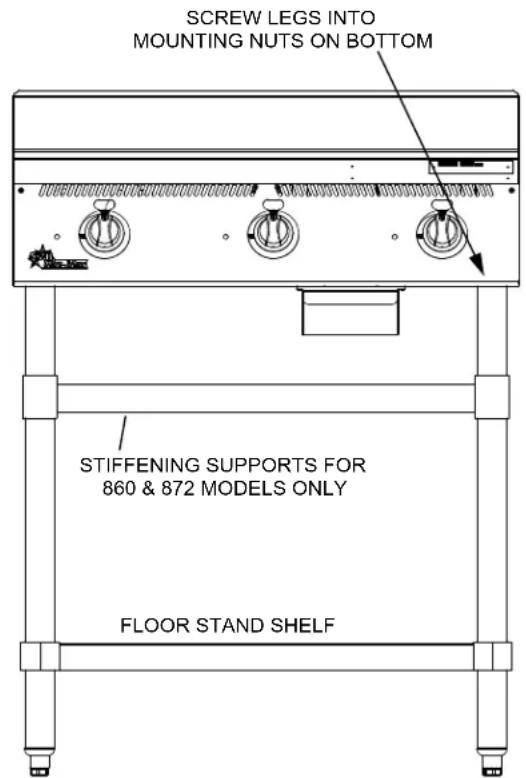
IL2586
Caster Kits: Casters can be used with floor stand models or optional equipment stand. For installation, carefully mark and cut off from the bottom of each leg using a straight cutting saw and de-burr the inside tube wall prior to installing the caster. Cut leg should measure 19^ tube length, not overall length. Casters add about 6 - 1 / 4'' of height to the unit. Be sure to use approved strain relief means for protecting gas line connection. If an appliance is equipped with casters and is gas connected with a quick connect coupling, all personnel must be aware that there is a restraint on the appliance and if disconnected for service or cleaning it must be reconnected as originally installed prior to use.

GAS PIPING
Gas piping shall be of such size and so installed as to provide a supply of gas sufficient to meet the full gas input of the appliance. If the appliance is to be connected to existing piping, it shall be checked to determine if it has adequate capacity. Joint compound shall be used sparingly and only on the male threads of the pipe joints. Such compounds shall be resistant to the action of L.P. gases. WARNING: Any loose dirt or metal particles which are allowed to enter the gas lines on this appliance will damage the valve and affect its operation. When installing this appliance, all pipe and fittings must be free from all internal loose dirt.
A convertible pressure regulator is provided with each griddle. It should be connected to the inlet pipe at the rear of the unit. The gas supply is then connected to it. The supply pressure to the regulator is not to exceed 1/2 psig. If the gas pressure going to the regulator on the griddle exceeds 1/2 PSIG then another regulator must be installed to lower the pressure going to it. This second regulator is not supplied with the griddle and is the customers responsibility. All units are shipped for use with natural gas. MA and TA Series Models are shipped set for 5^ water column manifold pressure. TSA and TSCHSA Series Models are shipped set for 5^ water column manifold pressure.
MANUAL SHUT OFF VALVE
A manual shut off valve should be installed upstream from the manifold and within six feet of the griddle. The shut-off valve is not supplied with the griddle and is the customers responsibility.
CONNECTING GAS SUPPLY LINE
The gas inlet of the griddle is sealed at the factory to prevent entry of dirt. Do not remove this seal until the actual connection is made to the gas supply line.
This griddle is equipped with fixed orifice hoods and is shipped from the factory for use with natural gas. To convert to propane gas install the orifice hoods located behind the front panel as follows:
- Remove the front panel by removing the screws located on the front and bottom.
- Remove the burner mounting screws in the center of the combustion chamber access covers.
- Slide the burners back off the orifice hoods.
- Remove the natural gas orifice hoods and install the propane orifice hoods.
- Slide the burners back over the orifice hoods and reinstall the burner mounting screws.
- Reinstall the front panel.
- Set the pressure regulator to 10" (25.4cm) water column by removing the slotted or hex cap from the center of the regulator. Invert the plug and reinstall. The letters "LP"
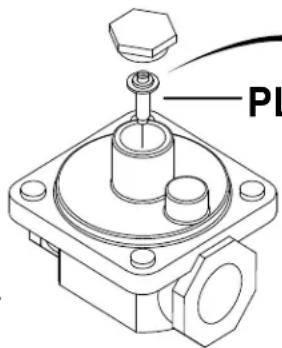
Natural
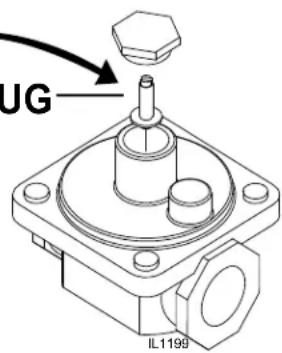
Propane / LP
Regulator
CHECKING FOR GAS LEAKS
Check entire piping system for leaks. Soap and water solution or other material acceptable for the purpose, shall be used in locating gas leakage.

CAUTION
Matches, candle flame or other sources of ignition shall not be used for locating gas leaks.
PILOT FLAME ADJUSTMENT
The griddles are equipped with standing pilots and should be lit immediately after the gas is turned on.
MANUAL VALVE AND THROTTLING CONTROL MODELS
Adjust the flame as low as possible while still providing immediate burner ignition when the control knob is turned to high.
LIGHTING INSTRUCTIONS
When the griddle is first lit, it will smoke until the preservative oils and impurities are burned off. The griddles are equipped with standing pilots and should be lit immediately after the gas is turned on. Snap Action giddles do not have a standing pilot and do not require lighting. The Unit should be properly leveled prior to lighting, with the rear of the griddle slightly higher than the front to allow grease to roll off and flue gasses to escape out the rear..

DO NOT ATTEMPT TO LIGHT YOUR PILOT BURNER IF YOU EXPERIENCE A STRONG GAS ODR.
MANUAL VALVE AND THROTTLING CONTROL MODELS
- Turn off the main valve to the unit and wait 5 minutes to clear gas.
- Turn off all knobs and pilot valves.
- Turn on main valve to unit and light all pilots.
- Turn burner knobs to desired position.
- To turn burners off, turn knobs to off.
ORIFICE ELEVATION COMPENSATION CHART
| Orifice @ sea level | 2000 3000 | 4000 500 | 60000 | 7000 8000 | 9000 10000 | ||||
| NAT LP | Manual Control Gas Griddles: 824ma thru 872MA | ||||||||
| 41 | 42 | 42 | 42 | 43 | 43 | 44 | 44 | 45 | |
| 52 | 52 | 53 | 53 | 53 | 53 | 54 | 54 | 54 | |
| NAT LP | Thermostatic Conrol Gas Griddles: 824TA thru 872TA | ||||||||
| 38 | 39 | 40 | 41 | 41 | 42 | 42 | 43 | 43 | |
| 52 | 52 | 53 | 53 | 53 | 53 | 54 | 54 | 54 | |
| NAT LP | Snap Action Gas Griddles: 824TSA thru 872TSA | ||||||||
| 34 | 35 | 36 | 36 | 37 | 37 | 38 | 39 | 40 | |
| 49 | 50 | 50 | 50 | 51 | 51 | 51 | 52 | 52 | |
BURNER AIR SHUTTER ADJUSTMENT
The burner air shutter has a locking screw on the bottom side of the venturi. Loosen this screw to make any adjustment and tighten the screw to lock the air shutter in place after adjustment is complete. Any adjustment must be made when the burner is at full input before the control temperature setting has been satisfied.
- Turn the control knob to the highest position and observe the burner flame.
- Slowly decrease the air shutter opening until the flame is a soft blue with yellow tips, then increase the opening until the yellow tips disappear and the flame is a hard blue.
- Do not open the shutter to a point where the flame is unstable or lifting from the burner surface. The flame must be steady and even across the entire burner.

The following was set at the factory and the adjustment should only be made by an authorized installer and only if you are experiencing this specific problem.
BYPASS ADJUSTMENT ON THROTTLING CONTROL MODELS ONLY
Throttling control models have a minimum flame setting that provides a steady uniform flame across the burner when the control heat setting has been satisfied.
- Set the control at the maximum setting and wait for the burner flame to throttle back.
- Turn the dial to the 200 degree setting. A small steady flame should be visible on all the burner ports. This flame should be approximately 1/8 high.
- An adjustment screw is located either on the front or side of the control housing.
- Turn clockwise to decrease the flame height; turn counterclockwise to increase the flame
ELECTRICAL CONNECTION FOR SNAP ACTION AND CHROME SURFACE MODELS ONLY
Snap action and chrome surface griddles are equipped with a three-prong grounding plug. The unit is designed for use on a 120 volt 15 amp 50/60 cycle AC single-phase circuit only. For protection against electrical shock, the unit must be plugged directly into a properly grounded three-prong receptacle. Do not cut or remove the grounding prong from this plug.
Do not connect to any other type of current or serious damage will occur.
OPERATING INSTRUCTIONS
SEASONING THE GRIDDLE HEATING SURFACE (NON-CHROME SURFACES)
Clean the griddle surface thoroughly. After the griddle has been thoroughly cleaned, it should be seasoned to prevent food from sticking. Before using and after each thorough scouring, season the griddle heating surface in the following manner:
- Turn the temperature control dial to 350^ (174.0^)
- Using a clean cloth, not a spatula, spread a thin film of cooking oil or shortening over the griddle, cooking surface. This film should remain on the hot griddle surface 1/2 hour.
- Remove excess shortening and wipe clean.
- Apply another film of cooking oil over the hot cooking area for another 1/2 hour, and again remove excess shortening and wipe clean. The griddle surface should now be ready for use.

Even with careful seasoning food may, to some extent, stick to the griddle cooking surface until griddle plate is "broken in."
COOKING
Set the dial knob to the setting desired. After a 30 minute (minimum) preheating period, the griddle will automatically maintain the selected temperature.
GRIDDLE CARE (NON-CHROME SURFACES)
It takes very little time and effort to keep the griddle attractive and performing at top efficiency. If grease is permitted to accumulate, it will form a gummy cake and then carbonize into a hard substance which is extremely difficult to remove. To prevent this condition, the following suggestions for cleanliness should be followed:
- After each use, scrape the griddle with a scraper or flexible spatula to remove excess grease and food. A waste drawer is provided for the scrapings. If there is an accumulation of burned-on grease and food, the griddle should be thoroughly scoured and reseasoned. Use pumice or griddle stone while the griddle is warm. Do not use steel wool because of the danger of steel slivers getting into the food.
- Use a clean cloth and good non-abrasive cleaner to clean the stainless steel body of the griddle. Wipe the control panel front with a soft cloth.
- At least once a day, remove the waste drawer and wash in the same way as an ordinary cooking utensil. The drawer is removed by pulling forward and out.
GRIDDLE CARE (CHROME SURFACES)
(Chrome surface griddles are marked with "CHS" at the end of the model number designation on the nameplate.) It takes very little time and effort to keep this Industrial Chrome griddle surface sparkling clean and performing at top efficiency. DO NOT allow grease to accumulate as it will carbonize and become difficult to remove. To prevent this condition, the following cleaning suggestions should be followed:
- Remove excess oil and food regularly with a 4^ (100mm) wide razor sharp type scraper and wipe surface with a damp cloth if desired.
- Following the scraping, for end of the day cleaning, a damp cloth and a non-silicated, non-abrasive, non-chlorinated cleaner such as Bon-Ami may be used to wipe surface clean, followed by wiping with clean wet cloth.
- Follow steps 2 and 3 from Griddle Care (Non-Chrome Surfaces).

CAUTION
CAUTION
- Never use pumice, griddle stones, or abrasives on the surface.
- Never strike the griddle surface with a sharp instrument or spatula edge.
- Never use steel wool.
- Never use commercial liquid grill cleaner on the griddle surface.
- Abusing the surface voids the warranty.
WASTE DRAWER
A waste drawer is located at the front and can be removed from the front for cleaning by pulling drawer forward. This drawer should be checked and emptied when necessary or at least once per day.

CAUTION
EXERCISE EXTREME CARE IN HANDLING THE WASTE DRAWER CONTAINING HOT GREASE.
OVERNIGHT SHUTDOWN
MANUAL VALVE AND THROTTLING CONTROL MODELS
Turn knobs to the off position to turn burners off.
SNAP ACTION AND CHROME SURFACE MODELS
Turn knobs to the lowest setting and turn power switch off.
CHROME GRIDDLE SURFACE LIMITED WARRANTY EXCLUSIONS
Your chrome griddle has been designed to give you many years of cooking reliability and requires minimum maintenance to keep the chrome surface in its original condition. All chrome griddle surfaces are warranted for a period of 5 years against manufacturing defects to the original owner from the date of installation. This limited warranty is void if it is determined by Star Manufacturing International Incorporated or one of its authorized representatives that the chrome surface has been misused or abused or subjected to the following situations:
- Improperly installed.
- By-pass adjustments not set properly on gas units allowing the appliance to overheat and discolor the chrome surface. (See by-pass adjustment section.)
- The misuse of any instrument or tool which scratches or makes indentations in the surface which could cause the surface to peel, flake, or chip off.
- The use of any chemical or abrasive cleaning solution, griddle brick, stone, screen or other cleaning products which could damage and affect the performance of the chome surface.
- The neglect of daily routine maintenance to the chrome surface.
CONSERVEZ CE MANUEL POUR RÉFERENCE FUTURE AVIS

Model: 836MA, Manual Control Ultra-Max Gas Griddle
SK2623, Rev. A 12/11/12
Model: 824MA, 836MA, 848MA, 860MA, 872MA Gas Griddle, Manual Control
| Fig No Part No. Qty | Description Application | |||
| 1 | G5-824037 | 36MA | GRIDDLE PLATE ASSY-MANUAL | 824MA |
| G5-836037 | 48MA | |||
| G5-848037 | ||||
| G5-860037 | 60MA | |||
| G5-872037 | 72MA | |||
| 2 G5 | 824012 | 1 | CHUTE ASSEMBLY | 824, 836, 848 |
| 2 66 | 0, 872 | |||
| 3 2C | Z2893 AR NUT | 10-24 | HEX STL ZP | |
| 4 2F | Z4613 | 2 | 6MA | 824MA |
| 3 83 | ||||
| 4 84 | 8BURNER 824 SERIES | |||
| 5 86 | 0MA | |||
| 6 87 | 2MA | |||
| 5 G5 | Z16155 | 2 | 6MA | 824MA |
| 3 83 | ||||
| 4 84 | 8BURNER COVER PLATE | |||
| 5 86 | 0MA | |||
| 6 87 | 2MA | |||
| 6 2C | 8833 AR SCR | EW 8- | 18X1/2 HEX STL NP | |
| 7 2A | 9369 | 2 | 6MA | 824MA |
| 3 83 | ||||
| 4 84 | 8URIFICE-FITTING | |||
| 5 86 | 0MA | |||
| 6 87 | 2MA | |||
| 8 | 2A-Z4930 | 2 | 6MA | 824MA |
| 3 83 | ||||
| 4 84 | 8URIFICE #41 | |||
| 5 86 | 0MA | |||
| 6 87 | 2MA | |||
| 2A-Z4931 | 2 | 6MA | 824MA | |
| 3 83 | ||||
| 4 84 | 8URIFICE #52 BLK | |||
| 5 86 | 0MA | |||
| 6 87 | 2MA | |||
| 9 G5 | Z4798 | 1 | 6MA | 824MA |
| 2 83 | ||||
| 3 84 | 8BURNER BAFFLE | |||
| 4 86 | 0MA | |||
| 5 87 | 2MA | |||
| 10 | G5-Z4812 | 1 | FLUE 24" 824MA | |
| G5-Z4813 | FLUE 36" 836MA | |||
| G5-Z4814 | FLUE 48" 848MA | |||
| G5-Z4815 | FLUE 60" 860MA | |||
| G5-Z4816 | FLUE 72" 872MA | |||
| 11 | G5-Z4817 | 1 FLUE DIVIDER 824, 836, 848, 860 | ||
| G5-Z4817 | 2 FLUE DIVIDER 872 | |||
| 12 | 2J-Z4686 | 1 REGULATOR-3/4 X 3/4 | ||
| 13 | G5-Z4897 | 1 DRAWER SLIDE 824, 836, 848 | ||
| 2 86 0, 872 | ||||
| 14 | G5-824014 | 1 GREASE DRAWER ASSY 824, 836, 848 | ||
| 2 86 0, 872 | ||||
| 15 | 2R-Z19119 | FOOT TAPERED STEEL | ||
Model: 824MA, 836MA, 848MA, 860MA, 872MA Gas Griddle, Manual Control
2M-Z16558; Ultra-Max Gas Griddle
| Fig No Part No. Qty Description Application | |||
| 16 | 2M-Z15805 | 1 ULTRA MAX LOGO | |
| 17 | I4-Z15484 | 2 6MA KNOB ASSEMBLY LG GAS 8MA KEYB 8MA 0MA 2MA | 824MA |
| 3 83 | |||
| 4 84 | |||
| 5 86 | |||
| 6 87 | |||
| 18 | 2M-Z15245 | 2 6MA 8KMOB LABEL ULTRAMAX | 824MA |
| 3 83 | |||
| 4 84 | |||
| 5 86 | |||
| 6 87 | |||
| 19 | 2C-200014 AR SCREW 8-32X3/8 THP SS | ||
| 20 | G5-Z16406 | 1 FRONT PANEL - 824MA | 824MA |
| G5-Z15203 | 836MA | ||
| G5-Z16407 | FRONT PANEL - 848 | 848MA | |
| G5-Z16408 | FRONT PANEL - 60" | 860MA | |
| G5-Z16409 | FRONT PANEL - 72" | 872MA | |
| 21 | 2C-8477 | 4 CI IP .125 PO STL PHOS | |
| 22 | 2K-Z15272 | 1 MANIFOLD - 824MA/ISA | 824MA |
| 2K-Z15273 | |||
| 2K-Z15274 | MANIFOLD - 836MA/TSA 836MA | 848MA | |
| 2K-Z15275 | MANIFOLD - 848MA/ISA | 860MA | |
| 2K-Z15276 | MANIFOLD - 860MA/ISA | 860MA | |
| MANIFOLD - 872MA/ISA | 872MA | ||
| 23 | 2V-6671 | 2 6MA VALVE-LINCOLN 8MA BRASS#3817 | 824MA |
| 3 83 | |||
| 4 84 | |||
| 5 86 | |||
| 6 87 | |||
| 24 | 2V-Z15280 | 2 6MA | 824MA |
| 3 83 | |||
| 4 84 | |||
| 5 86 | |||
| 6 87 | |||
| 25 | 2V-Y8832 | 2 6MA | 824MA |
| 3 83 | |||
| 4 84 | |||
| 5 86 | |||
| 6 87 | |||
| 26 | 2A-Z0790 | 2 6MA | 824MA |
| 3 83 | |||
| 4 84 | |||
| 5 86 | |||
| 6 87 | |||
| 27 | 2K-Z4921 | 2 6MA 8MATING-STRAIGHT | 824MA |
| 3 83 | |||
| 4 84 | |||
| 5 86 | |||
| 6 87 | |||
| 28 | 2P-1453 | 1 PLUG-PIPE 1/8NPT SQ HD | 836MA |
| 29 | I5-Z16262 | 2 FRONT PANEL SIDE BRACKET | |
| NI | 2J-Z4686 | 1 RGLTR-GAS 3/4X3/4, CONVERTABLE | |
SK2631, Rev. - 12/11/12
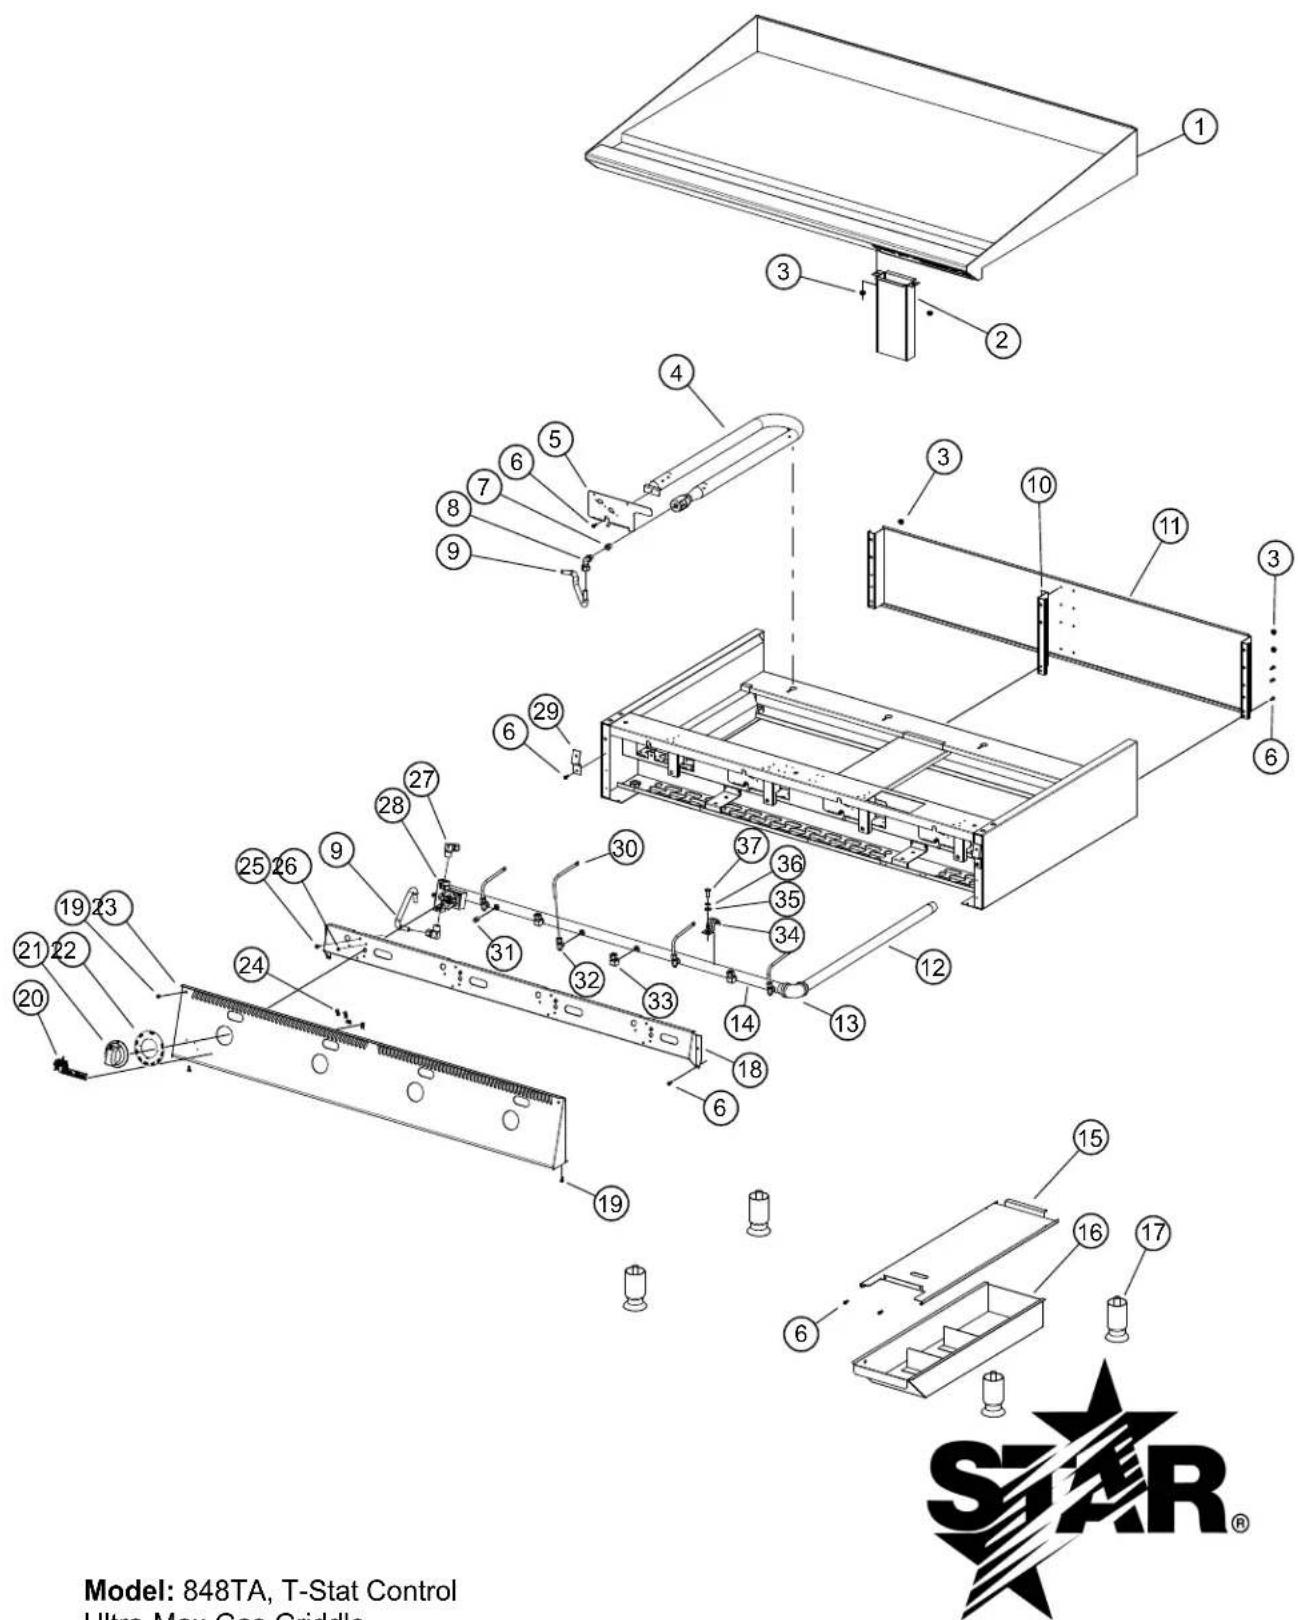
Model: 848TA, T-Stat Control
Ultra-Max Gas Griddle
Model: 824TA, 836TA, 848TA, 860TA, 872TA
Gas Griddle, Thermostat Control
| Fig No Part No Qty Description | ||||
| 1 | G5-824032 | 824TC | HSA | 824TA |
| G5-824033 | 824TC | HSA | ||
| G5-836032 | 836TA | |||
| G5-836033 | 836TC | HSA | ||
| G5-848032 | 848TA | GRIDDLE PLATE GAS STEEL/CHROME (TCHSA) | ||
| G5-848033 | 848TC | HSA | ||
| G5-860032 | 860TA | |||
| G5-860033 | 860TC | HSA | ||
| G5-872032 | 872TA | |||
| G5-872033 | 872TC | HSA | ||
| 2 G5 | 824012 | 1 | CHUTE ASSEMBLY 0TA, 872TA | 824TA, 836TA, 848TA |
| 2 86 | ||||
| 3 2C | Z2893 | 8 | 6TA, 848TA | 824TA |
| 11 83 | ||||
| 13 86 | ||||
| 16 87 | ||||
| 4 2F | Z4613 | 2 | 6TA | 824TA |
| 3 83 | ||||
| 4 84 | ||||
| 5 86 | ||||
| 6 87 | ||||
| 5 G5 | Z16155 | 2 | 6TA | 824TA |
| 3 83 | ||||
| 4 84 | ||||
| 5 86 | ||||
| 6 87 | ||||
| 6 2C | 8833 | 31 | 6TA | 824TA |
| 42 83 | ||||
| 45 84 | ||||
| 5 86 | ||||
| 6 87 | ||||
| 74 87 | ||||
| 7 | 2J-Z16923 | 2 | 6TA | 824TA |
| 3 83 | ||||
| 4 84 | ||||
| 5 86 | ||||
| 6 87 | ||||
| 2A-Z4931 | 2 | 6TA | 824TA | |
| 3 83 | ||||
| 4 84 | ||||
| 5 86 | ||||
| 6 87 | ||||
| 8 2A | 9369 | 2 | 6TA | 824TA |
| 3 83 | ||||
| 4 84 | ||||
| 5 86 | ||||
| 6 87 | ||||
| 9 | 2K-70104-03 | 4 | 6TA | 824TA |
| 6 83 | ||||
| 8 84 | ||||
| 8 87 | ||||
| 10 86 | ||||
| 12 87 | ||||
| 10 G5 | Z4817 | 1 | FLUE DIVIDER | 824TA, 836TA, 848TA, 860TA |
| 2 87 | ||||
Model: 824TA, 836TA, 848TA, 860TA, 872TA
Gas Griddle, Thermostat Control
2M-Z16558; Ultra-Max Gas Griddle
| 11 | G5-Z4812 | FLUE 36" 836TA | ||
| G5-Z4813 FL | FLUE 48" 848TA | |||
| G5-Z4814 FL | FLUE 60" 860TA | |||
| G5-Z4815 FL | FLUE 72" 872TA | |||
| 12 2K-Z15231 1 PIPE SEG - 3/4x24.00 BI 848TA | ||||
| 13 2K-Z4611 1 ELBO W 3/4 NPT 848TA | ||||
| Fig No Part No Qty Description on Application | ||||
| 14 | 2K-Z16583 | 1 | MANIFOLD PIPE 824T 824TA | |
| 2K-Z16584 | MANIFOLD PIPE - 836TA | 836TA | ||
| 2K-Z16585 | MANIFOLD PIPE - 848TA | 848TA | ||
| 2K-Z16586 | MANIFOLD PIPE 860T 860TA | |||
| 2K-Z16587 | MANIFOLD PIPT 872TA | 872TA | ||
| 15 G5-Z4897 | 1 | 2 86 | DRAWER SLIDE OTA, 872TA | 824TA, 836TA, 848TA |
| 16 G5-824014 | 1 | 2 86 | GREASE DRAWER ASSY OTA, 872TA | 824TA, 836TA, 848TA |
| 17 | 2R-Z19119 | 4 | FOOT, 4" TAPERED, STEEL | |
| 18 | G5-Z16588 | 1 | T-STAT BRKT 824TA | 824TA |
| G5-Z16589 | T-STAT BRKT 836TA | 836TA | ||
| G5-Z16590 | T-STAT BRKT 848TA | 848TA | ||
| G5-Z16591 | T-STAT BRKT 860TA | 860TA | ||
| G5-Z16592 | T-STAT BRKT 872TA | 872TA | ||
| 19 2C-200014 4 | SCREW 8-32X3/8 THP SS | ALL | ||
| 20 2M-Z15805 1 ULTRA MAX LOGO 848TA | ||||
| 21 G3-624329 | 2 | 3 83 67A KNOB ASSY LG GS/K 67A KEYR 680TA | 824TA | |
| 4 84 67A 2TA | ||||
| 22 2M-Z15214 | 2 | 3 83 67A | 824TA | |
| 4 84 67A 2TA | ||||
| 23 | G5-Z16516 | 1 | FRONT PNL 24" TA | 824TA |
| G5-Z16515 | FRONT PANEL 836TA | 836TA | ||
| G5-Z16514 | FRONT PANEL 48" TA | 848TA | ||
| G5-Z16513 | FRONT PNL 60" TA | 860TA | ||
| G5-Z16512 | FRONT PANEL 72" TA | 872TA | ||
| 24 2C-8477 2 CLIP 125 PO STL PHOS 848TA | ||||
| 25 2C-Z5883 | 6 | 8 83 67A 10-24 X 1/2 FZA SCREW 872TA | 824TA | |
| 8 83 67A 10-24 X 1/2 FZA SCREW | ||||
| 12 84 67A 10-24 X 1/2 FZA SCREW | ||||
| 16 86 67A 10-24 X 1/2 FZA SCREW | ||||
| Model: 824TA, 836TA, 848TA, 860TA, 872TA Gas Griddle, Thermostat Control | ||||
| 26 2C | Z8547 | 2 | 6TA SCREW, 6-32 SHOULDER OTA 2TA | 824TA |
| 3 83 | ||||
| 4 84 | ||||
| 5 86 | ||||
| 6 87 | ||||
| 27 2K | Z675 | 4 | 6TA ELL90 3/8MPTX3/8CC OTA BRASS OTA 2TA | 824TA |
| 6 83 | ||||
| 8 84 | ||||
| 10 86 | ||||
| 12 87 | ||||
| Fig No | Part No Qty | Description | Application | |
| 28 2T | Z16593 | 2 | 6TA | 824TA |
| 3 83 | ||||
| 4 84 | 8T&STAT GAS GS 550F | |||
| 5 86 | OTA | |||
| 6 87 | 2TA | |||
| 29 G5 | Z16703 2 FRNT PANEL BRKT ALL | |||
| 30 2V | Z15281 | 2 | 6TA | 824TA |
| 3 83 | ||||
| 4 84 | 8T&LOT BURNER | |||
| 5 86 | OTA | |||
| 6 87 | 2TA | |||
| 31 2P | 1453 1 PLUG-PIPE | 1/8NPT SQ 848TA | ||
| 32 2V | 6671 | 2 | 6TA VALVE-LINCOLN OTA BRASS#3817 OTA 2TA | 824TA |
| 3 83 | ||||
| 4 84 | ||||
| 5 86 | ||||
| 6 87 | ||||
LIMITED EQUIPMENT WARRANTY
Star Manufacturing [as well as its subsidiaries, Toastmaster and Holman] warranties new products to be free from defects in material and/or workmanship for a period of one [1] year from the date of original installation, except as noted below. Defects that occur as a result of normal use, within the time period and limitations defined in this warranty, will at Star's discretion have the parts replaced or repaired by Star or a Star-authorized service agency.
THIS WARRANTY IS SUBJECT TO ALL LISTED CONDITIONS.
Repairs performed under this warranty are to be performed by a Star authorized service agency. Star will not be responsible for charges incurred or service performed by non-authorized repair agencies. In all cases, the nearest Star-authorized service agency must be used. Star will be responsible for normal labor charges incurred in the repair or replacement of a warranted product within 50 miles (80.5 km) of an authorized service agency. Time and expense charges for anything beyond that distance will be the responsibility of the owner. All labor will need to be performed during regular service hours. Any overtime premium will be charged to the owner. For all shipments outside the U.S.A. and Canada, please see the International Warranty for specific details. It is the responsibility of the owner to inspect and report any shipping damage claims, hidden or otherwise, promptly following delivery. No mileage or travel charges will be honored on any equipment that is deemed portable. In general, equipment with a cord and plug weighing less than 50 lb. (22.7 kg) is considered portable and should be taken or shipped to the closest authorized service agency, transportation prepaid.
PORTABLE EQUIPMENT EXAMPLES
- 514LL fryer
15MC and 18MCP hot food merchandisers - QCS1, QCS2, and RCS2 toas
16PD-A pretzel merchandi - Condiment dispensers except HPD-and SPD-series models
- All pop-up toasters
- All pastry display cabinets
- All heat lamps
J4R popcorn machine
12NCPW and 15NCPW nachomERCHANTisers
- Nacho cheese warmers
except 11WLA-series models
Specialty food warmers except 130R, 11RW, and 11WSA models
All butter dispensers
- All nacho chip merchandisers
- All accessories
CONTACT
Should you require any assistance regarding the operation or maintenance of any Star equipment; write, phone, fax or email our service department. In all correspondence mention the model number and serial number of your unit, as well as the voltage or type of gas you are using.
Business hours are 8:00 a.m. to 4:30 p.m. Central Standard Time (CST)
Telephone: (800)-264-7827
Fax: (314)-781-2714
Email: Customerservice@star-mfg.com
www star-mfg.com
WARRANTY EXCLUSIONS
THE FOLLOWING WILL NOT BE COVERED UNDER WARRANTY.
- Any product which has not been used, cleaned, maintained, or installed in accordance with the directions published in the appropriate installation sheet and/or owner's manual as well as national and local codes, including incorrect gas, electrical, or water connection. Star is not liable for any unit which has
been mishandled, abused, misapplied, subjected to chlorides, harsh chemicals, or caustic cleaners, damaged from exposure to hard water, modified by unauthorized personnel, damaged by flood, fire, or other acts of nature [or God], or which have an altered or missing serial number. - Installation, labor, and job checkouts, calibration of heat controls, air and gas burner/bypass/pilot adjustments, gas or electrical system checks, voltage and phase conversions, cleaning of equipment, or seasoning of griddle surface.
- Replacement of fuses or resetting of circuit breakers, safety controls, or reset buttons.
- Replacement of broken or damaged glass components, quartz heating elements, and light bulbs.
- Labor charges for all removable parts in gas charbroilers and hotplates, including but not limited to burners, grates, and radiants.
- Any labor charges incurred by delays, waiting time, or operating restrictions that hinder a service technician's ability to perform service.
- Replacement of items subject to normal wear or items that can easily be replaced during a daily cleaning routine, such as but not limited to knobs, bulbs, fuses, quartz heating elements, baskets, racks, and grease drawers.
- Components that should be replaced when damaged or worn, but have been field-repaired instead [eg. field-welded fry pots]
- Any loss of business or profits.
| PRODUCTS PARTS LABOR | |
| Star-Ultra Max® fryers, griddles, charbroilers, and hotplates | 2 years 2 years |
| Star-Max® fryers, griddles, charbroilers, and hotplates | 2 years 2 years |
| Jetstar® popcorn poppers | 2 years 2 years |
| Staltek™ roller grill coatings | 5 years |
| Cast iron grates, burners; and burner shields | 180 days |
| Star, Toastmaster, or Holman parts sold to repair equipment | 90 days |
| Service First 1 year |