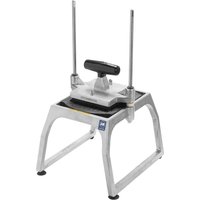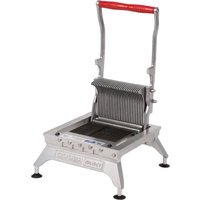
403NH - Slicer Vollrath - Free user manual and instructions
Find the device manual for free 403NH Vollrath in PDF.


User questions about 403NH Vollrath
0 question about this device. Answer the ones you know or ask your own.
Ask a new question about this device
Download the instructions for your Slicer in PDF format for free! Find your manual 403NH - Vollrath and take your electronic device back in hand. On this page are published all the documents necessary for the use of your device. 403NH by Vollrath.
USER MANUAL 403NH Vollrath
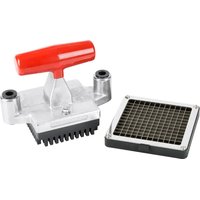
Redco® InstaCut™ 3.5TabletopandWallMount
ThankyouforpurchasingthisVollrathequipment.Beforeoperatingthe equipment,readandfamiliarizeyourselfwiththefollowingoperating andsafetyinstructions.SAVETHESEINSTRUCTIONSFORFUTURE REFERENCE.Savetheoriginalboxandpackaging.Usethispackaging toshiptheequipmentifrepairsareneeded.
SAFETYPRECAUTIONS
Toensuresafeoperation, read the following statements and understand their meaning. This manual contains safety precautions which are explained below. Pleaseread carefully.

WARNING
Warningisusedtoindicatethepresenceofahazardthatwillorcan causeseverepersonalinjuryordeath.

CAUTION
Cautionisusedtoindicatethepresenceofahazardthatwillorcan causeminorormajorpersonalinjuryifthecautionisignored.
NOTICE: Notice is used to note information that is important but not hazard-related.
Toreduceriskofinjuryordamagetotheequipment
- Checkequipmentbeforeeachusetoinsuretheequipmentisclean.
- Checkforbroken, nickedordullbladesandiffound, replacethe bladeassembly.
- Checktoinsurethatthepusherheadsitsdowncompletelyonthe rubberbumpers.
- Checktoensuretherubberbumpersareinplace.DONOTUSE EQUIPMENTIFBUMPERSARENOTINPLACE.
- Ontabletopmodelsthesuctioncupswillholdtheequipment securelytosmoothsurfaces.
- Wallmountedequipmentmustbesecurelymountedtowallstuds. Usepropersizeandtypehardwaretomountequipmenttowall.
• If necessary, lubricateguiderodsusing alight coating of mineral oil, PetroGel, or food gradelubricant. DONOTUSECOOKINGOILASIT WILL BE COMESTICKY AND MAY PERMANENTLY DAMAGETHE PUSHERHEADBEARINGS.
FUNCTIONANDPURPOSE
Intended for cutting, dicing and wedging vegetables and fruits.
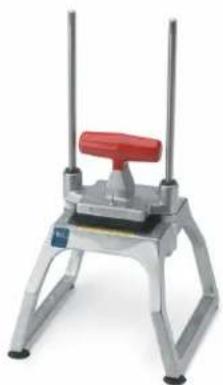
natural_image
Metallic laboratory stand with red handle and metal legs, no visible text or symbols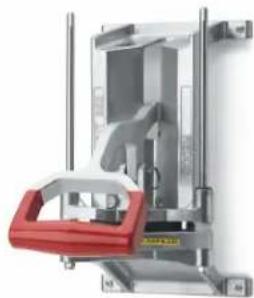
natural_image
Mechanical device with red handle and transparent frame, no visible text or symbols| Tabletop ItemNo. | WallMount ItemNo.Description | |
| 1500015016 | 14 "Dice | |
| 1500115017 | 38 "Dice | |
| 1500215018 | 12 "Dice | |
| 1500315019 | 4SectionWedge | |
| 1500515021 | 6SectionWedge | |
| 1500615022 | 8SectionWedge | |
| 1500715023 | 10SectionWedge | |
| 1500815024 | 12SectionWedge | |
| 15009—6 | SectionCore | |
| 1501015026 | 8SectionCore |
UNPACKINGTHEEQUIPMENTANDINITIALSETUP
Carefullyremovecratingorpackagingmaterialsfromtheequipment. Whennolongerneeded, disposeofallpackagingmaterialsinan environmentallyresponsiblemanner.
Installingthewallmountedmodel
- Usefour(4) ^1/4 screwsofasuitablelengthtosecurethebasetothe wall.Installscrewsintostuds.Ifthisisnotpossible,useproper anchorsandscrewstosecurebase.
FEATURESANDCONTROLS
text_image
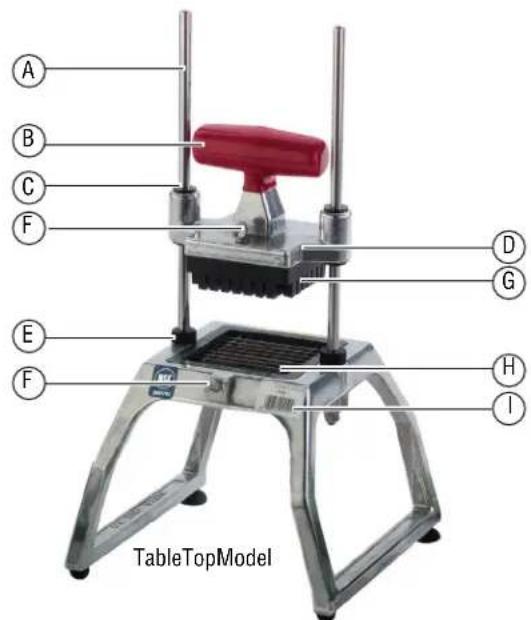
A B C F D G E F H I TableTopModelA Guide Rods. Guides and align the pusher head onto the blade set.
B Handle.Usedtolowerandraisethepusherheadblock
CGuides. Usedforsmoothandconsistentoperationofpusherhead ontheguiderods
DPusherHeadAssembly.Madeupofthepusherheadblock(and "T"handlefortabletopmodels).
E Bumpers. Cushions the stop of the pusher head.
text_image
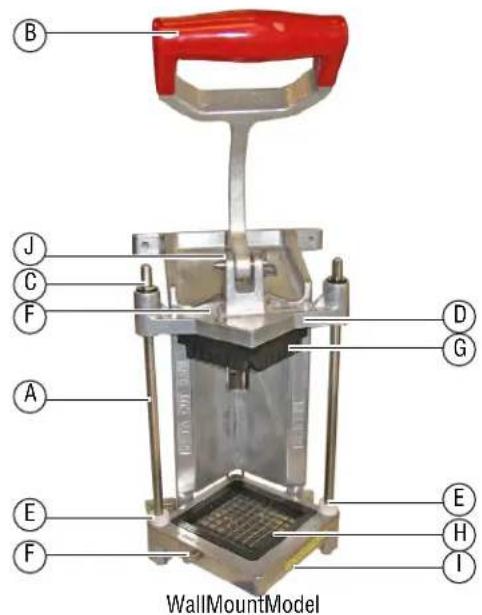
B J C F A D G E F E H I WallMountModelF Thumbscrew. Used to secure the pusher head block or the blade assembly.
GPusherHeadBock. Pushesthefoodproductthroughthebladeset. Specifically-sizedtomatchthecorrespondingbladeassembly.
HBladeAssembly.Housestheblades.Specificallysizedtomatchthe correspondingpusherheadblock
BaseAssembly.Holdstheguiderodsandbladeassembly.
J Locking Pin. Secures the pusher head to the handle.
OPERATION


WARNING
SharpBladeHazard
Bladesaresharpandcancausecuts.Toavoidinjuryfrom sharpblades,handlewithcaution.
Priortofirstuse,itisimportanttocleantheequipment.Washnew bladeswithwarmsoapywaterandrinsethoroughlytoremovethethin protectiveoilfilm.Beforeeachuse,checkthattheequipmentisclean andthebladesareingoodconditionandbumpersareinplace.Ifloose orbrokenbladesarefound,bladesmustbeserviced.
- Before each use, always check for proper blade alignment. Slowly set the pusher head onto the blade assembly. They should slide together with no obstructions. If there are obstructions, verify they are matching set. Removethe obstruction.
- Verify that the blade assembly and pusher head assembly are the desired size.
- Verify the bumpers are in place on the guide rods. DONOTUSE EQUIPMENTIFBUMPERS ARE NOT IN PLACE.
- Prepare the food product to be processed. The maximum size of the food product is 3-1/2" (8.9cm) indiameter.
- Lift the handle and placethe food on the blade assembly with the flat sidedown.
-
Remove hand from the blade assembly area and placethathandon the leg of the base on table to equipment, or on the wall for wall mounted models.
-
Using a strong, quick, downward thrust, forcethe food product through the blade assembly.
- Repeat this process until you have prepared enough food product for your daily needs.
- Cleanandlubricateyourequirepmentimmediatelyaftereachuse.See theCLEANINGsectionofthismanualformoreinformation.
CLEANING


WARNING
SharpBladeHazard
Bladesaresharpandcancausecuts.Toavoidinjuryfrom sharpblades,handlewithcaution.
Tomaintaintheappearanceandincreasetheservicelife,cleanyour daily.
NOTICE: Foodacidswillmakebladesdullandcorrodethemetal. Alwayscleanthisfoodpreparationequipmentimmediately aftereveryuse.
- Removethepusherheadassembly:
Tabletopmodels.Slidethepusherheadofftherodguides.
Wallmountmodels.Removethepin.Liftthehandleandslidethe pusherheadofftheguiderods.Placepinbackintotheholeonthe handleassemblytopreventitsloss. - Raisethebumpersapproximately2" (5.0cm).
- Loosenthethumbscrewandcarefullyremovethebladeassembly.
- Wipe, rinseorsprayoffequipment, pusherheadandbladeassembly thoroughlywithHOTwater.
- Donotwipeacrossthebladesorusescrubpadsonthisequipment. Wipingacrossthesharpedgeofthebladecancauseinjuryandwill dulltheblades.
- The cutting blade assembly is best cleaned by forcing water under pressure through the blades from the unsharpened side. If necessary, use an nylon bristle cleaning brush top push food particles out from the unsharpened side of the cutting blade assembly.
- Donotputthisequipmentinadishwasherordishmachinewith soaps, detergents, orotheralkalinechemicalsthatcanharmthe equipment.
- Aftercleaning, let the equipment air dry.
- Install the cutting blade assembly by inserting the tabon the blade holder into the groove in the base, then lowering the blade holder into these seated and flush position in the base. Tighten the thumbscrew.
- LubricatetheguidebarwithmineraloilorPetro-Gelaftereachuse. Donotusecookingoilasitwillbecomestickyandmaypermanently damagetheequipment.
11.Slidethebumpersintoplace. - Install the pusher head assembly: Tabletop models.Slid the pusher head on to therod guides. Wallmount models.Removethe pinfrom its storag elocation on the handle assembly.Lifthandle and slid the pusher head on the guiderods.Placepin back into the hole through the handle assembly and the pusher head.
PREVENTATIVE MAINTENANCE
- Cleantheequipmentaftereveryuse.
- Use for intended purposes only.
- Changetheblades regularly—basedonusage.
REPLACINGBLADEASSEMBLY


WARNING
SharpBladeHazard
Bladesaresharpandcancausecuts.Toavoidinjuryfrom sharpblades,handlewithcaution.
Washnewbladeswithwarm,soapywaterandrinsethoroughlyto removethethinprotectiveoilfilm.Keepthesharpedgeawayfromyou whenhandlingblades.
-
Familiarize yourself with the parts diagram for you equipment.
-
Removethepusherheadassembly:
Tabletopmodels.Slidethepusherheadofftherodguides. Wallmountmodels.Removethepin.Lifhandleandslide the pusherheadofftheguiderods.Placepinbackintotheholeonthe handleassemblytopreventloss.
-
Raisethebumpersapproximately2" (5.0cm).
-
Loosenthumbscrew and carefully remove the blade assembly. Removethe cutting blade assembly by pressing upwards on the bottom of these side of the blade holder, where the thumbs screw is located. Discard the old blade assembly.
-
Installthenewcuttingbladeassemblybyinsertingthetabonthe bladeholderintothegrooveinthebase,thenloweringtheblade holderintotheseatedandflushpositioninthebase.Tightenthe thumbscrew
6.Slidebumpersdownguiderodstocontactbaseassembly.Position pusherheadassemblyontotheguiderods,slowlylowerpusher headassembly,andcheckpusherheadblocktobladealignment.
- LubricatetheguidebarwithmineraloilorPetro-Gelaftereachuse. Donotusecookingoilasitwillbecomestickyandmaypermanently damagetheequipment.
TROUBLESHOOTING
If the equipment no longer processes food cleanly or without damage to the food product, the blades could be dull and be in need of replacement. Broken, bent, ornicked blades must bereplaced.
| ProblemMightbeCausedByCourseofAction | |
| BrokenBladeBladesweredull. |
SERVICEANDREPAIR
ServiceablepartsareavailableonVollrath.com.
To avoid serious injury or damage, never attempt to repair the unit or replace a damaged power cord yourself. Do not send units directly to TheVollrathCompanyLLC.PleasecontactVollrathTechnicalServicesforinstructions.
When contacting Vollrath Technical Services, please be ready with the item number, model number (if applicable), serial number, and proof of purchaseshowingthedatetheunitwaspurchased.
WARRANTYSTATEMENTFORTHEVOLLRATHCO.L.L.C.
This warranty does not apply to products purchased for personal, family or household use, and The Vollrath Company LLC does not offer a written warranty top purchasersforsuchuses.
The Vollrath Company LLC warrants the products it manufactures or distributes against defects in materials and workmanship as specifically described in our full warranty statement. In all cases, the warranty runs from the date of the end user's original purchase date found on the receipt. Any damages from improper use, abuse, modification or damage resulting from improper packaging during return shipment for warranty repair will not be recovered under warranty.
Forcompletewarrantyinformation,productregistrationandnewproductannouncement,visitwww.vollrath.com.

Outperform every day."
www.vollrath.com
The VollrathCompany, L.L.C.
1236North18thStreet
Sheboygan, WI53081-3201U.S.A.
MainTel:800.624.2051or920.457.4851
MainFax:800.752.5620or920.459.6573
CustomerService:800.628.0830
CanadaCustomerService:800.695.8560
TechnicalServices
techservicereps@vollrathco.com
InductionProducts:800.825.6036
CountertopWarmingProducts:800.354.1970
AllOtherProducts:800.628.0832
Redco® InstaCut™ 3.5detableetàfixationmurale
natural_image
Metal laboratory stand with red handle and metal legs, no visible text or symbols
natural_image
Mechanical device with red handle and transparent frame, no visible text or symbols| No.modèle detable | No.modèleà fixationmurale | Description |
| 1500015016 | Désde0.5cm(1⁄4po) | |
| 1500115017 | Désde1cm(3⁄8 po) | |
| 1500215018 | Désde1.3cm(1⁄2po) | |
| 15003150194 | Quartiers | |
| 15005150216 | Quartiers | |
| 15006150228 | Quartiers | |
| 15007150231 | 10Quartiers | |
| 15008150241 | 12Quartiers | |
| 15009—6 | Sectionsàévider | |
| 15010150268 | Sectionsàévider |
DÉBALLAGEETINSTALLATIONINITIALEDE L'APPAREIL
natural_image
Metallic laboratory clamp device with red handle and metal legs (no visible text or symbols)
natural_image
Mechanical device with red handle and transparent frame, no visible text or symbols| Sobremesa Númerode artículo | Depared Númerode artículoDescripción | |
| 15000150160 | .6cm( 14 ")Cubos | |
| 15001150171 | cm( 38 ")Cubos | |
| 15002150181 | .3cm( 12 ")Cubos | |
| 15003150194 | segmentos | |
| 15005150216 | segmentos | |
| 15006150228 | segmentos | |
| 15007150231 | 0segmentos | |
| 15008150241 | 2segmentos | |
| 15009—6 | seccionessacacorazones | |
| 15010150268 | seccionessacaccrazones |
DESEMBALADODELEQUIPOY CONFIGURACIÓNINICIAL
Cuandoyanolosnecesite, desechetodoslosmaterialesdeembalado deunamaneraambientalmenteresponsable.