8013 - Deep fryer Blackstone - Free user manual and instructions
Find the device manual for free 8013 Blackstone in PDF.


User questions about 8013 Blackstone
0 question about this device. Answer the ones you know or ask your own.
Ask a new question about this device
Download the instructions for your Deep fryer in PDF format for free! Find your manual 8013 - Blackstone and take your electronic device back in hand. On this page are published all the documents necessary for the use of your device. 8013 by Blackstone.
USER MANUAL 8013 Blackstone
natural_image
Technical line drawing of a rectangular device with a recessed top and base (no text or symbols)OWNER'S MANUAL
IMPORTANT SAFETY INFORMATION ....02
WARRANTY 03
ASSEMBLY GUIDE 04
USING YOUR BLACKSTONE 05
TROUBLESHOOTING 07
IMPORTANT:
This instruction manual contains important information necessary for the proper assembly and safe use of the appliance.
Read and follow all warnings and instructions before assembling and using the appliance.
Follow all warnings and instructions when using the appliance.
Keep this manual for future reference.
Installer/Assembler: Leave these instructions with the consumer.

For the latest version of this manual, scan this code or visit BlackstoneProducts.com/support
SAFETY ALERT KEY
! DANGER
Indicates a hazardous situation that, if not avoided, will result in death or serious injury.
CAUTION
Indicates a hazardous situation that, if not avoided, could result in minor or moderate injury.
WARNING
Indicates a hazardous situation that, if not avoided, could result in death or serious injury.
NOTICE
Indicates information considered important, but not hazard-related (e.g. messages related to property damage).
IMPORTANT SAFETY INFORMATION
IMPORTANT SAFEGUARDS
When using electrical appliances, basic safety precautions should always be followed including the following:
- DO NOT touch hot surfaces. Use handles or knobs.
- To protect against electrical shock DO NOT immerse cord, plugs, or appliance in water or other liquid.
- Close supervision is necessary when any appliance is used by or near children.
- Unplug from outlet when not in use and before cleaning. Allow to cool before putting on or taking off parts.
- DO NOT operate any appliance with a damaged cord or plug or after the appliance malfunctions or has been damaged in any manner. Return appliance to the nearest authorized service facility for examination, repair, or adjustment.
- The use of accessory attachments not recommended by the appliance manufacturer may cause injuries.
- DO NOT let cord hang over edge of table or counter, or touch hot surfaces.
- DO NOT place on or near a hot gas or electric burner, or in a heated oven.
- Extreme caution must be used when moving an appliance containing hot oil or other hot liquids.
- To disconnect, turn any control to "off", then remove plug from wall outlet.
- DO NOT use appliance for other than intended use.
- Fuel, such as charcoal briquettes, is not to be used with appliance.
- Use only on properly grounded outlet.
- ▲ CAUTION: Risk of Electric Shock. Keep extension cord connection dry and off the ground.
- The appliance is not to be used by persons (including children) with reduced physical, sensory or mental capabilities, or lack of experience and knowledge, unless they have been given supervision or instruction concerning use of the appliance by a person responsible for their safety.
- Children should be supervised to ensure that they DO NOT play with the appliance.
For outdoor use only, DO NOT expose to rain.
SAVE THESE INSTRUCTIONS
WARNING
DO NOT operate this appliance unattended.
FOR EXTENSION CORDS:
a. A short power-supply cord is provided to reduce the risk resulting from becoming entangled in or tripping over a longer cord.
b. Longer power-supply cords or extension cords are available and may be used if care is exercised in their use.
c. If a longer power-supply cord or extension cord is used:
01. The marked electrical rating of the cord set or extension cord should be at least as great as the electrical rating of the appliance.
02. The cord should be arranged so that it will not drape over the countertop or tabletop where it can be pulled on by children or tripped over unintentionally.
03. The cord set or extension cord should be a grounding-type 3-wire cord.
d. Outdoor extension cords should be used with outdoor use appliances and are surface marked with the suffix letter "W" and with a tag stating "Suitable for use with outdoor appliances."
e. The connection to an Extension cord should be kept dry and off the ground.
f. Store appliance indoors when not in use - out of the reach of children.
g. DO NOT clean this product with a water spray or the like.
PIZZA OVEN SAFETY
- Oversize foods or metal utensils must not be inserted in the appliance as they may create a fire or risk of electric shock.
- A fire may occur if the appliance is covered or touching flammable material, including curtains, draperies, walls, and the like, when in operation. DO NOT store any item on top of the appliance when in operation.
- DO NOT clean with metal scouring pads. Pieces can break off the pad and touch electrical parts involving a risk of electric shock.
- Extreme caution should be exercised when using containers constructed of other than metal or glass.
- DO NOT store any materials, other than manufacturers recommended accessories, in this appliance when not in use.
- DO NOT place any of the following materials in the appliance: paper, cardboard, plastic, and the like.
- DO NOT cover crumb tray or any part of the appliance with metal foil. This will cause overheating of the oven.
WARRANTY
The North Atlantic Imports LLC 1-Year Warranty covers replacement parts up to one year after the date of purchase.
TO ENABLE THIS WARRANTY, YOU WILL NEED TO PROVIDE:
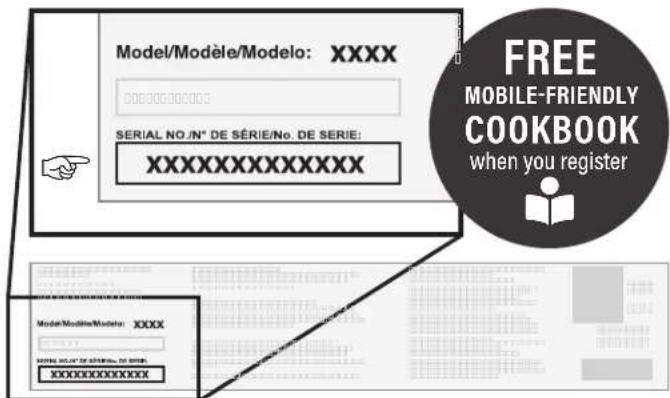
Your appliance's Serial Number
text_image
Model/Modèle/Modelo: XXXX 30000000000 SERIAL NO./N° DE SÉRIE/No. DE SÉRIE: XXXXXXXXXXXXX FREE MOBILE-FRIENDLY COOKBOOK when you register Model/Modèle/Modelo: XXXX 20000000000 XXXXXXXXXXXXXThe Serial Number can be found on your appliance's Manufacturer Label.
(The Manufacturer Label is a large silver sticker found on the body of your appliance.)

Register your appliance at BlackstoneProducts.com/register
WARRANTY OVERVIEW
North Atlantic Imports, the manufacturer, will warranty for one year from purchase all parts, workmanship, and finishes. It will be the manufacturer's option as to whether to repair or replace any of the above items. All warranties are limited to the original purchaser only. This warranty does not cover any liability on the part of North Atlantic Imports, its agents or employees, for any indirect or consequential damages for breach of warranty. The purchaser must follow the manufacturer's usage instructions.
Under no circumstances is the manufacturer responsible for damages from the failure to operate the cooking station properly. It is the responsibility of the purchaser to establish the warranty period by verifying the original purchase date with original sales receipt.
DETAILED EXPLANATION OF THE WARRANTY
North Atlantic Imports LLC warrants to the owner that the product covered by this agreement is free from defects in material and workmanship under normal use and service for which it was intended if, but only if, it has been operated in accordance with North Atlantic Imports LLC instructions exclusively for domestic use, and not for private or public club, institutional or commercial purposes.
North Atlantic Imports LLC's obligation under this warranty is limited to replacing or repairing, free of charge, any part or parts that may prove, to the satisfaction of North Atlantic Imports LLC, to be defective under normal home use and service within the following stated periods of time from the date of purchase; for one year from purchase, all parts, finish, and workmanship. Should any failure to conform to this warranty become apparent during applicable warranty periods stated above, the original purchaser must notify North Atlantic Imports LLC of breach of warranty within the applicable warranty period.
North Atlantic Imports LLC shall upon notice and compliance by the original purchaser with such instructions, correct such nonconformity by repair or replacement of the defective part or parts.
Correction in the manner provided above shall constitute a fulfillment of all obligations of North Atlantic Imports LLC with respect to the quality of the product.
North Atlantic Imports LLC does not warrant this equipment to meet the requirement of any safety code of any state, municipality or other jurisdiction, and the original purchaser assumes all risk and liability whatsoever resulting from the use thereof, whether used in accordance with North Atlantic Imports LLC instructions or otherwise.
This warranty does not cover and is intended to exclude any liability on the part of North Atlantic its agents, servants or employees whether under this warranty or implied by law for any indirect or consequential damages for breach on any warranty. The purchaser must establish all applicable warranty periods pursuant to this warranty by verifying the original purchase date by producing the dated sales receipt. This warranty shall not apply to this product or any other part thereof which has been subject to accident, negligence, alteration, abuse, or misuse or which has been repaired or altered without North Atlantic written consent, outside of North Atlantic Imports LLC factory. The full manufacturer warranty is not valid for griddles purchased from unlicensed, third-party resellers, purchased at a discount due to missing or damaged parts, or purchased as a floor model; at the discretion of North Atlantic Imports.
North Atlantic Imports LLC makes no warranty whatsoever in respect to accessories or parts not supplied with it. This warranty shall apply only within the boundaries of the United States of America and Canada. This warranty gives the original purchaser specific rights, and the original purchaser may also have other rights, which vary from state to state.

ASSEMBLY GUIDE
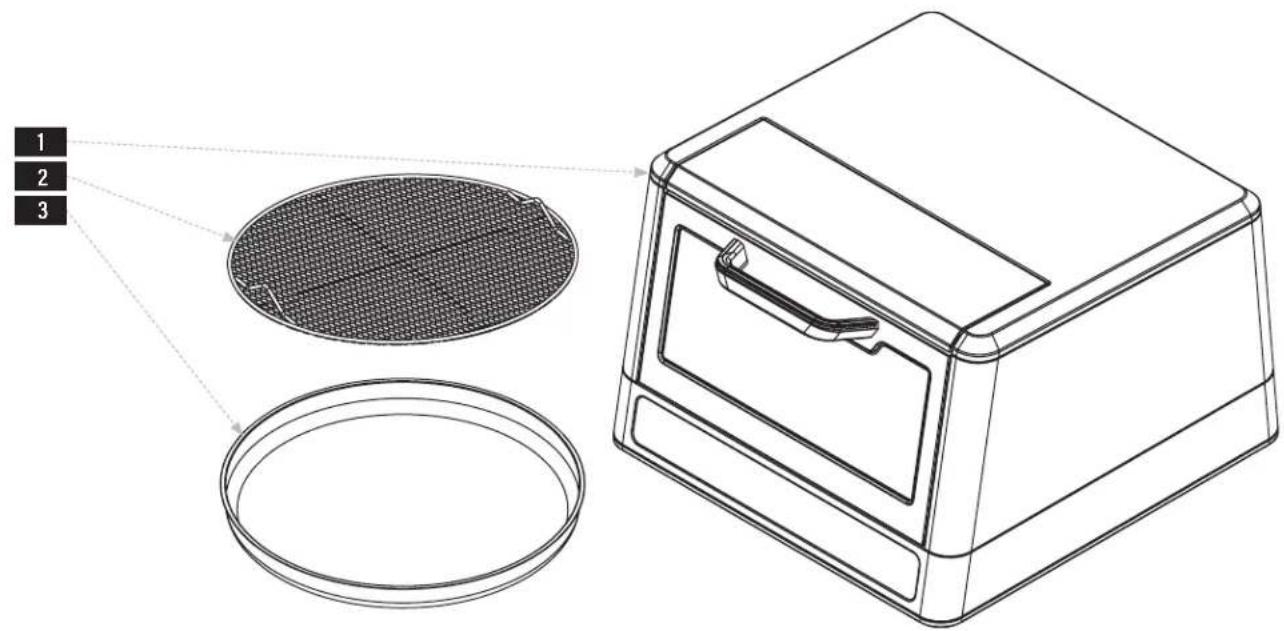
EXPLODED VIEW
text_image
1 2 3PARTS LIST
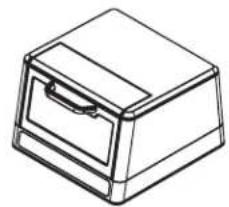
1 Oven body (1 piece)
natural_image
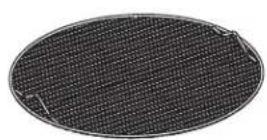
Line drawing of a box with handle and lid (no text or symbols)2 Air fryer trivet (1 piece)
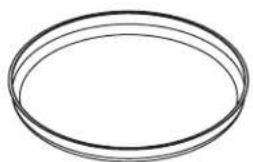
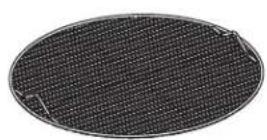
3 Air fryer pan (1 piece)
natural_image
Simple line drawing of a circular ring or washer (no text or symbols)ASSeMBIY INSTRUCTIONoNS
Find a large, clean area to assemble your appliance. Remove all packing material before assembling.
CAUTION
Sharp edges. Wear gloves while assembling.
NOTICE
Place appliance on a heat-resistant and flame-resistant surface while in use.
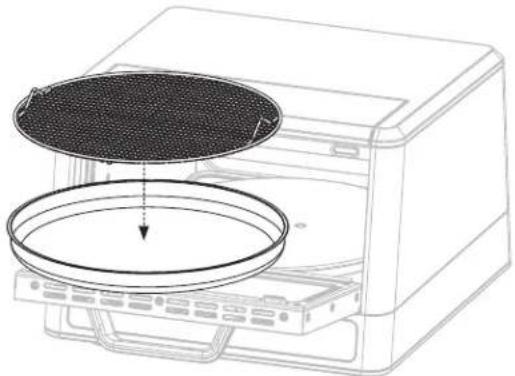
STEP 01 When using the Air fryer function, set the trivet into the pan. STEP 02 Proceed to USING YOUR BLACKSTONE.
natural_image
Line drawing of a microwave oven with a lid and tray, showing internal components (no text or symbols)USING YOUR BLACKSTONE

text_image
E!SERIES BY BLACKSTONE ⑤ + SET TEMP HOT SURFACE + TIMER ④ START/STOP FRESH PIZZA BAKE - 425F - 00:08 CANCEL FROZEN PIZZA AIR FRYIGNITION
(Ensure that the cord is plugged into an outlet.)
TO COOK FRESH OR FROZEN PIZZA:
STEP 01 Press ① ON/OFF to enter standby.
STEP 02 Press ② FRESH PIZZA or FROZEN PIZZA button. (OR, you can manually set the temperature and timer.)
STEP 03 Press 4 START/STOP to start preheat function. (PRE HEAT will display)
Two (2) short beeps will sound when pre-heating is done. (ADD FOOD will display)
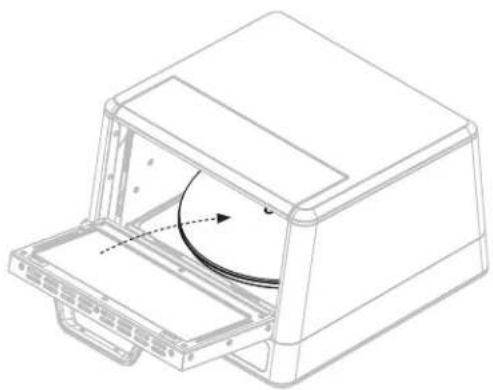
STEP 04 Open the door and insert pizza directly on the steel turntable.
STEP 05 Five (5) short beeps will sound when job is done. (END will display)
natural_image
Technical line drawing of a mechanical device with an open lid and internal curved component (no text or symbols)TO BAKE OR AIR FRY:
STEP 01 Press ① ON/OFF to enter standby.
STEP 02 Press ③ BAKE or AIR FRY button.
STEP 03 Set ⑥ TEMP +/-
STEP 04 Set ⑤ TIMER +/-
STEP 05 Press 4 START/STOP to start preheat function. (PRE HEAT will display) Two (2) short beeps will sound when pre-heating is done (ADD FOOD will display)
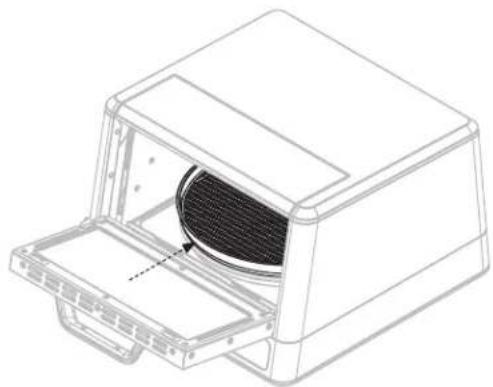
STEP 06 Open the door and insert food. (Pan can be used by itself as a cookie sheet, etc. Trivet MUST be used when air frying.)
STEP 07 Five (5) short beeps will sound when job is done. (END will display)
natural_image
Technical line drawing of a mechanical device with a circular component inserted, showing internal structure and housing (no text or symbols)Press the ⑥ TEMP +/- buttons at the same time.
MUTE:
Press the ⑤ TIMER +/- buttons at the same time.
SHUTDOWN:
In COOL mode, long press the ① ON/OFF button for 5 seconds. Oven will enter standby mode directly.
ERROR:
Oven will turn OFF when:
Er1 = Open/short circuit failure.
VIDEO RECIPES
Find recipes and cooking tips at:
BlackstoneProducts.com/recipes
youtube.com/BlackstoneGriddles
@blackstoneproducts
NEW YORK STYLE PIZZA DOUGH
1 hour 30 min.
INGREDIENTS
- 4 cups of bread flour
- 1 and 12 cups of warm water
- 1 teaspoon of instant dry yeast
- 3 teaspoons of honey
- 2 teaspoons of salt
- 4 teaspoons of olive oil
natural_image
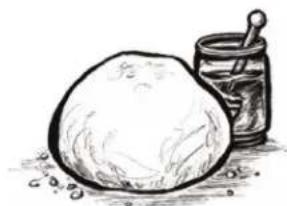
Sketch of a round ball next to a jar with chopsticks (no text or symbols)STEP 01 Add water, flour, yeast, honey together in a large bowl. (Don't add the oil and salt yet. You want the flour to hydrate first before adding oil.)
STEP 02 Mix the dough until most of the flour is incorporated.
STEP 03 Add the oil and salt and knead your dough for 5-10 minutes.
STEP 04 Cover dough and let it rest for 10-15 minutes.
STEP 05 Divide the dough into 3 pieces and round into balls. Wipe the dough balls with oil or cooking spray.
STEP 06 Cover dough balls and let rise for about an hour.
natural_image
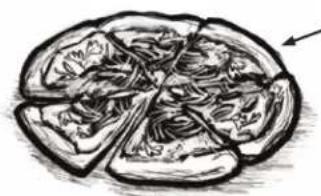
Sketch of a sliced pizza with visible slice and arrow (no text or symbols)CLASSIC MARGHERITA
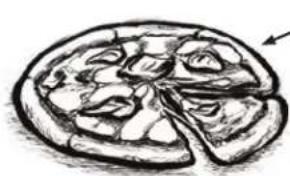
- Tomato sauce
- Grated parmesan cheese
- Basil leaves
- Fresh mozzarella
• Light drizzle of olive oil
BBQ CHICKEN
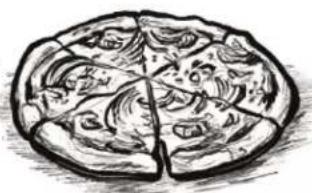
- Your favorite BBQ sauce
- Chopped cooked chicken
- Thinly sliced red onion
- Shredded mozzarella cheese
natural_image
Sketch of a pizza with visible toppings and a central slice (no text or symbols)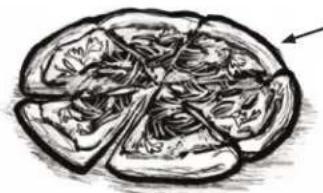
natural_image
Sketch of a sliced pizza with visible segments and a small arrow pointing to one slice (no text or symbols)THAI SWEET CHILI
- Sweet Thai chili sauce
- Chopped cooked chicken
- Thinly sliced red onion
- Chopped fresh cilantro
- Shredded mozzarella cheese
COOKING ON YOUR BLACKSTONE
WARNING
DO NOT move the appliance when in use. Allow the appliance to complete its COOL mode before moving or storing.
CAUTION
This appliance will be hot during and after use. Use long-handled utensils and oven mitts/ protective gloves when handling potentially hot parts to protect against burns and splatters.
CLEANING
WARNING
Grease build up can cause a fire. Clean any part of the appliance that gets hot and experiences grease build up after each use.
CAUTION
All cleaning and maintenance should be carried out after the appliance has copleted its COOL mode and the appliance is unplugged.
- Clean out the crumb tray with a nylon brush or paper towel after each use.
- Pan and trivet are dishwasher safe.
TROUBLESHOOTING
CUSTOMER SUPPORT
Visit us online at BlackstoneProducts.com/support
for assistance concerning appliance use, replacement parts, or your warranty.
CUSTOMER SUPPORT HOURS:

Monday - Friday
7:00 am - 5:00 pm (Mountain Time)
BLACKSTONE®
This product may be covered by one or more issued U.S. and/or international patents and may include patent applications pending. For more information, please visit: BlackstoneProducts.com/patents
DISTRIBUTED BY NORTH ATLANTIC IMPORTS, LLC 1073 W 1700 N LOGAN, UT 84321 USA | BLACKSTONE IS A REGISTERED TRADEMARK OF NORTH ATLANTIC IMPORTS, LLC
MODÈLE: 8013 v04
natural_image
Technical line drawing of a rectangular device with a recessed top and side panel (no text or symbols)MANUEL DU PROPRIÉTAIRE
MANOLE DU THOT MÉTINIE FOUR À PIZZA ÉLECTRIQUE COMBO FRITEUSE À AIR
TABLE DES MATIÈRES
INFORMATIONS DE SÉCURITÉ IMPORTANTES .....02
GARANTIE....03
GUIDE D'ASSEMBLAGE....04
UTILISATION DE VOTRE BLACKSTONE 05
DÉPANNAGE....07
IMPORTANT:
BlackstoneProducts.com/support
CLÉ D'ALERTE DE SÉCURITÉ
! DANGER
natural_image
Line drawing of a rectangular box with a handle and lid (no text or symbols)natural_image
Simple line drawing of two concentric ovals (no text or symbols)INSTRUCTION de MoNTAGe
natural_image
Line drawing of a microwave oven with a lid and tray, showing internal components (no text or symbols)UTILISATION DE VOTRE BLACKSTONE

text_image
E!SERIES BY BLACKSTONE + SET TEMP HOT SURFACE + TIMER START/STOP FRESH PIZZA BAKE - 425F - 00:08 CANCEL FROZEN PIZZA AIR FRYALLUMAGE
POUR CUISINER UNE PIZZA FRAÎCHE OU SURGELÉE:
natural_image
Technical line drawing of a mechanical device with an open lid and internal curved component (no text or symbols)natural_image
Technical line drawing of a mechanical device with a mesh chamber and handle (no text or symbols)RECETTES VIDÉO
BlackstoneProducts.com/recipes
youtube.com/BlackstoneGriddles
@blackstoneproducts
PÂTE À PIZZA À LA NEW YORKAISE
1h30.
INGRÉDIENTS
natural_image
Sketch of a large ball and a jar with a spoon, no text or symbols presentnatural_image
Hand-drawn sketch of a sliced pizza with an arrow pointing to the slice (no text or symbols)MARGUERITE CLASSIQUE
- Sauce tomate
natural_image
Illustration of a sliced bread with visible segments and a directional arrow (no text or symbols)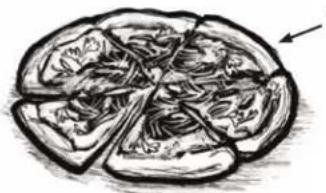
natural_image
Sketch of a sliced pizza with visible toppings and a pointing arrow (no text or symbols)PIMENT DOUX THAÏ
natural_image
Technical line drawing of a rectangular device with a recessed top and side panels (no text or symbols)MANUAL DEL PROPIETARIO
USANDO SU BLACKSTONE 05
BlackstoneProducts.com/support
BlackstoneProducts.com/register
natural_image
Line drawing of a rectangular box with a handle and lid (no text or symbols)2 Salvamanteles para freidora (1 pieza)
natural_image
Simple line drawing of an oval shape with no text or symbolsINSTRUCCIoNeS de MoNTAJe
natural_image
Line drawing of a microwave oven with a circular filter lid and tray (no text or symbols)USANDO SU BLACKSTONE

text_image
E!SERIES BY BLACKSTONE + SET TEMP HOT SURFACE + TIMER START/STOP FRESH PIZZA BAKE - 425F - 00:08 CANCEL FROZEN PIZZA AIR FRYENCENDIDO
PARA COCINAR PIZZA FRESCA O CONGELADA:
natural_image
Technical line drawing of a mechanical device with an open lid and internal rotation arrow (no text or symbols)natural_image
Technical line drawing of a mechanical device with a circular component inserted into a housing (no text or symbols)VÍDEO RECETAS
BlackstoneProducts.com/recipes
youtube.com/BlackstoneGriddles
@blackstoneproducts
MASA DE PIZZA AL ESTILO DE NUEVA YORK
1 hora 30 min.
INGREDIENTES
natural_image
Sketch of a round dough ball next to a jar with a pestle (no text or symbols)natural_image
Hand-drawn sketch of a sliced pizza with an arrow pointing to the slice (no text or symbols)MARGARITA CLASICA
- Salsa de tomate
- Queso parmesano rallado
- Hojas de albahaca
- mozzarella fresca
- Ligero chorrito de aceite de oliva
POLLO A LA BARBACOA
natural_image
Illustration of a sliced pizza with visible toppings and segments (no text or symbols)