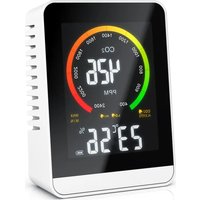
306644 - Measuring equipment Brandson - Free user manual and instructions
Find the device manual for free 306644 Brandson in PDF.


| Product Type | CO2 meter with temperature and humidity measurement |
| Brand | Brandson |
| Model | 306644 |
| Power Supply | 5 V DC via power adapter (hollow plug 3.5 mm x 1.3 mm) |
| Battery | Rechargeable Li-Ion 2000 mAh |
| CO₂ measurement range | 0 – 5000 ppm |
| CO₂ accuracy | ±50 ppm + 5% |
| Temperature range | -10 °C to +60 °C |
| Humidity range | 0% to 95% |
| Humidity accuracy | ±6% (0-95%) |
| Display | Digital with adjustable backlight |
| Alarm functions | Wake-up alarm, CO₂ alarm (adjustable thresholds) |
| Snooze function | Yes, 5 minutes |
| Calibration | Automatic (150 s) and manual (30 min) |
| °C/°F conversion | Yes, via DOWN key |
| 12/24 hour display | Yes, adjustable |
| Max/Min memory | Yes, for temperature and humidity |
| Package contents | Device, power adapter, quick start guide |
| Intended use | Indoor, private use (non-medical) |
| Maintenance | Clean with a dry cloth; do not immerse in water |
| Safety | Do not open, do not expose to moisture or fire, keep out of reach of children |
| Compliance | CE declaration available from WD Plus GmbH |
Frequently Asked Questions - 306644 Brandson
User questions about 306644 Brandson
0 question about this device. Answer the ones you know or ask your own.
Ask a new question about this device
Download the instructions for your Measuring equipment in PDF format for free! Find your manual 306644 - Brandson and take your electronic device back in hand. On this page are published all the documents necessary for the use of your device. 306644 by Brandson.
USER MANUAL 306644 Brandson
ENG: Current drivers, user manuals and other relevant documents for this product can be found on our homepage.
Thank you for purchasing a BRANDSON product. Please read the following quick guide carefully so that you can enjoy your purchased appliance for a long time.
1. Scope of delivery
- CO_2 meter
• DC hollow plug power supply (3.5mm x 1.3mm) - Quick guide
2. Technical data
| Power supply 5V DC | |
| Rechargeable battery Li-Ion 2000 mAh | |
| CO2measuring range 0-5000ppm | |
| Tolerance (CO2) ±50 ppm + 5% tolerance | |
| Temperature measuring range -10°C - +60°C | |
| Humidity measuring range | 0% - 95% |
| Tolerance (humidity) 0-95%: ±6% | |
| Features | • Alarm function (alarm clock)• Alarm function (CO2)• Snooze function• °C /°F display• 12/24 hour display |

3. Additional notes
Before using the appliance, make sure that it is not damaged. If this is the case, do not use it. The device must not be exposed to moisture, direct sunlight or dust. Do not immerse the device in water. Do not throw it into a fire as there is a risk of explosion. Before using the product, ensure that the available mains voltage corresponds to the operating voltage specified on the rating plate. The product is not suitable for medical purposes or for public information and is intended for private use only. This appliance is only suitable for indoor use.

Attention!
Keep the batteries and the appliance out of the reach of children. Batteries contain acids that are harmful to health. Charge the device when the battery level is low. Never throw batteries into a fire and do not short-circuit them.
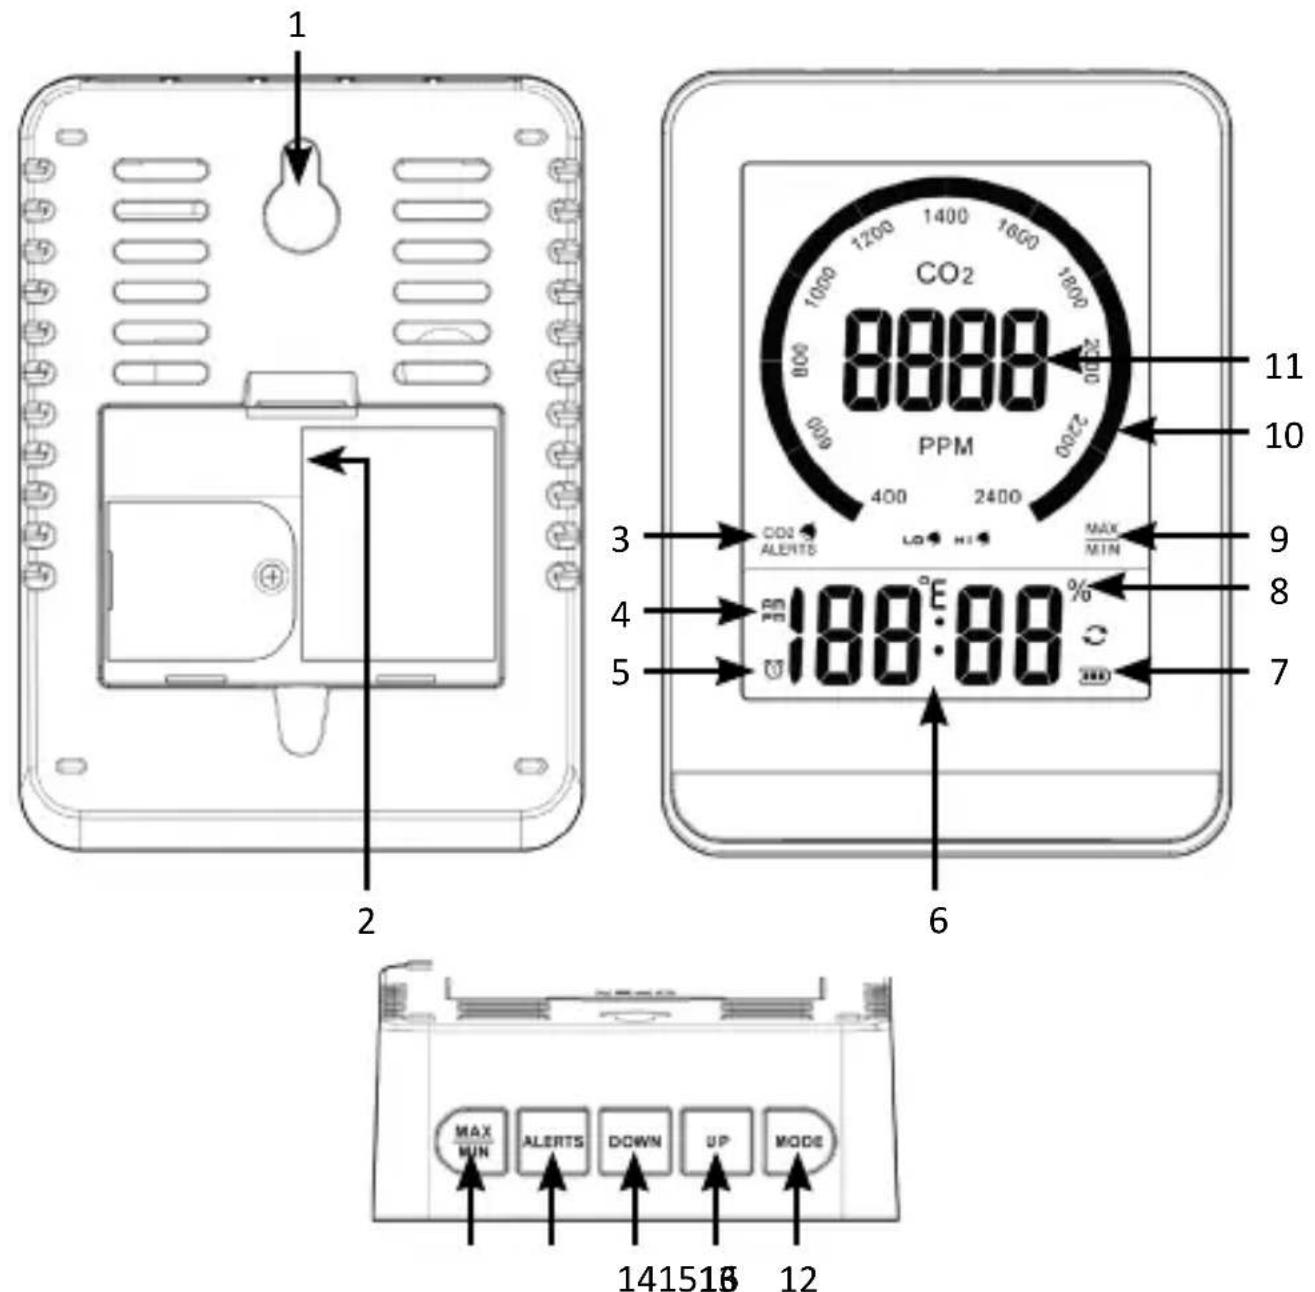
- Product details
17English
| 1 Wall bracket |
| 2 Mains connection DC hollow plug 5V |
| 3 CO2 alarm symbol |
| 4 AM/PM indicator |
| 5 Alarm clock symbol |
| 6 Time/humidity/temperature |
| 7 Battery level |
| 8 Humidity indicator |
| 9 Max/Min symbol |
| 10 CO2 colour diagram |
| 11 CO2 display |
| 12 “MODE” button |
| 13 “UP” button |
| 14 “DOWN” button |
| 15 “ALERTS” button |
| 16 “MAX/MIN” button |
5. Commissioning
Remove the product from the packaging and remove all packaging material. Connect the mains adapter supplied with the device to a properly connected socket. If you want to use the device in battery mode, fully charge the device first.
Press the „MAX/MIN“ and „ALERTS“ buttons to switch the device on or off. A 150-second countdown appears on the screen, indicating that the CO₂ sensor is being initialised. The CO₂ values are then shown on the display.
When using the charging cable, the battery inside the device is charged. If the power supply is interrupted, the device switches to battery operation or it can be operated directly with the built-in battery.
5.1 Battery
You can check the battery status on the display at any time by looking at the battery status symbol.
The battery symbol is displayed continuously while the battery is charging. When the battery is fully charged, the symbol is fully displayed.
6. Time and alarm setting
Press and hold the „MODE“ button for approx. 3 seconds to call up the time setting.
-
The 12/24 hour display starts to flash. Press the „UP“ or „DOWN“ button to set.
-
Press the „MODE“ button to confirm the entry. The hour then flashes. Set the current hour and press the „MODE“ button again to confirm.
- Repeat the process with the minute display.
- Then set the alarm time, starting with the hour. Then press the „MODE“ button to confirm the entry.
- Repeat the process with the minute display.
- The setting mode is then exited. You can also save the setting and exit the setting mode by not pressing any button for about 15 seconds.
6.1 Activate/deactivate alarm
Briefly press the „UP“ button to switch the alarm function on or off. When the alarm is switched on, „ALon“ appears in the display and a symbol also appears next to the time.
The alarm tone has a duration of 1 minute. You can touch any button to activate the snooze function for 5 minutes.
To deactivate the alarm completely so that it sounds the next day, press a button twice in succession. While the snooze function is active, the alarm symbol flashes on the display.
Press the „UP“ button to deactivate the alarm and stop the alarm clock immediately. AL--“ appears on the display.
7. Minimum and maximum values for temperature and humidity
Press the „MAX/MIN“ button to display the display between the minimum and maximum measured value. The display cycle is: Maximum → Minimum → Return to normal display mode.
If you press and hold the „MAX/MIN“ button for approx. 3 seconds while the maximum and minimum values are displayed, you can delete the maximum and minimum values and restart the recording.
8. Calibration of the CO_2 concentration
Due to transport, vibration, ageing and other reasons, the detection accuracy of the sensor may be reduced. Deviations are corrected by calibration. The device has an automatic and a manual calibration option. It is recommended to use the automatic calibration. Alternatively, you can carry out manual calibration. Both methods are described below.
8.1 Automatic calibration
After commissioning, the device calibrates itself automatically for 150 seconds.
Make sure that during this time the sensor is in an environment where the atmospheric level is approximately the same as outdoors (approx. 400 ppm).
The automatic calibration function is suitable for office, home and other non-weather environments. It is not suitable for agricultural greenhouses, farms, warehouses and other locations.
8.2 Manual calibration of the CO_2 concentration
During calibration, the product must be positioned in an environment with a CO_2 concentration equal to the outside air (approx. 400 ppm) to ensure that the CO_2 concentration in the environment is stable.
In normal display mode, press and hold the „DOWN“ button for 3 seconds to enter manual calibration mode. „CAL“ flashes on the display. At this point, you can press the „DOWN“ button to exit the calibration mode.
The duration of the manual calibration is approximately 30 minutes.
9. Carbon dioxide alarm
Press the „ALERTS“ button to switch the carbon dioxide alarm function on or off. The display will show „CO2-ALERTS“ as soon as the alarm function is activated. Press and hold the „ALERTS“ button for 3 seconds to call up the setting for the CO₂ concentration alarm. The value of the maximum CO₂ concentration flashes. Press the „UP“ or „DOWN“ button to set the desired value.
Press the „ALERTS“ button to confirm the setting. The CO_2 concentration for the minimum alarm then flashes. Select this and confirm again with the „ALERTS“ button.
As soon as the alarm function is activated, the device will emit the alarm tone at the maximum and minimum CO_2 concentration.
If the alarm function is not activated and the value of the respective alarm is exceeded, either „Lo“ or „Hi“ flashes. However, the alarm tone is only emitted if the alarm function is activated via the „ALERTS“ button and the CO_2 concentration exceeds the set maximum concentration.
22 English
10. Dimming the backlight
You have the option of dimming the backlight of the device by pressing and holding the „UP“ button for approx. 3 seconds. L:1" (light level 1) appears on the display. You can switch through the different light levels by briefly pressing the „UP“ button:
- L:1 = light level 1
- L:2 = Light level 2
• L: OFF = Switch off the backlight
Note: The light level setting only works when the power supply is connected.
11. Conversion °C / °F
To switch the temperature display between °C and °F, briefly press the „DOWN“ button once.
12. Reset device
To reset the device, press and hold the “MAX/MIN” and “DOWN” buttons for about 5 seconds. The display then switches completely off and on again, the device restarts and begins automatic calibration again.

13. Safety instructions and liability disclaimer
Never attempt to open the appliance to carry out repairs or modifications. Avoid contact with the mains voltage. Do not short-circuit the product. The device is not waterproof, please only use it in dry conditions. Protect it from high humidity, water and snow. Keep the device away from high temperatures. Do not expose the device to sudden temperature changes or strong vibrations, as this could damage the electronic parts. Check the device for damage before use. The appliance should not be used if it has been knocked or damaged in any other way. Please observe the national regulations and restrictions.
Do not use the device for purposes other than those described in the instructions. This product is not a toy. Keep it out of the reach of children or mentally impaired persons. Any repair or modification to the appliance that is not carried out by the original supplier will invalidate the warranty or guarantee. The appliance may only be used by persons who have read and understood these instructions. The device specifications may change without prior notice.

14. Disposal instructions
According to the European WEEE Directive, electrical and electronic devices may not be disposed of with household waste. Their components must be recycled or disposed of separately, as toxic and hazardous components can cause lasting damage to the environment if disposed of incorrectly. As a consumer, you are obliged under the Electrical and Electronic Equipment Act (ElektroG) to return electrical and electronic equipment free of charge at the end of its life to the manufacturer, the point of sale or to public collection centres set up for this purpose.
24 English
Details are regulated by the respective state law. The symbol on the product, the operating instructions and/or the packaging refers to these regulations. By separating, recycling and disposing of old appliances in this way, you are making an important contribution to protecting our environment. For information on authorised collection points in your area, please contact your local city or municipal administration.

15. Notes on battery disposal
In connection with the sale of batteries or the delivery of devices containing batteries, the supplier is obliged to inform the customer of the following: The customer is legally obliged to return used batteries as the end user. The customer can return used batteries that the supplier carries or has carried as new batteries free of charge to the supplier's dispatch warehouse (dispatch address). The symbols shown on the batteries have the following meaning: Pb = battery contains more than 0.004 per cent lead by mass, Cd = battery contains more than 0.002 per cent cadmium by mass, Hg = battery contains more than 0.0005 per cent mercury by mass.

The crossed-out dustbin symbol means that the battery must not be disposed of with household waste.



WEEE Directive 2012/19/EU
WEEE Register No.: DE 67896761
Hereby, WD Plus GmbH declares that the device 306644 is in compliance with the essential requirements and other relevant provisions. A complete declaration of conformity can be obtained from: WD Plus GmbH, Wohlenbergstraße 16, 30179 Hanover, Germany
MO-FR 9:30am - 18pm CET

brandson-equipment.de
WD Plus GmbH

- Scope of delivery
- Technical data
- Additional notes
- Attention!
- Commissioning
- Battery
- Time and alarm setting
- Activate/deactivate alarm
- Minimum and maximum values for temperature and humidity
- Calibration of the CO_2 concentration
- Automatic calibration
- Manual calibration of the CO_2 concentration
- Carbon dioxide alarm
- English
- Dimming the backlight
- Conversion °C / °F
- Reset device
- Safety instructions and liability disclaimer
- Disposal instructions
- English
- Notes on battery disposal
Brand : Brandson
Model : 306644
Category : Measuring equipment