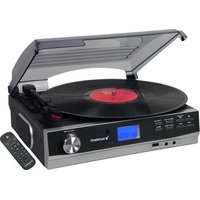
PXR23 - Turntable Sunstech - Free user manual and instructions
Find the device manual for free PXR23 Sunstech in PDF.


| Product Type | Vinyl turntable with built-in speakers, Bluetooth, USB, FM radio, MP3 encoder |
| Brand | Sunstech |
| Model | PXR23 |
| Power Supply | 230 V AC / 50 Hz |
| Power Consumption | ≤ 12 W (standby ≤ 0.7 W) |
| Output Power | 2 x 5 W (RMS 2 x 1.5 W) |
| Frequency Response | 40 Hz - 20 kHz |
| Signal-to-Noise Ratio | 45 dB |
| FM Radio Frequency Range | 87.5 - 108 MHz |
| Rotational Speeds | 33/45 RPM |
| Stylus Type | Stereo ceramic cartridge |
| Maximum USB Capacity | 64 GB (FAT32) |
| Playable File Formats | MP3, WMA |
| Recording Formats | MP3 (128 kbps, 44.1 kHz) |
| Main Functions | Vinyl playback, USB, FM radio, Bluetooth, MP3 encoder, alarm, timer, equalizer (Pop/Rock/Classic/Jazz), track programming |
| Maintenance and Cleaning | Unplug before cleaning; use a soft slightly damp cloth; no abrasive products |
| Safety | Do not expose to water or moisture; do not open the device; keep away from heat sources; do not block ventilation openings |
| Spare Parts and Repairability | No user-serviceable parts; refer all repairs to qualified technician |
| General Information | Made in China; Class II (double insulation); remote control included (AAA batteries not supplied) |
Frequently Asked Questions - PXR23 Sunstech
User questions about PXR23 Sunstech
0 question about this device. Answer the ones you know or ask your own.
Ask a new question about this device
Download the instructions for your Turntable in PDF format for free! Find your manual PXR23 - Sunstech and take your electronic device back in hand. On this page are published all the documents necessary for the use of your device. PXR23 by Sunstech.
USER MANUAL PXR23 Sunstech
PXR23
TURNTABLE
USER GUIDE
TABLE OF CONTENTS
SAFETY INSTRUCTIONS 1
FIRST USE OF THE TURNTABLE 4
Installation....4
Connection 4
Setting the clock....4
TURNTABLE OVERVIEW....5
REMOTE CONTROL OVERVIEW....6
REMOTE CONTROL'S BATTERY INSTALLATION ....7
Battery Precautions 7
VYNIL DISC PLAYBACK 8
MP3 AUDIO PLAYBACK FROM USB DEVICE 9
Connecting the USB device 9
Pause / Play playback.... 10
Stop playback ■ 10
Next / Previous track (▶▶/▶◀).... 10
Folder playback control 10
Track / Album title 10
Repeat / Intro / Random playback 10
Tracks programming 11
FM RADIO TUNING....12
Manual tuning.... 12
Auto tuning....12
Preset stations 12
FM-mono & FM-stereo reception 13
BLUETOOTH CONNECTING AND PLAYBACK 13
AUX-IN CONNECTION 14
ENCODING FUNCTION 14
Vynil and Aux-in encoding.... 15
Radio encoding 15
Track separation (by remote control) 15
Delete recorded files with Encoding function of USB (by remote control)....16
Removing the USB used for Encoding function 16
MORE FEATURES....16
ENGLISH
User guide
PXR23
Sleep function (by remote control) 16
Alarm clock setting (by remote control) 17
EQUALIZER (EQ) function (by remote control) 17
Display function (by remote control).... 18
TECHNICAL SPECIFICATIONS....18
PXR23
For correctly operating, please read this manual carefully before using. Any content revise of the manual won't declare again, and we are no responsible for consequence caused by fault or oversight of this manual.
SAFETY INSTRUCTIONS
To prevent fire or shock hazard, do not use this plug with an extension cord, receptacle or other outlet unless the blades can be fully inserted to prevent blade exposure. To prevent fire or shock hazard, do not expose this appliance to rain or moisture.

Warning: to reduce the risk of electric shock, do not remove cover (or back). No user serviceable parts inside, refer servicing to qualified service personnel.
READ INSTRUCTIONS - All the safety and operating instructions should be read before the product is operated.
RETAIN INSTRUCTIONS -The safety and operating instructions should be retained for future reference.
HEED WARNINGS - All warnings on the product and in the operating instructions should be adhered to.
FOLLOW INSTRUCTIONS - All operating and use instructions should be followed.
CLEANING - Unplug this product from the wall outlet before cleaning. Do not use liquid cleaners or aerosol cleaners. Use a damp cloth for cleaning.
ATTACHMENTS - Do not use attachments not recommended by the product manufacturer as they may cause hazards.
WATER AND MOISTURE - Do not use this product near water - for example, near a bath tub, wash bowl, kitchen sink, or laundry tub; in a wet basement; or near a swimming pool; and the like. This appliance shall not be exposed to dripping or splashing water and no object filled with liquids such as vases shall be placed on the apparatus.
Do not place this product on an unstable cart, stand, tripod, bracket, or table. The product may fall, causing serious injury to a child or adult and serious damage to the product. Use only with a cart, stand, tripod, bracket, or table recommended by the manufacturer, or sold with the product.
Any mounting of the product should follow the manufacturer instructions, and
PXR23
should use a mounting accessory recommended by the manufacturer.
POWER SOURCES - This product should be operated only from the type of power source indicated on the marking label. If you are not sure of the type of power supply to your home, consult your product dealer or local power company. For products intended to operate from battery power, or other sources, refer to the operating instructions.
POWER-CORD PROTECTION - Power-supply cords should be routed so that they are not likely to be walked on or pinched by items placed upon or against them, paying particular attention to cords at plugs, convenience receptacles, and the point of exit from the product.
NON-USE PERIODS - The power cord of the product should be unplugged from the outlet when left unused for long periods of time.
LIGHTNING - For added protection for this product during a lightning storm, or when it is left unattended and unused for long periods of time, unplug it from the wall outlet and disconnect the antenna or cable system. This will present damage to the product due to lightning and power-line surges.
POWER LINES -An outside antenna system should not be located in the vicinity of overhead power lines or other electric light or power circuits, or where it can fall into such power lines or other electric light or power circuits, or where it can fall into such power lines or circuits. When installing an outside antenna system, extreme care should be taken to keep from touching such power lines or circuits as contact with them might be fatal.
OVERLOADING - Do not overload wall outlets, extension cords, or integral convenience receptacles as this can result in a risk of fire or electric shock.
SAFETY CHECK - Upon completion of any service or repair to this product, ask the service technician to perform safety checks to determine that the product is in proper operating condition.
HEAT -The product should be situated away from heat sources such as radiators, heat registers, stoves or other products (including amplifiers) that produce heat.
Changes or modification not expressly approved by the party responsible for compliance could void the user's authority to operate the equipment. Changes or modifications made without written approval may void the user's authority to operate this equipment.
The device shall not be exposed to dripping or splashing and that objects filled with liquids, such as vases, shall not be placed on apparatus.
ENGLISH
User guide
PXR23
The batteries shall not be exposed to excessive heat such as sunshine or fire.
The direct plug-in adapter/ power cord is used as disconnect device, the disconnect device shall remain readily operable.
Do not open. No user replaceable parts inside, refer servicing to qualified technician.

To prevent possible hearing damage, do not listen at high volume levels for long periods.

Class II construction double insulated.

Waste electrical and electronic products must not be disposed of with household waste. Please refer to the retailer from whom you purchased this item for disposal instructions. Batteries and packaging materials can be recycled using your local collection facilities.
All electrical and electronic products including batteries should be disposed of separately from the municipal waste stream via designated collection facilities appointed by the government or the local authorities.
FIRST USE OF THE TURNTABLE
Installation
- Unpack all parts and remove protective material.
- Do not connect the unit to the main power supply before checking the main voltage and before all other connections have been made.
- Do not cover any holes and make sure that there is a space of several centimeters around the unit for ventilation.
Connection
- Connect the power cable to AC outlet.
- When you first plug the unit into the main power supplyt, the LCD display will show "00:00".
- Turn on the unit by pressing Power On - Off / Volume knob. If the LCD display is on with backlighting, it means the power supply is correctly connected. Now your system is ready to play the music.
Setting the clock
- Set unit in standby mode.
- Press the "Mem / Clk-adj" button twice, the display will start flashing. Press ☑r ▶▶▶ buttons to select the appropriate hour format (12 hr / 24 hr)
- Press "Mem / Clk-adj" button again, the first second digit of "00:" will flash. Press ◀◀ or ▶◀ button to set the correct hour. Press "Mem / Clk-adj" button to confirm and save the correct hour.
- Then, the third fourth digit of ":00" will flash, press the ◀◀ or ▶▶ button to set the correct minutes. Then press "Mem / Clk-adj" again to confirm and save the correct minutes.

The pre-set time will be re-set completely if the turnatbel is disconnected from the main power supply. You are recommended to always switch the system into standby mode for convenience usage and not to disconnect it form the cable.
TURNTABLE OVERVIEW
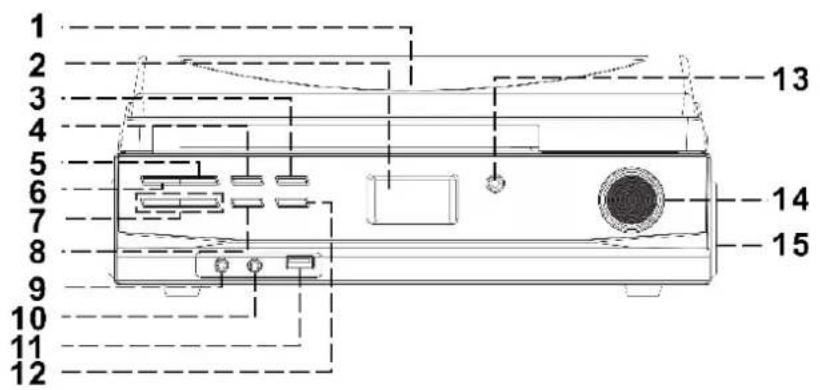
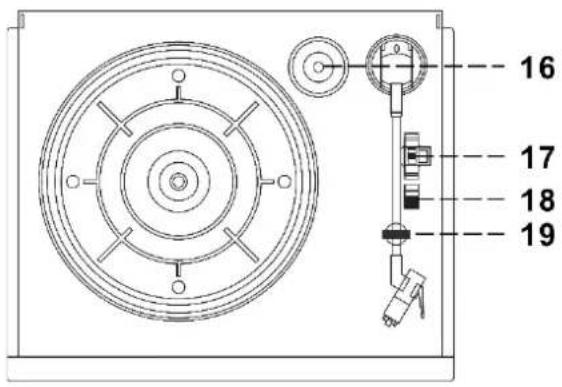

1) Dust cover
2) LCD display
3) Function button
4) Mem / Clk-adj button
5) Play/Pause/ST/MONO button
6) Stop button
7) Next track ▶▶/ Previous track ◀◀ buttons
8) Folder / PRE △ button
9) 3.5 mm headphone jack
10) 3.5 mm aux-in jack
Usage of controls or adjustments or performance of procedures other than those specified herein may result in hazardous radiation exposure.
This unit should not be adjusted or repaired by anyone except qualified service personnel.
ENGLISH
User guide
PXR23
REMOTE CONTROL OVERVIEW
| Press to power on or set to standby the system. | |
| FUNCTION | Press to select the playback function: Vynil record (Phono) / USB / Aux / Radio / BT) |
| FOLDER/PRE(up / down) | In USB mode: press to skip the music albums.In FM Tuner mode: press to select the preset stations. |
| MEM /CLK - ADJ | In USB mode: press to active tracks programming function.In standby mode: press to adjust clock |
| ▶▶/ TUNE - ◀◀/ TUNE + | In USB mode: press to select next / previous track.In FM Tuner mode: to choose and tune the radio stations. |
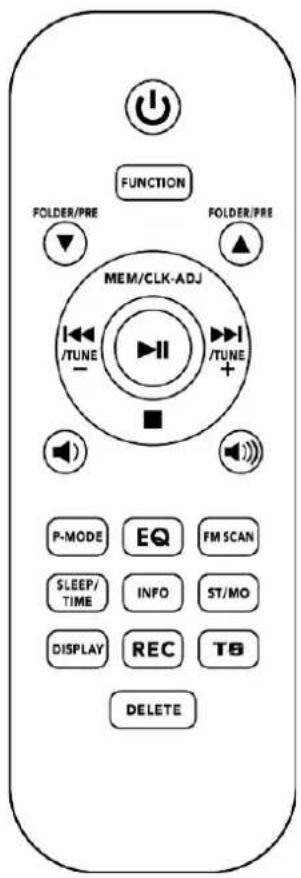
| Play / pause | Press once to start USB playback. Press once again to pause the playback temporarily. |
| Stop | In USB mode: press to end playback or cancel programmed songs on USB memory device. |
| Volume | Press to adjust the volume level. |
| P-MODE | Press to active repeat / intro / random function for USB playback. |
| EQ (Equalizer) | Press to select different sound effects. |
| FM SCAN | Press to scan different radio stations automatically. |
| SLEEP / TIME | When the turntable is switched on: press to active sleep function.In standby mode: press to set the alarm on / off and active / deactive alarm function. |
| INFO | Press to show information of the playing track or folder on the LCD screen. |
| ST/MO | Press to change between MONO and STEREO modes. |
| DISPLAY | Press to show on screen difference information of the system. |
| REC(Recording) | Press to encode the tracks in MP3 format. |
| TS | In Encoding mode: press to active track separation function. |
| DELETE | In USB mode: press to active file delete function |
REMOTE CONTROL'S BATTERY INSTALLATION
The remote control requires 1 pc "CR2032" battery for operation
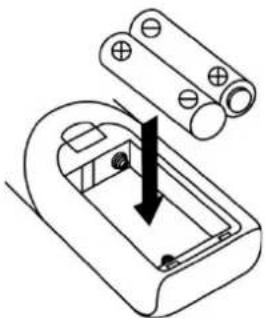
The battery compartment is located on the back of the remote control.
-
Remove the battery compartment door by pressing in on the tab and lifting it off.
-
Insert two (2) AAA size batteries (not included) into the battery compartment following the polarity markings inside the battery compartment.
-
Replace the battery compartment door.
Battery Precautions
- Replacement of batteries must be done by an adult.
• Do not mix old and new batteries. - Do not mix alkaline, standard (carbon-zinc) or rechargeable (nickel-cadmium) batteries.
• The supply terminals are not to be short-circuited.
• Non-rechargeable batteries are not to be recharged.
• Exhausted batteries are to be removed.
• Only batteries of the equivalent type are to be used.
• Batteries are to be inserted with the correct polarity. - Dispose of batteries properly. Do not dispose of batteries in fire. The batteries may explode or leak.
Remark (for Europe market only):
The unit will switch to standby mode automatically once no music is playing over 15 minutes.
VYNIL DISC PLAYBACK
Remark:
Remove the stylus protector.
Be sure that the tone arm is being detached from the tone arm rest before operating and re-secured again afterwards.
-
Press Function button to select "Phon / Aux" mode.
-
Set the speed selector to the proper position depending on the record to be played.
-
Place the vynil record on the platter (use the spindle adaptor if required).
-
Lift the tone arm from the tone arm rest and slowly move it to the record side. The platter will start to rotate.
-
Place the tone arm by the pick up holder to the desired position of the record.
-
Adjust the volume to the desired level.
-
At the end of record, the platter will automatically stop rotating. Lift the tone arm from the record and return it to the tone arm rest.
-
To stop manually, lift the tone arm from the record and return it to the tone arm rest.

Remark:
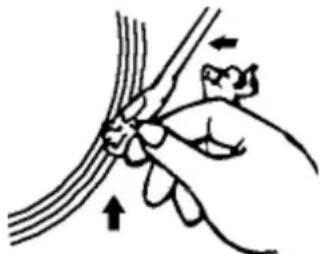
As some kind of vynil records may have the auto-stop area out of the unit setting, it may stop before the last track finishes. In this case, select the auto-stop function and switch it to "Off" position, then the tone arm it will run to the end of the record and will not stop automatically. (To stop the platter to rotate, you will have turn off the unit with the Power On - Off / Volume knob or switch back the auto-stop function to "On" position). Then put back the tone arm to the tone arm rest position.
If you plug-in any external device to Aux-in jack during listening to phono, the platter will stop automatically, and Aux-in connection will be functioned.
MP3 AUDIO PLAYBACK FROM USB DEVICE
Remark:
MP3 track format requirement:
- MP3 bit rate : 32 kbps\~256 kbps and bit rate : 32 kbps \~ 320 kbps
- The performance of playing MP3 file is various from the quality of encoding file and the method of encoding.
The system can detect and read the files under MP3 format only though the USB port. Please make sure to check all the desired songs are in MP3 format, if not, use a MP3 converter.
If a MP3 player is connected to the turntable via the USB port, due to variances in MP3 encoding format, some MP3 players may not be able to play via the USB port. This is not a malfunction of the system.
Connecting the USB device
The system is able to decode and playback all MP3 files which are stored in a USB memory device. Plug in the USB port to start using this function.

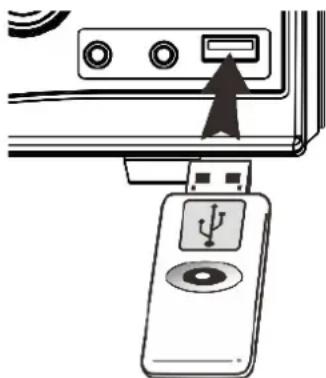
Connecting the USB device upside down or backwards could damage the audio system. Check to be sure that the direction and position of the USB device is correct before it is connected.
- Connect the device in the USB port with the face up and make sure it is well connected.
- Press "Function" button to select USB mode.
- The system will start reading the device after it has been connected, and it will start playback automatically. If you press "Stop ■" button, the LCD display will show the total number of MP3 files and total number of folders that the turntable has detected.
Remark:
"USB" mode can only be shown on LCD display after the USB plug is connected.
USB port does not support connections with an USB extension cable and
ENGLISH
User guide
PXR23
is not designed to be connected with any computer directly. (If you want to connect a computer, please use the Aux-in connection).
Pause / Play playback
To interrupt the playback in USB mode, press the "Play / Pause / ST / MONO" button once. Then, the audio will freeze and the LCD display will start flashing.
Press again the button to resume to normal playback.
Stop playback ■
If the "Stop ■" button is pressed during listening to music, the system will end music playback. To continue listening to music, once the "Play / Pause / ST / MONO" button is pressed, the song will restart from the beginning.
Next / Previous track (▶/I)
-
During playback moed, if "Next track ▶" button is pressed. It will skip the playback to next track showing the following track number on the display.
-
If "Previous track ◀◀" button is pressed it will skip to the previous track and play it.
-
If "Next / Previous track (▶▶/▶◀)" button is holded some seconds during MP3 playback, the playing track will go fast forward or backward until the button being released.
Folder playback control
-
Press "Folder / PRE Δ " button, to change to the following audio folder of the USB device.
-
Press "Next / Previous track (▶▶/▶◀)" button to select the track of the new folder you want to start playing.
Track / Album title
Press the "Info" button on the remote control during playback to show the track /album title on display. Press the "Info" button again to disable this function.
Repeat / Intro / Random playback
Press the "Repeat / Intro / Random" button before or during playback. Then, a single track, a single folder or all the tracks can be repeated in difference modes as the following:
Note that the following options are ordered by the times the button is
![graph TD A["(1 press)"] --> B["(2) Repeat one folder"] B --> C["(3) Repeat all tracks"] C --> D["(4) Intro playback"] D --> E["(5) Random playback"] E --> F["(6) Repeat mode Off"] F --> G["pressed."]](/content/2026/04/723198/images/ef725ac7e893c773de403c92dd523fcaf74eb2570c513931cb98ea2f98800550.jpg)
On the LCD screen on the turntable will appear the following information as for the Repeat option selected:
| Repeat option | Indicator in LCD screen |
| Repeat single track |  |
| Repeat all tracks |  |
| Repeat single folder |  |
| Intro playback* | Intro |
| Random playback | Random |
| Repeat mode Off | - |
* Intro playback: You can listen the beginning (10 seconds) of each track by this function & saving your time to search the desire song
Tracks programming
Up to 20 tracks can be programmed for MP3 file and can be played in any order. Before using this function, be sure the system is at Stop mode "■" before programming:
- Select USB mode & press "Stop ■" button to enter in Stop mode.
ENGLISH
User guide
PXR23
-
Press the "Mem / Clk-Adj" button. A message of "MEMORY "will appear on LCD display. Moreover, it will indicate the program no. and digits of the track no. To be programmed:
-
Select a desired track by pressing "Next track ▶" or "Previous track ◀◀" buttons.
-
Press the "Mem / Clk-Adj" button to store the selected track inside the sistem memory.
-
Repeat steps 3 and 4 to enter additional tracks into the memory if necessary.
-
When all the desired tracks have been programmed, press "Play / Pause / ST / MONO" button to play the stored files in assigned order.
-
Press "Stop ■" button to stop program playback.
Once the track storage is completed, press "Next track ▶" or "Previous track ◀" button to review the tracks which have been programmed. Press "Stop ■" button to cancel all tracks being programmed.
FM RADIO TUNING
Manual tuning
-
Turn on the unit by pressing Power On - Off / Volume Knob and press the Function button to select "FM Tuner" mode.
-
Tune to the required station by pressing the ◀◀ or ▶▶ button
-
Adjust volume knob to the desired volume level.
Auto tuning
-
With the Function button select "FM Tuner" mode.
-
Press and hold the ◀◀ or ▶◀ button for some seconds and then release. The unit will start searching for radio stations automatically and will stop until one is reached.
-
Repeat step 2 until the desired radio station is reached.
-
Adjust volume knob to the desired volume level.
Preset stations
You can store up to 40 radio stations in the memory.
-
Set the turntable to "Tuner" mode.
-
Choose the desired radio station by using "manual" or "auto" tuning
PXR23
methods.
- Press the "Mem / Clk-adj" button to enable the programming state. "MEMORY" indicator and the preset station number will start flashing on LCD screen.
- Press the ◀◀ or ▶◀ button to select the desired radio station you want to save on storage.
- Press "Mem / Clk-adj" button again to confirm the selection.
- Repeat step 2 to 5 to store otherradio stations.
- On Radio tuning mode, press the Folder / PRE △ button once by once to enter to the preset memory.

- The pre-set memories will be cancelled completely if the main power supply is disconnected. You are recommended to switch the system always into standby mode for convenient usage.
- The programming state takes only 10 seconds. After 10 seconds, the programming state will quit and return to normal tuner mode automatically.
- You can overwrite a present station by storing another radi station in its place.
FM-mono & FM-stereo reception
To swipe between mono and stereo reception, press the "Play / Pause / ST / MONO" button repeatedly. When stereo signals are weak, it is preferable to receive the program in mono.
If a stereo signal is being received, the stereo indicator “(ST)” will appear on LCD screen, showing that FM stereo program is now activated.
Hints for best reception:
The receiver has a built-in FM wire antenna hanging at the rear cabinet. This wire should be totally unraveled and extended for the best reception.
BLUETOOTH CONNECTING AND PLAYBACK
- Press the Function button to to select BT (Bluetooth) mode. The symbol "BT" will be shown on LCD display.
- The text "PAIRING" on the LCD display will flash meaning the unit is searching and waiting to connect to a Bluetooth device.
User guide
PXR23
- Switch on the Bluetooth function on your Bluetooth device (such as a Mobile Phone, Tablet, Computer, etc.) and select the detected turntable name on founded device list: "PXR23".
- When the Bluetooth device has paired successfully with the turntable, it will show "BT" on the display.
- Start playing the music on your Bluetooth device and enjoy it through the speakers of the turntable.
- Adjust the Volume knob to the desired volume level.
- If you want to connect the turntable to another Bluetooth enabled device, turn off the Bluetooth on the device that was previously paired with the turntable. Then, the text "PAIRING" on the display will begin to flash. At this point, repeat steps 2-6 showed above.
AUX-IN CONNECTION
Connect the unit to any auxiliary device (i.e. MP3 player, computer, etc.) by connecting the aux-in jack with a 3.5 mm stereo cable (not included) and connect the cable to the desired auxiliary device to play its music.
- Press Function button and select "Phono / Aux" mode.
- Plug the Aux-in cable to the jack of the turntable and your auxiliary device.
- Start to play music from your device and adjust the Volume knob to the desire level. If the sound distortion is too high, reduce the volume level of your auxiliary device.
Remark:
If, durning the auxiliary device playback, you decide to change the playback mode and start listening to your vynil records, just simply unplug the external device from Aux-in jack. Then, you will be able to place any vynil record on the platter and start listening to it with Phono mode automatically.
ENCODING FUNCTION
Convert Vynil records / Radio stations or Aux-in music into MP3 files.
The turntable system is able to encode the Phono / Radio or Aux-in music to MP3 format and save it and record it with a USB memory device.
Vynil and Aux-in encoding
- Insert a USB device on the USB port.
- Press Function button and select "Phono / Aux" mode. Then, press the "Record" button directly.
- The LCD display with show the word "USB" and "REC" will start to flash, showing that the turntable is starting the encoding mode.
- Start playing the vynil (or the auxiliary device) with the song you want to save and record.
- To finish the recording, hold the "Record" button until the LCD screen stops flashing and return to "Phono/Aux" mode.
Radio encoding
- Insert a USB device on the USB port.
- Press Function button and select "FM Tuner" choose desired radio station by "manual" or "auto" tuning method, and then press the "Record" button directly.
- The LCD display with show the word "USB" and "REC" will start to flash, showing that the turntable is starting the encoding mode.
- To finish the recording, hold the "Record" button until the LCD screen stops flashing and return to "FM Tuner" mode.
Remark:
- The recording speed is 1:1 and it is according to the actual playing time.
- The system will create an audio folder on the USB device to store there the encoded tracks.
- The recording format is default – MP3 bit rate : 128 kbps, sampling rate : 44.1kHz
- No song title will be recorded during encoding mode.
- To stop the recording, press the "Record" button again during recording on encoding mode.
Track separation (by remote control)
You can divide the recording music from vynil records to USB track by trace during encoding. Every time the "T8" (track separation) button is pressed, in the remote control, during encoding vynil records, the system will generate a new track and continue the recording. The LCD display will show 'TS' one time,
PXR23
meaning that the unit is creating a new track successfully.
Note that track separation function is not available at FM radio encoding.
Delete recorded files with Encoding function of USB (by remote control)
The turntable's system is able to erase the encoded files stored inside the USB.
- When playing the songs stored on the USB device with Encoding function, set USB on "Stop ■" mode. Choose the song you want to delete.
- Press "DELETE" once to delete the track.
- To exit, press and hold the "DELETE" button for 3 seconds and normal USB playback will start.
Remark:
Only the encoded tracks can be deleted. Tracks from the USB wich were transferred from PC cannot be deleted.
Removing the USB used for Encoding function
To remove the USB, turn off the power of the turntable or switch the function mode to either FM Tuner or Vynil (Phono) first. Then, unplug the USB device by pulling it out of the USB port directly.
MORE FEATURES
Sleep function (by remote control)
- Press "Sleep / Time" button and the sleep indicator will show on the LCD screen.
- Keep pressing the "Sleep / Time" button to adjust the sleep timer in the order of 90 > 80 >70....10 minutes.
- System will stop and turn to standby mode automatically after the selected timing.
- To cancel the sleep mode, press "Sleep / Time" button and keep pressing until you reach the "Off" mode.
Remark:
If you press the "Sleep / Time" button once and the "Sleep" indicator appears on the LCD screen, note that the system will turn to standby
mode automatically after selected minutes.
Alarm clock setting (by remote control)
This function allows the turntable to turn on automatically and wake you up by playing soft music or radio.
First, set the unit at standby mode then press and hold the "Timer" button to enter to the timer program mode until "On time" is flashing on LCD display. Then, you will be able to adjust the alarm settings:
Activate time settings: press the "Timer" button again (the hour digit will start flashing) and press "(▶▶/▶◀)" buttons to set the hour. Then press again "Timer" to confirm the hour. Press "Timer" and "(▶▶/▶◀)" buttons again to set the minutes, press "Timer" button to confirm and enter to the wake-up setting mode.
Wake up mode: press "Function" button to set the wake up mode (you can choose between USB and FM Tuner for waking sounds). Then press "Timer" button to confirm and enter to the volume mode.
Volume level: press “(▶▶/▶◀)” button to set the volume level, then press "Timer" button again to confirm, activate and exit the alarm clock settings.
Deactivate time settings: press the "Timer "button and then press "(▶▶/▶◀)" button to set the "Off" alarm clock mode. Then press "Timer "button again to confirm the setting.
Stop alarm clock
-
To cancel alarm function, press again "Timer" button until the timer indicator "💡" disappears.
-
To re-active the alarm, repeat the alarm clock setting procedure abovementioned.
This unit provides 4 differences sound effects to enhance your listening experience.
ENGLISH
User guide
PXR23
You can select the desired Equalizer effect by pressing the "EQ" button repeatedly in the following sequence:
![graph TD A["Jazz"] --> B["No effect"] C["Rock"] --> A D["Classic"] --> B E["Pop"] --> C F["Top 1"] --> C](/content/2026/04/723198/images/37bd953af7ae9eea13bd35abb5fa613fde371ff9a7f38c418d757d6ca11ff8ba.jpg)
Display function (by remote control)
Press "Display" to indicate various information of the system, each step switches as below:
![graph TD A["Alarm info"] --> B["Track / Radio station"] B --> C["Clock"] C --> A](/content/2026/04/723198/images/14d9d211a437c279a0b37a38f807b72a0f38acfa1455d09d9e862ac05e85a87c.jpg)
TECHNICAL SPECIFICATIONS
| Input power: AC 230V / 50Hz | Max supported USB capacity: 64GB |
| Power consumption: ≤12W | USB playback system: FAT32 |
| Standby mode consumption ≤ 0.7W | File playback: MP3, WMA |
| Output power: 2 x 5W 4Ω | Recording file formats: MP3 |
| Frequency response: 40HZ-20KHz | Audio Type: Stereo Ceramic Head |
| S / N ratio: 45 dB | Audio Rate: 33/45 RMP |
| FM frequency range: 87.5-108MHz | Output RMS: 2 x 1.5W |
ENGLISH
User guide
PXR23
WARNINGS
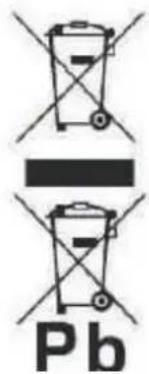 | Correct disposal of this Product(Waste Electrical & Electronic Equipment) (WEEE)Your product is designed and manufactured with high quality materials and components which can be recycled and reused.This symbol means that electrical and electronic equipment, at their end of-life should be disposed of separately from your household waste.Please dispose of this equipment at your local community waste collection/recycling centre.In the European Union there are separate collection systems for used electrical and electronic products.Please help us to conserve the environment we live in! |
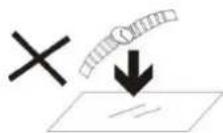 | DO NOT place objects on top of the device, as objects may scratch the device. |
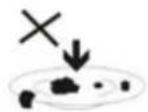 | DO NOT expose the device to dirty or dusty environments. |
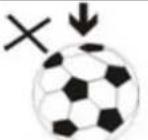 | DO NOT place the device on an uneven or unstable surface. |
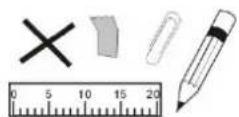 | DO NOT insert any foreign objects into the device. |
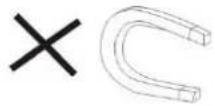 | DO NOT expose the device to strong magnetic or electrical field. |
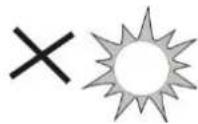 | DO NOT expose the device to direct sunlight as it can damage the device. Keep it away from heat sources. |
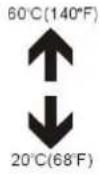 | DO NOT store your device in temperatures higher than 40°C(104°F). The internal operating temperature for this device is from 20°C (68°F) to 60°C(140°F). |
ENGLISH
User guide
PXR23
 | DO NOT use the device in the rain. |
 | Please check with your Local Authority or retailer for proper disposal of electronic products. |
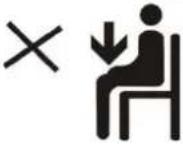 | The device and adaptor may product some heat during normal operation of charging. To prevent discomfort or injury from heat exposure, DO NOT leave the device on your lap. |
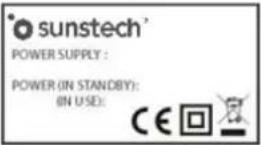 | POWER INPUT RATING: Refer to the rating label on the device and be sure that the power adaptor complies with the rating. Only use accessories specified by the manufacturer. |
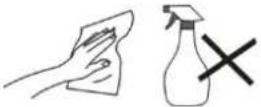 | Clean the device with a soft cloth. If needed, dampen the cloth slightly before cleaning. Never use abrasives or cleaning solutions. |
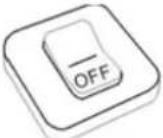 | Always power off the device to install or remove external devices that do not support hot-plug. |
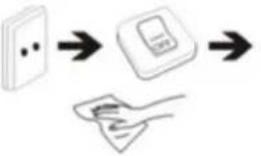 | Disconnect the device from an electrical outlet and power off before cleaning the device. |
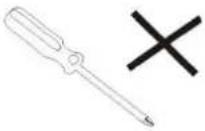 | DO NOT disassemble the device. Only a certified service technician should perform repair. |
 | The device has apertures to disperse heat. DO NOT block the device ventilation, the device may become hot and malfunction as a result. |
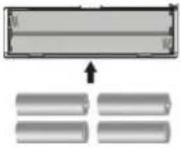 | Risk of explosion if battery replaced by an incorrect type. Dispose of used batteries according to the instruction. |
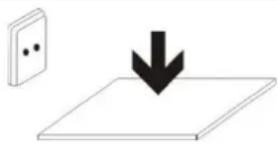 | PLUGGABLE EQUIPMENT: the socket-outlet shall be installed near the equipment and shall be easily accessible. |
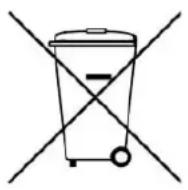 | European Union: Disposal Information.This symbol means that according to local laws and regulations your product and/or its battery shall be disposed of separately from household waste. When this product reaches its end of life, take it to a collection point designated by local authorities. The separate collection and recycling of your product and/or its battery at the time of disposal will help conserve natural resources and ensure that it is recycled in a manner that protects human health and the environment. |
| MADE IN CHINA | |

PXR23
GIRADISCOS
GUÍA DE USUARIO
Guía de usuario
PXR23
CONTENIDO

Observación:
Observación:
PXR23
TOURNE-DISQUE
GUIDE DE L'UTILISATEUR
CONTENU
INSTRUCTIONS DE SÉCURITÉ....1
PREMIÈRE UTILISATION DU TOURNE-DISQUE ....4
Installation....4
Branchement....4

PXR23
TOCA-DISCOS
GUIA DO UTILIZADOR
TABELA DE CONTEÚDO
INSTRUÇÕES DE SEGURANÇA......1
PRIMEIRO USO DO TOCA-DISCOS....4
Instalação 4
Conexão 4
CONEXÃO AUX-IN....14

PORTUGUÊS
Guia do utilizador
PXR23
Max supported USB capacity: 64GB
For you. For everyone.
- TABLE OF CONTENTS
- ENGLISH
- PXR23
- SAFETY INSTRUCTIONS
- USER GUIDE
- FIRST USE OF THE TURNTABLE
- INSTALLATION
- CONNECTION
- SETTING THE CLOCK
- TURNTABLE OVERVIEW
- REMOTE CONTROL'S BATTERY INSTALLATION
- BATTERY PRECAUTIONS
- REMARK (FOR EUROPE MARKET ONLY)
- VYNIL DISC PLAYBACK
- MP3 AUDIO PLAYBACK FROM USB DEVICE
- CONNECTING THE USB DEVICE
- PAUSE / PLAY PLAYBACK
- STOP PLAYBACK
- NEXT / PREVIOUS TRACK (▶/I)
- FOLDER PLAYBACK CONTROL
- TRACK / ALBUM TITLE
- REPEAT / INTRO / RANDOM PLAYBACK
- TRACKS PROGRAMMING
- FM RADIO TUNING
- MANUAL TUNING
- AUTO TUNING
- PRESET STATIONS
- FM-MONO & FM-STEREO RECEPTION
- HINTS FOR BEST RECEPTION
- BLUETOOTH CONNECTING AND PLAYBACK
- AUX-IN CONNECTION
- REMARK
- ENCODING FUNCTION
- VYNIL AND AUX-IN ENCODING
- RADIO ENCODING
- TRACK SEPARATION (BY REMOTE CONTROL)
- DELETE RECORDED FILES WITH ENCODING FUNCTION OF USB (BY REMOTE CONTROL)
- REMOVING THE USB USED FOR ENCODING FUNCTION
- MORE FEATURES
- SLEEP FUNCTION (BY REMOTE CONTROL)
- ALARM CLOCK SETTING (BY REMOTE CONTROL)
- STOP ALARM CLOCK
- DISPLAY FUNCTION (BY REMOTE CONTROL)
- TECHNICAL SPECIFICATIONS
- WARNINGS
- GUÍA DE USUARIO
- CONTENIDO
- OBSERVACIÓN
- CONTENU
- TABELA DE CONTEÚDO
- PORTUGUÊS
- GUIA DO UTILIZADOR
Brand : Sunstech
Model : PXR23
Category : Turntable