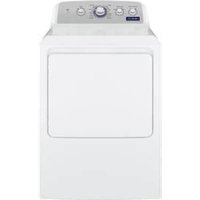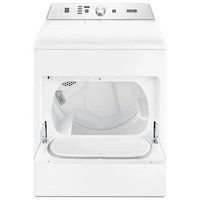
ZEGD7009GW - Dryer Crosley - Free user manual and instructions
Find the device manual for free ZEGD7009GW Crosley in PDF.


User questions about ZEGD7009GW Crosley
0 question about this device. Answer the ones you know or ask your own.
Ask a new question about this device
Download the instructions for your Dryer in PDF format for free! Find your manual ZEGD7009GW - Crosley and take your electronic device back in hand. On this page are published all the documents necessary for the use of your device. ZEGD7009GW by Crosley.
USER MANUAL ZEGD7009GW Crosley
text_image
CROSLEY PROFESSIONALnatural_image
Line drawing of a washing machine with front panel and side door (no text or symbols)Your safety and the safety of others are very important.
We have provided many important safety messages in this manual and on your appliance. Always read and obey all safety messages.

This is the safety alert symbol.
This symbol alerts you to potential hazards that can kill or hurt you and others.
All safety messages will follow the safety alert symbol and either the word "DANGER" or "WARNING."
These words mean:
DANGER
WARNING
You can be killed or seriously injured if you don't immediately follow instructions.
You can be killed or seriously injured if you don't follow instructions.
All safety messages will tell you what the potential hazard is, tell you how to reduce the chance of injury, and tell you what can happen if the instructions are not followed.

WARNING - "Risk of Fire"
- Clothes dryer installation must be performed by a qualified installer.
- Install the clothes dryer according to the manufacturer's instructions and local codes.
- Do not install a clothes dryer with flexible plastic venting materials or flexible metal (foil type) duct. If flexible metal duct is installed, it must be of a specific type identified by the appliance manufacturer as suitable for use with clothes dryers. Flexible venting materials are known to collapse, be easily crushed, and trap lint. These conditions will obstruct clothes dryer airflow and increase the risk of fire.
- To reduce the risk of severe injury or death, follow all installation instructions.
- Save these instructions.
IMPORTANT: When discarding or storing your old clothes dryer, remove the door.
IMPORTANT SAFETY INSTRUCTIONS
WARNING: To reduce the risk of fire, electric shock, or injury to persons when using the dryer, follow basic precautions, including the following:
- Read all instructions before using the dryer.
■ Do not place items exposed to cooking oils in your dryer. Items contaminated with cooking oils may contribute to a chemical reaction that could cause a load to catch fire. - Do not dry articles that have been previously cleaned in, washed in, soaked in, or spotted with gasoline, dry-cleaning solvents, or other flammable or explosive substances as they give off vapors that could ignite or explode.
■ Do not allow children to play on or in the dryer. Close supervision of children is necessary when the dryer is used near children.
■ Before the dryer is removed from service or discarded, remove the door to the drying compartment.
■ Do not reach into the dryer if the drum is moving.
■ Do not install or store the dryer where it will be exposed to the weather.
■ Do not tamper with controls.
■ Do not repair or replace any part of the dryer or attempt any servicing unless specifically recommended in this Use and Care Guide or in published user-repair instructions that you understand and have the skills to carry out.
■ Do not use fabric softeners or products to eliminate static unless recommended by the manufacturer of the fabric softener or product.
■ Do not use heat to dry articles containing foam rubber or similarly textured rubber-like materials.
■ Clean lint screen before or after each load.
- Keep area around the exhaust opening and adjacent surrounding areas free from the accumulation of lint, dust, and dirt.
■ The interior of the dryer and exhaust vent should be cleaned periodically by qualified service personnel.
■ See "Electrical Requirements" located in the installation instructions for grounding instructions.
SAVE THESE INSTRUCTIONS
WARNING: For your safety, the information in this manual must be followed to minimize the risk of fire or explosion, or to prevent property damage, personal injury, or death.
- Do not store or use gasoline or other flammable vapors and liquids in the vicinity of this or any other appliance.
- WHAT TO DO IF YOU SMELL GAS:
- Do not try to light any appliance.
- Do not touch any electrical switch; do not use any phone in your building.
- Clear the room, building, or area of all occupants.
- Immediately call your gas supplier from a neighbor's phone. Follow the gas supplier's instructions.
- If you cannot reach your gas supplier, call the fire department.
- Installation and service must be performed by a qualified installer, service agency, or the gas supplier.
WARNING: Gas leaks cannot always be detected by smell.
Gas suppliers recommend that you use a gas detector approved by UL or CSA.
For more information, contact your gas supplier.
If a gas leak is detected, follow the "What to do if you smell gas" instructions.
State of California Proposition 65 Warnings:
WARNING: This product contains one or more chemicals known to the State of California to cause cancer.
WARNING: This product contains one or more chemicals known to the State of California to cause birth defects or other reproductive harm.
CHECK YOUR VENT SYSTEM FOR GOOD AIRFLOW
WARNING
Fire Hazard
Use a heavy metal vent.
Do not use a plastic vent.
Do not use a metal foil vent.
Failure to follow these instructions can result in death or fire.
Good airflow
Along with heat, dryers require good airflow to efficiently dry laundry. Proper venting will reduce your drying times and improve your energy savings. See Installation Instructions.
The venting system attached to the dryer plays a big role in good airflow. Blocked or crushed vents as well as improper venting installation will reduce airflow and dryer performance.
Service calls caused by improper venting are not covered by the warranty and will be paid by the customer, regardless of who installed the dryer. To clean or repair venting, contact a venting specialist.
Maintain good airflow by:
■ Cleaning your lint screen before each load.
■ Replacing plastic or foil vent material with 4" (102 mm) diameter heavy, rigid vent material.
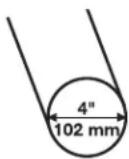
■ Using the shortest length of vent possible.
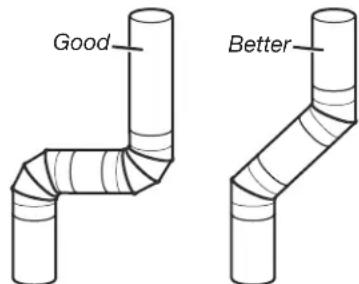
■ Using no more than four 90° elbows in a vent system; each bend and curve reduces airflow.
text_image
Good Better■ Removing lint and debris from the exhaust hood.
■ Removing lint from the entire length of the vent system at least every 2 years. When cleaning is complete, be sure to follow the Installation Instructions supplied with your dryer for final product check.
■ Clearing away items from the front of the dryer.
Use Sensor cycles for better fabric care and energy savings
Use the Sensor cycles to provide the most energy savings and enhanced fabric care from the dryer. During Sensor cycles, drying air temperature and moisture level are sensed in the load. This sensing occurs throughout the drying cycle and the dryer shuts off when the load reaches the selected dryness. Use the Normal dryness level to provide optimal energy savings.
With Timed Dry, the dryer runs the amount of time set and sometimes results in shrinkage, wrinkling, and static due to over-drying. Use Timed Dry for the occasional damp load that needs a little more drying time or when using the drying rack.
Tips for getting the best performance from your steam dryer
■ Results may vary depending on fabric. 100% cotton garments with wrinkle-free finish may yield better results than those without. 100% cotton items may require additional touching up after cycles that use steam.
■ Use of fabric softener sheet is not recommended with cycles that use steam. It may cause temporary staining on clothes.
■ Cycles that use steam are not recommended for items that have been starched. Wash any starched or new garments prior to using cycles that use steam.
■ The Steam Refresh cycle is best for reducing light wrinkles from loads left in the dryer too long.
CONTROL PANEL AND FEATURES
Not all features and cycles are available on all models.
flowchart
graph TD
    A["1 POWER"] --> B["2 HEAVY DUTY BEDDING"]
    B --> C["3 SANITIZE STEAM REFRESH"]
    C --> D["4 WRINKLE CONTROL DELICATES"]
    D --> E["5 Estimated Cycle Time 0.50"]
    E --> F["6 Tized Dry Adjust - +"]
    F --> G["7 STATIC REDUCE - Sensing - Steam - Done - Check Lint Screen"]
    G --> H["8 DAMP DRY SIGNAL - Audio Level"]
    H --> I["9 WRINKLE PREVENT Off On With Steam"]
    I --> J["10 DRY LEVEL Less Normal More"]
    J --> K["11 Hold to START"]
    K --> L["12 Rapid DRY TIMED DRY"]
NOTE: The control panel features a sensitive surface that responds to a light touch of your finger. To ensure your selections are registered, touch the control panel with your fingertip, not your fingernail. When selecting a setting or option, simply touch its name.
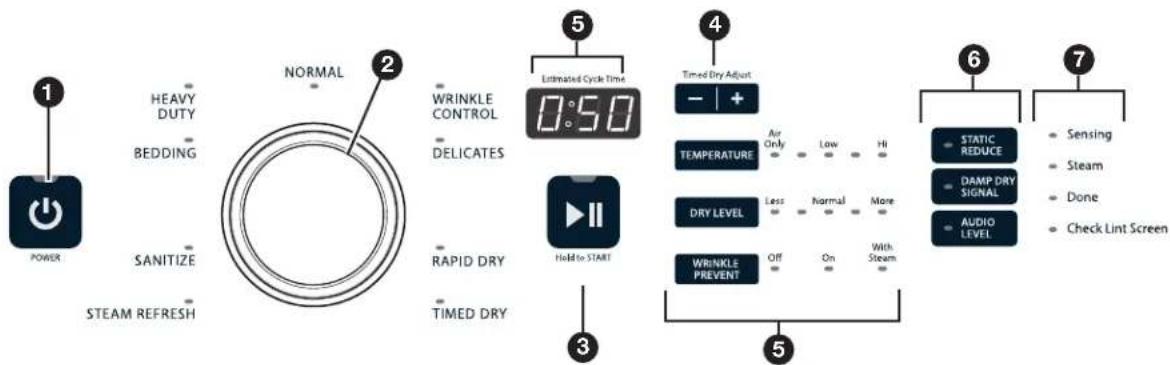
1 POWER BUTTON
Touch to turn the dryer on and off. Touch to stop/cancel a cycle at any time.
② CYCLE CONTROL KNOB
Use your dryer's cycle control knob to select available cycles on your dryer. Turn the knob to select a cycle for your laundry load. See "Cycle Guide" for detailed descriptions of cycles.
3 START/PAUSE BUTTON
Touch and hold to start a cycle, or touch once while a cycle is in process to pause it.
4 TIMED DRY ADJUST
Use “+” and “−” with Timed cycles to increase or decrease the length of a Timed Dry or Rapid Dry cycle.
5 LED DISPLAY AND SETTINGS
When you select a cycle, its default settings will light up and the Estimated Time Remaining (for Sensor cycles) or actual time remaining (for Timed cycles) will be displayed. Touch the setting names next to the display to adjust settings. See "Cycle Guide" for available settings on each cycle. Not all settings are available with all cycles.
Temperature
When using Timed cycles, you may select a dry temperature based on the type of load you are drying. Use the warmest setting safe for the garments in the load. Follow garment label instructions.
NOTE: Sensor cycles allow temperature adjustment. At most, 3 of available temperatures (not including Air Only) are allowed.
Dry Level
You may adjust the Dry Level on Sensor cycles (except for the Sanitize cycle), if desired.
NOTE: Dryness level is for use with Sensor cycles only.
Wrinkle Prevent
If you will be unable to remove a load immediately, touch Wrinkle Prevent to add up to 150 minutes of periodic tumbling to help reduce wrinkling. On some cycles, you may select the "With Steam" setting to add a short steam cycle after 60 minutes to help smooth out wrinkles.
6 OPTIONS
Use to select available options for your dryer. Not all cycles and options are available on all models.
Static Reduce (on some models)
Touch to add the Static Reduce option to selected Sensor cycles (see "Cycle Guide"). The dryer will automatically tumble, pause, and introduce a small amount of moisture into the load to help reduce static. This option adds approximately 8 minutes to the total cycle time.
Damp Dry Signal
Touch to select the Damp Dry Signal to Low, High, or Off. When selected, a series of beeps will sound when the load is damp but not completely dry. This will allow you to take clothes out of the load that do not need to dry completely. This option is not available on Sanitize, Steam Refresh, and the Timed Dry cycles.
Audio Level
Touch AUDIO LEVEL to change end beep and button sounds simultaneously to Low, High, or Off.
7 CYCLE STATUS LIGHTS
The indicator bar on the right side of the control will let you know what stage of the drying cycle is in process.
Sensing
The Sensing indicator will light during Sensor cycles to indicate that the moisture sensor on the dryer is operating. This indicator will not light during Timed cycles or options such as Wrinkle Prevent.
Steam
This indicator will light when a steam function is active.
NOTE: Steam is not available on all models or on all cycles.
Done
This will indicate that the selected cycle has ended and the load may be removed from the dryer. If Wrinkle Prevent has been selected, the dryer may continue to tumble the load, even if the Done indicator is lit.
Check Lint Screen
The Check Lint Screen indicator light will flash as a reminder to clean the lint screen. It will flash until the door is opened or a cycle is started. It will turn off when the dryer is turned off.
CYCLE GUIDE — SENSOR CYCLES
Senses moisture in the load and shuts off when the load reaches the selected dryness level. The dry temperature shown is the default temperature. This setting can be modified on some cycles but is not retained for future drying with this cycle. The dryness level shown is the default dryness setting. This setting can be changed on some cycles and will be retained for future drying with this cycle. Available options shown in bold are default settings for that cycle.
Use Sensor cycles for better fabric care and energy savings
To get the most energy savings and enhanced fabric care from your dryer, use the Sensing cycles. These cycles measure the drying air temperature and moisture levels to turn the dryer off once the load reaches the selected dryness level. For electric models, dryer performance and results may vary with service voltage less than 240.
| Items to dry: | Cycle: Temperature: Dry Level: Available | Options: | Cycle Details: | ||
| Sheets and towels | Sanitize* Wri | 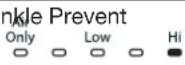 | 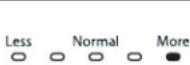 | w/o Steam | 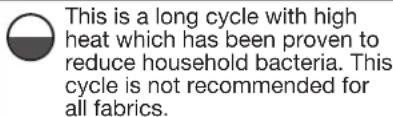 |
| Jackets, comforters, pillows | Bedding Dar | 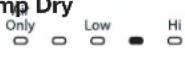 | 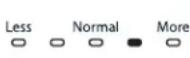 | Signal Wrinkle Prevent† | 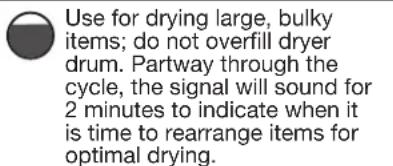 |
| Heavyweight items such as towels or heavy work clothes | Heavy Duty | 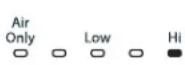 | 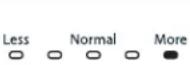 | Damp Dry Signal Wrinkle Prevent† Static Reduce |  |
| Work clothes, casual wear, mixed cottons, corduroys | Normal Dam | 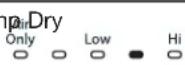 | 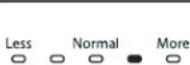 | Signal Wrinkle Prevent† Static Reduce | 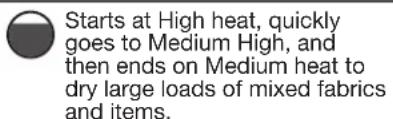 |
| Shirts, blouses, permanent press, synthetics, lightweight items | Wrinkle Control | 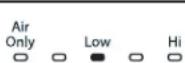 | 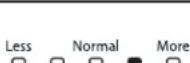 | Damp Dry Signal Wrinkle Prevent w/ Steam Static Reduce | [240K]  |
 |  | ||||
| Undergarments, blouses, lingerie, performance wear | Delicates Da | 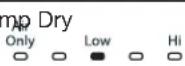 | 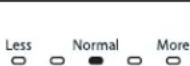 | Signal Wrinkle Prevent† Static Reduce | 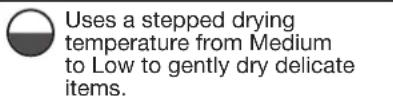 |
*Extended high-heat drying cycle intended to help sanitize items such as sheets and towels. This cycle is not recommended for all fabrics. For best results, do not interrupt cycle; this cycle should be run to completion to ensure sanitization.
†You may select the “With Steam” setting to add a short steam cycle after 60 minutes. This is not available on Sanitize or Delicates. On Steam Models for these cycles, Wrinkle Prevent without Steam will be run to keep clothes protected and for optimal performance.
Load Size Recommendations
For best results, follow the wet load size recommendations noted for each cycle.

Small load: Fill the dryer drum with 3–4 items, not more than 1/4 full.

Medium load: Fill the dryer drum up to about 1/2 full.

Large load: Fill the dryer drum up to about 3/4 full. Do not overload. Items need to tumble freely.
CYCLE GUIDE — TIMED CYCLES
Settings shown and options in bold are default settings for that cycle.
Not all features and cycles are available on all models.
Not all settings and options are available on each cycle.
Adjusting drying time on Timed Cycles
When you select a Timed cycle, the default time appears in the display. Use the "+" and "-" buttons to increase or decrease the time in 1-minute increments. Touch and hold to change the time in 5-minute increments.
The maximum dry time is 150 minutes.
Estimated Cycle Time
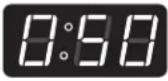
Timed Dry Adjust

Selecting the Temperature
A High heat setting may be used for drying heavyweight items such as towels and work clothes.
A low-to-medium heat setting may be used for drying medium-weight items such as sheets, blouses, dresses, underwear, permanent press fabrics, and some knits.
Use a no-heat (air dry) setting for foam, rubber, plastic, or heat-sensitive fabrics.
Line dry bonded or laminated fabrics.
NOTE: If you have questions about drying temperatures for various loads, refer to the care label directions.
| Items to dry: Cycle: Temperature: Default | Time: | Available Options: | Cycle Details: | ||
| Any loadNOTE: Select Air Only to dry foam, rubber, plastic, or heat-sensitive fabrics. | Timed Dry 40 | WrinkleOnly Low Hi | Prevent ^ | Use to dry items to a damp level for items that do not require an entire drying cycle. Select a drying temperature based on the type of fabrics in your load. If you are unsure of the temperature to select for a load, select the lower setting rather than the higher setting. | |
| Small loads and sportswear | Rapid Dry 15 | WrinkleOnly Low Hi | Prevent ^ | For small loads of 3–4 items. | |
†You may select the “Wrinkle Prevent With Steam” setting to add a short steam cycle after 60 minutes. This is available only with High and Medium Temperature settings.
Depending on settings, Steam option may be disabled to protect clothing and optimize performance.
CYCLE GUIDE — STEAM CYCLES
Settings and options shown in bold are default settings for that cycle.
Not all settings and options are available on each cycle.
Steam cycles are designed for use with dry loads to loosen wrinkles, reduce odors, and refresh fabrics.
| Items to refresh: | Cycle: Temperature: Available | Options: | Cycle Details: | |
| Mixed Loads Steam | Refresh (on some models) | Air Only Low Hi | Wrinkle Prevent ^ | Use to smooth out wrinkles and reduce odors from loads. |
†You may select the “Wrinkle Prevent With Steam” setting to add a short steam cycle after 60 minutes.
Load Size Recommendations
For best results, follow the load size recommendations noted for each cycle.

Small load: Fill the dryer drum with 3–4 items, not more than 1/4 full.

Medium load: Fill the dryer drum up to about 1/2 full.

Large load: Fill the dryer drum up to about 3/4 full. Do not overload. Items need to tumble freely.
USING YOUR DRYER
WARNING
Explosion Hazard
Keep flammable materials and vapors, such as gasoline, away from dryer.
Do not dry anything that has ever had anything flammable on it (even after washing).
Failure to follow these instructions can result in death, explosion, or fire.
WARNING: To reduce the risk of fire, electric shock, or injury to persons, read the IMPORTANT SAFETY INSTRUCTIONS before operating this appliance.
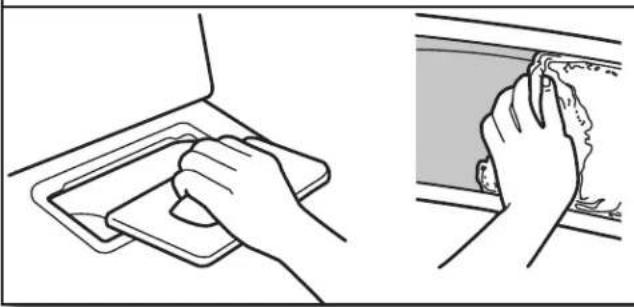
- Clean the lint screen
natural_image
Line drawing showing two hand positions: one on a tray, the other on a window with a cloth (no text or symbols)Clean the lint screen before each load. Pull the lint screen out of its holder. Roll lint off the screen with your fingers. Do not rinse or wash screen to remove lint. Push the lint screen firmly back into place.
For additional cleaning information, see "Dryer Care."
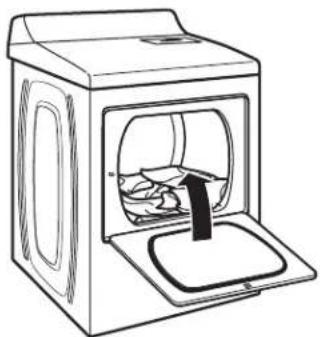
- Load the dryer
natural_image
Line drawing of a washing machine with a lid and outlet (no text or symbols)Open the door by pulling on the handle. Place laundry in the dryer. Add a dryer sheet to wet load, if desired. Close the door.
IMPORTANT: Do not tightly pack the dryer. Items need to tumble freely. Tightly packing can lead to poor drying performance and may increase wrinkling and tangling.
WARNING
Fire Hazard
No washer can completely remove oil.
Do not dry anything that has ever had any type of oil on it (including cooking oils).
Items containing foam, rubber, or plastic must be dried on a clothesline or by using an Air Cycle.
Failure to follow these instructions can result in death or fire.
- Touch POWER button

POWER
Touch the POWER button to turn on the dryer.
- Select the desired cycle
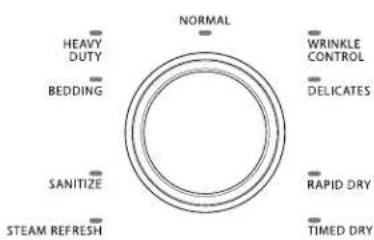
text_image
HEAVY DUTY BEDDING SANITIZE STEAM REFRESH NORMAL WRINKLE CONTROL DELICATES RAPID DRY TIMED DRYSelect the desired cycle for your load. See the "Cycle Guide" for more information about each cycle. Not all cycles are on all models.
Steam Refresh:
Reduces light wrinkles and odors from a few garments at a time. Do not add dryer sheets.
5. Adjust cycle settings, if desired
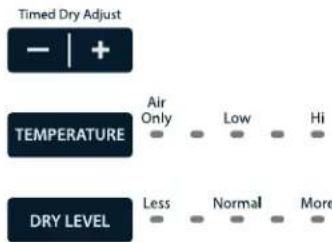
text_image
Timed Dry Adjust - | + TEMPERATURE Air Only Low Hi DRY LEVEL Less Normal MoreYou may adjust different settings, depending on whether you have selected a Sensor cycle, Timed cycle, or Steam Refresh cycle. See the "Cycle Guide" for detailed information.
NOTE: Not all options and settings are available with all cycles. Not all cycles are on all models.
Sensor Cycles:
You can select a different dryness level, depending on your load, by touching Dry Level to scroll to More, Normal, or Less. Selecting More, Normal, or Less automatically adjusts the dryness level at which the dryer will shut off. Dry Level can be changed in the first 5–8 minutes of the cycle.
Sensor cycles give the best drying in the shortest time. Drying time varies based on fabric type, load size, and dryness setting.
Timed Cycles:
When you select a Timed cycle, the default time appears in the display. Touch "+" and "-" to increase or decrease the time
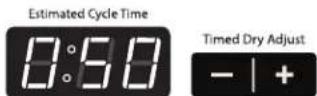
in 1-minute increments. Touch and hold to change the time in 5-minute increments.
The default temperature may be changed by touching Temperature until the desired dry temperature is lit.
6. Select any additional options
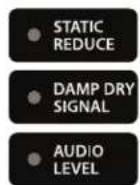
Add additional options such as Static Reduce by touching that option. If you will be unable to remove the load promptly, select the Wrinkle Prevent options before touching the Start/Pause button.
NOTE: Not all options and settings are available with all cycles.
7. Touch and hold START/PAUSE button to begin cycle
Touch and hold the START/PAUSE button to begin the cycle.
8. Remove garments promptly after cycle is finished

Promptly remove garments after cycle has completed to reduce wrinkling. If you will be unable to remove the load promptly, select the Wrinkle Prevent option.
Changing the Sensor Cycle settings to increase drying time
If all your loads on all Sensor Cycles are consistently not as dry as you would like, you may change the default settings to increase or decrease the default dryness level.
Your sensor drying settings can be adjusted to adapt to different installations, environmental conditions, or personal preference. This change is retained and will affect all of your Sensor cycles, not just the current cycle/load. There are 5 drying settings, which are displayed using the time display:
0 Much wetter clothes, 30% less drying time
1 Slightly wetter clothes, 15% less drying time
2 Factory preset dryness level
3 Slightly drier clothes, 15% more drying time
4 Much drier clothes, 30% more drying time
To change the drying settings:
NOTE: The settings cannot be changed while the dryer is running or paused. The dryer must be in Standby mode (power is off) to adjust the default settings.
- Before starting a cycle, touch and hold DRY LEVEL for 6 seconds.
- Touch DRY LEVEL to select the dryness level shown in the time display: 0, 1, 2, 3, or 4.
- Touch the START/PAUSE button to save the new dryness level setting.
DRYER CARE
Keep dryer area clear and free from items that would block the airflow for proper dryer operation. This includes clearing piles of laundry in front of the dryer.
WARNING
Explosion Hazard
Keep flammable materials and vapors, such as gasoline, away from dryer.
Place dryer at least 18 inches (460 mm) above the floor for a garage installation.
Failure to do so can result in death, explosion, or fire.
CLEANING THE DRYER INTERIOR
To clean dryer drum
- Use a mild hand dish detergent mixed at a low concentration with very warm water, and rub with a soft cloth.
- Rinse well with a wet sponge or towel.
- Tumble a load of clean clothes or towels to dry drum OR
Use a microfiber cloth and hot water in a spray bottle to clean the drum and a second microfiber towel to dry.
NOTE: Garments that contain unstable dyes, such as denim blue jeans or brightly colored cotton items, may discolor the rear of the dryer interior. These stains are not harmful to your dryer and will not stain future loads of clothes. Dry unstable dye items inside out to avoid transfer of dye.
REMOVING ACCUMULATED LINT
From Inside the Dryer Cabinet
Lint should be removed every 2 years, or more often, depending on dryer usage. Cleaning should be done by a qualified appliance servicer or ventilation system cleaner.
From the Exhaust Vent
Lint should be removed every 2 years, or more often, depending on dryer usage.
CLEANING THE LINT SCREEN
Every load cleaning
The lint screen is located in the top of the dryer. The control panel has an indicator light "Check Lint" to remind you to clean the lint screen after each load. A screen blocked by lint can increase drying time.
To clean:
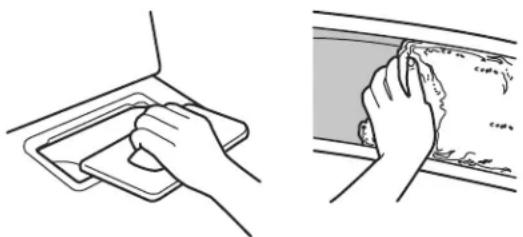
- Pull the lint screen out of its holder. Roll lint off the screen with your fingers. Do not rinse or wash screen to remove lint. Wet lint is hard to remove.
natural_image
Two line drawings showing hands cleaning a surface: one with a cloth, the other with a cloth covering the surface (no text or symbols)- Push the lint screen firmly back into place.
IMPORTANT:
■ Do not run the dryer with the lint screen loose, damaged, blocked, or missing. Doing so can cause overheating and damage to both the dryer and fabrics.
If lint falls off the screen into the dryer during removal, check the exhaust hood and remove the lint. See "Venting Requirements" in the Installation Instructions.
As-needed cleaning
Laundry detergent and fabric softener residue can build up on the lint screen. This buildup can cause longer drying times for your clothes or cause the dryer to stop before your load is completely dry. The screen is probably clogged if lint falls off while the screen is in the dryer.
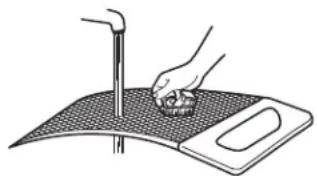
Clean the lint screen with a nylon brush every 6 months, or more frequently, if it becomes clogged due to a residue buildup.
To wash:
- Roll lint off the screen with your fingers.
- Wet both sides of lint screen with hot water.
- Wet a nylon brush with hot water and liquid detergent. Scrub lint screen with the brush to remove residue buildup.
natural_image
Illustration of a hand holding a small object over a textured surface with a vertical rod and a flat plate (no text or symbols)- Rinse screen with hot water.
- Thoroughly dry lint screen with a clean towel. Reinstall screen in dryer.
NON-USE, STORAGE, AND MOVING CARE
Steam models only: Install and store your dryer where it will not freeze. Because some water may stay in the hose, freezing can damage your dryer. If storing or moving your dryer during freezing weather, winterize it.
Non-Use or Storage Care
Operate your dryer only when you are at home. If you will be on vacation or not using your dryer for an extended period of time, you should:
- Unplug dryer or disconnect power.
- Clean lint screen. See "Cleaning the Lint Screen."
- Turn off the water supply to the dryer. This helps to avoid unintended flooding (due to a water pressure surge) while you are away.
Moving Care
For power supply cord-connected dryers:
- Unplug the power supply cord.
- Gas models only: Close shut-off valve in gas supply line.
- Gas models only: Disconnect gas supply line pipe and remove fittings attached to dryer pipe.
- Gas models only: Cap the open fuel supply line.
- Steam models only: Shut off water faucet.
- Steam models only: Disconnect the water inlet hose from faucet, then drain the hose. Transport hose separately.
- Make sure leveling legs are secure in dryer base.
- Use tape to secure dryer door.
WARNING
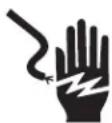
Electrical Shock Hazard
Disconnect power before servicing.
Replace all parts and panels before operating.
Failure to do so can result in death or electrical shock.
For direct-wired dryers:
- Disconnect power.
- Disconnect wiring from dryer and secure wire ends.
- Steam models only: Shut off water faucet.
- Steam models only: Disconnect the water inlet hose from faucet; then drain the hose. Transport hose separately.
- Make sure leveling legs are secure in dryer base.
- Use tape to secure dryer door.
Reinstalling the Dryer
Follow the Installation Instructions to locate, level, and connect the dryer.
SPECIAL INSTRUCTIONS FOR STEAM MODELS
Water Inlet Hose
Replace inlet hose and hose screen after 5 years of use to reduce the risk of hose failure. Periodically inspect and replace inlet hose if bulges, kinks, cuts, wear, or leaks are found.
When replacing your inlet hose, record the date of replacement.
To Winterize the Dryer
- Unplug dryer or disconnect power.
- Shut off water faucet.
- Disconnect water inlet hose from faucet and drain.
To Use the Dryer Again
- Flush water pipes. Reconnect water inlet hose to faucet. Turn on water faucet.
- Plug in dryer or reconnect power as described in the Installation Instructions.
TROUBLESHOOTING
| First try the solutions suggested here or visit our website and reference FAQs (Frequently Asked Questions) to possibly avoid the cost of a service call. | ||
| If you experience Pos | sible Causes Solution | |
| Dryer Operation | ||
| Dryer will not run Door not | closed completely. Make sure the dryer | door is closed completely. |
| Start/Pause button not touched firmly or held long enough. | Touch and hold the START/PAUSE button 2-5 seconds. | |
| Household fuse is blown, circuit breaker has tripped, or dryer is not plugged in. | There may be 2 household fuses or circuit breakers for the dryer. Check that both fuses are intact and tight or that both circuit breakers have not tripped. Replace the fuses or reset the circuit breaker. If the problem continues, call an electrician. | |
| Incorrect power supply. Electric dryers | require 240-volt or 208-volt power supply. Check with a qualified electrician. | |
| Wrong type of fuse. Use a time-delay fuse. | ||
| Dryer will not heat Househ | old fuse is blown or circuit breaker has tripped. | The drum may be turning, but you may not have heat. Electric dryers use 2 household fuses or circuit breakers. Replace the fuses or reset the circuit breaker. If the problem continues, call an electrician. |
| Incorrect power supply. Electric dryers | require 240-volt or 208-volt power supply. Check with a qualified electrician. | |
| The gas supply line valve not open. For gas dryers, make sure that the valve on the gas supply line is open. | ||
| Unusual Noise | ||
| Humming or whining noise with Steam cycle selected | Water inlet valve on dryer is running. The water pump on the dryer is used during the Steam function. If the dryer has just been installed or unused for an extended period, the pump may be louder and run longer. This is normal. | |
| Thumping noise | Dryer hasn't been used in a while. | This is normal. The thumping sound should diminish after a few minutes of use. |
| Rattling or vibrating noise A | small object caught between the edges of dryer drum. | Check the front and rear edges of the drum for small objects. Clean out pockets before laundering. |
| Dryer isn't properly leveled. The dryer may vibrate if not properly installed. See the Installation Instructions. All 4 dryer feet should be in firm contact with the floor. | ||
| Clothing is balled up in dryer. When balled up, the load will bounce, causing the dryer to vibrate. Separate the load items and restart the dryer. | ||
| Clicking noise | Gas valve operating. | On gas dryers, you may hear the gas valve clicking as it opens and closes. This is normal. |
| Dryer Results | ||
| Clothes are not drying satisfactorily, clothes are balling or tangling, or drying times are too long | Lint screen is clogged with lint. | Clean lint screen before each load. |
| The exhaust vent or outside exhaust hood is clogged with lint, restricting air movement. | Run the dryer on Air Only for 5-10 minutes. Hold your hand under the outside exhaust hood to check air movement. If you do not feel air movement, clean exhaust system of lint or replace exhaust vent with heavy metal or flexible metal vent. See the Installation Instructions. | |
| The exhaust vent is not the correct length. | Check that the exhaust vent is not too long or has too many turns. Long venting will increase drying times. See the Installation Instructions. | |
| The exhaust vent diameter is not the correct size. | Use 4" (102 mm) diameter vent material. | |
| The dryer is not level. | Clothes not contacting the moisture sensors during Sensor cycles. See "Level Dryer" in the Installation Instructions. | |
| The Air Only temperature setting has been selected. | Select the correct temperature for the types of garments being dried. See "Cycle Guide." | |
TROUBLESHOOTING
| First try the solutions suggested here or visit our website and reference FAQs (Frequently Asked Questions) to possibly avoid the cost of a service call. | ||
| If you experience Possible Causes Solution | ||
| Dryer Results (cont.) | ||
| Clothes are not drying satisfactorily, clothes are balling or tangling, or drying times are too long (cont.) | The load is too large and heavy to dry quickly. | Separate the load to tumble freely. |
| The dryer is located in a room with temperature below 45°F (7°C). | Proper operation of dryer cycles requires temperatures above 45°F (7°C). | |
| The dryer is located in a closet. Closet | doors must have ventilation openings at the top and bottom of the door. The front of the dryer requires a minimum of 1" (25 mm) of airspace, and, for most installations, the rear of the dryer requires 5" (127 mm). See the Installation Instructions. | |
| Cycle time is too short The | load may not be contacting the sensor strips on Sensor cycles. | Level the dryer. See the Installation Instructions. All 4 dryer feet should be in firm contact with the floor. |
| Clothes are coming out of the Steam Refresh cycle with damp or wet spots. | If you are doing a Steam Refresh cycle of 1 or 2 items, you can add a towel to the load to help avoid uneven spraying from the steam valve. Then select the appropriate time based on the load to be refreshed. | |
| The Sensor cycle is ending early. Change the dryness level setting on Sensor cycles. Increasing or decreasing the dryness level will change the amount of drying time in a cycle. If loads are consistently ending too early, see also “Changing the Sensor cycle settings to increase or decrease drying time.” | ||
| Lint on load Lint screen is clogged with lint. Clean lint screen before each load. | ||
| Stains on load Improper use of fabric softener. Add dryer fabric softener sheets at the beginning of the cycle.Fabric softener sheets added to a partially dried load can stain your garments. Do not use fabric softener sheets with Steam cycles. | ||
| Stains on drum Loose dyes in clothes. Drum stains are caused by dyes in clothing (usually blue jeans).These will not transfer to other clothing. | ||
| Loads are wrinkled The load was not removed from dryer at the end of the cycle. | Select Steam Refresh cycle (on some models) to tumble the load with water and heat. This cycle is best for smoothing out wrinkles and reducing odors from dry loads consisting of 1 to 9 dry items of wrinkle-free cotton, cotton-polyester blend, common knits, and synthetic garments.NOTE: Refer to garment care label instructions. Dry-clean-only garments are not recommended. | |
| The dryer was tightly packed. Dry smaller loads that can tumble freely. Results may also vary depending on fabric type. This cycle is best for reducing wrinkles and odors from loads consisting of wrinkle-free cotton, cotton-polyester blends, common knits, and synthetics. | ||
| For Steam cycles, the water is not properly connected with the dryer. | Make sure water is connected to the dryer. Check that water inlet hose is connected to both the faucet and dryer's water inlet valve. Check that the water supply is turned on. | |
| Odors Recent painting, staining, or varnishing in the area where your dryer is located. | Ventilate the area. When the odors or fumes are gone from the area, rewash and dry the clothing. | |
| Make sure water is connected to the dryer. Check that water inlet hose is connected to both the faucet and dryer's water inlet valve. Check that the water supply is turned on. | ||
| To remove odors left in garments after wearing, select Steam Refresh (on some models). This cycle is best for reducing wrinkles and odors from dry loads consisting of wrinkle-free cotton, cotton-polyester blends, common knits, and synthetics. | ||
| Steam did not occur during Wrinkle Prevent | Wrinkle Prevent does not enable Steam on all cycle/option combinations. | Refer to “Cycle Guide” to verify which cycles and settings enable Steam. |
TROUBLESHOOTING
| First try the solutions suggested here or visit our website and reference FAQs (Frequently Asked Questions) to possibly avoid the cost of a service call. | ||
| If you experience Possible Causes Solution | ||
| Dryer Results (cont.) | ||
| Load too hot Load removed | d before cool-down portion of cycle complete. | Allow the dryer to complete the cool-down portion of the cycle before removing the load. |
| Using Timed Dry cycle with a high temperature setting. | Select an Sensor cycle with a lower heat setting to avoid overdrying the load. | |
| Dryer Displaying Code Message or Indicator Is Lit | ||
| “PF” (power failure) The drying cycle has been interrupted by a power failure. | Touch the START/PAUSE button to clear the PF error message; then touch and hold the START/PAUSE button to resume cycle. | |
| “L2” Diagnostic code (low or no line voltage condition) | There may be a problem with your home power supply, keeping the dryer's heater from turning on. | The dryer will continue to run when this diagnostic code is present. Touch any pad to clear the code from the display and return to the estimated time remaining.Try the following:Check to see if a household fuse has blown or circuit breaker has tripped. Electric dryers use 2 household fuses or breakers. Replace the fuse or reset the circuit breaker.Confirm that the power cord is properly installed. Refer to the Installation Instructions for details.Select a Timed Dry heated cycle, and restart the dryer.If the message persists, consult a qualified electrician. |
| “F# E#” (F1 E1, F3 E1, etc.) variable service codes | The dryer is in need of service. If a code beginning with an “F” appears in the display, alternating between F# and E#, the dryer control has detected a problem that requires service. Call for service. | |
CROSLEY CORPORATION MAJOR APPLIANCE LIMITED WARRANTY
ATTACH YOUR RECEIPT HERE. PROOF OF PURCHASE IS REQUIRED TO OBTAIN WARRANTY SERVICE.
Please have the following information available when you call for service:
■Name, address and telephone number
■Model number and serial number
■A clear, detailed description of the problem
■ Proof of purchase including dealer or retailer name and address
IF YOU NEED SERVICE:
- Before contacting us to arrange service, please determine whether your product requires repair. Some questions can be addressed without service. Please take a few minutes to review the Troubleshooting section of the Use and Care Guide.
- All warranty service is provided exclusively by our authorized Whirlpool Service Providers. In the U.S. and Canada, direct all requests for warranty service to:
In the U.S.A., call 1-800-253-1301. In Canada, call 1-800-807-6777.
If outside the 50 United States or Canada, contact your authorized Crosley dealer to determine whether another warranty applies.
ONE YEAR LIMITED WARRANTY
WHAT IS COVERED
WHAT IS NOT COVERED
For one year from the date of purchase, when this major appliance is installed, operated, and maintained according to instructions attached to or furnished with the product, Whirlpool Corporation or Whirlpool Canada LP (hereafter "Whirlpool") will pay for Factory Specified Replacement Parts and repair labor to correct defects in materials or workmanship that existed when this major appliance was purchased, or at its sole discretion, replace the product. In the event of product replacement, your appliance will be warranted for the remaining term of the original unit's warranty period.
YOUR SOLE AND EXCLUSIVE REMEDY UNDER THIS LIMITED WARRANTY SHALL BE PRODUCT REPAIR AS PROVIDED HEREIN. Service must be provided by a Whirlpool designated service company. This limited warranty is valid only in the United States or Canada and applies only when the major appliance is used in the country in which it was purchased. This limited warranty is effective from the date of original consumer purchase. Proof of original purchase date is required to obtain service under this limited warranty.
- Commercial, non-residential, multiple-family use, or use inconsistent with published user, operator, or installation instructions.
- In-home instruction on how to use your product.
- Service to correct improper product maintenance or installation, installation not in accordance with electrical or plumbing codes, or correction of household electrical or plumbing (i.e., house wiring, fuses, or water inlet hoses).
- Consumable parts (i.e., light bulbs, batteries, air or water filters, preservation solutions, etc.).
- Defects or damage caused by the use of non-genuine Whirlpool parts or accessories.
- Conversion of products from natural gas or L.P. gas.
- Damage from accident, misuse, abuse, fire, floods, acts of God, or use with products not approved by Whirlpool.
- Repairs to parts or systems to correct product damage or defects caused by unauthorized service, alteration, or modification of the appliance.
- Cosmetic damage including scratches, dents, chips, and other damage to the appliance finishes, unless such damage results from defects in materials and workmanship and is reported to Whirlpool within 30 days.
- Discoloration, rust, or oxidation of surfaces resulting from caustic or corrosive environments including, but not limited to, high salt concentrations, high moisture or humidity, or exposure to chemicals.
- Food or medicine loss due to product failure.
- Pickup or delivery. This product is intended for in-home repair.
- Travel or transportation expenses for service in remote locations where an authorized Whirlpool servicer is not available.
- Removal or reinstallation of inaccessible appliances or built-in fixtures (i.e., trim, decorative panels, flooring, cabinetry, islands, countertops, drywall, etc.) that interfere with servicing, removal, or replacement of the product.
- Service or parts for appliances with original model/serial numbers removed, altered, or not easily determined.
The cost of repair or replacement under these excluded circumstances shall be borne by the customer.
DISCLAIMER OF IMPLIED WARRANTIES
IMPLIED WARRANTIES, INCLUDING ANY IMPLIED WARRANTY OF MERCHANTABILITY OR IMPLIED WARRANTY OF FITNESS FOR A PARTICULAR PURPOSE, ARE LIMITED TO ONE YEAR OR THE SHORTEST PERIOD ALLOWED BY LAW. Some states and provinces do not allow limitations on the duration of implied warranties of merchantability or fitness, so this limitation may not apply to you. This warranty gives you specific legal rights, and you also may have other rights that vary from state to state or province to province.
DISCLAIMER OF REPRESENTATIONS OUTSIDE OF WARRANTY
Whirlpool makes no representations about the quality, durability, or need for service or repair of this major appliance other than the representations contained in this warranty. If you want a longer or more comprehensive warranty than the limited warranty that comes with this major appliance, you should ask Whirlpool or your retailer about buying an extended warranty.
LIMITATION OF REMEDIES; EXCLUSION OF INCIDENTAL AND CONSEQUENTIAL DAMAGES
YOUR SOLE AND EXCLUSIVE REMEDY UNDER THIS LIMITED WARRANTY SHALL BE PRODUCT REPAIR AS PROVIDED HEREIN. WHIRLPOOL SHALL NOT BE LIABLE FOR INCIDENTAL OR CONSEQUENTIAL DAMAGES. Some states and provinces do not allow the exclusion or limitation of incidental or consequential damages, so these limitations and exclusions may not apply to you. This warranty gives you specific legal rights, and you also may have other rights that vary from state to state or province to province.
01/17
SÉCURITÉ DE LA SÉCHEUSE
natural_image
Illustration showing two hand cleaning a laptop and a hand cleaning a window (no text or symbols)natural_image
Line drawing of a washing machine with a lid and outlet (no text or symbols)text_image
Timed Dry Adjust - | + TEMPERATURE Air Only Low Hi DRY LEVEL Less Normal Moretext_image
WRINKLE PREVENT Off On With Steamnatural_image
Two-step illustration showing hand cleaning a car interior with a cloth (no text or symbols)natural_image
Illustration of a hand pressing down on a textured surface with a tool, no text or symbols presentAssistance or Service
Before calling for assistance or service, please check "Troubleshooting."
It may save you the cost of a service call. If you still need help, follow the instructions below.
When calling, please know the purchase date and the complete model and serial number of your appliance.
This information will help us to better respond to your request.
If you need replacement parts or to order accessories
We recommend that you use only FSP® Factory Specified Parts.
These parts will fit right and work right because they are made with the same precision
used to build every new WHIRLPOOL® appliance.
To locate FSP® replacement parts, assistance in your area, or accessories:
Whirlpool Corporation
Customer eXperience Center
1-800-253-1301
www.crosley.com
Whirlpool Canada LP
Customer eXperience Centre
1-800-807-6777
www.crosley.com
or call your nearest designated service center or refer to your Yellow Pages telephone directory.
Our consultants provide assistance with
In the U.S.A.
■ Features and specifications on our full line of appliances.
■ Installation information.
■ Specialized customer assistance (Spanish speaking, hearing impaired, limited vision, etc.).
In the U.S.A. and Canada
■ Use and maintenance procedures.
■ Accessory and repair parts sales.
■ Referrals to local dealers, repair parts distributors, and service companies. Whirlpool ^® designated service technicians are trained to fulfill the product warranty and provide after-warranty service, anywhere in the United States and Canada.
You can write with any questions or concerns at:
Crosley Corporation
111 Cloverleaf Drive, Suite 200
Winston-Salem, NC 27103
Customer eXperience Centre
Whirlpool Canada LP
Unit 200-6750 Century Ave
Mississauga, Ontario L5N 0B7
Please include a daytime phone number in your correspondence.