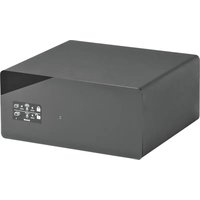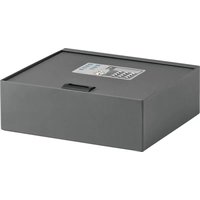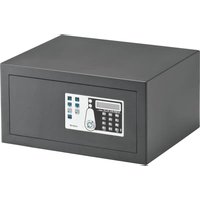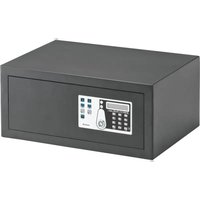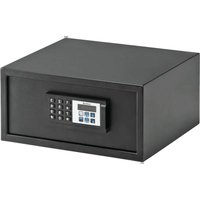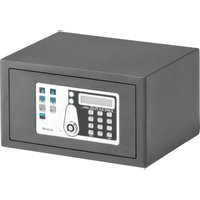
SAFE 10 PLUS - Safe Indel B - Free user manual and instructions
Find the device manual for free SAFE 10 PLUS Indel B in PDF.


User questions about SAFE 10 PLUS Indel B
0 question about this device. Answer the ones you know or ask your own.
Ask a new question about this device
Download the instructions for your Safe in PDF format for free! Find your manual SAFE 10 PLUS - Indel B and take your electronic device back in hand. On this page are published all the documents necessary for the use of your device. SAFE 10 PLUS by Indel B.
USER MANUAL SAFE 10 PLUS Indel B
instructions for use
mode d'emploi
gebrauchsanweisung
natural_image
Line drawing of a hand using a screwdriver to adjust or install a component on a metal bracket (no text or symbols)SAFE_10_30_PLUS_IM_20190506
This device is not designed for use by people (children included) with reduced physical, sensory or mental capacities, or with lack of experience or knowledge, unless they could have benefited, thanks to the intermediation of someone in charge for their safety, from a surveillance or instructions for the device use. Children must be under surveillance, to make sure that they don't play with the device.
OVERALL DIMENSIONS
SAFE 10 PLUS
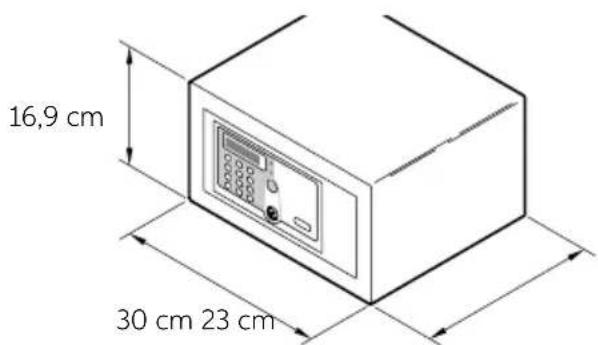
text_image
16,9 cm 30 cm 23 cmSAFE 30 PLUS
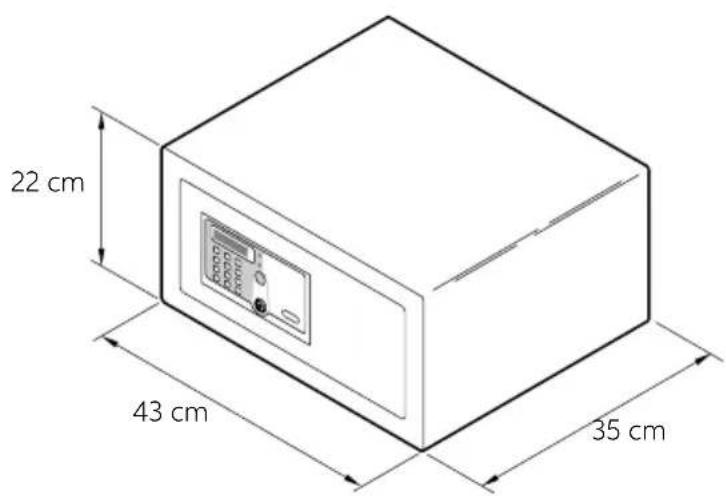
text_image
22 cm 43 cm 35 cmSAFE_10_30_PLUS_IM_20190506
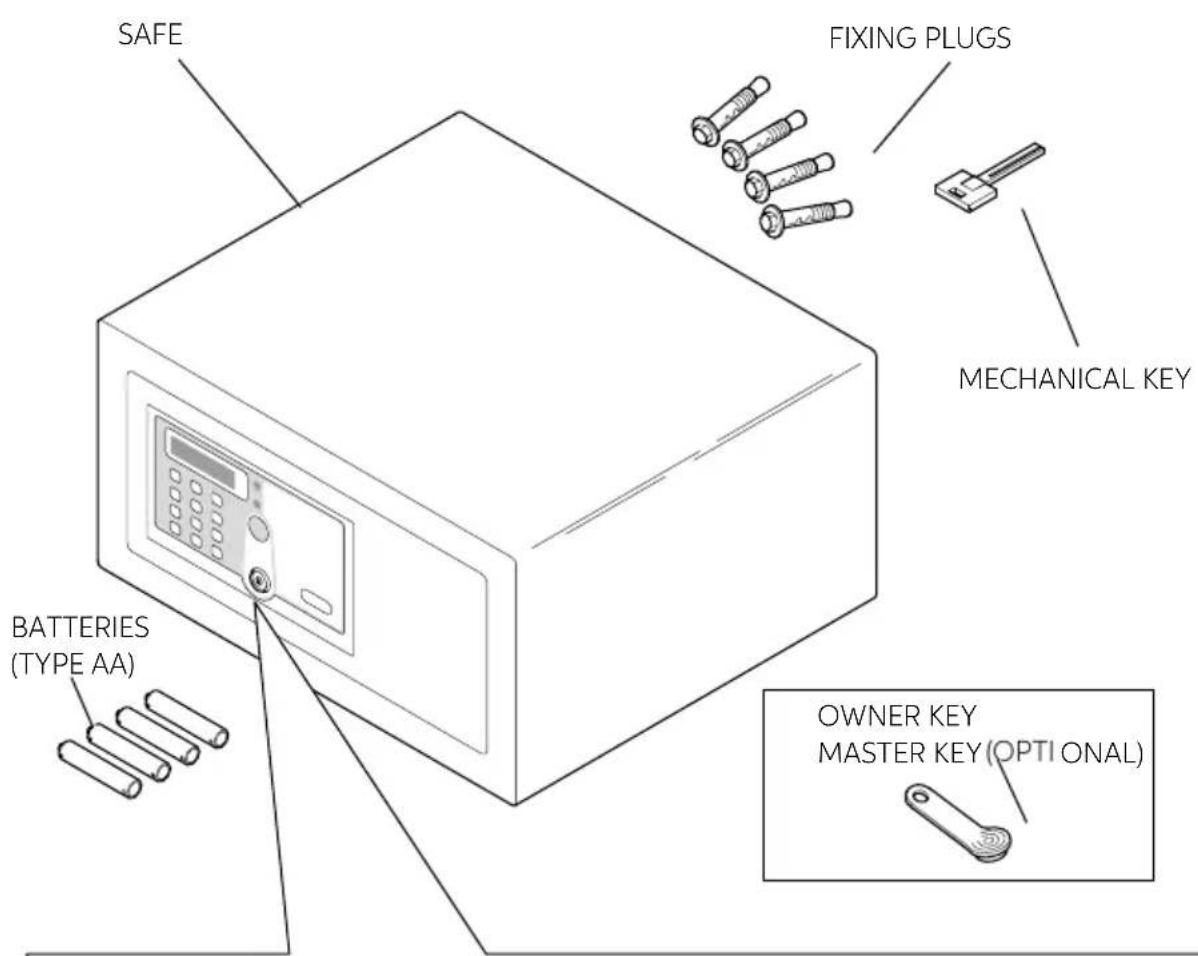
PACKING CONTENT
text_image
SAFE FIXING PLUGS MECHANICAL KEY BATTERIES (TYPE AA) OWNER KEY MASTER KEY (OPTI ONAL)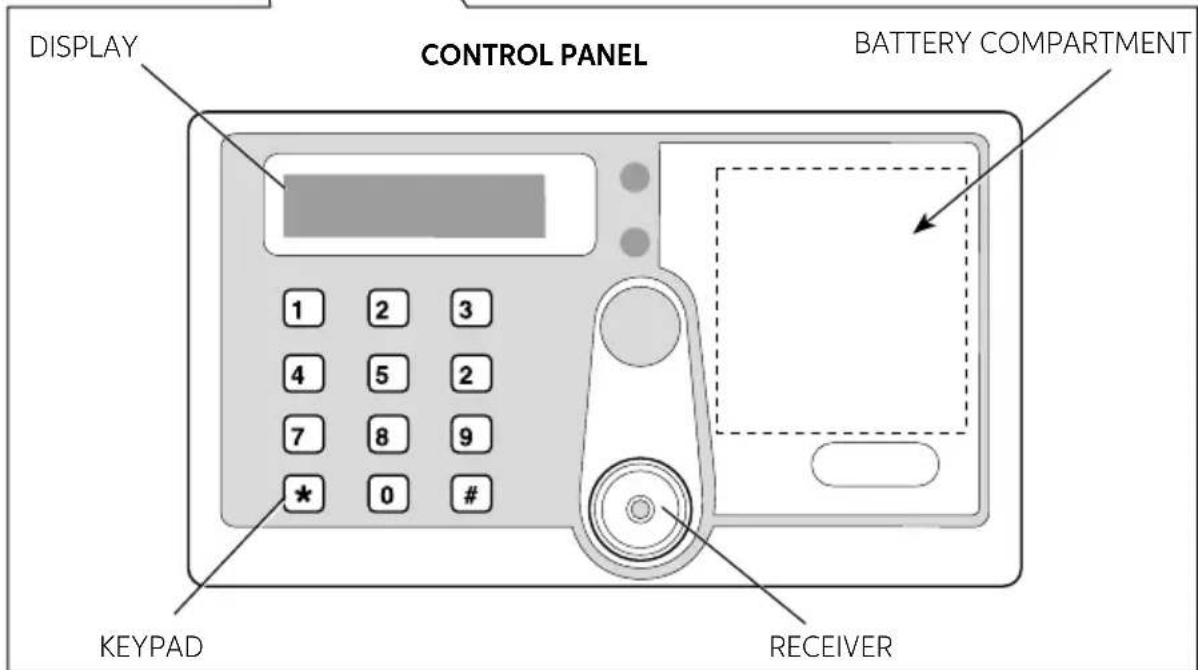
text_image
DISPLAY CONTROL PANEL BATTERY COMPARTMENT 1 2 3 4 5 2 7 8 9 * 0 # KEYPAD RECEIVERSAFE 10/30 PLUS
INSTALLATION
On receipt of the Safe it is necessary to install it, with some simple operations, to make its use possible.
BATTERY INSERTION
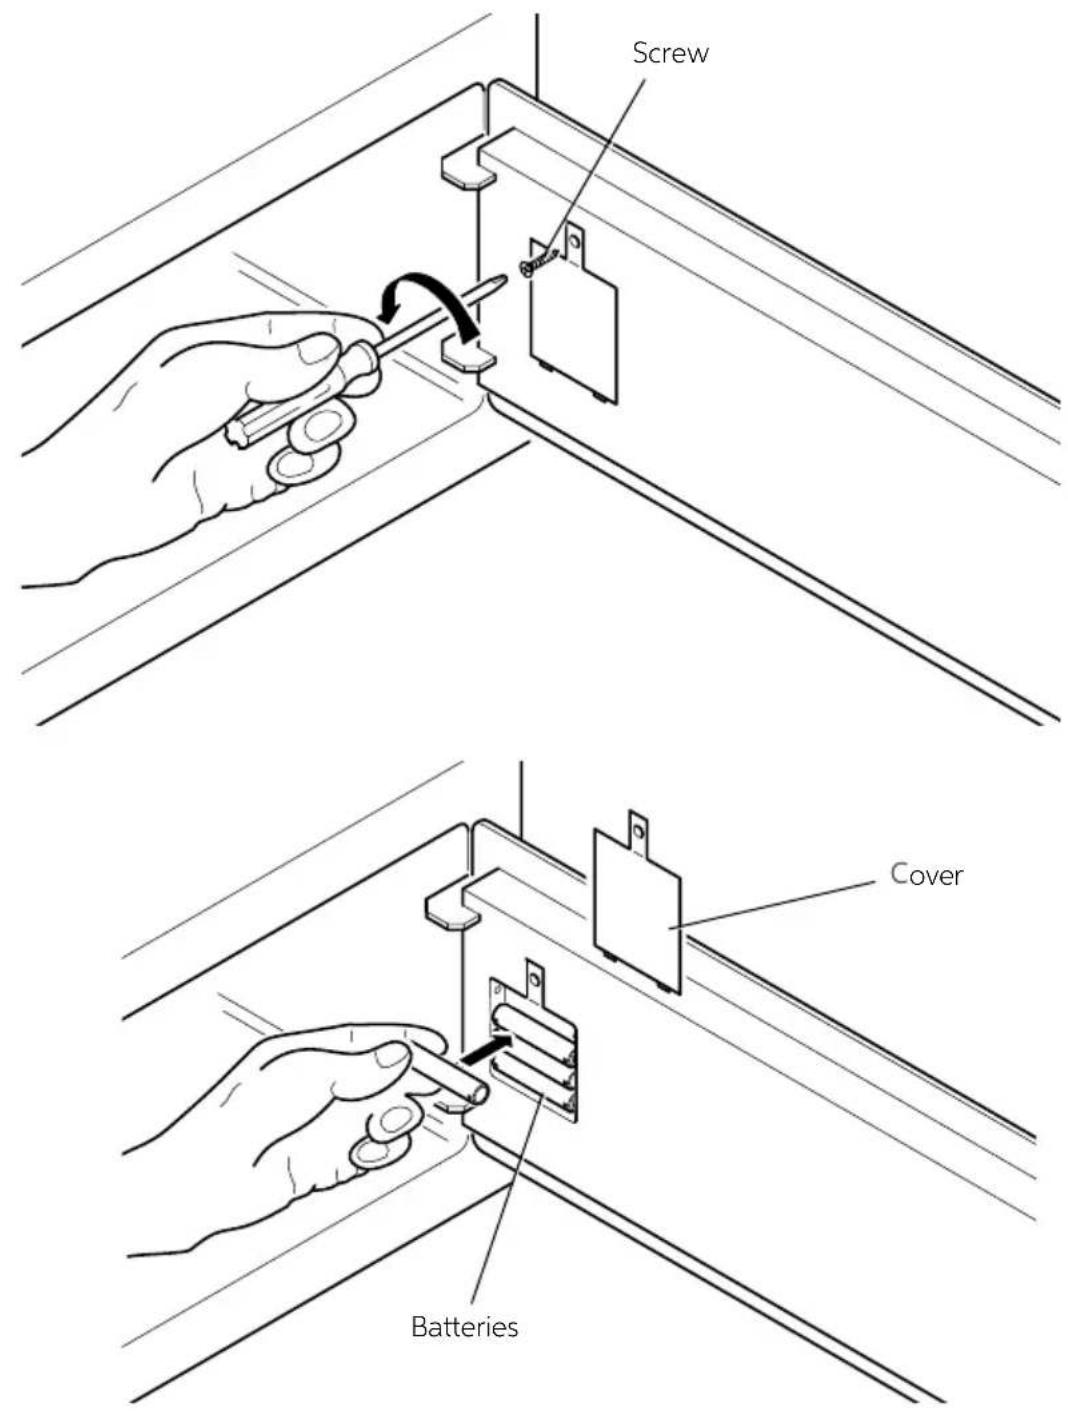
Remove the protection cover unscrewing the screw and insert batteries in their proper locations.
text_image
Screw Cover BatteriesSAFE_10_30_PLUS_IM_20190506
PLACEMENT
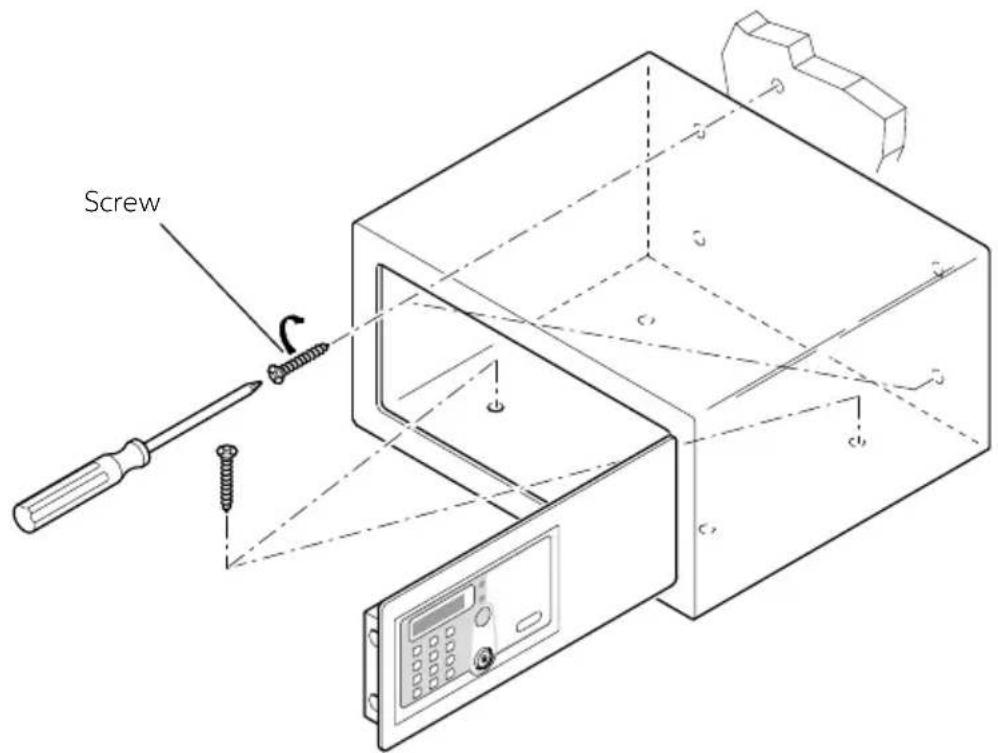
Now it is possible to place the Safe over a piece of furniture or inside a wardrobe, locking it with 2 fixing screws supplied in packing.
The Safe has 8 through holes for fixing, 4 on the rear wall and 4 on the horizontal face, to be used at the installer's discretion, according to the place where the Safe will be placed.
Note: Lock the Safe in 2 corresponding holes on the diagonal in the same flat.
text_image
ScrewSAFE 10/30 PLUS
DRILLING DIAGRAMS
SAFE 10 PLUS
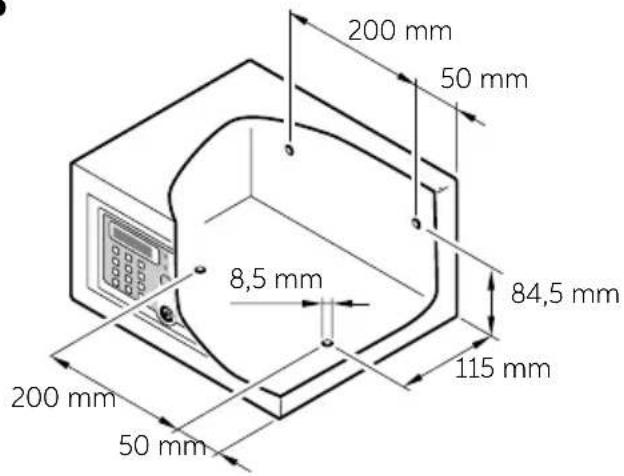
text_image
200 mm 50 mm 8,5 mm 84,5 mm 115 mm 200 mm 50 mmSAFE 30 PLUS
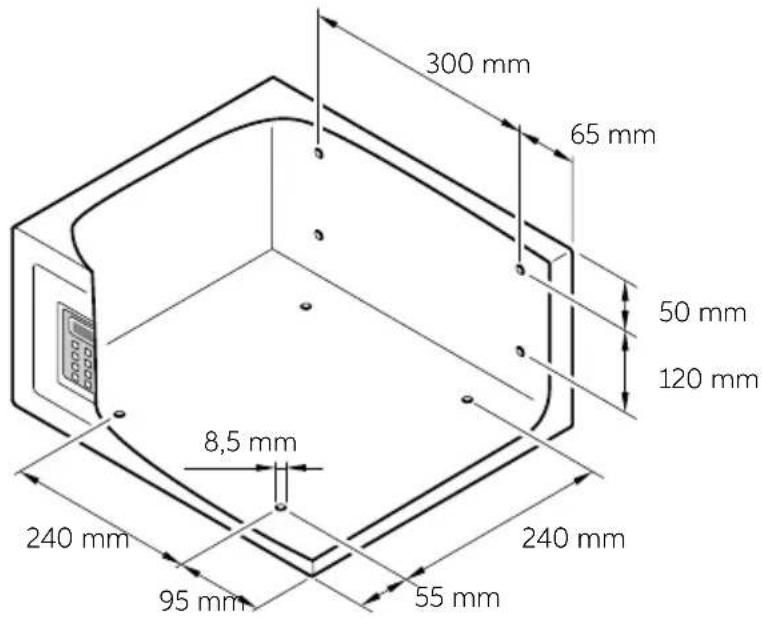
text_image
300 mm 65 mm 50 mm 120 mm 8,5 mm 240 mm 240 mm 95 mm 55 mmSAFE_10_30_PLUS_IM_20190506
PRELIMINARY SETTINGS
This operation is required only for Safe already used and initialized. It is not necessary with new Safe, just purchased and installed.
To reset memory, press the RESET button (see Instructions for Use chapter); after three acoustic signals ("beep") the Safe initialization has been completed and the keys and codes memorised have been cancelled.
OWNER KEY
The Owner Key is the "mother" key necessary for the configuration of the Safe and its opening in case of emergency.
OWNER KEY (RED OR BLUE) ACTIVATION
Once the initialization has been done, put the first IB key (red or blue) on the receiver. After three acoustic signals ("beeps") the Safe opens and the IB key becomes the Owner Key. The first electronic key resting on the safe becomes the Owner Key (red or blue). For each Safe only one Owner Key will be set.
SAFE OPENING WITH THE OWNER KEY
Place the Owner Key on the receiver, after one acoustic signal ("beep") the Safe will open.
OWNER KEY ERASURE
Press the RESET button (see Instruction for Use chapter), after three beeps the Owner Key will be erased.
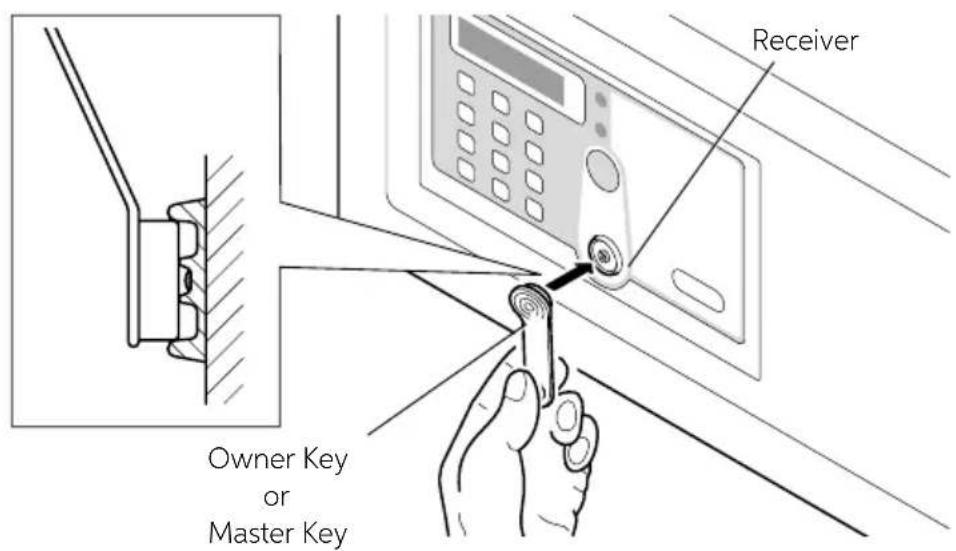
text_image
Owner Key or Master Key ReceiverSAFE 10/30 PLUS
MASTER KEY
The Master Keys are the "secondary" keys; they are necessary for Safe opening in case of emergency.
MASTER KEY (RED OR BLUE) ACTIVATION
Place the Owner Key on the receiver, after one beep place it again, after another beep place an IB Key on the receiver, after one beep the IB Key becomes the Master Key. It is possible to activate up to a maximum of five Master Keys for each Safe.

flowchart
graph LR
    A["Place the Owner Key\n1 Beep"] --> B["Place the Owner Key\n1 Beep"]
    B --> C["Place the IB Key\n1 Beep"]
    C --> D["Master Key"]
To set an IB Key as Master Key, place it on the receiver within 4 seconds after the last typing. The Safe will emit four beeps to show that the Master Key has been activated.
OPENING THE Safe WITH THE MASTER KEY
Place the Master Key on the receiver, after one beep the Safe opens.
ERASURE OF A MASTER KEY
Place the Owner Key on the receiver, after one beep place it again, after another beep place the Master Key on the receiver, after 2 beeps the Master Key will be erased.

flowchart
graph LR
    A["Place the Owner Key\n1 Beep"] --> B["Place the Owner Key\n1 Beep"]
    B --> C["Place the Master Key\n2 Beep"]
    C --> D["Master Key Erased"]
You can keep erasing the Master Keys within 4 seconds after the last typing.
ERASURE OF ALL THE MASTER KEY
Place the Owner Key on the receiver, after one beep, place it again, after another beep place it again, after three beeps all the Master Keys will be erased.

flowchart
graph LR
    A["Place the Owner Key\n1 Beep"] --> B["Place the Owner Key\n1 Beep"]
    B --> C["Place the Owner Key\n3 Beep"]
    C --> D["Master Keys Erased"]

WARNING
At this point the Master Key cannot open the Safe anymore; to reactivate it follow again the above-described procedures.
SAFE_10_30_PLUS_IM_20190506
TEMPORARY CODE
TEMPORARY CODE SETTING
While the Safe is open, insert a code with 4 to 9 digits, followed by #. After two beeps the Safe closes and the inserted code will become the Temporary Code. It is possible to set a temporary code for each Safe until it will be substituted by the new permanent code.

flowchart
graph LR
    A["Opened Safe"] --> B["Code + # 2 Beep"]
    B --> C["Temporary code"]
SAFE CLOSURE
Insert the Temporary Code with 4 to 9 digits followed by #, the Safe emits a beep and closes.
SAFE OPENING
Insert the Temporary Code, the Safe opens.
In case you forget the Temporary Code, rest the Owner Key or the Master Key: the Safe opens.
SAFE 10/30 PLUS
INSTRUCTIONS FOR USE
The Safe appears to the user with its door open and ready for use.
SAFE OPENING AND CLOSURE
To close the Safe the user must keep the door pressed and type on the keypad the code followed by the # key. This code can be composed by four to nine digits, at user's discretion.
To open the Safe you just need to type the same code, again followed by the # key. While the code is set, if a wrong digit is typed, press the * key to cancel it and insert the right digit.
It is possible to change the secret code every time the Safe is opened and closed.

WARNING
If the user forgets the code and the Safe is closed, or if the user leaves the room and the Safe is closed, it is possible to open the Safe using the Owner Key, the Master Key or the mechanical key.
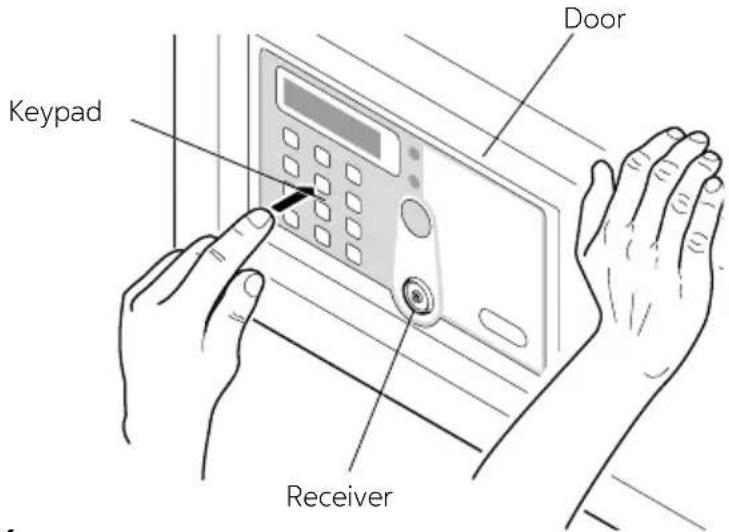
text_image
Keypad Door ReceiverOWNER KEY - MASTER KEY
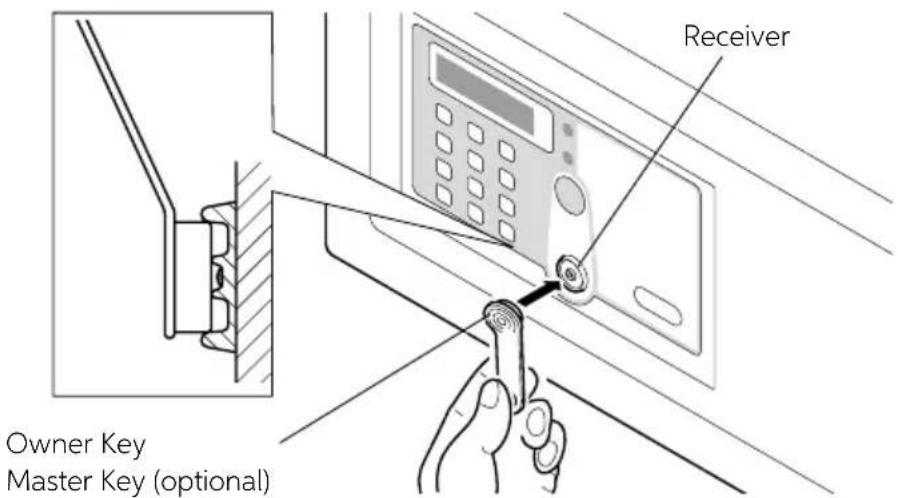
In case the user forgets the code typed and the Safe is closed, it is possible to open it using the Owner Key or the Master Key, by proceeding as follows.
Place on the receiver the Owner Key or the Master Key; an acoustic signal ("beep") confirms the Safe opening.
text_image
Owner Key Master Key (optional) ReceiverSAFE_10_30_PLUS_IM_20190506
MECHANICAL KEY USE
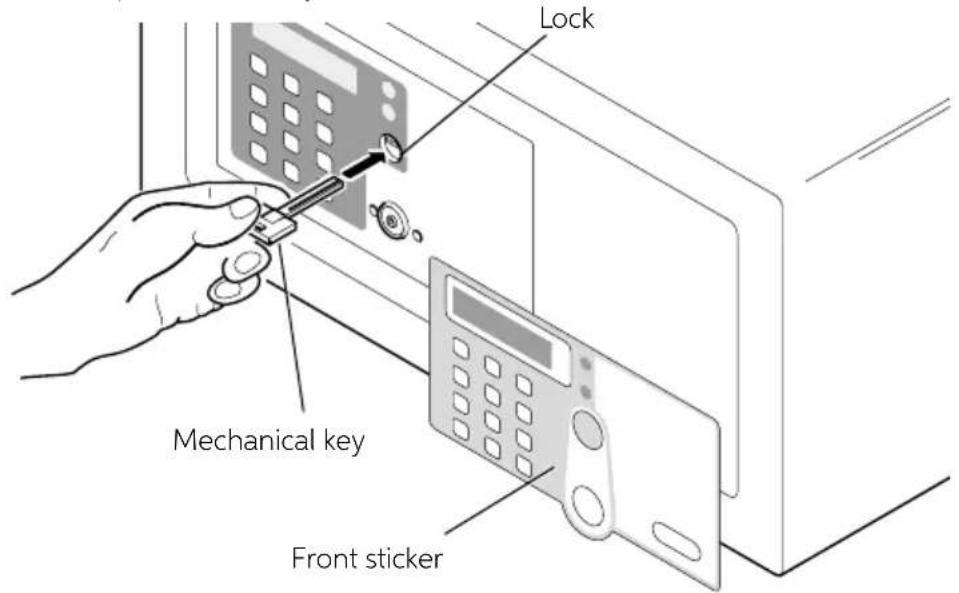
In case you lose accidentally the Owner Key, the Master Key, or malfunction of the electronic card, it is possible to open the Safe with the mechanical key, proceeding as follows. Remove the front sticker from the door and insert the mechanical key, supplied with the device, in the apposite lock. Now the door can be opened manually.
text_image
Lock Mechanical key Front sticker
WARNING
Never leave the mechanical key and the Owner and Master Keys inside the Safe.
ALARM FUNCTION
When you try to type a wrong code, after the third time, the Safe emits an acoustic signal for sixty seconds and it gets blocked.
After these sixty seconds the Safe can be used once again.
RESET BUTTON
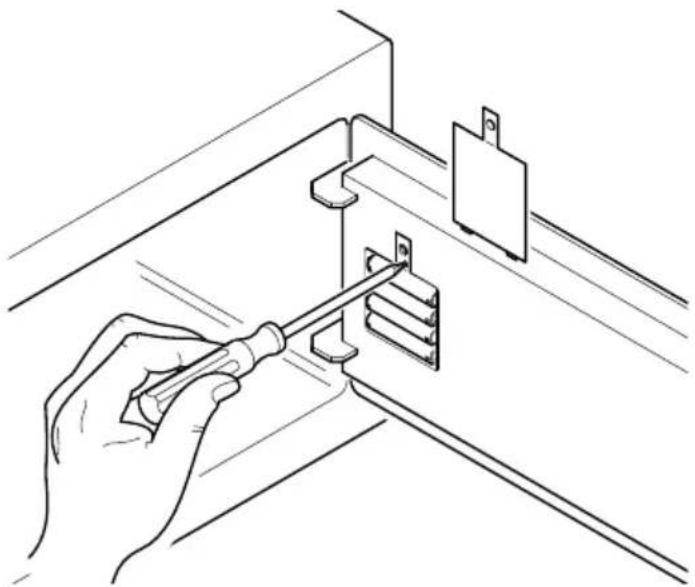
The RESET button, placed on top of the batteries location, deletes all the stored data concerning the related Keys.
Pressing the RESET key with the tip of a small screwdriver, as shown in the picture, all the Keys are not associated to the Safe anymore, and therefore it is possible to set new ones. For example it is advisable to use the RESET function, pressing the related button, in case at least one of the Keys gets lost.
natural_image
Line drawing of a hand using a screwdriver to install a wall-mounted component (no text or symbols present)SAFE 10/30 PLUS
BATTERY REPLACEMENT
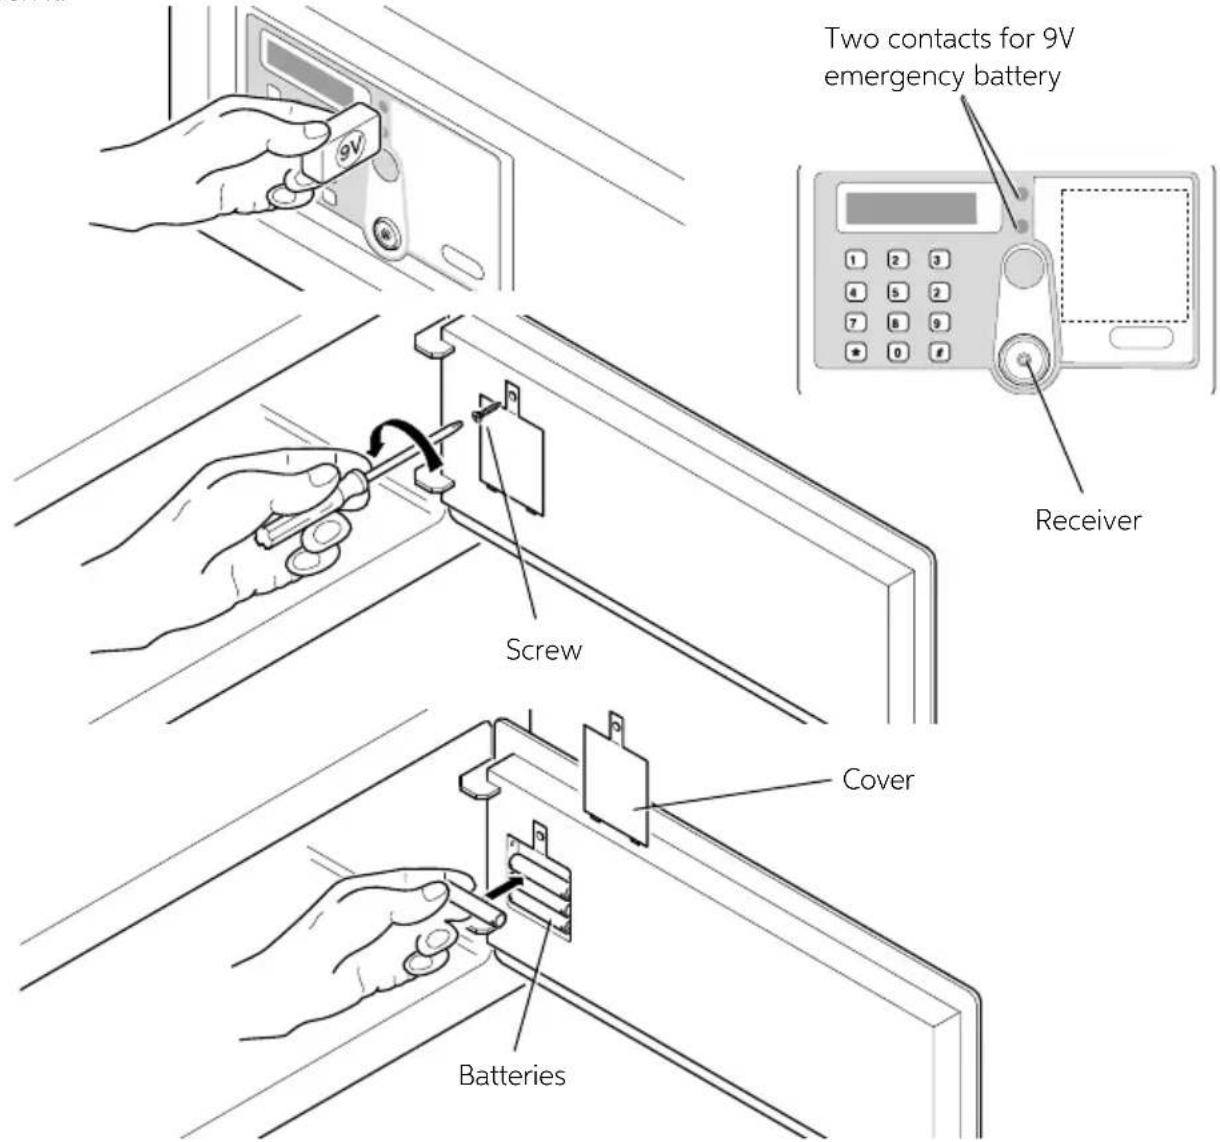
If a warning tone (beep) is sent from the safe after each opening and closing, the batteries need to be replaced.
To do this remove the protection cover by unscrewing the screw and replace the exhausted batteries with new ones.

WARNING
Make sure that the batteries in question are alkaline 1.5 Volt. Risk of explosion if battery is replaced by an incorrect type. Dispose of used batteries according to the instructions.

WARNING
Batteries are delivered free of charge for the operating test and must be replaced in a short time.
EMERGENCY POWER SUPPLY
If batteries are not replaced before they are completely exhausted, it is possible to place a 9V battery in the two contacts on the right of the display, to supply temporarily the Safe with power and therefore be able to open it.
text_image
Two contacts for 9V emergency battery Receiver Screw Cover BatteriesSAFE_10_30_PLUS_IM_20190506

AVERTISSEMENT
OUVERTURE DU COFFRE-FORT AVEC LA CLE MAITRESSE
EFFACEMENT D'UNE CLE MAITRESSE
natural_image
Line drawing of a hand using a screwdriver to install a wall-mounted bracket (no text or symbols present)SAFE_10_30_PLUS_IM_20190506
REEMPLACEMENT DE LA PILE
flowchart
graph LR
    A["Inhaberschlüssel ansetzen\n1 Signalton"] --> B["Inhaberschlüssel ansetzen\n1 Signalton"]
    B --> C["IB-Schlüssel ansetzen\n1 Signalton"]
    C --> D["Masterschlüssel"]
natural_image
Line drawing of a hand using a screwdriver to adjust or install a metal bracket component (no text or symbols present)SAFE 10/30 PLUS
BATTERIEN AUSTAUSCHEN
natural_image
Line drawing of a hand using a screwdriver to adjust or install a wall-mounted component (no text or symbols present)SAFE_10_30_PLUS_IM_20190506