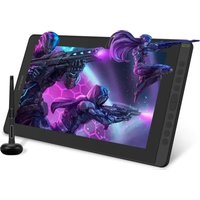
Kamvas 16 - Graphic tablet Huion - Free user manual and instructions
Find the device manual for free Kamvas 16 Huion in PDF.


User questions about Kamvas 16 Huion
0 question about this device. Answer the ones you know or ask your own.
Ask a new question about this device
Download the instructions for your Graphic tablet in PDF format for free! Find your manual Kamvas 16 - Huion and take your electronic device back in hand. On this page are published all the documents necessary for the use of your device. Kamvas 16 by Huion.
USER MANUAL Kamvas 16 Huion
natural_image
Blank digital tablet device with no visible text, numbers, or symbols on the screen or frameContents
1 / Precautions....3
2 / Product Overview......4
2.1 Display Introduction....4
2.2 Product and Accessories....4
2.3 Setting Up Display 8
2.4 Install Driver 8
3 / Pen Basic Operation 9
3.1 Hold the Pen....9
3.2 Position the Cursor....9
3.3 Click.... 10
3.4 Move....10
3.5 Use the Side Buttons.... 10
3.6 Pen Nib Replacement.... 11
4 / OSD Buttons....11
5 / Function Setting 12
5.1 Working Area Setting 12
5.2 Display Setting.... 14
5.3 Pen Buttons Function Setting.... 16
5.4 Enable the Windows Ink Feature.... 16
5.5 Pressure Sensitivity Setting.... 17
5.6 Pen Pressure Testing.... 18
5.7 Pen Nib Activity Setting.... 18
5.8 Data Export and Import 19
6 / Specifications....20
7 / Trouble Shooting....21
8 / After-service Contact 24
1 / Precautions

【Please read this manual carefully before using, and keep it well for future reference.】
--Before cleaning the display, please unplug the USB cable and wipe with a soft damp cloth, do not use any kind of detergents.
--Please don't place the display near water sources such as bathtub, washbasin, sinks, washing machine, damp basement, swimming pool, etc.
--Do not place the display on where is unstable or a height for children reaching easily in order to avoid danger.
--Do not place the display and digital pen close to the magnetic field.
--The grooves and holes on the back case is designed for ventilation to prevent the monitor from overheating. Please don't place the display on beds, sofas, carpets or in embedded device.
--Only power supplies shown on the nameplate can be used for the display. If you have questions about the power supply which you are using, please consult the distributor of your display.
--To protect your display, please switch off the power when it is not in use. During blackouts or not using for long time, please unplug the display from the socket.
--Make sure no foreign bodies get inside the monitor through grooves and prevent liquid from splashing on the display as to prevent short-circuit or fire.
--If the display has a breakdown, do not open the main case and try to repair it by yourself. Please ask for a service for proper repair and maintenance.
--When the following situations occur, please unplug the power adapter and you may need a service for full repair and maintenance:
A. The power wire or plug is damaged or worn out;
B. There is liquid splashed inside of the display;
C. The display has fallen or the LCD is broken;
D. When obvious abnormalities occur to the display.
--While getting the components replaced, you are supposed to guarantee that the repairman is using the substitute components specified by the manufacturer. Unauthorized component replacement might cause fire, electric shocks or other dangers.
2 / Product Overview
2.1 Display Introduction
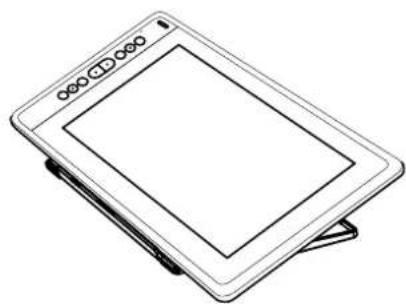
Thanks for choosing HUION® KAMVAS® 16 (2021) creative display. This is a new generation professional drawing display, which can greatly improve your work efficiency of painting and creation, and full of fun. You can freely paint and write, depicting different lines and colors, just as the pen writes on the paper, which brings you a real shock experience.
To give you a better understanding and using of your display, please read this user manual carefully. The user manual only shows the information under Windows, unless otherwise specified, this information applies to both Windows and Mac systems.
2.2 Product and Accessories
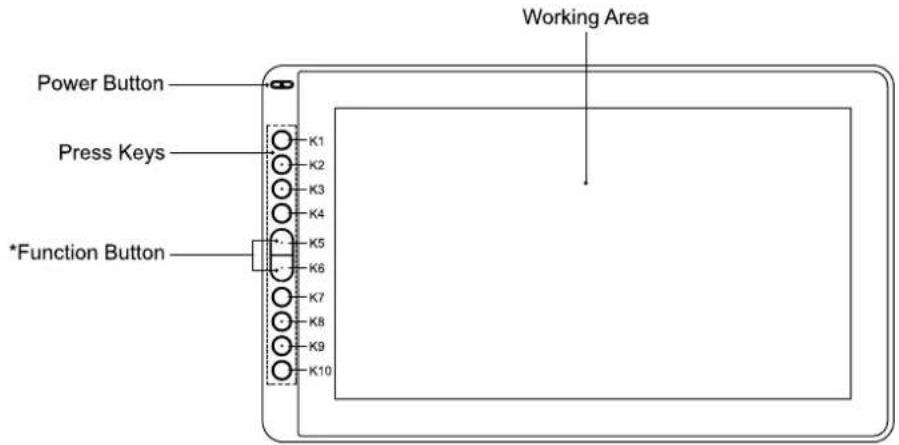
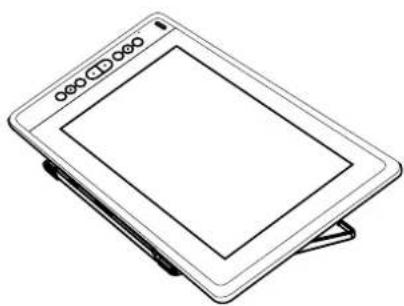
2.2.1 Tablet Overview
text_image
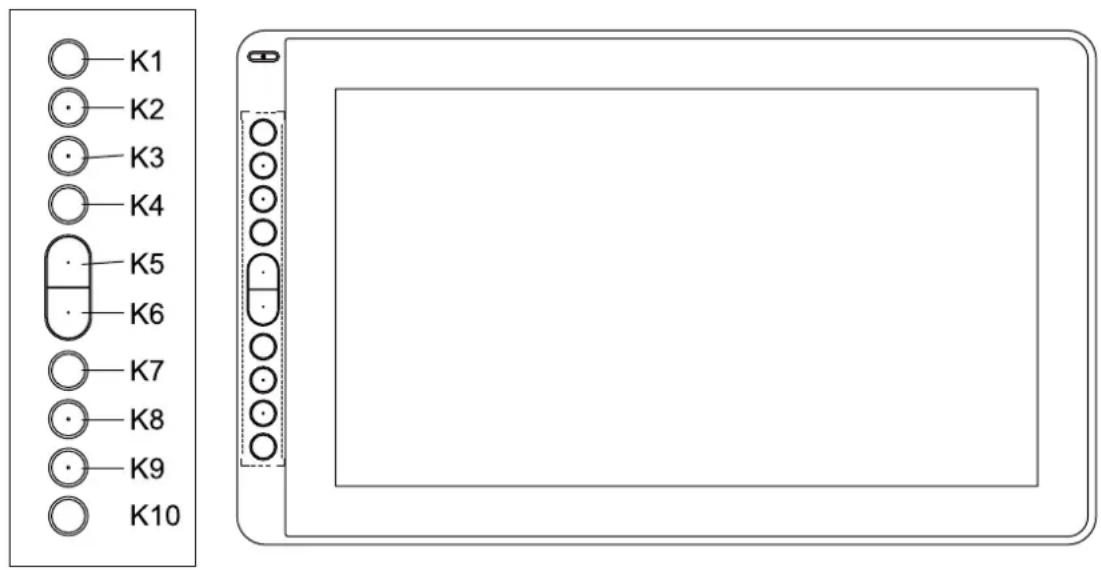
Power Button Press Keys *Function Button K1 K2 K3 K4 K5 K6 K7 K8 K9 K10 Working Area*Function Button: Press K5 & K6 around three seconds to open the OSD menu.
text_image
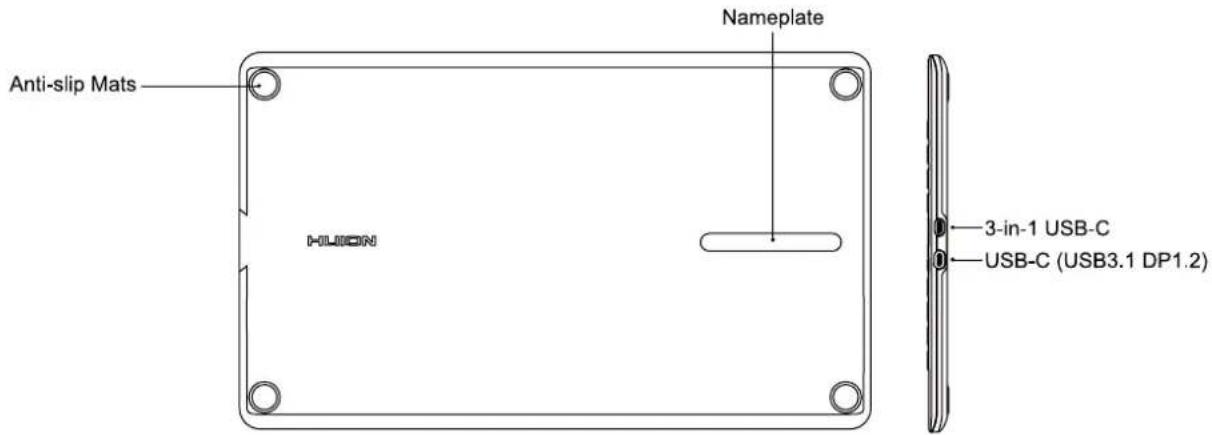
Anti-slip Mats HILION Nameplate 3-in-1 USB-C USB-C (USB3.1 DP1.2)2.2.1 Accessories
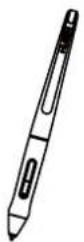
Battery-free pen
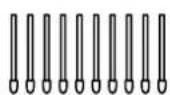
Replacement Nibs (inside the pen holder)
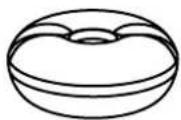
Pen Holder
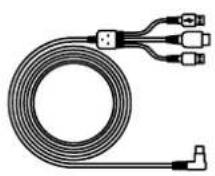
3-in-1 Cable
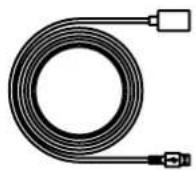
USB Extension Cable
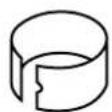
Pen Nib Clip (inside the pen holder)
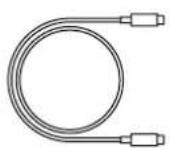
USB-C Cable
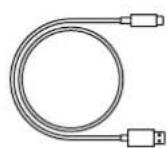
Power Cable
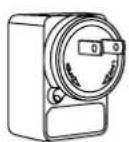
Power Adapter
Warranty Card
Quick Start Guide
Cleaning Cloth
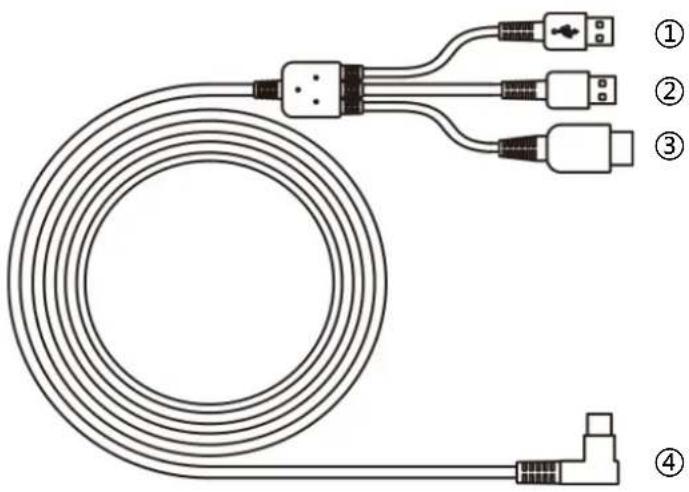
2.2.2 3-in-1 Cable
natural_image
Diagram of a coiled electrical cable with four labeled connectors (no text or symbols on the cable itself)① USB (Data)
② USB (Power)
③ HDMI
④ Type-C
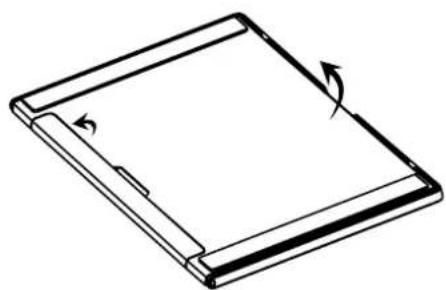
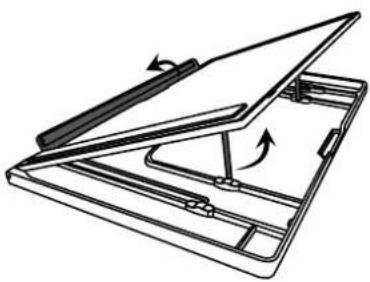
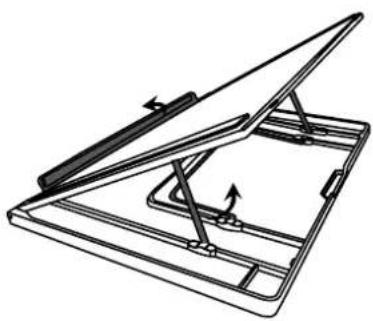
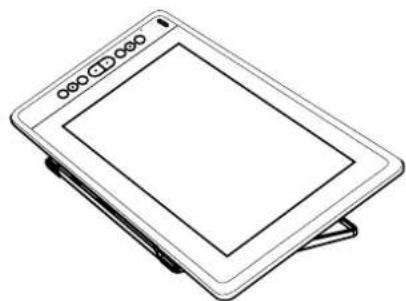
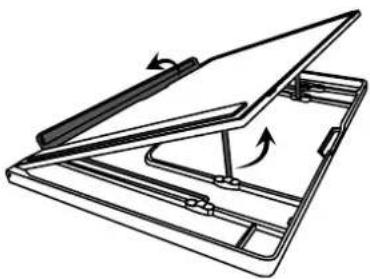
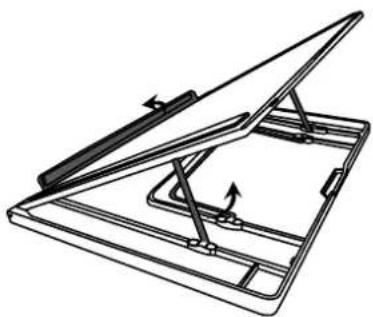
2.2.3 Adjustable Stand (Optional)
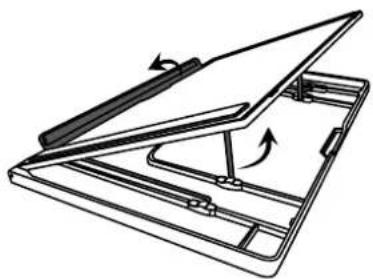
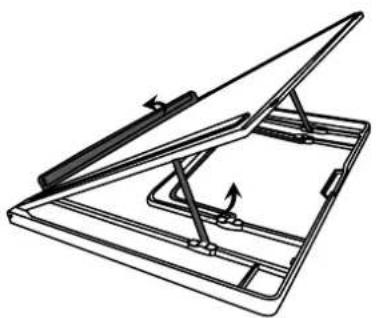
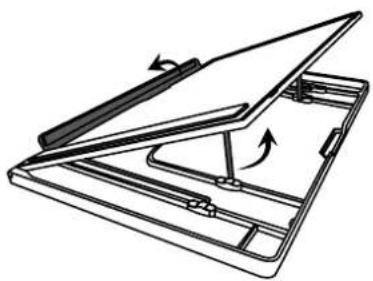
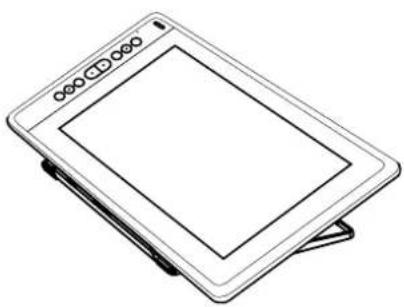
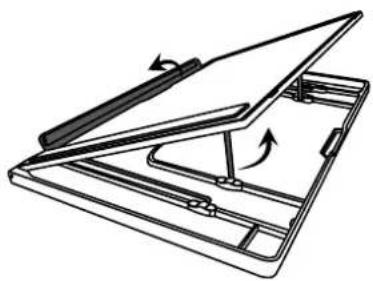
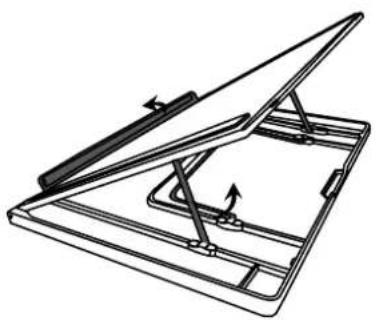
We designed this ergonomic adjustable stand specially for your KAMVAS display, you can adjust the angle of the display according to your usage habit, and make you feel more comfortable when painting and creating.
①
natural_image
Simple line drawing of a rectangular object with a curved arrow indicating rotation (no text or symbols)②
natural_image
Diagram of a folding or folding paper holder with a flat cover and directional arrows indicating rotation (no text or symbols)③
natural_image
Technical line drawing of a folding stand with an arrow indicating rotation (no text or symbols)④
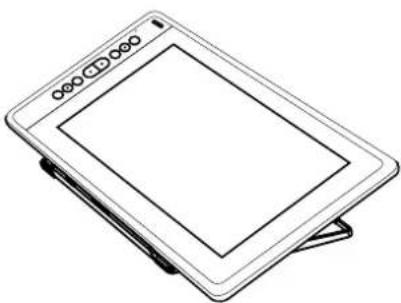
natural_image
Line drawing of a generic electronic device with a screen and antenna (no text or symbols)2.3 Display Connection
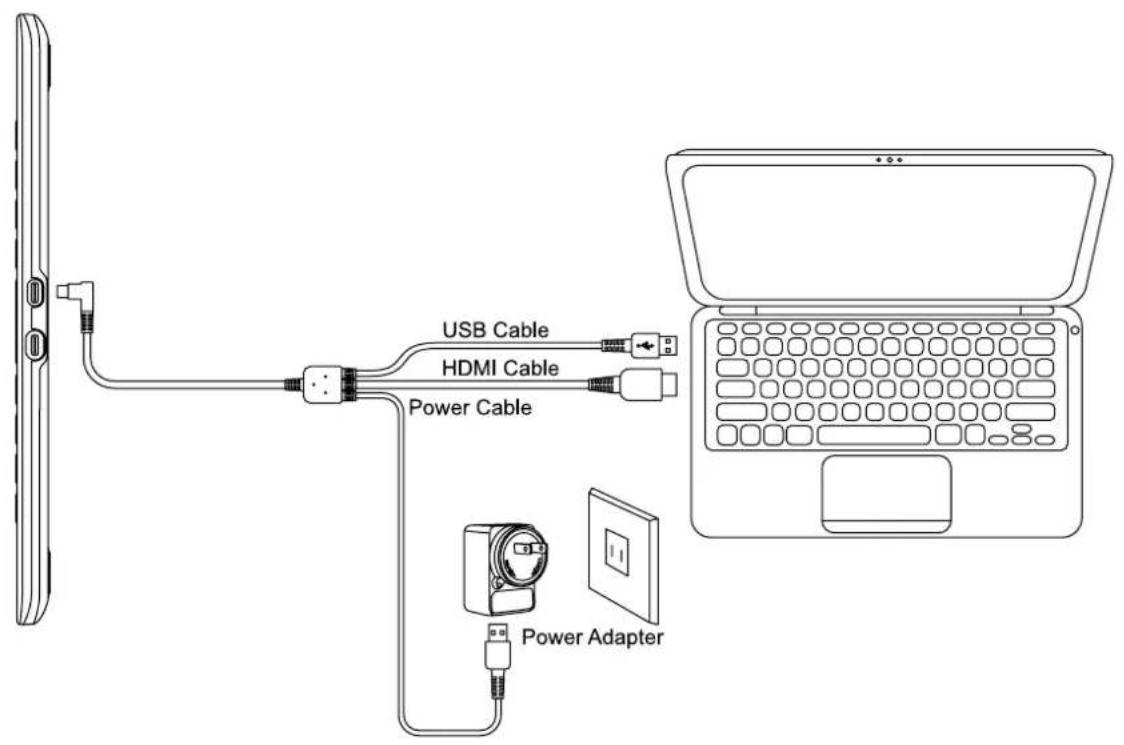
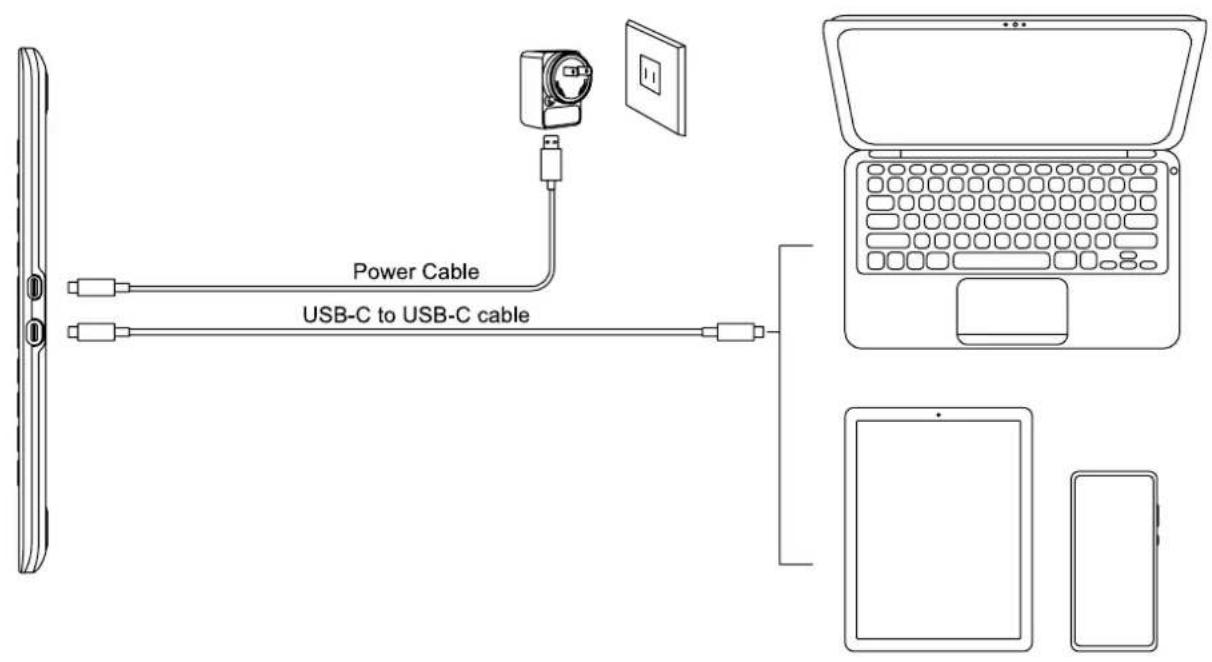
Connect the pen display to your computer with 3-in-1 Cable or USB-C to USB-C Cable.
[1] Connect the pen display to your computer with 3-in-1 Cable.
text_image
USB Cable HDMI Cable Power Cable Power Adapter[2] Connect the display to your computer with USB-C to USB-C cable.
text_image
Power Cable USB-C to USB-C cable2.4 Install Driver
2.4.1 OS Support
Windows 7 or later, macOS 10.12 or later.
2.4.2 Install Driver
Please download the driver from our website: www.huion.com/download
After finishing installation, you can find the driver icon "⚡" in the system tray area, which means the driver was installed successfully; when you connect the display to computer, the icon will change to color "⚡", which means the driver has already recognized the display and you can start using it now.

Notes:
[1] Before installing, you need to uninstall other driver of similar products, including the old driver of this product.
[2] Before installing, please close all graphics software and anti-virus software to avoid unnecessary mistake.
2.4.3 Driver Page
After the download is successful, double-click to open the driver, connect the display to your computer with attached cables.
When the connection is complete, watch for a prompt at the bottom left of the driver page that display two states "Device disconnected" or "Device connected".
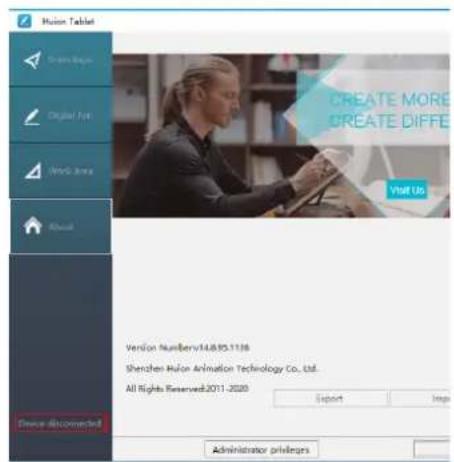
text_image
Mujon Tablet Green Pages Digital Eye Work Area About Device Disconnected Create More Create Diffes Visit Us Version Number:148951136 Sherizen Muon Animation Technology Co., Ltd. All Rights Reserved:2011-2020 Export Import Administrator privileges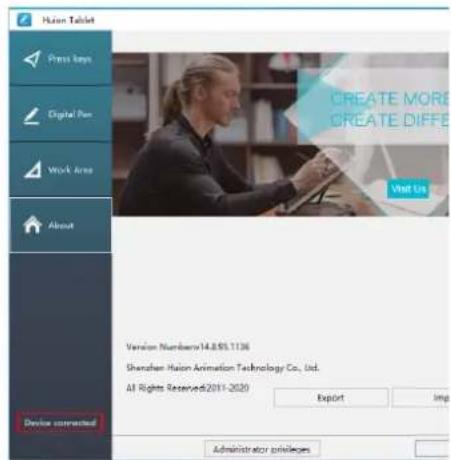
text_image
Husion Tablet Press Maps Digital Pos Work Area About Device connected CREATE MORE CREATE DIFFE Visit Us Version Numbers:14.8.95.7136 Shenzhen Husion Animation Technology Co., Ltd. All Rights Reserved:2011-2020 Export Img Administrator privileges3 / Pen Basic Operation
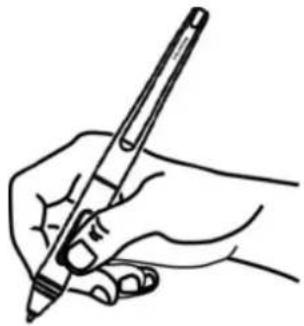
3.1 Hold the pen
Hold the pen as you hold a normal pen or pencil. Adjust your grip so that you can toggle the side switch easily with your thumb or forefinger. Be careful not to accidentally press the switch while drawing or positioning with the pen.
Notice:
When not in use, place the pen in the pen case or on the desk. Do not place the pen on the surface of screen, which may interfere with the use of other screen cursor positioning equipment, may also cause your computer can not enter the sleep mode.
natural_image
Line drawing of a hand holding a pen, no text or symbols present3.2 Position the cursor
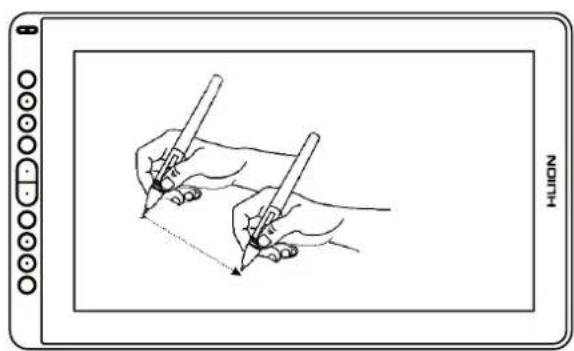
Move the pen slightly above the active area without touching the screen surface, the cursor will move to the new position accordingly.
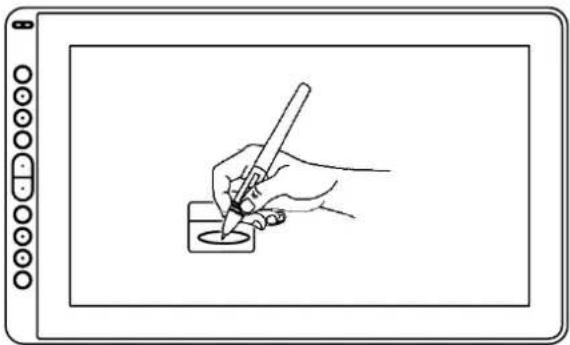
Press the pen tip on the screen to make a selection. Tap the screen once with the pen tip, or touch it to the screen with enough pressure to register a click.
natural_image
Illustration of two hands holding pens and a pencil, writing on a line (no text or symbols present)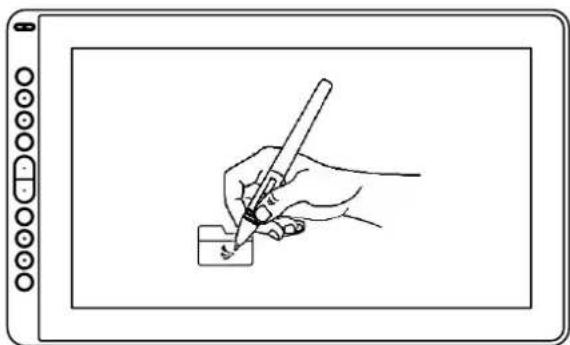
natural_image
Line drawing of a hand holding a pen writing on a small object, enclosed in a tablet device (no text or symbols present)3.3 Click
Use the pen tip to tap once on the screen to register a click. Tap to highlight or select an item on the screen and double-click to open it.
natural_image
Line drawing of a hand holding a pen writing on a digital inkwell (no text or symbols present)3.4 Move
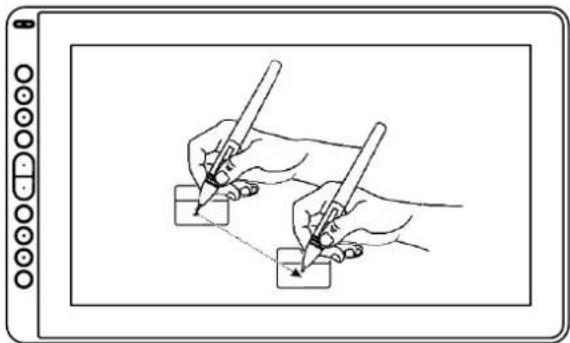
Select the object, then slide the pen tip across the screen to move it.
natural_image
Illustration of two hands drawing a square with a pencil, no text or symbols present3.5 Use the side buttons
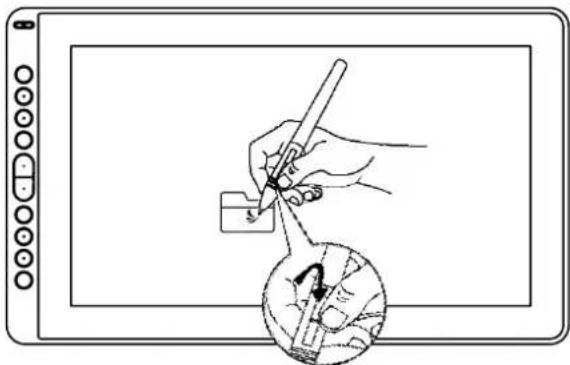
The buttons on the pen can be set to two different customizable functions.
You can use the buttons whenever the pen tip is within 10mm of the display active area.
You do not have to touch the pen tip to the display in order to use the switch.
natural_image
Illustration of a hand using a pen to write on a digital screen, with an inset showing a close-up of the pen tip (no text or symbols present)3.6 Pen Nib Replacement
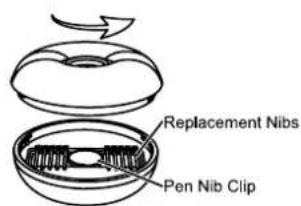
The nib will be worn off after using for a long time, then you need to replace a new nib.
[1] Anticlockwise rotate the pen holder to open the cover, take a new nib out.
[2] Insert the pen nib into the pen nib clip and tilt the pen to pull out the old nib.
[3] Insert the new nib straight into the pen and push the nib slowly and firmly until it stops.
text_image
Replacement Nibs Pen Nib Clip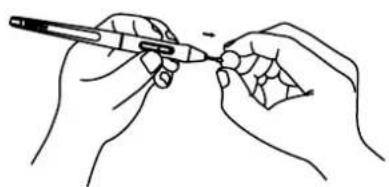
natural_image
Line drawing of two hands holding a pen, no text or symbols present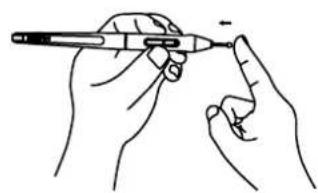
natural_image
Line drawing of two hands holding a pen, with no visible text or symbols4 / Display features overview
4.1 Power Button
The power button was placed on the left side of the digital screen, you need to turn on the power switch before using.
4.2 Press Keys
There are 8 press keys on the top left side of the display, which you can modify the functions according to your own habits, thus will help to improve your work efficiency.
4.3 OSD Function
Enter OSD Menu:
[1] Press K5 & K6 for around three seconds until the OSD menu appears and meanwhile the indicator will flash green. The function of K1 K2 K3 K4 will become OSD function.
[2] In the menu, the function of K1 K2 K3 K4 will become as the following:
K1 AUTO: Before entering menu, its function is "auto adjustment".
After entering menu, its function is "back to previous menu".
K2 MENU: Press to call up the menu, after entering menu, its function is "confirm".
K3 - : After entering menu, its function is "down/left/decrease".
K4 + : After entering menu, its function is "up/right/increase".
Exit OSD Menu:
[3] Press K5 & K6 again for around three seconds until the OSD menu disappears, the function of K1 K2 K3 K4 will become shortcuts function again.
text_image
K1 K2 K3 K4 K5 K6 K7 K8 K9 K105 / Function Setting
5.1 Working Area Setting
5.1.1 Using Multiple Monitors
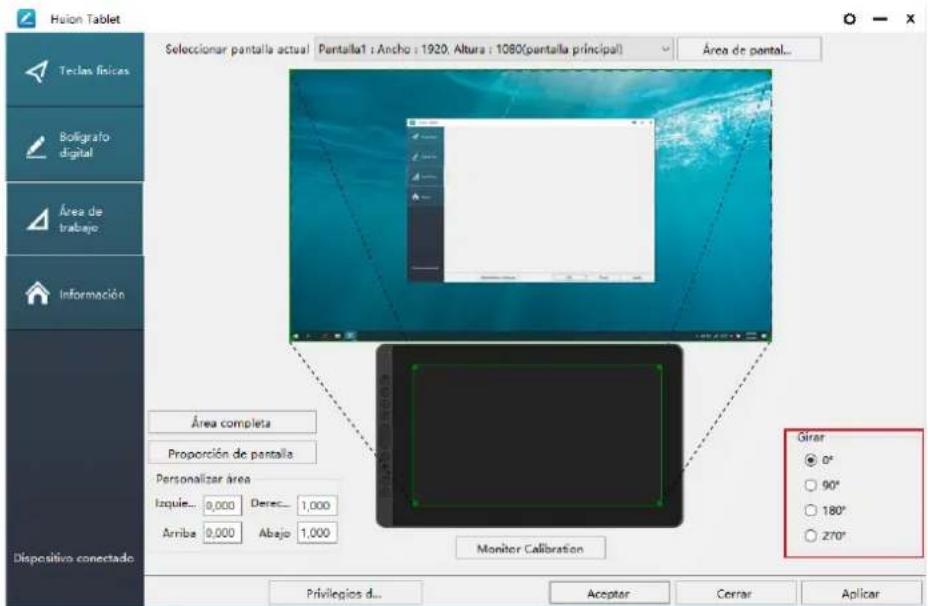
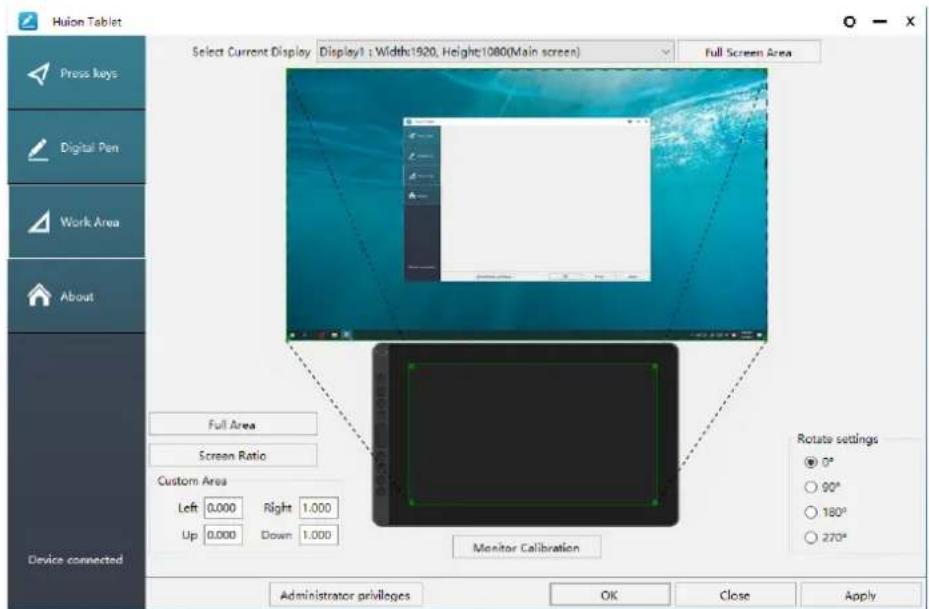
Select the Working Area tab to define the relationship between pen movement on the display and cursor movement on the monitor screen.
By default the entire active area of display maps to the entire monitor. If more than one monitor is in use and you are in extended mode, you need to choose the related monitor on the driver interface which you are going to map to.
If your monitors are in mirror mode (All monitors display the same content), the display maps to the entire space on each monitor and the screen cursor is displayed on each monitor simultaneously.
text_image
Huilon Tablet Select Current Display Display1:Width:1920, Height:1080(Main screen) Full Screen Area Full Area Screen Ratio Custom Area Left 0.000 Right 1.000 Up 0.000 Down 1.000 Monitor Calibration Rotate settings ● 0° ○ 90° ○ 180° ○ 270° Device connected Administrator privileges OK Close Apply5.1.2 Working Area Setting
Define the display area that will be mapped to the screen area.
[1] Full Area: the entire active area of the display. This is the default setting.
[2] Screen Ratio: As a general rule, be 16:9.
[3] Customized Area:
1> Enter coordinate values.
2> Drag the corners of the foreground graphic to select the screen area.

text_image
Huilon Tablet Select Current Display Display1 : Width:1920, Height:1080(Main screen) Full Screen Area Full Area Screen Ratio Custom Area Left 0.000 Right 1.000 Up 0.000 Down 1.000 Monitor Calibration Rotate settings ● 0° ○ 90° ○ 180° ○ 270° Device connected Administrator privileges OK Close Apply5.1.3 Rotate Working Area
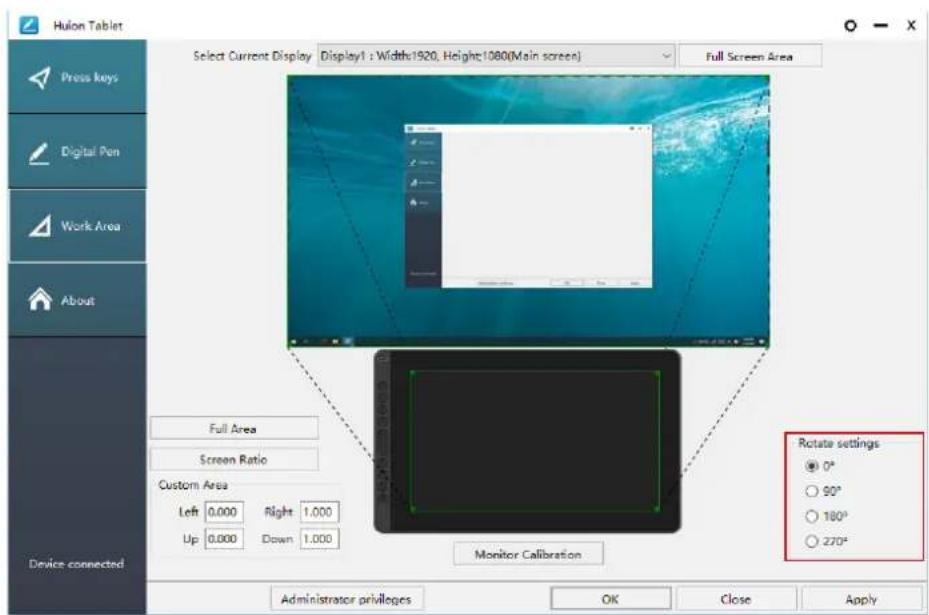
By changing the direction of the display to adapt to the left and right hand operation. You can rotate the display by 0^ , 90^ , 180^ or 270^ .
text_image
Hulon Tablet Select Current Display Display1 : Width:1920, Height:1080(Main screen) Full Screen Area Full Area Screen Ratio Custom Area Left 0.000 Right 1.000 Up 0.000 Down 1.000 Monitor Calibration Rotate settings ● 0° ○ 90° ○ 180° ○ 270° Administrator privileges OK Close Apply5.2 Display Setting
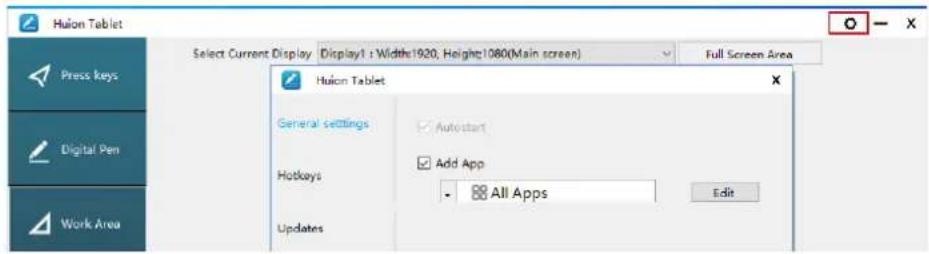
Click the " & in the upper right corner of the driver to set the Display, including General settings, Hotkeys and Updates.
text_image
Huilon Tablet Select Current Display Display1: Width:1920, Height:1080(Main screen) Full Screen Area Press keys Digital Pen Work Area Huilon Tablet General settings Hotkeys Autostart Add App All Apps Edit5.2.1 General settings
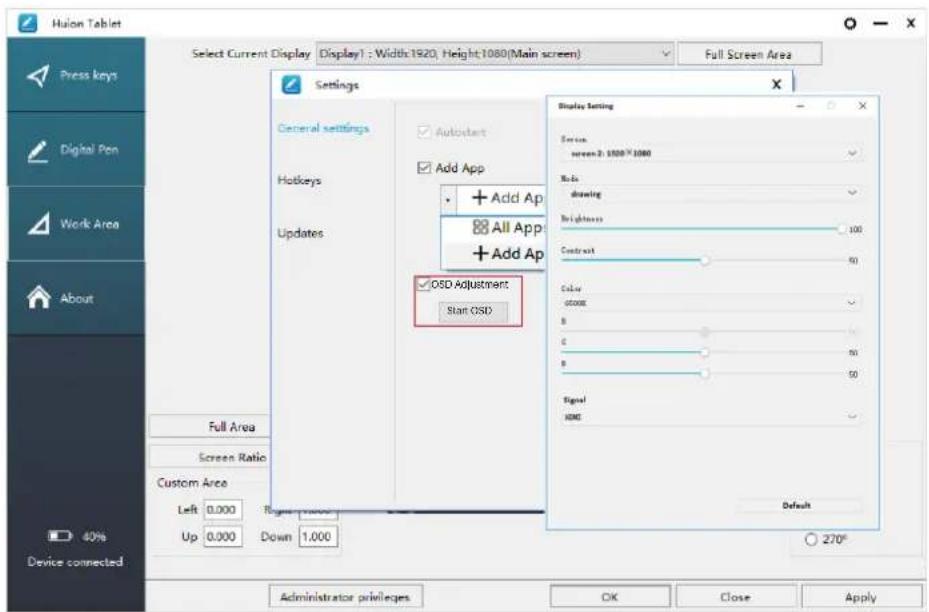
[1] Add App: Shortcut key function can be set by adding different programs.
When opening different programs, the driver will automatically recognize that the shortcut function is the corresponding function set.
text_image
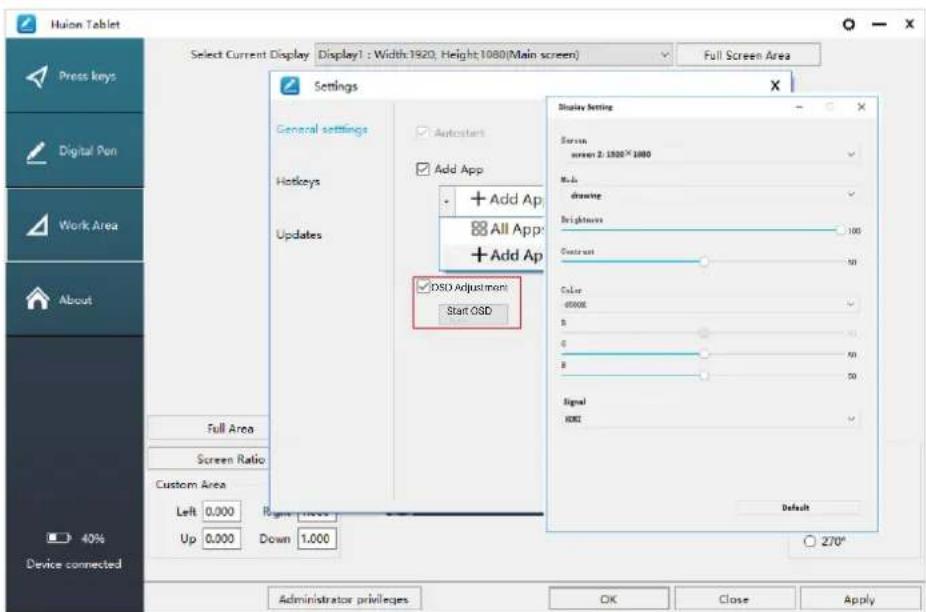
Huilon Tablet Select Current Display Display1 : Width:1920, Height:1080(Main screen) Full Screen Area Press keys Digital Pen Work Area About General settings Hotkeys Updates Autocast Add App + Add Ap All App + Add Ap OSD Adjustment Start OSD Display Setting Screen: screen-2: $500*1080 Auto drawing heightens 100 Contract 50 Color atmos B C B 50 Signal AIDS Default 40% Device connected Full Area Screen Ratio Custom Area Left 0.000 Right 0.000 Up 0.000 Down 1.000 Administrator privileges OK Close Apply[2] OSD Adjustment: Click on the "Activate the OSD" button and then you can adjust the screen, scene mode, brightness, contrast and color.
text_image
Huion Tablet Select Current Display Display1 : Width: 1920, Height: 1080 (Main screen) Full Screen Area Press keys Digital Pen Work Area About General settings Hotkeys Updates Add App + Add App All App + Add App DSO Adjustment Start OSD Display Setting Screen screen 2: 1920×1000 Auto drawing Brightness Contract Color 0000X S S S Signal NONE Default Full Area Screen Ratio Custom Area Left 0.000 Right 1000 Up 0.000 Down 1.000 40% Device connected Administrator privileges OK Close Apply5.2.2 Hotkeys settings
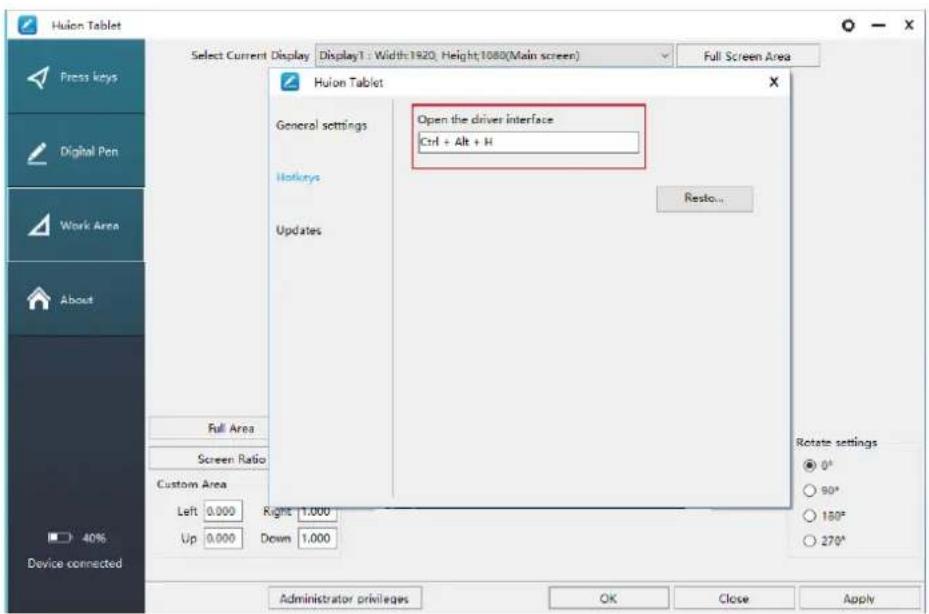
Set the shortcut key to quickly open the driver interface. The default value is Ctrl+Alt+H, which can be set according to usage habits.
text_image
Huion Tablet Select Current Display Display1 : Width:1920, Height:1080(Main screen) Full Screen Area Huaon Tablet General settings Open the driver interface Ctrl + Alt + H Hotkeys Updates Resto... Full Area Screen Ratio Custom Area Left 0.000 Right 1.000 Up 0.000 Down 1.000 Rotate settings ● 0° ○ 90° ○ 180° ○ 270° Device connected 40%5.2.3 Updates
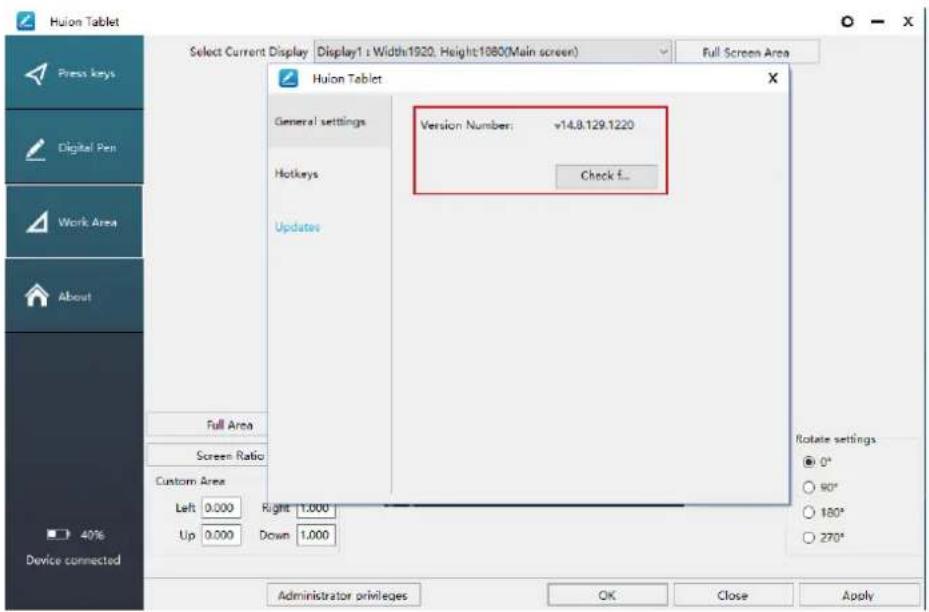
You can view the driver version number, click "Check for Update", view the latest driver version, and update according to the system prompt.
text_image
Hulon Tablet Select Current Display | Display1: Width:1920, Height:1080(Main screen) | Full Screen Area Hulon Tablet General settings Version Number: v14.8.129.1220 Hotkeys Check f... Updates Full Area Screen Ratio Custom Area Left 0.000 Right 1.000 Up 0.000 Down 1.000 Rotate settings ● 0° ○ 90° ○ 180° ○ 270° Device connected 40%5.3 Pen Buttons Function Setting
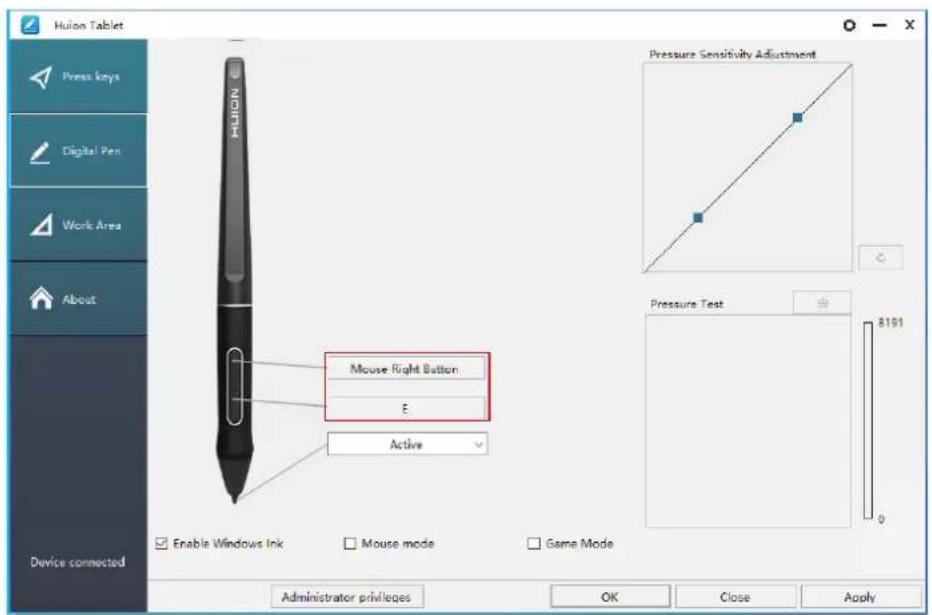
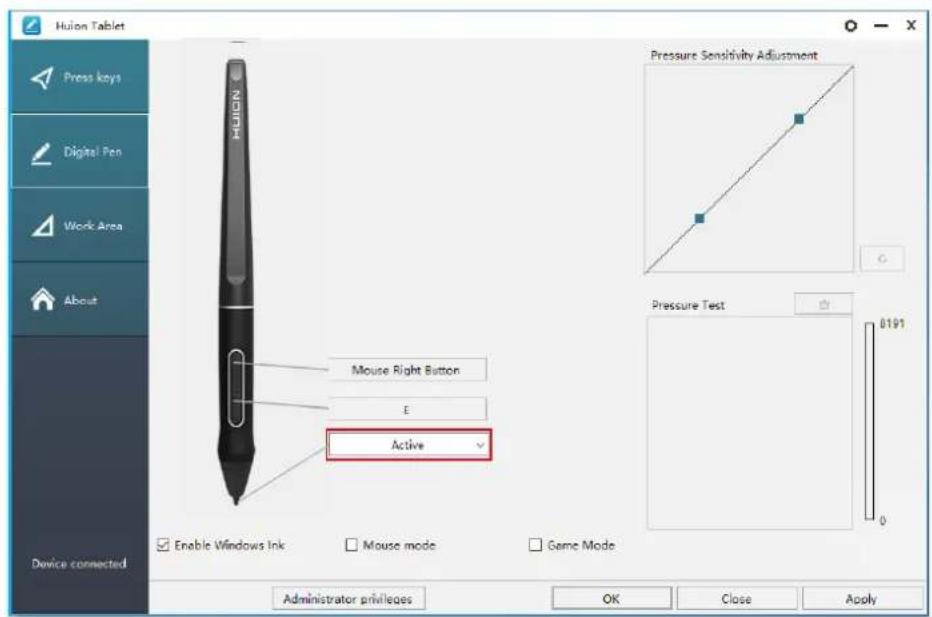
Select the function to be achieved on the pop-up dialog box, then click "Apply" or "OK" to take effect.
text_image
Hulon Tablet Press keys Digital Pen Work Area About Device connected Mouse Right Button E Active Enable Windows Ink Mouse mode Game Mode Pressure Sensitivity Adjustment Pressure Test 8191 0 Administrator privileges OK Close Apply5.4 Enable the Windows Ink Feature
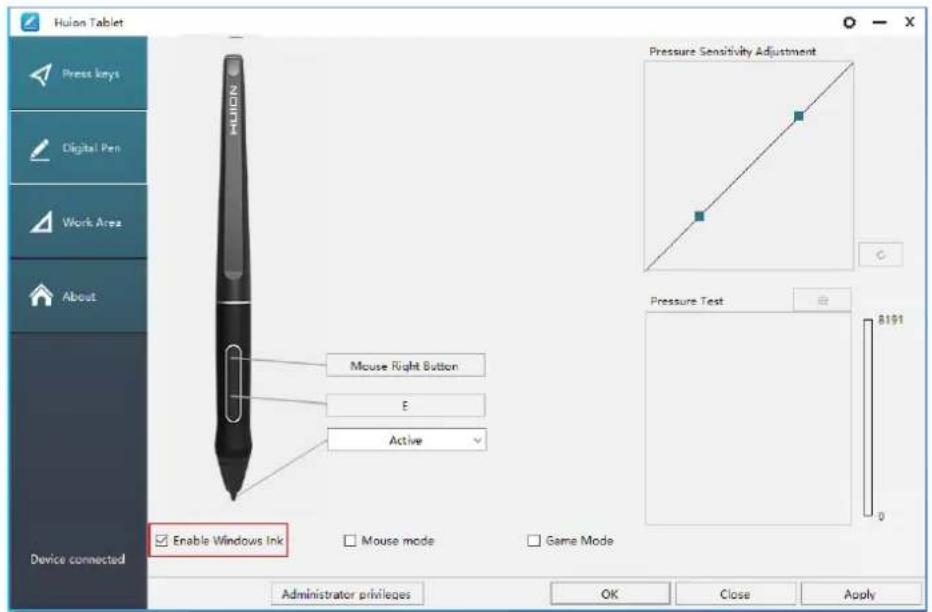
Microsoft Windows provides extensive support for pen input. Pen features are supported in such as Microsoft Office, Windows Journal, Adobe Photoshop CC, SketchBook 6 and so on.
text_image
Huilon Tablet Press keys Digital Pen Work Area About Device connected Mouse Right Button E Active Enable Windows Ink Mouse mode Game Mode Pressure Sensitivity Adjustment Pressure Test B191 0 Administrator privileges OK Close Apply5.5 Pressure Sensitivity Setting
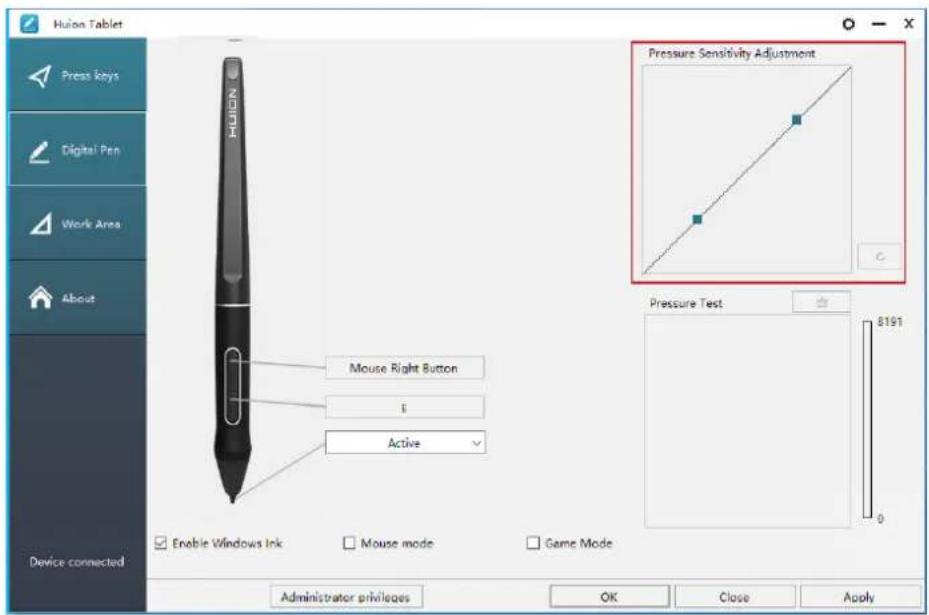
The pressure sensitivity will be changed by dragging the slider up and down, the smaller the value, the more pressure sensitive.
text_image
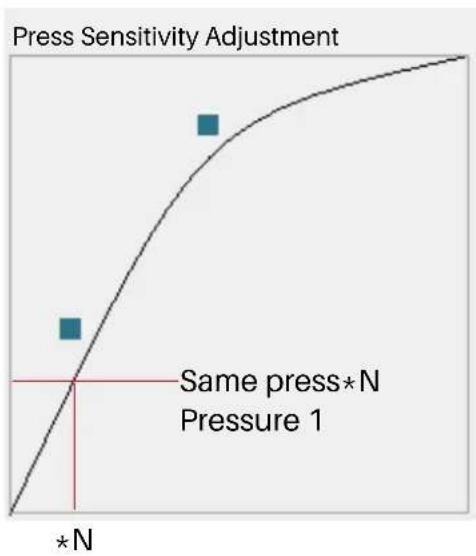
Huilon Tablet Press keys Digital Pen Work Area About Device connected Mouse Right Button i Active Enable Windows Ink Mouse mode Game Mode Pressure Sensitivity Adjustment Pressure Test 8191 0 Administrator privileges OK Close ApplyDrag upward (left): the pressure change is more obvious, small pressure produces a great pressure.
Drag down (right): pressure change is weak, a lot of pressure produces less pressure.
Click the button ☐ at the bottom right of the Settings box to reset the pressure sensitivity to the default state.
For example: apply *N respectively the same pressure, under different pressure coefficient produced different pressure effects. According to their habit of holding the pen posture and the size of the hand for the appropriate pressure Settings.
line
| Pressure | Sensitivity Adjustment | | -------- | ---------------------- | | *N | 0 | | Same press* N | 0 |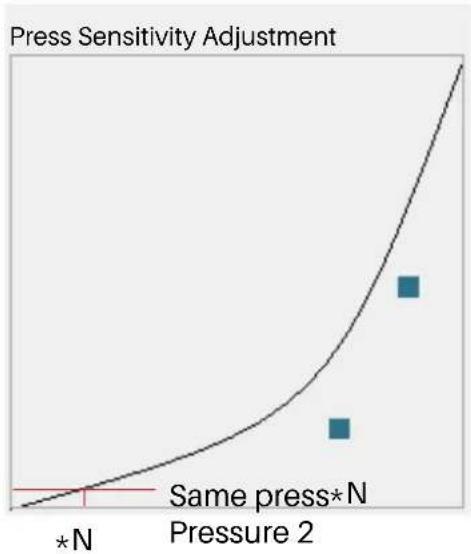
line
| Pressure | Press Sensitivity Adjustment | | -------- | ---------------------------- | | Same press* N | 0 | | Pressure 2 | 1 |5.6 Pen Pressure Testing
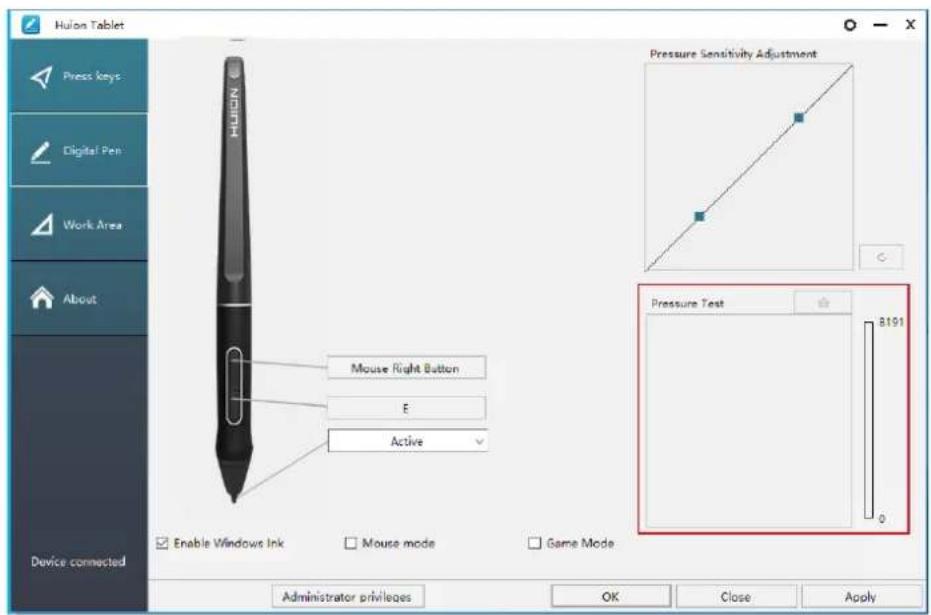
You can gradually apply pressure to the stylus on the screen to test the pressure level. Click " [ ] " button to clear all the ink.
text_image
Hulon Tablet Press keys Digital Pen Work Area About Device connected Mouse Right Button E Active Enable Windows Ink Mouse mode Game Mode Pressure Sensitivity Adjustment Pressure Test 8191 0 Administrator privileges OK Close Apply5.7 Pen Nib Activity Setting
The pen nibs can be set to be Active/Inactive as needed. Click the drop-down option to select, and click OK again to save the Settings. In Active mode, the digital pen can be used normally. In Inactive mode, the digital pen has cursor movement, but cannot complete the specified action.
text_image
Hulon Tablet Press keys Digital Pen Work Area About Device connected Mouse Right Button E Active Enable Windows Ink Mouse mode Game Mode Pressure Sensitivity Adjustment Pressure Test 0191 Administrator privileges OK Close Apply5.8 Data Export and Import
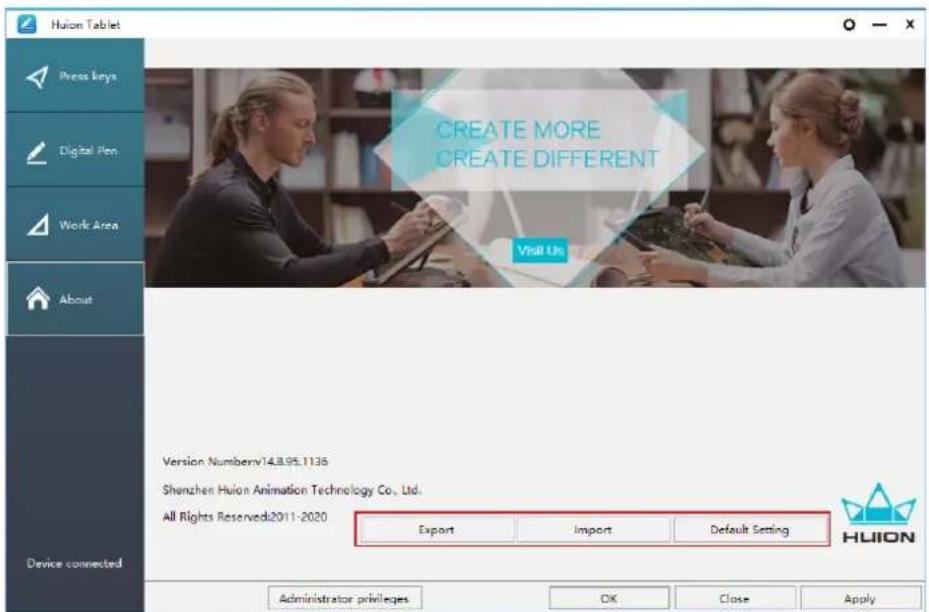
The driver supports exporting and importing your custom configuration data of the product, which is convenient for you to use different software and avoid the trouble of repeated settings.
text_image
Huion Tablet Press keys Digital Pen Work Area About Device connected CREATE MORE CREATE DIFFERENT Visit Us Version Numbers:14.8.95.1136 Shenzhen Huion Animation Technology Co., Ltd. All Rights Reserved:2011-2020 Export Import Default Setting Administrator privileges OK Close Apply HUION6 / Specifications
| Model GS1562 | ||
| Screen | Panel Size 15.6 inches | |
| Resolution 1920 x 1080 (16:9) | ||
| LCD Type IPS | ||
| Active Area 311.16 x 193.59mm | ||
| Contrast Ratio 1000:1 | ||
| Brightness 220cd/m | 2 | |
| Response Time 25ms | ||
| View Angle 89°/89° (H) /89°/89° (V) (Typ.) (CR > 10) | ||
| Gamut 120% sRGB | ||
| Display Color 16.7M (8bit) | ||
| Touch | Touch Type Battery-Free Electromagnetic Resonance | |
| Resolution 5080LPI | ||
| Pressure Level 8192 | ||
| Accuracy ±0.3 mm (Center), ±2 mm (Corner) | ||
| Sensing Height | 10mm | |
| Pen | Model | PW517 |
| Dimension | 163.7 x Φ14.3 mm | |
| Buttons | Two Customized Press Key | |
| General | Output Voltage 5V 2A | |
| Video Interface | 3-in-1 USB-C and USB-C to USB-C | |
| Dimension | 423.52 x 253 x 12mm (Without Stand) | |
| Net Weight 1.26Kg (With stand) | ||
| OS Support | Windows 7 or later, mac OS 10.12 or later, Android (USB3.1 DP1.2) | |
7 / Trouble Shooting
7.1 Possible Breakdowns Related to DISPLAY
| Abnormal Phenomena Possible Solutions | |
| Power indicator does not flash | 1. Make sure power is on.2. Check the socket and power cable. |
| No display on the screen | 1. Make sure power is on.2. Correctly connect the cables.3. If you connect the display with a laptop, please make sure the display is on the right display mode: extend or duplicate mode.4. Check whether the side indicator shows green, if not, it means no signal in. Please reboot your computer or reconnect the cable.5. Is the signal wire broken or bent? If so, please replace the signal wire. |
| No signal | 1. Make sure the cables are well connected.2. If you use a desktop, make sure the HDMI port is plugged into the graphic card on the tower, but not into the motherboard.3. If you use a Windows OS computer, make sure to press "Windows+P" on keyboard, then choose Duplicate or Extend. Don't choose Computer Only or Projector Only.4. If there is no HDMI port on your computer, you need an extra HDMI adapter. We don't recommend a USB to HDMI adapter. Also, we don't recommend a USB hub. We recommend DVI/ VGA/ Display Port/ Type-C/ Thunderbolt, etc. to HDMI adapters. |
| Images are blurred Please set | the display resolution with 1920 x 1080. |
| Displays wallpaper & task bar of computer monitor only. | 1. It is because you are under extended mode right now. It is a normal situation.2. If you are not familiar with extended mode, we recommend you to use in Duplicate/Mirror mode. Windows OS: Press keyboard combination---Windows+P---then choose Duplicate Mac OS: System Preference---Displays--- Arrangement--- Check "Mirror Displays".3. If you decide to use in Extended mode. Make sure to choose pen display as Work Area in Driver. It is usually "Display 2". |
| Lack of colors Check the pins of the signal wire are not bent or fractured. | |
| There is chromatic aberration | As the regional color temperature is different, so minor chromatic aberration is a normal phenomenon. |
| Images jitter or ripple images appear | It is likely that there is electric equipment nearby that brings about electronic interference. |
7.2 Possible Breakdowns Related to FUNCTIONS
| Abnormal Phenomena Possible Solutions | |
| There is no pressure in the graphics software but the cursor moves | You may have installed other display drivers or opened the drawing software when installing the driver. Please uninstall all drivers and close the drawing software, then reinstall the Huion driver. It's better to restart your computer after finishing the installation. |
| The pen does not work | 1. Make sure you are using the pen that originally came with your display.2. Make sure you installed the driver correctly. |
| Press Keys does not work | 1. Make sure the Press Keys function was enabled in the driver.2. Make sure you have correctly defined the Press Keys.3. Check if the press lock switch is on the unlock position. |
| The computer can't enter sleep mode | When you are not using the display, please do not put the pen on the display surface, which will keep the computer awake. |
| The side button of the pen doesn't work | When pressing the side button, please make sure that the nib didn't touch the display surface and the distance between the nib and surface is within 10mm. |
| The side button of the pen doesn't work | Make sure the USB port is functional, if not, please change to another USB port. |
| The computer can't recognize the display | Check that the USB port is normal. If there is any problem, please use another USB port. |
8 / After-service Contact
SHENZHEN HUION ANIMATION TECHNOLOGY CO., LTD.
Bldg 28, Quarter 4, HuaiDeCuiGang Industrial Park, Fuyong Street, Bao'an District, Shenzhen, 518106, China
The information in this manual is subject to change without notice. For more information, please contact us by email: service@huion.com
Or visit our website www.huion.com to get the latest driver and user manual.
Inhalt
natural_image
Diagram of a multi-core cable with four connected connectors (no text or symbols)① USB (Daten)
② USB (Power)
③ HDMI
④ Type-C
2.2.3 Displayständer (Optional)
natural_image
Simple line drawing of a rectangular electronic device with a scroll wheel and directional arrows indicating rotation (no text or symbols)②
natural_image
Diagram of a folding or folding sheeting device with a flat lid and directional arrows indicating rotation (no text or symbols)③
natural_image
Line drawing of a folding stand with arrows indicating movement or force (no text or symbols)④
natural_image
Line drawing of a flat-screen digital tablet with control buttons and a clip (no text or symbols)2.3 Displayverbindung
natural_image
Line drawing of a hand holding a pen, no text or symbols presenttext_image
Illustration showing two-step digital drawing process: one with a pen and pencil, the other with a pencil and pencil inside a small container.3.3 Klicken
natural_image
Line drawing of a hand holding a pen writing on a digital inkwell (no text or symbols present)3.4 Bewegung
natural_image
Illustration of two hands drawing a square with a pencil, no text or symbols presentnatural_image
Illustration of a hand using a stylus to mark a small object on a tablet screen, with an inset showing the same hand and tool (no text or symbols present)natural_image
Line drawing of two hands holding a pen, no text or symbols present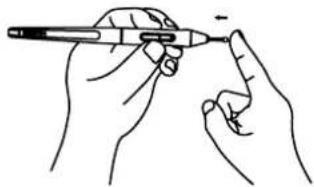
natural_image
Line drawing of two hands holding a pen, no text or symbols present4 / OSD Funktion
OSD-Menü aufrufen:
natural_image
Diagram of a multi-core cable with four labeled connectors (no text or symbols on the main diagram)natural_image
Simple line drawing of a rectangular object with a curved arrow indicating rotation or movement (no text or symbols)②
natural_image
Diagram of a folding paper holder with a flat lid and internal compartments, showing rotational motion (no text or symbols)③
natural_image
Technical line drawing of a folding stand device with an open lid and internal components (no text or symbols)④
natural_image
Line drawing of a generic electronic device with a screen and antenna (no text or symbols)natural_image
Line drawing of a hand holding a pen, no text or symbols presentnatural_image
Illustration of two hands holding pens and a stylus, writing on a line (no text or symbols present)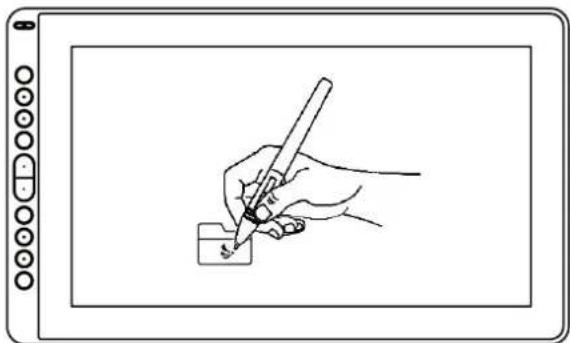
natural_image
Line drawing of a hand holding a pen writing on a small object, placed on a tablet screen (no text or symbols present)3.3 Clic
natural_image
Line drawing of a hand holding a pen writing on a digital inkwell (no text or symbols present)3.4 Mouvement
natural_image
Illustration of two hands drawing a square with a pencil and eraser (no text or symbols present)natural_image
Illustration of a hand using a pen to draw a small object on a screen, with an inset showing a magnified view of the tool (no text or symbols present)natural_image
Line drawing of two hands holding a pen, no text or symbols present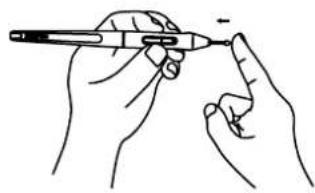
natural_image
Line drawing of two hands holding a pen, no text or symbols present4 / Fonction OSD
Building 28, 4th Block, Huaide Cuigang Industrial Park, Fuyong, Bao'an District, Shenzhen, Chine
text_image
Diagram of a multi-pin electrical connector with labeled pins and cable routingnatural_image
Simple line drawing of a rectangular object with a curved arrow indicating rotation or movement (no text or symbols)②
natural_image
Diagram of a folding or folding sheeting device with a flat cover and directional arrows indicating rotation (no text or symbols)③

natural_image
Technical line drawing of a folding stand with an open lid and internal compartments (no text or symbols)④
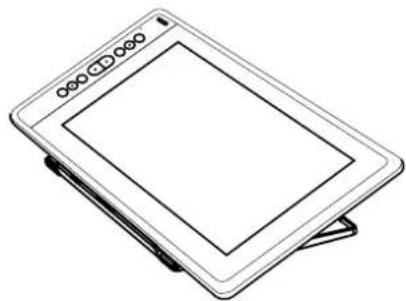
natural_image
Line drawing of a generic electronic device with a screen and antenna (no text or symbols)2.3 ディスプレイイを接続する
natural_image
Line drawing of a hand holding a pen, no text or symbols present3.2 カーソルの移動
natural_image
Illustration of two hands holding pens and a drawing line on a tablet device (no text or symbols)
natural_image
Line drawing of a hand holding a pen writing on a small object, enclosed in a tablet device (no text or symbols present)3.3 クリック
natural_image
Line drawing of a hand holding a pen writing on a digital signature (no text or symbols present)3.4 アイテムの移動
natural_image
Illustration of two hands drawing a square with a pencil and arrow on a notepad (no text or symbols)3.5 サイドボタンを使用する
natural_image
Illustration of a hand holding a pen and a small object inside a tablet device, with an inset showing a magnified view of the tool (no text or symbols present)3.6 替え芯をセットする
natural_image
Line drawing of two hands holding a pen, no text or symbols present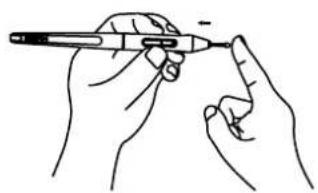
natural_image
Line drawing of two hands holding a pen, no text or symbols present4 / OSD 機能
OSD メニューに入る:
Building 28, 4th Block, Huaide Cuigang Industrial Park, Fuyong, Bao'an District, Shenzhen, Chine
text_image
Diagram of a multi-pin cable with labeled connectors and ports, showing connections to four different types of devices.① USB (Dati)
② USB (Power)
③ HDMI
④ Type-C
2.2.3 Supporto del Display
natural_image
Simple line drawing of a rectangular electronic device with a scroll wheel and directional arrows indicating rotation (no text or symbols)②
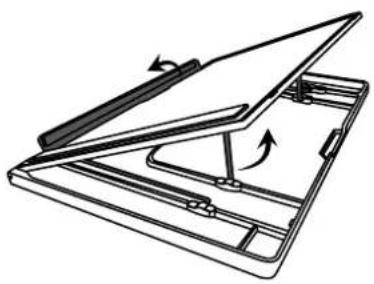
natural_image
Diagram of a folding or folding sheeting device with a flat cover and directional arrows indicating rotation (no text or symbols)③
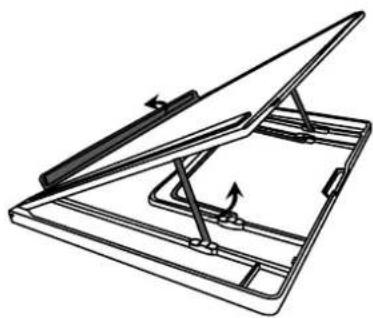
natural_image
Technical line drawing of a folding stand device with an open lid and internal compartments (no text or symbols)④
natural_image
Line drawing of a generic electronic device with a screen and antenna (no text or symbols)2.3 Connessione del Display
natural_image
Line drawing of a hand holding a pen, no text or symbols presentnatural_image
Illustration of two hands holding pens and a stylus, writing on a digital tablet device (no text or symbols present)
natural_image
Line drawing of a hand holding a pen writing on a small object, placed on a tablet screen (no text or symbols present)3.3 Cliccare
natural_image
Line drawing of a hand using a pen to write or print a small object into a digital device (no text or symbols present)3.4 Spostare
natural_image
Illustration of two hands drawing a square with a pencil, no text or symbols presentnatural_image
Illustration of a hand using a pen to apply a tool on a digital tablet, with an inset showing the same hand holding a pen (no text or symbols present)natural_image
Line drawing of two hands holding a pen, no text or symbols present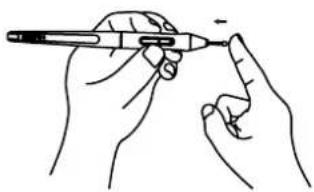
natural_image
Line drawing of two hands holding a pen, no text or symbols present4 / OSD Funktion
OSD-Menü aufrufen:
Building 28, 4th Block, Huaide Cuigang Industrial Park, Fuyong, Bao'an District, Shenzhen
text_image
Diagram of a multi-pin electrical connector with labeled parts including plug, socket, and terminal connections① USB (Datos)
② USB (Power)
③ HDMI
④ Type-C
natural_image
Simple line drawing of a rectangular electronic device with a scroll wheel and directional arrows indicating rotation (no text or symbols)②
natural_image
Diagram of a folding or folding sheeting device with a flat cover and directional arrows indicating rotation (no text or symbols)③
natural_image
Line drawing of a folding stand with an open lid and internal compartments, no text or symbols present④
natural_image
Line drawing of a generic electronic device with a screen and antenna (no text or symbols)natural_image
Line drawing of a hand holding a pen, no text or symbols presentnatural_image
Illustration of two hands holding pens and a stylus, writing on a line (no text or symbols present)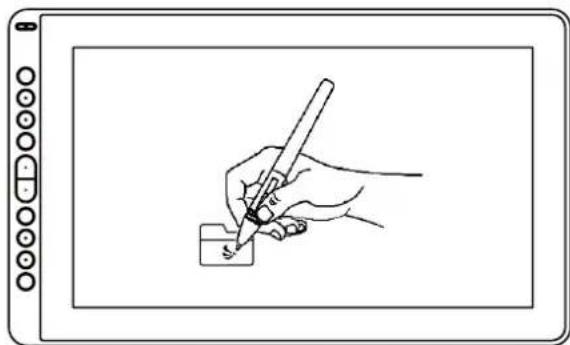
natural_image
Line drawing of a hand holding a pen writing on a small object, enclosed in a tablet device (no text or symbols present)3.3 Click
natural_image
Line drawing of a hand holding a pen writing on a digital inkwell (no text or symbols present)3.4 Movimiento
natural_image
Illustration of two hands drawing a square with a pencil, no text or symbols presentnatural_image
Illustration of a hand using a pen to draw a small object on a digital tablet screen, with an inset showing the tool being inserted (no text or symbols present)5.1.3 Rotate Working Area
Rotar el Área de Trabajo By changing the direction of the display to adapt to the left and right hand operation. You can rotate the display by 0^, 90^, 180^ or 270^ .