SnackTastic ST 7520 - Deep fryer FRITEL - Free user manual and instructions
Find the device manual for free SnackTastic ST 7520 FRITEL in PDF.

User questions about SnackTastic ST 7520 FRITEL
0 question about this device. Answer the ones you know or ask your own.
Ask a new question about this device
Download the instructions for your Deep fryer in PDF format for free! Find your manual SnackTastic ST 7520 - FRITEL and take your electronic device back in hand. On this page are published all the documents necessary for the use of your device. SnackTastic ST 7520 by FRITEL.
USER MANUAL SnackTastic ST 7520 FRITEL
text_image
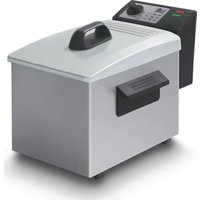
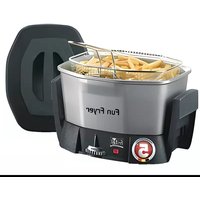
Fritel FAMILYSNACKTASTIC® ST 7520
natural_image
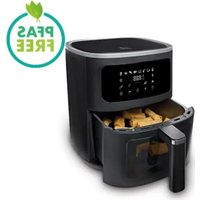
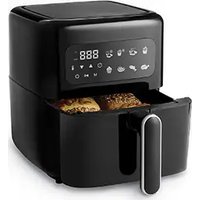
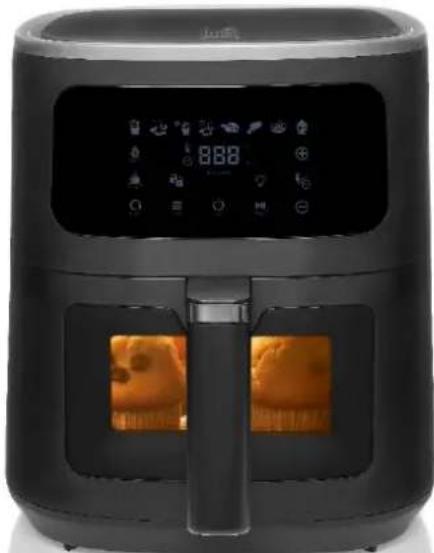
Black air fryer with digital display and two side panels showing orange-brown baked goods (no visible text or symbols)GEBRUIKSAANWIJZING
Read the user manual attentively before using this appliance. Keep the user manual carefully.
GEBRAUCHSANLEITUNG
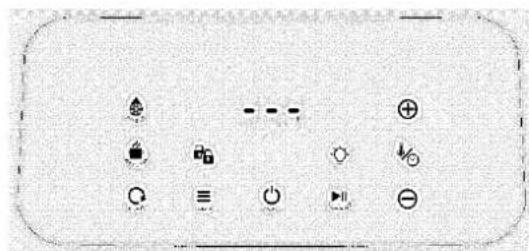
- On/Off Symbol
- Time and temperature Symbol
- Start/pause Symbol
- Symbol for program for fresh fries
- Symbol for program for snacks
- Symbol for program for frozen fries
- Symbol for program for frozen snacks
- Symbol for program for poultry
- Symbol for program for fish
- Symbol for program for steak
- Symbol for program for cupcakes
- Menu Symbol
- Symbol for keep warm function
- Symbol for reheat function
- Symbol for defrost function
- Symbol for shaking up
- Symbol drawer + basket (not) correctly placed in the appliance
Not all symbols are always visible
BEDIENFELD
natural_image
Blank rectangular frame with a small circular icon at the bottom center (no text or symbols)text_image
Control panel interface with icons for battery, switch, battery, reset, power, and displaytext_image
SNACKS SNACKS Snacks Seafood Cups 180natural_image
Row of black-and-white icons representing snacks, fries, fireworks, fish, seafood, and a cupcake (no text or symbols)natural_image
Simple diagram of a rectangular device with a small power button symbol at the bottom (no text or labels)natural_image
Simple diagram of a rectangular device with a small circular symbol at the bottom (no text or labels)natural_image
Blank white rectangular area with rounded corners and a small circular symbol at the bottom center (no text or labels)text_image
Control panel interface with icons for display, function, and operation buttonstext_image
SNACKS SNACKS Snacks Meat Meat Snacks 180natural_image
Row of black-and-white icons representing snacks, fries, fireworks, fish, and food items (no text or symbols)natural_image
Simple rectangular outline with a small circular symbol at the bottom center (no text or labels)natural_image
Simple diagram of a rectangular device with a small power button symbol at the bottom (no text or labels)Congratulations! You just bought a quality appliance that will guarantee you a lot of snack pleasure for many years. For further information and useful tips, we advice you to have a look at our website www.fritel.com. All persons who have NOT read this user manual are NOT allowed to use this appliance. Violations of the rules and regulations stated in these instructions automatically invalidate the warranty.
1. SAFETY PRESCRIPTIONS
This appliance was built in accordance with the European CE-safety standards. As for all electrical household appliances, all safety measures have to be taken, in order to prevent and/or avoid damages.
ATTENTION! Burning danger! Due to the use of the appliance surface becomes hot. Only touch the handle or the control buttons on the appliance is operating.
- ATTENTION! After switching off the appliance surfaces stay hot which causes burning danger. Let the appliance cool down completely before replacing it, cleaning it or putting it away
- This appliance shall not be used by children from 0 year to 8 years. This appliance can be used by children aged from 8 years and above if they are continuously supervised. This appliance can be used by people with reduced physical, sensory or mental capabilities or lack of experience and knowledge provided they are supervised or instructed to use the appliance in a safe way and understand the hazards involved. Keep the appliance and its cord out of reach of children aged less than 8 years. Cleaning and user maintenance shall not be made by children.
- Cooking appliances should be positioned in a stable situation with the handles (if any) positioned to avoid spillage of liquids.
-
This appliance is only intended domestic use at room temperature and similar applications, excluding staff kitchens shops, offices, and other working environments; farms; clients in hotels, motels, and other residential environments; bed and breakfast environments.
-
Only operate the appliance with 230 V AC power.
- In accordance with the legal safety standards, the appliance must always be connected to a socket with earthing.
- NEVER touch the buttons, the electrical cord, or the plug with wet
hands. NEVER immerse the appliance and cord in water or (any other liquid). Only clean with a damp cloth. If the appliance does get wet or damp, unplug it immediately.
- A damaged power cord can cause electrical shocks. NEVER use the appliance if it is damaged, fallen or shows a malfunction, or if the power cord or plug are damaged. In all these cases return the appliance to your sales point or recognized after sales service.
- Always unplug the appliance immediately after use. Do this even when the appliance is not in use, before cleaning it and before moving it. When doing so, NEVER pull on the cord itself, but only on the plug head.
-
NEVER use separate timers or remote controls.
-
NEVER cover the ventilation grille when the appliance is operating or has not yet cooled down completely.
- NEVER put oil directly in the drawer. This may cause fire.
- NEVER touch the inside or the appliance while it is operating.
- While baking, hot steam might come out of the openings of the appliance. ALWAYS keep hands and face at a safe distance from the steam. Also, ALWAYS be careful when you remove the baskets when the appliance is operating, steam might come out.
- IMMEDIATELY unplug the appliance if dark smoke comes out of it. Only remove the baskets when no more smoke is coming out.
- Always place the appliance on a solid and flat surface, such as a kitchen table so that the appliance cannot tilt or slide.
- NEVER pull on the electrical cord to unplug it.
- NEVER use extension cords or extension sockets. Place the appliance close to a socket and always connect it directly. Always unwind the entire cord when in use.
- NEVER leave the electrical cord hanging over the edge of the table or countertop.
- NEVER use the electrical cord and appliance near heat sources such as cookers, ovens, or heaters.
- NEVER place the appliance near curtains, wall decoration, clothing, towels or other inflammable objects. Always make sure to have 15 cm on all sides of the appliance.
- NEVER cover the appliance and air inlet/outlet when in operation
- Only use the appliance with 230 Volt alternating current.
- In accordance with legal safety standards, the appliance must always be connected to an earthed socket.
- For your own safety, the appliance will only work if it is correctly assembled.
- This appliance is for oilfree frying/grilling/baking only. The appliance must not be used for any other purposes or combined with other appliances!
- NEVER leave the appliance unsupervised when in operation and never move it when in operation.
- Let the appliance cool down completely before moving it.
- Immediately switch off the appliance and unplug it:
○ After use
- When the appliance is NOT in use
- When the appliance is NOT functioning properly
- When cleaning the appliance
- Only use original the accessories.
• Repairs can only be carried out by an authorised professional or by an authorised repair service.
2. BEFORE FIRST USE
- Remove all packagings and stickers.
- Keep all packing material out of reach of children.
- Check the appliance and the electrical cord for any damages. If damaged, do not use the appliance and return it immediately to your sales point or contact your vendor.
- Before using the appliance for the first time, it is recommended to clean the basket (see maintenance).
- Check that the mains voltage of your appliance (230 volts) matches the mains voltage in your home.
3. SETTINGS
The chart below indicates which settings should be used for which ingredients.
ATTENTION: these settings are merely indicative. Since each ingredient may differ from brand to brand, but also from size, shape, content... it is possible that the indicated settings don't always entirely correspond.
TIPS:
- Smaller ingredients often require a shorter baking time than larger ingredients.
- Shaking small ingredients during the baking process might improve the final result. (See USE).
- Add a little bit of oil on fresh potatoes for a crispier result. Add the oil on the ingredients before putting them in the basket. Bake the ingredients within a few minutes after adding the oil.
- Snacks that can be prepared in a traditional oven can be prepared in the SnackTastic®. Snacks or fries only meant to be prepared in a deep fryer will not provide the desired result.
- You can use the SnackTastic® to heat up ingredients. To do so, use the reheat function
| Min-Max capacity (gram) | Time (minutes) | Temperature (°C) | Shake | Other | |
| Potatoes and fries | |||||
| Thin Fries *** | 300-1200 | 9-19 | 200 | Shake** | |
| Thick Fries *** | 300-1200 | 12-22 | 200 | Shake** | |
| Home-made fries (8x8mm) | 300-1500 | 18-30 | 180 | Shake** | Add 1⁄2 tsp oil |
| Potato quarters | 300-1200 | 18-24 | 180 | Shake** | Add 1⁄2 tsp oil |
| Diced potatoes | 300-1200 | 22-18 | 180 | Shake** | Add 1⁄2 tsp oil |
| Rösti | 250 | 15-18 | 180 | * | |
| Potato gratin | 500 | 18-22 | 180 | * | |
| Meat and poultry | |||||
| Steak | 100-600 | 8-12 | 180 | ||
| Pork chops | 100-500 | 10-14 | 180 | ||
| Hamburger | 100-500 | 7-14 | 180 | ||
| Meat loaf | 100-500 | 18-22 | 180 | ||
| Drumstick | 100-500 | 18-22 | 180 | ||
| Chicken breast | 100-800 | 10-30 | 180 | ||
| Whole chicken | 1200 | 60 | 180 | ||
| Snacks | |||||
| Bitterballs | 240 | 7 | 200 | * | |
| Spring rolls | 100-500 | 8-10 | 200 | Shake** | * |
| Chicken Nuggets | 100-500 | 6-10 | 200 | Shake** | * |
| Fish fingers | 100-500 | 6-10 | 200 | * | |
| Breaded cheese snack | 100-500 | 8-10 | 180 | * | |
| Vegetables | 100-500 | 10 | 160 | ||
NOTE: Oven-safe frozen products are always suitable, but generally require less baking time and a lower temperature in the SnackTastic® than in the oven.
NOTE: If you prefer a preheated appliance before starting the desired programme, you can also use the reheat function (180°C - 4 min)
NOTE: * Make sure the ingredients are suitable for cooking in the oven
** See 4 Use
Homemade fries
For the best result we advise to use prebaked fries (e.g., frozen fries). If you want to make homemade fries, we advise you following the steps below.
-
Peel the potatoes and cut them into fries.
-
Soak the fries in a bowl of water for at least 30 minutes, take them out and dry them with some paper towel.
-
Pour 1/2 spoon of oil in a bowl, add the fries and mix properly until all fries are covered with oil.
-
Don't pour the fries from the bowl into the basket to avoid abundant oil from ending up in the pan. Take out the fries from the bowl with your hands or tongs so that abundant oil remains in the bowl. Put the fries in the basket.
-
Bake the fries as mentioned earlier.
4. USE
On/Off Connect the appliance and a beep sounds, with all the lights illuminating for 1 second. The appliance then enters standby mode. Only is shown on the display (flashing):
natural_image
Simple rectangular outline with a small circular symbol at the center (no text or labels)When pressed, the display shows:
text_image
Control panel interface with icons for alarm, power, battery, and display functionsWhen the appliance is in standby mode, the display shows ⏻. The appliance returns to standby mode after 5 minutes if no function has been selected.
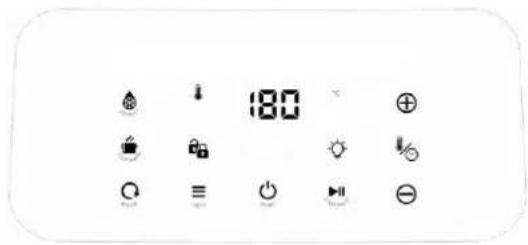
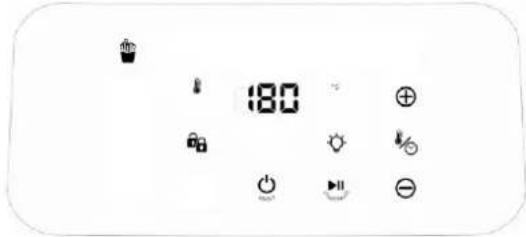
Temperature / Time ⚡️ Press ⚡️ to set the desired temperature and time. ⏻ and ℃ lights up and the temperature can be set with ⊕ and ⊖. ⏽ and MIN light up and the time can be set with ⊕ and ⊖.
text_image
180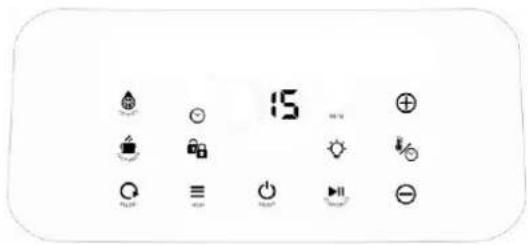
text_image
15The temperature can be set from 40^ to 200^ C. The time can be set from 1 to 60 minutes. The timer counts down by minute. The last minute it counts down in seconds.
"MIN" is not showing during the countdown in seconds. Default setting: 180°C – 15 minutes.
Start ▶▶▶ Press the ▶▶▶ symbol to start the appliance. ▶▶▶ stops flashing throughout the process unless interrupted. Press the ▶▶▶ symbol to interrupt the function or to open the drawer. starts flashing. The remaining time is shown flashing on the display. The appliance restarts when ▶▶▶ pressed or the drawer is closed again. This button only works when the drawer and basket are correctly inserted in the appliance. The symbol 🔒 should be illuminated in white. When the process is complete fill appear on the display for 30 seconds.
End
Then OFF appears for 10 seconds: 5 beeps and the device switches to standby mode.

text_image
OFF
natural_image
Simple rounded rectangle outline with a small circular symbol at the center (no text or labels)If is not pressed, the device returns to the home screen after 5 minutes.
Light Press the symbol to view the food through the window
Shake (SHAKE) Halfway through the set time, you will hear a beep. Open the drawer and shake up the food. Not available during: Cup Cake Keep warm mode, defrost mode en reheat mode.
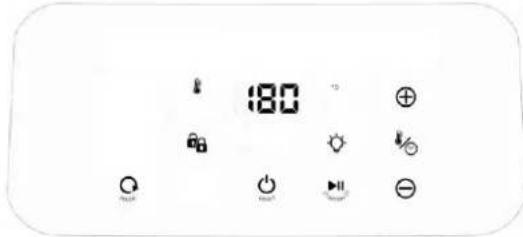
Menu ≡ Press the ≡ symbol to select a pre-programmed function. All menu programme symbols light up.

natural_image
Row of black-and-white icons representing snacks, fries, fish, and food items (no text or symbols)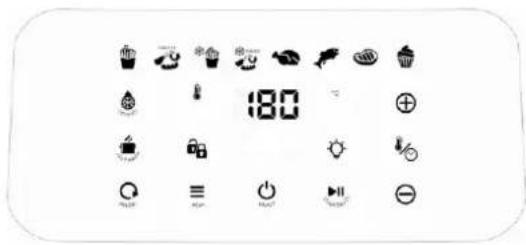
text_image
180- Press : programme for fries
- Press : Programme for snacks
- Press 🍴: Programme for frozen fries
- Press : Programme for frozen snacks
• Press 📋: Programme for poultry - Press ↗ : Programme for fish
- Press 📂: Programme for steak
• Press 🎨 : Programme for cupcakes
Only the selected programme starts flashing.
If the selected programme is not the one you want, select another programme.


The selected programme then starts flashing.
Press the symbol to start the appliance. stops flashing and only the selected programme remains lit.
text_image
180When the process is complete, will appear on the display for 30 seconds

text_image
EndThen OFF appears for 10 seconds: 5 beeps and the device switches to standby mode.

text_image
OFFIf no selection is made, the device returns to the home screen after 5 minutes.

natural_image
Blank rounded rectangle with a small circular symbol at the bottom center (no text or labels)Reheat function ☐ Press the ☐ symbol to reheat the food, the "Reheat" symbol flashes. Default settings: 180^ C-4 minutes. The temperature can be set between 40 - 200^ C and the time between 1 - 30 minutes.
text_image
180Press ⚙ to set the desired temperature and time. ⏻ and °C lights up and the temperature can be set with ⊕ and ⊖. ⏱ and MIN lights up and the time can be set with ⊕ and ⊖. Press the ▶ symbol to start the appliance. ▶ stops flashing. When the proces is complete, ∑ will appear on the display for 30 seconds.

text_image
EndThen OFF appears for 10 seconds: 5 beeps and the device switches to standby mode.

text_image
OFFIf no selection is made, the device returns to the home screen after 5 minutes.

natural_image
Blank rectangular frame with a small circular symbol at the bottom center (no text or labels)Keep warm function Press the symbol to keep food warm, the "Keep warm" symbol flashes. Default setting: 70^ C - 30 minutes. The time can be set between 1 – 60 minutes. The temperature can not be set.
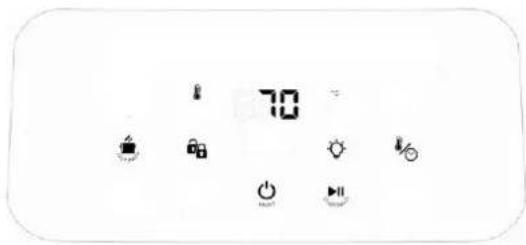
text_image
70Press to set the desired time. and MIN lights up and the time can be set with and. Press the symbol to start the appliance. stops flashing. When the process is complete, will appear on the display for 30 seconds.

text_image
EndThen OFF appears for 10 seconds: 5 beeps and the device switches to standby mode.

text_image
OFFIf no selection is made, the device returns to the home screen after 5 minutes.

natural_image
Blank rounded rectangle with a small circular symbol in the center (no text or labels)Defrost function Press the symbol for the defrost function, the symbol "Defrost" flashes. Default setting: 40^ C - 5 minutes. Can be adjusted from 1 - 60 minutes.
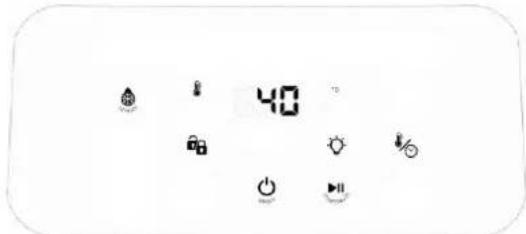
text_image
40The temperature can not be set with this function.
Press ☑ to set the desired time. ☑ and MIN lights up and time can be set with ⊕ and ⊖. Presse the ▶ symbol to start the appliance. stops flashing. When the process is complete, will appear on the display for 30 seconds.
End
Then OFF appears for 10 seconds: 5 beeps and the device switches to standby mode.
OFF
If no selection is made, the device returns to the home screen after 5 minutes.
(
Lock status
• If the closed lock is lit (white/blue), the basket is correctly places.
- If the open lock is lit (red) 🔍, the bakset is not correctly placed and the appliance will not function.
Memorize function:
Any programme under the menu function can be personalized and saved by pressing and holding one of the selected programmes for 5 seconds.
Follow the steps under press to set the desired time and temperature. and lights up and the temperature can be set with ⊕ and ⊖. and MIN lights up and the time can be set with ⊕ and ⊖. Press and hold the selected programme for 5 seconds, a beep sounds and the preferred setting is saved.
Reset Functie All saved settings can be reset to factory settings by pressing 🔒 and 🔒 for 10 seconds.
5. PREPROGRAMMED FUNCTIONS
| Function | Time | Temperature |
| Fries | 25 min. | 180°C |
| Snacks | 15 min. | 180°C |
| Frozen fries | 16 min. | 200°C |
| Frozen snacks | 10 min. | 200°C |
| Poultry * *Whole chicken | 60 min. | 180°C |
| Fish | 9 min. | 180°C |
| Meat (steak) | 12 min. | 180°C |
| Cupcakes | 18 min. | 160°C |
ATTENTION: these settings are only guidelines. As each ingredient varies from one type to another, from one brand to another and also from size, shape, content... deviations from these recommended settings can always occur.
6. MAINTENANCE
- Clean the appliance after each use.
- First remove the plug from the socket and let the appliance cool down completely before cleaning.
TIP: in order to make the appliance cool down more quickly you can remove the basket out of the appliance - The basket and grill grid have a non-stick coating. Do not use metal kitchen ware or abrasive cleaning materials to clean them. This may damage the non-stick coating.
- Only clean the housing with a moist cloth.
- The basket and grill grid can be cleaned in warm soapy water and a soft cleaning brush.
TIP: The basket and grill grid are dishwasher proof.
TIP: Use the FRITEL airfryer cleaner to remove remains.
TIP: If the foodremains stick to the basket: let it soak for about 20 minutes in warm water. - The inside of the appliance can be cleaned with warm water and a soft sponge.
- Clean the heating elements with a cleaning brush to remove sticking residues.
- Dry the appliance thoroughly before using or storing it again.
7. STORAGE
- Pull the plug out from the socket and let the appliance cool down completely.
- Make sure all parts are clean and dry.
8. TROUBLE SHOOTING
| Problem | Possible cause | Solution |
| The SnackTastic® does not work. | The cord is not plugged in the socket. | Insert the cord into the socket. |
| There is no basket in the appliance. | Put the basket correctly in the appliance. | |
| No button was pressed | Press after selecting all settings to start the device | |
| The ingredients are not done enough. | There are too many ingredients in the basket. | Put smaller amounts at once in the basket. |
| The set temperature is too low. | Increase the temperature. | |
| The baking time is too short. | Increase baking time. | |
| The ingredients are not equally baked. | Some ingredients need to be shaken halfway through the baking process. | Shake ingredients which are piled up (f. ex. fries) halfway through the baking process. |
| The fried ingredients are not crispy. | You used snacks only suited for a traditional or a “Cold Zone” fryer. | Use oven snacks or slightly grease the ingredients with oil for a crispier result. |
| I cannot slide the basket into the appliance properly. | There are too many ingredients in the basket. | Fill maximum 4/5 of the basket. |
| The basket is not correctly placed in the appliance. | Place the basket correctly in the appliance. | |
| There’s white smoke coming out of the appliance. | You’re using greasy ingredients. | When baking greasy ingredients, the oil drips on and causes smoke. This will not affect the final cooking result. |
| There are some residues from prior bakings in the basket. | The smoke is caused by greasy residues heating up. Clean the basketproperly after each use. | |
| Fries are fried unequally. | You used the wrong kind of potato. | Use another kind of potato. |
| Crispiness depends on the amount of water and oil in the fries. | Dry the fries properly before you grease them with oil. | |
| You are not using oil or the fries were not evenly distributed. | Use some oil (see point 3 home-made fries) | |
| The fries are not crispy. | The crispiness depends on the amount of water and oil in the fries. | Cut smaller fries. |
| Grease with a little bit more oil. |
| Error code E* |
| Bring the appliance to your point of sale |
If the malfunction HAS NOT been solved, do NOT use the appliance. Contact your point of sale immediately.
THE APPLIANCE HAS BEEN DESIGNED FOR DOMESTIC USE. THE WARRANTY CONDITIONS EXPIRE UPON PROFESSIONAL USE. DEFECTS AND/OR DAMAGES FOLLOWING TO THE NON OBSERVANCE OF THE USER MANUAL ARE NOT COVERED BY THE WARRANTY.
9. WARRANTY CONDITIONS
The legal warranty is valid from the date of purchase. The proof of purchase determines the date of purchase. The duration and conditions of the warranty depend on the national legislation of the country of purchase. If you have a defective appliance, contact your seller with your proof of purchase.
The user is responsible for cleaning and proper packaging of the defective appliance before presenting it for repair. It is insufficient to wrap the device in cardboard packaging with paper. FRITEL is not liable for damage resulting from insufficient packaging, which also irrevocably invalidates the warranty.
Determination of the warranty:
- The warranty covers every repair and/or replacement free of charge of the parts recognized defective by our technical department and for which the defects are caused by material-, construction- or production defects.
- The warranty is only valid for the original user.
■ For 2 ^nd hand appliances, the seller is the only point of contact.
■ The transport costs, in case of reparation, are at the expenses of the purchaser. - The warranty is only granted after presentation of your purchase invoice.
- The warranty cannot be invoked for normal wear and tear.
The warranty does not apply in the following cases:
- Incorrect connection, e.g. electric voltages.
■ Abnormal or professional use or misuse handling.
In case of insufficient packaging and bad transport in case of return shipping. - Lack of care and cleaning.
■ Modifications or repairs made to the appliance by persons not authorized by us as a manufacturer. - When reference numbers have been altered or been removed.
- For faults not due to the appliance itself, but to an external cause, collision, damage, fire, earthquake, flood, lightning, etc.
- When not respecting the instructions in the user instructions.
For appliances that are not under warranty for any of the above reasons, all costs (transport, administration, research, handling) will be charged.
The most recent version of the detailed legal warranty conditions, as well as the detailed commercial warranty conditions can always be consulted on www.fritel.com.
10. ENVIRONNEMENT
Do not throw the appliance away with the normal household waste at the end of its life, but hand it in at an official collection point for recycling. By doing so, you will help to preserve the environment.
11. LIABILITIES
All liabilities, towards both consumer(s) and third parties, which could result from not observing all the safety regulations prescribed in this user manual, shall under no circumstances be charged to the manufacturer. In case of non-observance of these safety regulations, the user of the appliance, or any other person not having observed these safety regulations, protects the manufacturer from all responsibilities that he could be charged with.
12. ACCESSORIES, COMPONENTS AND OTHER FRITEL PRODUCTS
Visit our webshop www.fritel.com and discover frequently asked questions, available components, and accessories, as well as all our other products from our FRITEL range for even more FRITEL fun!
natural_image
Simple rectangular outline with a small circular symbol at the center (no text or labels)text_image
Diagram showing various electrical or mechanical symbols including power source, switch, and diode with corresponding icons.natural_image
Row of black-and-white icons representing snacks, fries, fish, fish, and food items (no text or symbols)natural_image
Simple line drawing of a rectangular device with a small power button symbol at the bottom (no text or labels)natural_image
Blank rectangular frame with a small circular symbol at the bottom center (no text or labels)natural_image
Blank rounded rectangle with a small circular symbol at the center (no text or labels)• If the closed lock is lit (white/blue), the basket is correctly places
- If the open lock is lit (red) 🔍, the basket is not correctly placed and the appliance will not function.