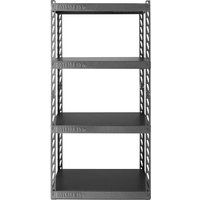
GARC304RGG - Wardrobe Gladiator - Free user manual and instructions
Find the device manual for free GARC304RGG Gladiator in PDF.


| Product Type | Storage cabinet / modular shelving |
| Brand | Gladiator |
| Model | GARC304RGG |
| Height | 152 cm (60 inches) |
| Width | 76.2 cm (30 inches) |
| Depth | 38.1 cm (15 inches) |
| Net weight | Approximately 30 kg |
| Main material | Powder-coated steel |
| Shelf material | Laminate |
| Number of levels | 4 |
| Load capacity per shelf | 181 kg (400 lbs) |
| Total load capacity | 726 kg (1600 lbs) |
| Number of pieces | 28 (4 lower uprights, 4 upper uprights, 8 horizontal beams, 8 side beams, 4 shelves) |
| Assembly required | Yes, tool-free |
| Number of persons required | 1 for assembly, 2 for moving |
| Fastening type | Snap-fit (EZ Connect) |
| Adjustable height | Yes, via notches (multiple positions) |
| Color | Anthracite gray |
| Recommended use | Garage, workshop, basement |
| Warranty | Limited (see manual) |
Frequently Asked Questions - GARC304RGG Gladiator
User questions about GARC304RGG Gladiator
0 question about this device. Answer the ones you know or ask your own.
Ask a new question about this device
Download the instructions for your Wardrobe in PDF format for free! Find your manual GARC304RGG - Gladiator and take your electronic device back in hand. On this page are published all the documents necessary for the use of your device. GARC304RGG by Gladiator.
USER MANUAL GARC304RGG Gladiator
Assembly Instructions
ÉTAGÈRE
EZ CONNECT
DE 60 PO (1,52 M)
DE HAUT
ASSEMBLY INSTRUCTIONS......5
Shelving Use Requirements......5
Unpack 5
Assemble & Complete ....5
WARRANTY....7
ÉTAGÈRE EZ CONNECT
SÉCURITÉ 8
DIMENSIONS 9
PIÈCES ....10
EZ CONNECT RACK SHELVING SAFETY
Your safety and the safety of others are very important.
We have provided many important safety messages in this manual and on your appliance. Always read and obey all safety messages.

This is the safety alert symbol.
This symbol alerts you to potential hazards that can kill or hurt you and others.
All safety messages will follow the safety alert symbol and either the word "DANGER" or "WARNING."
These words mean:
DANGER
You can be killed or seriously injured if you don't immediately follow instructions.
WARNING
You can be killed or seriously injured if you don't follow instructions.
All safety messages will tell you what the potential hazard is, tell you how to reduce the chance of injury, and tell you what can happen if the instructions are not followed.
DIMENSIONS
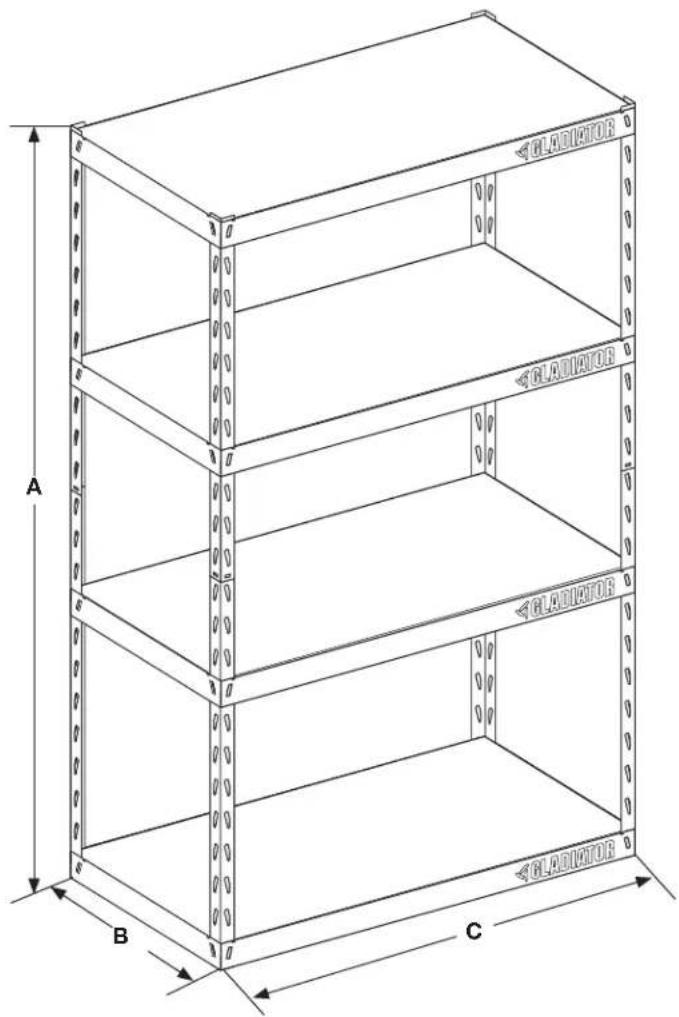
| Model | GARC304R*/YGRC304R* |
| A | 60"(152 cm) |
| B | 15"(38.1 cm) |
| C | 30"(76.2 cm) |
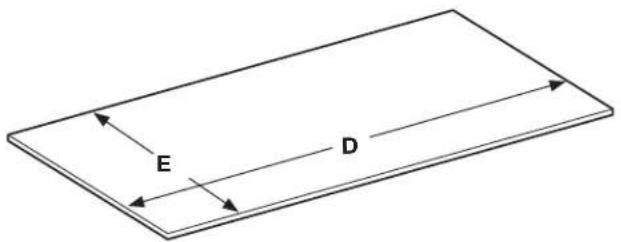
| D | 29"(73.8 cm) |
| E | 14"(36.1 cm) |
PARTS
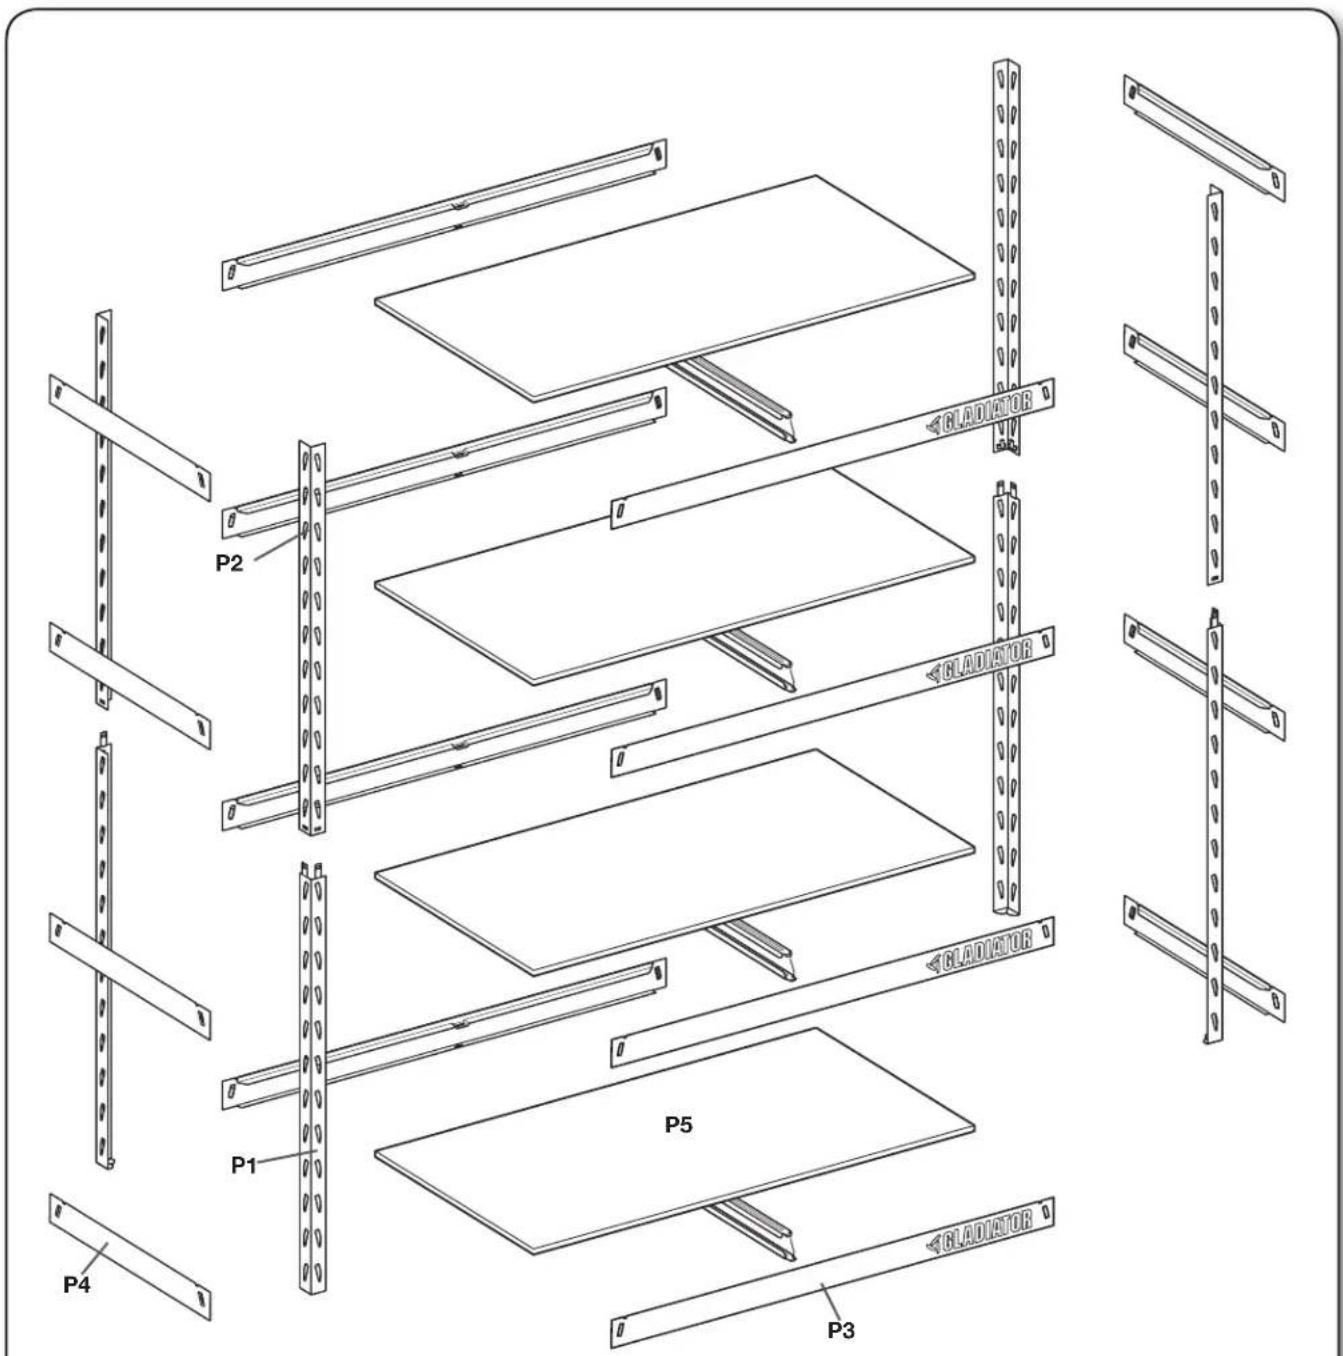
RACK
P1 - Bottom Posts (4)
P2 - Top Posts (4)
P3 - Horizontal Support Beams (8)
P4 - Side Support Beams (8)
P5 - Laminate Shelves (4)
NOTE: No tools or hardware needed for assembly
ASSEMBLY INSTRUCTIONS
Shelving Use Requirements
■ Maximum weight limit is 400 lbs (181 kg) for each shelf, not to exceed 1,600 lbs (726 kg) for the entire shelving unit.
WARNING
Excessive Weight Hazard
Use two or more people to move shelving.
Failure to do so can result in back or other injury.
Unpack
NOTE: Use one person to assemble shelving and two people to move it.
-
Remove and verify the contents. See the "Parts" section so you can sort out all of the parts.
-
Dispose of/recycle all packaging materials.
Assemble & Complete
■No tools or hardware required.
■Can be assembled by one person.
IMPORTANT:
■Determine shelf spacing before assembly.
NOTE: It is recommended to equally space the shelves from top to bottom of the shelving unit and build it from the bottom up. See the "End Frames/Support Beams" illustration.
■Prior to assembly, refer to the sticker located on the inside of one of the P4 side support beams and record model and serial numbers on the included warranty page. There are many benefits for registering the product. Find out more and register the product online at www.gladiatorgarageworks.com.
Support Beam Orientation
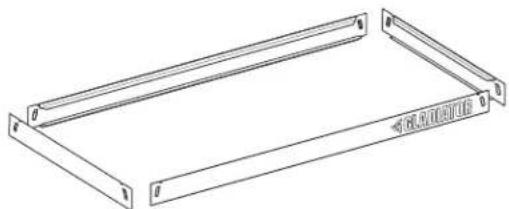
End Frames/Support Beams
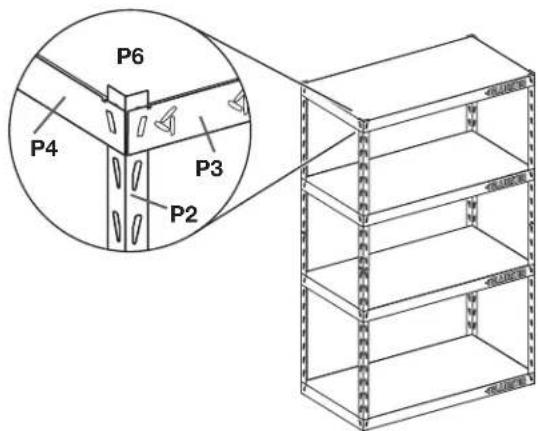
NOTES:
■It is recommended to put beams at notch 1, 9, 16, and 23 (counting from the bottom up) to keep shelving rack balanced. Keep two of the shelves on the bottom half of the shelving rack.
■All support beams need to be at the same height or the shelves will not assemble correctly.
■During assembly press firmly on all side and horizontal support beams (P3 and P4) to ensure they are properly installed into the slots on top and bottom posts.
- Attach support beams to bottom post
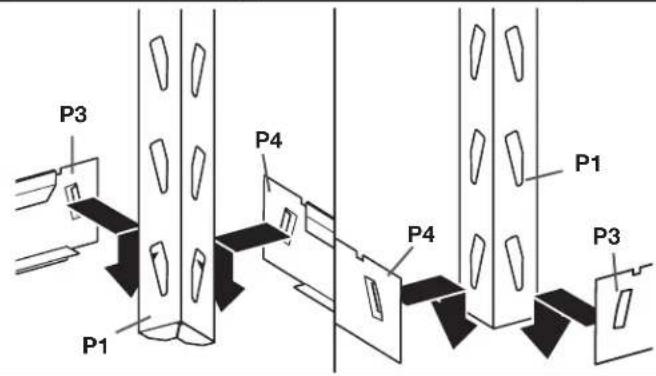
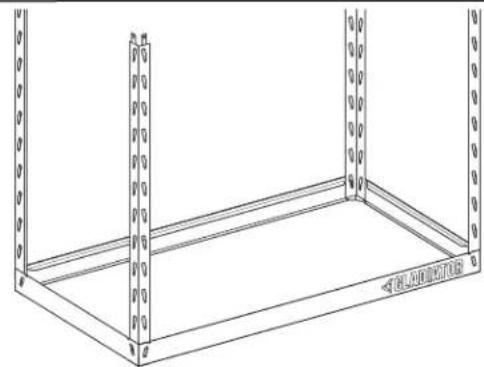
Use bottom post (P1) and attach horizontal support beam (P3) across the front, and attach a side support beam (P4) to the other side. Insert horizontal and side beams starting at the top of the slots on the upright posts and pushing down after engagement. This will give you support while building your shelves up. You have now assembled one corner.
- Add 1 st shelf
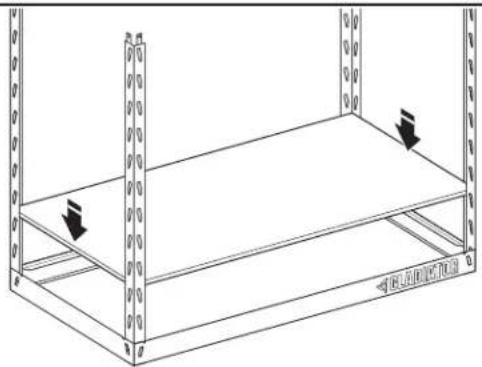
Add laminate shelf to the bottom of the frame.
- Add top post
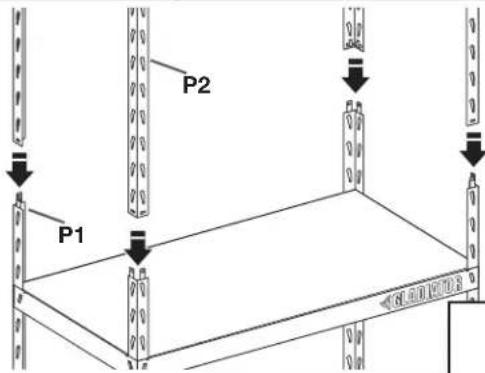
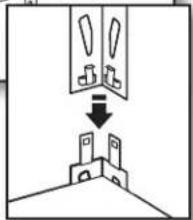
Insert top post (P2) into bottom post (P1) until you hear a click.
NOTE: Posts may appear loose until completion of Step 7.
- Assemble bottom
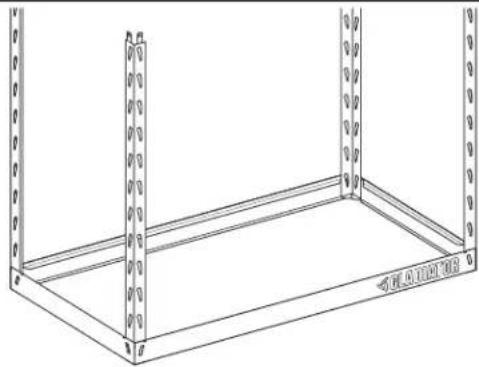
Repeat Step 1 to assemble the other 3 corners, completing the bottom shelf. Press firmly on all side and horizontal support beams to ensure they are properly installed in the upright beams.
- Assemble 2 nd shelf
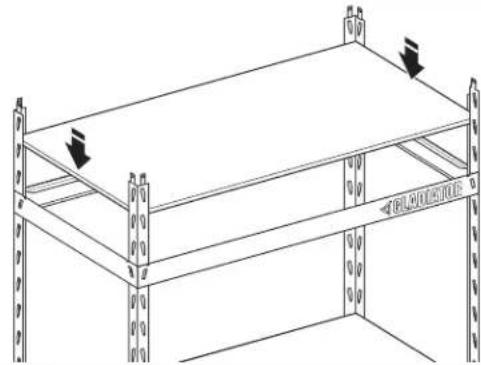
Repeat steps 1 and 2. We recommend adding the section at notch 9 from the bottom of the post. Add the horizontal and side support beams. Add shelf.
NOTE: It is recommend adding shelves to the bottom half of the shelving rack for better support before beginning next step.
- Assemble 3 rd shelf
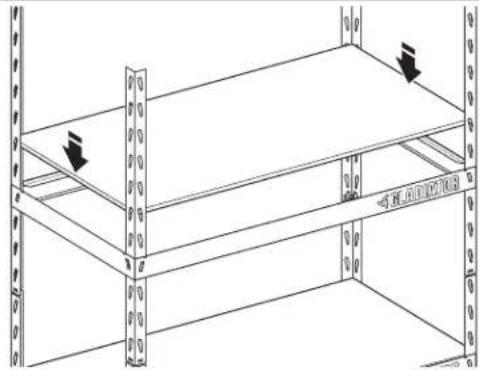
Repeat steps 1 and 2. We recommend adding the section at notch 8 from the top. Add the horizontal and side support beams. Add shelf.
- Assemble top shelf
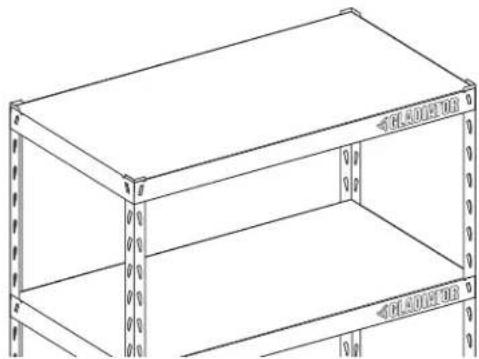
Repeat steps 1 and 2. We recommend adding the section at the top notch of the post. Add the horizontal and side support beams. Add shelf.
- Check all beams
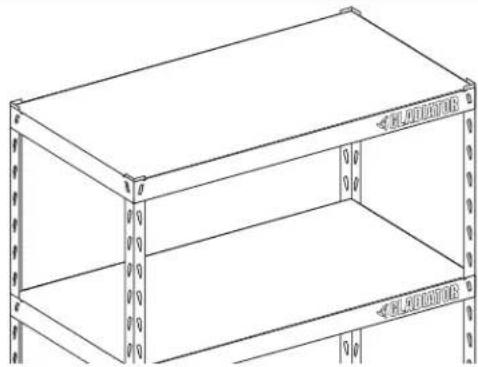
Verify that all beams are properly assembled and firmly seated into the top and bottom post slots.
- Move shelving
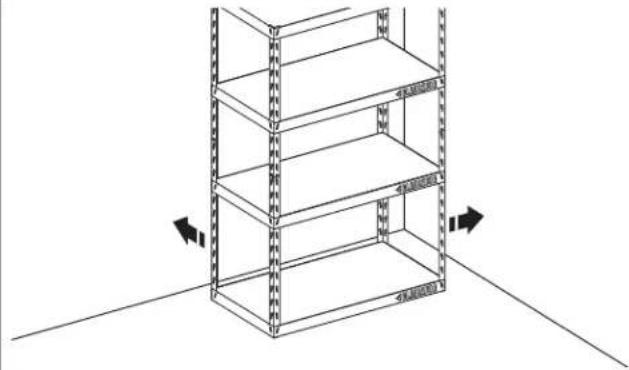
Using two people, move the rack shelving to its final location.
WARRANTY
For warranty information:
In the U.S.A. call 1-866-342-4089 or visit our website at
www.gladiatorgarageworks.com
In Canada call 1-800-807-6777 or visit our website at
www.gladiatorgarageworks.ca
ÉTAGÈRE EZ CONNECT SÉCURITÉ
2. Assembler le bas
www.gladiatorgarageworks.com
www.gladiatorgarageworks.ca
ESTANTE EZ CONNECT SEGURIDAD
www.gladiatorgarageworks.com
www.gladiatorgarageworks.ca

- ÉTAGÈRE
- EZ CONNECT
- DE 60 PO (1,52 M)
- DE HAUT
- ASSEMBLY INSTRUCTIONS......5
- ÉTAGÈRE EZ CONNECT
- EZ CONNECT RACK SHELVING SAFETY
- YOUR SAFETY AND THE SAFETY OF OTHERS ARE VERY IMPORTANT
- DANGER
- WARNING
- DIMENSIONS
- RACK
- ASSEMBLY INSTRUCTIONS
- SHELVING USE REQUIREMENTS
- UNPACK
- ASSEMBLE & COMPLETE
- IMPORTANT
- SUPPORT BEAM ORIENTATION
- NOTES
- WARRANTY
- ÉTAGÈRE EZ CONNECT SÉCURITÉ
- ASSEMBLER LE BAS
- ESTANTE EZ CONNECT SEGURIDAD
Brand : Gladiator
Model : GARC304RGG
Category : Wardrobe