Iridea D2DFA02IRVE - Deep fryer Tognana - Free user manual and instructions
Find the device manual for free Iridea D2DFA02IRVE Tognana in PDF.

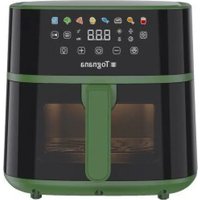
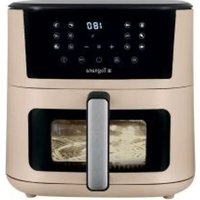
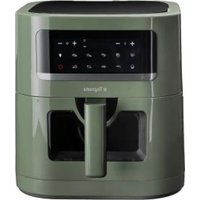
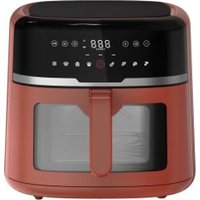
| Product type | Oil-free fryer (air fryer) |
| Brand | Tognana |
| Model | Iridea D2DFA02IRVE |
| Capacity | 5.5 L |
| Power | 1500 W |
| Supply voltage | 220-240 V ~ 50/60 Hz |
| Dimensions (L x W x H) | 34.5 x 27.4 x 31.5 cm |
| Net weight | 3.9 kg |
| Temperature range | 80 °C to 200 °C |
| Maximum timer | 60 minutes |
| Preset programs | 8 (fries, fish, desserts, shrimp, steak, chicken, toast, chicken thighs) |
| Control type | Touch screen with buttons |
| Basket material | Non-stick |
| Dishwasher safe | Yes (basket and grid, max 55 °C) |
| Standby consumption | 0.26 W |
| Protection | Automatic shutdown, overheat protection |
| Warranty | 2 years (conventional warranty) |
| Included accessories | Cooking grid, user manual |
| Maintenance | Clean exterior with damp cloth; basket and grid with hot water or dishwasher |
| Safety | Do not immerse, do not use unattended, hot surfaces |
Frequently Asked Questions - Iridea D2DFA02IRVE Tognana
User questions about Iridea D2DFA02IRVE Tognana
0 question about this device. Answer the ones you know or ask your own.
Ask a new question about this device
Download the instructions for your Deep fryer in PDF format for free! Find your manual Iridea D2DFA02IRVE - Tognana and take your electronic device back in hand. On this page are published all the documents necessary for the use of your device. Iridea D2DFA02IRVE by Tognana.
USER MANUAL Iridea D2DFA02IRVE Tognana
Thank you for choosing our air fryer designed to cook and heat food for domestic consumption. Tognana Porcellane S.p.A. shall not be held liable for any damage that may be caused directly or indirectly to persons, property or pets as a result of failure to observe all the instructions set out in the operating Manual regarding installation, operation and maintenance of the appliance.
SYMBOLS USED THE MANUAL/ITEM AND THEIR MEANINGS
| This symbol indicates that the manual must be read carefully before use. Pay special attention to the safety precautions. Keep this manual in a safe place as it is an integral part of the product itself. | |
| HAZARD: this indicates a potential imminent hazard with a high level of risk which, if not prevented, is highly likely to result in severe injury or even loss of life | |
| WARNING: this indicates a potential hazard with a medium level of risk which, if not prevented, is highly likely to result in severe injury or loss of life | |
| CAUTION: this indicates a potential hazard with a low level of risk which, if not prevented, may result in minor or moderate injury. | |
| Class I: this symbol indicates that protection against electric shock does not rely on basic insulation alone but requires additional safety measures. | |
| CAUTION - HOT SURFACE!!: This symbol indicates that the surface temperature of the area where the symbol is applied may reach dangerously high values. Therefore, direct contact of the surface with the skin and with heat-sensitive fabrics/materials must be avoided. | |
| IMPORTANT NOTE: this indicates useful information for the correct use of the item. | |
| This symbol on the item or on the packaging indicates that the appliance must be disposed of separately from other waste at the end of its life for proper treatment and recycling purposes. | |
| This symbol indicates that the device complies with the essential safety requirements of European Community regulations/directives. | |
| This symbol indicates that the MOCA (materials and objects intended for contact with food) are suitable for contact with food. |

IMPORTANT NOTES ON CORRECT USE
- This appliance is intended exclusively to heat and cook food for domestic consumption.
- This appliance is intended for domestic use and similar applications, such as:
staff kitchens of shops, offices, and other work environments;
agritourisms;
guests of hotels, pensions, and other residential type environments;
bed and breakfast type environments.
- This product is not a toy.
- Do not leave parts of the packaging (plastic bags, polystyrene foam, etc.) within reach of children or non-self-sufficient persons, as these objects are potential sources of danger (e.g. risk of suffocation).
- Use the product for the sole purpose for which it has been designed. The manufacturer is not liable for damage or injury caused by improper use.
- Unauthorised repairs or changes shall void the warranty.
- Do not use outdoors.
- Never leave the appliance on unattended.
- Do not position it above or near hot gas or electric burners, or in a heated oven.
- Before use, place the appliance on a solid, flat, horizontal and non-flammable surface.
- To manually turn the appliance off, press the off button.
- Never put the appliance in the dishwasher.
- Do not immerse the appliance in water or rinse it under running water as it contains electronic components and heating elements.
- Use only original accessories and spare parts, or those recommended by the manufacturer.

HAZARD
ITEM
- Before connecting the fryer to the power, check that the voltage shown on the appliance corresponds to your household voltage.
- Connect the appliance to an earthed power socket. The manufacturer shall not be held liable for any accidents resulting from the electrical installation not being earthed.
- The appliance can be used by children at least 8 years of age and by
persons with reduced physical, sensory or mental capabilities, or lacking experience or the necessary knowledge, provided they are supervised or have received instructions on how to safely use the appliance and understand the inherent dangers. Children must not play with the appliance. Cleaning and maintenance tasks intended to be carried out by the user must not be carried out by unsupervised children.
- Supervise children in order that they do not play with the appliance.
- Do not insert metal objects into the slots of the appliance.
- Do not cover the air intake and vent when the product is being used or is connected to the power socket.
- Do not position the product against the wall or other objects: the clearance from the rear, middle and upper sides of the product must be at least 10cm . Do not lay objects on top of the product.
- Do not add oil to the fryer as this may cause a fire hazard.
- To avoid short circuits, do not insert foods that exceed the maximum level indicated inside the basket, or metal utensils.
- Disconnect the appliance from the power socket when it is moved and not in use.
- Leave the appliance to cool before cleaning.
- Improper use of the product may cause damage or injury.
- To avoid electric shocks, do not submerge the body of the product in water or other liquids.
- This appliance does not contain repairable parts. Do not try to repair it by yourself. Arrange for maintenance to be performed by a qualified service centre using only identical spare parts. This will ensure the continued safety of the product.
- Do not use the appliance in very hot, humid or wet environments, or near inflammable materials (curtains, tablecloths, etc.).
- Do not use if the appliance has been dropped or damaged in any way. Do not attempt to repair it yourself. Contact the retailer for repair/replacement, if under warranty, or call customer support.
- If the product gives off black smoke, disconnect the power supply immediately. Wait for the product to stop giving off smoke before removing the basket from the fryer.
BURN HAZARD!
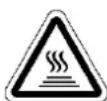
- Do not touch the hot parts of the appliance to avoid burns (see Fig.1). Use handles, tongs or suitable protective devices to remove food from the basket.
-
This appliance can release heat, steam, or condensate during and after operation. The hands and face must be kept at a safe distance from the steam and air vents. Beware of hot steam and heat when removing the basket from the product to prevent the risk of burns, scalds or other injuries and damage to property.
-
When the appliance is in use and for a few minutes after the end of cooking, the temperature of the outer surface and air vent may be very high. Do not touch and do not move the appliance to avoid the risk of burns.
-
Appropriately sized baking paper or aluminium/tin foil can be used for the air fryer. Do not use excessively large sheets that touch the heating elements when in use.
PLUG AND CORD
-
The power cord must be connected to an AC power outlet (standard household current). Do not use other power outlets.
-
In case of incompatibility between the socket and plug of the appliance, have the socket replaced with a suitable type by qualified personnel. The use of adapters, power strips and/or extension cords is not recommended. Should their use become necessary, use only simple or multiple adaptors and extension cords that comply with current safety standards, taking care not to exceed the power limit marked on the adapter and/or extension cord.
-
Do not use the power cord if damaged.
-
Use only the power cord included in the packaging.
-
To avoid electric shocks, do not submerge the power cord complete with the base in water or other liquids.
-
The power cord must be used in a dry and clean place. Use of the appliance in wet or dirty environments may give rise to the risk of fire, electric shocks or electrocution.
-
Do not touch the power cord or plug with wet hands.
-
Do not let the cord hang over the counter.
-
Be careful not to pull or trip on the power cord. Keep the cord far from sources of heat, hot objects and open flames.
-
Disconnect the cord from the mains before cleaning and when it is not
in use. To disconnect the appliance, turn it off and then remove the plug from the wall socket. Do not pull on the cord, but rather grab the plug.
- Always connect the plug to the appliance first, then connect the cord to the wall socket. Check that the cord is fully unwound.
- The cord must not be twisted or wrapped around the appliance.
- Do not use the appliance if the power cord is damaged. Do not attempt to repair it yourself. Contact the retailer for repair/replacement, if under warranty, or call customer support.
- Do not use extension cords, power strips or timer devices.
PRODUCT CONFORMITY
The manufacturer Tognana Porcellane S.p.A. declares that the product Air Fryer 5.5L Mod. Iride complies with Directive 2014/30/EU of the European Parliament and of the Council, of 26th February 2014, on the harmonisation of the laws of the Member States relating to electromagnetic compatibility.
The manufacturer Tognana Porcellane S.p.A. declares that the product Air Fryer 5.5L Mod. Iride complies with Directive 2014/35/EU of the European Parliament and of the Council, of 26th February 2014, on the harmonisation of the laws of the Member States relating to the making available on the market of electrical equipment designed for use within certain voltage limits.
The manufacturer Tognana Porcellane S.p.A. declares that the product Air Fryer 5.5L Mod. Iride Directive 2009/125/EC of the European Parliament and of the Council, of 21st October 2009, on establishing a framework for the setting of ecodesign requirements for energy-related products
The manufacturer Tognana Porcellane S.p.A. declares that the product Air Fryer 5.5L Mod. Iridea complies with Directive 2011/65/EU of the Parliament and of the Council, of 8th June 2011 and subsequent Commission Delegated Directive 2015/863, on the restriction of the use of certain hazardous substances in electrical and electronic equipment.
TECHNICAL DATA
Power: 1500W
- Capacita: 5,5L
- Input voltage: 220-240Vac ~ 50-60Hz; 16A
- Dimensions: 34.5 × 27.4 × 31.5 cm
Net weight: 3900 g
ENERGY CONSUMPTION
Product information regarding energy consumption and the maximum time required to reach the applicable low-power mode.
| Off mode | 0.26 W |
| Maximum time required for the device to automatically reach the applicable low-power mode or condition. | 0 minutes |
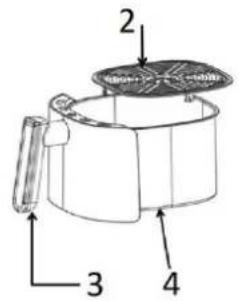
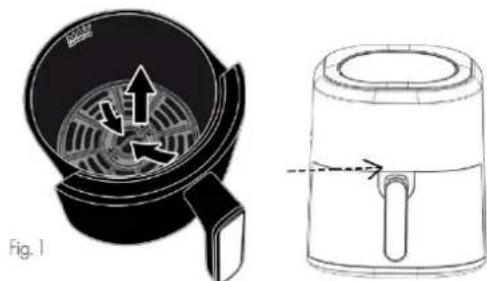
- Control panel
- Cooking grate
- Basket handle
- Cooking basket with window
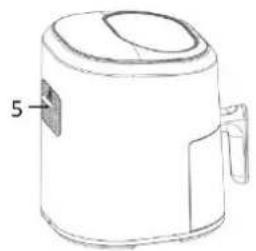
- Air outlets
- Main unit
- Heating element
BEFORE FIRST USE
- Extract the various components from the packaging, check that they are intact and complete, gently remove any protections and labels. The packaging includes:
No.1 Air fryer
No.1 Cooking grate
No.1 User Manual
- Check that all the parts are properly assembled and in position before use.
- If the air fryer is being used for the first time, it is recommended to wash all removable parts that will come into contact with foodstuffs, following the instructions in the section, "CLEANING AND MAINTENANCE".
- Operate the appliance at 200^ without food for 10 - 15 minutes. The appliance may give off smoke and odours due to residue from the manufacturing process. This is normal and is not an indication of a defect or hazard.
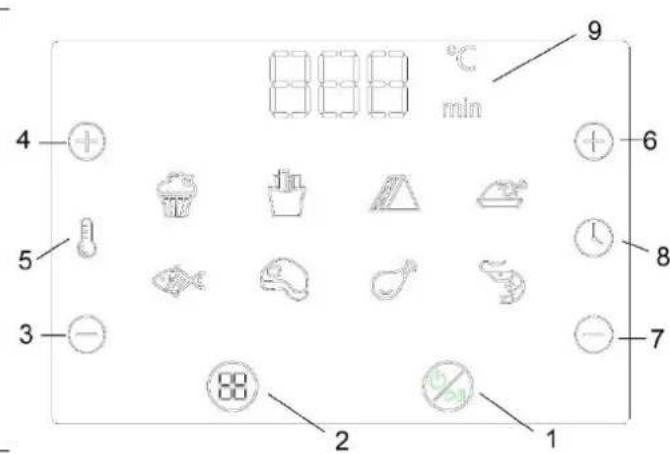
DESCRIPTION OF DISPLAY KEYS
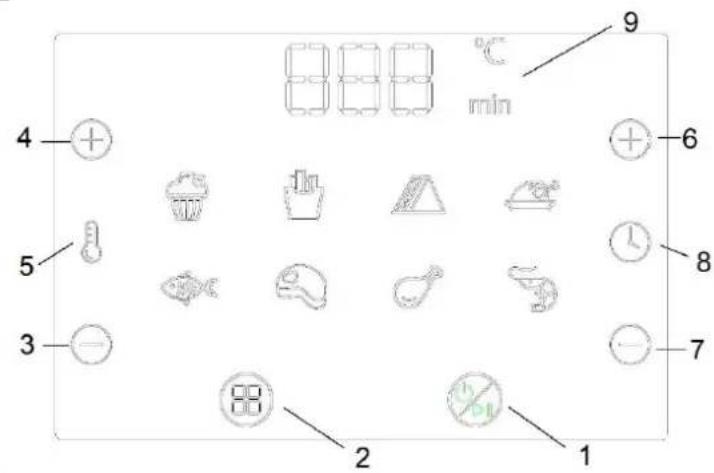
- On, off/stand-by, pause, start key
- "Pre-set menu" key
- Decrease temperature key
- Increase temperature key
- Temperature setting indicator
- Increase time key
- Decrease time key
- Time setting indicator
- Time/temperature display
INSTRUCTIONS FOR USE
- Place the appliance on a flat, stable, heat-resistant and dry surface.
- Insert the power plug in an earthed wall socket, an acoustic signal will be heard, the display will light up
for 1 second then return to STANDBY mode: all the lights will turn off except the "ON/OFF KEY"
- Remove the basket and insert the ingredients in the cooking grate.
-
Fit the basket properly in its compartment.
-
Press the ON key, the display will show the temperature and then the time, which are respectively 200^ and 15 min.
-
The time and temperature can now be manually adjusted using the Time adjustment + / - (C) and Temperature adjustment + / - (A) keys, or by selecting one of the menu functions.
-
Press the START/PAUSE key to start cooking.
- During cooking, the internal light will be lit for the entire duration of the program.
- At the end of cooking. The appliance will turn off.
DESCRIPTION OF KEYS
| On, off/stand-by, pause, start key: insert the plug in an earthed power socket and the display will show "8.88", the appliance is in standby mode. Press the ON key for 1 second, all the LEDs will turn on steadily; the fries LED and the START key LED will start to blink. | |
| Start key: The display shows the pre-set temperature and time (200°C - 15'). The cooking time and temperature can be adjusted at will, after which press the START/PAUSE button to start cooking. | |
| Temperature setting: once the desired cooking mode has been selected or the cooking process has been paused, press the temperature increase or decrease keys (4 and 3) to adjust the desired cooking temperature. Each press increases or decreases the temperature by 5 °C, otherwise the key can be held pressed to continually increase or decrease the temperature. The highest temperature is 200 °C, the lowest temperature is 80 °C. | |
| Time setting: once the desired cooking mode has been selected or the cooking process has been paused, press the time increase or decrease keys (6 and 7) to adjust the desired cooking time. Each press adjusts the time by 1 minute, otherwise the keys can be held pressed to continually adjust the time. The maximum settable time is 60 minutes. | |
| Pause key: if the PAUSE key is pressed during cooking, the appliance goes into pause mode and the LED starts to blink. Press the START key again to resume the cooking cycle from the start. Press the ON key again to cancel the cooking settings and place the appliance back in standby mode (no memory function). When the appliance is in use, the START key LED remains steadily lit; when the appliance is paused using the START button, the LED continues to blink. | |
| Pre-set menu key: press the PRE-SET MENU key to change the various operating modes. After selecting the desired operating mode, press the START key to start the appliance. The START/PAUSE button can be pressed to adjust the temperature and time once any operating mode has been selected. |
PRE-SET MENU TABLE
| SYMBOL | FOOD | PRE-SET COOKING TEMPERATURE | PRE-SET COOKING TIME |
| Fries and frozen snacks | 200°C | 20 min | |
| Fish | 160°C | 20 min | |
| Desserts | 180°C | 30 min | |
| Prawns | 180°C | 20 min | |
| Steak | 180°C | 20 min | |
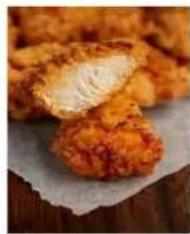
| Chicken | 200°C | 30 min | |
| Toast, Sandwiches, Omelettes | 200°C | 15 min | |
| Chicken legs | 200°C | 30 min |
The "pre-set menu" table is indicative; the cooking time and temperature depend on the type of food and its consistency. Therefore, the pre-set values are for reference only.
Helpful tips
- Always heat the appliance for 3-5 minutes before starting the cooking process.
- The cooking time and temperature can be adjusted at any time during use: in this case, the cooking cycle will restart from the beginning.
- It may be necessary to check and shake certain foods halfway through the cooking time. Shaking small-sized foods improves the end result and avoids uneven cooking. Remove the basket from the main unit and shake it slightly. Place the basket back in the main unit to continue cooking.

CAUTION: The basket may be very hot. Always hold the basket by its handle.
- Cooking times in the air fryer are different to those of a normal oven.
- Smaller and smaller quantities of food require only slightly less preparation time compared to larger foods.
The ideal quantity for crispy fries is 500g - Do not prepare very fatty foods in the appliance.
To bake a cake/quiche or fry delicate or filled foods, place a baking tray or baking dish in the container. - The appliance can also be used to heat food. Set the appliance to 150^ for no longer than 10 minutes and regularly check to make sure the food does not burn.
COOKING TIPS
| Food | Cooking time (min) | Temperature °C | Shake | Notes |
| Potatoes and fried food | ||||
| Thin frozen fries | 12-16 | 200 | Shake every 6 minutes | |
| Thick frozen fries | 12-20 | 200 | Shake every 6 minutes | |
| Homemade fries (8x8 mm) | 18-25 | 180 | Shake every 6 minutes | Add 1/2 tablespoon of oil |
| Homemade potato wedges | 18-22 | 180 | Shake every 6 minutes | Add 1/2 tablespoon of oil |
| Homemade diced potatoes | 12-18 | 200 | Shake every 6 minutes | Add 1/2 tablespoon of oil |
| Potatoes au gratin | 18-22 | 180 | ||
| Meat and poultry | ||||
| Steak | 8-12 | 180 | ||
| Pork chops | 10-14 | 180 | ||
| Hamburgers | 7-14 | 180 | ||
| Sticks | 18-22 | 180 | ||
| Chicken breast | 10-15 | 180 | ||
| Snacks | ||||
| Spring rolls | 8-10 | 200 | Shake every 6 minutes | Pre-heated oven |
| Frozen chicken nuggets | 6-10 | 200 | Shake every 6 minutes | Pre-heated oven |
| Frozen fish fingers | 6-10 | 200 | Pre-heated oven | |
| Frozen cheese snacks | 10 | 200 | Pre-heated oven | |
| Stuffed vegetables | 20 | 160 | Pre-heated oven | |
| Cakes | ||||
| Cakes | 20-25 | 160 | ||
Notes:
- Add 3 minutes of preparation time before starting to fry if the appliance is cold.
- Add maximum 12 tablespoon of oil. Larger quantities may compromise the integrity of the appliance.
CLEANING AND MAINTENANCE
Before cleaning, always disconnect the air fryer from the power socket and leave it to completely cool.
Remove the cooking basket to allow more rapid cooling of the appliance.
The appliance must be cleaned after each use.
1. CLEANING
Cleaning the outside of the fryer
Clean the outside of the fryer with a soft cloth or slightly dampened sponge and dry with a cloth.

HAZARD! DO NOT PLACE IN THE DISHWASHER OR IMMERSE LIQUIDS.
Cleaning the basket and cooking grate
Clean the inside of the basket and the grate with warm water and a non-abrasive sponge. Otherwise, the non-stick coating will be damaged.
The grill and the basket can be washed in the dishwasher at a temperature not exceeding 55^
IMPORTANT NOTE : Do not use chemical cleaners, steel wool or abrasive cleaners for cleaning.
Cleaning the heating element
Clean with a brush to remove any food residue.
2. STORAGE
Leave the appliance to fully cool before stowing it or winding the power cord.
Check that all food residue has been removed from inside the appliance.
Check that all the parts are clean and dry before putting them away.
Never stow the appliance while it is still wet.
It is recommended to store the appliance in a dry, clean place far from moisture and dust.
| Problem | Possible cause | Solution |
| The appliance is not working | The plug is not inserted. | Insert the plug in the power socket. |
| The cooking basket is not inserted. | Insert the cooking basket correctly. | |
| The cooking time and temperature have not been selected. | Set the desired cooking time and temperature. | |
| The overheating protection has tripped. | Turn the appliance off and wait for it to fully cool before turning it on again. | |
| The food is not well cooked. | There is an excessive amount of food. | Reduce the amount of food. |
| The set temperature is too low. | Set a higher temperature. | |
| The set cooking time is too short. | Set a longer cooking time. | |
| The food is not evenly cooked. | The food needs to be shaken halfway through cooking. | Shake the food and check the doneness. |
| The snacks are not crispy. | Snacks intended for cooking in an oil fryer have been used. | Use oven snacks or brush some oil over the snacks. |
| The cooking basket does not fit properly in the main unit. | Too much food in the basket. | Do not overfill the container. |
| White smoke is emitted and the outside of the appliance is hotter than usual. | Fatty food is being cooked. | This is a normal phenomenon that does not affect the appliance or the cooking result. |
| The cooking basket contains fat residue from previous cooking. | Clean the basket after each use. | |
| The fresh potatoes are unevenly cooked or are not crispy. | The potato sticks were not properly rinsed and dried before cooking. | Rinse the potato sticks well to remove any starch and dry them well. |
| The potato sticks are too big. | Cut the sticks into smaller pieces. | |
| Not enough oil. | Add some oil. | |
| The problem is not solved. | Contact your retailer or customer support. |
RECIPE BOOK
1. Fries
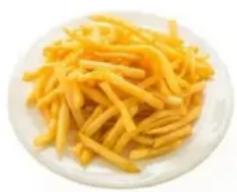
Ingredients
Potatoes 500g
- Oil 2 teaspoons
Salt as desired
Pepper as desired
a. Peel the potatoes and cut them into sticks.
b. Immerse the potato sticks in salted water for at least 20 minutes and boil for 2 minutes, then dry the strips with paper towel.
c. Mix the potato sticks with the oil.
d. Pre-heat the fryer to 200^ for 3 minutes.
e. Evenly arrange the potato fries on the grate inside the basket, insert the basket in the appliance and set the "fries" program or set the time and temperature depending on the size and number of potato fries, or until they turn golden brown.
f. At the end of cooking, place the potato sticks in a bowl, season with salt and pepper as desired and serve.
TIP: for better results, shake the basket with the potato sticks halfway through cooking.
2. Fried chicken wings
Ingredients
- Chicken wings
350g
Garlic
2 cloves
- Oil
2 teaspoons
Salt
1 teaspoon
Pepper
1 teaspoon
a. Pre-heat the fryer to 200^ for 3 minutes.
b. Mix the chicken wings with the oil, garlic, salt and pepper and leave to marinate for 20 minutes.
c. Evenly arrange the chicken wings on the grate inside the cooking basket, insert the basket in the appliance and set the "Fries and snacks" program or set the time and temperature depending on the size and number of chicken wings, or until they turn golden brown.
d. At the end of cooking, place the chicken wings in a bowl and serve.
TIP: for better results, shake the basket with the chicken wings halfway through cooking.
3. Beef steak

Ingredients
Beef steak
350 g
Garlic powder
1 teaspoon
Oil
2 teaspoons
Salt
1/2 teaspoon
Pepper
1 teaspoon
- Soy sauce
As desired
a. Pre-heat the fryer to 200^ for 5 minutes.
b. Mix the steak with the oil, garlic, soy sauce, salt and pepper and leave to marinate for 20 minutes.
c. Place the steak on the grate inside the basket, insert the basket in the appliance and set the "Steaks" program or set the time and temperature depending on the size and number of steaks, or until they turn golden brown.
d. Halfway through cooking, turn the steak, reduce the temperature to 150^ and cook for another 10 minutes or until golden brown.
TIP: for better results, turn the steak halfway through cooking.
4. Grilled sausage
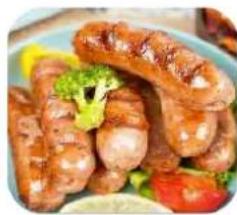
Ingredients
- Fresh sausage
250g
Oil
1 teaspoon
a. Pre-heat the fryer to 200^ for 3 minutes.
b. Mix the sausages with the oil.
c. Evenly arrange the sausages on the grate inside the basket, insert the basket in the appliance and set the "Chicken legs" program or set the time and temperature depending on the size and number of sausages, or until they turn golden brown.
d. At the end of cooking, place the sausages in a bowl and serve.
TIP: for better results, shake the basket with the sausages halfway through cooking.
5. Fried prawns

Ingredients
- Fresh prawns
300g
Oil
1 teaspoon
- Semolina flour
t.t.
Salt
t.t.
a. Clean the prawns, wash and dry them well with paper towel.
b. Take a bowl and place the prawns inside.
c. Season with a little oil and bread them with the semolina flour.
d. Pre-heat the fryer to 200^ for 3 minutes.
e. Spray some oil on the prawns.
f. Evenly arrange the prawns on the grate inside the basket, insert the basket in the appliance and set the "Fries" program or set the time and temperature depending on the size and number of prawns, or until they turn golden brown.
g. At the end of cooking, place the prawns in a bowl and serve.
TIP: for better results, shake the basket with the prawns halfway through
INFORMATION ON DISPOSAL
ITEM
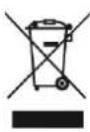
Pursuant to Art. 26 of Legislative Decree No. 49 of 14 March 2014 "Implementation of Directive 2012/19/EU on waste electrical and electronic equipment (WEEE)", the crossed-out bin symbol indicates that this appliance is not to be considered municipal waste. Disposing of it must therefore be carried out by separate waste collection. Failure to dispose of the appliance as separate waste may constitute a potential hazard to the environment and human health. Said product can be returned to the distributor upon purchase of a new appliance.
Improper disposal of the appliance constitutes fraudulent conduct and is subject to sanctions by the Police Authority. For further information, contact the local administration responsible for environmental management.
PACKAGING
For information on how to correctly dispose of the packaging used to protect this product and its parts and/or accessories, follow the instructions in the packaging.
The Company Tognana Porcellane S.p.A. thanks its Customers for their choice and guarantees that its appliances are the result of the latest technologies and research.
This warranty applies only to small appliances marked with the "Tognana" brand and is valid as a conventional warranty pursuant to Article 135-quinques of the Italian Consumer Code (Legislative Decree 206 of 6 September 2005). This warranty does not in any way affect the rights expressly provided for in favour of the consumer by the regulations on the sale of consumer movable goods, whether Italian or of the consumer's country of residence: the consumer can therefore always assert his rights against the retailer from which he purchased the appliance, under the conditions and within the terms provided for by these regulations.
Under this warranty, the appliance is covered by the conventional warranty for a period of two years from the date of purchase by the first user.
It is up to the consumer - through a delivery document issued by the retailer (or by Tognana Porcellane S.p.A. itself, in the case of a purchase made by the consumer directly in the online shop of the latter) or by another evidentiary document (for example, tax receipt, cash receipt or similar, purchase order, etc.), which shows the name of the retailer and the date on which the sale was made - to demonstrate that this warranty is still valid at the time of filing the complaint of defect of the appliance.
In the event of a defect in the appliance, pursuant to this warranty, the consumer may highlight this defect by contacting the appliance dealer or by contacting Tognana Porcellane S.p.A. directly at the e-mail addresssupport@tognana.com, or at the telephone number +39 0422 6721.
Tognana Porcellane S.p.A. guarantees the free repair or replacement of the appliance and/or its components that have defects due to ascertained causes of manufacture and/or malfunctions, directly or through affiliated service centres (check any contacts on the Tognana Porcellane S.p.A. website:
www.tognana.com). Tognana Porcellane S.p.A. reserves the right to completely replace the appliance, if repairability is impossible or too expensive, with another identical or similar appliance (or one that has functional and aesthetic characteristics similar to those of the purchased appliance), without the consumer being able, in this second hypothesis, to contest the choice made by Tognana Porcellane S.p.A.
The consumer, in the presentation of the complaint, in addition to specifying the defect found, also providing photographic documentation, if indispensable for the purpose of ascertaining the defect of the appliance, must communicate their personal data - name and surname, residence address, email and telephone number - for each subsequent contact. For the successful replacement or repair of the appliance, the consumer will in any case be required to follow the instructions provided in this regard by the employees of Tognana Porcellane S.p.A. or the service centre in charge.
All costs of repair and delivery of the replacement appliance or defect-free components will be entirely borne by Tognana Porcellane S.p.A., which will also bear the costs of returning the defective appliance or component, if expressly requested by the consumer.
It should be noted that, following the replacement or repair of the appliance, the effective date of this warranty remains that of the first purchase: therefore, the service performed under the warranty does not extend the period of its validity.
For the purposes of the effectiveness of this warranty, it is specified that: the appliance has been designed and built for exclusively domestic use, consequently terminating this warranty for any other different use. In addition, the appliance can never be considered defective if it has to be adapted or modified to comply with national or local safety and/or technical standards, in force in the consumer's country, if outside the European Union.
In any case, this warranty does not cover:
-
parts subject to wear and tear, nor those that require periodic replacement and/or maintenance;
-
negligence or carelessness in the use of the appliance (e.g. failure to comply with the operating instructions of the appliance);
-
professional use of the appliance;
-
defects due to incorrect installation, configuration, updating of software/BIOS/firmware not performed by authorized personnel Tognana Porcellane S.p.A;
-
repairs or interventions carried out by personnel not authorised by Tognana Porcellane S.p.A.;
-
manipulations of components of the appliance or, where applicable, of the software;
-
other circumstances that, in any case, cannot be traced back to manufacturing defects in the appliance.
Tognana Porcellane S.p.A. declines all responsibility for any damage that may, directly or indirectly, result to people, property and pets as a result of failure to comply with all the requirements indicated in the specific instruction booklet and concerning especially the warnings regarding installation, use and maintenance of the device.
Further claims, in particular if they relate to claims, are excluded, unless the liability arises from express provision of law. At the end of the period of validity of this warranty, or for goods that are not covered by it, Tognana Porcellane S.p.A. remains available to the customer for any questions or information. Further information is available on the website: www.tognana.com.
Cher Client,
CONFORMITE DU PRODUIT
CONFORMIDAD DEL PRODUCTO
POMEMBNA OBVESTILA ZA PRAVILNO UPORABO
OPIS TASTERA NA DISPLEJU
- Uključivanje, isključivanje/stanje pripravnosti, pauza, dugme zaPokretanje
- Taster „unapred postavljeni meni"
- Taster za smanjenje temperature
- Taster za povecanje temperature
- Indikator rodešene temperature
- Taster za povećanje vremena
- Taster za smanjenje vremena
- Indikator podesenog vremena
- Prikaz vremena/temperature
UPUTSTVA ZA UPOTREBU
- Postavite uredj na ravnu, stabilnu i suvu povrsin utpornu na toplotu.
- Ubacite utikač u uzemljenu zidnu uticnicu. Oglasićse se zvučni signal, dispiejće zasvetleti 1 sekundu, a zatim se vratiti u STANBY režim rada: sva svetla ce se isklujcit i osim svetla „TASTER ZA
UKLJUCIVANJE/ISKLJUCIVANJE
- Uklonite korpu i stavite sastojke u rešetku za pečenje.
-
Pravilno ubacite korpu u njen odeljak.
-
Pritisnite TASTER ZA UKLJUÇIVANJE , na displeju ce se prikazati temperatura i vreme, i to 200 °C i 15 min.
-
U ovom trenutku moguce je ručno podesiti vreme i temperaturu pomócu tastera za podešavanje vremena +/- (C) i temperature +/- (A) ili odabrati jegnu od funkcjja menija.
-
Pritisnite taster START/PAUZA za početak kuvanja.
-
Tokom kuvanja, unutrasnje svetlo ce svetleti tokom kompletnog trajanja programa.
- Na kraju kuvanja, urejad ce se iskljuciti.
OPIS TASTERA
| Uključeno, isklučeno/pripravnost, pauza, taster zaPokretanje: Ubacite utiće u uzemljenu utičnicu i na displejuće se prikrazati „8,88“, urežaj je u stanju pripravnosti. Pritisnite tast UKLJUČIVANJE 1 sekundu, svá svetlaće svetleti, sijalica pomfrita i lampica tastera START ime trepereti. | |
| Taster start: Displej prikrazuje unapred postavljenu temperaturu i vreme (200 °C – 15') i moguce je podesitiŽeljeno vreme kuvanja i temperaturu. Nakon toga pritisnite taster START/PAUZA za početak kuvanja. | |
| Podešavanje temperature: nakon biranjaŽeljenog načina kuvanja ili prekidanja procesa kuvanja, pritisnite taster za povećanje ili smanjenje temperature (4 i 3) da biste podesiliŽeljenu temperaturu kuvanja. Svaki pritisak povećava ili smanjuje temperaturu za 5 °C, a možete pritsnuti i držati taster za povećanje ili smanjenje za kontinuirano podešavanje temperature, najviš temperatura je 200 °C, majniža temperatura je 80 °C. | |
| Podešavanje vremena: nakon biranjaŽeljenog načina kuvanja ili prekidanja procesa kuvanja, pritisnite tastere za povećanje ili smanjenje vremena (6 i 7) da biste podesiliŽeljeno vre kuvanja. Svaki pritisak je 1 minut, a možete i da držite tastere pritsnute za kontinuirano podešavanje vremena. Maksimalno vreme koje se moze postaviti je 60 minuta. | |
| Taster za pauzu: tokom kuvanja pristrisnite taster PAUZA, urežaj prelazi u način rada za pauzu i lampica treperi. Ponovo pritsnite taster START i urežaj ime ponovnoPokrenuti kuvanje oc početka. Ponovnim pritskom na taster za napajanje, postavke kuvanja ime peoništi i urežaj ime se vratiti u stanje pripravnosti (nema funkcjije memorije). Kada je urežaj u radu, lampica tasteru START ostaje uključena, a kada se urežaj isključi pritiskom na taster START, lampica ime nastaviti da bljeska. | |
| Taster menija unapred postavljenih opcija: pritsnite taster UNAPRED POSTAVLJENI MENI za promenu različitih fungcionalnih načina rada. Nakon biranjaŽeljenog načina rada pritsnite taster START za početak rada. Moguce je pritsnuti taster START/PAUZA za podešavanji temperature i vremena nakon biranja bilo kojeg načina rada. |
LABELA UNAPRED POSTAVLJENOG MENIJA
| SIMBOL | NAMIRNICA | UNAPRED POSTAVLJENA TEMPERATURA KUVANJA | UNAPRED PODEŠENO VREME KUVANJA |
| Pomfrit i smrznute grickalice | 200°C | 20 min | |
| Riba | 160°C | 20 min | |
| Deserti | 180°C | 30 min | |
| Škampi | 180°C | 20 min | |
| Goveči odrezak | 180°C | 20 min | |
| Piletina | 200°C | 30 min | |
| Tostovi, sendviči, omleti | 200°C | 15 min | |
| Pileči batak | 200°C | 30 min |
Tabela „unapred postavljenog menija“ je indikativna i vreme kuvanja i temperatura zavise od vrste hrane i njene konzistencije. Zato su zadate vrednosti samo za referencu.
Korisni saveti
Uvek prethodno zagrejte uredaj 3-5 minuta pre poctka procesa kuvanja.
- Tokom upotrebe, vreme kuvanja i temperatura mogu se podesiti u bilo kom trenutku: u ovom slučaju, ciklus kuvanja ce se ponovoPokrenuti od početka.
- Neke namirnice cete mozda morati da proverite i protresete na pola vremena kuvanja. Protresanje malih namirnica optimizuje konačni rezultat i sprečava neravnomerno kuvanje. Izvadite korpu iz glavne jedinice i lagano je protresite. Vratite korpu u glavnu Jedinicu za nastavak procesa kuvanja.