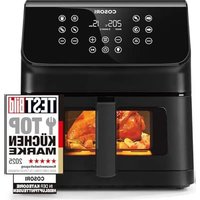
Premium II Plus 6.2l - Deep fryer Cosori - Free user manual and instructions
Find the device manual for free Premium II Plus 6.2l Cosori in PDF.


| Product Type | Air Fryer |
| Brand | Cosori |
| Model | Premium II Plus 6.2 L (CAF-P652-KEU) |
| Capacity | 6.2 L (for 3 to 5 people) |
| Rated Power | 1700 W |
| Power Supply | 220-240 V~, 50/60 Hz |
| Temperature Range | 75 to 205 °C |
| Timer | 1 to 60 minutes |
| Dimensions (including handle) | 37.2 x 30 x 32.1 cm |
| Net Weight | 5.7 kg |
| Cooking Functions | 11 preset functions: Chicken, Steak, Seafood, Shrimp, Preheat, Frozen Foods, French Fries, Bacon, Vegetables, Bake, Roast |
| Control Screen | Touch digital display with backlight |
| Basket | Removable, non-stick coating without PFOA or BPA, dishwasher safe |
| Crisper Plate | Included, non-stick, dishwasher safe |
| Viewing Window | Yes, with interior light (turns off after 2 min) |
| Safety | Auto shutdown after 3 min inactivity, overheat protection, cool-touch handle, basket lock (auto shutdown when removed) |
| Care and Cleaning | Basket and plate dishwasher safe; exterior wiped with a damp cloth |
| Included Accessories | Crisper plate, recipe book, user manual, quick reference guide |
| Warranty | 2-year limited (by Arovast Corporation) |
| Customer Support | Email: support.fr@cosori.com |
Frequently Asked Questions - Premium II Plus 6.2l Cosori
User questions about Premium II Plus 6.2l Cosori
0 question about this device. Answer the ones you know or ask your own.
Ask a new question about this device
Download the instructions for your Deep fryer in PDF format for free! Find your manual Premium II Plus 6.2l - Cosori and take your electronic device back in hand. On this page are published all the documents necessary for the use of your device. Premium II Plus 6.2l by Cosori.
USER MANUAL Premium II Plus 6.2l Cosori
Thank you for your purchase!
(We hope you love your new air fryer as much as we do)


Get Creative with COSORI
Download the free VeSync app to access original recipes and video tutorials from the COSORI chefs, interact with our online community, and more!

explore
our digital recipe gallery cosori.com

enjoy
weekly, featured recipes made exclusively by our in-house chefs

natural_image
Simple line drawings of a chef's hat, microphone, and phone receiver (no text or symbols)CONTACT OUR CHEFS
Our helpful, in-house chefs are ready to assist you with any questions you might have!
Email: recipes@cosori.com
On behalf of all of us at COSORI,
Happy cooking!
Table of Contents
| Package Contents | 2 |
| Specifications | 2 |
| Important Safeguards | 3 |
| Getting to Know Your Air Fryer | 5 |
| Display Diagram | 6 |
| Display Messages | 6 |
| Before First Use | 7 |
| Using Your Air Fryer | 8 |
| Accessories | 12 |
| Care & Maintenance | 13 |
| Troubleshooting | 13 |
| Warranty Information | 15 |
| Customer Support | 17 |
Package Contents
1 × Premium II Plus 6.2-Litre Air Fryer
1 × Crisper Plate
1 × Recipe Book
1 × User Manual
1 × Quick Reference Guide
Specifications
| Model | CAF-P652-KEU |
| Power Supply | AC 220–240V, 50/60Hz |
| Rated Power | 1700W |
| Capacity | 6.2 L / 6.5 qt (serves 3–5 people) |
| Temperature Range | 75°–205°C / 170°–400°F |
| Time Range | 1–60 min |
| Dimensions (including handle) | 37.2 x 30 x 32.1 cm / 14.6 x 11.8 x 12.6 in |
| Dimensions (not including handle) | 30.5 x 30 x 32.1 cm / 12 x 11.8 x 12.6 in |
| Weight | 5.7 kg / 12.6 lb |
READ AND SAVE THESE INSTRUCTIONS
IMPORTANT SAFEGUARDS
Follow basic safety precautions when using your air fryer. Read all instructions.
Key Safety Points
- Do not touch hot surfaces. Use handle. [Figure 2]
- Do not block any ventilation openings. Hot steam is released through openings. Keep your hands and face clear of openings.[Figure 3]
- CAUTION: The hot crisper plate may fall out when turning the basket over. [Figure 4]
Note:
- Firmly insert the crisper plate into the basket to reduce the chance of it falling out.
• Always use tongs to carefully remove hot food.
General Safety
• To protect against electric shock, do not immerse the air fryer cord, plug, or housing in water or other liquids.
- Close supervision is necessary when the air fryer is used by or near children.
- Unplug when not in use and before cleaning. Allow to cool before putting on or taking off parts.
- Do not use your air fryer if it has a damaged cord or plug, if it malfunctions, or if it has been damaged in any way. Contact Customer Support (see page 17).
- Using accessory attachments not recommended by COSORI may cause injuries.
- Do not use outdoors.
- Do not place the air fryer or any of its parts on a stove, near gas or electric burners, or in a heated oven.
- Be extremely cautious when moving your air fryer (or removing the basket) if it contains hot oil or other hot liquids.
- Always place the crisper plate on a heat-resistant surface after removing it from the basket.
- Do not clean with metal scouring pads. Metal fragments can break off the pad and touch electrical parts, creating a risk of electric shock.
- This air fryer can be used by children 8 years and older as well as persons with reduced physical, sensory, or mental capabilities or lack of experience and knowledge if they have been given supervision or instruction concerning use of the air fryer in a safe way and understand the hazards involved.
- Do not allow children to clean or perform maintenance on the air fryer unless they are older than 8 and supervised.
• Children should be supervised to ensure that they do not play with the air fryer. - This air fryer is not intended to be operated by means of an external timer or separate remote-control system.
- Do not use the air fryer for any purpose other than its intended use.
- Not for commercial use. Household use only.
Note: See Care & Maintenance (page 13) for guidelines on how to clean accessories.
While Air Frying
- Use on a flat, stable, heat-resistant surface away from heat sources or liquids.
- An air fryer works with hot air only. Never fill the basket with oil or fat.
- CAUTION: To avoid risk of electric shock, cook only in the removable basket.
- To avoid risk of fire or electric shock, do not place oversized foods or metal utensils into the air fryer.
- Do not overfill the air fryer basket. Heaping amounts of food may touch the heating coils and cause a fire hazard.
- Do not touch the basket or crisper plate during or immediately after air frying.
- Do not cover any part of the air fryer with metal foil, except for the basket as directed.
- Do not place paper, cardboard, non-heat-resistant plastic, or similar materials into your air fryer.
- Never put baking or parchment paper into the air fryer without food on top. Air circulation can cause paper to lift and touch heating coils.
- Always use heat-safe containers. Be extremely cautious if using containers that aren't metal or glass.
- To avoid risk of fire, do not cover or allow the air fryer to touch flammable materials (curtains, draperies, walls, etc.) when it is turned on.
- Do not place items on top of the air fryer when it is turned on.
- Do not store any materials other than COSORI's recommended accessories in the air fryer when not in use.
- To turn the air fryer off, press once. The air fryer will beep, will turn orange, and other buttons will turn off.
- Immediately turn off and unplug your air fryer if you see dark smoke coming out. White smoke is normal, caused by heating fat or food splashing, but dark smoke means that food is burning or there is a circuit problem. Wait for smoke to clear before pulling the basket out. If the cause was not burnt food, contact Customer Support (page 17).
- Do not leave your air fryer unattended while in use.
Power & Cord
- Turn off the air fryer before removing the plug from the outlet.
- Do not let the power cord (or any extension cord) hang over the edge of a table or counter, or touch hot surfaces.
- Remove and discard the protective cover fitted over the power plug of the air fryer to prevent choking hazards.
- Never use an outlet below the counter when plugging in your air fryer.
- If the power supply cord is damaged, it must be replaced by Arovast Corporation or similarly qualified persons in order to avoid an electric or fire hazard. Please contact Customer Support (page 17).
- Keep the air fryer and its cord out of reach of children less than 8 years old.
- Your fryer should only be used with 220–240V, 50/60Hz electrical systems. Do not plug into another type of outlet. [Figure 5]
Extension Cords
- A short power-supply cord is provided to reduce the risk resulting from becoming entangled in or tripping over a longer cord.
- Longer extension cords are available and may be used if care is exercised in their use. If a longer extension cord is used:
- The marked electrical rating of the cord set or extension cord should be at least as great as the electrical rating of the air fryer.
- The cord should be arranged so that it will not drape over the countertop or tabletop where it can be pulled on by children or tripped over unintentionally.
- If the appliance is of the grounded type, the cord set or extension cord should be a grounding-type 3-wire cord.
Electromagnetic Fields (EMF)
The COSORI Air Fryer complies with all standards regarding electromagnetic fields (EMF). If handled properly and according to the instructions in this user manual, the appliance is safe to use based on scientific evidence available today.
natural_image
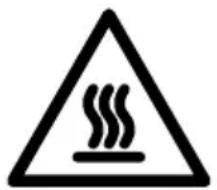
Warning symbol of a hot water surface inside a triangle (no text or numbers)Note: Items marked with the following symbol may reach high temperatures and should be handled carefully.
This product is RoHS compliant.
This product is in compliance with Directive 2011/65/EU, and its amendments, on the restriction of the use of certain hazardous substances in electrical and electronic equipment.
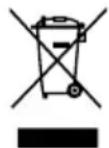
This symbol means the product must not be discarded as household waste, and should be delivered to an appropriate collection facility for recycling. Proper disposal and recycling helps protect natural resources, human health and the environment.
For more information on disposal and recycling of this product, contact your local municipality, disposal service, or the shop where you bought this product.
SAVE THESE INSTRUCTIONS
GETTING TO KNOW YOUR AIR FRYER
Your COSORI Air Fryer uses rapid 360° air circulation technology to cook with little to no oil for quick, crispy, delicious food with up to 85% less oil than deep fryers. With user-friendly, one-touch controls, a nonstick basket, and an intuitive, safe design, the COSORI Air Fryer is the star of your kitchen.
Air Fryer Diagram (Figure 1)
Note:
- Do not try to open the top of the air fryer. This is not a lid. [Figure 6]
-
The basket and crisper plate are made with nonstick coating. It is PFOA-free and BPA-free.
-
Air Inlet
- Control Screen
- Crisper Plate
- Air Outlet
-
Power Cord
-
Housing Handles
- Basket
- Basket Window
- Basket Handle
DISPLAY DIAGRAM
Note:
- When you press a button to use a cooking function, it will turn blue to show that it's active. Pressing again will deselect the function and return to air frying manually.
• To save or reset cooking functions, see Cooking Function Settings (page 9).
Cooking Functions (Figure 1)
A. Chicken
B. Steak
C. Seafood
D. Shrimp
E. Preheat
Note: Tums Preheat on/off (while in a cooking function or cooking manually).
F. Frozen Foods
G. French Fries
H. Bacon
I. Vegetables
J. Bake
K. Roast
Control Panel (Figure 1)
L. Shake Reminder On/Off
M. Decrease time/temperature
N. Cooking Light On/Off
O. Switch between controlling time and temperature
P. On/Off
Q. Start/Pause
R. Increase time/temperature
Display (Figure 1)
S. Temperature display
T. Time display
DISPLAY MESSAGES
• Cooking function has ended. [Figure 7]
- Reminder to shake or flip food. [Figure 8]
- Air fryer is preheated. Add food to the basket. Cooking will start when the basket is reinserted. [Figure 9]
Setting Up
- Remove all packaging from the air fryer, including any temporary stickers.
- Place the air fryer on a stable, level, heat-resistant surface. Keep away from areas that can be damaged by steam (such as walls or cupboards).
Note: Leave 5 inches / 13 cm of space behind and above the air fryer. (Figure 10) Leave enough room in front of the air fryer to remove the basket.
3. Wash the basket and crisper plate thoroughly, using either a dishwasher or a non-abrasive sponge.
Note: There may be water spots on the basket window after washing. This is normal. Run the air fryer for 15 minutes to completely dry the basket.
4. Wipe the inside and outside of the air fryer with a slightly moist cloth. Dry with a towel.
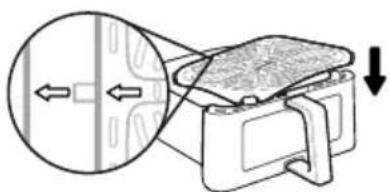
5. Align the arrows on the crisper plate with the arrows on the basket and push down firmly to insert. Place the basket inside the air fryer. [Figure 1.2]
natural_image
Diagram of a mechanical device with directional arrows indicating movement or force (no text or symbols present)Figure 1.2
Test Run
A test run will help you become familiar with your air fryer, make sure it's working correctly, and clean it of possible residues in the process.
- Make sure the air fryer basket is empty and plug in the air fryer.
- Press PREHEAT. The display will show "205°C" and "5 MIN".
- Press to begin preheating. When preheating is done, the air fryer will beep.
- Pull out the basket and let it cool for 5 minutes. Then place the empty basket back in the air fryer.
- Press 📋 to select the Steak fuction. The display will show "205°C" and "10 MIN".
- Press TEMP/TIME twice. The time will blink on the display. Press the — button once to change the time to 5 minutes.
Note: Optionally, press SHAKE to turn off the shake reminder and press PREHEAT to remove preheat.
- Press to begin. When finished, the air fryer will beep.
- Pull out the basket. This time, let the basket cool completely for 10–30 minutes.
Note:
- Any air fryer may have a plastic smell from the manufacturing process. This is normal. If the plastic smell does not decrease after a test run, contact Customer Support (see page 17).
- Use caution when turning the basket over after cooking, as the hot crisper plate may fall out and create a safety hazard.
Preheating
We recommend preheating before placing food inside the air fryer, unless your air fryer is already hot. Food will not cook thoroughly without preheating.
- Plug in. Press to turn on the air fryer display.
- Press PREHEAT. The display will show "205°C" and "5 MIN".
- Optionally, press the + or — buttons to change the temperature. The time will adjust automatically.
| Temperature Time | |
| 205°C / 400°F 5 minutes | |
| 200°C / 390°F 5 minutes | |
| 195°C / 380°F 5 minutes | |
| 190°C / 370°F 5 minutes | |
| 180°C / 360°F 4 minutes | |
| 175°C / 350°F 4 minutes | |
| 170°C / 340°F 4 minutes | |
| 165°C / 330°F and below 3 minutes |
- Press to begin preheating.
- When preheating is done, the air fryer will beep 3 times. The display will show the set preheat temperature. [Figure 9]
Note:
- If no buttons are pressed for 3 minutes while in standby, the air fryer will clear all settings.
- All cooking functions (except Bacon) include Preheat. To skip the preheating stage, press PREHEAT to remove Preheat.
Air Frying
Note:
- Do not place anything on top of your air fryer. This will disrupt airflow and cause poor air frying results. (Figure 11)
- An air fryer is not a deep fryer. Do not fill the basket with oil, frying fat, or any liquid.
- Be careful of hot steam when taking the basket out of the air fryer.
Cooking Function Settings
Using a cooking function is the easiest way to air fry. Cooking functions are programmed with an ideal time and temperature for cooking certain foods.
-
You can customize a function's time (1–60 minutes), temperature (75°–205°C / 170°–400°F), Preheat settings, and Shake Reminder settings, unless noted.
• To customize a function: -
Choose a function and adjust the time and temperature. Optionally, add/remove the Shake Reminder by pressing SHAKE, and add/remove Preheat by pressing PREHEAT.
- Press and hold the function icon until the air fryer beeps 1 time.
- To reset a function:
- Without making changes, press and hold both the function icon and Temp/Time icon for 3 seconds until the air fryer beeps 1 time.
• To reset all functions:
- Press and hold both + and — for 3 seconds until the air fryer beeps 1 time.
Results may vary. Check out our Quick Reference Guide and Recipe Book for a guide to customizing functions for perfect results.
Note: The air fryer will remember the most recent cooking function settings the next time you turn on the air fryer.
| Function Symbol | Default | Temperature | Default Time (Minutes) | Preheat | Shake Reminder?* |
| Steak 205°C / 400°F 10 | √ | √ | |||
| Chicken 200°C / 390°F 20 | √ | √ | |||
| Seafood 190°C / 370°F 10 | √ | ||||
| Shrimp 190°C / 370°F 6 | √ | √ | |||
| Bacon | √ | 160°C / 320°F 8 | |||
| Frozen Foods | * | 195°C / 380°F 12 | √ | √ | |
| French Fries** | ### | 195°C / 380°F 18 | √ | √ | |
| Vegetables | # | 205°C / 400°F 10 | √ | √ | |
| Roast 195°C / 380°F | 15 | √ | √ | ||
| Bake | BAKE | 165°C / 330°F 20 | √ | ||
| Preheat | PREHEAT | 205°C / 400°F | 5 (auto adjust) | ||
* See Shaking Food (page 11). ** See Cooking Guide (page 11) for tips on air frying french fries.
Air Frying
- Place the crisper plate into the basket. The crisper plate allows excess oil to drip down to the bottom of the basket.
Note:
- The crisper plate may not be used for all recipes, such as for muffins and breads.
-
Align the arrows on the crisper plate and basket bottom when inserting.
-
Select a cooking function (see page 9).
Note: Cooking functions are programmed with an ideal time and temperature for cooking certain foods. You can also set a custom time and temperature without choosing a function.
- Optionally, customize the temperature and time, turn Preheat on/off, and add/remove a Shake Reminder. You can do this anytime during cooking.
a. Press TEMP/TIME to change temperature or time. The temperature or time will blink on the display.
b. Press the + or - buttons to change the temperature (75°-205°C / 170°-400°F) or time (1-60 minutes).
Note:
- To rapidly increase or decrease time or temperature, press and hold the + or - buttons.
- If you do not press TEMP/TIME, then pressing + or - will automatically change temperature.
c. Press SHAKE to add/remove a Shake Reminder.
d. Press PREHEAT to add/remove Preheat.
- Press to begin air frying.
-
When preheating is finished, add food to the basket when the air fryer displays. [Figure 9]
-
If the Shake Reminder is turned on, it will appear halfway through cooking time. The air fryer will beep 5 times, and ((SHAKE)) will blink on the display.
a. Take the basket out of the air fryer, being careful of hot steam. The air fryer will pause cooking automatically, and the display will turn off until the basket is replaced.
b. Shake or flip the food.
c. Put the basket back into the air fryer.
Note: See Shaking Food (page 11).
- During cooking, press to turn on the cooking light and monitor cooking status of the food. The light will automatically turn off after 2 minutes.
- The air fryer will beep 3 times when finished. The display will show: [Figure 7]
- Take the basket out of the air fryer, being careful of hot steam.
- Remove food from the basket.
a. Make sure the basket is resting on a flat surface.
CAUTION: The hot crisper plate may fall out when turning the basket over.
b. Watch for hot oil or fat collected in the basket. To avoid splashing, drain oil before replacing the basket. [Figure 12]
11. Allow to cool before cleaning.
Shaking Food
How to Shake
- During cooking, take the basket out of the air fryer and shake, mix, or flip the food.
a. To shake food:
- Hold the basket handle just above a heat-resistant surface for safety purposes. Shake the basket.
b. If the basket is too heavy to shake:
- Place the basket on a heat-resistant holder or surface.
- Carefully shake the basket.
Note: Do not use this method if there is a risk of hot liquids splashing.
c. If the basket is too heavy to shake and there are hot liquids present:
- Place the basket on a heat-resistant holder or surface.
-
Use tongs to mix or flip the food.
-
When you take the basket out, the air fryer will pause cooking automatically. As a safety feature, the display will turn off until the basket is replaced.
- When you replace the basket, cooking will automatically resume.
- Avoid shaking longer than 30 seconds, as the air fryer may start to cool down.
What to Shake
- Small foods that are stacked will usually need shaking, such as fries or nuggets.
- Without shaking, foods may not be crispy or evenly cooked.
- You can flip other foods, such as steak, to ensure even browning.
When to Shake
- Shake or flip food once halfway through cooking, or more if desired.
- The Shake Reminder is designed to remind you to check on your food. Tap SHAKE to turn on the Shake Reminder. Certain functions use the Shake Reminder automatically (see Cooking Function Settings, page 9).
Shake Reminder
- The Shake Reminder will alert you with 5 beeps, and ((SHAKE)) will blink on the display.
- If you do not remove the baskets, the Shake Reminder will beep again after 1 minute and the display will show a solid ((SHAKE)).
• The Shake Reminder will go away once you take out the basket.
Cooking Guide
Overfilling
- If the basket is overfilled, food will cook unevenly.
- Do not pack in food.
French Fries
- Add 1/2 - 1 US tbsp / 8-15 mL oil for crispiness.
- When making fries from raw potatoes, soak uncooked fries in water for 15 minutes to remove starch prior to frying. Pat dry with a towel before adding oil.
- Cut uncooked fries smaller for crispier results. Try cutting fries into 14 - by 3-inch / 0.6- by 7.6-cm strips.
Food Tips
- You can air fry any frozen foods or goods that can be baked in an oven.
- To make cakes, hand pies, or any food with filling or batter, place food in a heat-safe container before placing in the basket.
• Air frying high-fat foods will cause fat to drip to the bottom of the basket. To avoid excess smoke while cooking, pour out fat drippings after cooking. - Liquid-marinated foods create splatter and excess smoke. Pat these foods dry before air frying.
Using Oil
- Adding a small amount of oil to your food will make it crispier. Use no more than 2 US tbsp / 30 mL of oil.
- Oil sprays are excellent for applying small amounts of oil evenly to all food items.
Note: For more from the COSORI Kitchen, check out our Recipe Book and Tips from the Chef.
More Functions
Monitor Cooking Status
- Press to turn the cooking light on/off.
• View the food cooking through the clear basket window without removing the basket from the air fryer.
Note:
- The cooking light will automatically turn off after 2 minutes.
- When the air fryer is cooking and you reinsert the basket or press ▶, the cooking light will turn off after 30 seconds.
Automatically Resume Cooking
- If you pull out the basket, the air fryer will pause cooking automatically. The display will turn off temporarily as a safety feature.
- When you return the basket, the air fryer will automatically resume cooking based on your previous settings.
Switching Temperature Units
- Press and hold TEMP/TIME for 3 seconds.
• The air fryer will beep once, and the temperature unit will change from Fahrenheit to Celsius. - Repeat to switch back to Fahrenheit.
ACCESSORIES
Turn Sound On/Off
- Press and hold BAKE and SHAKE at the same time for 3 seconds until the air fryer beeps once to turn off the sound. Repeat to turn the sound back on..
Pausing
- Press ▶pause cooking. The air fryer will stop heating, and ▶will blink until you press ▶to resume cooking.
• After 30 minutes of inactivity, the air fryer will turn off. - This allows you to pause the cooking function without removing the basket from the air fryer.
Automatic Shutoff
- If the air fryer has no active cooking functions, the air fryer will clear all settings and turn off after 3 minutes of inactivity.
Overheat Protection
- If the air fryer overheats, it will automatically shut down as a safety feature.
- Let the air fryer cool down completely before using it again.
Additional and replacement accessories are available for your air fryer. For more information, contact Customer Support Customer Support (see page 17).
CARE & MAINTENANCE
Note:
• Always clean the air fryer basket and interior after every use.
- Lining the basket with foil (except the crisper plate) may make cleanup easier.
-
Turn off and unplug the air fryer. Allow it to cool completely before cleaning. Pull out the basket for faster cooling.
-
Wipe the outside of the air fryer with a moist cloth, if necessary.
-
The basket and crisper plate are dishwasher-safe. You can also wash them with hot, soapy water and a non-abrasive sponge. Soak if necessary.
Note:
- The basket and crisper plate have a nonstick coating. Avoid using metal utensils and abrasive cleaning materials.
-
There may be water spots on the basket window after washing. This is normal. Run the air fryer for 15 minutes to completely dry the basket.
-
For stubborn grease:
a. In a small bowl, mix 2 US tbsp / 30 mL of baking soda and 1 US tbsp / 15 mL of water to form a spreadable paste.
b. Use a sponge to spread the paste on the baskets and scrub. Let the baskets sit for 15 minutes before rinsing.
c. Wash basket with soap and water before using.
-
Clean the inside of the air fryer with a slightly moist, non-abrasive sponge or cloth. Do not immerse in water. [Figure 13] If needed, clean the heating coil to remove food debris.
-
Dry before using.
Note: Make sure the heating coil is completely dry before turning on the air fryer.
TROUBLESHOOTING
| Problem Possible Solution | |
| The air fryer will not turn on. | Make sure the air fryer is plugged in. |
| Push the basket securely into the air fryer. | |
| Food is not completely cooked. | Place smaller batches of food items into the basket. If the basket is overstuffed, then foods will be undercooked. |
| Increase cooking temperature or time. | |
| Food is cooked unevenly. | Foods that are stacked on top of each other or close to each other need to be shaken or flipped during cooking (see Shaking Food, page 11). |
| Food is not crispy after air frying. | Spraying or brushing a small amount of oil on foods can increase crispiness (see Cooking Guide, page 11). |
TROUBLESHOOTING (CONT.)
| French fries are not cooked correctly. | See French Fries, page 11. |
| Problem Possible Solution | |
| Basket will not slide into the air fryer securely. | Make sure the basket is not overfilled with food. |
| Make sure the crisper plate is securely inside the basket. | |
| Basket window is dirty or foggy. | Wash the basket in the dishwasher. Make sure it is dried thoroughly. |
| Dark smoke is coming out of the air fryer. | Immediately unplug your air fryer. Dark smoke means that food is burning or there is a circuit problem. Wait for smoke to clear before pulling the baskets out. If the cause was not burnt food, contact Customer Support (see page 17). |
| White smoke or steam is coming out of the air fryer. | The air fryer may produce some white smoke or steam when you use it for the first time or during cooking. This is normal. |
| Make sure the basket and the inside of the air fryer are cleaned properly and not greasy. | |
| Cooking greasy foods will cause oil to collect beneath the crisper plate. This oil will produce white smoke, and the basket may be hotter than usual. This is normal, and should not affect cooking. Handle basket with care. | |
| The air fryer has a plastic smell. | Any air fryer may have a plastic smell from the manufacturing process. This is normal. Follow the instructions for a Test Run (page 7) to get rid of the plastic smell. If a plastic smell is still present, please contact Customer Support (see page 17). |
| Display shows Error Code "E1". | There is an open circuit in the temperature monitor. Contact Customer Support (see page 17). |
| Display shows Error Code "E2". | There is a short circuit in the temperature monitor. Contact Customer Support (see page 17). |
| Display shows Error Code "E3". | The air fryer's overheat protection has activated. Turn off and unplug the air fryer and allow it to cool completely. If the display continues to show "E3", contact Customer Support (see page 17). |
If your problem is not listed, please contact Customer Support (see page 17).
| Product Name | Premium II Plus6.2-Litre Air Fryer |
| Model CAF-P652-KEU | |
| For your own reference, we strongly recommend that you record your order ID and date of purchase. | |
| Date of Purchase | |
| Order ID | |
Levoit Limited Product Warranty
Two (2) Year\* Limited Consumer Product Warranty
Arovast Corporation (“Arovast”) warrants that the product shall be free from defects in material and workmanship for a period of 2 years from the date of original purchase (“Limited Warranty Period”), provided the product was used in accordance with its use and care instructions (e.g., in the intended environment and under normal circumstances). *This warranty does not limit your rights as may be mandated or granted by the applicable national or regional consumer protection laws in your region, in which cases the Limited Warranty Period is extended pursuant to the applicable requirements.
Your Limited Warranty Benefits
During the Limited Warranty Period and subject to this limited Warranty Policy, Arovast will, in its sole and exclusive discretion, either (i) refund the purchase price if the purchase was made directly from the online Levoit store, (ii) repair any defects in material or workmanship, (iii) replace the product with another product of equal or greater value, or (iv) provide store credit in the amount of the purchase price.
Who is Covered?
This limited warranty extends only to the original consumer purchaser of the product and is not transferable to any subsequent owner of the product, regardless of whether the product transferred ownership during the specified term of the limited warranty. The original consumer purchaser must provide verification of the defect or malfunction and proof of the date of purchase to claim the Limited Warranty Benefits.
Be Aware of Unauthorized Dealers or Sellers
This limited warranty does not extend to products purchased from unauthorized dealers or sellers. Arovast's limited warranty only extends to products purchased from authorized dealers or sellers that are subject to Arovast's quality controls and have agreed to follow its quality controls. Please be aware, products purchased from an unauthorized website or dealer may
be counterfeit, used, defective, or may not be designed for use in your country. You can protect yourself and your products by making sure you only purchase from Arovast or its authorized dealers.
If you have any questions about a specific seller, or if you think you may have purchased your product from an unauthorized seller, please contact our Customer Support Team.
What's Not Covered?
- Normal wear and tear, including normal wearing parts, such as dust bin, filter, roller brush, battery, and power cord, or carpet or floor damage due to misuse.
- If the proof-of-purchase has been altered in any way or is made illegible.
- If the model number, serial number or production date code on the product has been altered, removed or made illegible.
- If the product has been modified from its original condition.
- If the product has not been used in accordance with directions and instructions in the user manual.
- Damages caused by connecting peripherals, additional equipment or accessories other than those recommended in the user manual.
- Damages or defects caused by accident, abuse, misuse, or improper or inadequate maintenance.
- Damages or defects caused by service or repair of the product performed by an unauthorized service provider or by anyone other than Arovast
- Damages or defects occurring during commercial use, rental use, or any use for which the product is not intended.
- If the unit has been damaged, including but not limited to damage by animals, lightning, abnormal voltage, fire, natural disaster, transportation, dishwasher, or water (unless the user manual expressly states that the product is dishwasher-safe).
• Incidental and consequential damages. - Damages or defects exceeding the cost of the product.
Claiming Your Limited Warranty Service in 5 Simple Steps:
- Make sure your product is within the specified limited warranty period.
- Make sure you have a copy of the invoice and order ID or proof-of-purchase.
- Make sure you have your product. DO NOT dispose of your product before contacting us.
- Contact our Customer Support Team.
- Once our Customer Support Team has approved your request, please return the product with a copy of the invoice and order ID.
Sole and Exclusive Remedy
THE FOREGOING LIMITED WARRANTY CONSTITUTES AROVAST CORPORATION'S EXCLUSIVE LIABILITY, AND YOUR SOLE AND EXCLUSIVE REMEDY, FOR ANY BREACH OF ANY WARRANTY OR OTHER NONCONFORMITY OF THE PRODUCT COVERED BY THIS LIMITED PRODUCT WARRANTY STATEMENT. THIS LIMITED WARRANTY IS EXCLUSIVE, AND IN LIEU OF ALL OTHER WARRANTIES. NO EMPLOYEE OF AROVAST CORPORATION OR ANY OTHER PARTY IS AUTHORIZED TO MAKE ANY WARRANTY IN ADDITION TO THE LIMITED WARRANTY IN THIS LIMITED PRODUCT WARRANTY STATEMENT.
Disclaimer of Limited Warranties
TO THE FULLEST EXTENT PROVIDED BY APPLICABLE LAW, EXCEPT AS WARRANTED IN THIS LIMITED PRODUCT WARRANTY POLICY, AROVAST CORPORATION PROVIDES THE PRODUCTS YOU PURCHASE FROM AROVAST CORPORATION "AS IS" AND AROVAST CORPORATION HEREBY DISCLAIMS ALL WARRANTIES OF ANY KIND, WHETHER EXPRESS OR IMPLIED, STATUTORY, OR OTHERWISE, INCLUDING BUT NOT LIMITED TO ANY WARRANTIES OF MERCHANTABILITY, NON-INFRINGEMENT, AND FITNESS FOR PARTICULAR PURPOSE.
Limitations of Liability
TO THE FULLEST EXTENT PROVIDED BY APPLICABLE LAW, IN NO EVENT WILL AROVAST CORPORATION, ITS AFFILIATES, OR THEIR LICENSORS, SERVICE PROVIDERS, EMPLOYEES, AGENTS, OFFICERS, OR DIRECTORS BE LIABLE FOR:
(a) DAMAGES OF ANY KIND ARISING OUT OF OR IN CONNECTION WITH PRODUCTS PURCHASED FROM AROVAST CORPORATION IN EXCESS OF THE PURCHASE PRICE PAID BY THE PURCHASER FOR SUCH PRODUCTS, OR
(b) INDIRECT, SPECIAL, INCIDENTAL, CONSEQUENTIAL, OR PUNITIVE DAMAGES EVEN IF AROVAST CORPORATION OR ONE OF ITS SUPPLIERS HAS BEEN ADVISED OF THE POSSIBILITY OR LIKELIHOOD OF SUCH DAMAGES.
AND REGARDLESS OF WHETHER CAUSED BY TORT (INCLUDING NEGLIGENCE), BREACH OF CONTRACT, OR OTHERWISE. OUR LIABILITY SHALL UNDER NO CIRCUMSTANCES EXCEED THE ACTUAL AMOUNT PAID BY YOU FOR THE DEFECTIVE PRODUCT, NOR SHALL WE UNDER ANY CIRCUMSTANCES BE LIABLE FOR ANY CONSEQUENTIAL, INCIDENTAL, SPECIAL OR PUNITIVE DAMAGES OR LOSSES, WHETHER DIRECT OR INDIRECT.
EXCEPT AS COVERED BY THIS LIMITED PRODUCT WARRANTY STATEMENT, AROVAST CORPORATION SHALL NOT BE LIABLE FOR COSTS ASSOCIATED WITH THE REPLACEMENT OR REPAIR OF PRODUCTS PURCHASED FROM IT, INCLUDING, BUT NOT LIMITED TO, LABOR, INSTALLATION, OR OTHER COSTS INCURRED BY THE USER AND, IN PARTICULAR, ANY COSTS RELATING TO THE REMOVAL OR REPLACEMENT OF ANY PRODUCT.
Other Rights You May Have
SOME JURISDICTIONS DO NOT ALLOW FOR: (1) EXCLUSION OF IMPLIED WARRANTIES; (2) LIMITATION ON THE DURATION OF IMPLIED WARRANTIES; AND/OR (3) EXCLUSION OR LIMITATION OF INCIDENTAL OR CONSEQUENTIAL DAMAGES; SO THE DISCLAIMERS IN THIS POLICY MAY NOT APPLY TO YOU. IN THESE JURISDICTIONS YOU HAVE ONLY THE IMPLIED WARRANTIES THAT ARE EXPRESSLY REQUIRED TO BE PROVIDED IN ACCORDANCE WITH APPLICABLE LAW. THE LIMITATIONS OF WARRANTIES, LIABILITY, AND REMEDIES APPLY TO THE MAXIMUM EXTENT PERMITTED BY LAW.
ALTHOUGH THIS LIMITED WARRANTY GIVES YOU SPECIFIC LEGAL RIGHTS, YOU MAY HAVE OTHER RIGHTS IN YOUR JURISDICTION. THIS STATEMENT OF LIMITED WARRANTY IS SUBJECT TO APPLICABLE LAWS THAT APPLY TO YOU AND THE PRODUCT. PLEASE REVIEW THE LAWS IN YOUR JURISDICTION TO UNDERSTAND YOUR RIGHTS FULLY.
Changes to this policy
We may change the terms and availability of this limited warranty at our discretion, but any changes will not be retroactive.
This warranty is made by:
AROVAST CORPORATION
1202 N. Miller St., Suite A
Anaheim, CA 92806
USA
If you have any questions or concerns about your new product, please contact our helpful Customer Support Team.
Arovast Corporation
1202 N. Miller St., Suite A
Anaheim, CA 92806, USA
Email: support.eu@cosori.com
support.fr@cosori.com
support.de@cosori.com
support.it@cosori.com
support.es@cosori.com
*Please have your invoice and order ID ready before contacting Customer Support.
natural_image
Simple line drawings of a chef's hat, mask, and phone (no text or symbols)KONTAKTIEREN SIE UNSERE KÜCHENCHEFS
natural_image
Warning symbol depicting steam rising inside a triangle (no text or numbers)natural_image
Mechanical assembly diagram showing a cam or bracket component with directional arrows indicating movement (no text or symbols)Abb 1.2
Testvorgang
support.de@cosori.com
support.it@cosori.com
support.es@cosori.com
natural_image
Simple line drawings of a chef's hat, microphone, and phone receiver (no text or symbols)COMUNÍQUESE CON NUESTROS CHEFS
natural_image
Warning symbol depicting a steaming triangle (no text or numbers present)natural_image
Diagram of a mechanical device with directional arrows indicating movement or force (no text or symbols present)Figura 1.2
natural_image
Simple line drawings of a chef's hat, mask, and phone receiver (no text or symbols)CONTATTA I NOSTRI CHEF
natural_image
Warning symbol depicting steam rising inside a triangle (no text or numbers)natural_image
Diagram of a mechanical component with directional arrows indicating movement or force (no text or symbols present)Figura 1.2
support.de@cosori.com
support.it@cosori.com
support.es@cosori.com
natural_image
Simple line drawings of a chef's hat, microphone, and phone receiver (no text or symbols)CONTACTEZ NOS CHEFS
natural_image
Warning symbol depicting a steaming triangle (no text or numbers present)natural_image
Technical diagram of a mechanical assembly with directional arrows indicating movement (no text or symbols)Figure 1.2
Lancement du test
INFORMATIONS SUR LA GARANTIE
support.de@cosori.com
support.it@cosori.com
support.es@cosori.com
- Thank you for your purchase!
- Get Creative with COSORI
- CONTACT OUR CHEFS
- Table of Contents
- Package Contents
- READ AND SAVE THESE INSTRUCTIONS
- IMPORTANT SAFEGUARDS
- Key Safety Points
- Note:
- General Safety
- While Air Frying
- Power & Cord
- Extension Cords
- Electromagnetic Fields (EMF)
- This product is RoHS compliant.
- SAVE THESE INSTRUCTIONS
- GETTING TO KNOW YOUR AIR FRYER
- Air Fryer Diagram (Figure 1)
- DISPLAY DIAGRAM
- Cooking Functions (Figure 1)
- Control Panel (Figure 1)
- Display (Figure 1)
- DISPLAY MESSAGES
- Setting Up
- Test Run
- Preheating
- Air Frying
- Cooking Function Settings
- Shaking Food
- How to Shake
- What to Shake
- When to Shake
- Shake Reminder
- Cooking Guide
- Overfilling
- French Fries
- Food Tips
- Using Oil
- More Functions
- Monitor Cooking Status
- Automatically Resume Cooking
- Switching Temperature Units
- ACCESSORIES
- Turn Sound On/Off
- Pausing
- Automatic Shutoff
- Overheat Protection
- CARE & MAINTENANCE
- TROUBLESHOOTING
- TROUBLESHOOTING (CONT.)
- Levoit Limited Product Warranty
- Two (2) Year\* Limited Consumer Product Warranty
- Your Limited Warranty Benefits
- Who is Covered?
- Be Aware of Unauthorized Dealers or Sellers
- What's Not Covered?
- Claiming Your Limited Warranty Service in 5 Simple Steps:
- Sole and Exclusive Remedy
- Disclaimer of Limited Warranties
- Limitations of Liability
- Other Rights You May Have
- Changes to this policy
- AROVAST CORPORATION
- KONTAKTIEREN SIE UNSERE KÜCHENCHEFS
- Testvorgang
- COMUNÍQUESE CON NUESTROS CHEFS
- CONTATTA I NOSTRI CHEF
- CONTACTEZ NOS CHEFS
- Lancement du test
- INFORMATIONS SUR LA GARANTIE
Brand : Cosori
Model : Premium II Plus 6.2l
Category : Deep fryer